Budget Solo Travel: A Proven System for Trips Under $1000
TrekGuider @trekguider
Planning a solo trip should be thrilling. But for many, one question hangs in the air, casting a shadow of stress and analysis paralysis over the entire process: "How much will this actually cost?" You’ve scrolled through the endless, generic "tips," but you’re still left without a real plan, haunted by the specter of hidden fees, unexpected expenses, and the daunting idea that a trip under $1000 is pure fantasy.
This is not another list. This is your financial playbook. It’s a proven, three-phase system designed to dismantle uncertainty and empower you to plan an incredible adventure with total confidence. This guide to budget solo travel will give you the framework and the tools to build a realistic budget you can actually trust. A successful trip, however, involves more than just money. For a complete masterclass covering everything from safety to packing and meeting people, be sure to read our ultimate guide to .
The Strategic Foundation—The Decisions That Save the Most
The secret to a truly affordable solo trip isn't about pinching every penny until it screams. It’s about making a few smart, high-impact decisions long before you even think about packing. These foundational choices have the biggest impact on your bottom line and set the stage for a stress-free adventure.
Choose Your Playground Wisely
This is the single most important decision you will make. Your destination dictates the cost of everything else. A week in Zurich will cost exponentially more than a month in Hanoi, no matter how frugal you are. To keep your trip under $1000, you must focus on regions where your home currency has heavyweight buying power.
Southeast Asia (The Budget Gold Standard): Countries like Vietnam, Thailand, Cambodia, and Indonesia are legendary for a reason. You can feast on world-class street food for a couple of dollars, secure a clean, private guesthouse room for $20-$30, and witness breathtaking landscapes that cost absolutely nothing to enjoy.
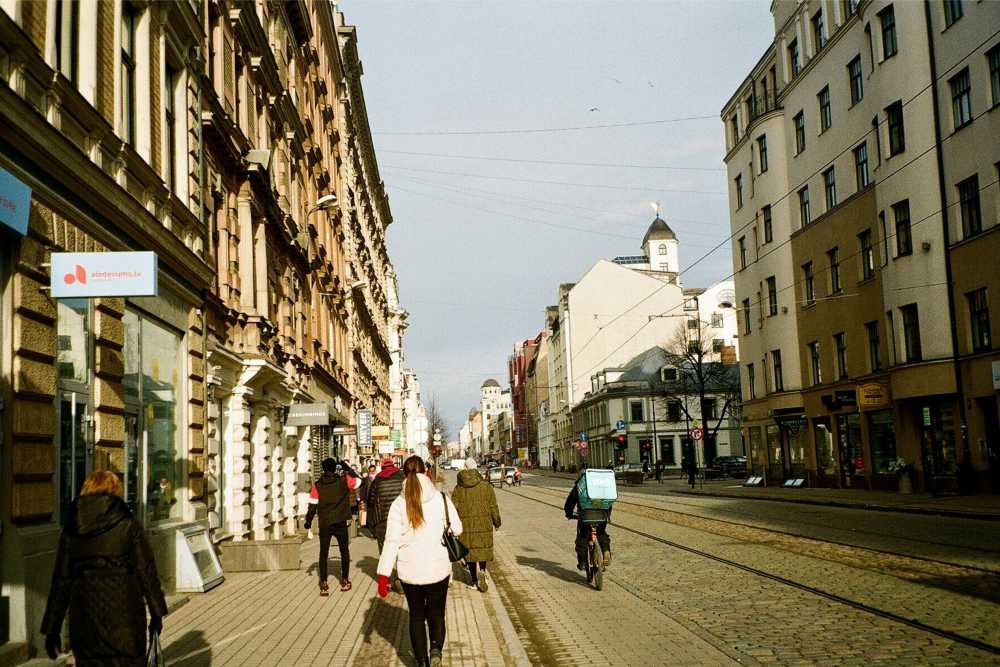
Eastern Europe (Culture Without the Cost): Forget the well-trodden paths of Paris and Rome. Cities like Budapest (Hungary), Prague (Czech Republic), Krakow (Poland), and Lisbon (Portugal) offer centuries of history, stunning architecture, and vibrant culture at a price that feels like a pleasant time warp.
Latin America (Adventure Capital): For raw adventure and rich culture, destinations like Mexico, Colombia, Bolivia, and Guatemala provide unparalleled value. You can explore ancient Mayan ruins, hike active volcanoes, and immerse yourself in dynamic local life, all on a remarkably modest budget.

Master the Calendar
Timing isn't just important; it's everything. Every destination has three travel seasons, and knowing the difference is like having a cheat code.
High Season: Peak tourist time with postcard-perfect weather, but also the biggest crowds and eye-watering prices.
Low Season: The off-season, often with challenging weather, fewer open attractions, and rock-bottom prices.
Shoulder Season: The magic window. Nestled between the high and low seasons (typically April-May and September-October in the northern hemisphere), this is the budget traveler's sweet spot.
Traveling during the shoulder season means you get the best of both worlds: pleasant weather, far fewer tourists cluttering your photos, and dramatic drops in the cost of flights and accommodations. Visiting the Greek Islands in May instead of July, for instance, can easily cut your two biggest expenses by 30-50%.
Build Your Budget Blueprint
Let’s reframe the word "budget." It isn't a restriction; it's a permission slip. A well-crafted budget doesn't tell you what you can't do; it gives you the freedom to do what you want to do, without the guilt or anxiety. Here’s how to build one you can rely on.
Set Your Ceiling: Before anything else, define your absolute maximum trip cost. For this playbook, we're targeting a complete trip under $1000.
Become a Researcher: Open a spreadsheet and start plugging in real numbers. Use sites like Kayak, Booking.com, and detailed travel blogs to estimate average costs for your chosen destination. Be thorough.
Flights/Major Transport: Your biggest single purchase.
Accommodation: Your largest daily expense.
Food & Drink: A realistic mix of meals out, street food, and groceries.
Activities & Tours: Museum entries, day trips, cooking classes.
Local Transport: Subways, buses, and the occasional ride-share.
Travel Insurance: Non-negotiable. Don't even consider leaving home without it.
Build a Financial Safety Net: This is the pro move. Once you have your total estimated cost, add a 15-20% "contingency fund." This isn't for overspending; it’s for the unexpected. It’s the money that lets you say "yes" to a spontaneous adventure or handle a missed train without a panic attack. It’s the key to true peace of mind.

With that blueprint in hand, it’s time to move from strategy to action.
The Booking Engine—Locking in Value on Your Biggest Expenses
This is where the rubber meets the road. With your strategic plan in place, you can now book the core components of your trip with surgical precision, ensuring you get the absolute best value for every dollar spent.
Accommodation Strategy
For a solo traveler, a standard hotel room is almost always the least imaginative and most expensive option. The world of alternative accommodations is where you’ll find incredible value and far more interesting experiences.
Hostels (The Social Hub): The undisputed champion of budget solo travel. They offer dorm beds for incredibly low prices and have a built-in social atmosphere that’s perfect for meeting other travelers. If dorms aren’t your scene, a private room in a quality hostel gives you the perfect blend of privacy and community at a price well below a hotel.
Guesthouses & Local Inns: These smaller, often family-run establishments offer a direct line to the local culture. They're typically much cheaper than large hotel chains and infinitely more charming.
Apartment Rentals (with a Kitchen): For stays of three days or more, sites like Airbnb can be fantastic value. The real secret weapon here is the kitchen. Being able to prepare your own breakfast and the occasional dinner will slash your daily food costs.

How to Slay the Single Supplement Dragon
The "single supplement" is an infuriating fee that tour companies and cruise lines charge solo travelers to cover the perceived loss of a second person in a double-occupancy room. It’s a penalty for your independence, and you should refuse to pay it. Here’s how:
Seek Out Solo-Friendly Companies: Tour operators like Intrepid Travel, G Adventures, and Overseas Adventure Travel are built for travelers like you. They’ll match you with a same-sex roommate to eliminate the fee entirely.
Use the Calendar to Your Advantage: Companies are far more likely to waive the fee during the shoulder season when they have more empty spots to fill.
Become a Last-Minute opportunist: If your schedule is flexible, call companies a week or two before a tour's departure. They may be desperate to fill a final spot and will gladly waive the fee to make a sale.
Don't Be Afraid to Ask: If a solo option isn't listed online, pick up the phone. A friendly, direct request can often work wonders.
Transportation Hacks
Getting from Point A to Point B is a major budget item. A few smart moves here can free up hundreds of dollars for more exciting things.
Pack Light, Win Big: Master the art of carry-on-only travel. Checked baggage fees are a massive profit center for airlines, especially budget carriers. A well-packed carry-on is free, keeps you nimble, and prevents the nightmare of lost luggage.
Make Your Travel Day Your Hotel Night: For longer overland journeys, an overnight train or bus is a brilliant two-for-one hack. It combines your transportation and accommodation costs into a single ticket, saving you a night's expense and a full day of travel time.
Be a Flexible Flier: Use flight aggregators like Google Flights and Skyscanner like a pro. Their "price graph" and "entire month" views are your best friends, instantly showing you the cheapest days to fly. Always search in an incognito browser to prevent price hikes based on your search history.
Pro-Tip: When comparing flight prices, always factor in the "hidden" cost of airport transfers. A flight that looks $50 cheaper might land at a remote airport where a $70 taxi ride is your only option, completely negating your savings.
The Execution Playbook—Living Smart on the Ground
You’ve arrived. Your meticulous planning has paid off. Now, it's all about execution. Your daily habits and micro-decisions will determine your budget's success. This is where you shift your mindset from "tourist" to "savvy local."
The Food Budget
You don’t have to survive on protein bars to eat affordably. The key is a "High-Low" hybrid approach that lets you experience the best of the local food scene without blowing your budget.
Make Lunch the Main Event: In many cultures, lunch is the biggest meal of the day. Look for a "menu of the day" (or menu del día) where you can get a multi-course, high-quality meal for a fantastic price. Have a lighter, cheaper dinner.
Go on a Supermarket Safari: Your local grocery store is more than just a place for supplies; it’s a cultural institution. It’s perfect for grabbing breakfast items, picnic lunches, and local snacks.
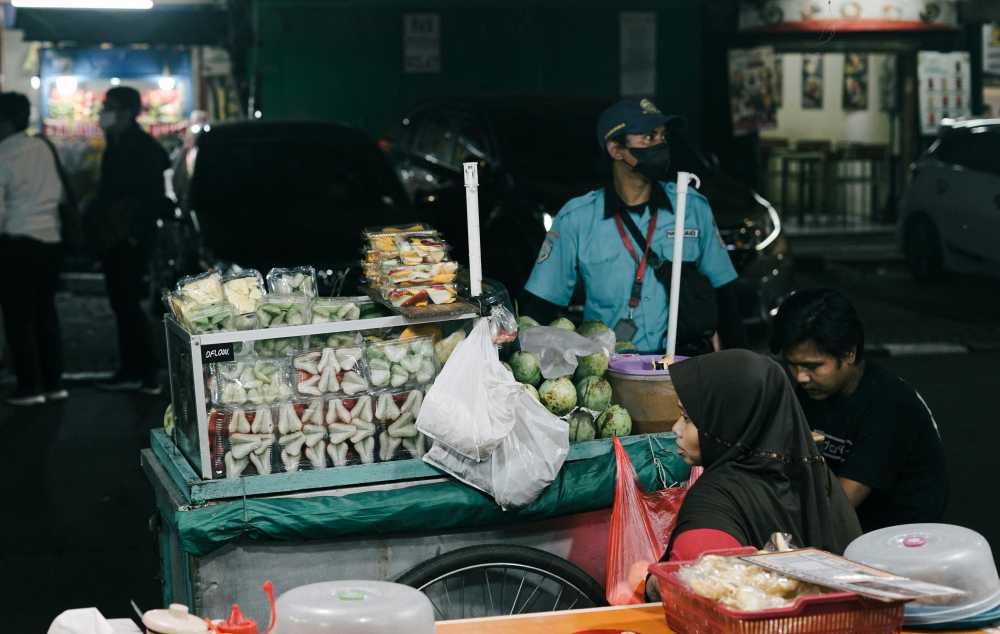
Trust the Streets: In many destinations, especially in Asia and Latin America, the best, most authentic food is found at bustling street food stalls for a dollar or two. It’s a delicious, ultra-affordable way to dive deep into the local cuisine.
Maximize Your Experience, Not Your Spending
The most memorable travel moments are rarely the most expensive. Every city is overflowing with incredible, zero-cost experiences for those who know where to look.
Take a Free Walking Tour (On Day One): This should be your first activity in any new city. It’s a crash course in history, layout, and local culture. You’ll get your bearings and receive priceless insider tips from your guide. Just be sure to tip them what you feel the tour was worth.
Explore Public Parks and Spaces: From the lush gardens of Paris to the sprawling beaches of Rio, a city's public spaces are its soul. They cost nothing to enjoy and are perfect for people-watching.
Hunt for Free Museum Days: Nearly every major museum offers free admission on certain days of the month or evenings of the week. A quick Google search can save you a significant amount on entry fees.
Embrace the Art of Wandering: The single best way to discover a city's hidden courtyards, charming side streets, and authentic local life is to put away the map and simply wander.

Your Blueprint for Affordable Adventure
This isn't just a collection of tips; it's a mindset. You now understand that successful budget solo travel is not a competition to spend the least amount of money possible. It's about the strategic allocation of your resources to maximize experience, discovery, and joy. It's the difference between being cheap and being smart.
Avoid the trap of "false economies"—like booking a hotel far outside the city to save $10, only to spend $15 and two hours on transport each day. But also, know when to embrace the "strategic splurge"—that one incredible meal, cooking class, or guided tour that will become the cornerstone memory of your entire trip. You have the playbook. You have the system. You have the confidence to reject the anxiety of the unknown and step into the incredible freedom of solo travel. The world is not as expensive as you think.
Frequently Asked Questions (FAQ)
How much money do I really need for a trip under $1000?
Excluding your main international flight, a budget of $1000 can comfortably last for 2-4 weeks in high-value regions like Southeast Asia or parts of Eastern Europe. For a one-week trip including flights from the US, you’ll need to target shoulder-season deals to nearby destinations like Mexico and Central America, or watch for flash sales to Europe.
Is it cheaper to stay in a hostel or an Airbnb when solo?
A hostel dorm bed will almost always be your cheapest nightly option. A private room in a hostel is often comparable in price to a basic room in an Airbnb. An entire Airbnb apartment only becomes cost-effective if you stay long enough and use the kitchen religiously to offset the higher upfront cost.
What are the best apps for budget solo travel?
Skyscanner/Google Flights: For finding the cheapest flight dates.
Hostelworld/Booking.com: For finding and booking affordable accommodation.
Rome2rio: For figuring out the cheapest way to get between cities.
Trail Wallet/TravelSpend: For tracking every penny of your expenses in real-time.
How do I handle currency conversion and ATM fees abroad?
First, get a debit card from a bank that charges zero foreign transaction fees and reimburses ATM fees (Charles Schwab Bank is excellent for this). Always decline the "dynamic currency conversion" offered by ATMs and card machines—it's a scam with a terrible exchange rate. Always choose to be charged in the local currency.
Don't Miss Out! Subscribe for Exclusive Content
Subscribe


Comments 0
No comments yet
Be the first to share your experience!
Dont Miss Out! Subscribe for Exclusive Content

Ultimate USA Holidays Guide: Top Picks

FTC Affiliate Disclosure Essentials: Stay Compliant as a Travel Creator

Essential Affiliate Tools: From Tracking to Full Optimization

Booking.com Affiliate Program Review: Pros, Cons, and Earnings Potential

Decoding Affiliate Commission Rates: Benchmarks for Travel Creators

Top 11 High-Paying Affiliate Programs for Travel Bloggers
July 4th NYC: Best Fireworks Views
TrekGuider @trekguider
Trying to see the Macy's 4th of July fireworks in New York City can feel like plotting a military campaign. You know it’s one of the most spectacular patriotic displays on the planet, a dazzling barrage of color and sound against the world’s most famous skyline. But the thought of navigating the colossal crowds, deciphering the cryptic official viewing spots, and battling for a sliver of sidewalk with a view of a brick wall is enough to trigger a full-blown anxiety attack.
You’re haunted by visions of being pinned for hours in a human gridlock, craning your neck to see absolutely nothing, with no access to a restroom or a bottle of water. What if you spend all day planning, only to find your chosen spot has been unceremoniously cordoned off by the NYPD? The dream of a magical Independence Day quickly sours into a logistical nightmare, leaving you sweating on a crowded street corner wondering why you didn't just stay home and watch it on TV.
Forget the chaos. This is your definitive battle plan for conquering the crowds and securing a breathtaking view. We’ve distilled the official intel and insider secrets into a foolproof strategy. Whether you want a free patch of grass with a picnic or a more civilized vantage point, this guide will equip you for an unforgettable Fourth of July in New York.

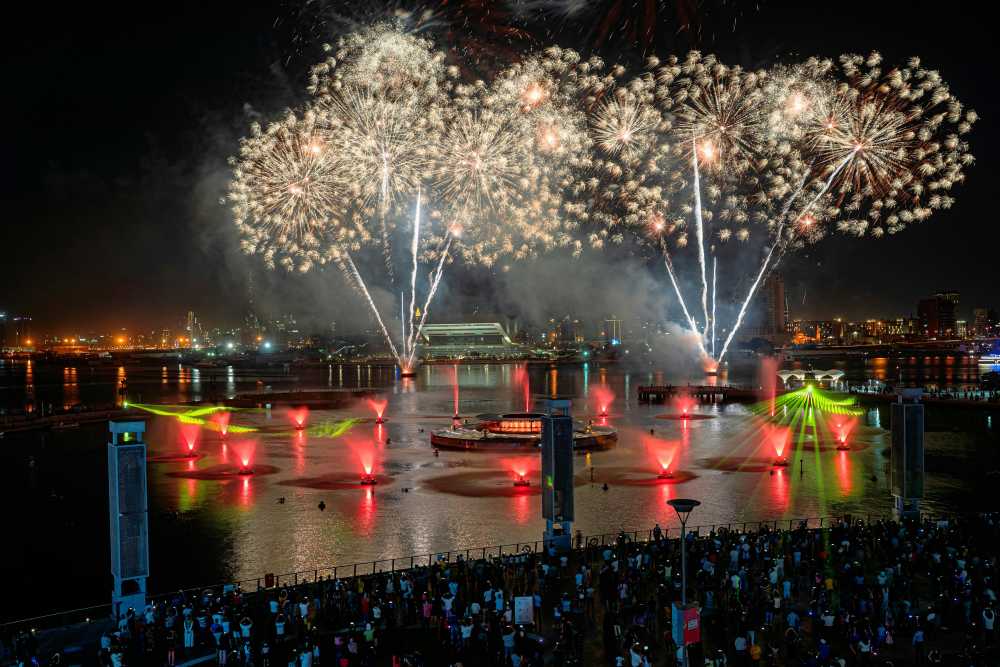
Understanding the Main Event: The Macy's Fireworks Spectacular
Let’s be clear about the sheer scale of this operation. The Macy's 4th of July Fireworks isn't just a show; it's the nation's largest pyrotechnic spectacle, a city-shaking tradition that paints the skyline with thousands of meticulously choreographed shells launched from barges on the water. For Friday, July 4, 2025, the show continues its reign on the East River, meaning the most coveted views will be found along the waterfronts of Brooklyn, Queens, and Manhattan.
This isn't a casual affair where you can wander up a few minutes before showtime. It's a massive, city-wide celebration that demands a solid game plan. While the fireworks are an undisputed summer highlight, they're just one piece of the city's vibrant celebratory calendar, which we cover in our definitive guide to [New York Holidays: 10 Must-Do Events]. Thinking about your trip through this lens—as one epic event among many—is the key to unlocking a truly memorable visit.
The Best Free Viewing Spots for the Fourth of July in New York
Securing a great free spot is the holy grail for most spectators. It requires a healthy dose of patience and impeccable timing, but the reward is a front-row seat to history without spending a dime. The secret is knowing precisely where to go and, just as critically, which tourist traps to avoid.
Brooklyn's Cinematic Waterfront Views
For years, the Brooklyn waterfront has offered the most cinematic views of the fireworks, framing the pyrotechnics against the iconic Manhattan skyline. This is where you go for the postcard shot.
Transmitter Park (Greenpoint): Consistently hailed as a top-tier viewing location, this park offers a direct, jaw-droppingly clear sightline across the East River. Its open, grassy layout is a godsend, providing more room to spread out a blanket than the narrow promenades elsewhere. But its reputation precedes it. To claim a decent piece of turf, you must arrive by 6 PM at the absolute latest.
Domino Park (Williamsburg): With its clever multi-level design, reclaimed factory artifacts, and ample seating, Domino Park is a phenomenal—and popular—option. The elevated walkway provides a unique perspective, and the park's modern amenities (hello, clean restrooms!) make the long wait far more civilized.
East River State Park (Williamsburg): Just a short walk from Domino Park, this location offers a more traditional park experience with a sprawling grassy lawn. It’s a magnet for families and larger groups looking to set up a proper picnic and make a full day of it.
Manhattan's Official Front Lines (and What to Expect)
Manhattan offers official, NYPD-managed viewing points that get you incredibly close to the action. However, this proximity comes at the cost of the highest crowd density and the tightest security.
Official Access Points: The city announces these designated entry points a few days before the event, typically along the FDR Drive in the East Village, Murray Hill, and Midtown East. Check the official Macy's or NYC websites on the day of the event for the exact cross-streets.
The No-Go Zones: Heed the official warnings. The city explicitly advises spectators to avoid FDR Drive in Midtown, Battery Park, and the Brooklyn Heights Promenade. These areas will either be completely closed to the public or offer severely obstructed views. Don't be the tourist who wastes hours trekking to a dead end.
Queens: The Savvy Spectator's Choice
Often overlooked by the masses flocking to Brooklyn, the Queens waterfront in Long Island City provides views that are every bit as stunning, but often with slightly more breathing room.
Gantry Plaza State Park: This park is a true gem, famous for its iconic Pepsi-Cola sign and beautifully restored waterfront gantries. It offers a sweeping panorama of the Midtown skyline, which serves as the ultimate canvas for the fireworks display.
Hunter's Point South Park: Located just south of Gantry Plaza, this park boasts a vast, open green space perfect for laying down a blanket. It’s an excellent alternative for those looking to escape the most intense choke points in Manhattan and Brooklyn.

Pro-Level Strategy: Navigating Security and Human Gridlock
Experiencing the Fourth of July in New York is as much about logistical prowess as it is about patriotic fervor. This is not a casual security checkpoint. The NYPD's presence is comprehensive, involving everything from drones providing aerial surveillance and metal detectors at entry points to NYPD scuba divers patrolling the river itself. This isn't to intimidate, but to ensure a safe event for millions.
Your Arrival and Entry Checklist
Embrace the Early Bird Ethos: We cannot overstate this. For prime real estate like Transmitter Park, a 6 PM arrival is the bare minimum. For the official Manhattan zones, dedicated viewers begin lining up in the early afternoon. The later you arrive, the more likely you are to be watching the back of someone's head.
Pack Like a Pro: You will be on your feet or sitting on the ground for hours. Comfort is paramount, but you also need to breeze through security. Large backpacks, coolers, alcohol, and lawn chairs are almost always prohibited. Knowing what to bring—and what to leave behind—is crucial. Our [How to Pack Light Guide] offers brilliant strategies for carrying just the essentials, a skill that's just as valuable for a day in the city as it is for a week-long trip.
Trust but Verify (Your Sources): On July 4th, follow the NYPD and Macy's on social media or refresh their websites. Viewing points can and do change or close without notice based on crowd capacity. A quick check before you head out can save you from a massive, frustrating detour.
The Buddy System is Non-Negotiable: In crowds of this magnitude, getting separated is incredibly easy. Establish a clear, unambiguous meeting point in advance (e.g., "the corner of X and Y," not "by the hot dog stand"). Keep your phones fully charged, and consider sharing your location with your group via a mapping app.
Pro-Tip: Public transportation is your only sane option. Do not even entertain the idea of driving. Street closures begin in the early afternoon, and parking is a fantasy. The subway is the most efficient way to get close to the action, but expect platforms and train cars to be packed to capacity. Plan your route, buy your MetroCard in advance, and budget at least double the normal travel time.

Beyond the Fireworks: Mastering the All-American Picnic
The fireworks are the grand finale, but Independence Day is an all-day affair. A classic American picnic is the perfect way to spend the afternoon, soaking in the city's festive energy in a more relaxed setting before diving into the waterfront fray.
Prime Picnic Parks (Well Away from the Fireworks Chaos)
Central Park: It’s the quintessential NYC experience for a reason. Head to the vast Sheep Meadow or the Great Lawn, find a spot under a tree, and enjoy the people-watching. You won't see the main fireworks from here, but it’s the perfect stage for your pre-show festivities.
Prospect Park, Brooklyn: Often called Brooklyn's answer to Central Park, the Long Meadow in Prospect Park offers a similarly idyllic and expansive setting. It’s a favorite among locals and provides a more laid-back, community-focused vibe.
Governors Island: A quick and scenic ferry ride away, Governors Island is a true urban oasis. With its sprawling lawns, hammocks, and unparalleled views of the Statue of Liberty, it’s an ideal place to decompress for the day before heading back for the evening's main event.
Your Picnic Pack-Out List
The Spread: Stick to classics that travel well: gourmet sandwiches, cold fried chicken, pasta salads, and fresh fruit. Most importantly, bring more water than you think you'll need. Remember that alcohol is prohibited in public parks.
The Comfort Kit: A large, durable blanket is your foundation. Sunscreen, hats, and sunglasses are absolutely essential for a long day outdoors.
The Clean-Up Crew: Pack a dedicated trash bag and commit to the golden rule of picnicking: leave your spot cleaner than you found it.
Paid Options for a Crowd-Free Fourth of July in New York
If the idea of battling the masses for a patch of grass makes you want to run for the hills, several paid alternatives offer a more comfortable and exclusive experience. These options require booking far in advance and come at a premium, but for many, the guaranteed view and amenities are worth every penny.
Rooftop Bars and Viewing Parties
Many hotels and restaurants with prime real estate in Midtown East, Williamsburg, and Long Island City host ticketed fireworks viewing parties. These events typically include an open bar, food, and live music, all with an elevated, unobstructed view high above the street-level chaos. Expect tickets to start in the low hundreds and sell out weeks, if not months, ahead of time.
Fireworks Cruises on the East River
For a truly cinematic experience, watch the fireworks from the water itself. Numerous companies offer July 4th dinner cruises that place you directly on the East River, offering an unparalleled, up-close perspective of the show.
The Perks: You get a completely unobstructed view, dinner and drinks are often included, and you have access to clean, private restrooms—a luxury that cannot be overstated.
The Price: This is the most expensive option, with prices frequently ranging from $150 to over $500 per person. They are incredibly popular and must be booked months in advance.
Pro-Tip: When booking any ticketed event, do your due diligence. Scrutinize the venue's location on a map to confirm its viewing position relative to the fireworks barges. Search for reviews and photos from previous years' events to ensure the view is as spectacular as advertised. Not all "river views" are created equal.

Your Mission: An Unforgettable Independence Day
You are now armed with the strategy and insider intelligence to make your Fourth of July in New York a resounding success. The key is to decide on your desired experience—a free-for-all on the grass, a civilized seat at a rooftop bar, or a luxurious view from the water—and plan with precision. Arrive early, pack smart, and stay informed.
This is about more than just watching fireworks; it's about taking part in a quintessential American tradition in the most dynamic city on Earth. You're no longer a tourist hoping for a lucky break; you're an insider with a plan. Go forth, claim your spot, and create some dazzling memories. And when you're ready to plan your next great urban adventure, our comprehensive [Travel Guide] is packed with the expert resources you need to make every trip a masterpiece.
Don't Miss Out! Subscribe for Exclusive Content
SubscribeComments 0
No comments yet
Be the first to share your experience!
Dont Miss Out! Subscribe for Exclusive Content

San Francisco Cherry Blossoms: A Local's Guide to the Blooms

Halloween SF: Haunts Without Horrors

SF Festivals: 7 Must-See Lineups

Christmas SF: Lights & Wharf Wonders

SF Pride: 6 Route & Party Hacks

Chinese New Year SF: Parade Essentials
11 Essential Solo Travel Safety Tips You Need to Know
TrekGuider @trekguider
Let's be honest: the idea of solo travel is a mix of exhilaration and pure terror. It’s the ultimate promise of freedom, shadowed by the persistent question, "But will I be safe?" The thought of navigating an unfamiliar city alone, fending off unwanted attention, or feeling vulnerable can be enough to keep the most adventurous spirit grounded. This anxiety is real, and it can paralyze your plans or, worse, follow you on your trip, robbing you of the joy you set out to find.
But safety isn’t a matter of luck; it’s a matter of skill. It’s a mindset you can cultivate and a set of practices you can master. This guide is your new playbook. We’ve distilled insights from security experts, psychologists, and veteran solo travelers into 11 essential, gender-neutral solo travel safety tips. This isn't a list of warnings designed to scare you. It’s a practical framework for building unshakeable confidence, mastering situational awareness, and empowering yourself to explore the globe. While these strategies are crucial for any solo traveler, they are one part of a larger safety ecosystem, which we cover in our comprehensive guide to [The Ultimate Guide to Travel Safety: A 2026 Playbook].

The Foundation: Building Unshakeable Confidence and Awareness
True safety begins in your mind long before your boots hit the ground. It’s a foundation built on proactive awareness and a confident mindset. By mastering these core principles, you transform yourself from a potential target into a "hard target"—someone who looks like they know exactly what they’re doing, even when they're just soaking it all in.
1. Master the Art of Situational Awareness
Situational awareness is not paranoia; it's a state of relaxed observation. Security experts emphasize that it’s about consciously understanding your environment by first establishing a baseline and then learning to spot anomalies.
Establish a Baseline: Wherever you are—a train station, a market, a park—take a moment to observe the normal rhythm. How are people walking? What’s the general noise level? This is the "normal" for that environment.
Identify Anomalies: Once you know the baseline, things that deviate will immediately stand out: someone moving against the flow of foot traffic, wearing a heavy coat in hot weather, or loitering without purpose near an entrance. These anomalies are your early warning system.
Limit Distractions: "Tunnel vision" is a solo traveler’s enemy. Keep your headphones out and your phone in your pocket when walking through crowded areas. Keep your head up.
Practice Active Scanning: Make a habit of periodically looking around in a full 360-degree arc. This simple act keeps you aware of who is behind and beside you, preventing you from being caught by surprise.
Project Confident Body Language: Your posture speaks volumes. Walk with a purposeful stride, keep your head held high, and make brief, deliberate eye contact with those around you. This non-verbally communicates that you are aware and not an easy target.
2. Trust Your Intuition—It's Your Best Guide
Psychologists and security experts agree: that "gut feeling" is a real and powerful threat-detection tool. It's your subconscious mind recognizing thousands of tiny cues that something is wrong long before your conscious mind can articulate why. If a person, a street, or a situation feels "off," do not ignore it. Treat that feeling as a valid warning. Cross the street, leave the bar, get in a taxi—do whatever you need to do to honor that instinct without apology or hesitation.
3. Build Confidence with "Practice Runs" Before You Go
The confidence to navigate a foreign capital alone isn't born on the plane; it's built at home. Start with small, local "practice runs" to build your self-reliance.
Take yourself on a solo date to a new restaurant or movie in your own city.
Spend an afternoon exploring a neighborhood you don’t know well, navigating by yourself.
Take a solo day trip to a nearby town using only public transportation.
These small wins prove to yourself that you are capable and resourceful, which is the bedrock of the confidence you'll carry with you across the globe.

Navigating Like a Pro: Practical Solo Travel Safety Tips
Once you’ve calibrated your internal compass with a confident mindset, it’s time to translate that awareness into action. How you move, what you wear, and how you interact with your environment are the practical skills that complete your safety toolkit.
4. Walk with Purpose, Navigate with Discretion
Looking lost is like wearing a sign that says "vulnerable." Your goal is to navigate with quiet confidence.
Plan Before You Leave: Study your route before you walk out the door of your hotel or hostel. Having a clear mental map allows you to walk with purpose, which is a powerful deterrent.
Be Discreet with Maps: Avoid standing on a busy corner staring at a large paper map or your phone. If you need to check your directions, step into a shop, cafe, or hotel lobby to reorient yourself away from prying eyes.
Manage Your Tourist Gear: An expensive camera hanging around your neck and a bulky backpack are clear signals that you're a tourist. Keep your camera in a non-descript bag until you’re ready to use it, and consider using a more subtle crossbody bag for daily exploring instead of a large daypack.
5. Dress to Blend, Not to Stand Out
Your clothing is your first and most obvious cultural handshake. Observe what locals are wearing and aim for a similar level of formality.
Avoid Loud Logos: Leave the clothing with your home country's flag, university, or sports team logos at home. Opt for neutral, less conspicuous attire.
Respect Local Norms: In more conservative regions, dressing modestly (covering shoulders and knees) is not just a sign of respect; it’s a key safety strategy that helps you blend in and avoid unwanted attention.
Pro-Tip: Pack a lightweight scarf. It takes up almost no space and is incredibly versatile. You can use it to cover your head when entering a religious site, cover your shoulders for modesty, or add a layer of warmth.
6. Learn a Few Key Local Phrases
You don't need to be fluent, but knowing a few words in the local language is a massive confidence booster and a sign of respect. Focus on the essentials:
Hello
Please
Thank you
Excuse me
Do you speak English?
Being able to handle simple transactions or politely ask for help shows you've made an effort and can make interactions much smoother.

Your Safe Haven: Accommodation and Socializing Strategies
As a solo traveler, where you stay and how you choose to meet people are critical safety decisions. Your accommodation is your sanctuary, and your social life should be a source of joy, not anxiety.
7. Perform a 60-Second Hotel Security Sweep
The moment you first enter your hotel room or rental, take a minute to perform this essential security check.
Prop the Door: Keep the door propped open with your luggage while you do a quick visual sweep to ensure the room is empty (check the closet, behind the shower curtain, under the bed).
Test the Locks: Close the door and test every lock from the inside—the deadbolt, the security chain, and the latch. They should all feel solid.
Find Your Exits & Count: Locate the fire escape map on the back of the door. Identify the two nearest exits and count the number of doors between your room and the closest one. Fire safety experts stress this is crucial for navigating in a dark or smoke-filled hallway.
Check for Privacy: Ensure windows and any connecting doors lock properly. Close the curtains fully.
8. Choose Social Accommodations for Safe Connections
Hostels are the original social network for travelers and remain one of the best and safest ways to meet people. They are designed for interaction, with common areas and organized events like walking tours or group dinners. Even if you book a private room in a hostel, you get the benefit of privacy combined with a built-in, vetted community right outside your door.
9. Join Group Tours and Classes to Meet Like-Minded People
A shared interest is a natural foundation for friendship. Signing up for group activities is a fantastic way to connect with other travelers and locals in a structured, safe environment.
Free Walking Tours: Most major cities have them. They're a great way to get oriented and chat with fellow travelers.
Specialty Day Tours: A food tour or historical excursion brings together people with a common passion.
Local Classes: A cooking workshop or language class provides an authentic cultural experience and an easy way to start conversations.
Pro-Tip: If you connect with people on a tour, suggest meeting up later in a public place. "A few of us are going to grab a bite at that market we saw, want to join?" is a low-pressure way to extend the connection.

Your Digital Safety Net
In the modern era, technology provides some of the most powerful solo travel safety tips. Your smartphone can be your lifeline, your map, and your guardian angel—if you set it up correctly.
10. Arm Yourself with Personal Safety Apps
Before you leave, download a personal safety app and set it up with your trusted contacts back home. These apps can share your location, send distress signals, and even connect you with emergency services.
bSafe: A comprehensive app that features a voice-activated SOS alarm, live location sharing ("Follow Me"), and even automatically records video and audio during an emergency.
Noonlight: Acts as a silent panic button. You press and hold a button on the screen when you feel unsafe. If you release it and don't enter your PIN within 10 seconds, it automatically sends your location to professional dispatchers who coordinate with local police.
Life360: Excellent for creating a private location-sharing map ("Circle") with family or friends. It includes an SOS alert that messages your entire circle and can even detect if you've been in a car crash.
11. Keep Your Trusted Contacts in the Loop
Beyond apps, make a habit of sharing your itinerary with someone back home before you leave. A quick text or email saying, "Just arrived at my hostel in Lisbon, all is good!" provides peace of mind for both you and them.

A Note for Women Traveling Solo
While all the tips in this guide are universal, women often face a unique set of challenges and cultural nuances on the road. For advice tailored specifically to navigating these issues—from understanding cultural dress codes to responding to harassment and leveraging female-focused networks—our specialized guide is an essential resource.
Deep Dive: The Solo Female Traveler's Playbook
Ready for a resource that speaks directly to the female experience? Download our free, in-depth [Solo Female Travel Safety Guide] for expert advice on cultural etiquette, empowerment, and staying safe and confident on your own terms.
Solo Travel Safety FAQ
A prepared mind is a safe mind. Here are answers to a few common questions that solo travelers ask.
1. What's the best way to handle street harassment?
Security experts advise a tiered response. First, try to ignore it. Often, a harasser's goal is a reaction. Avoid eye contact and keep walking with purpose as if you heard nothing. If they persist, get loud and firm. Use a strong voice and say a simple command like "Stop" or "Leave me alone." Finally, your priority is to get to a safe place. Duck into a busy shop, hotel lobby, or cafe. Don't lead them back to where you're staying.
2. Are hostels really safe for solo travelers?
Yes, reputable hostels are generally very safe. They are designed for travelers and often have excellent security measures like key-card access, 24/7 reception, and lockers for your valuables (bring your own padlock). They are one of the best ways to meet other travelers in a secure environment. Read recent reviews before booking, and consider choosing a female-only dorm if it makes you more comfortable.
3. How can I avoid looking like a tourist?
It's a combination of the tips above. Navigate with discretion (plan your route in advance), dress to blend in (avoid flashy logos and follow local clothing norms), and manage your tourist gear (keep the big camera in a bag). The biggest factor, however, is confident body language. Walk like you belong there, and most people will assume you do.

The World is Waiting
Solo travel is one of the most rewarding experiences a person can have. It will challenge you, change you, and fill your life with stories. The goal of these solo travel safety tips is not to make you fearful, but to make you fearless. By replacing anxiety with awareness and confidence with preparation, you give yourself the freedom to say "yes" to adventure and to fully embrace the incredible journey of discovering the world, and yourself, on your own.
Now that you're equipped with the strategies for a safe and confident solo journey, you can focus on the bigger picture. For a complete master guide to planning every aspect of your next adventure, from budgeting and packing to booking and logistics, our all-encompassing [Travel Guide] is the only resource you'll ever need.
Don't Miss Out! Subscribe for Exclusive Content
SubscribeComments 0
No comments yet
Be the first to share your experience!
Dont Miss Out! Subscribe for Exclusive Content
Ultimate USA Holidays Guide: Top Picks
FTC Affiliate Disclosure Essentials: Stay Compliant as a Travel Creator
Essential Affiliate Tools: From Tracking to Full Optimization
Booking.com Affiliate Program Review: Pros, Cons, and Earnings Potential
Decoding Affiliate Commission Rates: Benchmarks for Travel Creators
