Solo Travel Blog Monetization: Turning Stories into Income
TrekGuider @trekguider
You've seen the Instagram posts tagged '#digitalnomad' and wondered if it's actually real. Can a solo travel blog—your solo travel blog—truly become a source of income, or is it just a path to burnout? The truth is, most new bloggers fail because they follow a random list of 'monetization ideas.' They're missing the most critical element: a strategic, time-based plan. This is not a list of ideas. This is your 24-month roadmap, grounded in real data from six-figure bloggers, showing you exactly what to do, when to do it, and the income you can realistically expect at each stage. This is your guide to successful solo travel blog monetization.

Moving from Hobbyist to Business Owner
The first and most critical shift you must make is mental. Your blog is no longer just a personal travel diary; it is the central asset of a new business. Every decision, from the topics you cover to the way you structure your articles, must be made with a clear purpose: to provide immense value to a specific audience. Before you can monetize effectively, you must provide that value, which starts with mastering the fundamentals. For a complete playbook on creating world-class content and navigating your journey, review our comprehensive .
This business-oriented mindset means prioritizing the single most important driver of revenue: Search Engine Optimization (SEO). While social media can provide fleeting traffic spikes, SEO delivers a consistent, sustainable stream of readers who are actively searching for the solutions you provide. These are the people who will click your links, book tours, and buy your products. From this day forward, think of yourself not as a blogger, but as the CEO of a media company whose primary asset is high-ranking, helpful content.
What to Expect and When
Forget the overnight success stories. Building a profitable blog is a marathon, not a sprint. Having a realistic timeline prevents discouragement and keeps you focused on the right tasks at the right time.

Year 1 Expectations: Building Traffic and Earning Your First ~$2,000
The first year is all about laying the foundation. Your primary goal is not to make a full-time income, but to publish a critical mass of high-quality, SEO-optimized content and establish topical authority in your niche. You'll spend the first few months writing and publishing consistently without seeing much traffic, and that's completely normal.
Data from established bloggers shows that you can expect to make your first affiliate sale around month four or five. By the end of the first year, a dedicated blogger can realistically earn between $1,000 and $5,000. This income will come almost exclusively from strategic affiliate marketing.
Year 2 Expectations: Scaling to a Viable Income ($20,000 - $40,000)
Year two is the scaling phase. The content you published in your first year begins to mature and rank higher in Google search results, leading to a significant increase in traffic. This is the year you'll likely cross the critical threshold needed to qualify for premium ad networks. This combination of escalating affiliate commissions and new, high-earning display ad revenue is what transforms your blog from a side hustle into a viable business. It's not uncommon for bloggers who were earning $200/month at the end of year one to be earning $2,000-$4,000/month by the end of year two.
(Months 1-6): Laying the Foundation for Your Solo Travel Blog Monetization
Welcome to the grind. In this foundational phase, you are building the powerful engine of your business long before you see significant fuel (i.e., traffic). Success here isn't measured in dollars; it's measured in discipline and consistent output.
Your Primary Focus: Publishing High-Quality, SEO-Optimized Content
Think of high-quality content as the real estate upon which you'll build your entire business. It's the non-negotiable asset that makes all future income possible. In these first six months, your goal should be to publish 25-40 thoroughly researched, long-form articles that target specific keywords your audience is searching for. Every article should aim to be the single best resource on the internet for its given topic. This early library of content is what Google will eventually reward with traffic.
Method 1: Strategic Affiliate Marketing (The Best First Step)
Affiliate marketing is the practice of earning a commission by promoting another company's products or services. It is the perfect first monetization method because most programs have no minimum traffic requirements. You can, and should, include affiliate links from day one.
The key is to recommend products you genuinely use and trust. Your recommendations must be woven naturally into helpful content. Don't just list products; explain why a certain backpack is perfect for a carry-on-only trip or how a specific travel insurance policy saved you during an emergency. A crucial element of this is transparency. Always include a clear affiliate disclosure at the top of your posts. This isn't just an FTC requirement; it's a critical component of building long-term trust with your audience.
Choosing the Right Affiliate Platforms: A Data-Driven Comparison
Start with a mix of affiliate aggregators and direct programs to maximize your opportunities.
Travelpayouts: An excellent starting point. It's an aggregator that gives you access to dozens of travel brands like Booking.com, GetYourGuide, and Hostelworld through a single platform, making it easy to manage your links and payments.
Stay22: A powerful, map-based tool specifically for accommodations. It often has a higher conversion rate than other hotel affiliate links because it shows users a variety of options on a map, which is incredibly helpful in the travel planning process.
Direct Programs: Many essential travel brands have their own programs. Be sure to sign up for:
Amazon Associates: For all the physical gear you recommend, from packing cubes to portable chargers.
Booking.com / Agoda: The top platforms for hotel bookings worldwide.
GetYourGuide / Viator: The leaders in tours, activities, and attraction tickets.
Pro-Tip: Don't go back and add affiliate links later. Research and include relevant links in every article as you write it. This saves an immense amount of time and ensures your monetization efforts start from the moment you hit "publish."
(Months 7-18): Scaling Traffic and Unlocking Serious Income
With a solid foundation of content beginning to rank, you now shift your focus from pure production to growing the one metric that unlocks the next level of income: monthly sessions.
Your Primary Focus: Reaching 50,000+ Monthly Sessions
This is the magic number. Crossing the threshold of 50,000 monthly sessions (the number of visits to your site, as measured by Google Analytics) is the key inflection point where your income potential grows exponentially. It signals to premium ad networks that you have a substantial and engaged audience, making you a valuable partner. Reaching this level requires continued content production and a focus on building high-quality backlinks to your articles.

Method 2: Display Advertising (Unlocking Passive Income)
Display ads are the advertisements you see placed within the content of a website. When you have significant traffic, this becomes a powerful and almost entirely passive income stream. The key is to work with the right network.
The Ad Network Ladder: From Beginner to Premium
Not all ad networks are created equal. Your goal is to climb the ladder to a premium network as quickly as possible.
Avoid Google AdSense: Many new bloggers start here, which is a major mistake. AdSense pays extremely low rates, often resulting in an RPM (Revenue Per Mille, or earnings per 1,000 pageviews) of just $1-$3. It clutters your site for pennies.
Starter Networks (The Stepping Stone): Networks like Journey by Mediavine (requires 10,000 monthly sessions) or Ezoic offer a significant step up from AdSense. They are a great intermediate goal.
Premium Networks (The Goal): This is where serious income begins.
Mediavine: The gold standard for many bloggers. They require a minimum of 50,000 monthly sessions. Mediavine is known for its incredible support and high RPMs, often in the $20 - $40+ range. They command higher rates from advertisers because of their high-quality publisher network and direct sales teams.
Raptive (formerly AdThrive): The top tier. Raptive requires 100,000 monthly sessions and is known for having some of the highest RPMs in the industry for the same reasons.
Getting accepted into Mediavine is a major milestone. For a blog with 50,000 sessions, a $25 RPM translates to $1,250 in passive income per month. This is in addition to your growing affiliate revenue.
(Months 19+): The CEO Phase—Building a Diversified Travel Brand
Once you have stable traffic and income from ads and affiliates, you can move into the final phase: maximizing profitability by leveraging your most valuable asset—your audience's trust.
Building Brand Authority and Audience Trust
At this stage, your readers see you as a trusted expert. They've followed your advice, booked hotels you recommended, and bought gear you reviewed. This trust is the asset you will now monetize directly, leading to the highest profit margins possible.
Method 3: Selling Your Own Digital Products (The Highest Profit Margin)
Creating and selling your own products is the holy grail of solo travel blog monetization. You control the price, the product, and you keep nearly 100% of the revenue. This requires a loyal audience that trusts your expertise, which is why it's an advanced strategy.
Examples of high-value digital products for a solo travel audience include:
Comprehensive E-books: A deep dive into a specific topic, like "The Ultimate Guide to Solo Female Travel in Southeast Asia."
Printable Destination Itineraries: Detailed day-by-day plans for cities like Rome, Tokyo, or Lisbon that your readers can purchase and download.
Trip Planning Templates: Customizable spreadsheets or Notion templates that help your readers organize their own trips.
Digital Packing Lists: Niche-specific checklists for different types of travel (e.g., carry-on only, winter travel, hiking).
Pro-Tip: Validate your product idea before you build it. Send a survey to your email list or poll your audience on social media, asking what they struggle with most. If dozens of people say "planning my Italy itinerary is overwhelming," you have a winning product idea.
Method 4: Sponsored Content and Brand Partnerships
Sponsored content, where a brand pays you for a dedicated article or mention, represents a shift from passive to active income. While it can be lucrative, with sponsored posts often fetching $1,000 or more, you shouldn't just wait for opportunities to land in your inbox. As your brand authority grows, you can proactively pitch partnerships. Create a professional media kit—a one-page PDF outlining your website traffic, audience demographics, and core values—and reach out to brands you already use and love with a specific collaboration idea.
Frequently Asked Questions (FAQ Section)
How much money can you make from a travel blog?
In your first year, aim for $1,000-$5,000. By the end of year two, $20,000-$40,000 is a realistic target for dedicated bloggers. Established, six-figure travel bloggers who have diversified into ads, affiliates, and digital products can earn well over $100,000 per year.
How long does it take to make $1000 a month blogging?
For most travel bloggers who consistently publish high-quality, SEO-optimized content, it takes between 12 and 18 months to consistently earn $1,000 per month. This milestone typically occurs after being accepted into a premium ad network like Mediavine.
Do I need a large social media following to make money?
No. This is a common and damaging myth. The most profitable travel blogs focus on SEO. You can make a full-time income from a travel blog with fewer than 1,000 Instagram followers if your website traffic from Google is high and consistent.
What are the initial costs of starting a profitable travel blog?
The essential startup costs are minimal. You'll need a domain name (around $15/year) and web hosting (around $5-$15/month). Investing in a premium WordPress theme ($60 one-time) and an SEO tool like Keysearch ($17/month) are highly recommended but not strictly necessary on day one.
Turning your passion for solo travel into a profitable business is not a dream; it's a project. It requires a strategic plan, immense dedication, and an unwavering focus on providing real value. This roadmap has shown you the what and the when. By following this phased approach to solo travel blog monetization, you move beyond wishful thinking and begin the methodical work of building a business that can fund your travels and your life. The journey is long, but the destination—a life of freedom and financial independence—is worth every step.
Don't Miss Out! Subscribe for Exclusive Content
Subscribe


Comments 0
No comments yet
Be the first to share your experience!
Dont Miss Out! Subscribe for Exclusive Content

FTC Affiliate Disclosure Essentials: Stay Compliant as a Travel Creator

Essential Affiliate Tools: From Tracking to Full Optimization

Avoid These 5 Affiliate Landing Page Mistakes for Better Conversions

Affiliate Keyword Research Mastery for Travel Blogs

Booking.com Affiliate Program Review: Pros, Cons, and Earnings Potential

Decoding Affiliate Commission Rates: Benchmarks for Travel Creators
NYE Times Square: How to Survive Crowds
TrekGuider @trekguider
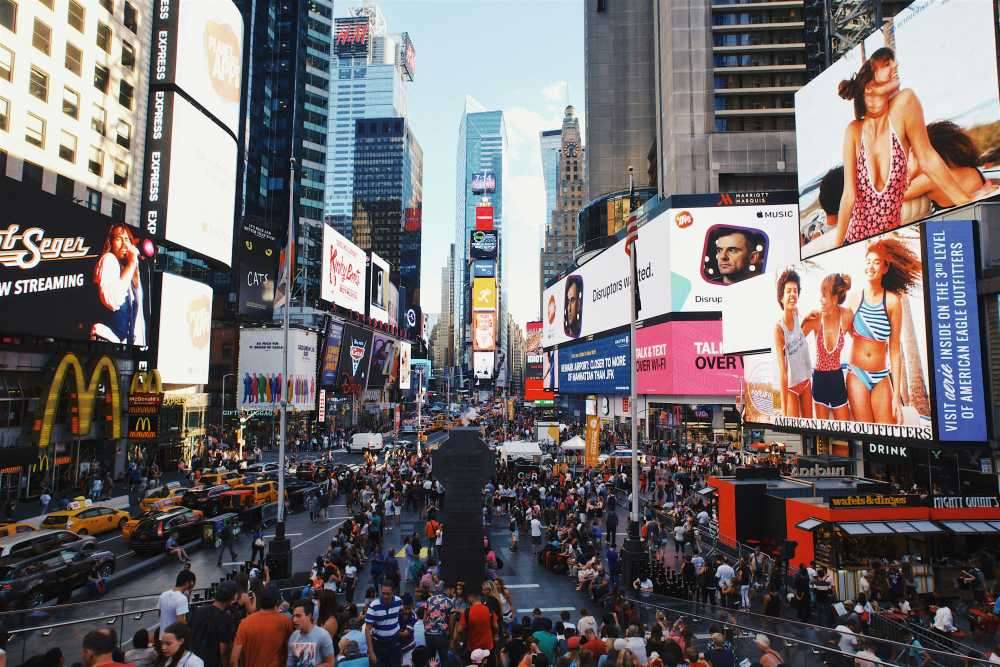
The image is seared into our collective consciousness: a million smiling faces turned upward, a cascade of confetti, and the glittering descent of the Waterford Crystal ball marking the start of a new year. Experiencing New York's Eve Times Square is a bucket-list dream for travelers worldwide. But behind that minute of pure magic lies a grueling, 12-hour urban endurance test. The reality is a battle against massive crowds, freezing temperatures, and a complete lack of basic amenities. Without a solid strategy, your once-in-a-lifetime dream can quickly devolve into a miserable, claustrophobic nightmare, leaving you with nothing but cold feet and regret.
You’ve seen the celebration on TV, but you haven’t seen the real story: the hours spent standing in a single spot, the desperate need for a bathroom that doesn’t exist, and the crushing disappointment of arriving too late only to have your view blocked by a skyscraper. This isn’t just a party; it’s a logistical gauntlet. But what if you could walk into that chaos armed with the knowledge of a seasoned local? What if you knew exactly when to arrive, what to bring, and how to navigate the human labyrinth to secure a prime spot?
Consider this your definitive survival guide. We’re cutting through the noise to give you the actionable, step-by-step playbook required to not just survive the chaos, but to conquer it and forge an unforgettable memory. This single event is the crown jewel of the city's festive calendar, a spectacle we put into context in our complete guide to [New York Holidays: 10 Must-Do Events]. Now, let's master the art of the ball drop.

The Gauntlet Defined: What to Really Expect on New Year's Eve Times Square
Before you even think about your outfit, you need a crystal-clear understanding of the environment you’re about to enter. The Times Square ball drop is one of the most heavily secured and controlled public events on the planet. Forget a casual, free-flowing party; this is a highly structured affair managed by the New York City Police Department (NYPD).
The entire area, from 42nd Street to 47th Street between Broadway and 7th Avenue, is sectioned off into a series of viewing pens. Think of them as metal-barricaded corrals. Once the NYPD deems a pen full, they close it for good. You cannot move between pens, and crucially, if you leave your pen for any reason—food, bathroom, a moment of fresh air—you will not be allowed back in. There is no re-entry.
Here’s a breakdown of the harsh realities:
The Timeline is Brutal: Streets in and around Times Square begin closing in the early afternoon. To get a decent viewing spot, the official recommendation is to arrive by 3:00 PM. That means you’ll be standing in your designated spot for at least nine hours until the ball drops at midnight.
Zero Public Bathrooms: This is the single most challenging aspect for most attendees. There are absolutely no public restrooms or portable toilets available within the viewing areas. Once you are in a pen, you have no options. This requires careful planning regarding your food and drink intake.
Security is Absolute: You will pass through a security screening to enter the viewing areas. Security is absolute, a high-tech fortress of surveillance that includes everything from drones overhead to NYPD scuba divers in the nearby waters. All bags will be checked, and there is a long list of prohibited items.
The Weather is Unforgiving: Late December in New York City is predictably cold. Temperatures often dip below freezing, and wind chill can make it feel even colder as it funnels between the skyscrapers. You will be exposed to the elements for the entire duration.
Knowing these truths isn't meant to discourage you, but to prepare you. Success on New Year's Eve Times Square is 90% preparation and 10% endurance.
The Strategic Arrival: Your Step-by-Step Game Plan
Your experience will be made or broken in the first few hours. A well-executed arrival strategy is the difference between a prime view of the ball drop and being stuck blocks away staring at the back of a building.
When to Arrive: The 3 PM Deadline is Non-Negotiable
The official guidance confirms what veterans know: arriving by 3:00 PM is essential. For the upcoming celebration on Wednesday, December 31, 2026, you should treat this as your final deadline. The pens closest to One Times Square (where the ball descends) fill up the fastest. The NYPD systematically fills the area, starting from the south at 42nd Street and moving north. If you arrive at 5:00 PM or 6:00 PM, you will likely end up miles away, with your only view of the event coming from a distant Jumbotron. Arriving early doesn't just get you a better view; it guarantees you get a view at all.
Where to Enter: Navigating the Frozen Zones
As streets close, navigating Midtown Manhattan becomes a confusing maze. Driving is impossible. Your only viable option is public transportation.
Take the Subway: The New York City subway system is your best friend. However, the Times Sq-42nd St station will be chaos, with many exits likely closed or designated for egress only.
Aim for Peripheral Stations: Instead of heading directly to Times Square, get off at a station a few blocks away and walk. Good options include:
Rockefeller Center (B, D, F, M lines): Walk south and west.
49th Street (N, Q, R, W lines): This is close, so be prepared for crowds.
50th Street (C, E lines): Walk east.
Follow NYPD Instructions: As you approach the secured zone, you will see barricades and police officers. They will direct you to official entry points, which are typically located on 6th Avenue and 8th Avenue. Be polite, listen to their instructions, and be prepared for a slow, shuffling walk to the screening areas.
The Art of the "Pen": Securing Your Viewing Spot
Once you’re through security, you’ll be herded into one of the viewing pens. You won't have much choice in the matter, as officers fill them sequentially. However, the goal is to get into a pen with a direct line of sight to the One Times Square building. This is where the ball is. A spot further north on Broadway or 7th Avenue is generally better than being shunted off to a side street. Once you’re in, stake out a small piece of territory with your group and prepare to settle in for the long haul.

The Ultimate Survival Kit: What to Pack (and What to Leave Behind)
Packing for this event is like preparing for a winter camping trip in the middle of a city. You need to be strategic, minimalist, and focused on warmth and sustenance.
Essential Gear for the Urban Tundra
Everything you bring must be carried on your person. Think pockets, not bags.
Extreme Winter Wear: This is not the time for fashion. Dress in warm, waterproof layers.
Base Layer: Thermal, moisture-wicking underwear (top and bottom).
Mid Layer: Fleece or a down vest.
Outer Layer: A heavy, insulated, and waterproof winter coat.
Accessories: A warm hat that covers your ears, a scarf or neck gaiter, insulated gloves, and thick wool socks are all non-negotiable.
Hand and Foot Warmers: These small, air-activated heat packs are a game-changer. Bring several pairs and activate a new set every few hours to keep your extremities from freezing.
Food and Water: Pack high-energy, easy-to-eat snacks like protein bars, nuts, and chocolate. Bring your own water in a plastic bottle. Avoid caffeine and other diuretics for obvious reasons.
Portable Phone Charger: Your phone battery will drain quickly in the cold. A fully charged power bank is essential for communication and capturing the midnight moment.
Simple Entertainment: A book, a deck of cards, or downloaded podcasts can help pass the time.
Pro-Tip: Pack a few large, empty plastic water bottles with secure caps. While it’s not glamorous, they can serve as a last-resort emergency "bathroom" for men and a more challenging but still possible option for women, a well-known but unspoken hack for veterans of the event.
The Forbidden List: Items That Will Get You Turned Away
The NYPD is extremely strict about what is allowed into the viewing areas. Bringing any of these items will result in them being confiscated, or you being denied entry.
Backpacks, Large Purses, or Any Large Bags: This is the most common mistake. You will be turned away. Use your pockets.
Alcohol: Absolutely forbidden.
Umbrellas: They block the view for others and are considered a security risk. Wear a waterproof coat with a hood instead.
Strollers: While not always explicitly banned, navigating the dense crowds with a stroller is practically impossible and unsafe.
Coolers, Chairs, or Blankets: There is simply no room for these items.
Mastering the Marathon: How to Endure the 9-Hour Wait
The wait is a mental and physical challenge. Success lies in conserving energy, staying warm, and keeping your spirits up.
Fueling Your Body: The Right Way to Eat and Drink
Your strategy for consumption should be carefully managed. Eat a large, hearty meal before you leave for Times Square. A meal rich in protein and complex carbs will provide sustained energy. Once you are in your pen, ration your snacks. The goal is to keep your energy levels stable without over-consuming liquids. Sip your water slowly and methodically throughout the evening. This isn't the time to chug a whole bottle.
Staying Sane: Entertainment and Mental Fortitude
The nine-hour wait can be tedious. Keeping morale high, especially in a group, is a skill unto itself. It requires patience and planning—the same principles that make any challenging journey a success. For a deeper dive into managing group dynamics and keeping everyone happy during long waits, our [Stress-Free Flying with Kids Guide] offers timeless strategies that work just as well on the ground in Times Square as they do at 30,000 feet.
Here’s how to manage the wait:
Befriend Your Neighbors: You’ll be standing shoulder-to-shoulder with the same people for hours. Strike up a conversation! Sharing stories with people from around the world is one of the most unique parts of the experience.
Enjoy the Show: The Times Square Alliance puts on a live show starting around 6:00 PM. There are musical performances, celebrity appearances, and hourly countdowns that help break up the monotony.
Stay Active (in Place): Do small exercises to keep your blood flowing. Wiggle your toes, shift your weight from foot to foot, and do small leg stretches. This will help prevent stiffness and keep you warmer.

The Grand Finale and The Great Escape
After hours of waiting, the final moments are a whirlwind of excitement. But your strategic planning doesn’t end when the ball drops.
The Ball Drop: Savoring the Moment
At 11:59 PM, the 12,000-pound geodesic sphere begins its 60-second descent. The energy of the crowd is electric. This is the moment you’ve been waiting for. Put your phone away for a few seconds and be fully present. Absorb the sounds, the sights, and the feeling of shared celebration with a million other people. The confetti drop, the cheering, the fireworks—it’s a truly magical experience that justifies the entire ordeal.

Post-Midnight Exodus: Navigating the Human River
Once the celebration peaks, the next challenge begins: the exit. A million people will be trying to leave a very small area at the exact same time.
Do Not Rush: The biggest mistake is trying to push your way out immediately. The initial surge is dangerous and stressful. Be patient. Wait 15-20 minutes in your spot for the thickest crowds to begin to disperse.
Have a Predetermined Exit Route: Before you even arrive, decide which direction you will walk. Do not just follow the herd. Plan to walk at least 10-15 blocks away from Times Square before even attempting to find a subway or hail a rideshare.
Avoid the Main Subway Hubs: The Times Sq-42nd St station will be dangerously overcrowded. Walk further to a less central station to begin your journey home.
Pro-Tip: Pre-book a table at a restaurant or bar a 15-20 minute walk away from Times Square for 12:45 AM. This gives you a warm place to decompress, use a real bathroom, and have a proper celebratory drink while the worst of the crowds clear out.
Your Unforgettable New Year's Eve Awaits
Attending the New Year's Eve Times Square ball drop is not for the faint of heart. It is an intense, demanding, and often uncomfortable experience. But by following this guide, you are no longer just a hopeful tourist; you are a prepared strategist. You have the expert-level knowledge to navigate the chaos, endure the wait, and place yourself in the perfect position to witness one of the world's most iconic celebrations. The cold, the crowds, and the long hours will fade into the background, replaced by the unforgettable memory of counting down to a new year in the heart of the world.
You've conquered the ultimate urban challenge. To discover what other incredible adventures await you in the city and beyond, our comprehensive [Travel Guide] is the only resource you'll need. It’s your all-access pass to mastering travel like a pro.
Meta Data Suggestions:
SEO Meta Title: NYE Times Square Survival Guide: Beat The Crowds & See The Ball
URL Slug: /nye-times-square-crowds-survival-guide
SEO Meta Description: A complete guide to surviving New Year's Eve in Times Square. Learn when to arrive, what to pack, and how to get the best view of the ball drop.
Don't Miss Out! Subscribe for Exclusive Content
SubscribeComments 0
No comments yet
Be the first to share your experience!
Dont Miss Out! Subscribe for Exclusive Content

San Francisco Cherry Blossoms: A Local's Guide to the Blooms

Halloween SF: Haunts Without Horrors

SF Festivals: 7 Must-See Lineups

Christmas SF: Lights & Wharf Wonders

SF Pride: 6 Route & Party Hacks

Chinese New Year SF: Parade Essentials
The Minimalist Solo Travel Packing List: A Complete Guide
TrekGuider @trekguider
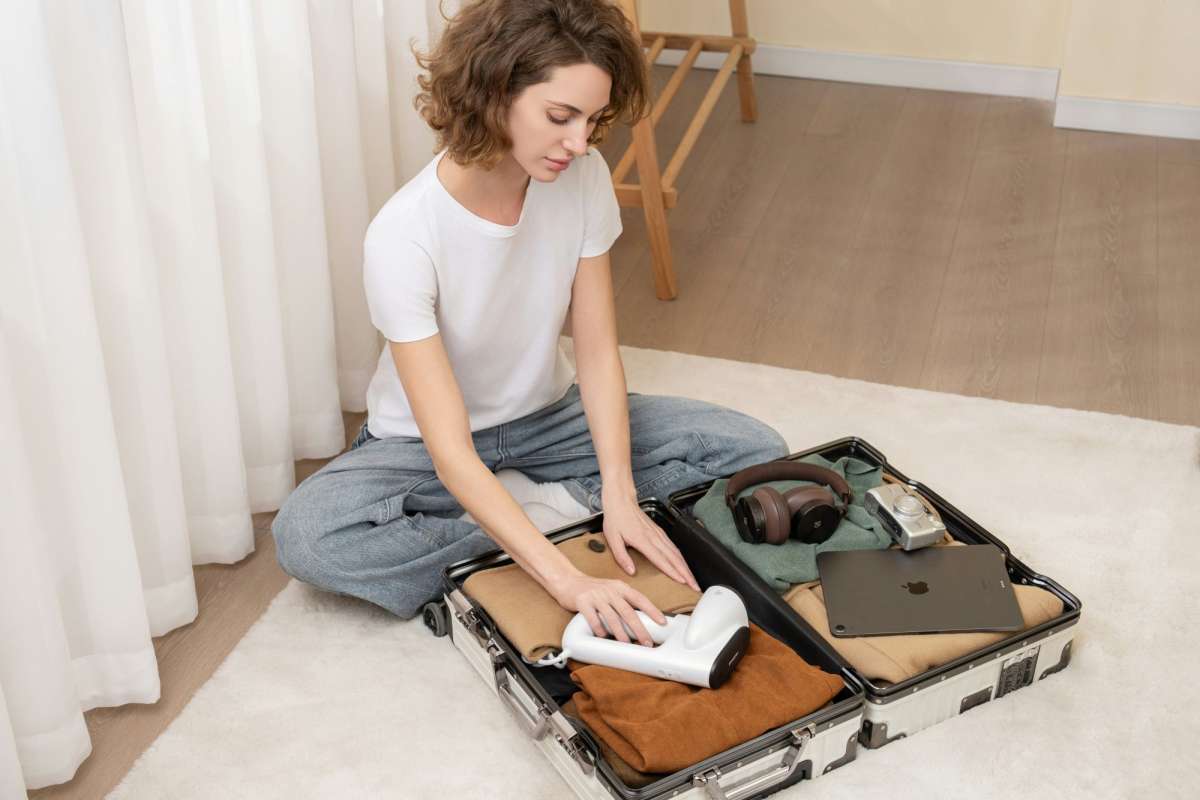
You’ve seen the photo a hundred times: a solo traveler, backpack slung casually over one shoulder, gazing out at a breathtaking vista with a look of pure, unburdened freedom. That’s the dream. But then you look at your own open, empty suitcase, and a wave of anxiety hits. The "what ifs" start piling up. What if it rains? What if I get invited to a fancy dinner? What if I need more options? Before you know it, you’re wrestling with a monstrously heavy bag, convinced you need to pack for every conceivable scenario. This isn't just an inconvenience; for a solo traveler who has no one to help them, an overpacked bag is a physical burden, a financial drain in baggage fees, and a security risk that screams "tourist." It is the very anchor that weighs down the freedom you seek.

This guide is your liberation. It’s the tactical blueprint for adopting a minimalist mindset and the definitive solo female travel packing list you need to execute it with absolute confidence. We will systematically replace the anxiety of "what if" with the certainty of "I have what I need." By packing smarter, not fuller, you’ll unlock the mobility, savings, and peace of mind that define a truly life-changing solo adventure. This isn't just about what to pack; it's about reclaiming the freedom you deserve. For a complete overview of every stage of your journey, be sure to start with our comprehensive pillar guide, [The Ultimate Guide to Solo Female Travel (15 Essential Tips)].
The Freedom Philosophy: Why Less is Radically More for Solo Travelers
Adopting a minimalist packing ethos isn’t about deprivation; it’s a strategic choice that unlocks four key freedoms essential to the solo travel experience.
Freedom of Mobility: Navigating a bustling train station in Tokyo, climbing the winding cobblestone streets of Lisbon, or hopping on a last-minute ferry to a Greek island becomes effortless with a single, lightweight bag. You are nimble, agile, and free to say "yes" to spontaneous adventures without being weighed down.
Freedom from Fees: In an era where budget airlines charge for everything, checking a bag can add hundreds of dollars to your trip cost. Traveling carry-on only eliminates these fees entirely, putting that money back where it belongs: into your experience fund for things like a cooking class in Florence or a guided hike in Patagonia.
Freedom in Security: A large, checked bag is out of your control for hours, vulnerable to loss, damage, or theft. A carry-on stays with you, dramatically reducing your risk profile. Furthermore, a traveler with a single, manageable bag is less conspicuous and presents a less appealing target than someone struggling with multiple, bulky pieces of luggage.
Freedom of Mind: The fewer items you have, the fewer you have to track, manage, and worry about. A minimalist wardrobe simplifies your daily decisions, reduces clutter in your hotel room, and frees up mental energy to focus on what truly matters: being present and soaking in your surroundings.
The Core of Your Minimalist Solo Female Travel Packing List
The secret to a successful minimalist wardrobe is not about having less; it’s about making sure every single item does more. This means building a small, curated collection of high-quality, versatile pieces that can be mixed, matched, and layered to create multiple outfits for different occasions and climates. This is the art of the capsule wardrobe.
Clothing: The Art of the 10-Day Carry-On Capsule
This checklist is designed to fit into a standard 40-liter carry-on bag for a 10-day trip to a destination with a temperate climate (think European cities in spring or autumn). The core principle is to pack for one week and plan to do laundry once.
Tops (5):
2 neutral-colored t-shirts (merino wool or a high-quality blend is ideal)
2 versatile tank tops or blouses that can be dressed up or down
1 long-sleeve shirt for layering or sun protection
Layers (2):
1 comfortable sweater or cardigan in a neutral color
1 light, weather-resistant jacket (a packable rain shell or a classic denim jacket)
Bottoms (3):
1 pair of dark, comfortable travel pants or jeans (wear these on the plane to save space)
1 pair of versatile trousers, a skirt, or shorts (depending on the destination)
1 pair of leggings (perfect for sleeping, layering under pants for warmth, or lounging)
One-Piece Outfit (1):
1 simple, wrinkle-resistant dress or jumpsuit that can be worn casually with sneakers or dressed up with a scarf and flats.
Undergarments & Sleepwear:
5-7 pairs of underwear (quick-drying fabric is a game-changer)
3 pairs of socks (at least one pair of wool socks for warmth and comfort)
2 bras (one regular, one sports bra or bralette)
1 set of pajamas or comfortable sleepwear
Footwear (Maximum 3 pairs):
Comfortable Walking Shoes: A pair of stylish but supportive sneakers. This is your most important item. Wear them on the plane.
Versatile Flats or Sandals: A pair that can be dressed up for a nice dinner but are still comfortable enough to walk in.
Utility Shoes: A pair of flip-flops (essential for hostels and beaches) or waterproof boots, depending on your itinerary.
Pro-Tip: The combination of rolling your clothes tightly and using packing cubes is the single most effective space-saving technique. Packing cubes not only compress your clothing but also keep your bag impeccably organized, so you're not tearing everything apart to find one pair of socks.
The Champions of Versatility: 5 Items You Can't Live Without
Within your capsule wardrobe, a few key items will do the heaviest lifting. Investing in these five pieces will form the indestructible core of your minimalist packing list.
A Merino Wool T-Shirt: This isn't just a t-shirt; it's a piece of high-performance gear. Merino wool is a natural fiber that is thermo-regulating (keeps you cool when it's hot, warm when it's cold), moisture-wicking, and, most importantly, antimicrobial. This means it resists odor and can be worn multiple times between washes, allowing you to pack far fewer tops.
A Large, High-Quality Scarf or Sarong: This is the Swiss Army knife of a travel wardrobe. It can be a stylish accessory, a wrap for a chilly airplane, a head covering for entering religious sites, a makeshift picnic blanket, or even a privacy curtain in a hostel dorm.
A Simple Black Dress (in a wrinkle-resistant fabric): Choose a dress in a fabric like jersey or tencel. It can be paired with sneakers for a day of sightseeing and then instantly transformed for a nice dinner with the addition of flats and your versatile scarf. It’s a complete outfit in one lightweight piece.
Dark, Comfortable, Multi-Purpose Pants: A single pair of well-fitting, dark-colored pants can anchor your entire travel wardrobe. Whether they are high-tech travel pants, comfortable dark-wash jeans, or polished black trousers, they should be able to transition seamlessly from a day of exploring to a casual evening out.
A Lightweight Button-Down Shirt: A classic button-down in a breathable fabric like linen or tencel offers countless styling options. Wear it buttoned up, wear it open as a light jacket over a tank top or your black dress, or tie it at the waist. It’s a layering hero.
Beyond the Wardrobe: Your Solo Female Travel Packing List for Safety & Tech
While clothing makes up the bulk of your bag, a few key non-clothing items are indispensable for a safe, smooth, and convenient solo trip.
Your Personal Security Toolkit
Your awareness is your primary safety tool, but these devices provide a crucial layer of physical security and peace of mind.

Personal Safety Alarm: A small device that attaches to your keychain and emits an ear-piercing siren and flashing strobe light when activated. It’s designed to startle a potential attacker and attract immediate attention, giving you a window to escape.
Portable Door Lock or Door Stop Alarm: These inexpensive, lightweight devices give you absolute control over the security of your hotel or Airbnb room, making it nearly impossible for someone to enter, even with a key.
Anti-Theft Bag: With a 2024 report noting that 29% of solo female travelers had experienced a theft or attempted scam, a specialized bag is a wise investment. Look for features like slash-proof fabric and lockable zippers. A crossbody style worn in front of your body is the most secure option.
Small Padlock: A simple combination lock is a must-have for securing your belongings in a hostel locker or for locking the zippers of your backpack together in crowded areas.
Essential Tech and Convenience Items
Universal Travel Adapter with USB Ports: A modern essential. Choose a model that includes multiple USB-A and USB-C ports, allowing you to charge your phone, power bank, and other devices simultaneously from a single outlet.
High-Capacity Portable Power Bank: For a solo traveler, a dead phone is a safety issue. A reliable power bank (at least 10,000 mAh) ensures your lifeline for navigation, communication, and emergency help stays operational all day.
Solid Toiletry Kit: This is a game-changer for carry-on travel. Shampoo bars, conditioner bars, solid soap, and solid perfume sticks eliminate the need to worry about the TSA's liquids rule, prevent disastrous leaks, and are more environmentally friendly.
Pro-Tip: Before you leave, use your phone to download offline maps of your destination via Google Maps. This allows your phone's GPS to function perfectly even without a cell signal or Wi-Fi, making it nearly impossible to get truly lost. This makes a fully charged power bank your most important piece of tech.
Ready to Master the Art of Packing Light?
This guide gives you the "what," but to truly perfect the "how"—from advanced folding techniques to brand recommendations—you need the complete toolkit. Our free guide is the ultimate resource for step-by-step strategies, visual guides, and our ultimate pre-trip checklist.
Download the [How to Pack Light Guide] for free!
The "Do Not Pack" List: 5 Things to Leave at Home
Effective packing is as much about what you leave behind as what you bring. Ditching these common items will save you space, weight, and stress.

Expensive or Sentimental Jewelry: Wearing flashy jewelry can make you a target for theft. More importantly, the risk of losing a cherished or irreplaceable item is simply too high.
Multiple "Just-in-Case" Outfits: Resist the urge to pack for imaginary, unlikely scenarios. Pack for the trip you know you're taking. If an unexpected need arises, you can almost always buy what you need locally.
A Hair Dryer: This bulky item is provided by nearly every hotel and even most modern hostels. Leave yours at home.
Full-Sized Toiletries: There is no reason to carry large bottles of shampoo. Decant your essential liquids into reusable, travel-sized (under 100ml/3.4oz) containers or, better yet, switch to solids.
A Money Belt: While once a travel staple, money belts are often impractical for daily access and can be conspicuous. A more modern and secure approach is to use an anti-theft crossbody bag for daily essentials, while keeping deep storage items (like a backup credit card and passport) locked in your accommodation.
Frequently Asked Questions About Minimalist Packing
Are packing cubes really worth it?
Absolutely. They are the single most effective organizing tool for a carry-on. Not only do they compress clothing to save space, but they also function like dresser drawers inside your backpack, allowing you to find what you need without destroying your perfectly packed bag.
How do I pack for a trip with multiple climates?
The key is layering. Your capsule wardrobe (merino wool base layers, a fleece or sweater, and a waterproof/windproof shell) is designed for this. A merino t-shirt that keeps you cool in Rome can be layered under a sweater and jacket to keep you warm on a chilly evening in the Swiss Alps. Focus on adding or removing these versatile layers rather than packing entirely separate outfits.
What if I forget something important?
Unless it’s your passport or essential medication, you can almost certainly buy it at your destination. Forgetting a toothbrush or a pair of socks isn't a crisis; it’s an opportunity for a mini-adventure into a local pharmacy or shop.
Pro-Tip: Once you’ve mastered this universal list, you can find hyper-specific packing lists for destinations from Patagonia to Portugal—all shared by seasoned solo travelers on the [TrekGuider] platform.
Cleared for Takeoff: Navigating Airport Security with Your Carry-On
Knowing the rules is essential for a stress-free airport experience. For travelers departing from the US, the Transportation Security Administration (TSA) has two key guidelines for carry-on luggage.
The 3-1-1 Liquids Rule: All liquids, gels, creams, and pastes must be in containers of 3.4 ounces (100 milliliters) or smaller. All of these containers must fit into a single, clear, quart-sized bag. Each passenger gets one of these bags.
Electronics: All electronic devices larger than a cell phone (laptops, tablets, e-readers) must be removed from your bag and placed in a separate bin for X-ray screening.
Pack Light, Travel Far, Live Freely
Minimalist packing is not a restrictive set of rules; it's a liberating mindset. It’s a conscious decision to trade the burden of "stuff" for the freedom of experience. By focusing on versatility, quality, and intention, you transform your luggage from an anchor into a launchpad. You are now armed with more than just a checklist; you have a complete philosophy for navigating the world with ease and confidence. This solo female travel packing list is your blueprint for a lighter, smarter, and more enriching journey.
Once your minimalist kit is packed and ready, the only thing left to do is decide where to take it. Explore our collection of expert-written [Travel Guide] resources to find destination-specific advice and build the adventure of a lifetime.
Don't Miss Out! Subscribe for Exclusive Content
SubscribeComments 0
No comments yet
Be the first to share your experience!
Dont Miss Out! Subscribe for Exclusive Content

Ultimate USA Holidays Guide: Top Picks
FTC Affiliate Disclosure Essentials: Stay Compliant as a Travel Creator
Essential Affiliate Tools: From Tracking to Full Optimization
Booking.com Affiliate Program Review: Pros, Cons, and Earnings Potential
Decoding Affiliate Commission Rates: Benchmarks for Travel Creators
