SF Pride: 6 Route & Party Hacks
TrekGuider @trekguider
Picture it: a river of rainbow flags, glitter, and pure, unadulterated joy flowing down Market Street. The air thrums with music, cheers, and the collective heartbeat of hundreds of thousands celebrating love, identity, and resilience. This isn't just any parade; this is the legendary San Francisco Pride Parade. But for every person lost in the moment, there's another lost in the crowd, wrestling with a dead phone, a terrible view, and no idea where their friends have vanished. The sheer scale of SF Pride can be overwhelming, threatening to turn a day of pure celebration into a stressful logistical nightmare.
You’ve imagined yourself at the heart of the action, capturing the perfect photo, feeling that powerful sense of community. The reality, however, could be getting stuck behind a seven-foot-tall person, unable to see a single float, with your phone battery blinking at 3% and no cell service to find your crew. The difference between an unforgettable experience and a frustrating ordeal isn't luck—it's preparation. You deserve to experience every ounce of joy this iconic event has to offer, without the chaos and confusion that can so easily derail the day.
This is your definitive guide to conquering the celebration. We’re giving you six battle-tested route and party hacks to navigate the pride parade San Francisco like a seasoned pro. Forget the stress; this playbook ensures you soak in the history, master the logistics, and create memories that will last a lifetime, all while staying safe and comfortable.

Before You Go: Essential Prep for the Pride Parade San Francisco
Before you even think about your rainbow outfit, a little prep work will set the stage for a flawless day. The SF Pride Parade is more than a party; it’s a powerful legacy. Born from the first "gay-in" in 1970 and commemorating the key 1969 Stonewall Uprising, this event has evolved from a protest into a global platform for activism and celebration. In the 1980s, it became a crucial front line for raising AIDS awareness, and today it continues to champion the diverse spectrum of the LGBTQ+ community. Understanding this history enriches the entire experience, transforming it from a spectacle into a meaningful pilgrimage.
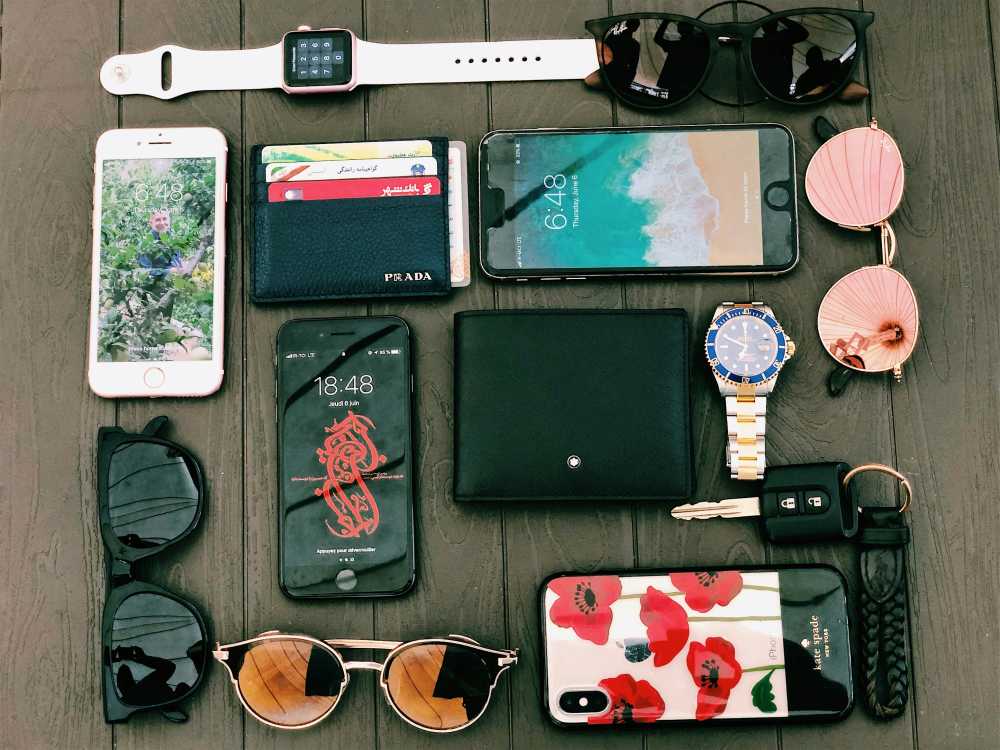
The 2026 SF Pride Parade is scheduled for Sunday, the last Sunday of Juneth, with the first contingents stepping off at 10:30 AM. To be ready, your day pack is your most critical asset. Here’s a non-negotiable checklist:
Hydration: Pack a reusable water bottle. There are water stations, but having your own is crucial for staying hydrated in the California sun.
Sun Protection: Sunscreen, a hat, and sunglasses are absolutely essential. There is very little shade along the parade route.
Layered Clothing: San Francisco weather is famously fickle. What starts as a chilly, foggy morning can quickly turn into a warm, sunny afternoon. A light jacket or hoodie you can tie around your waist is the smartest move you can make.
Comfortable Shoes: You will be on your feet for hours, walking and standing. Prioritize comfort over style; your feet will thank you by the end of the day.
Portable Power Bank: Your phone will be working overtime as your camera, map, and communication device. A fully charged power bank is an absolute must-have.
Snacks: While there are food vendors, lines can be long and prices high. Pack some energy bars or other easy-to-eat snacks to keep your energy levels up.
Finally, let's talk safety. SF Pride is known for its strong security measures, including advanced weapon detection technology at key entry points. While organizers work hard to create a secure environment, personal safety matters most in any large crowd. Familiarize yourself with basic protocols, like being aware of your surroundings and keeping your valuables secure. For a comprehensive look at staying safe while traveling, our Solo Female Travel Safety Guide offers invaluable tips that apply to everyone, regardless of gender, in any crowded event scenario.

Hack #1: Master the Market Street Route for the Pride Parade San Francisco
The parade route is deceptively simple: it runs straight down Market Street, starting at Beale Street and culminating at 8th Street, right by the Civic Center Plaza. The challenge isn't knowing the route; it's knowing where on the route to be and when to be there.
The Hack: Arrive by 9 AM and choose your zone strategically. The parade officially starts at 10:30 AM, but the sidewalks begin filling up much earlier. Arriving an hour and a half beforehand allows you to claim a prime spot without having to battle the late-coming masses.
Here’s a breakdown of the route's key zones to help you decide on your ideal viewing experience:
The Starting Zone (Beale to Montgomery Street): This area is often less crowded, especially right at the beginning. You'll see all the contingents when they are fresh, energized, and at their most organized. It’s a fantastic spot for photographers who want clean shots of the floats and performers before the crowds swell. The energy here is one of joyful anticipation.
The Commercial Core (Montgomery to Powell Street): This is the heart of the parade and, consequently, the most packed section. The tall buildings create a canyon-like effect, amplifying the sound and energy. It’s an intense and exhilarating place to be, but not for the faint of heart. If you want to be in the thick of it, this is your spot, but be prepared for a tight squeeze.
The Climax Zone (Powell to 8th Street): As the parade approaches its end at the Civic Center, the energy reaches a fever pitch. This is where the performers give their all, knowing they’re approaching the main celebration. The crowd here is dense but incredibly vibrant. Positioning yourself near 8th Street gives you a head start on moving into the Civic Center Plaza for the post-parade festivities.
Pro-Tip: For a less obstructed view and better photos, try to secure a spot on the south side of Market Street. In the late morning and early afternoon, the sun will be mostly at your back, beautifully illuminating the parade without forcing you to squint. This side is often just slightly less congested than the north side.
Hack #2: The Transportation Game Plan - Ditch the Car, Embrace Public Transit
Let’s be perfectly clear: driving to the SF Pride Parade is a recipe for disaster. Street closures are extensive, parking is virtually non-existent and astronomically expensive, and navigating the gridlock will drain your celebratory spirit before you even arrive.
The Hack: Make BART (Bay Area Rapid Transit) and Muni your best friends for the day. San Francisco’s public transit system is designed to handle massive events like this, and it is by far the most efficient way to get to and from the parade.
Here’s your transit strategy:
BART: The underground trains are the fastest way to get downtown from the East Bay, the Peninsula, or other parts of the city. The key is choosing the right station to exit.
Embarcadero Station: Puts you right near the start of the parade. A great option if you plan to arrive early and watch from the beginning.
Montgomery Station: A perfect middle-ground, placing you in the energetic core of the route. It’s one of the busiest stations, so be prepared for crowds.
Powell Station: Another central option, close to the cable car turnaround and a major shopping area. Like Montgomery, expect it to be very busy.
Civic Center Station: This is your stop if you want to head directly to the post-parade celebration or watch the parade's final leg.
Muni: The city’s network of buses and light rail (Muni Metro) is another excellent choice. The F-Market & Wharves historic streetcar will be rerouted, but the Muni Metro lines run directly under Market Street, using the same stations as BART. Many bus lines will have detours, so be sure to check the SFMTA website or your favorite transit app for real-time updates on the day of the event.
Rideshare services like Uber and Lyft will be operating, but expect heavy surge pricing and designated drop-off/pick-up zones that may be several blocks away from Market Street to avoid the worst of the congestion. Public transit remains the most reliable and cost-effective option.

Hack #3: The Civic Center Celebration - Your Post-Parade HQ
The last float crossing 8th Street doesn't mark the end of the day—it marks the beginning of the next phase. The parade flows directly into the massive Pride Celebration at Civic Center Plaza, a sprawling festival with multiple stages of live music, DJs, inspiring speakers, hundreds of community booths, art installations, and food vendors.
The Hack: Have a concrete plan for navigating the festival, especially for meeting your group. Cell service in and around Civic Center Plaza can become extremely unreliable due to the sheer number of people. A "we'll find each other" approach will likely fail.
Follow these steps for a seamless transition from parade to party:
Establish a Hyper-Specific Meeting Point: Before you separate, agree on a meeting spot that is impossible to mistake. "By the main stage" is too vague. Instead, choose something like, "At the base of the statue of James Lick, on the side facing the library," or "Directly in front of the main entrance to the Asian Art Museum." Set specific times to meet there (e.g., 2 PM and 4 PM).
Pace Yourself and Hydrate: The celebration runs for hours after the parade. It's a marathon, not a sprint. Continue to drink water, find moments of shade, and don't forget to eat.
Explore with Purpose: Don't just wander aimlessly. The community booths are the soul of the celebration. You can connect with dozens of non-profits, activist groups, and local organizations. It’s an incredible opportunity to learn, connect, and find your community.
Know Your Exits: Take a moment upon arrival to orient yourself and identify the main exit points from the plaza. Knowing how to get out quickly in case of an emergency or if you simply feel overwhelmed is a smart move.

Hack #4: Beyond Market Street - Unofficial Parties & Neighborhood Vibes
The official parade and Civic Center festival are the main events, but the spirit of Pride permeates the entire city, becoming a vibrant key element of the city’s festive calendar—a calendar we explore in our broader guide to San Francisco Holidays: Bay Area Buzz.
The Hack: Dip out of the main event for a few hours to experience a different, more intimate side of Pride.
The Castro District: As the historic heart of San Francisco's LGBTQ+ community, the Castro is ground zero for Pride weekend. The streets become a massive, vibrant block party. While it will be just as crowded as the parade, the atmosphere is different—more neighborhood-focused and less structured. Grab a drink at a historic bar, watch the impromptu dance parties, and soak in the history.
Dolores Park: On Pride Sunday, the park's famous "Gay Beach" area expands to cover nearly the entire lawn. It transforms into a massive, sun-drenched picnic party. The vibe is more relaxed and bohemian than the official festival. Pack a blanket, bring some snacks, and enjoy people-watching in one of the city's most beautiful settings.
SoMa (South of Market): This neighborhood is home to many of the city's most famous clubs and venues. Throughout Pride weekend, these spaces host a huge variety of official and unofficial after-parties, from daytime DJ sets to late-night dance events. Check event listings in advance, as many of the most popular parties sell out.

Hack #5: Tech & Safety - Your Digital Toolkit for a Seamless Day
In a modern festival environment, your smartphone is your most powerful tool—if you use it wisely.
The Hack: Prep your phone and apps to be your digital command center for the day.
The Power Bank is Non-Negotiable: We mentioned it before, but it bears repeating. A dead phone means no photos, no map, and no way to contact your friends. A fully charged portable power bank is the single most important piece of tech you can bring.
Master Your Communication Apps: Standard text messages can be delayed when cell networks are overloaded. Use a data-based messaging app like WhatsApp or Signal for your group chat. Their delivery is often more reliable in dense crowds. Use the "Share Live Location" feature for a set period (e.g., 15 minutes) if you get separated and need to find your way back to your group.
Download Offline Maps: Before you leave home, download an offline map of the downtown San Francisco area in your map app of choice. Even if you lose all cell service, your phone's GPS will still work, allowing you to see your location on the map and navigate.
Embrace Official Resources: Check the official SF Pride website in the days leading up to the event. If they release an official app, download it. It will likely have the most accurate schedules, maps, and emergency alerts.
Pro-Tip: Take a screenshot of your planned meeting spots, the parade route map, and the contact info for everyone in your group. Create a dedicated photo album for these screenshots so you can access them instantly, even if your apps won't load due to poor connectivity.

Hack #6: The Exit Strategy - How to Leave Without the Headache
Just as important as your arrival plan is your exit strategy. When hundreds of thousands of people try to leave the same area at the same time, the public transit stations and rideshare zones become incredibly congested.
The Hack: Avoid leaving during the peak rush right as the festival winds down.
You have two primary strategies for a stress-free departure:
The Early Exit: If you've had your fill of the crowds and the main celebration, start making your way out before the final headliners take the stage at Civic Center. By leaving an hour before the official end time, you can beat the massive wave of people heading for the BART and Muni stations.
The Patient Wait: This is often the better option. Instead of rushing out with everyone else, wait it out. Find a restaurant or cafe a few blocks away from Civic Center, grab a bite to eat, and relax for an hour or so. Let the crowds on the transit platforms thin out. By the time you're done, your journey home will be far more pleasant.
If you're using a rideshare service, walk at least four or five blocks away from Market Street and Civic Center before you even attempt to request a ride. This will get you out of the most congested, no-pickup zones and will likely save you from the highest surge pricing.
Your Guide to an Unforgettable Pride
You are now armed with the knowledge to do more than just attend the pride parade San Francisco —you are ready to experience it with confidence, joy, and a sense of empowered preparedness. From mastering the Market Street route and navigating the Civic Center celebration to knowing the smartest ways to get there and back, you have the tools to craft a perfect day. This isn't just about avoiding stress; it's about creating space for the powerful moments of connection, celebration, and solidarity that define SF Pride. Go forth, celebrate loudly, and have an incredible time.
For a complete blueprint to planning your ultimate trip to the Bay Area, including deep dives into its other iconic holidays and hidden gems, be sure to explore our comprehensive Travel Guide.
Meta Data Suggestions:
SEO Meta Title: SF Pride: 6 Essential Hacks for the Parade Route & Parties
URL Slug: sf-pride-parade-route-party-hacks
SEO Meta Description: Master the SF Pride Parade! Get 6 expert hacks on navigating the Market Street route, finding the best parties, and staying safe in the crowds.
Don't Miss Out! Subscribe for Exclusive Content
Subscribe


Comments 0
No comments yet
Be the first to share your experience!
Dont Miss Out! Subscribe for Exclusive Content

San Francisco Cherry Blossoms: A Local's Guide to the Blooms

Halloween SF: Haunts Without Horrors

SF Festivals: 7 Must-See Lineups

Christmas SF: Lights & Wharf Wonders

Chinese New Year SF: Parade Essentials

San Francisco Holidays: Bay Area Buzz
How to Create a Digital Travel Guide People Will Buy
TrekGuider @trekguider
You’re a travel expert. Your notes are filled with hidden gems, your camera roll is a treasure trove of untold stories, and your advice could save fellow travelers hundreds of dollars and hours of stress. You know your expertise has value, but packaging it into a real, scalable income stream feels like a monumental task. Relying on the slow trickle of ad revenue or the unpredictability of affiliate sales is a frustrating grind, keeping your dream of a truly independent business just out of reach.
This uncertainty keeps you on the content treadmill, trading your valuable time for pennies. You see other creators launching their own products and achieving a level of financial freedom that feels like a distant fantasy. The path forward is a confusing fog of questions about design, content, pricing, and technology, leaving you stuck in analysis paralysis while the immense opportunity of the creator economy—a market projected to nearly double from $250 billion to almost $500 billion by 2027—passes you by.
It’s time to stop trading hours for dollars and start building assets. This is your chronological, step-by-step playbook. We will demystify the entire process and show you exactly how to create a digital travel guide that people will not only buy but will also love and recommend. This is your complete workflow for transforming your hard-won expertise into a polished, professional product that generates passive income for years to come. Think of this as a critical chapter in your business plan; for the complete blueprint on building a modern creator enterprise, be sure to read our ultimate guide to How to Make Money Online: A Creator's Guide for 2026.

Why a Digital Guide is Your Ultimate Scalable Asset
Before diving into the "how," it's critical to understand the "why." Transitioning from promoting others' products to creating and selling your own is the single most powerful step you can take toward building a profitable, independent business. While ads and affiliate links have their place, digital products offer a level of control and scalability that other models simply can't match.
The advantages are transformative:
Infinite Scalability: Digital products operate on a "create once, sell forever" model. Whether you sell 10 copies or 10,000, your workload remains the same. There is no inventory to manage and no shipping to worry about.
Exceptionally High Profit Margins: With no manufacturing or distribution costs, the profit margins are extraordinary. Once you recoup your initial time investment, nearly every sale is pure profit.
Full Ownership and Control: When you sell your own guide, you own the entire process. You control the product, the pricing, the marketing, and the customer relationship. You are no longer dependent on an affiliate partner’s commission rates or an ad network's traffic requirements.
Solidifies Your Authority: Creating and selling a high-quality product instantly positions you as an expert. It builds deep trust with your audience, as you are no longer just recommending other people's stuff—you are standing behind your own valuable creation.
The market reflects this opportunity. The e-learning sector alone, a huge component of the digital product world, is projected to surge to an incredible $848 billion by 2030. This isn't a fleeting trend; it's a fundamental shift in how creators build resilient businesses.
The Blueprint – Research and Validation
The costliest mistake a creator can make is to spend months building a product nobody asked for. Thorough research and validation aren't optional; they are the foundation upon which a profitable product is built.
Identify Audience Needs and Define a Specific Niche
Your first job isn't to be a brilliant inventor; it's to be a sharp detective, uncovering the real, recurring problems your audience is desperate to solve.
Listen to Your Audience: The best ideas are hidden in plain sight. Dive into your blog comments, email replies, and social media DMs. What destinations are people constantly asking about? What part of the travel planning process do they find most challenging or stressful? Their recurring questions are your product ideas.
Define a Hyper-Specific Niche: Avoid creating a generic guide. A broad guide to "Mexico" will get lost in a sea of competition. A highly specific product like "A First-Timer's Foodie Guide to Mexico City's Roma Norte Neighborhood" is more valuable, easier to market, and instantly positions you as a niche expert.
Conduct Keyword and Market Research to Validate Demand
Once you have an idea, you must validate it with data.
Analyze Search Volume: Use an SEO tool to check the search volume for terms related to your guide idea. High search volume for long-tail keywords like "7-day Japan itinerary for foodies" or "what to do in Lisbon with kids" is a strong data signal that a ready market exists for a guide on that topic.
Conduct Competitor Analysis: Find 3-5 comparable digital travel guides in your niche. Your goal isn’t to copy them, but to identify a gap in the market. Analyze their price points, what they include, and, most importantly, read their reviews. What are customers praising? What are they complaining about? This will show you exactly how to create a superior product.
Pro-Tip: True validation comes from the intersection of qualitative and quantitative data. A great product idea is one that your audience is asking for (qualitative) and that a significant number of people are searching for online (quantitative).

The Core – Outlining and Content Creation
With a validated idea, it’s time to build the heart of your product: the content. This is where your unique expertise, voice, and experience shine.
Develop a Logical Structure
A good guide flows intuitively and is easy to navigate. Before you write a single word, create a detailed table of contents. This will be your roadmap and ensure you don't miss any crucial information. A typical structure includes:
Introduction: A brief overview of the destination, essential facts (currency, language), and why your guide is the ultimate resource.
Logistics: The practical nuts and bolts—getting there, getting around, visa requirements, and curated recommendations on where to stay for different budgets.
Experiences: The core of your guide. This includes top attractions, detailed daily itineraries, and deep dives into your niche (e.g., food and drink recommendations, hiking trails, photo spots).
Practicalities: The crucial final details like safety tips, packing lists, a budget breakdown, and useful local phrases.
Write Compelling and Useful Content
This is where you go beyond the generic advice found on a thousand other blogs.
Gather Your Assets: Compile all of your personal notes, journal entries, and high-quality photographs from your travels to the destination. Your first-hand experience and unique visuals are your primary competitive advantage.
Be Both Inspirational and Intensely Practical: Write in an engaging, personal tone. Share anecdotes and insider tips that bring the destination to life. Go beyond simply listing facts; tell your readers why a place is special. Share the hard-won wisdom that can't be found elsewhere, like "skip the line at the Colosseum by booking this specific tour" or "the best gelato is actually found two blocks away from the main square at this tiny shop."
With your raw content compiled, the next step is to give it a professional polish that signals its immense value.

The Polish – Professional Design for Non-Designers
Your guide's content may be brilliant, but in the digital world, packaging matters. A professional, user-friendly design signals quality and dramatically improves the customer experience.
Select a User-Friendly Design Tool
You don't need to be a graphic designer to create a stunning product. For a travel blogger whose primary goal is to efficiently create a static PDF travel guide, a template-based tool like Canva is the strategically superior choice. While powerful professional software like Figma or Adobe Illustrator has a steep learning curve that can delay your launch by weeks, Canva is built specifically for this type of project. Its intuitive, drag-and-drop interface is designed to help non-designers produce high-quality visuals quickly.
Feeling inspired to build your own assets but not sure where to begin? Creating high-value products is the core of a modern creator business. To accelerate your journey, we've bundled together some of our most powerful resources. The Travel Creator's Toolkit is a free collection of checklists, templates, and guides designed to help you streamline your workflow and build your business faster.
5 Essential Mobile-First Design Principles for a User-Friendly Guide
Your guide will almost certainly be used on a mobile phone while your customer is in-destination. Designing with a mobile-first user experience (UX) is not an option; it is essential for your product to be functional and valuable.
Prioritize Legibility and High Contrast: The content must be effortlessly readable on a small screen, often in bright sunlight. Use a clean, simple font of at least 11 points so users don't need to pinch-and-zoom. Crucially, ensure a high contrast ratio between the text and background—at least 4.5:1 as recommended by Web Content Accessibility Guidelines (WCAG)—to maintain readability.
Implement Simplified Navigation: The single most important navigation element is a hyperlinked Table of Contents at the beginning of the document. This allows users to jump directly to the section they need with a single tap, which is crucial when they're trying to find information quickly on a busy street.
Design for Touch with Finger-Friendly Targets: Any included hyperlinks (e.g., a link to a restaurant's website or a Google Maps location) must have a clickable area large enough to be easily tapped with a finger—the industry standard is a minimum touch target size of 44x44 points (approximately 7-10mm).
Minimize Cognitive Load by Eliminating Clutter: Mobile users are often distracted. Their interaction with a guide is typically in short bursts or "micro-tasks". To accommodate this, use short paragraphs, bulleted lists, bolded text for key information, and generous white space. A clean, uncluttered interface helps users find what they need with minimum effort.
Optimize for Performance and Portrait Orientation: The vast majority (94%) of mobile users hold their phones vertically. Your guide must be designed with a portrait layout (e.g., A4 or US Letter size). Crucially, keep the final PDF file size as small as possible by compressing all images before inserting them into your document. A large file will download slowly on a weak cellular connection, creating a poor user experience.

The Launchpad – How to Create a Digital Travel Guide for Sale
You've created a valuable, beautifully designed resource. The final phase is to package it, price it for profit, and get it into the hands of your customers.
How to Price Your First Digital Product
Pricing is one of the most challenging decisions. The most effective strategy for a knowledge-based product is value-based pricing. Instead of focusing on your production costs, price your product based on the transformation it provides to the customer. If your guide saves a user 20 hours of stressful research and helps them discover priceless experiences they would have otherwise missed, its value is immense.
A practical process for setting your price:
Step 1: Research the Market: Identify 3-5 comparable digital travel guides in your niche to establish a realistic market range.
Step 2: Articulate the Value: Make a specific list of the tangible outcomes your guide provides (e.g., "Saves over 15 hours of planning," "Includes a pre-planned 7-day itinerary worth over $100 in planning fees").
Step 3: Set an Initial Price and Test: For a high-quality, first-time travel guide, a price point between $19 and $49 is a strong starting position. It communicates significant value without creating sticker shock for the buyer.
Choose a Sales Platform That Works for You
You need a platform to handle the sale and secure digital delivery of your product. While you can use e-commerce plugins on your own blog, the smartest strategy is to leverage a platform that puts you in front of a built-in audience of motivated buyers.
Pro-Tip: Don't just build a product; build your business inside an ecosystem. A specialized marketplace like TrekGuider is the ideal place to sell your high-quality Travel Guide. It provides a professional, ready-made storefront and connects you with a global audience of passionate travelers who are actively searching for expert resources. You can publish articles to attract new customers directly on the platform, creating a powerful marketing funnel that leads right back to your product page.
Frequently Asked Questions (FAQ)
1. How long should my digital travel guide be?
Value is not measured in page count. A concise, 50-page guide packed with unique, actionable advice is far more valuable than a rambling 200-page guide filled with generic information. Focus on comprehensively solving the specific problem your niche audience has.
2. Do I need to have visited the destination very recently?
While recent, first-hand experience is ideal, an "evergreen" guide focused on core attractions, culture, and logistics can have a long shelf life. The key is transparency. Be clear about when you last visited and focus on information that doesn't change rapidly. You can always update your guide with new editions.
3. What if I'm not a professional writer or photographer?
You don't need to be. Your audience values authenticity and expertise over perfect prose. Write in your natural, conversational voice, as if you were giving advice to a friend. For photos, a modern smartphone can capture high-quality images. The goal is to be clear, helpful, and genuine.
Your Journey from Expert to Entrepreneur Starts Now
You now have the complete, A-to-Z workflow. You've moved from the vague idea of a product to a concrete, actionable blueprint that covers research, content creation, professional design, and a smart launch strategy. The path from being a passionate travel expert to a successful digital entrepreneur is no longer a fog of confusion.
You have the definitive answer to the question of how to create a digital travel guide that provides immense value and generates a sustainable income. The only thing left to do is take the first step. Start the research, outline your expertise, and begin building the asset that will power your business and fund your adventures for years to come.
SEO Meta Data Suggestions:
SEO Meta Title (58 characters): How to Create a Digital Travel Guide People Will Actually Buy
URL Slug: how-to-create-digital-travel-guide
SEO Meta Description (154 characters): A step-by-step playbook for travel creators on how to create a digital travel guide, from research and writing to design, pricing, and selling your product.
Read the full guide: The Travel Blog Business Plan: How to Make Real Money in 2026
Don't Miss Out! Subscribe for Exclusive Content
SubscribeComments 0
No comments yet
Be the first to share your experience!
Dont Miss Out! Subscribe for Exclusive Content

FTC Affiliate Disclosure Essentials: Stay Compliant as a Travel Creator

Essential Affiliate Tools: From Tracking to Full Optimization

Avoid These 5 Affiliate Landing Page Mistakes for Better Conversions

Affiliate Keyword Research Mastery for Travel Blogs

Booking.com Affiliate Program Review: Pros, Cons, and Earnings Potential

Decoding Affiliate Commission Rates: Benchmarks for Travel Creators
3 Types of Solo Travel Holidays: Which Is Right For You?
TrekGuider @trekguider
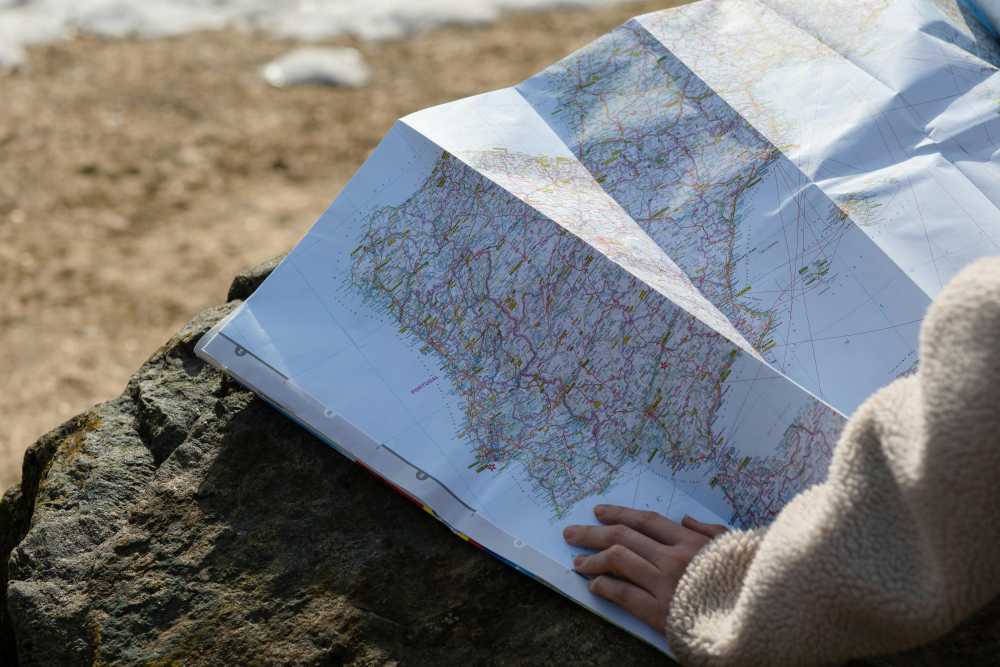
Are you dreaming of a solo trip but find yourself stuck between two conflicting images? On one hand, the exhilarating freedom of a backpack and a map with no agenda. On the other, the comfort and camaraderie of sharing a laugh with new friends on a guided tour. You're not alone in this dilemma. The term solo travel holidays is one of the most misunderstood in travel, causing a frustrating mix of excitement and decision paralysis that stalls too many great adventures before they even begin. This guide is designed to be your compass. For a complete playbook on the fundamental skills and mindset needed for any solo journey, be sure to read . Here, we'll demystify the options, help you discover your unique solo travel style, and give you the confidence to book the adventure that's truly right for you—whether that means forging your own path or joining a pack of like-minded explorers.

Why 2026 is the Year of Going It Alone
If you're feeling the pull to travel by yourself, you're not just following a whim; you're part of a massive global movement. Once considered a niche way to see the world, solo travel has exploded into the mainstream. This isn't a fleeting trend—it's a fundamental shift in how people approach life and exploration.
At its heart, this global movement is fueled by a collective hunger for something beautifully simple: unrestricted freedom and flexibility. In a world of shared schedules and compromises, the ability to create a trip that is 100% yours—your pace, your interests, your budget—is the ultimate form of luxury. A post-pandemic "carpe diem" mindset has only amplified this, with millions re-evaluating their priorities and refusing to wait for a travel partner whose schedule and interests align perfectly with their own.

The rise of remote work has also untethered millions from the traditional office, making longer, more immersive solo journeys more feasible than ever. Technology has transformed the landscape, turning what was once a daunting logistical challenge into a manageable and secure endeavor. Solo travel is no longer about being alone; it's about being empowered, independent, and in complete control of your own adventure.
What Exactly Are Solo Travel Holidays?
The core of the confusion for many aspiring travelers lies in the ambiguity of the term itself. A "solo holiday" isn't a single, rigid concept. It exists on a dynamic spectrum, ranging from absolute, self-reliant independence to fully supported group experiences. Understanding where you feel most comfortable on this spectrum is the essential first step to planning the perfect trip.
At one end, you have Purely Independent Travel. This is the classic vision: you book your own flights, find your own accommodation, craft your own itinerary, and navigate every challenge and triumph of the journey yourself. It offers the greatest freedom but also demands the most planning and self-reliance.
At the other end is the Fully-Escorted Group Tour. Here, you are traveling as an individual, but every detail—from hotels and transport to daily activities and most meals—is expertly arranged by a tour company. You benefit from a professional guide, a built-in safety net, and the instant camaraderie of a shared experience.
In between, a rich variety of options exist, from solo wellness retreats and specialized adventure trips to semi-independent tours that offer a blend of structured activities and ample free time. The beauty of the modern travel landscape is that there are solo travel holidays designed for every personality and comfort level.
Are You an Independent Adventurer or a Social Explorer?
To find your perfect trip, you need to honestly assess your own personality, priorities, and travel goals. Are you energized by the challenge of navigating a new city on your own, or do you thrive on the shared energy of a group discovering a new place together? Neither approach is better—they simply serve different needs.
This framework is your diagnostic tool. Use this table to compare the core trade-offs and identify the travel style that resonates most deeply with you.
For those who see themselves as an Independent Adventurer, the thrill is in the planning and execution. Our digital travel planners and itinerary templates are perfect for the self-reliant traveler who wants expert-level organization without the constraints of a group tour.
For the Social Explorer who thrives on connection, choosing the right tour company matters most. A great small group tour can lead to lifelong friendships and unforgettable shared memories.
Top Solo Travel Holidays for Every Style
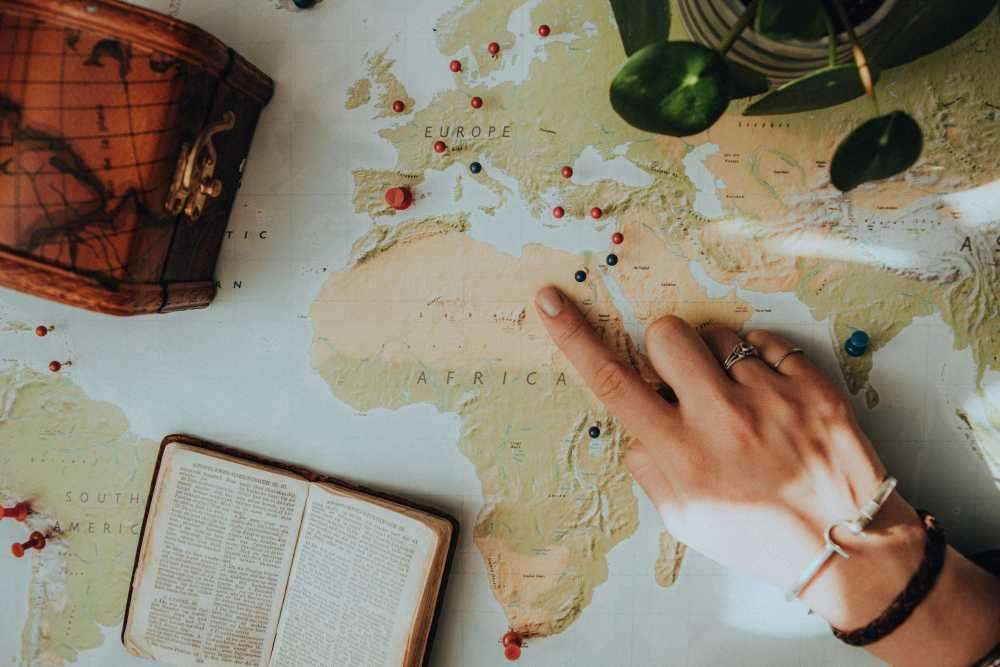
Once you’ve identified your travel style, you can choose a destination that plays to its strengths. The perfect location for a rugged independent trip may be a poor choice for a relaxing wellness retreat. Here are our top picks for 2026, categorized by the type of solo traveler you are.

For the Independent Adventurer
These destinations are celebrated for their world-class safety, excellent tourist infrastructure, and sheer joy of discovery, making them a paradise for those forging their own path.
Copenhagen, Denmark: Discover the meaning of hygge in this incredibly safe and bike-friendly capital. Effortless public transport, a friendly English-speaking populace, and a cozy cafe culture make it a dream for first-time solo travelers looking to explore with confidence.
Tokyo, Japan: A mesmerizing city that perfectly blends hyper-modern efficiency with ancient tradition. Japan's legendary safety record, unparalleled public transit, and the cultural acceptance of dining alone make it a uniquely stress-free environment for solo exploration.
Portland, Oregon, USA: With its vibrant food cart scene, quirky independent neighborhoods, and easily accessible nature, Portland offers a welcoming and low-key solo experience. It's a city built for wandering and spontaneous discovery.
For the Social Explorer
These destinations are global hubs for the world's best small group tour companies, offering epic landscapes and cultural experiences that are often richer when shared.
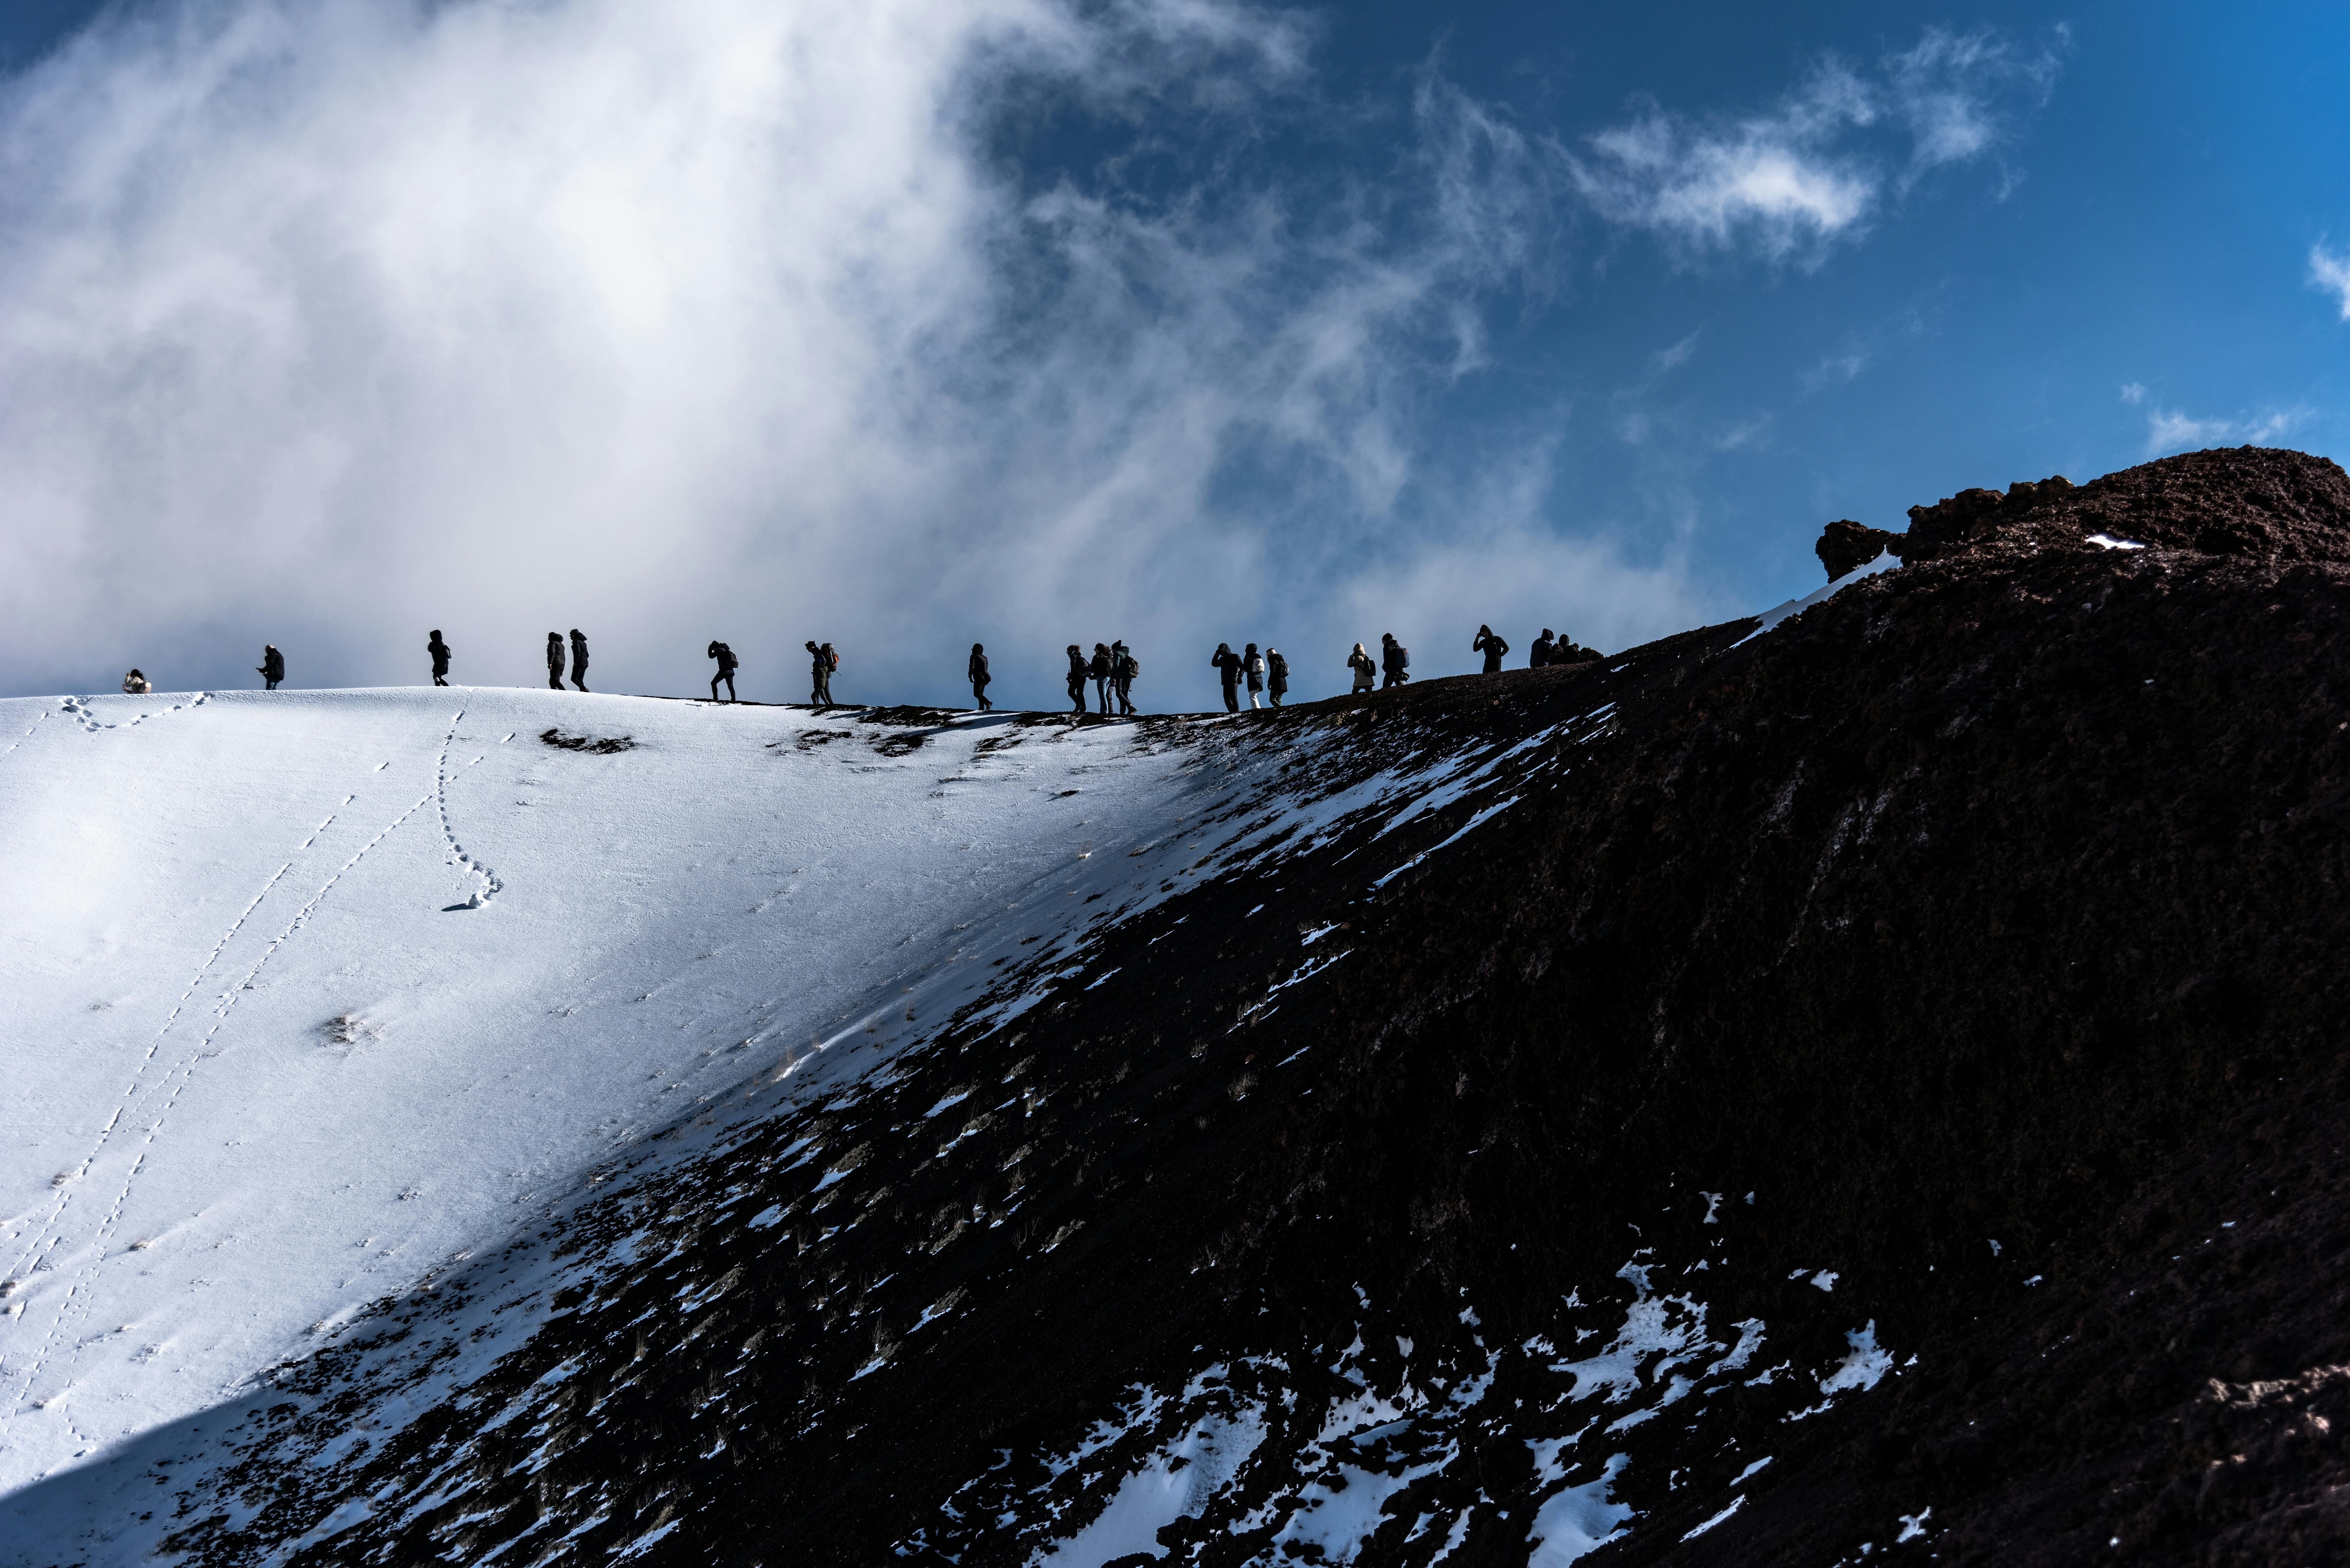
Costa Rica: The ultimate adventure playground. Join a group to zip-line through cloud forests, spot sloths and toucans, and learn to surf on volcanic sand beaches. The country's well-established eco-tourism circuit is perfectly suited for adventure holidays for singles and solo travelers.
Vietnam: A country of breathtaking beauty and profound history. A small group tour expertly handles the logistics of navigating between cities, leaving you free to immerse yourself in the culture, whether you're cycling through rice paddies or taking a cooking class in Hoi An.
Morocco: From the bustling souks of Marrakech to the vast silence of the Sahara Desert, Morocco offers an incredible diversity of experiences. A guided tour provides crucial cultural insight and logistical ease for a truly unforgettable journey.
For the Wellness Seeker
If your goal is to recharge, recenter, and return home renewed, these destinations are global epicenters for solo wellness retreats and profound self-care.
Sedona, Arizona, USA: Known for its stunning red rock landscapes and palpable spiritual energy, Sedona is packed with world-class spas, yoga studios, and wellness centers perfect for a restorative solo escape from the daily grind.
Bali, Indonesia: The undisputed global capital of yoga and wellness. Whether you're in Ubud for a dedicated yoga retreat or in a coastal town for surfing and meditation, Bali is an island designed for nourishing the mind, body, and soul.
Thailand: The "Land of Smiles" combines legendary hospitality with an affordable and accessible wellness scene. From luxury spa resorts to traditional Thai massage schools, it's an ideal place to focus entirely on your own well-being.
Your Action Plan for Solo Travel's Biggest Hurdles
Mastering the practical challenges is the final step to a successful trip. By addressing the biggest pain points head-on—cost, safety, and loneliness—you can move from planning to packing with total confidence.
How to Find Deals and Ditch the Single Supplement
The dreaded "single supplement" can make solo travel feel unfairly expensive. But the industry is adapting, and a savvy traveler can almost always find a way around it.
Hunt for Waivers: Many small group adventure travel companies (like Intrepid Travel and G Adventures) will waive the single supplement if you're willing to share a room with another solo traveler of the same gender—potentially cutting your accommodation costs in half and providing an instant travel companion.
Travel in the Shoulder Season: Traveling just outside of the peak months (e.g., September in Europe instead of July) can lead to massive savings on flights and accommodation while still offering great weather and fewer crowds.
Search Specifically: Use search terms like "no single supplement holidays" or "solo travel deals" to find companies and travel agents who specialize in this market.
Pro-Tip: Sign up for the email newsletters of solo-friendly tour companies. They often announce flash sales and last-minute deals on trips where they need to fill a final spot, offering incredible value for the flexible traveler.
Smart Strategies for Confident Exploration
Your personal safety matters most, and a few smart, proactive strategies can make all the difference, especially when determining the safest place for a woman to travel alone.
Share Your Itinerary: Before you leave, share a cloud document (like Google Docs) with your flight details, hotel reservations, and general itinerary with a trusted friend or family member back home. They'll appreciate the peace of mind.
Vet Your Neighborhoods: Before booking accommodation, use Google Street View to take a virtual walk around the block. Get a feel for the lighting, businesses, and overall vibe. Then, read recent reviews that specifically mention the area's safety at night.
Use Technology as a Safety Net: Apps like GeoSure provide neighborhood-level safety scores, while sharing your live location via Google Maps or WhatsApp with a contact at home provides an extra layer of security.
How to Meet People on the Road (If You Want To)
One of the great benefits of traveling alone is the freedom to be as social or as solitary as you wish. If and when you're in the mood to connect, it's easier than you think.
Join a Day Tour: A free walking tour or a local food tour is the number one hack for meeting people on your first day in a new city. It provides a natural, low-pressure group setting and an easy excuse to suggest grabbing lunch afterward.
Stay in Social Accommodations: Even if you prefer a private room, choosing a high-end hostel or a guesthouse with a welcoming common area, bar, or organized activities is a fantastic way to meet fellow travelers organically.
Leverage Pre-Trip Chats: Many tour companies now create private WhatsApp or Facebook groups for travelers before the trip begins. This allows you to "meet" your future travel companions and break the ice before you even leave home.
Pro-Tip: The easiest and most reliable conversation starter in any travel setting is simply, "Where are you from?" or "What's been your favorite thing you've seen here so far?" Every traveler loves to share their story.

Your Solo Travel Questions, Answered
Is it weird to go on holiday by yourself?
Absolutely not. It is a fulfilling, empowering, and increasingly celebrated experience that allows for total control over your trip. In today's world, choosing to travel solo is rightly seen as a sign of confidence and independence.
What is the best age for solo travel?
There is no "best age." Solo travel is embraced by all demographics, from younger generations who value experiences over possessions to a growing number of travelers on solo travel holidays for over 50s who are finally exploring their bucket-list destinations.
Are solo holidays more expensive?
They can be, but they don't have to be. While single occupancy rates can increase costs for independent travelers, the industry is rapidly adapting with more single rooms, waived supplements on tours, and deals specifically for individuals. With smart planning, solo travel is very affordable.
You now have a complete framework for making an informed and confident decision. You understand the rich spectrum of solo travel holidays, you have a tool to identify your personal travel style, and you have actionable strategies to plan a safe, affordable, and deeply rewarding adventure. The world isn't just for couples or families; it's for the curious, the brave, and the independent. It's for you.
Read the full guide: Anxious to Adventurous: The Ultimate Guide to Solo Travel Confidence
Don't Miss Out! Subscribe for Exclusive Content
SubscribeComments 0
No comments yet
Be the first to share your experience!
Dont Miss Out! Subscribe for Exclusive Content

Ultimate USA Holidays Guide: Top Picks
FTC Affiliate Disclosure Essentials: Stay Compliant as a Travel Creator
Essential Affiliate Tools: From Tracking to Full Optimization
Booking.com Affiliate Program Review: Pros, Cons, and Earnings Potential
Decoding Affiliate Commission Rates: Benchmarks for Travel Creators

Amazon Associates for Travel: Strategies to Maximize Commissions
The Complete Guide to Solo Road Trips: Planning, Safety & Vehicle Prep
TrekGuider @trekguider
You see the pictures, you hear the stories—the ultimate solo road trip, a journey of pure freedom on the open road. But when you actually start to think about it, a wave of very real questions hits hard: What if I get a flat tire in the middle of nowhere? How do I stay safe alone at a motel? Can I really handle all the planning, driving, and navigating by myself?
That initial thrill can quickly turn to anxiety, paralyzing you before you even check your tire pressure. Without a rock-solid plan, a dream trip can easily become a stressful, expensive, or even dangerous ordeal. The difference between a life-changing experience and a cautionary tale lies in preparation. While the logistics of solo travel are unique, the core principles of smart preparation are universal—a foundation just as crucial when mapping out Family Travel Ideas: The 2026 Guide to Unforgettable Trips as it is for hitting the road alone.
This guide is your solution. It is the definitive roadmap designed to systematically dismantle every fear and answer every question. We will replace uncertainty with a comprehensive, step-by-step framework covering everything from strategic planning and budgeting to critical safety protocols and vehicle preparation. After reading this, you will not only feel capable but completely empowered to pack your bags, turn the key, and confidently hit the road for one of the great solo road trips you've always imagined.

Why a Solo Trip is a Powerful Investment in Yourself
Before we dive into logistics, let's anchor ourselves in the why. A solo road trip is more than a change of scenery; it’s an active opportunity to disconnect from the demands of daily life and reconnect with the one person you can sometimes lose track of: yourself.
Absolute Freedom: You decide when to start, where to stop, and how long to linger. There are no compromises on the itinerary, the music, or the choice between a greasy-spoon diner and a scenic picnic. Every decision is yours alone.
Radical Self-Reliance: Successfully navigating hundreds of miles on your own is a profound confidence builder. You’ll learn to solve problems on the fly, trust your judgment, and discover a deep well of resilience you never knew you had.
The Luxury of Headspace: The long stretches of highway provide the mental space for deep thought and reflection. It’s a chance to process, dream, and learn what truly energizes you without the noise of external influence.
The Blueprint: Strategic Planning for the Open Road
While the soul of a road trip lives in its moments of spontaneity, its backbone is forged in smart preparation. This isn't about creating a rigid, fun-killing schedule; it's about building the strong framework that enables true freedom and removes decision fatigue when it matters most.

Define Your Mission: Destination & Purpose
First things first: What kind of journey are you craving? Your answer will be the compass for your entire plan. Are you seeking:
Rejuvenation? Picture a scenic drive along Oregon's coast, with stops in quiet towns and fog-laced forests.
High Adventure? A route looping through Utah's "Mighty 5" national parks, filled with challenging hikes and epic vistas. Planning a park-centric journey is a classic for a reason, and our National Park Road Trip Checklist can be an invaluable tool.
Cultural Discovery? A trip winding through the historic backroads of New England or the music-rich towns of the Mississippi Delta.
Your "why" dictates your route. The iconic Pacific Coast Highway delivers on coastal drama, while a journey along Route 66 is a nostalgic dive into Americana. Use tools like Google Maps, Roadtrippers, and travel blogs to map a general path, but also search for terms like "scenic byways in California" (or whichever state you're exploring) to uncover less-traveled gems.
The Art of the Flexible Itinerary
A rigid, minute-by-minute schedule is the enemy of a great road trip. The goal is to create a structured yet pliable plan.
Respect Your Driving Limits: This is the golden rule. Aim for no more than 4-6 hours of actual driving per day. This prevents burnout, gives you ample time to explore your stops, and, crucially, ensures you can arrive at your lodging before dark.
Anchor Your Journey: Always pre-book your accommodation for the first night and the last night of your trip. This brackets your journey, removing the stress of finding a place to stay when you’re either buzzing with first-day energy or exhausted from the final leg.
Identify Key "Pillars": Pinpoint the 2-3 must-see sights, cities, or parks on your route. These are your pillars. Plan your overnight stays around them, giving yourself enough time to explore them properly.
Embrace the In-Between: For the days between your pillars, keep your plans loose. This is where the magic happens. It allows you to follow a sign for a quirky roadside museum, spend an extra two hours at a breathtaking viewpoint, or explore a town that just feels right.
Budgeting: Your Financial Freedom Fund
A clear budget isn't a leash; it’s the tool that frees you from financial stress on the road.
Fuel: Use an app like GasBuddy to estimate total fuel costs based on your car's MPG and planned mileage. Be conservative and round up.
Lodging: Research average costs for hotels, motels, or campgrounds in your target areas. Prices can fluctuate wildly by season and local events.
Food & Drink: Set a daily food budget. Packing a cooler with drinks, snacks, and breakfast items is a pro move that drastically cuts costs.
Activities: Account for national park passes (an "America the Beautiful" annual pass is often a great value), museum tickets, and tours.
The "Uh-Oh" Fund: This is non-negotiable. Set aside 15-20% of your total budget as a contingency. This fund is for the flat tire, the surprise concert ticket, or the necessary hotel upgrade after a rough day.
Pro-Tip: Before you go, call your bank and credit card companies to notify them of your travel plans. This prevents them from freezing your account due to "unusual activity" when you're buying gas 500 miles from home.
Mastering Solo Road Trips with Confidence
Your personal safety matters most. A proactive, systematic approach doesn't create fear; it builds the confidence you need to explore freely.

Personal Safety
Think of your awareness as your most critical travel companion—the one piece of gear that should never be packed away. It's your built-in radar for navigating the world with confidence.
Share Your Battle Plan: Leave a detailed copy of your itinerary with at least two trusted friends or family members. Include hotel names, addresses, and phone numbers.
The Daily Check-In: Establish a simple system. A quick "Made it to Flagstaff! All good." text each evening provides peace of mind for everyone.
Daylight is Your Ally: Plan your driving to end well before sunset. Navigating unfamiliar roads and finding your hotel is infinitely easier and safer in the light.
Trust Your Gut Instinct: Your intuition is a highly evolved threat-detection system. If a gas station, rest stop, or situation feels wrong, it is wrong for you. Leave immediately. Don't second-guess it.
Walk with Purpose: Project confidence. Be aware of your surroundings. Avoid looking lost or glued to your phone. If you need to check a map, step inside a coffee shop or store.
Social Media Lag Time: Share your amazing photos after you've left a location. Posting your real-time whereabouts can broadcast your solo status to the wrong people.
A DEEPER DIVE ON SAFETY
For many independent travelers, safety is the number one concern. We've compiled a comprehensive resource filled with actionable strategies and expert advice specifically for navigating the world on your own.
Download our free Solo Female Travel Safety Guide to build unshakeable confidence for your next adventure.
The Solo Mindset: From Loneliness to Solitude
Let’s address the elephant in the room: loneliness. It's a valid concern, but it's crucial to differentiate it from solitude. Loneliness is a lack; solitude is a presence—the presence of yourself.
Embrace Dinners for One: Bring a book or a journal. Use the time to people-watch and savor your meal without distraction.
Strike Up Casual Conversations: Chat with the barista, the park ranger, or the shopkeeper. These small interactions can provide a welcome dose of human connection without any obligation.
Schedule Calls Home: Plan a few calls with friends or family during your trip. Hearing a familiar voice can be a great reset if you're feeling isolated.
Your Co-Pilot Check
On a solo trip, your car isn't just transportation; it's your partner. Ensuring it's in peak condition is the single most important thing you can do before you leave.

The Pre-Flight Mechanical Inspection
At least one week before you depart, have your vehicle inspected by a trusted mechanic, or do it yourself if you're knowledgeable.
Tires (The Four You See and The One You Don't): Check the pressure on all four tires plus the spare. Inspect the tread depth using the "penny test." If the tread doesn't cover Lincoln's head, you need new tires.
Fluids: Check your oil, coolant, brake fluid, and windshield washer fluid. Get an oil change if you're within 1,000 miles of your next service interval.
Brakes: Listen for squealing. Feel for any vibration when braking. Don't compromise here; get them checked if there's any doubt.
Battery: Look for corrosion (a white, powdery substance) on the terminals. If your battery is over three years old, have it load-tested at an auto parts store (it's often free).
Lights & Wipers: Test all lights. Replace wiper blades if they're cracked or leave streaks. A sudden downpour is a terrible time to discover they're useless.
Building the Ultimate Roadside Emergency Kit
A well-stocked kit can turn a trip-ending crisis into a manageable inconvenience. Having a comprehensive checklist is key. A great starting point for any major is our International Travel Checklist, which you can adapt for a domestic journey.
Jumper cables and a portable jump starter
Tire pressure gauge and a portable 12V air compressor
A complete first-aid kit
A powerful LED flashlight or headlamp (with extra batteries)
Basic toolkit (multi-tool, adjustable wrench, screwdrivers, gloves)
Duct tape and zip ties
Reflective warning triangles
A warm blanket, emergency rain poncho
High-energy, non-perishable snacks (protein bars, nuts)
At least one gallon of water
Pro-Tip: A portable jump starter (a small lithium-ion battery pack) is the best safety device a solo traveler can buy. It allows you to jump-start your own car without the need for another vehicle or the risk of asking a stranger for help.
Frequently Asked Questions
How much should I budget for a solo road trip?
Your main costs will be fuel, lodging, and food. A good starting point for a domestic US trip is to budget $150-$250 per day. This can be much lower if you're camping and cooking your own meals, or higher if you prefer nicer hotels and restaurants. Always add a 15-20% contingency fund for unexpected costs.
What's the best way to stay safe at rest stops or gas stations?
Choose busy, well-lit locations whenever possible. Before you get out of the car, take a moment to observe your surroundings. Stay off your phone, be aware of who is around you, and trust your gut instinct. If a place feels unsafe, leave and find the next one.
Is it better to book all my accommodations in advance for a solo trip?
We recommend a hybrid approach. Book your first and last nights in advance to reduce stress. For the nights in between, having flexibility is great, but it's wise to book your next night's stay at least 24 hours in advance, especially in popular areas, so you're not left scrambling at dusk.
Turn the Key: Your Adventure Begins Now
The journey of a thousand miles begins not with a single step, but with a decision—the decision to prepare. By now, the idea of a solo adventure should feel less like a daunting challenge and more like an exciting, achievable reality. You have the framework for careful planning, the knowledge to build a strong safety net, and the checklist to ensure your vehicle is a reliable partner.
You are equipped to handle the road with confidence and embrace the unparalleled freedom that only solo road trips can offer. The open road is not just a path to a new destination; it’s a path to a more capable and self-aware version of yourself. The planning is part of the adventure. The preparation is part of the empowerment. Now, it's time to put it all into action. Go create a story that is entirely your own.

Don't Miss Out! Subscribe for Exclusive Content
SubscribeComments 0
No comments yet
Be the first to share your experience!
Dont Miss Out! Subscribe for Exclusive Content
San Francisco Cherry Blossoms: A Local's Guide to the Blooms
Halloween SF: Haunts Without Horrors
SF Festivals: 7 Must-See Lineups
Christmas SF: Lights & Wharf Wonders

SF Pride: 6 Route & Party Hacks