SF Pride: 6 Route & Party Hacks
TrekGuider @trekguider
Picture it: a river of rainbow flags, glitter, and pure, unadulterated joy flowing down Market Street. The air thrums with music, cheers, and the collective heartbeat of hundreds of thousands celebrating love, identity, and resilience. This isn't just any parade; this is the legendary San Francisco Pride Parade. But for every person lost in the moment, there's another lost in the crowd, wrestling with a dead phone, a terrible view, and no idea where their friends have vanished. The sheer scale of SF Pride can be overwhelming, threatening to turn a day of pure celebration into a stressful logistical nightmare.
You’ve imagined yourself at the heart of the action, capturing the perfect photo, feeling that powerful sense of community. The reality, however, could be getting stuck behind a seven-foot-tall person, unable to see a single float, with your phone battery blinking at 3% and no cell service to find your crew. The difference between an unforgettable experience and a frustrating ordeal isn't luck—it's preparation. You deserve to experience every ounce of joy this iconic event has to offer, without the chaos and confusion that can so easily derail the day.
This is your definitive guide to conquering the celebration. We’re giving you six battle-tested route and party hacks to navigate the pride parade San Francisco like a seasoned pro. Forget the stress; this playbook ensures you soak in the history, master the logistics, and create memories that will last a lifetime, all while staying safe and comfortable.

Before You Go: Essential Prep for the Pride Parade San Francisco
Before you even think about your rainbow outfit, a little prep work will set the stage for a flawless day. The SF Pride Parade is more than a party; it’s a powerful legacy. Born from the first "gay-in" in 1970 and commemorating the key 1969 Stonewall Uprising, this event has evolved from a protest into a global platform for activism and celebration. In the 1980s, it became a crucial front line for raising AIDS awareness, and today it continues to champion the diverse spectrum of the LGBTQ+ community. Understanding this history enriches the entire experience, transforming it from a spectacle into a meaningful pilgrimage.
The 2026 SF Pride Parade is scheduled for Sunday, the last Sunday of Juneth, with the first contingents stepping off at 10:30 AM. To be ready, your day pack is your most critical asset. Here’s a non-negotiable checklist:
Hydration: Pack a reusable water bottle. There are water stations, but having your own is crucial for staying hydrated in the California sun.
Sun Protection: Sunscreen, a hat, and sunglasses are absolutely essential. There is very little shade along the parade route.
Layered Clothing: San Francisco weather is famously fickle. What starts as a chilly, foggy morning can quickly turn into a warm, sunny afternoon. A light jacket or hoodie you can tie around your waist is the smartest move you can make.
Comfortable Shoes: You will be on your feet for hours, walking and standing. Prioritize comfort over style; your feet will thank you by the end of the day.
Portable Power Bank: Your phone will be working overtime as your camera, map, and communication device. A fully charged power bank is an absolute must-have.
Snacks: While there are food vendors, lines can be long and prices high. Pack some energy bars or other easy-to-eat snacks to keep your energy levels up.
Finally, let's talk safety. SF Pride is known for its strong security measures, including advanced weapon detection technology at key entry points. While organizers work hard to create a secure environment, personal safety matters most in any large crowd. Familiarize yourself with basic protocols, like being aware of your surroundings and keeping your valuables secure. For a comprehensive look at staying safe while traveling, our Solo Female Travel Safety Guide offers invaluable tips that apply to everyone, regardless of gender, in any crowded event scenario.

Hack #1: Master the Market Street Route for the Pride Parade San Francisco
The parade route is deceptively simple: it runs straight down Market Street, starting at Beale Street and culminating at 8th Street, right by the Civic Center Plaza. The challenge isn't knowing the route; it's knowing where on the route to be and when to be there.
The Hack: Arrive by 9 AM and choose your zone strategically. The parade officially starts at 10:30 AM, but the sidewalks begin filling up much earlier. Arriving an hour and a half beforehand allows you to claim a prime spot without having to battle the late-coming masses.
Here’s a breakdown of the route's key zones to help you decide on your ideal viewing experience:
The Starting Zone (Beale to Montgomery Street): This area is often less crowded, especially right at the beginning. You'll see all the contingents when they are fresh, energized, and at their most organized. It’s a fantastic spot for photographers who want clean shots of the floats and performers before the crowds swell. The energy here is one of joyful anticipation.
The Commercial Core (Montgomery to Powell Street): This is the heart of the parade and, consequently, the most packed section. The tall buildings create a canyon-like effect, amplifying the sound and energy. It’s an intense and exhilarating place to be, but not for the faint of heart. If you want to be in the thick of it, this is your spot, but be prepared for a tight squeeze.
The Climax Zone (Powell to 8th Street): As the parade approaches its end at the Civic Center, the energy reaches a fever pitch. This is where the performers give their all, knowing they’re approaching the main celebration. The crowd here is dense but incredibly vibrant. Positioning yourself near 8th Street gives you a head start on moving into the Civic Center Plaza for the post-parade festivities.
Pro-Tip: For a less obstructed view and better photos, try to secure a spot on the south side of Market Street. In the late morning and early afternoon, the sun will be mostly at your back, beautifully illuminating the parade without forcing you to squint. This side is often just slightly less congested than the north side.
Hack #2: The Transportation Game Plan - Ditch the Car, Embrace Public Transit
Let’s be perfectly clear: driving to the SF Pride Parade is a recipe for disaster. Street closures are extensive, parking is virtually non-existent and astronomically expensive, and navigating the gridlock will drain your celebratory spirit before you even arrive.
The Hack: Make BART (Bay Area Rapid Transit) and Muni your best friends for the day. San Francisco’s public transit system is designed to handle massive events like this, and it is by far the most efficient way to get to and from the parade.
Here’s your transit strategy:
BART: The underground trains are the fastest way to get downtown from the East Bay, the Peninsula, or other parts of the city. The key is choosing the right station to exit.
Embarcadero Station: Puts you right near the start of the parade. A great option if you plan to arrive early and watch from the beginning.
Montgomery Station: A perfect middle-ground, placing you in the energetic core of the route. It’s one of the busiest stations, so be prepared for crowds.
Powell Station: Another central option, close to the cable car turnaround and a major shopping area. Like Montgomery, expect it to be very busy.
Civic Center Station: This is your stop if you want to head directly to the post-parade celebration or watch the parade's final leg.
Muni: The city’s network of buses and light rail (Muni Metro) is another excellent choice. The F-Market & Wharves historic streetcar will be rerouted, but the Muni Metro lines run directly under Market Street, using the same stations as BART. Many bus lines will have detours, so be sure to check the SFMTA website or your favorite transit app for real-time updates on the day of the event.
Rideshare services like Uber and Lyft will be operating, but expect heavy surge pricing and designated drop-off/pick-up zones that may be several blocks away from Market Street to avoid the worst of the congestion. Public transit remains the most reliable and cost-effective option.

Hack #3: The Civic Center Celebration - Your Post-Parade HQ
The last float crossing 8th Street doesn't mark the end of the day—it marks the beginning of the next phase. The parade flows directly into the massive Pride Celebration at Civic Center Plaza, a sprawling festival with multiple stages of live music, DJs, inspiring speakers, hundreds of community booths, art installations, and food vendors.
The Hack: Have a concrete plan for navigating the festival, especially for meeting your group. Cell service in and around Civic Center Plaza can become extremely unreliable due to the sheer number of people. A "we'll find each other" approach will likely fail.
Follow these steps for a seamless transition from parade to party:
Establish a Hyper-Specific Meeting Point: Before you separate, agree on a meeting spot that is impossible to mistake. "By the main stage" is too vague. Instead, choose something like, "At the base of the statue of James Lick, on the side facing the library," or "Directly in front of the main entrance to the Asian Art Museum." Set specific times to meet there (e.g., 2 PM and 4 PM).
Pace Yourself and Hydrate: The celebration runs for hours after the parade. It's a marathon, not a sprint. Continue to drink water, find moments of shade, and don't forget to eat.
Explore with Purpose: Don't just wander aimlessly. The community booths are the soul of the celebration. You can connect with dozens of non-profits, activist groups, and local organizations. It’s an incredible opportunity to learn, connect, and find your community.
Know Your Exits: Take a moment upon arrival to orient yourself and identify the main exit points from the plaza. Knowing how to get out quickly in case of an emergency or if you simply feel overwhelmed is a smart move.

Hack #4: Beyond Market Street - Unofficial Parties & Neighborhood Vibes
The official parade and Civic Center festival are the main events, but the spirit of Pride permeates the entire city, becoming a vibrant key element of the city’s festive calendar—a calendar we explore in our broader guide to San Francisco Holidays: Bay Area Buzz.
The Hack: Dip out of the main event for a few hours to experience a different, more intimate side of Pride.
The Castro District: As the historic heart of San Francisco's LGBTQ+ community, the Castro is ground zero for Pride weekend. The streets become a massive, vibrant block party. While it will be just as crowded as the parade, the atmosphere is different—more neighborhood-focused and less structured. Grab a drink at a historic bar, watch the impromptu dance parties, and soak in the history.
Dolores Park: On Pride Sunday, the park's famous "Gay Beach" area expands to cover nearly the entire lawn. It transforms into a massive, sun-drenched picnic party. The vibe is more relaxed and bohemian than the official festival. Pack a blanket, bring some snacks, and enjoy people-watching in one of the city's most beautiful settings.
SoMa (South of Market): This neighborhood is home to many of the city's most famous clubs and venues. Throughout Pride weekend, these spaces host a huge variety of official and unofficial after-parties, from daytime DJ sets to late-night dance events. Check event listings in advance, as many of the most popular parties sell out.

Hack #5: Tech & Safety - Your Digital Toolkit for a Seamless Day
In a modern festival environment, your smartphone is your most powerful tool—if you use it wisely.
The Hack: Prep your phone and apps to be your digital command center for the day.
The Power Bank is Non-Negotiable: We mentioned it before, but it bears repeating. A dead phone means no photos, no map, and no way to contact your friends. A fully charged portable power bank is the single most important piece of tech you can bring.
Master Your Communication Apps: Standard text messages can be delayed when cell networks are overloaded. Use a data-based messaging app like WhatsApp or Signal for your group chat. Their delivery is often more reliable in dense crowds. Use the "Share Live Location" feature for a set period (e.g., 15 minutes) if you get separated and need to find your way back to your group.
Download Offline Maps: Before you leave home, download an offline map of the downtown San Francisco area in your map app of choice. Even if you lose all cell service, your phone's GPS will still work, allowing you to see your location on the map and navigate.
Embrace Official Resources: Check the official SF Pride website in the days leading up to the event. If they release an official app, download it. It will likely have the most accurate schedules, maps, and emergency alerts.
Pro-Tip: Take a screenshot of your planned meeting spots, the parade route map, and the contact info for everyone in your group. Create a dedicated photo album for these screenshots so you can access them instantly, even if your apps won't load due to poor connectivity.

Hack #6: The Exit Strategy - How to Leave Without the Headache
Just as important as your arrival plan is your exit strategy. When hundreds of thousands of people try to leave the same area at the same time, the public transit stations and rideshare zones become incredibly congested.
The Hack: Avoid leaving during the peak rush right as the festival winds down.
You have two primary strategies for a stress-free departure:
The Early Exit: If you've had your fill of the crowds and the main celebration, start making your way out before the final headliners take the stage at Civic Center. By leaving an hour before the official end time, you can beat the massive wave of people heading for the BART and Muni stations.
The Patient Wait: This is often the better option. Instead of rushing out with everyone else, wait it out. Find a restaurant or cafe a few blocks away from Civic Center, grab a bite to eat, and relax for an hour or so. Let the crowds on the transit platforms thin out. By the time you're done, your journey home will be far more pleasant.
If you're using a rideshare service, walk at least four or five blocks away from Market Street and Civic Center before you even attempt to request a ride. This will get you out of the most congested, no-pickup zones and will likely save you from the highest surge pricing.
Your Guide to an Unforgettable Pride
You are now armed with the knowledge to do more than just attend the pride parade San Francisco —you are ready to experience it with confidence, joy, and a sense of empowered preparedness. From mastering the Market Street route and navigating the Civic Center celebration to knowing the smartest ways to get there and back, you have the tools to craft a perfect day. This isn't just about avoiding stress; it's about creating space for the powerful moments of connection, celebration, and solidarity that define SF Pride. Go forth, celebrate loudly, and have an incredible time.
For a complete blueprint to planning your ultimate trip to the Bay Area, including deep dives into its other iconic holidays and hidden gems, be sure to explore our comprehensive Travel Guide.
Meta Data Suggestions:
SEO Meta Title: SF Pride: 6 Essential Hacks for the Parade Route & Parties
URL Slug: sf-pride-parade-route-party-hacks
SEO Meta Description: Master the SF Pride Parade! Get 6 expert hacks on navigating the Market Street route, finding the best parties, and staying safe in the crowds.
Don't Miss Out! Subscribe for Exclusive Content
Subscribe


Comments 0
No comments yet
Be the first to share your experience!
Dont Miss Out! Subscribe for Exclusive Content

San Francisco Cherry Blossoms: A Local's Guide to the Blooms

Halloween SF: Haunts Without Horrors

SF Festivals: 7 Must-See Lineups

Christmas SF: Lights & Wharf Wonders

Chinese New Year SF: Parade Essentials

San Francisco Holidays: Bay Area Buzz
Solo Travel Packing: Pack for Freedom, Not Fear
TrekGuider @trekguider
Forget every checklist you’ve ever downloaded. The internet is littered with lists of what to pack, but they all miss the fundamental point. For a solo traveler, the contents of your bag are secondary. What truly matters is the system behind it. Mainstream packing advice is a trap, designed for travelers who can lean on a partner. But for you, every ounce and every decision is a direct reflection of your independence.
The secret the pros know is this: packing isn’t a chore you endure before a trip. It is the first, most critical act of the adventure itself. It’s a declaration of self-reliance. Getting it wrong leads to the classic traveler mistakes: wrestling an overstuffed bag on a crowded train, becoming an obvious target, or having a minor inconvenience like a dead phone escalate into a genuine crisis in an unfamiliar city.
This is not another packing list. This is a manifesto on the philosophy of smart travel. We’re going to dismantle the conventional wisdom and replace it with a set of battle-tested systems. These are the solo travel packing hacks that go beyond gear, transforming your bag from a burdensome anchor into a strategic asset for a safer, more mobile, and profoundly more liberating journey. Of course, packing is just one piece of the puzzle. For the complete playbook on traveling alone, be sure to consult our master resource on Anxious to Adventurous: Solo Travel Tips for Confidence.

The Mindset Shift: Why Your Bag is Your Most Important Travel Companion
For a solo traveler, your pack is your superpower. It’s your home, your toolkit, and your shield. Embracing this mindset is the key. A masterful packing strategy isn’t about what you leave behind; it’s about what you gain—freedom from the tyranny of heavy luggage, the anxiety of unpreparedness, and the vulnerability that comes with looking like a lost tourist.
This philosophy is built on three core pillars:
Radical Self-Reliance: You are your entire support system. Every item must be a tool that empowers your independence, from a simple roll of duct tape for on-the-fly repairs to a power bank that ensures you are never without your digital lifeline.
Calculated Efficiency: Your time and energy are your most precious resources. An intelligently organized bag means less time spent rummaging for a charging cable and more time savoring a sunset. It means navigating cobblestone streets and endless train station stairs with ease, not exhaustion.
Proactive Security: A smart packer moves with confidence, and confidence is a powerful deterrent. This isn't about paranoia; it's about preparation. It’s choosing and organizing your gear in a way that makes you a "hard target," so you can focus on the joy of discovery.
System 1: The Capsule Wardrobe - A Masterclass in Infinite Style, Minimal Space
The Philosophy: More Options from Fewer Items
The capsule wardrobe isn't just a space-saving technique; it's a strategic weapon against decision fatigue. The goal is to create a small, curated collection of versatile, interchangeable clothing. This ensures you feel confident and appropriate in any situation, from a morning market stroll to an impromptu dinner invitation, without ever having to waste mental energy on what to wear.
The Method in Action
This system works by making smart, upfront choices. For example, a common framework for a one-week trip is the 5-4-3-2-1 guideline: 5 sets of socks/underwear, 4 tops, 3 bottoms, 2 pairs of shoes, and 1 layering piece. But the real magic is in the details.
Invest in high-performance fabrics. Merino wool is the undisputed champion for solo travelers; it’s temperature-regulating, moisture-wicking, and naturally odor-resistant, meaning you can wear it multiple times without washing. One merino wool shirt does the work of three cotton ones.
Build on a neutral palette. Sticking to a base of colors that all work together (black, grey, navy, tan) creates dozens of potential outfits. You can then add personality with a lightweight, colorful scarf or a unique accessory—items that provide maximum visual impact for minimal packing space.
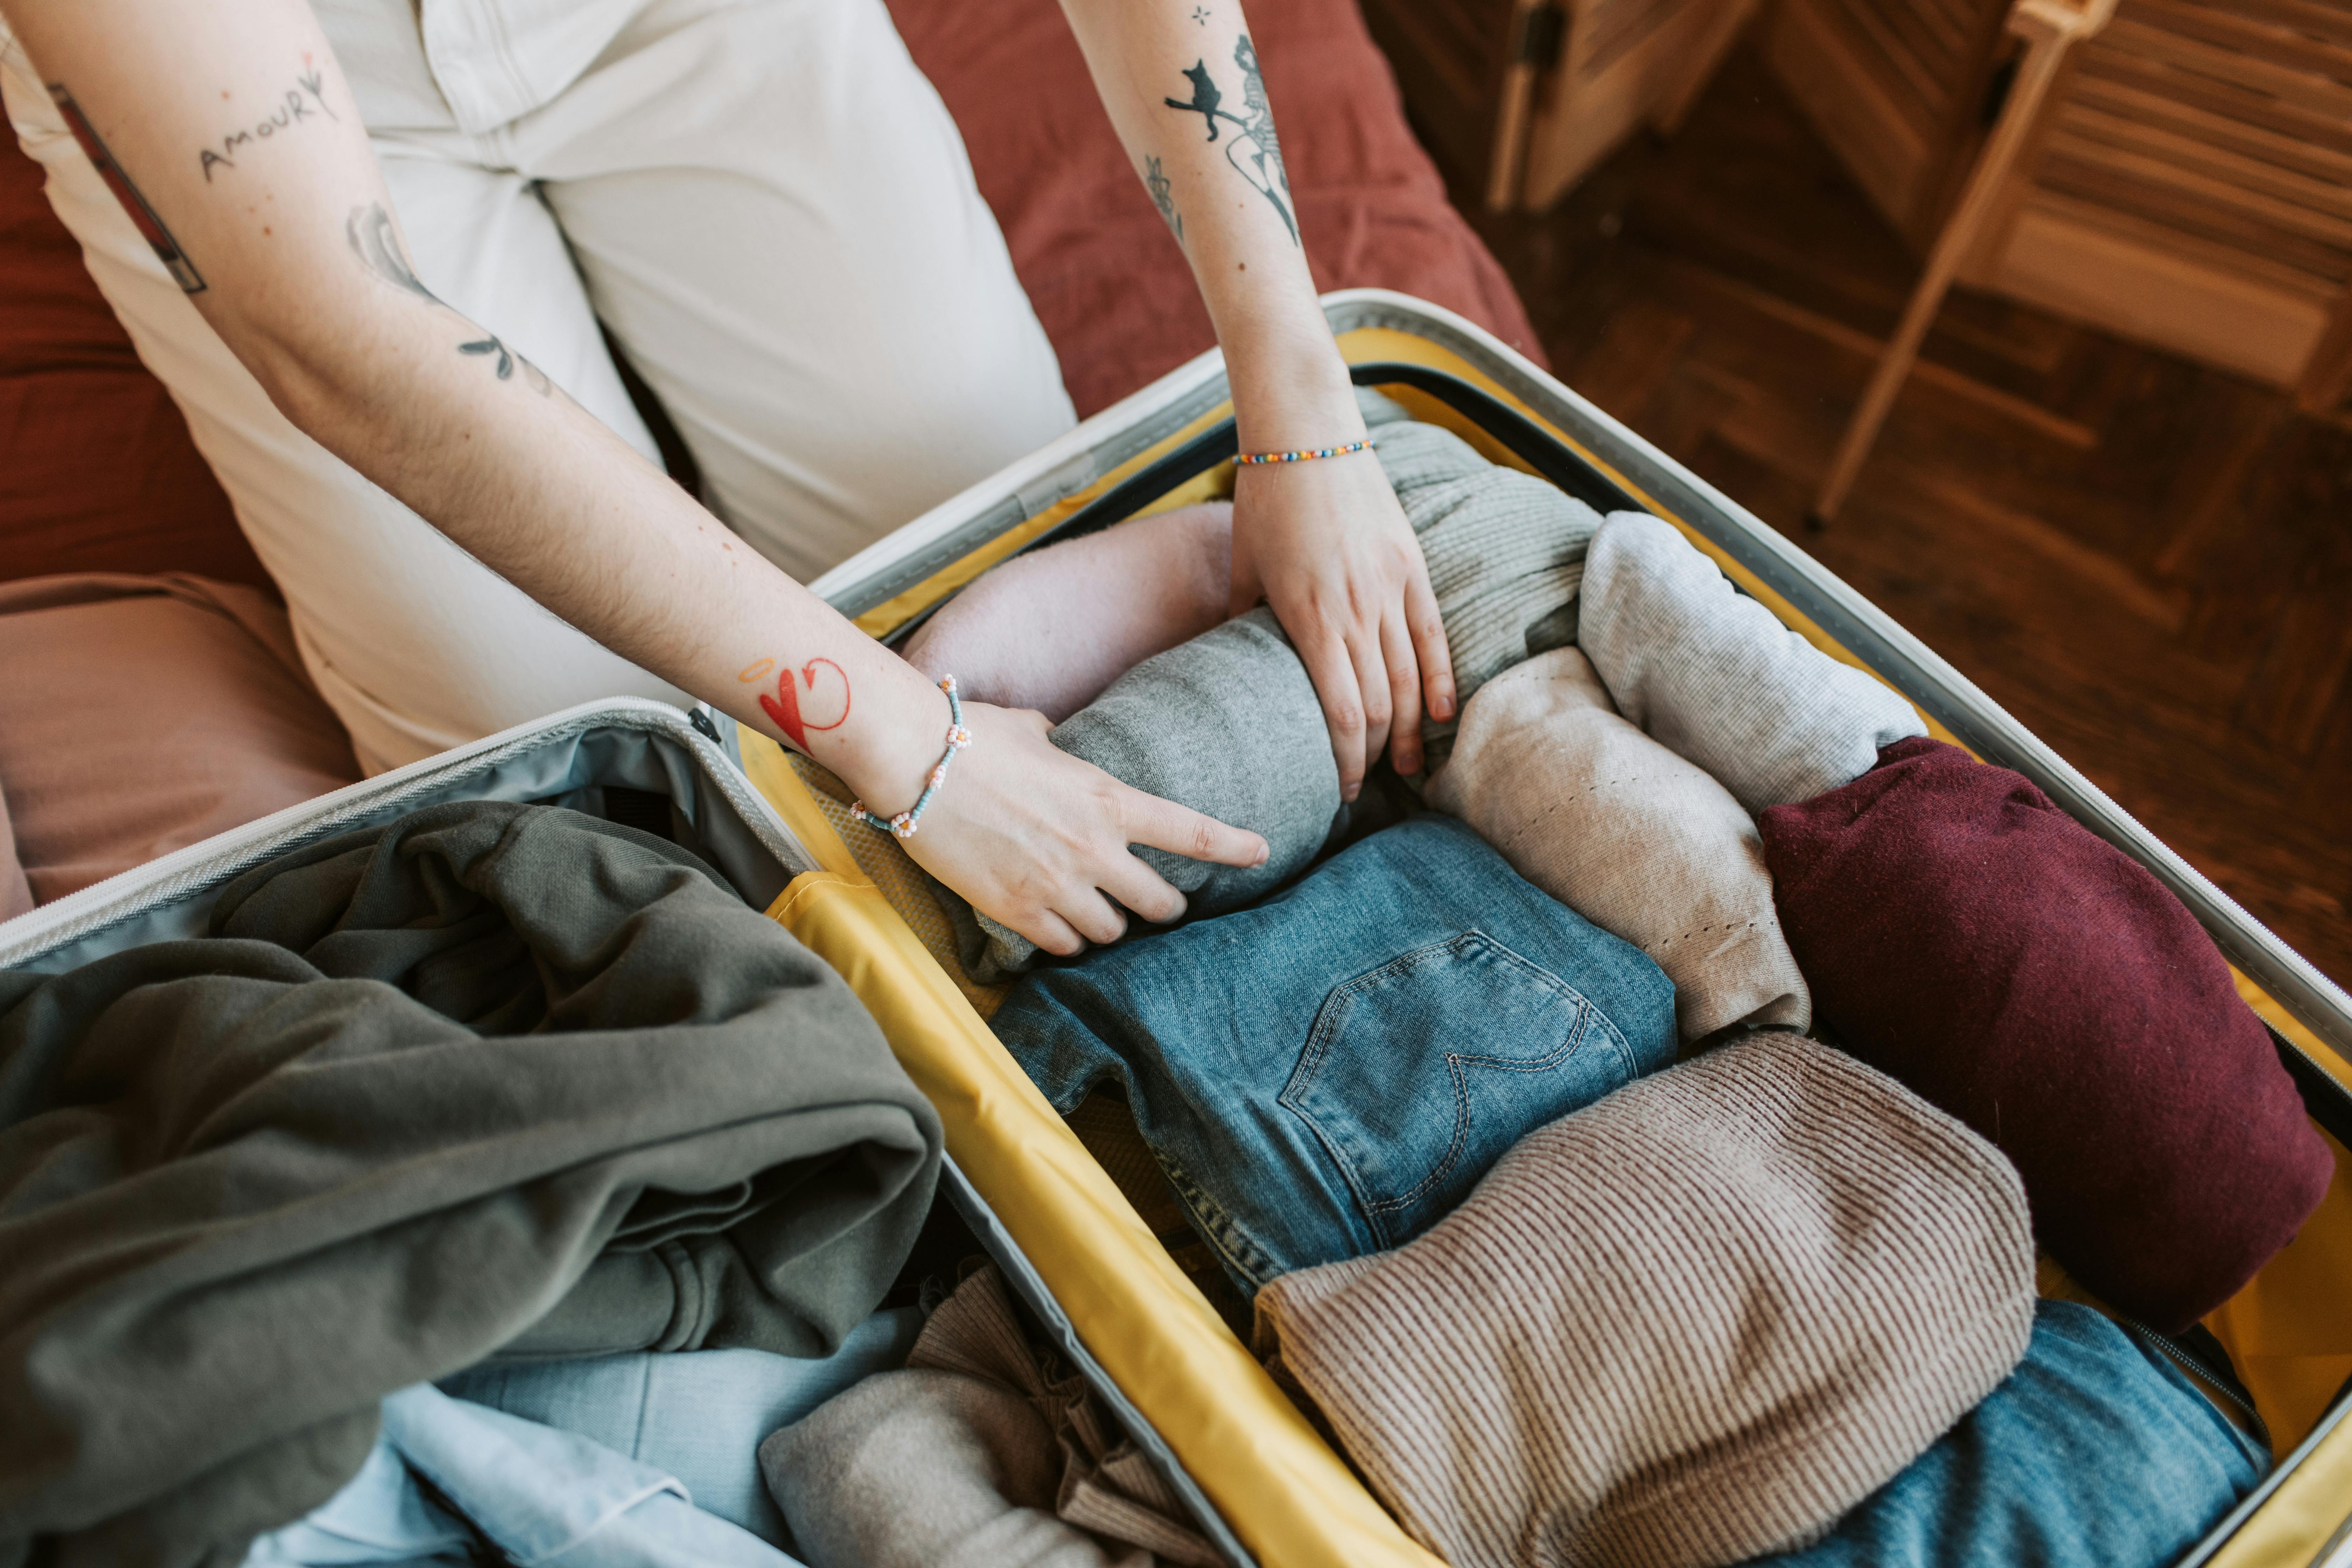
System 2: Modular Organization - The Secret to Effortless Efficiency & Discretion
The Philosophy: A Place for Everything, and Everything in Its Place
How you organize your bag is a strategic choice. A chaotic bag bleeds time and energy. Worse, it forces you to expose your entire inventory just to find one item, a critical vulnerability in a shared hostel dorm. The goal is to create a modular system that allows you to access exactly what you need, when you need it, without disrupting anything else.
The Method in Action
The key element of modular organization is compartmentalization.
Packing cubes are the gold standard. They aren’t just for compression; they turn your backpack into a tidy chest of drawers. By using different colored cubes for different categories (e.g., blue for tops, red for bottoms, grey for electronics), you can retrieve an item in seconds, discreetly and efficiently.
The rolling method is foundational. Tightly rolling your clothes is superior to folding. It minimizes wrinkles and allows you to see every piece of clothing at a glance within your packing cube, eliminating the need to dig.
System 3: The Fortress of Self-Reliance - Your Security & Problem-Solving Toolkit
The Philosophy: Prepare for the Worst, Enjoy the Best
True freedom on the road doesn't come from hoping problems won't arise. It comes from the quiet confidence that you can handle them when they do. This system is about building a portable fortress of security and a toolkit for self-reliance, so you can explore with an unshakeable peace of mind.
The Three Layers of Your Fortress
Layer 1: Proactive Gear Security
The goal here is to make yourself a less appealing target. Opportunistic thieves look for easy wins.
Carry a decoy wallet with a small amount of local currency and some expired cards. If confronted, you can hand it over without losing your essential documents.
Use a simple carabiner to clip the zippers of your daypack together. It’s not a high-security lock, but it’s an effective deterrent against a pickpocket trying to subtly slide your bag open in a crowd.
Layer 2: Personal & Digital Safety
Your well-being matters most. These items are non-negotiable.
A rubber door stop is one of the most effective, low-cost security tools you can carry. Shoved under your hotel or Airbnb door, it provides a powerful physical barrier against unwanted entry.
Your phone is your lifeline. A dead phone is a safety crisis. Always carry a fully charged power bank (at least 10,000mAh).
Public Wi-Fi is a hunting ground for data thieves. Using a VPN on your phone and laptop is essential to protect your banking information and passwords.
Layer 3: The "MacGyver" Multi-Tools
When you’re alone, small problems can become major headaches. The MacGyver mindset is about packing a few multi-purpose items that can solve countless issues.
Wrap a few feet of duct tape around a water bottle or pen. It can repair a broken sandal, patch a backpack, or serve as a makeshift bandage.
A bandana or sarong is the ultimate multi-tool. It can be a towel, a sun shield, a dust mask, a makeshift bag, or a privacy screen.
Beyond the Gear: Packing for the Solo Experience
Expert packing goes beyond the purely practical. It’s also about packing for your emotional well-being and enhancing the unique moments that solo travel offers.
Pack a sensory comfort item. Loneliness can strike unexpectedly. Something small that connects you to home—a few of your favorite tea bags, a familiar scent, a silk pillowcase—can be an incredible comfort.
Bring a social icebreaker. A simple deck of playing cards placed on a table in a hostel common room is a universal invitation to connect with other travelers, breaking down language and cultural barriers instantly.
Empower your inner photographer. Don't let being solo stop you from getting great photos. A small, flexible mini tripod allows you to use your phone's self-timer for stunning shots that aren't just selfies. The "video screenshot hack" is another pro move: record a short video of yourself moving through a scene, then scrub through it later to pull out perfect, candid-looking still images.
Conclusion: Stop Packing, Start Preparing
You now possess the framework. The difference between an amateur and an expert traveler isn't what they pack, but how they think. It’s the understanding that a capsule wardrobe is about mental clarity, modular organization is about efficiency, and a fortress of self-reliance is about absolute freedom.
This guide was the "why." You have the philosophy.
Now it's time for the "what." To put these systems into practice, you need the right tools. We've compiled everything—every piece of gear, every item of clothing, every essential document—into one definitive resource.
Your next step is clear. Take these principles and build your ultimate kit with our . It’s the tactical playbook that will bring this strategy to life.
Read the full guide: Anxious to Adventurous: The Ultimate Guide to Solo Travel Confidence
Don't Miss Out! Subscribe for Exclusive Content
SubscribeComments 0
No comments yet
Be the first to share your experience!
Dont Miss Out! Subscribe for Exclusive Content

Ultimate USA Holidays Guide: Top Picks

FTC Affiliate Disclosure Essentials: Stay Compliant as a Travel Creator

Essential Affiliate Tools: From Tracking to Full Optimization

Booking.com Affiliate Program Review: Pros, Cons, and Earnings Potential

Decoding Affiliate Commission Rates: Benchmarks for Travel Creators

Amazon Associates for Travel: Strategies to Maximize Commissions
7 Best Travel Photography Blogs for Tips
TrekGuider @trekguider
You know the feeling. You’re standing before a truly breathtaking scene—a fiery sunset melting into the ocean, a frenetic city street alive with energy, a mountain range so vast it stills your breath. You raise your camera, convinced you can bottle that magic. But when you get home, the photos on your screen are a pale imitation. The colors look washed out, the epic scale feels diminished, and the raw emotion of the moment is gone. It's the most common frustration in photography.
The gap between the photos you take and the professional shots you admire isn't about money or a more expensive camera. It's about knowledge. It's about seeing the world through a trained eye and understanding the techniques that transform a simple snapshot into a powerful story. The secret is learning from those who have already walked the path and mastered the craft. In a world saturated with social media portfolios, however, finding true educators can feel impossible.
That’s why we’ve sifted through the noise for you. We’ve identified the creators who are dedicated to teaching—the ones who provide the actionable advice, in-depth tutorials, and honest gear reviews that will actually make you a better photographer. If you’re ready to finally start creating travel photos that do your memories justice, you’re in the right place. These are the best travel photography blogs for real, practical tips. And for panoramic view of the top creators ac across every niche, our definitive guide to The Best Travel Blogs to Follow in 2026 is your essential starting point.
What Separates a Portfolio from a Powerhouse Educational Blog?
Before we dive in, let’s clarify our criteria. A gallery of beautiful photos is inspiring, but it won’t teach you how to improve. The blogs on this list were handpicked because they are exceptional educational platforms that empower their audience.
According to our 2026-2026 market analysis, the most authoritative blogs share key traits that set them apart. First is niche specificity and expertise; they establish themselves as deep experts in a specific domain, whether it’s adventure photography or post-processing. Second is the quality of writing and originality, allowing them to deconstruct complex topics—like the exposure triangle or advanced composition—into language anyone can understand. They are teachers, not just tastemakers.
The Top 7 Travel Photography Blogs for Actionable Advice
These seven blogs deliver on the promise of education. Each offers a unique perspective and a wealth of knowledge to help you improve your craft, whether you’re starting out or looking to refine your professional skills.
1. Expert Vagabond (Matthew Karsten)
For the photographer who thrives in the wild, there’s no better mentor than Matthew Karsten of Expert Vagabond. With over a decade of professional experience shooting in some of the world's most remote corners, Karsten doesn’t just show you the shot; he shows you the grit behind it. His gear guides are legendary for their depth, explaining not just what he uses, but why a particular piece of equipment is e essential for a specific environment. This is the ultimate resource for learning to create stunning images under rugged, challenging conditions.
2. Along Dusty Roads (Andrew & Emily)
Andrew and Emily are masters of mood. Their work has a distinct, cinematic quality, and their blog is an incredible resource for learning how to evoke emotion through imagery. While they offer detailed guides on photography techniques, their true genius lies in post-processing. Their Lightroom tutorials are models of clarity, focused on teaching you how to use editing to enhance the story of your image, not just apply a generic filter. They prove that the art happens just as much in the digital darkroom as it does in the camera.
3. BucketListly Blog (Pete R.)
If you love the tech behind the art, BucketListly Blog is your paradise. Pete’s gear reviews are exhaustive, moving far beyond spec sheets to deliver careful real-world performance analysis. He covers everything from the latest flagship mirrorless cameras to the best travel drones and action cameras. What makes his blog essential is its dual focus on both photography and videography, making it a one-stop shop for the modern hybrid creator who needs to produce elite content in multiple formats.
4. I Hit The Button (Andy Feliciotti)
The name says it all. This blog is laser-focused on the science and art of photography. Andy Feliciotti dives deep into the technical craft, offering detailed explorations of topics like long exposure, astrophotography, and advanced composition. This is where you go when you’re ready to move beyond beginner tips and truly understand the why behind a great photo. It’s the perfect resource for the photographer who loves to geek out on the details and push their creative boundaries.

5. The Blonde Abroad (Kiersten Rich)
Kiersten Rich is a powerhouse in the travel industry, and her photography is a masterclass in creating a vibrant, aspirational brand. Her blog is an excellent resource for anyone looking to master lifestyle and portrait travel photography. She offers fantastic, practical tips on everything from styling and wardrobe choices to using presets to achieve a cohesive, professional aesthetic. Her content is especially helpful for solo travelers who want to learn how to take incredible photos of themselves.
6. The Planet D (Dave & Deb)
Dave and Deb have been exploring the world for over a decade, and their photography captures the sheer scale and grandeur of our planet's most epic landscapes. Their blog is a fantastic learning tool for anyone looking to improve their landscape and wildlife photography. They provide practical, field-tested advice on what lenses to use for sweeping vistas, how to shoot in harsh weather conditions (like Antarctica!), and how to tell a story of adventure through a series of powerful images.
7. The Lovers Passport (Stephen & Giselle)
Focused on couple’s travel, The Lovers Passport is an invaluable resource for anyone wanting to learn how to weave human elements into their photography. They excel at breaking down how to plan and execute an epic shot, from location scouting with Google Earth to posing subjects to create a compelling narrative. Their guides are packed with practical advice on making a destination feel both grand in scale and deeply intimate at the same time.
Decoding the Masters: Key Lessons from the Pros
Studying the work of these top-tier photographers reveals a set of shared principles. Their incredible images are not the result of magic, but a consistent application of three core pillars: strategic gear selection, timeless composition, and masterful post-processing.

It Starts with the Right Gear (But Not How You Think)
A unanimous philosophy among these pros is that the best camera for travel is the one you’re willing to carry. A bulky, heavy kit is a liability, not an asset. The market trend is toward smaller, lighter, yet incredibly powerful mirrorless systems.
Beyond the camera, your core kit should include a few essentials: a versatile "walk-around" lens (like a 24-70mm), extra batteries, and a solid camera bag.
Pro-Tip: A lightweight carbon fiber tripod is the single best investment for elevating your landscape photography. It allows you to shoot at "golden hour" with a low ISO for clean images and enables creative long exposures that are impossible handheld.
Mastering the Fundamentals of Composition
Gear is just a tool. The real art lies in arranging the elements within your frame. The best photographers use these timeless principles to tell a story.
Rule of Thirds: Mentally divide your frame into a 3x3 grid. By placing your subject along a line or at an intersection, you create a more balanced and visually engaging image than a simple centered shot.
Leading Lines: Use a road, river, or fence to create a line that guides the viewer's eye through the scene toward your main subject. This technique is a powerful way to create a sense of depth.
Shooting at Golden Hour: The hour after sunrise and before sunset offers soft, warm, directional light. This is far more flattering and dramatic than the harsh, flat light of midday.
Framing: Use foreground elements like an archway, a window, or tree branches to create a natural frame around your subject. This adds context and draws the viewer's focus.
Changing Perspective: Don't shoot everything from eye level. Get low to the ground to emphasize a foreground or find a high vantage point for a unique, sweeping overview. This simple shift can make a scene extraordinary.
Ready to Practice Your Composition Skills? Download the free Best NYC Photo Spots Map and start capturing incredible cityscapes today!
The Digital Darkroom: Post-Processing is Half the Battle
Every single professional photo you admire has been post-processed. Editing is not about "fixing" a bad photo; it's about enhancing a good one to fully realize your creative vision. The blogs we've highlighted consistently teach three key areas of editing in software like Adobe Lightroom.
Using Lightroom Presets: Presets are one-click settings that create a consistent aesthetic. They are excellent learning tools for understanding how different settings interact to create a professional look.
Editing Sunset Photos: This is a classic challenge that requires balancing the extreme dynamic range between the bright sky and the dark landscape. Tutorials will teach you how to use tools like graduated filters and the shadow/highlight sliders to balance the exposure and bring out the rich, vibrant colors.
Basic Color Grading: This is the art of adjusting the colors in your image to create a specific mood. Mastering the HSL (Hue, Saturation, Luminance) panel allows you to take full control, making the blues in the ocean deeper, the greens in a forest richer, or giving your entire photo a warm, autumnal feel. Destinations with distinct color palettes, like the neon-lit streets of Tokyo or the serene temples of Kyoto, are perfect places to practice these skills. If you're planning a trip, our Japan Travel Guide can help you find the most visually stunning locations.
Pro-Tip: When starting with post-processing, focus on mastering one tool at a time. The HSL panel in Lightroom is a great place to begin. Learning how to selectively adjust the hue, saturation, and luminance of individual colors can have a bigger impact on your photos than trying to learn every single tool at once.
Your Path to Better Travel Photos
Improving your travel photography is a journey, not a destination. It doesn't happen overnight. But by following the right guides, you can accelerate your progress and avoid common pitfalls. The path is simple: learn from the best travel photography blogs, focus on mastering the fundamental techniques of composition and light, and practice every chance you get. Pick one blog from this list to follow this week. Choose one composition technique to practice on your next outing, even if it's just in your own backyard. The more you shoot with intention, the faster you will begin to create images that truly capture the magic of your travels.
Meta Data Suggestions:
SEO Meta Title (56 characters): 7 Best Travel Photography Blogs for Tips (2026 Update)
URL Slug: best-travel-photography-blogs-tips
SEO Meta Description (154 characters): Want to take better travel photos? Discover the 7 best travel photography blogs that offer actionable tips on gear, composition, and editing from the pros.
Don't Miss Out! Subscribe for Exclusive Content
SubscribeComments 0
No comments yet
Be the first to share your experience!
Dont Miss Out! Subscribe for Exclusive Content
Ultimate USA Holidays Guide: Top Picks
FTC Affiliate Disclosure Essentials: Stay Compliant as a Travel Creator
Essential Affiliate Tools: From Tracking to Full Optimization

Avoid These 5 Affiliate Landing Page Mistakes for Better Conversions

Affiliate Keyword Research Mastery for Travel Blogs
Booking.com Affiliate Program Review: Pros, Cons, and Earnings Potential
Best Family Vacations: 4 Ideas That Are Fun With a Toddler
TrekGuider @trekguider
Feeling the pull for a family adventure but paralyzed by the thought of traveling with a toddler? You’re not alone. Many parents find themselves caught between the deep desire for new memories and the very real fear of meltdowns, jet lag, and logistical chaos. This guide is here to solve that conflict, proving that the best family vacations aren't just possible during the toddler years—they can be truly wonderful.
The internet is filled with horror stories that can make any parent second-guess their plans. The stress is immense, from packing to navigating public spaces with a tiny human whose whims are as unpredictable as the weather. But what if the problem isn’t the toddler, but our definition of a “vacation”? What if we shifted the goal from blissful relaxation to creating a pocket of truly joyful, shared memories within a framework of manageable stress?
This is your new playbook. We’ll move beyond generic lists to give you a system for choosing a trip that matches your family’s unique personality. Drawing inspiration from our comprehensive guide to Family Travel Ideas: The 2026 Guide to Unforgettable Trips, this article drills down into the specific, data-driven strategies that make traveling with toddlers a success.

The Unspoken Rules of Toddler Travel
The term "kid-friendly" is one of the most misleading labels in the travel industry. A destination that’s a thrill ride for a ten-year-old can be a sensory overload nightmare for a two-year-old. A truly "toddler-friendly" vacation must be measured by a more rigorous, operational standard.
After analyzing countless family travel experiences, we’ve identified four pillars that are the primary determinants of a trip’s success. The very best family vacations with toddlers master these principles.
Logistical Simplicity: This is about relentlessly reducing friction. It means favoring destinations with direct flights or manageable driving distances. Every layover, every transfer, is a potential failure point. The goal is to minimize the number of stressful transitions between your front door and your final destination.
Environmental Control: A successful toddler trip creates a safe, contained environment where your child can have a degree of freedom without causing constant parental anxiety. This is why car-free locations, walkable beach towns, and all-inclusive resorts are so popular. They create a "bubble" of safety that allows parents to relax their hyper-vigilance.
Flexible Pacing: The rigid, minute-by-minute itineraries of pre-child travel are a recipe for disaster. A successful toddler vacation is built around the non-negotiable anchors of their day: naps and meals. The best destinations offer low-pressure activities. A beach day can be cut short without a major loss, unlike a day at a theme park with expensive, time-stamped tickets.
Sensory Management: Toddlers are experiencing the world with wide-open senses. While new stimuli are great, overstimulation is the number one trigger for meltdowns. The ideal destination is engaging but not overwhelming. Nature-focused trips and smaller, more relaxed theme parks often hit this sweet spot perfectly.
Four Proven Archetypes for the Best Family Vacations With Toddlers
With this framework in mind, the theoretical becomes practical. Let's move from the "what" to the "where." To combat the classic parental decision fatigue, we’ve categorized the world of toddler-friendly travel into four distinct archetypes, allowing you to quickly identify a style that aligns with your family’s goals.
1. The All-Inclusive Sanctuary: For Parents Craving a True Break
Think of this as the 'total surrender' model—the ultimate choice for parents whose primary goal is to escape the relentless cognitive load of planning, cooking, and cleaning that defines daily life. This is the closest a toddler’s parent can get to a restorative break. For a deeper dive into this option, it's worth reading our guide on Choosing an All-Inclusive Family Resort? Read This First.
Beaches Resorts (Turks & Caicos, Jamaica): The gold standard. They offer childcare for infants and toddlers supervised by certified nannies, providing parents with actual, legitimate downtime. With Sesame Street characters, tot-specific waterparks, and endless food options, it’s an entire ecosystem designed to eliminate stress.
Club Med (Multiple Locations): Known for its family focus, Club Med excels at creating a predictable daily rhythm that toddlers thrive on—breakfast, beach, nap, lunch, pool, dinner. This routine, combined with available childcare, gives parents a perfect blend of family time and personal time.
Woodloch (Pocono Mountains, PA): A fantastic domestic option, this resort is built around "togethering." With all-inclusive meal plans and a staggering array of on-site activities, you never have to get in a car or wonder what to do next. It’s a self-contained world of low-stress fun.
2. The Classic Beach Getaway: For Low-Key, Flexible Fun

A beach vacation remains a top contender for a simple reason: sand and water are the ultimate open-ended toys. A beach day has no rules, no schedule, and no pressure, allowing for maximum flexibility and making it one of the very best family vacations you can take.
San Diego, California: Perhaps the most perfect U.S. city for toddlers. It offers gentle beaches like La Jolla Shores, the world-class San Diego Zoo, and the perfectly-scaled LEGOLAND California. The weather is famously mild year-round, removing another layer of planning stress.
The Florida Gulf Coast (e.g., Rosemary Beach, Siesta Key): This region is known for its calm, warm waters and powder-soft sand. Towns like Rosemary Beach are master-planned for walkability, with stroller-friendly paths connecting everything. You can park your car and live a simple, blissful rhythm of beach, naps, and evening strolls for ice cream.
Outer Banks, North Carolina: For families who prefer the space and control of a rental home, the Outer Banks are ideal. You can set up your own home base, cook familiar meals, and enjoy wide-open, uncrowded beaches where your toddler can run free.
Pro-Tip: When booking a beach rental, use satellite view on a map to check the actual distance from the property to the sand. A "beachfront" listing can sometimes mean a grueling trek over dunes or across a busy road—a deal-breaker with a toddler and gear in tow.
3. The National Park Expedition (Toddler Edition)

Introducing your toddler to the wonders of nature can be incredibly rewarding. The key is to radically adjust expectations. Forget long, strenuous hikes. The goal is to leverage scenic drives and short, paved, stroller-friendly trails to experience the majesty of the parks with minimal strain.
Zion National Park, Utah: Exceptionally well-suited for families. The Pa'rus Trail is a paved, 3.5-mile path that follows the Virgin River and is perfect for strollers. The park's shuttle system makes accessing key areas effortless.
Great Smoky Mountains National Park (TN/NC): A classic choice with strong infrastructure. The Cades Cove Loop Road is a scenic 11-mile drive with fantastic opportunities for spotting wildlife from your car. There are also numerous short, accessible nature trails perfect for little legs.
Acadia National Park, Maine: Offers stunning coastal scenery with manageable effort. The Ocean Path is a relatively flat trail that offers iconic views, and the Jordan Pond Loop is another fantastic, stroller-friendly option. The proximity to the charming town of Bar Harbor means you're never far from a good meal or a comfortable bed.
4. The Low-Key Theme Park Experience: For Managed Excitement

Many parents want to give their kids a theme park experience but are rightly terrified of the cost, crowds, and sensory assault of the mega-parks. These smaller, smarter alternatives deliver the magic without the madness.
LEGOLAND (California, Florida, New York): The undisputed champion for this age group. It is specifically designed for kids ages 2-12, with an entire DUPLO Village for toddlers. It’s consistently praised for being quieter, smaller, and more relaxed than its larger competitors, making it the ideal "starter" theme park.
Sesame Place (San Diego, CA & Langhorne, PA): Leveraging a cast of beloved characters, these parks are a massive hit. They blend gentle rides with fantastic, age-appropriate water park features, offering a full day of excitement in a more contained and focused environment.
Story Land (Glen, NH): A charming, classic theme park where beloved fairy tales come to life. The park is designed for young children, with rides and attractions that are whimsical rather than over-the-top, creating a magical but manageable experience.
Want to Make Flying With Your Toddler a Breeze?
The thought of a long flight can be the most stressful part of planning. Our free, printable guide is packed with expert tips, checklists, and sanity-saving strategies to make your travel day smooth and meltdown-free. Download the Stress-Free Flying with Kids Guide and fly with confidence.
The Savvy Parent's Logistics Toolkit
A smooth trip is built on a foundation of careful planning. Mastering the practical details is what separates a stressful ordeal from an enjoyable adventure.
The Ultimate Toddler Vacation Packing System

This isn't just a list; it's a strategic system. Pack by category to ensure nothing essential is forgotten. To keep your days organized, you can also download our free Travel Itinerary Template.
Sleep & Comfort
Portable Crib/Pack-n-Play (unless confirmed by accommodation)
Slumber Pod or similar blackout solution (a game-changer for room sharing)
White Noise Machine
Familiar sheets and a favorite "lovey" or stuffed animal
Baby Monitor
Feeding & Mealtime
An abundance of familiar, non-perishable snacks
Spill-proof sippy cups and a portable water bottle
Toddler utensils and a travel-friendly plate/bowl
Wipeable bibs
Travel high chair or booster seat
Health & Safety
Comprehensive First-Aid Kit (Children's Tylenol/Motrin, thermometer, bandages, etc.)
All prescription medications
Toddler-safe sunscreen and bug spray
Diapering supplies (pack more than you think you need)
Small bag of child-proofing supplies (outlet covers) and a small roll of painter's tape for on-the-fly fixes.
Gear & Entertainment
FAA-approved Car Seat and padded travel bag for gate-checking
Lightweight travel stroller
Baby carrier or hiking backpack carrier
Tablet pre-loaded with shows and games (and volume-limiting headphones)
A bag of new, inexpensive "surprise" toys and mess-free activities (Water Wow!, sticker books)
Pro-Tip: The gate-check tag for your stroller or car seat is your best friend. Get it as soon as you arrive at the gate. On a full flight, overhead bin space disappears fast; waiting until the last minute to get your gear tagged risks having to check it with regular luggage, where it's more likely to be damaged.
The Lodging Debate: Hotel Suite vs. Vacation Rental
This is one of the most critical decisions you'll make, reflecting your core vacation philosophy.
Team Hotel/Resort: Choose this if your primary goal is parental relaxation. The biggest advantages are daily housekeeping (no cleaning!), room service, and on-site amenities like pools and restaurants. The major downside is often being confined to a single dark room after your toddler goes to bed at 7:30 PM. The Fix: Book a suite with a separate living area or adjoining rooms if the budget allows.
Team Airbnb/Vacation Rental: Choose this if your primary goal is maintaining routine and control. The biggest advantages are a separate bedroom for the child (giving parents their evenings back), a full kitchen for preparing familiar meals, and a laundry machine. The downside is that you’re still responsible for cooking and cleaning. The Trade-off: Plan for simple meals and accept that the space will get a little messy. The freedom you gain is often worth it.
Frequently Asked Questions
What is the best age to travel with a toddler?
There's no single "best" age, as success depends more on strategy than the child's exact age. The key is choosing a destination that aligns with their developmental stage by focusing on logistical simplicity, flexible pacing, and avoiding overstimulation, which this guide helps you do.
How can I make flying with a toddler easier?
Preparation is everything. Pack a bag of new, engaging toys, bring more snacks than you think you'll need, and use a tablet with headphones for screen time. For a complete strategy, download our Stress-Free Flying with Kids Guide to cover all your bases from check-in to landing.
Are all-inclusive resorts a good option for toddlers?
Yes, they can be fantastic. All-inclusive resorts excel at creating a controlled, safe environment that minimizes planning and stress for parents. With kids' clubs, endless food options, and on-site activities, they allow parents a rare chance to relax while ensuring the toddler's needs are met.
Your Adventure Awaits
Finding the best family vacations with a toddler is entirely possible when you approach it with the right mindset and strategy. It begins by letting go of pre-child expectations and embracing a new goal: creating joyful, shared experiences within a framework of manageable logistics.
By thoughtfully choosing a destination archetype that aligns with your family’s unique needs—whether it's the effortless escape of an all-inclusive resort or the flexible fun of a classic beach getaway—you set the stage for success. Mastering the details of packing and lodging removes the friction that leads to stress, allowing you to focus on what truly matters.
This proactive approach transforms planning into an act of empowerment. You are not just booking a trip; you are architecting an experience for memories that will last a lifetime. The challenges of this age are temporary, but the joy of watching your child discover the world is permanent.
Read the full guide: Family Travel Ideas: The 2026 Guide to Unforgettable Trips
Don't Miss Out! Subscribe for Exclusive Content
SubscribeComments 0
No comments yet
Be the first to share your experience!
Dont Miss Out! Subscribe for Exclusive Content
Ultimate USA Holidays Guide: Top Picks
FTC Affiliate Disclosure Essentials: Stay Compliant as a Travel Creator
Essential Affiliate Tools: From Tracking to Full Optimization
Booking.com Affiliate Program Review: Pros, Cons, and Earnings Potential
Decoding Affiliate Commission Rates: Benchmarks for Travel Creators