SF Pride: 6 Route & Party Hacks
TrekGuider @trekguider
Picture it: a river of rainbow flags, glitter, and pure, unadulterated joy flowing down Market Street. The air thrums with music, cheers, and the collective heartbeat of hundreds of thousands celebrating love, identity, and resilience. This isn't just any parade; this is the legendary San Francisco Pride Parade. But for every person lost in the moment, there's another lost in the crowd, wrestling with a dead phone, a terrible view, and no idea where their friends have vanished. The sheer scale of SF Pride can be overwhelming, threatening to turn a day of pure celebration into a stressful logistical nightmare.
You’ve imagined yourself at the heart of the action, capturing the perfect photo, feeling that powerful sense of community. The reality, however, could be getting stuck behind a seven-foot-tall person, unable to see a single float, with your phone battery blinking at 3% and no cell service to find your crew. The difference between an unforgettable experience and a frustrating ordeal isn't luck—it's preparation. You deserve to experience every ounce of joy this iconic event has to offer, without the chaos and confusion that can so easily derail the day.
This is your definitive guide to conquering the celebration. We’re giving you six battle-tested route and party hacks to navigate the pride parade San Francisco like a seasoned pro. Forget the stress; this playbook ensures you soak in the history, master the logistics, and create memories that will last a lifetime, all while staying safe and comfortable.

Before You Go: Essential Prep for the Pride Parade San Francisco
Before you even think about your rainbow outfit, a little prep work will set the stage for a flawless day. The SF Pride Parade is more than a party; it’s a powerful legacy. Born from the first "gay-in" in 1970 and commemorating the key 1969 Stonewall Uprising, this event has evolved from a protest into a global platform for activism and celebration. In the 1980s, it became a crucial front line for raising AIDS awareness, and today it continues to champion the diverse spectrum of the LGBTQ+ community. Understanding this history enriches the entire experience, transforming it from a spectacle into a meaningful pilgrimage.
The 2026 SF Pride Parade is scheduled for Sunday, the last Sunday of Juneth, with the first contingents stepping off at 10:30 AM. To be ready, your day pack is your most critical asset. Here’s a non-negotiable checklist:
Hydration: Pack a reusable water bottle. There are water stations, but having your own is crucial for staying hydrated in the California sun.
Sun Protection: Sunscreen, a hat, and sunglasses are absolutely essential. There is very little shade along the parade route.
Layered Clothing: San Francisco weather is famously fickle. What starts as a chilly, foggy morning can quickly turn into a warm, sunny afternoon. A light jacket or hoodie you can tie around your waist is the smartest move you can make.
Comfortable Shoes: You will be on your feet for hours, walking and standing. Prioritize comfort over style; your feet will thank you by the end of the day.
Portable Power Bank: Your phone will be working overtime as your camera, map, and communication device. A fully charged power bank is an absolute must-have.
Snacks: While there are food vendors, lines can be long and prices high. Pack some energy bars or other easy-to-eat snacks to keep your energy levels up.
Finally, let's talk safety. SF Pride is known for its strong security measures, including advanced weapon detection technology at key entry points. While organizers work hard to create a secure environment, personal safety matters most in any large crowd. Familiarize yourself with basic protocols, like being aware of your surroundings and keeping your valuables secure. For a comprehensive look at staying safe while traveling, our Solo Female Travel Safety Guide offers invaluable tips that apply to everyone, regardless of gender, in any crowded event scenario.

Hack #1: Master the Market Street Route for the Pride Parade San Francisco
The parade route is deceptively simple: it runs straight down Market Street, starting at Beale Street and culminating at 8th Street, right by the Civic Center Plaza. The challenge isn't knowing the route; it's knowing where on the route to be and when to be there.
The Hack: Arrive by 9 AM and choose your zone strategically. The parade officially starts at 10:30 AM, but the sidewalks begin filling up much earlier. Arriving an hour and a half beforehand allows you to claim a prime spot without having to battle the late-coming masses.
Here’s a breakdown of the route's key zones to help you decide on your ideal viewing experience:
The Starting Zone (Beale to Montgomery Street): This area is often less crowded, especially right at the beginning. You'll see all the contingents when they are fresh, energized, and at their most organized. It’s a fantastic spot for photographers who want clean shots of the floats and performers before the crowds swell. The energy here is one of joyful anticipation.
The Commercial Core (Montgomery to Powell Street): This is the heart of the parade and, consequently, the most packed section. The tall buildings create a canyon-like effect, amplifying the sound and energy. It’s an intense and exhilarating place to be, but not for the faint of heart. If you want to be in the thick of it, this is your spot, but be prepared for a tight squeeze.
The Climax Zone (Powell to 8th Street): As the parade approaches its end at the Civic Center, the energy reaches a fever pitch. This is where the performers give their all, knowing they’re approaching the main celebration. The crowd here is dense but incredibly vibrant. Positioning yourself near 8th Street gives you a head start on moving into the Civic Center Plaza for the post-parade festivities.
Pro-Tip: For a less obstructed view and better photos, try to secure a spot on the south side of Market Street. In the late morning and early afternoon, the sun will be mostly at your back, beautifully illuminating the parade without forcing you to squint. This side is often just slightly less congested than the north side.
Hack #2: The Transportation Game Plan - Ditch the Car, Embrace Public Transit
Let’s be perfectly clear: driving to the SF Pride Parade is a recipe for disaster. Street closures are extensive, parking is virtually non-existent and astronomically expensive, and navigating the gridlock will drain your celebratory spirit before you even arrive.
The Hack: Make BART (Bay Area Rapid Transit) and Muni your best friends for the day. San Francisco’s public transit system is designed to handle massive events like this, and it is by far the most efficient way to get to and from the parade.
Here’s your transit strategy:
BART: The underground trains are the fastest way to get downtown from the East Bay, the Peninsula, or other parts of the city. The key is choosing the right station to exit.
Embarcadero Station: Puts you right near the start of the parade. A great option if you plan to arrive early and watch from the beginning.
Montgomery Station: A perfect middle-ground, placing you in the energetic core of the route. It’s one of the busiest stations, so be prepared for crowds.
Powell Station: Another central option, close to the cable car turnaround and a major shopping area. Like Montgomery, expect it to be very busy.
Civic Center Station: This is your stop if you want to head directly to the post-parade celebration or watch the parade's final leg.
Muni: The city’s network of buses and light rail (Muni Metro) is another excellent choice. The F-Market & Wharves historic streetcar will be rerouted, but the Muni Metro lines run directly under Market Street, using the same stations as BART. Many bus lines will have detours, so be sure to check the SFMTA website or your favorite transit app for real-time updates on the day of the event.
Rideshare services like Uber and Lyft will be operating, but expect heavy surge pricing and designated drop-off/pick-up zones that may be several blocks away from Market Street to avoid the worst of the congestion. Public transit remains the most reliable and cost-effective option.

Hack #3: The Civic Center Celebration - Your Post-Parade HQ
The last float crossing 8th Street doesn't mark the end of the day—it marks the beginning of the next phase. The parade flows directly into the massive Pride Celebration at Civic Center Plaza, a sprawling festival with multiple stages of live music, DJs, inspiring speakers, hundreds of community booths, art installations, and food vendors.
The Hack: Have a concrete plan for navigating the festival, especially for meeting your group. Cell service in and around Civic Center Plaza can become extremely unreliable due to the sheer number of people. A "we'll find each other" approach will likely fail.
Follow these steps for a seamless transition from parade to party:
Establish a Hyper-Specific Meeting Point: Before you separate, agree on a meeting spot that is impossible to mistake. "By the main stage" is too vague. Instead, choose something like, "At the base of the statue of James Lick, on the side facing the library," or "Directly in front of the main entrance to the Asian Art Museum." Set specific times to meet there (e.g., 2 PM and 4 PM).
Pace Yourself and Hydrate: The celebration runs for hours after the parade. It's a marathon, not a sprint. Continue to drink water, find moments of shade, and don't forget to eat.
Explore with Purpose: Don't just wander aimlessly. The community booths are the soul of the celebration. You can connect with dozens of non-profits, activist groups, and local organizations. It’s an incredible opportunity to learn, connect, and find your community.
Know Your Exits: Take a moment upon arrival to orient yourself and identify the main exit points from the plaza. Knowing how to get out quickly in case of an emergency or if you simply feel overwhelmed is a smart move.

Hack #4: Beyond Market Street - Unofficial Parties & Neighborhood Vibes
The official parade and Civic Center festival are the main events, but the spirit of Pride permeates the entire city, becoming a vibrant key element of the city’s festive calendar—a calendar we explore in our broader guide to San Francisco Holidays: Bay Area Buzz.
The Hack: Dip out of the main event for a few hours to experience a different, more intimate side of Pride.
The Castro District: As the historic heart of San Francisco's LGBTQ+ community, the Castro is ground zero for Pride weekend. The streets become a massive, vibrant block party. While it will be just as crowded as the parade, the atmosphere is different—more neighborhood-focused and less structured. Grab a drink at a historic bar, watch the impromptu dance parties, and soak in the history.
Dolores Park: On Pride Sunday, the park's famous "Gay Beach" area expands to cover nearly the entire lawn. It transforms into a massive, sun-drenched picnic party. The vibe is more relaxed and bohemian than the official festival. Pack a blanket, bring some snacks, and enjoy people-watching in one of the city's most beautiful settings.
SoMa (South of Market): This neighborhood is home to many of the city's most famous clubs and venues. Throughout Pride weekend, these spaces host a huge variety of official and unofficial after-parties, from daytime DJ sets to late-night dance events. Check event listings in advance, as many of the most popular parties sell out.

Hack #5: Tech & Safety - Your Digital Toolkit for a Seamless Day
In a modern festival environment, your smartphone is your most powerful tool—if you use it wisely.
The Hack: Prep your phone and apps to be your digital command center for the day.
The Power Bank is Non-Negotiable: We mentioned it before, but it bears repeating. A dead phone means no photos, no map, and no way to contact your friends. A fully charged portable power bank is the single most important piece of tech you can bring.
Master Your Communication Apps: Standard text messages can be delayed when cell networks are overloaded. Use a data-based messaging app like WhatsApp or Signal for your group chat. Their delivery is often more reliable in dense crowds. Use the "Share Live Location" feature for a set period (e.g., 15 minutes) if you get separated and need to find your way back to your group.
Download Offline Maps: Before you leave home, download an offline map of the downtown San Francisco area in your map app of choice. Even if you lose all cell service, your phone's GPS will still work, allowing you to see your location on the map and navigate.
Embrace Official Resources: Check the official SF Pride website in the days leading up to the event. If they release an official app, download it. It will likely have the most accurate schedules, maps, and emergency alerts.
Pro-Tip: Take a screenshot of your planned meeting spots, the parade route map, and the contact info for everyone in your group. Create a dedicated photo album for these screenshots so you can access them instantly, even if your apps won't load due to poor connectivity.

Hack #6: The Exit Strategy - How to Leave Without the Headache
Just as important as your arrival plan is your exit strategy. When hundreds of thousands of people try to leave the same area at the same time, the public transit stations and rideshare zones become incredibly congested.
The Hack: Avoid leaving during the peak rush right as the festival winds down.
You have two primary strategies for a stress-free departure:
The Early Exit: If you've had your fill of the crowds and the main celebration, start making your way out before the final headliners take the stage at Civic Center. By leaving an hour before the official end time, you can beat the massive wave of people heading for the BART and Muni stations.
The Patient Wait: This is often the better option. Instead of rushing out with everyone else, wait it out. Find a restaurant or cafe a few blocks away from Civic Center, grab a bite to eat, and relax for an hour or so. Let the crowds on the transit platforms thin out. By the time you're done, your journey home will be far more pleasant.
If you're using a rideshare service, walk at least four or five blocks away from Market Street and Civic Center before you even attempt to request a ride. This will get you out of the most congested, no-pickup zones and will likely save you from the highest surge pricing.
Your Guide to an Unforgettable Pride
You are now armed with the knowledge to do more than just attend the pride parade San Francisco —you are ready to experience it with confidence, joy, and a sense of empowered preparedness. From mastering the Market Street route and navigating the Civic Center celebration to knowing the smartest ways to get there and back, you have the tools to craft a perfect day. This isn't just about avoiding stress; it's about creating space for the powerful moments of connection, celebration, and solidarity that define SF Pride. Go forth, celebrate loudly, and have an incredible time.
For a complete blueprint to planning your ultimate trip to the Bay Area, including deep dives into its other iconic holidays and hidden gems, be sure to explore our comprehensive Travel Guide.
Meta Data Suggestions:
SEO Meta Title: SF Pride: 6 Essential Hacks for the Parade Route & Parties
URL Slug: sf-pride-parade-route-party-hacks
SEO Meta Description: Master the SF Pride Parade! Get 6 expert hacks on navigating the Market Street route, finding the best parties, and staying safe in the crowds.
Don't Miss Out! Subscribe for Exclusive Content
Subscribe


Comments 0
No comments yet
Be the first to share your experience!
Dont Miss Out! Subscribe for Exclusive Content

San Francisco Cherry Blossoms: A Local's Guide to the Blooms

Halloween SF: Haunts Without Horrors

SF Festivals: 7 Must-See Lineups

Christmas SF: Lights & Wharf Wonders

Chinese New Year SF: Parade Essentials

San Francisco Holidays: Bay Area Buzz
How to Create a Digital Travel Guide People Will Buy
TrekGuider @trekguider
You’re a travel expert. Your notes are filled with hidden gems, your camera roll is a treasure trove of untold stories, and your advice could save fellow travelers hundreds of dollars and hours of stress. You know your expertise has value, but packaging it into a real, scalable income stream feels like a monumental task. Relying on the slow trickle of ad revenue or the unpredictability of affiliate sales is a frustrating grind, keeping your dream of a truly independent business just out of reach.
This uncertainty keeps you on the content treadmill, trading your valuable time for pennies. You see other creators launching their own products and achieving a level of financial freedom that feels like a distant fantasy. The path forward is a confusing fog of questions about design, content, pricing, and technology, leaving you stuck in analysis paralysis while the immense opportunity of the creator economy—a market projected to nearly double from $250 billion to almost $500 billion by 2027—passes you by.
It’s time to stop trading hours for dollars and start building assets. This is your chronological, step-by-step playbook. We will demystify the entire process and show you exactly how to create a digital travel guide that people will not only buy but will also love and recommend. This is your complete workflow for transforming your hard-won expertise into a polished, professional product that generates passive income for years to come. Think of this as a critical chapter in your business plan; for the complete blueprint on building a modern creator enterprise, be sure to read our ultimate guide to How to Make Money Online: A Creator's Guide for 2026.

Why a Digital Guide is Your Ultimate Scalable Asset
Before diving into the "how," it's critical to understand the "why." Transitioning from promoting others' products to creating and selling your own is the single most powerful step you can take toward building a profitable, independent business. While ads and affiliate links have their place, digital products offer a level of control and scalability that other models simply can't match.
The advantages are transformative:
Infinite Scalability: Digital products operate on a "create once, sell forever" model. Whether you sell 10 copies or 10,000, your workload remains the same. There is no inventory to manage and no shipping to worry about.
Exceptionally High Profit Margins: With no manufacturing or distribution costs, the profit margins are extraordinary. Once you recoup your initial time investment, nearly every sale is pure profit.
Full Ownership and Control: When you sell your own guide, you own the entire process. You control the product, the pricing, the marketing, and the customer relationship. You are no longer dependent on an affiliate partner’s commission rates or an ad network's traffic requirements.
Solidifies Your Authority: Creating and selling a high-quality product instantly positions you as an expert. It builds deep trust with your audience, as you are no longer just recommending other people's stuff—you are standing behind your own valuable creation.
The market reflects this opportunity. The e-learning sector alone, a huge component of the digital product world, is projected to surge to an incredible $848 billion by 2030. This isn't a fleeting trend; it's a fundamental shift in how creators build resilient businesses.
The Blueprint – Research and Validation
The costliest mistake a creator can make is to spend months building a product nobody asked for. Thorough research and validation aren't optional; they are the foundation upon which a profitable product is built.
Identify Audience Needs and Define a Specific Niche
Your first job isn't to be a brilliant inventor; it's to be a sharp detective, uncovering the real, recurring problems your audience is desperate to solve.
Listen to Your Audience: The best ideas are hidden in plain sight. Dive into your blog comments, email replies, and social media DMs. What destinations are people constantly asking about? What part of the travel planning process do they find most challenging or stressful? Their recurring questions are your product ideas.
Define a Hyper-Specific Niche: Avoid creating a generic guide. A broad guide to "Mexico" will get lost in a sea of competition. A highly specific product like "A First-Timer's Foodie Guide to Mexico City's Roma Norte Neighborhood" is more valuable, easier to market, and instantly positions you as a niche expert.
Conduct Keyword and Market Research to Validate Demand
Once you have an idea, you must validate it with data.
Analyze Search Volume: Use an SEO tool to check the search volume for terms related to your guide idea. High search volume for long-tail keywords like "7-day Japan itinerary for foodies" or "what to do in Lisbon with kids" is a strong data signal that a ready market exists for a guide on that topic.
Conduct Competitor Analysis: Find 3-5 comparable digital travel guides in your niche. Your goal isn’t to copy them, but to identify a gap in the market. Analyze their price points, what they include, and, most importantly, read their reviews. What are customers praising? What are they complaining about? This will show you exactly how to create a superior product.
Pro-Tip: True validation comes from the intersection of qualitative and quantitative data. A great product idea is one that your audience is asking for (qualitative) and that a significant number of people are searching for online (quantitative).

The Core – Outlining and Content Creation
With a validated idea, it’s time to build the heart of your product: the content. This is where your unique expertise, voice, and experience shine.
Develop a Logical Structure
A good guide flows intuitively and is easy to navigate. Before you write a single word, create a detailed table of contents. This will be your roadmap and ensure you don't miss any crucial information. A typical structure includes:
Introduction: A brief overview of the destination, essential facts (currency, language), and why your guide is the ultimate resource.
Logistics: The practical nuts and bolts—getting there, getting around, visa requirements, and curated recommendations on where to stay for different budgets.
Experiences: The core of your guide. This includes top attractions, detailed daily itineraries, and deep dives into your niche (e.g., food and drink recommendations, hiking trails, photo spots).
Practicalities: The crucial final details like safety tips, packing lists, a budget breakdown, and useful local phrases.
Write Compelling and Useful Content
This is where you go beyond the generic advice found on a thousand other blogs.
Gather Your Assets: Compile all of your personal notes, journal entries, and high-quality photographs from your travels to the destination. Your first-hand experience and unique visuals are your primary competitive advantage.
Be Both Inspirational and Intensely Practical: Write in an engaging, personal tone. Share anecdotes and insider tips that bring the destination to life. Go beyond simply listing facts; tell your readers why a place is special. Share the hard-won wisdom that can't be found elsewhere, like "skip the line at the Colosseum by booking this specific tour" or "the best gelato is actually found two blocks away from the main square at this tiny shop."
With your raw content compiled, the next step is to give it a professional polish that signals its immense value.

The Polish – Professional Design for Non-Designers
Your guide's content may be brilliant, but in the digital world, packaging matters. A professional, user-friendly design signals quality and dramatically improves the customer experience.
Select a User-Friendly Design Tool
You don't need to be a graphic designer to create a stunning product. For a travel blogger whose primary goal is to efficiently create a static PDF travel guide, a template-based tool like Canva is the strategically superior choice. While powerful professional software like Figma or Adobe Illustrator has a steep learning curve that can delay your launch by weeks, Canva is built specifically for this type of project. Its intuitive, drag-and-drop interface is designed to help non-designers produce high-quality visuals quickly.
Feeling inspired to build your own assets but not sure where to begin? Creating high-value products is the core of a modern creator business. To accelerate your journey, we've bundled together some of our most powerful resources. The Travel Creator's Toolkit is a free collection of checklists, templates, and guides designed to help you streamline your workflow and build your business faster.
5 Essential Mobile-First Design Principles for a User-Friendly Guide
Your guide will almost certainly be used on a mobile phone while your customer is in-destination. Designing with a mobile-first user experience (UX) is not an option; it is essential for your product to be functional and valuable.
Prioritize Legibility and High Contrast: The content must be effortlessly readable on a small screen, often in bright sunlight. Use a clean, simple font of at least 11 points so users don't need to pinch-and-zoom. Crucially, ensure a high contrast ratio between the text and background—at least 4.5:1 as recommended by Web Content Accessibility Guidelines (WCAG)—to maintain readability.
Implement Simplified Navigation: The single most important navigation element is a hyperlinked Table of Contents at the beginning of the document. This allows users to jump directly to the section they need with a single tap, which is crucial when they're trying to find information quickly on a busy street.
Design for Touch with Finger-Friendly Targets: Any included hyperlinks (e.g., a link to a restaurant's website or a Google Maps location) must have a clickable area large enough to be easily tapped with a finger—the industry standard is a minimum touch target size of 44x44 points (approximately 7-10mm).
Minimize Cognitive Load by Eliminating Clutter: Mobile users are often distracted. Their interaction with a guide is typically in short bursts or "micro-tasks". To accommodate this, use short paragraphs, bulleted lists, bolded text for key information, and generous white space. A clean, uncluttered interface helps users find what they need with minimum effort.
Optimize for Performance and Portrait Orientation: The vast majority (94%) of mobile users hold their phones vertically. Your guide must be designed with a portrait layout (e.g., A4 or US Letter size). Crucially, keep the final PDF file size as small as possible by compressing all images before inserting them into your document. A large file will download slowly on a weak cellular connection, creating a poor user experience.

The Launchpad – How to Create a Digital Travel Guide for Sale
You've created a valuable, beautifully designed resource. The final phase is to package it, price it for profit, and get it into the hands of your customers.
How to Price Your First Digital Product
Pricing is one of the most challenging decisions. The most effective strategy for a knowledge-based product is value-based pricing. Instead of focusing on your production costs, price your product based on the transformation it provides to the customer. If your guide saves a user 20 hours of stressful research and helps them discover priceless experiences they would have otherwise missed, its value is immense.
A practical process for setting your price:
Step 1: Research the Market: Identify 3-5 comparable digital travel guides in your niche to establish a realistic market range.
Step 2: Articulate the Value: Make a specific list of the tangible outcomes your guide provides (e.g., "Saves over 15 hours of planning," "Includes a pre-planned 7-day itinerary worth over $100 in planning fees").
Step 3: Set an Initial Price and Test: For a high-quality, first-time travel guide, a price point between $19 and $49 is a strong starting position. It communicates significant value without creating sticker shock for the buyer.
Choose a Sales Platform That Works for You
You need a platform to handle the sale and secure digital delivery of your product. While you can use e-commerce plugins on your own blog, the smartest strategy is to leverage a platform that puts you in front of a built-in audience of motivated buyers.
Pro-Tip: Don't just build a product; build your business inside an ecosystem. A specialized marketplace like TrekGuider is the ideal place to sell your high-quality Travel Guide. It provides a professional, ready-made storefront and connects you with a global audience of passionate travelers who are actively searching for expert resources. You can publish articles to attract new customers directly on the platform, creating a powerful marketing funnel that leads right back to your product page.
Frequently Asked Questions (FAQ)
1. How long should my digital travel guide be?
Value is not measured in page count. A concise, 50-page guide packed with unique, actionable advice is far more valuable than a rambling 200-page guide filled with generic information. Focus on comprehensively solving the specific problem your niche audience has.
2. Do I need to have visited the destination very recently?
While recent, first-hand experience is ideal, an "evergreen" guide focused on core attractions, culture, and logistics can have a long shelf life. The key is transparency. Be clear about when you last visited and focus on information that doesn't change rapidly. You can always update your guide with new editions.
3. What if I'm not a professional writer or photographer?
You don't need to be. Your audience values authenticity and expertise over perfect prose. Write in your natural, conversational voice, as if you were giving advice to a friend. For photos, a modern smartphone can capture high-quality images. The goal is to be clear, helpful, and genuine.

Your Journey from Expert to Entrepreneur Starts Now
You now have the complete, A-to-Z workflow. You've moved from the vague idea of a product to a concrete, actionable blueprint that covers research, content creation, professional design, and a smart launch strategy. The path from being a passionate travel expert to a successful digital entrepreneur is no longer a fog of confusion.
You have the definitive answer to the question of how to create a digital travel guide that provides immense value and generates a sustainable income. The only thing left to do is take the first step. Start the research, outline your expertise, and begin building the asset that will power your business and fund your adventures for years to come.
SEO Meta Data Suggestions:
SEO Meta Title (58 characters): How to Create a Digital Travel Guide People Will Actually Buy
URL Slug: how-to-create-digital-travel-guide
SEO Meta Description (154 characters): A step-by-step playbook for travel creators on how to create a digital travel guide, from research and writing to design, pricing, and selling your product.
Read the full guide: The Travel Blog Business Plan: How to Make Real Money in 2026
Don't Miss Out! Subscribe for Exclusive Content
SubscribeComments 0
No comments yet
Be the first to share your experience!
Dont Miss Out! Subscribe for Exclusive Content

FTC Affiliate Disclosure Essentials: Stay Compliant as a Travel Creator

Essential Affiliate Tools: From Tracking to Full Optimization

Avoid These 5 Affiliate Landing Page Mistakes for Better Conversions

Affiliate Keyword Research Mastery for Travel Blogs

Booking.com Affiliate Program Review: Pros, Cons, and Earnings Potential

Decoding Affiliate Commission Rates: Benchmarks for Travel Creators
Affiliate Keyword Research Mastery for Travel Blogs
TrekGuider @trekguider
You’re doing everything right. Your destination guides are insightful, your photos are stunning, and your packing lists are careful. You’ve joined the affiliate programs, placed the links, and then... crickets. It’s the silent frustration that burns out thousands of talented travel creators.
You see the industry reports, like the one stating the average monthly income for travel affiliates is a staggering $13,847, and it feels like it’s happening in another universe. The chasm between the effort you pour into your work and the revenue trickling into your bank account isn't a reflection of your talent—it's a reflection of your strategy.
The solution is to stop writing into the void and start targeting your content with the precision of a sniper. The secret, the absolute bedrock of every successful affiliate business, is mastering affiliate keyword research. This isn't about SEO wizardry or gaming the system; it's about deeply understanding the language of your audience at the exact moment they are ready to buy. This guide is your definitive, step-by-step masterclass in finding the profitable keywords that will transform your travel blog from a passion project into a revenue-generating powerhouse. For a complete command of the entire affiliate landscape, our definitive pillar page, Travel Affiliate Programs: The 2026 Ultimate Guide, is your essential command center.

The Mindset Shift: From "What to Write" to "What to Target"
The most common mistake in content creation is brainstorming ideas in a vacuum. A creator thinks, "I'll write a post about my amazing trip to Rome." They produce a beautiful, engaging travelogue, sprinkle in a few links to hotels and tours, and then wonder why it doesn't make a dime.
But the highest-earning creators? They flip this model on its head. Their entire content strategy starts not with an idea, but with a question: "What are people who are ready to spend money on a trip to Rome searching for on Google?"
This is the critical difference between informational intent and commercial investigation intent.
Informational Intent: The user is in learning mode. They're searching for things like "what to do in Rome," "history of the Colosseum," or "how to pack a carry-on." This content is fantastic for building an audience, but it rarely leads directly to a sale.
Commercial Investigation Intent: The user has their wallet out. They are actively researching a purchase, comparing options, and looking for an expert to validate their final decision. This is where the money is.
Mastering affiliate keyword research is the disciplined process of finding these "commercial investigation" keywords and building your content around them. When you do this, you stop hoping for random sales and start attracting a steady stream of visitors who arrive on your blog primed to convert.

The Anatomy of a Money-Making Keyword
To find these golden-nugget keywords, you first need to know what they look like. Commercial investigation keywords typically fall into three high-value categories. If you build your content calendar around these formats, you are building a business designed for profit.
1. "Best Of" Keywords
This is the quintessential affiliate keyword. The user is overwhelmed with options and is looking for a trusted expert (you) to curate a list of the top choices.
Travel Examples:
"best carry-on luggage for international travel"
"best travel insurance for digital nomads"
"best hiking boots for rocky trails"
"best all-inclusive resorts in Mexico for families"
2. Comparison & "Vs" Keywords
These keywords are pure gold. The user has already done their initial research and has narrowed their options down to two or three contenders. They are at the final stage of their decision-making process.
Travel Examples:
"Viator vs GetYourGuide"
"SafetyWing vs World Nomads"
"Osprey Farpoint vs Porter"
"Booking.com vs Expedia"
3. Review Keywords
Here, the user is looking for a detailed, real-world verdict on a single product, tour, or service. They are one step away from clicking "buy" and are seeking that final piece of social proof and expert validation.
Travel Examples:
"G Adventures Peru tour review"
"Away Bigger Carry-On review"
"Nomatic travel pack review"
"SafetyWing insurance review"

The Affiliate Keyword Research Workflow: A Step-by-Step Tutorial
Theory is great, but execution is everything. Here is a simple, repeatable process for finding high-value affiliate keywords using a standard SEO tool like Ahrefs or Semrush.
Step 1: Brainstorm Your "Seed" Keywords
Begin by listing the broad topics, products, and services that are central to your niche. Don't filter yourself. If your niche is "luxury eco-tourism in Costa Rica," your seed keywords might include:
eco-lodge
Costa Rica tours
sustainable travel
adventure travel
bird watching gear
waterproof backpack
These terms are too broad to target on their own, but they are the seeds from which your entire profitable content strategy will grow.
Step 2: Use Commercial Modifiers to Find Gold
Now, take your seed keywords and plug them into your SEO tool's "Keywords Explorer." This is where you transform broad topics into specific, monetizable content ideas. Use the tool's filters to find phrases that contain your seed keyword plus a commercial modifier.
Commercial modifiers are the words that signal buying intent. Your core list should include:
best
review
vs
alternative
top
cheap
affordable
comparison
For example, using the seed keyword "eco-lodge," your research might uncover:
"best eco-lodges in Costa Rica"
"Pacuare Lodge Costa Rica review"
"Lapa Rios Lodge vs Pacuare Lodge"
"alternatives to luxury resorts in Costa Rica"
This single step will generate a treasure map of content ideas, each one pointing directly to a user with commercial intent.
Step 3: Analyze the SERP (Search Engine Results Page)
A keyword can look perfect in your SEO tool, but the real test is analyzing the live competition on Google. Before you commit to writing a single word, search for your target keyword and scrutinize the top 10 results.
Confirm the Intent: Are the top-ranking pages other blog posts, reviews, and listicles? That's a green light. If the page is dominated by the homepages of major brands or e-commerce category pages, it's a signal that Google doesn't think a blog post is the right answer, and it will be much harder to rank.
Scope Out the Competition: Are the top spots held by media behemoths like Forbes or Condé Nast Traveler? Or do you see other independent travel blogs like yours? If other creators are ranking, it's definitive proof that you can, too.
Find the "10x Content" Opportunity: Look for weaknesses in the current top-ranking articles. Are they outdated? Thin on detail? Lacking personal experience or high-quality photos? Your mission is to create a piece of content that is so much more thorough, helpful, and engaging that it's undeniably the best result for that search.
Step 4: Balance Keyword Difficulty (KD) and Search Volume
Your SEO tool will give you two final, crucial metrics:
Search Volume: An estimate of how many times a month people search for this term.
Keyword Difficulty (KD): A score (usually from 0-100) that estimates how hard it will be to rank on the first page of Google.
For a newer blog, the sweet spot is a keyword with a KD score under 30. Don't be put off by lower search volumes (e.g., 50-250 searches/month). These keywords are often far less competitive, and the traffic they bring is hyper-targeted and converts at a much higher rate.
Pro-Tip: Don't ignore long-tail keywords. These are longer, highly specific phrases like "best waterproof travel backpack for Southeast Asia monsoon season." They have low search volume, but the user searching for this knows exactly what they need. Ranking for these terms can be incredibly profitable.

Beyond Products: Keyword Research for Next-Level Opportunities
A truly sophisticated affiliate strategy evolves. Once you've mastered promoting products, you can apply the same affiliate keyword research principles to higher-margin opportunities like referral programs. This means shifting your focus from targeting consumers to targeting your peers: other creators.
The goal is to find what other creators are searching for when they're trying to grow their own businesses.
For example, the TrekGuider Seller Platform is built for travel creators to sell their own digital products—itineraries, guides, presets, and more. To attract other creators to the platform using your unique referral link, you would target keywords they are searching for:
"how to sell travel itineraries online"
"best platform for travel creators"
"make money as a travel blogger 2026"
"digital product ideas for travel creators"
"alternatives to Gumroad for travel guides"
By creating genuinely helpful content that solves these business-level problems, you can introduce your peers to a valuable tool and, through a referral program, earn a recurring revenue share from their success. This adds a powerful, diversified income stream that isn't dependent on one-off product sales.
Pro-Tip: The rise of video means your keyword research shouldn't be confined to your blog. According to industry projections, video will account for 55% of all affiliate traffic by 2026. The same keywords you find for your blog posts—"Away Bigger Carry-On review," "Best Hostels in Bangkok"—are the exact titles you should be using for your YouTube videos and TikToks to capture high-intent search traffic on those platforms as well.
The Travel Creator's Toolkit
Feeling ready to build your keyword strategy? Mastering affiliate keyword research is the first step. To help you organize your findings and build a complete, professional affiliate marketing system, we've created the ultimate resource bundle. It includes checklists, content templates, and keyword tracking sheets designed to accelerate your journey from beginner to pro.
Download Your Free Bundle: The Travel Creator's Toolkit

Frequently Asked Questions (FAQ)
1. What if two of my articles start ranking for the same keyword? Is that bad? This is called "keyword cannibalization," and yes, it can be a problem. It confuses Google about which page is the most important, potentially hurting the rankings of both. The best way to avoid this is to assign one primary target keyword to each article and ensure your content is distinct.
2. Should I ignore keywords with very low search volume (e.g., under 50 searches/month)? Absolutely not! These low-volume, long-tail keywords are often a goldmine. The competition is usually non-existent, and the user searching for such a specific phrase is often highly motivated and ready to buy. A page that gets only 20 visits a month but converts at 25% is a huge asset.
3. How long does it take to rank for a new keyword? For a newer blog, it can take 6-12 months for Google to fully trust your site and grant you authoritative rankings for competitive keywords. This is why consistency is key. The work you do on affiliate keyword research today is building a business asset that will pay you dividends for years to come.
Your Blueprint for a Profitable Content Strategy
You now possess the single most valuable skill for building a profitable travel blog. Affiliate keyword research is the foundation upon which every successful affiliate business is built. It elevates your content strategy from a game of chance into a predictable system for generating revenue.
By shifting your focus from simply "creating content" to "targeting commercial intent," you align your hard work directly with an audience that is actively looking for your expert guidance. You are no longer just a travel writer; you are a strategic business owner. You have the knowledge and the step-by-step process to find the keywords that will attract high-value traffic and drive consistent affiliate sales.
The path is clear. Stop writing into the void. Start targeting with precision. Your journey to becoming a top-earning travel creator begins with the very next keyword you choose.
Meta Data Suggestions:
SEO Meta Title (59 characters): Affiliate Keyword Research: A Masterclass for Travel Blogs
URL Slug: /affiliate-keyword-research-travel-blogs
SEO Meta Description (154 characters): Learn how to find profitable keywords with our step-by-step affiliate keyword research tutorial. Drive more sales and grow your travel blog's income today.
Read the full guide: The Travel Blogger's Playbook to Affiliate Marketing Mastery
Don't Miss Out! Subscribe for Exclusive Content
SubscribeComments 0
No comments yet
Be the first to share your experience!
Dont Miss Out! Subscribe for Exclusive Content
FTC Affiliate Disclosure Essentials: Stay Compliant as a Travel Creator
Essential Affiliate Tools: From Tracking to Full Optimization
Avoid These 5 Affiliate Landing Page Mistakes for Better Conversions
Booking.com Affiliate Program Review: Pros, Cons, and Earnings Potential
Decoding Affiliate Commission Rates: Benchmarks for Travel Creators

7 Proven Affiliate Marketing Tips to Skyrocket Travel Income
11 Essential Solo Travel Safety Tips You Need to Know
TrekGuider @trekguider
Let's be honest: the idea of solo travel is a mix of exhilaration and pure terror. It’s the ultimate promise of freedom, shadowed by the persistent question, "But will I be safe?" The thought of navigating an unfamiliar city alone, fending off unwanted attention, or feeling vulnerable can be enough to keep the most adventurous spirit grounded. This anxiety is real, and it can paralyze your plans or, worse, follow you on your trip, robbing you of the joy you set out to find.
But safety isn’t a matter of luck; it’s a matter of skill. It’s a mindset you can cultivate and a set of practices you can master. This guide is your new playbook. We’ve distilled insights from security experts, psychologists, and veteran solo travelers into 11 essential, gender-neutral solo travel safety tips. This isn't a list of warnings designed to scare you. It’s a practical framework for building unshakeable confidence, mastering situational awareness, and empowering yourself to explore the globe. While these strategies are crucial for any solo traveler, they are one part of a larger safety ecosystem, which we cover in our comprehensive guide to The Ultimate Guide to Travel Safety: A 2026 Playbook.

The Foundation: Building Unshakeable Confidence and Awareness
True safety begins in your mind long before your boots hit the ground. It’s a foundation built on proactive awareness and a confident mindset. By mastering these core principles, you transform yourself from a potential target into a "hard target"—someone who looks like they know exactly what they’re doing, even when they're just soaking it all in.
1. Master the Art of Situational Awareness
Situational awareness is not paranoia; it's a state of relaxed observation. Security experts emphasize that it’s about consciously understanding your environment by first establishing a baseline and then learning to spot anomalies.
Establish a Baseline: Wherever you are—a train station, a market, a park—take a moment to observe the normal rhythm. How are people walking? What’s the general noise level? This is the "normal" for that environment.
Identify Anomalies: Once you know the baseline, things that deviate will immediately stand out: someone moving against the flow of foot traffic, wearing a heavy coat in hot weather, or loitering without purpose near an entrance. These anomalies are your early warning system.
Limit Distractions: "Tunnel vision" is a solo traveler’s enemy. Keep your headphones out and your phone in your pocket when walking through crowded areas. Keep your head up.
Practice Active Scanning: Make a habit of periodically looking around in a full 360-degree arc. This simple act keeps you aware of who is behind and beside you, preventing you from being caught by surprise.
Project Confident Body Language: Your posture speaks volumes. Walk with a purposeful stride, keep your head held high, and make brief, deliberate eye contact with those around you. This non-verbally communicates that you are aware and not an easy target.
2. Trust Your Intuition—It's Your Best Guide
Psychologists and security experts agree: that "gut feeling" is a real and powerful threat-detection tool. It's your subconscious mind recognizing thousands of tiny cues that something is wrong long before your conscious mind can articulate why. If a person, a street, or a situation feels "off," do not ignore it. Treat that feeling as a valid warning. Cross the street, leave the bar, get in a taxi—do whatever you need to do to honor that instinct without apology or hesitation.
3. Build Confidence with "Practice Runs" Before You Go
The confidence to navigate a foreign capital alone isn't born on the plane; it's built at home. Start with small, local "practice runs" to build your self-reliance.
Take yourself on a solo date to a new restaurant or movie in your own city.
Spend an afternoon exploring a neighborhood you don’t know well, navigating by yourself.
Take a solo day trip to a nearby town using only public transportation.
These small wins prove to yourself that you are capable and resourceful, which is the bedrock of the confidence you'll carry with you across the globe.

Navigating Like a Pro: Practical Solo Travel Safety Tips
Once you’ve calibrated your internal compass with a confident mindset, it’s time to translate that awareness into action. How you move, what you wear, and how you interact with your environment are the practical skills that complete your safety toolkit.
4. Walk with Purpose, Navigate with Discretion
Looking lost is like wearing a sign that says "vulnerable." Your goal is to navigate with quiet confidence.
Plan Before You Leave: Study your route before you walk out the door of your hotel or hostel. Having a clear mental map allows you to walk with purpose, which is a powerful deterrent.
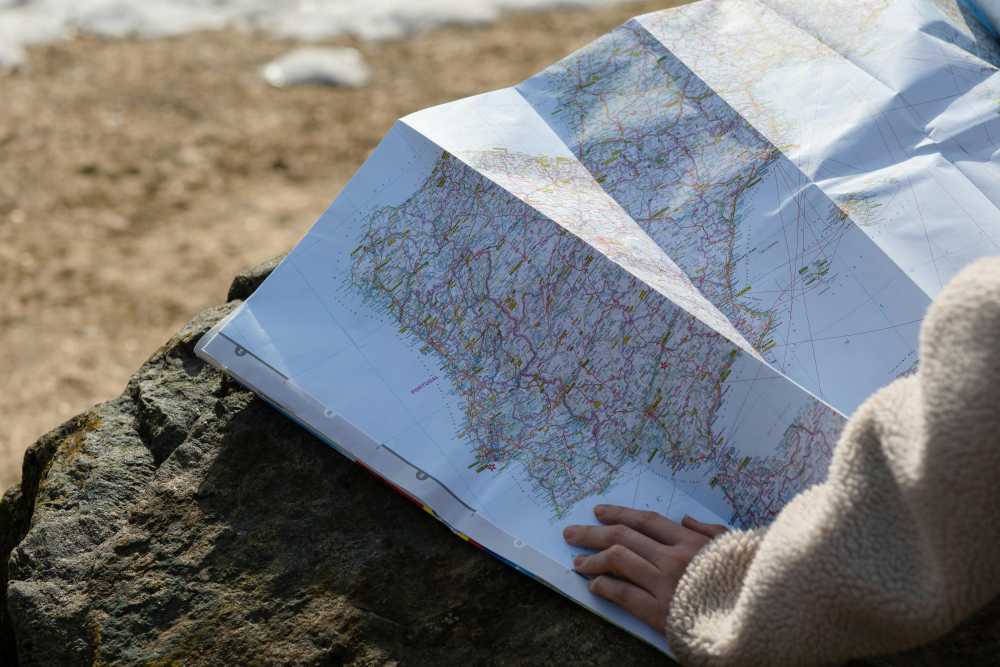
Be Discreet with Maps: Avoid standing on a busy corner staring at a large paper map or your phone. If you need to check your directions, step into a shop, cafe, or hotel lobby to reorient yourself away from prying eyes.
Manage Your Tourist Gear: An expensive camera hanging around your neck and a bulky backpack are clear signals that you're a tourist. Keep your camera in a non-descript bag until you’re ready to use it, and consider using a more subtle crossbody bag for daily exploring instead of a large daypack.
5. Dress to Blend, Not to Stand Out
Your clothing is your first and most obvious cultural handshake. Observe what locals are wearing and aim for a similar level of formality.
Avoid Loud Logos: Leave the clothing with your home country's flag, university, or sports team logos at home. Opt for neutral, less conspicuous attire.
Respect Local Norms: In more conservative regions, dressing modestly (covering shoulders and knees) is not just a sign of respect; it’s a key safety strategy that helps you blend in and avoid unwanted attention.
Pro-Tip: Pack a lightweight scarf. It takes up almost no space and is incredibly versatile. You can use it to cover your head when entering a religious site, cover your shoulders for modesty, or add a layer of warmth.
6. Learn a Few Key Local Phrases
You don't need to be fluent, but knowing a few words in the local language is a massive confidence booster and a sign of respect. Focus on the essentials:
Hello
Please
Thank you
Excuse me
Do you speak English?
Being able to handle simple transactions or politely ask for help shows you've made an effort and can make interactions much smoother.

Your Safe Haven: Accommodation and Socializing Strategies
As a solo traveler, where you stay and how you choose to meet people are critical safety decisions. Your accommodation is your sanctuary, and your social life should be a source of joy, not anxiety.
7. Perform a 60-Second Hotel Security Sweep
The moment you first enter your hotel room or rental, take a minute to perform this essential security check.
Prop the Door: Keep the door propped open with your luggage while you do a quick visual sweep to ensure the room is empty (check the closet, behind the shower curtain, under the bed).
Test the Locks: Close the door and test every lock from the inside—the deadbolt, the security chain, and the latch. They should all feel solid.
Find Your Exits & Count: Locate the fire escape map on the back of the door. Identify the two nearest exits and count the number of doors between your room and the closest one. Fire safety experts stress this is crucial for navigating in a dark or smoke-filled hallway.
Check for Privacy: Ensure windows and any connecting doors lock properly. Close the curtains fully.
8. Choose Social Accommodations for Safe Connections
Hostels are the original social network for travelers and remain one of the best and safest ways to meet people. They are designed for interaction, with common areas and organized events like walking tours or group dinners. Even if you book a private room in a hostel, you get the benefit of privacy combined with a built-in, vetted community right outside your door.
9. Join Group Tours and Classes to Meet Like-Minded People
A shared interest is a natural foundation for friendship. Signing up for group activities is a fantastic way to connect with other travelers and locals in a structured, safe environment.
Free Walking Tours: Most major cities have them. They're a great way to get oriented and chat with fellow travelers.
Specialty Day Tours: A food tour or historical excursion brings together people with a common passion.
Local Classes: A cooking workshop or language class provides an authentic cultural experience and an easy way to start conversations.
Pro-Tip: If you connect with people on a tour, suggest meeting up later in a public place. "A few of us are going to grab a bite at that market we saw, want to join?" is a low-pressure way to extend the connection.

Your Digital Safety Net
In the modern era, technology provides some of the most powerful solo travel safety tips. Your smartphone can be your lifeline, your map, and your guardian angel—if you set it up correctly.
10. Arm Yourself with Personal Safety Apps
Before you leave, download a personal safety app and set it up with your trusted contacts back home. These apps can share your location, send distress signals, and even connect you with emergency services.
bSafe: A comprehensive app that features a voice-activated SOS alarm, live location sharing ("Follow Me"), and even automatically records video and audio during an emergency.
Noonlight: Acts as a silent panic button. You press and hold a button on the screen when you feel unsafe. If you release it and don't enter your PIN within 10 seconds, it automatically sends your location to professional dispatchers who coordinate with local police.
Life360: Excellent for creating a private location-sharing map ("Circle") with family or friends. It includes an SOS alert that messages your entire circle and can even detect if you've been in a car crash.
11. Keep Your Trusted Contacts in the Loop
Beyond apps, make a habit of sharing your itinerary with someone back home before you leave. A quick text or email saying, "Just arrived at my hostel in Lisbon, all is good!" provides peace of mind for both you and them.

A Note for Women Traveling Solo
While all the tips in this guide are universal, women often face a unique set of challenges and cultural nuances on the road. For advice tailored specifically to navigating these issues—from understanding cultural dress codes to responding to harassment and leveraging female-focused networks—our specialized guide is an essential resource.
Deep Dive: The Solo Female Traveler's Playbook
Ready for a resource that speaks directly to the female experience? Download our free, in-depth Solo Female Travel Safety Guide for expert advice on cultural etiquette, empowerment, and staying safe and confident on your own terms.
Solo Travel Safety FAQ
A prepared mind is a safe mind. Here are answers to a few common questions that solo travelers ask.
1. What's the best way to handle street harassment?
Security experts advise a tiered response. First, try to ignore it. Often, a harasser's goal is a reaction. Avoid eye contact and keep walking with purpose as if you heard nothing. If they persist, get loud and firm. Use a strong voice and say a simple command like "Stop" or "Leave me alone." Finally, your priority is to get to a safe place. Duck into a busy shop, hotel lobby, or cafe. Don't lead them back to where you're staying.
2. Are hostels really safe for solo travelers?
Yes, reputable hostels are generally very safe. They are designed for travelers and often have excellent security measures like key-card access, 24/7 reception, and lockers for your valuables (bring your own padlock). They are one of the best ways to meet other travelers in a secure environment. Read recent reviews before booking, and consider choosing a female-only dorm if it makes you more comfortable.
3. How can I avoid looking like a tourist?
It's a combination of the tips above. Navigate with discretion (plan your route in advance), dress to blend in (avoid flashy logos and follow local clothing norms), and manage your tourist gear (keep the big camera in a bag). The biggest factor, however, is confident body language. Walk like you belong there, and most people will assume you do.

The World is Waiting
Solo travel is one of the most rewarding experiences a person can have. It will challenge you, change you, and fill your life with stories. The goal of these solo travel safety tips is not to make you fearful, but to make you fearless. By replacing anxiety with awareness and confidence with preparation, you give yourself the freedom to say "yes" to adventure and to fully embrace the incredible journey of discovering the world, and yourself, on your own.
Now that you're equipped with the strategies for a safe and confident solo journey, you can focus on the bigger picture. For a complete master guide to planning every aspect of your next adventure, from budgeting and packing to booking and logistics, our all-encompassing Travel Guide is the only resource you'll ever need.
Don't Miss Out! Subscribe for Exclusive Content
SubscribeComments 0
No comments yet
Be the first to share your experience!
Dont Miss Out! Subscribe for Exclusive Content

Ultimate USA Holidays Guide: Top Picks
FTC Affiliate Disclosure Essentials: Stay Compliant as a Travel Creator
Essential Affiliate Tools: From Tracking to Full Optimization
Booking.com Affiliate Program Review: Pros, Cons, and Earnings Potential
Decoding Affiliate Commission Rates: Benchmarks for Travel Creators
