SF Pride: 6 Route & Party Hacks
TrekGuider @trekguider
Picture it: a river of rainbow flags, glitter, and pure, unadulterated joy flowing down Market Street. The air thrums with music, cheers, and the collective heartbeat of hundreds of thousands celebrating love, identity, and resilience. This isn't just any parade; this is the legendary San Francisco Pride Parade. But for every person lost in the moment, there's another lost in the crowd, wrestling with a dead phone, a terrible view, and no idea where their friends have vanished. The sheer scale of SF Pride can be overwhelming, threatening to turn a day of pure celebration into a stressful logistical nightmare.
You’ve imagined yourself at the heart of the action, capturing the perfect photo, feeling that powerful sense of community. The reality, however, could be getting stuck behind a seven-foot-tall person, unable to see a single float, with your phone battery blinking at 3% and no cell service to find your crew. The difference between an unforgettable experience and a frustrating ordeal isn't luck—it's preparation. You deserve to experience every ounce of joy this iconic event has to offer, without the chaos and confusion that can so easily derail the day.
This is your definitive guide to conquering the celebration. We’re giving you six battle-tested route and party hacks to navigate the pride parade San Francisco like a seasoned pro. Forget the stress; this playbook ensures you soak in the history, master the logistics, and create memories that will last a lifetime, all while staying safe and comfortable.

Before You Go: Essential Prep for the Pride Parade San Francisco
Before you even think about your rainbow outfit, a little prep work will set the stage for a flawless day. The SF Pride Parade is more than a party; it’s a powerful legacy. Born from the first "gay-in" in 1970 and commemorating the key 1969 Stonewall Uprising, this event has evolved from a protest into a global platform for activism and celebration. In the 1980s, it became a crucial front line for raising AIDS awareness, and today it continues to champion the diverse spectrum of the LGBTQ+ community. Understanding this history enriches the entire experience, transforming it from a spectacle into a meaningful pilgrimage.
The 2026 SF Pride Parade is scheduled for Sunday, the last Sunday of Juneth, with the first contingents stepping off at 10:30 AM. To be ready, your day pack is your most critical asset. Here’s a non-negotiable checklist:
Hydration: Pack a reusable water bottle. There are water stations, but having your own is crucial for staying hydrated in the California sun.
Sun Protection: Sunscreen, a hat, and sunglasses are absolutely essential. There is very little shade along the parade route.
Layered Clothing: San Francisco weather is famously fickle. What starts as a chilly, foggy morning can quickly turn into a warm, sunny afternoon. A light jacket or hoodie you can tie around your waist is the smartest move you can make.
Comfortable Shoes: You will be on your feet for hours, walking and standing. Prioritize comfort over style; your feet will thank you by the end of the day.
Portable Power Bank: Your phone will be working overtime as your camera, map, and communication device. A fully charged power bank is an absolute must-have.
Snacks: While there are food vendors, lines can be long and prices high. Pack some energy bars or other easy-to-eat snacks to keep your energy levels up.
Finally, let's talk safety. SF Pride is known for its strong security measures, including advanced weapon detection technology at key entry points. While organizers work hard to create a secure environment, personal safety matters most in any large crowd. Familiarize yourself with basic protocols, like being aware of your surroundings and keeping your valuables secure. For a comprehensive look at staying safe while traveling, our Solo Female Travel Safety Guide offers invaluable tips that apply to everyone, regardless of gender, in any crowded event scenario.

Hack #1: Master the Market Street Route for the Pride Parade San Francisco
The parade route is deceptively simple: it runs straight down Market Street, starting at Beale Street and culminating at 8th Street, right by the Civic Center Plaza. The challenge isn't knowing the route; it's knowing where on the route to be and when to be there.
The Hack: Arrive by 9 AM and choose your zone strategically. The parade officially starts at 10:30 AM, but the sidewalks begin filling up much earlier. Arriving an hour and a half beforehand allows you to claim a prime spot without having to battle the late-coming masses.
Here’s a breakdown of the route's key zones to help you decide on your ideal viewing experience:
The Starting Zone (Beale to Montgomery Street): This area is often less crowded, especially right at the beginning. You'll see all the contingents when they are fresh, energized, and at their most organized. It’s a fantastic spot for photographers who want clean shots of the floats and performers before the crowds swell. The energy here is one of joyful anticipation.
The Commercial Core (Montgomery to Powell Street): This is the heart of the parade and, consequently, the most packed section. The tall buildings create a canyon-like effect, amplifying the sound and energy. It’s an intense and exhilarating place to be, but not for the faint of heart. If you want to be in the thick of it, this is your spot, but be prepared for a tight squeeze.
The Climax Zone (Powell to 8th Street): As the parade approaches its end at the Civic Center, the energy reaches a fever pitch. This is where the performers give their all, knowing they’re approaching the main celebration. The crowd here is dense but incredibly vibrant. Positioning yourself near 8th Street gives you a head start on moving into the Civic Center Plaza for the post-parade festivities.
Pro-Tip: For a less obstructed view and better photos, try to secure a spot on the south side of Market Street. In the late morning and early afternoon, the sun will be mostly at your back, beautifully illuminating the parade without forcing you to squint. This side is often just slightly less congested than the north side.
Hack #2: The Transportation Game Plan - Ditch the Car, Embrace Public Transit
Let’s be perfectly clear: driving to the SF Pride Parade is a recipe for disaster. Street closures are extensive, parking is virtually non-existent and astronomically expensive, and navigating the gridlock will drain your celebratory spirit before you even arrive.
The Hack: Make BART (Bay Area Rapid Transit) and Muni your best friends for the day. San Francisco’s public transit system is designed to handle massive events like this, and it is by far the most efficient way to get to and from the parade.
Here’s your transit strategy:
BART: The underground trains are the fastest way to get downtown from the East Bay, the Peninsula, or other parts of the city. The key is choosing the right station to exit.
Embarcadero Station: Puts you right near the start of the parade. A great option if you plan to arrive early and watch from the beginning.
Montgomery Station: A perfect middle-ground, placing you in the energetic core of the route. It’s one of the busiest stations, so be prepared for crowds.
Powell Station: Another central option, close to the cable car turnaround and a major shopping area. Like Montgomery, expect it to be very busy.
Civic Center Station: This is your stop if you want to head directly to the post-parade celebration or watch the parade's final leg.
Muni: The city’s network of buses and light rail (Muni Metro) is another excellent choice. The F-Market & Wharves historic streetcar will be rerouted, but the Muni Metro lines run directly under Market Street, using the same stations as BART. Many bus lines will have detours, so be sure to check the SFMTA website or your favorite transit app for real-time updates on the day of the event.
Rideshare services like Uber and Lyft will be operating, but expect heavy surge pricing and designated drop-off/pick-up zones that may be several blocks away from Market Street to avoid the worst of the congestion. Public transit remains the most reliable and cost-effective option.

Hack #3: The Civic Center Celebration - Your Post-Parade HQ
The last float crossing 8th Street doesn't mark the end of the day—it marks the beginning of the next phase. The parade flows directly into the massive Pride Celebration at Civic Center Plaza, a sprawling festival with multiple stages of live music, DJs, inspiring speakers, hundreds of community booths, art installations, and food vendors.
The Hack: Have a concrete plan for navigating the festival, especially for meeting your group. Cell service in and around Civic Center Plaza can become extremely unreliable due to the sheer number of people. A "we'll find each other" approach will likely fail.
Follow these steps for a seamless transition from parade to party:
Establish a Hyper-Specific Meeting Point: Before you separate, agree on a meeting spot that is impossible to mistake. "By the main stage" is too vague. Instead, choose something like, "At the base of the statue of James Lick, on the side facing the library," or "Directly in front of the main entrance to the Asian Art Museum." Set specific times to meet there (e.g., 2 PM and 4 PM).
Pace Yourself and Hydrate: The celebration runs for hours after the parade. It's a marathon, not a sprint. Continue to drink water, find moments of shade, and don't forget to eat.
Explore with Purpose: Don't just wander aimlessly. The community booths are the soul of the celebration. You can connect with dozens of non-profits, activist groups, and local organizations. It’s an incredible opportunity to learn, connect, and find your community.
Know Your Exits: Take a moment upon arrival to orient yourself and identify the main exit points from the plaza. Knowing how to get out quickly in case of an emergency or if you simply feel overwhelmed is a smart move.

Hack #4: Beyond Market Street - Unofficial Parties & Neighborhood Vibes
The official parade and Civic Center festival are the main events, but the spirit of Pride permeates the entire city, becoming a vibrant key element of the city’s festive calendar—a calendar we explore in our broader guide to San Francisco Holidays: Bay Area Buzz.
The Hack: Dip out of the main event for a few hours to experience a different, more intimate side of Pride.
The Castro District: As the historic heart of San Francisco's LGBTQ+ community, the Castro is ground zero for Pride weekend. The streets become a massive, vibrant block party. While it will be just as crowded as the parade, the atmosphere is different—more neighborhood-focused and less structured. Grab a drink at a historic bar, watch the impromptu dance parties, and soak in the history.
Dolores Park: On Pride Sunday, the park's famous "Gay Beach" area expands to cover nearly the entire lawn. It transforms into a massive, sun-drenched picnic party. The vibe is more relaxed and bohemian than the official festival. Pack a blanket, bring some snacks, and enjoy people-watching in one of the city's most beautiful settings.
SoMa (South of Market): This neighborhood is home to many of the city's most famous clubs and venues. Throughout Pride weekend, these spaces host a huge variety of official and unofficial after-parties, from daytime DJ sets to late-night dance events. Check event listings in advance, as many of the most popular parties sell out.

Hack #5: Tech & Safety - Your Digital Toolkit for a Seamless Day
In a modern festival environment, your smartphone is your most powerful tool—if you use it wisely.
The Hack: Prep your phone and apps to be your digital command center for the day.
The Power Bank is Non-Negotiable: We mentioned it before, but it bears repeating. A dead phone means no photos, no map, and no way to contact your friends. A fully charged portable power bank is the single most important piece of tech you can bring.
Master Your Communication Apps: Standard text messages can be delayed when cell networks are overloaded. Use a data-based messaging app like WhatsApp or Signal for your group chat. Their delivery is often more reliable in dense crowds. Use the "Share Live Location" feature for a set period (e.g., 15 minutes) if you get separated and need to find your way back to your group.
Download Offline Maps: Before you leave home, download an offline map of the downtown San Francisco area in your map app of choice. Even if you lose all cell service, your phone's GPS will still work, allowing you to see your location on the map and navigate.
Embrace Official Resources: Check the official SF Pride website in the days leading up to the event. If they release an official app, download it. It will likely have the most accurate schedules, maps, and emergency alerts.
Pro-Tip: Take a screenshot of your planned meeting spots, the parade route map, and the contact info for everyone in your group. Create a dedicated photo album for these screenshots so you can access them instantly, even if your apps won't load due to poor connectivity.

Hack #6: The Exit Strategy - How to Leave Without the Headache
Just as important as your arrival plan is your exit strategy. When hundreds of thousands of people try to leave the same area at the same time, the public transit stations and rideshare zones become incredibly congested.
The Hack: Avoid leaving during the peak rush right as the festival winds down.
You have two primary strategies for a stress-free departure:
The Early Exit: If you've had your fill of the crowds and the main celebration, start making your way out before the final headliners take the stage at Civic Center. By leaving an hour before the official end time, you can beat the massive wave of people heading for the BART and Muni stations.
The Patient Wait: This is often the better option. Instead of rushing out with everyone else, wait it out. Find a restaurant or cafe a few blocks away from Civic Center, grab a bite to eat, and relax for an hour or so. Let the crowds on the transit platforms thin out. By the time you're done, your journey home will be far more pleasant.
If you're using a rideshare service, walk at least four or five blocks away from Market Street and Civic Center before you even attempt to request a ride. This will get you out of the most congested, no-pickup zones and will likely save you from the highest surge pricing.
Your Guide to an Unforgettable Pride
You are now armed with the knowledge to do more than just attend the pride parade San Francisco —you are ready to experience it with confidence, joy, and a sense of empowered preparedness. From mastering the Market Street route and navigating the Civic Center celebration to knowing the smartest ways to get there and back, you have the tools to craft a perfect day. This isn't just about avoiding stress; it's about creating space for the powerful moments of connection, celebration, and solidarity that define SF Pride. Go forth, celebrate loudly, and have an incredible time.
For a complete blueprint to planning your ultimate trip to the Bay Area, including deep dives into its other iconic holidays and hidden gems, be sure to explore our comprehensive Travel Guide.
Meta Data Suggestions:
SEO Meta Title: SF Pride: 6 Essential Hacks for the Parade Route & Parties
URL Slug: sf-pride-parade-route-party-hacks
SEO Meta Description: Master the SF Pride Parade! Get 6 expert hacks on navigating the Market Street route, finding the best parties, and staying safe in the crowds.
Don't Miss Out! Subscribe for Exclusive Content
Subscribe


Comments 0
No comments yet
Be the first to share your experience!
Dont Miss Out! Subscribe for Exclusive Content

San Francisco Cherry Blossoms: A Local's Guide to the Blooms

Halloween SF: Haunts Without Horrors

SF Festivals: 7 Must-See Lineups

Christmas SF: Lights & Wharf Wonders

Chinese New Year SF: Parade Essentials

San Francisco Holidays: Bay Area Buzz
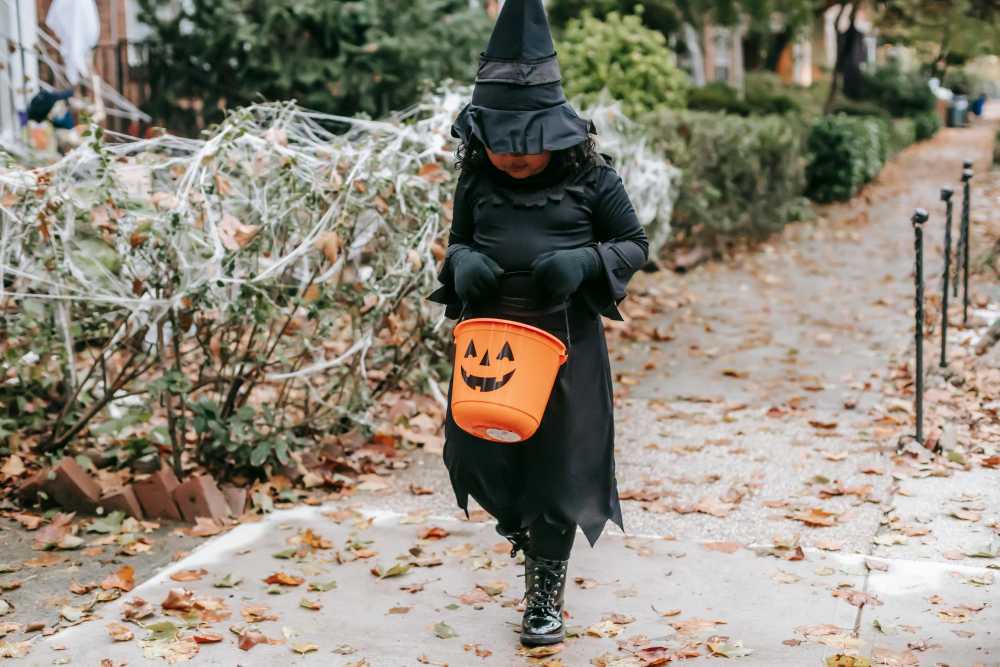
Halloween NYC: 5 Spooky Parades
TrekGuider @trekguider
The air in New York City crackles with a different kind of energy in October. The familiar city hum deepens into a mysterious, thrilling whisper as a tangible sense of mischief descends upon the five boroughs. You’re here to experience the legend of a New York Halloween, but the sheer volume of options is a paralyzing paradox of choice. You’ve seen the movies and heard the stories—the epic parties, the haunted houses, the city-wide transformation—but you’re determined to avoid a generic, tourist-trap experience.
The fear of missing out is palpable. A poorly planned evening during Halloween in New York City can quickly devolve from a dream into a logistical nightmare of impenetrable crowds, dead-end queues, and parties that are all hype and no soul. You risk wasting precious time and money on experiences that fail to deliver the spooky, spectacular magic you came for. With Halloween 2026 falling on a Friday, the energy will be at an absolute fever pitch, making a solid plan more critical than ever.
So, let's cut through the noise. Forget the endless blog posts and conflicting advice. This is your tactical guide to the city's electric Halloween spirit, distilled into five core experiences that deliver the spooky, spectacular magic you came for. From the world’s most famous public procession to exclusive rooftop spectacles, this blueprint will ensure your NYC Halloween is not just successful, but legendary. This is your ticket to the very heart of the city's spooky season, a key element celebration among the many incredible festivities we detail in our complete guide to New York Holidays: 10 Must-Do Events.

1. The Main Event: Conquering the Village Halloween Parade
When people talk about Halloween in NYC, they are almost always picturing the Village Halloween Parade. This isn’t just a parade; it’s a cultural institution, a vibrant, chaotic, and utterly breathtaking spectacle of creativity that has been marching through Greenwich Village for nearly half a century. It is, without a doubt, the single most important event on the city’s Halloween calendar.
What Makes It Legendary?
What began in 1974 as a humble neighborhood walk led by a local mask maker has exploded into a televised extravaganza drawing millions of spectators and over 50,000 costumed participants. Its defining feature is its radical inclusivity. This is a parade for the people, by the people. The procession is a mesmerizing river of giant puppets, hundreds of live bands, dancers, and, most importantly, thousands of New Yorkers in some of the most elaborate and imaginative costumes you will ever witness. The energy is infectious, a pure, uninhibited celebration of artistry and the macabre.
How to Participate vs. How to Watch
This is the most critical decision you’ll make. Unlike other parades, the Village Halloween Parade has one simple, golden rule: No Costume, No Marching.
To Participate: If you want to be in the parade, a costume is your non-negotiable ticket. This is your chance to unleash your creativity—the more unique and ambitious, the better. Marchers officially line up on 6th Avenue between Canal Street and Spring Street. The procession kicks off at 7:00 PM sharp on October 31st, but you’ll want to arrive at the lineup area by 6:00 PM to soak in the incredible pre-parade atmosphere and see the costumes up close.
To Watch: If you’d rather be a spectator, your mission is to find a prime viewing spot along the 6th Avenue route, which runs straight north from Spring Street to 16th Street. The sidewalks become incredibly packed, so arriving by 5:30 PM is essential, especially for spots between Bleecker Street and 14th Street, which are the most congested.
Pro-Level Viewing Strategy
For the best experience, avoid the intense crush of the central Village. Head further north on the route, closer to the 14th Street or 16th Street end. The crowds tend to thin out slightly here, giving you a bit more breathing room. Alternatively, find a spot on a cross-street corner, which can offer a slightly better vantage point as the parade turns or passes. Remember that public transportation is your best friend; the subway will be running, but expect crowded stations around the West 4th Street and 14th Street stops.
2. The High-Altitude Parade: Exclusive Rooftop Costume Parties
While the Village Halloween Parade owns the streets, a more exclusive and glamorous kind of procession takes place high above the city: the rooftop party. These events offer a different but equally thrilling version of Halloween in New York City, trading street-level chaos for breathtaking skyline views, curated music, and a parade of high-fashion costumes.
Why a Rooftop Party is a Must-Do
Imagine sipping a smoked old-fashioned while looking out over the glittering lights of the Manhattan skyline, surrounded by people in chic, clever, and sometimes terrifying attire. Rooftop parties provide a controlled, comfortable, and often luxurious environment to celebrate. You get the festive atmosphere without the overwhelming crowds of a public event. It’s the perfect way to see and be seen, offering some of the most photogenic Halloween moments imaginable.

The Unspoken Rules of the Rooftop Parade
This isn't a casual affair. To join this high-altitude parade, you need to plan ahead.
Book Early: Tickets for the best rooftop parties (think venues in the Meatpacking District or with views of the Empire State Building) sell out weeks, sometimes even a month, in advance. Do your research in early October and secure your spot.
Confirm the Dress Code: While it’s Halloween, many high-end venues still maintain a dress code. Your costume should be creative, but it also needs to be classy. Some venues may have specific themes, so read the event details carefully to ensure your costume fits the vibe.
Understand the Cost: These parties are a premium experience. Expect to pay a significant ticket price, which may or may not include drinks. Budget accordingly for a night of upscale revelry.
Pro-Tip: For travelers, especially those exploring the city's nightlife alone, safety matters most. Always let someone know your plans and be mindful of your surroundings. For a complete set of strategies on navigating new places with confidence, our Solo Female Travel Safety Guide offers invaluable, expert-approved advice that applies to any urban adventure.
3. The Parade of Screams: Navigating NYC's Premier Haunted Houses
Not all parades are about celebration; some are about pure, unadulterated fear. The experience of walking through a top-tier haunted house is its own kind of procession—a conga line of terror where every corner reveals a new nightmare. In New York City, this experience is elevated to a high-art horror show.
Inside Blood Manor: What to Expect
Blood Manor is consistently ranked as one of the city’s most intense and terrifying haunted attractions. This isn't a charming ghost tour; it's a full-frontal assault on your senses. You and your group will parade through a labyrinth of themed rooms, corridors, and chambers, each populated by professional actors dedicated to making you scream. The production value is immense, with Hollywood-level sets, gruesome special effects, and a palpable sense of dread that follows you from the moment you enter. You aren't just observing the horror; you are marching directly through its heart.

The Smart Way to Get Scared
The popularity of attractions like Blood Manor means that lines can be monstrous, eating up hours of your night. The single biggest rookie mistake is showing up without a plan. The only way to do this right is to buy timed tickets online in advance. This allows you to select a specific entry window, bypassing the hours-long general admission queue and saving you a massive headache. Arrive about 15-20 minutes before your scheduled time slot to check in.
Pro-Tip: When you’re inside, stick together. The actors are masters of their craft and are trained to identify and isolate the most scared members of a group. Hold onto your friends and move through as a unit. If you get genuinely overwhelmed, look for the designated "exit" signs within the attraction—there's no shame in tapping out if the parade of screams becomes too much.
4. The Family Parade: Charming Neighborhood Trick-or-Treating Processions
For those traveling with family or simply seeking a more wholesome and community-focused Halloween experience, the city’s neighborhood trick-or-treating events are a must. These are informal parades of the cutest kind, where streets are filled with tiny ghosts, goblins, superheroes, and fairies marching from brownstone to brownstone in search of candy.
Where to Find the Best Family-Friendly Atmosphere
While you can find trick-or-treating in many areas, some neighborhoods are famous for going all out. For the quintessential experience, head to the residential blocks of the Upper West Side and the Upper East Side, or cross the bridge to Brooklyn's Park Slope and Cobble Hill. Residents in these areas often decorate their stoops lavishly and are well-prepared for the annual procession of costumed children. Many local community groups and parks also organize specific Halloween "walks" or "rags" that provide a safe and festive environment for families.

Essential Safety for the Little Ghouls
Navigating the city with children on Halloween requires extra vigilance. The general safety rules are more important than ever:
Be Seen: Use reflective tape on costumes and candy bags to ensure children are visible to traffic after dusk. It's a simple step that makes a huge difference.
Stay Together: Adult supervision is non-negotiable. Keep a close eye on your children and establish clear rules about not running ahead.
Plan Your Route: Map out your trick-or-treating path in advance. Stick to well-lit streets and familiar neighborhoods.
Check the Candy: Before anyone eats their treats, inspect the candy at home to ensure everything is sealed and safe.
This charming, family-focused parade is a wonderful way to experience the heartwarming, community-driven side of a New York Halloween, proving that not all of the city’s festivities have to be frightening.
5. The DIY Parade: Crafting Your Own Spooky Pub Crawl
Sometimes the best parade is the one you create yourself. Organizing a themed pub crawl with your friends is a fantastic way to explore different neighborhoods and experience the city’s festive bar scene. This is your chance to be the grand marshal of your own personal procession, charting a course through the city’s most spirited watering holes.
Planning Your Route: From Greenwich Village to the East Village
The key to a successful pub crawl is a well-planned, walkable route. You don’t want to spend your night trekking long distances between stops. Choose a neighborhood with a high density of bars and a vibrant Halloween atmosphere.
Greenwich Village: After watching the main parade, you can easily transition into a crawl here. The area will be buzzing, and nearly every bar will have decorations and drink specials.
The East Village: Known for its edgier, more eclectic vibe, the East Village is packed with unique bars, from historic pubs to modern cocktail lounges. It’s a perfect landscape for a spooky-themed crawl.
Lower East Side: This area offers a fantastic mix of trendy bars and old-school dives, all of which embrace the Halloween spirit with gusto.

Staying Connected and Safe
When your group is on the move, staying safe and connected is crucial. Before you head out, make it a rule that everyone in your group shares their live location with each other using a mobile app. This simple step makes it incredibly easy to find anyone who gets separated from the group in a crowded bar or on a busy street. It’s a modern safety essential for any group outing in a big city.
This DIY approach allows you to fully customize your night, ensuring you experience the exact vibe you’re looking for, making your Halloween in New York City a truly personal and unforgettable adventure.
Your Ultimate Halloween Blueprint
You are now armed with the ultimate insider’s guide. You know how to march in the world’s greatest Halloween parade, how to ascend to an exclusive rooftop party, how to brave a parade of manufactured terror, and how to create your own festive procession through the city’s most iconic neighborhoods. The overwhelming chaos of Halloween in New York City has been distilled into a clear, actionable battle plan. You are no longer just a visitor; you are a participant, ready to dive into the very heart of the magic and madness.
This is just one of the many incredible experiences the city has to offer. To build out your entire trip with the same level of expert insight, from finding the best holiday markets to securing the perfect New Year's Eve spot, explore our comprehensive Travel Guide. It’s the only resource you’ll need to transform your travels from ordinary to extraordinary.
Don't Miss Out! Subscribe for Exclusive Content
SubscribeComments 0
No comments yet
Be the first to share your experience!
Dont Miss Out! Subscribe for Exclusive Content
San Francisco Cherry Blossoms: A Local's Guide to the Blooms
Halloween SF: Haunts Without Horrors
SF Festivals: 7 Must-See Lineups
Christmas SF: Lights & Wharf Wonders

SF Pride: 6 Route & Party Hacks
Chinese New Year SF: Parade Essentials
Mardi Gras: 6 Parade Survival Tips
TrekGuider @trekguider
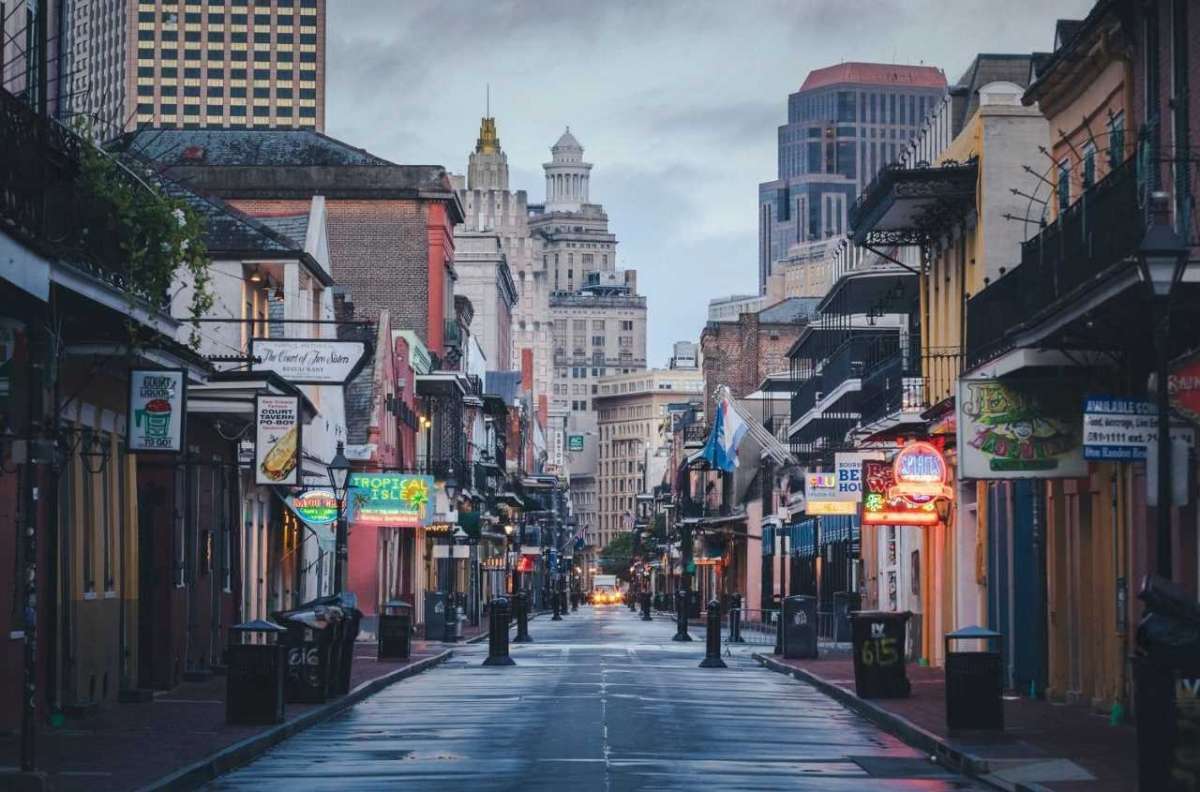
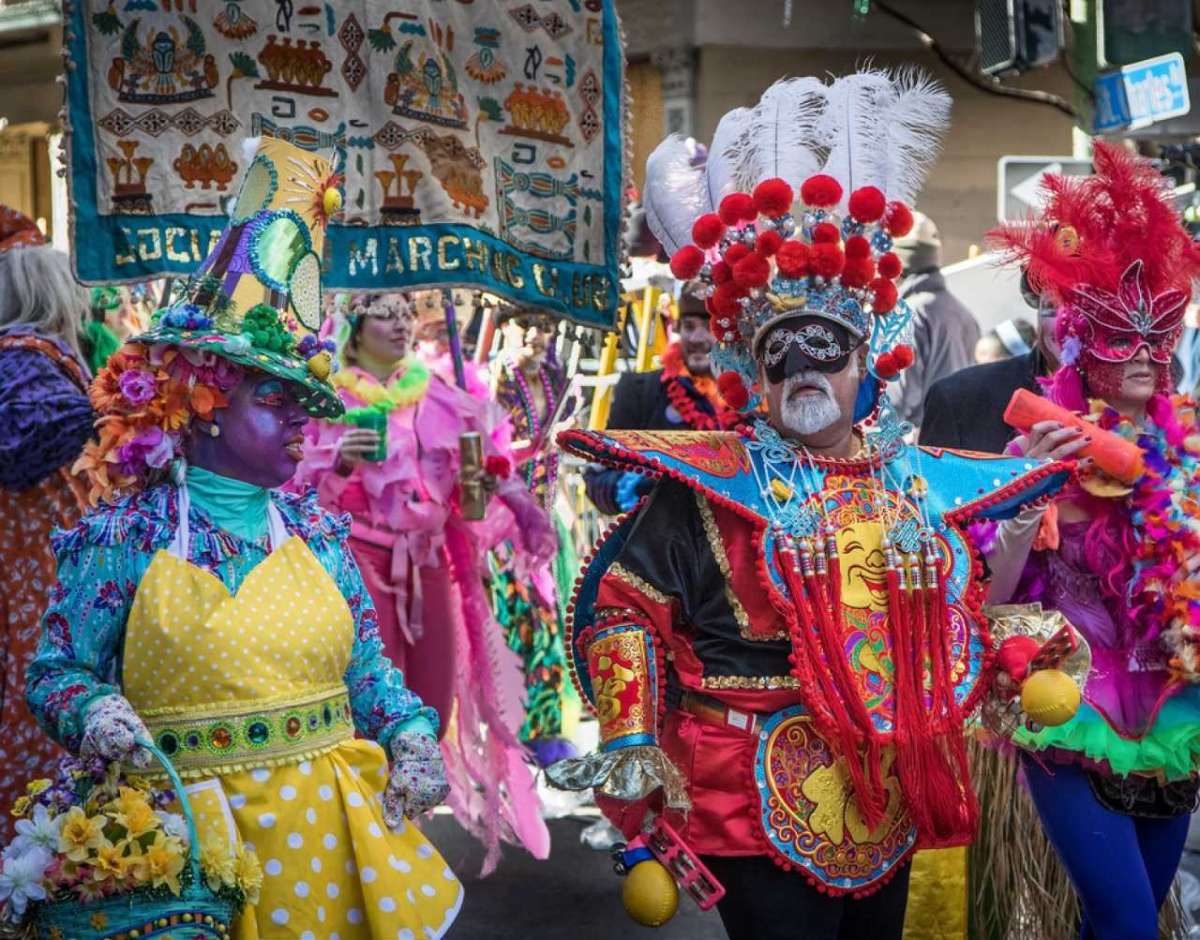
You’ve seen the photos—a blizzard of purple, green, and gold beads flying through the air. You’ve heard the stories of jazz music spilling onto streets packed with revelers. The dream of Mardi Gras in New Orleans is a powerful one, a siren call to the world’s greatest free party. It’s a bucket-list spectacle of dazzling floats, complex costumes, and pure, unadulterated joy. But let’s be honest: the reality behind that dream can be intimidating. The sheer scale of the crowds, the labyrinthine parade schedules, and the logistical hurdles can turn a fantasy trip into a frantic mess.
Without a battle plan, you risk becoming just another overwhelmed tourist. Imagine traveling all that way only to be stuck ten rows deep, craning your neck for a fleeting glimpse of a float. Picture the rising panic of losing your friends in a sea of humanity with zero cell service, or the bone-deep exhaustion that sets in after hours on your feet, unprepared. The magic of Carnival can fade fast when you’re fighting the chaos instead of embracing it.
This is where you stop worrying. Consider this your official playbook for not just surviving, but thriving at the parades. We’re going to arm you with the insider knowledge to navigate the festivities like a seasoned pro. These six essential survival tips will transform your Mardi Gras New Orleans experience from stressful to unforgettable. This is just one of the incredible cultural celebrations we explore in our complete guide to New Orleans Holidays: Cultural Feasts, but for now, let’s master the art of the parade.

Tip 1: Decode the Schedule & Choose Your Krewes Like a Local
First, let’s clear up a common misconception: Mardi Gras isn't just one day. It's an entire season, a cultural crescendo that officially begins on January 6th and leads to the city-wide blowout of "Fat Tuesday." The parades, organized by social clubs known as "krewes," are the lifeblood of the celebration, and they hit a fever pitch in the final two weeks. Knowing which parades to see—and when—is the first step to crafting your perfect experience.
The final weekend before Fat Tuesday is when the legendary "super-krewes" roll, drawing the biggest crowds and delivering the most spectacular shows. For 2026, these are the dates to circle in red on your calendar:
Saturday, the weekend before Mardi Gras: A marathon day featuring the massive Krewe of Endymion, an evening parade so spectacular it feels like a rolling blockbuster.
Sunday, the days leading up to Fat Tuesday: The Krewe of Bacchus, another titan of Carnival, hits the streets at 5:15 PM with its own celebrity monarch and jaw-dropping floats.
Monday, the Monday before Mardi Gras (Lundi Gras): Witness history with the Krewes of Proteus and Orpheus, two stunning nighttime parades that light up the city.
Tuesday, late February (dates shift each year—check nola.com for the exact schedule) (Fat Tuesday): The grand finale. The day kicks off with the Krewe of Zulu at 8:00 AM, famous for its coveted hand-painted coconut throws, followed by the regal Krewe of Rex at 10:30 AM, whose leader is the official "King of Carnival."
Not all krewes offer the same experience. Daytime parades often have a more relaxed, family-centric vibe. Nighttime parades are a different animal entirely—lit by historic gaslight torches called "flambeaux," they are dazzling, high-energy spectacles that draw a more party-oriented crowd. Do a little research on each krewe's theme and history to find the ones that match your style.
Pro-Tip: Before you even leave your hotel, download a real-time parade tracker app from a local New Orleans news station. These GPS-powered apps show you the exact location of the parade's lead float, giving you the intel to know if you have time for a bathroom break or a food run before the action reaches you.

Tip 2: Location is Everything: How to Claim Your Parade Turf
Your viewing spot will define your entire parade experience. The primary routes snake through the stately Uptown/St. Charles Avenue corridor and along the edge of the French Quarter. For a more traditional, family-friendly atmosphere, plant yourself along St. Charles Avenue. Under the canopy of ancient oak trees, you’ll find generations of families who have claimed the same spot for decades. For a more intense, high-octane experience, the sections of the route closer to Canal Street are where the crowds roar loudest.
Let’s be clear: the golden rule of securing a good spot is to arrive obscenely early. For a super-krewe on that final weekend, we’re not talking 30 minutes ahead—we’re talking hours. This is a marathon of patience. You’ll see locals set up their full camp—chairs, coolers, and ladders—long before the first siren wails. About those ladders: you’ll see many custom-built ladder seats designed to give kids a safe, elevated view. It’s a brilliant tradition, but if you use one, follow the local etiquette: place it at least six feet back from the curb to avoid obstructing the view of those in front and to stay clear of the massive floats.
Remember, the major parades do not go through the narrow, historic streets of the French Quarter. While Bourbon Street is its own unique Mardi Gras spectacle, it is not the place to watch the krewes roll.

Tip 3: Master the Art of the "Throw" for Your Mardi Gras New Orleans Haul
The quintessential Mardi Gras New Orleans experience is reaching up and catching a string of colorful beads. These items, tossed from the floats by krewe members, are called "throws," and they are the currency of Carnival. But it’s so much more than just beads. Each krewe has its own signature throws, from decorated plastic cups and doubloon coins to light-up toys and stuffed animals. Some are true collector's items, like the exquisitely hand-decorated shoes from the all-female Krewe of Muses or the legendary painted coconuts from Zulu.
Catching the best stuff is a skill. Here’s how to improve your odds:
Engage and Make Eye Contact: Float riders are scanning the crowd for energy. Wave your arms, smile, and yell the classic line: "Throw me something, mister!" They are more likely to toss something special to someone who is clearly having a great time.
Practice Good Karma: Be aware of the people around you, especially children. If a coveted throw lands near a kid, let them have it. The spirit of Mardi Gras is communal joy, not competition.
Bring a Designated Bag: You will catch far more than you can wear or carry. A simple tote bag or small backpack is essential for stashing your loot.
Above all, be safe. The number one rule is never, ever run into the street or chase a float for a throw. These floats are enormous, pulled by tractors with limited visibility. Wait for the throws to come to you and never reach under a float. No plastic necklace is worth the risk.
Tip 4: Pack Your Ultimate Parade Survival Kit
A day on the parade route is an urban endurance event. You’ll be on your feet for hours, exposed to the elements, and a long way from your home base. A well-packed day bag is non-negotiable. Being prepared for any great American adventure requires the right checklist, and just as you’d use our National Park Road Trip Checklist to prepare for the wild, this kit will ensure you conquer the urban jungle of Carnival.
These are the absolute essentials for your Mardi Gras survival kit:
Hydration: Pack more water than you think you need. Staying hydrated is critical.
Fuel: High-energy, easy-to-carry snacks like protein bars, trail mix, and pretzels will keep your energy levels up.
Sun & Rain Gear: New Orleans weather is fickle. Pack sunscreen, a hat, and sunglasses for daytime parades, but also throw in a cheap poncho. A sudden downpour can’t ruin your day if you’re prepared for it.
Layers: A sunny 70-degree afternoon can plummet to a chilly 50 degrees after sunset. Wear layers you can easily shed or add.
Portable Power Bank: Between taking photos, coordinating with friends, and running a parade tracker, your phone battery will vanish. A portable charger is a modern-day necessity.
Sanitation Supplies: Public restrooms are of the port-a-potty variety and see heavy use. A travel-sized pack of tissues and a bottle of hand sanitizer will feel like pure luxury.
A Throw Bag: A lightweight, foldable tote is perfect for your haul.
Tip 5: Navigate the Crowds & Stay Safe Like a Pro
The sheer scale of the crowds can be staggering—this is, after all, an event that generated an $891 million economic impact in 2024. Navigating this joyful mass of humanity requires a proactive approach to safety.
First, the buddy system is not optional. Stick with your group. Before you even head out, establish a non-obvious, hyper-specific meeting point. "Under the clock at the hotel" is good. "The corner of Canal and St. Charles" is a recipe for disaster. Cell service will be spotty at best, so you cannot rely on your phone to reunite.
When it comes to getting around, forget driving. Street closures and traffic make it a nightmare. Parking, if you can find it, will be exorbitant—reserve a spot in a garage well in advance if you must bring a car. Your best bets are walking, using public transit, or grabbing a rideshare, but be prepared for surge pricing and long waits after a parade.
Pro-Tip: To move through a thick crowd, don't try to bull your way through the middle. The pro move is to retreat one block off the parade route, walk parallel to it in the direction you want to go, and then cut back in. It’s a slightly longer walk that will save you immense time and frustration.
Tip 6: Embrace the Spirit of "Laissez les Bons Temps Rouler"
Finally, the most crucial tip of all: embrace the official motto of Mardi Gras, Laissez les bons temps rouler—Let the good times roll. This isn't just a slogan; it's the city's philosophy. This celebration is a profound expression of New Orleans' unique Creole heritage, a season defined by king cake feasts, brass bands, and an unbreakable sense of community. Don't get so wrapped up in logistics that you forget to be present.
Strike up a conversation with the family next to you. Compliment a stranger's incredible costume. Share your snacks. New Orleanians are famously hospitable and love sharing their traditions. Participate in the culture, don't just observe it. To truly understand the soul of this festival and others like it, our comprehensive Travel Guide offers a deep dive into the cultural fabric of America's most fascinating cities, providing the context that turns a great trip into a meaningful one.
Your Mission: Go Forth and Conquer Carnival
You are now officially prepared. Armed with these insider strategies, you can confidently tackle your Mardi Gras New Orleans adventure. You have the knowledge to decode the schedule, claim the best spots, pack for success, and stay safe in the joyous chaos. You are no longer just a tourist hoping for the best; you are an informed participant, ready to dive into the heart of one of the world's greatest cultural spectacles.
So book the ticket, pack your most festive attire, and get ready to let the good times roll. The magic of Mardi Gras is waiting for you.
Don't Miss Out! Subscribe for Exclusive Content
SubscribeComments 0
No comments yet
Be the first to share your experience!
Dont Miss Out! Subscribe for Exclusive Content
San Francisco Cherry Blossoms: A Local's Guide to the Blooms
Halloween SF: Haunts Without Horrors
SF Festivals: 7 Must-See Lineups
Christmas SF: Lights & Wharf Wonders
SF Pride: 6 Route & Party Hacks
Chinese New Year SF: Parade Essentials
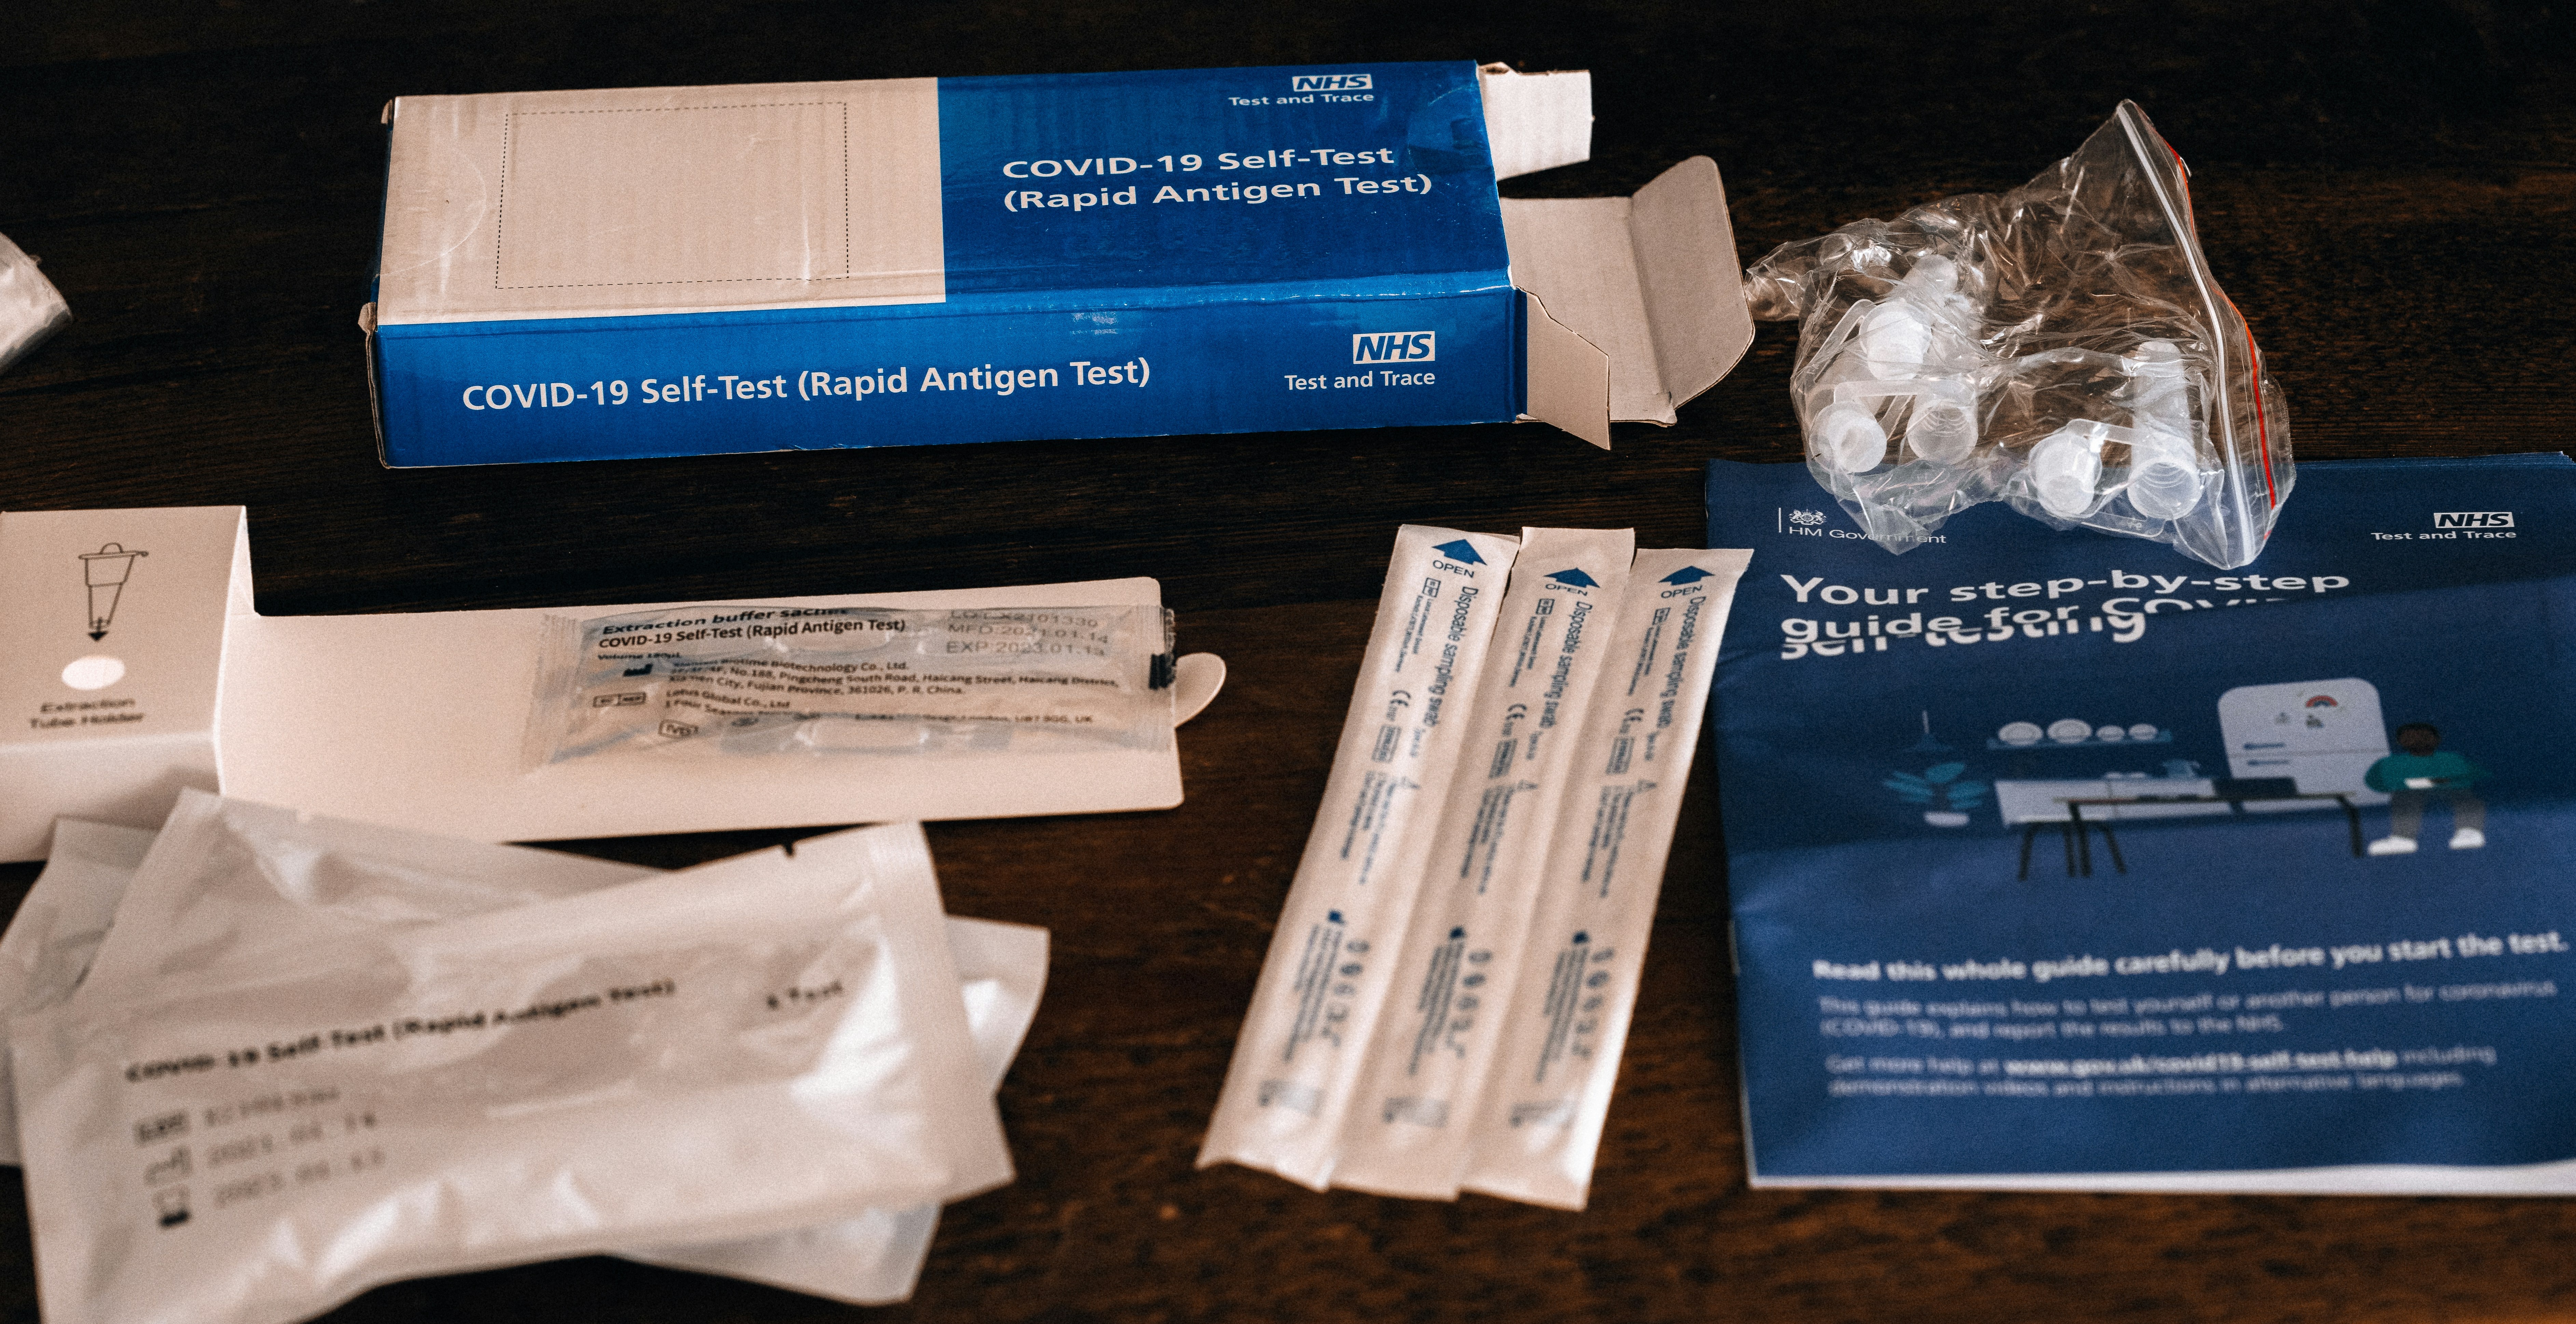
Food & Water Safety Abroad: How to Avoid Getting Sick
TrekGuider @trekguider
There’s a moment on every trip where the true magic happens: the first bite of a dish you can’t pronounce from a street cart buzzing with locals, the refreshing sip of a regional drink, the discovery of a flavor that will forever define a place in your memory. Food is culture, connection, and the fastest way to the heart of a destination. And that’s the traveler’s paradox, isn’t it? The very experiences that promise the most profound connection also carry a potent, gut-wrenching risk.
One bad meal or a single sip of contaminated water can derail your entire adventure, swapping days of discovery for days spent locked in a hotel room. This fear is agitated by horror stories from fellow travelers and the sheer unpredictability of an unfamiliar environment. It's a valid concern—traveler's diarrhea is unequivocally the most common travel-related illness, affecting up to 80% of international travelers depending on the destination. The fear of getting sick can make you timid, causing you to stick to bland, "safe" foods and miss out on the rich mix of flavors your destination has to offer. It can rob you of the very experiences you traveled so far to find.

But it doesn't have to be this way. This guide is your solution, a definitive and practical playbook for mastering food and water safety abroad. We’ve synthesized actionable advice from the world’s leading health organizations, including the Centers for Disease Control and Prevention (CDC) and the World Health Organization (WHO), to empower you to eat boldly and drink safely. This isn’t a list of things to fear; it’s a set of simple, memorable rules for prevention, identification, and, if necessary, management. This is a critical deep-dive into a core pillar of preparedness we cover in The Ultimate Guide to Travel Safety: A 2026 Playbook, designed to give you the confidence to dive fork-first into the heart of a culture.
The Golden Rule of Food and Water Safety: "Boil It, Cook It, Peel It, or Forget It"
If you remember only one thing from this guide, make it this simple, five-word mantra. Promoted by the CDC and other global health bodies, this single rule is a powerful and easy-to-use filter for nearly every culinary decision you'll make on the road. It’s the foundation of your entire food and water safety strategy.
Boil It: Your Safest Bet for Liquids
Pathogens like bacteria, viruses, and parasites are killed by heat. This makes boiling the most effective method for purifying liquids.
Examples: Drinking water that has been brought to a vigorous, rolling boil for at least one full minute. Hot beverages like tea or coffee that are served steaming hot are also generally safe. Any milk products you consume should be confirmed to be pasteurized or have been boiled.
Cook It: The Power of Heat
Thoroughly cooking food kills the harmful microorganisms that cause illness. The key is to ensure it is cooked all the way through and served hot.
Examples: Meat, poultry, or seafood that is well-cooked (not rare or raw) and served steaming hot to the touch. This is especially crucial for street food; dishes that are cooked fresh to order in front of you are a much safer bet than those that have been sitting out.
Peel It: Nature’s Own Packaging
For raw fruits and vegetables, the contamination is almost always on the outside surface. By peeling it yourself with clean hands, you remove the risk.
Examples: Fruits with a thick, peelable skin like bananas, oranges, mangoes, and avocados are your safest and best friends for a healthy snack. Similarly, vegetables you can peel, such as cucumbers, are also a great option.
Forget It: When in Doubt, Go Without
This is the most critical and sometimes most difficult part of the rule to follow. It requires discipline, but it’s your ultimate defense. If an item of food or drink doesn't meet one of the three criteria above, you must skip it.
Examples: Tap water and ice cubes made from tap water are the biggest culprits. Salads and raw leafy greens like lettuce are high-risk because they are difficult to clean thoroughly and may have been washed in contaminated water. You should also avoid fruits that cannot be peeled, such as grapes and berries, and any unpasteurized dairy products like milk or cheese. Finally, be very wary of any food served at room temperature, such as from a buffet.
Navigating the Streets: A Visual Guide to Spotting Unsafe Food
Street food is often the soul of a city's cuisine, but not all vendors are created equal. Your eyes are your best tool for vetting a stall. Before you order, take thirty seconds to perform a quick visual inspection. Look for these five clear signs of a safe or unsafe operation.
Poor General Cleanliness: This is the most obvious indicator. Red flags include dirty workstations with unwiped spills, visible food waste, rubbish on the ground, and the presence of pests like flies or wasps. The vendor themselves should also appear clean, with tidy clothes and hands.
Improper Food Temperatures: Food left in the "danger zone" (room temperature) is a breeding ground for bacteria. Avoid stalls where cooked food, especially meat, is sitting out in large trays. The safest option is always food that is cooked fresh to order, right in front of you. Hot food should be visibly steaming.
Obvious Cross-Contamination: Watch how the vendor handles ingredients. A major red flag is using the same cutting board, knife, or unwashed hands to handle raw meat and then touch ready-to-eat items like bread, salad, or cooked food.
Use of Contaminated Water: Look at the vendor’s water source. Rinsing dishes, utensils, or vegetables in a single bucket of murky, stagnant water is a sign of a high-risk operation. Likewise, avoid ice in your drinks unless you can confirm it was made from purified water (commercially bagged ice is usually a safe sign).
Lack of a Crowd (Especially Locals): A busy stall with a long line, particularly of local residents, is one of the best indicators of a trusted and safe food source. High customer turnover means the food is fresh and hasn't been sitting out for long. An empty stall is often empty for a reason.
Pro-Tip: Make "follow the locals" your street food mantra. A long line of residents is a walking, talking five-star review of a vendor's quality and safety. It's the most reliable seal of approval you can find.
Securing Your Water Supply: A Deep Dive into Hydration and Purification
Staying hydrated is non-negotiable for your health and energy while traveling, but assuming tap water is safe is one of the most common and dangerous mistakes a traveler can make. Here’s how to ensure every sip you take is safe.
Identifying Safe and Unsafe Drinking Water Sources
The CDC and WHO have clear guidelines. Unless you are in a country with a known, highly-developed sanitation system, you should assume all tap water is unsafe.
Safest Sources: Commercially bottled water in a factory-sealed, tamper-proof container is your most reliable option. Carbonated water is even safer, as a broken seal is immediately obvious. The second safest source is water that you have personally brought to a rolling boil for at least one minute.
Unsafe Sources to Avoid: Tap water, well water, ice made from tap water, fountain drinks mixed with tap water, and even water from clear mountain streams (which can contain germs) should all be avoided unless they have been purified.
Your Purification Playbook: The Top 3 Methods
When bottled or boiled water isn't available, you need a backup plan. Here are the top three recommended purification methods.
Boiling (The Gold Standard): This is consistently ranked by the CDC and WHO as the single most effective method. It kills all known disease-causing microorganisms, including viruses, bacteria, and parasites. Simply bring clear water to a rolling boil for 1 minute (or 3 minutes at elevations above 6,500 feet / 2,000 meters).
Filtration: A high-quality portable water filter is highly effective at removing bacteria and protozoan parasites like Giardia and Cryptosporidium. Look for a filter with an absolute pore size of 1 micron or smaller. The main limitation is that most portable filters do not remove viruses, so in high-risk areas, the CDC recommends following filtration with chemical disinfection.
Chemical Disinfection: Chlorine, iodine, or chlorine dioxide tablets/drops are a lightweight and easy way to kill viruses and bacteria. However, they are not consistently effective against the parasite Cryptosporidium and require a contact time of at least 30 minutes.
For in-depth planning on what gear to pack for every type of trip, from water filters to first-aid supplies, our all-encompassing Travel Guide is the only resource you'll ever need.
Damage Control: How to Manage Traveler's Diarrhea
But let’s be realistic: even the most diligent traveler can have a bad day. When that happens, knowing exactly what to do—and what not to do—can be the difference between a 24-hour nuisance and a trip-ruining ordeal. This is the damage control phase of your food and water safety plan.
The First and Most Critical Step: Oral Rehydration
According to travel medicine doctors, dehydration is the single most likely and dangerous complication of traveler's diarrhea. Replacing lost fluids and electrolytes is your absolute first priority.
Method: The best way to rehydrate is with a dedicated Oral Rehydration Solution (ORS), which comes in packets of salts and sugars that you mix with boiled or bottled water. In a pinch, sports drinks or clear soups can also be used.
Symptomatic Treatment for Mild to Moderate Cases
If the diarrhea is tolerable and not accompanied by a high fever or blood, over-the-counter medications can provide relief and help you get through a travel day.
Medications: An antimotility agent like Loperamide (the active ingredient in Imodium, a top pharmacist-recommended brand) can reduce the frequency of bowel movements. Bismuth Subsalicylate (found in Pepto-Bismol, another pharmacist favorite) can also help decrease the frequency and shorten the duration of the illness.
When to Use Standby Antibiotics (For Severe Cases)
If diarrhea is distressing, incapacitating, or contains blood or mucus, a prescribed antibiotic may be necessary.
Method: Before you travel, speak with your doctor or a travel medicine clinic. For travelers heading to high-risk destinations, they may provide a prescription for a standby antibiotic, such as Azithromycin, to carry with you. A single dose is often highly effective at treating severe cases.
Pro-Tip: Within your main travel first-aid kit, create a dedicated "Digestive Distress" module. Keep it in a separate, clearly-labeled zip-top bag containing a few packets of Oral Rehydration Salts, a strip of Loperamide, and a few antacids. This way, when you need it, you won't have to rummage through your entire kit.

Ready to Pack Like a Pro?
A smart food and water safety strategy is just one piece of your pre-trip preparation. To ensure you don't overlook a single essential item—from documents and finances to clothing and medical supplies—a master checklist is your most powerful tool. Our comprehensive, free checklist has you covered for every stage of your journey.
Download Your Free International Travel Checklist Now!
Food and Water Safety FAQs
A prepared mind is a safe mind. Here are expert answers to common questions that take your preparedness to the next level.
1. Besides traveler's diarrhea, what are the most common travel illnesses?
While traveler's diarrhea is number one, the CDC reports that other common issues include acute respiratory infections (like influenza or COVID-19, often acquired in transit), vector-borne fevers like Dengue and Malaria in tropical regions, and other food-borne illnesses like Hepatitis A and Typhoid Fever. Skin conditions from insect bites are also extremely common.
2. Is it safe to eat at a restaurant if I'm worried about street food?
Generally, restaurants can be safer, but the same principles apply. A busy restaurant full of locals is a great sign. Be cautious with the same high-risk items: salads, unpeeled fruits, and tap water or ice. If you want to find trusted, local-approved gems, explore the TrekGuider platform, where travel creators often share their own curated guides to safe and authentic eats.
3. Should I carry a standby antibiotic in my first-aid kit?
This is a question for your doctor or a travel medicine clinic. For travelers heading to high-risk destinations where severe traveler's diarrhea is common, many doctors will provide a prescription for a standby antibiotic like Azithromycin. It’s not for mild cases but can significantly shorten the duration of a severe bout of illness. Discuss your itinerary with your doctor to see if this is right for you.
Eat Boldly, Travel Well
The world of food is a world of incredible diversity and connection, and it deserves to be explored with an open mind and a curious palate. The goal of mastering food and water safety is not to build a wall of fear that separates you from authentic experiences. It is about building a foundation of knowledge that gives you the freedom to be adventurous. By internalizing the golden rule of "Boil it, cook it, peel it, or forget it," learning to trust your own visual assessment of a food stall, and knowing exactly what to do if you get sick, you replace anxiety with empowerment. You are now equipped with the skills to navigate the world's most exciting cuisines with confidence, ensuring your focus remains on the flavor, connection, and joy that every journey promises. Go explore, eat boldly, and travel well.

Meta Data Suggestions:
SEO Meta Title (Under 60 characters): Food & Water Safety Abroad: How to Avoid Getting Sick
URL Slug: food-water-safety-abroad
SEO Meta Description (Under 155 characters): Avoid traveler's diarrhea with our expert guide to food and water safety abroad. Learn the golden rules for eating street food, purifying water, and staying healthy.
Don't Miss Out! Subscribe for Exclusive Content
SubscribeComments 0
No comments yet
Be the first to share your experience!
Dont Miss Out! Subscribe for Exclusive Content

Chicago Beer Fests: Top 6 Tastings

Ultimate USA Holidays Guide: Top Picks

FTC Affiliate Disclosure Essentials: Stay Compliant as a Travel Creator

Essential Affiliate Tools: From Tracking to Full Optimization

Booking.com Affiliate Program Review: Pros, Cons, and Earnings Potential
