SF Festivals: 7 Must-See Lineups
TrekGuider @trekguider
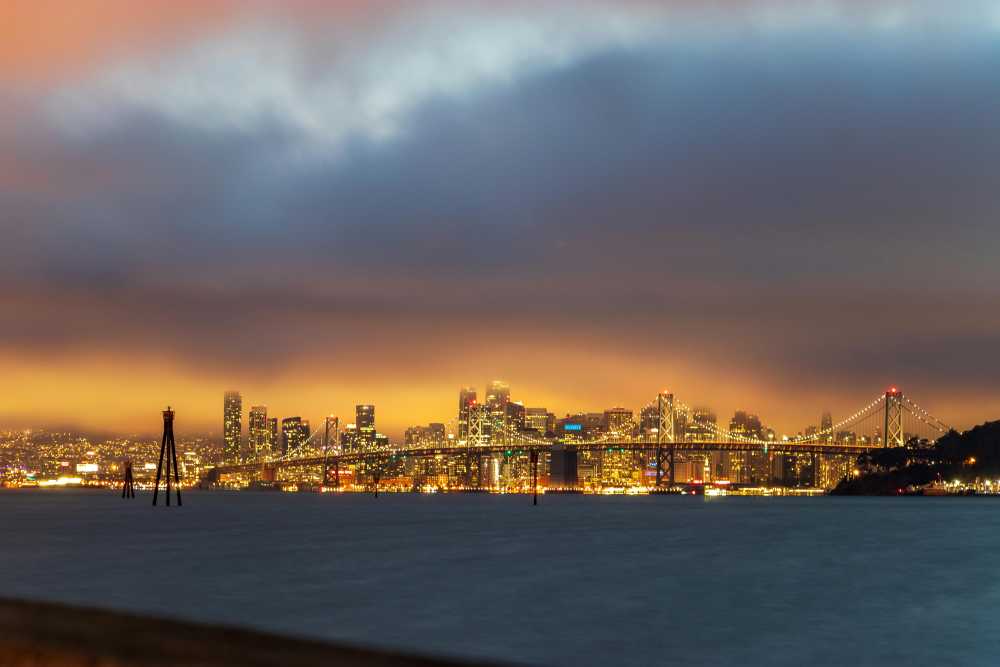
San Francisco’s cultural calendar is a dizzying, year-round whirlwind of activity, making it almost impossible to know where to begin. You want to dive into the authentic heart of the city, but you’re faced with an overwhelming number of options. How do you choose the events that are truly iconic, the ones that define the Bay Area’s unique spirit, without wasting your precious time on something that doesn’t live up to the hype?
The fear of missing out is real. You could easily find yourself stuck in a generic tourist trap, completely missing the vibrant, community-driven celebrations happening just a few blocks away. You risk leaving the city without ever experiencing the dazzling traditions of the Chinese New Year Parade or the electrifying energy of the Pride Parade on Market Street. Don’t let your trip be defined by indecision; let it be defined by unforgettable moments.
This guide is your definitive solution. We’ve hand-picked the 7 must-see lineups that represent the very best festivals in San Francisco. Think of this as your insider’s ticket to the city's biggest moments, but it's just one piece of the puzzle. For a complete, year-round look at the city's seasonal rhythm, be sure to explore our comprehensive guide to San Francisco Holidays: Bay Area Buzz.

1. Chinese New Year Parade: One of the Oldest Festivals in San Francisco
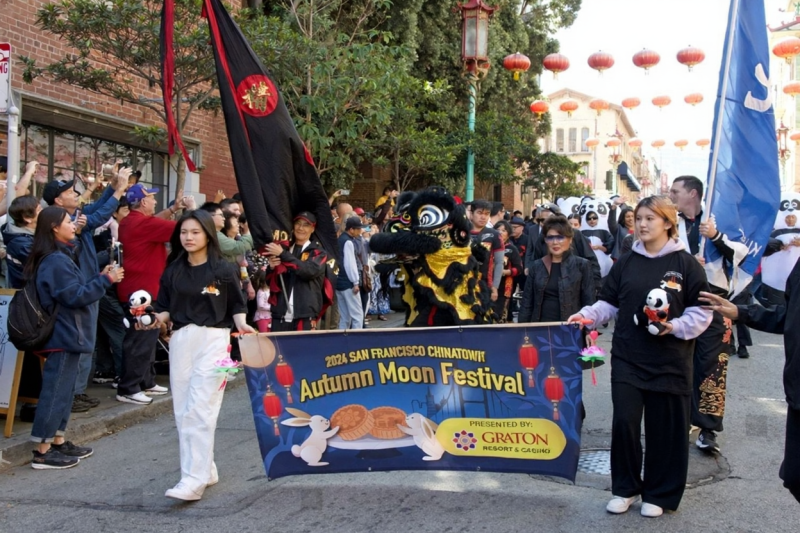
Forget what you think you know about parades. San Francisco’s Chinese New Year Parade isn’t just an event; it’s a full-blown sensory spectacle and a powerful link to the city’s soul. As one of the most cherished festivals in San Francisco, this celebration transforms the streets into a living river of light, sound, and ancient tradition.
The Cultural Significance: A Tradition Since 1851
San Francisco is home to the oldest and largest Chinese New Year celebration outside of Asia, a tradition that has been a key part of the city's cultural identity since 1851. The festival marks the beginning of the new year on the traditional lunisolar Chinese calendar and is a time for families to honor ancestors, share symbolic foods like noodles for longevity, and welcome a year of good fortune. While the celebration includes a vibrant Flower Fair and a bustling Street Fair, the main event is the spectacular night parade.
Key Dates and Times for 2026
Mark your calendars for the Year of the Snake. The main parade is scheduled for Saturday, around mid-February (dates shift each year), starting at 5:15 PM. As one of the few night-illuminated parades in North America, it offers a uniquely magical experience. Expect to see:
Elaborate Floats: Beautifully designed floats glowing under the city lights.
Traditional Lion Dancers: Energetic performers in stunning costumes, believed to bring good luck.
The Golden Dragon: The parade’s grand finale features the famous 268-foot Golden Dragon, a breathtaking sight that requires a team of over 100 people to carry through the streets.
Modern Drone Light Show: A stunning high-tech addition that blends ancient tradition with Bay Area innovation.
Pro-Tips for the Best Viewing Experience
To make the most of this incredible event, a little planning goes a long way.
Arrive Early: The parade route gets crowded hours before the start time. Secure a spot along the route by mid-afternoon for the best views.
Use Public Transit: Street closures make driving and parking nearly impossible. Use BART or Muni to get downtown and walk to the parade route.
Dress in Layers: San Francisco weather is famously unpredictable. Even if the day is warm, the evening will get chilly, so bring a jacket, hat, and gloves.
Consider Bleacher Seats: If you want to guarantee a comfortable spot with a clear view, you can purchase tickets for the bleacher seating located along the route.
Pro-Tip: Don't leave before the grand finale! The parade now incorporates a modern drone light show, a stunning high-tech contrast to the traditional 268-foot Golden Dragon that you won't want to miss.

2. SF Pride Parade: One of the Most Iconic Festivals in San Francisco
The San Francisco Pride Parade is more than just a festival; it’s a powerful, vibrant, and deeply meaningful declaration of love, equality, and resilience. Every June, hundreds of thousands of people from all over the world gather to celebrate the LGBTQ+ community in one of the largest and most famous Pride events globally.
From Protest to Celebration: The History of SF Pride
The roots of SF Pride run deep. The event commemorates the 1969 Stonewall Uprising in New York City, a key moment that ignited the modern fight for LGBTQ+ rights. San Francisco’s first "gay-in" was held in 1970, evolving from a political protest into the massive celebration of identity and activism it is today. Through the 1980s, the parade became a crucial platform for raising AIDS awareness, and it continues to be a powerful stage for advocating for the rights and visibility of the entire LGBTQ+ spectrum.
2026 Parade Route and Schedule
The 2026 SF Pride Parade is scheduled for Sunday, the last Sunday of June, starting at 10:30 AM. The route runs along Market Street, beginning at Beale Street and concluding at 8th Street, leading into the heart of the Civic Center Plaza celebration. The parade is a joyous spectacle featuring colorful floats, dynamic marching contingents from community organizations and corporate allies, and an infectious energy of pure celebration.
Navigating the Crowds and Staying Safe
With massive crowds, it’s essential to plan ahead for a smooth and safe experience.
Find a Good Spot: The sidewalks along Market Street fill up quickly. For a slightly less crowded experience, try finding a spot closer to the beginning of the route near the Embarcadero.
Stay Hydrated and Protected: The June sun can be strong. Bring water, sunscreen, and a hat.
Use Technology: The event is known for its strong security measures, which have included advanced weapon detection technology, allowing attendees to focus on the celebration. Look for official festival apps that provide maps, schedules, and emergency alerts.
Pro-Tip: Major events like SF Pride are leveraging technology for safety. Look for official festival apps or partnerships with services like SaferWatch for real-time, anonymous safety reporting and emergency alerts, ensuring you can focus on the celebration.
If you're inspired to document the incredible energy of events like Pride, our The Travel Creator's Toolkit provides essential tips and resources for capturing stunning photos and videos on the go.

3. St. Patrick's Day Parade: A Sea of Green on Market Street
San Francisco’s St. Patrick's Day Parade is a cherished tradition that brings a touch of Irish luck and culture to the West Coast. Held annually since 1852, it’s one of the city’s longest-running events, drawing families, locals, and visitors alike for a day of festive fun.
Honoring Irish Heritage in the Bay Area
While the holiday observes the anniversary of the death of Saint Patrick, the parade in San Francisco has evolved into a broad celebration of Irish and Irish-American culture. It’s a day to honor the significant contributions of the Irish community to the city’s history and development. The event is a vibrant display of heritage, filled with the sounds of bagpipes, the sight of traditional Irish dancers, and a sea of green attire.
Parade Details and What to Expect
The parade typically takes place on the Saturday closest to St. Patrick's Day (March 17). It proceeds down Market Street, culminating in a festival at Civic Center Plaza. You can expect to see a lively procession featuring:
Local Irish community groups and families.
Traditional Irish musicians and dance troupes.
Colorful floats and marching bands.
Local dignitaries and community leaders.
The post-parade festival continues the celebration with live music, Irish food and drink, and cultural exhibits, making it a full day of family-friendly entertainment.

4. Cinco de Mayo Festival: A Vibrant Celebration of Mexican-American Culture
While often mistaken for Mexican Independence Day, Cinco de Mayo commemorates the Mexican Army's unlikely victory over the French at the Battle of Puebla in 1862. In San Francisco, this day has a particularly deep historical significance, with parades held since 1863, evolving into a proud celebration of Mexican-American heritage and resistance.
The True Meaning of Cinco de Mayo
For Mexican-Americans in the 19th century, the victory at Puebla was a powerful symbol of resistance against European imperialism. Over the decades, particularly during the Chicano Movement, the holiday was embraced as a day to celebrate cultural pride. Today, the San Francisco festival continues this legacy, often featuring speakers and music that connect the historical victory to contemporary issues of democracy and social justice.
Where to Find the Festivities
The celebration is typically centered in the Mission District, the historic heart of the city’s Latino community. The festival transforms the neighborhood with a low-rider car show, live music stages featuring everything from mariachi to salsa, and booths offering delicious, authentic Mexican cuisine. It’s a family-friendly event that offers a rich, immersive cultural experience far beyond the commercialized versions of the holiday.
5. Fourth of July Fireworks: A Patriotic Explosion Over the Bay
There are few better places to celebrate American Independence Day than along the stunning San Francisco waterfront. The city’s annual Fourth of July celebration is a massive event, drawing huge crowds for a day of festivities capped off by a spectacular fireworks display over the bay.
The Best Viewing Spots for the Fireworks Display
The main event is the fireworks show, which is typically launched from barges located near Pier 39 and Aquatic Park. To get a prime viewing spot, you have several options:
Fisherman's Wharf & Pier 39: This is the epicenter of the celebration, offering close-up views but also the largest crowds. Arrive early in the afternoon to claim your space.
Aquatic Park and Ghirardelli Square: These spots offer fantastic, direct views of the fireworks.
Angel Island or Alcatraz: For a truly unique perspective, consider a ticketed boat tour that takes you out onto the bay for an unobstructed view away from the waterfront crowds.
Coit Tower: The hills around Coit Tower provide an elevated vantage point, though it’s a popular spot that also fills up quickly.
Planning Your Day: What to Bring and When to Arrive
This is one of the busiest days of the year on the waterfront. Plan to arrive by early afternoon at the latest. Bring blankets or low-backed chairs, snacks, and plenty of water. Most importantly, pack warm layers. As soon as the sun goes down, the famous San Francisco fog can roll in, bringing a significant temperature drop. Public transportation is strongly recommended, as parking will be extremely limited and expensive.
6. Halloween in the Castro: A Uniquely San Francisco Haunt
While many cities celebrate Halloween, San Francisco puts its own unique and fabulous spin on the holiday, with the Castro District historically serving as the vibrant, beating heart of the festivities. Although the massive official street party of years past has been discontinued, the spirit of Halloween is alive and well.
The Castro's Legendary Halloween Spirit
The Castro’s legacy as a Halloween destination is legendary. The neighborhood comes alive with incredible, elaborate costumes, and the atmosphere is one of pure, unadulterated fun. While there is no longer a formal, city-sponsored event, the evening still draws crowds who come to see and be seen in their Halloween best. The celebration now takes the form of numerous pub crawls, costume contests, and private parties hosted by the area's many bars and clubs.
Safety and Transportation Tips for a Spooky Night
If you plan to celebrate in the Castro, safety and logistics are key.
Use Rideshares or Public Transit: Parking is virtually nonexistent, and you’ll want a safe ride home. The Castro Muni station is centrally located.
Stay with Your Group: The streets can get crowded. Use a buddy system and keep your phone charged.
Be Respectful: Remember that the Castro is a residential neighborhood. Be respectful of residents and local businesses while you celebrate.
For those seeking a more traditional haunted experience, the famous Winchester Mystery House in nearby San Jose offers special candlelit tours during the Halloween season.

7. Christmas in Union Square: The Heart of SF's Holiday Magic
When the holiday season arrives, Union Square transforms into a magical winter wonderland, serving as the festive centerpiece for the entire city. If you’re looking for classic Christmas cheer, this is the place to be.
The Iconic Tree and Ice Rink
The two main attractions in Union Square are the massive, beautifully decorated Christmas tree and the seasonal outdoor ice rink. Skating under the twinkling lights with the iconic square as your backdrop is a quintessential San Francisco holiday experience. The entire area is decked out in festive lights and decorations, creating a joyful and picturesque atmosphere that’s perfect for families, couples, and anyone looking to get into the holiday spirit.
Finding the Best Views and Photo Ops
For a stunning bird’s-eye view of the tree, the ice rink, and all the festive chaos, head to the upper floors of the Macy's department store that borders the square. The windows of the Cheesecake Factory at the top offer one of the most sought-after views in the city during the holidays. The square itself offers countless photo opportunities, from the giant ornaments to the festive storefronts of the surrounding luxury retailers. This is the perfect place to capture that classic holiday memory.
Your Guide to the Best of the Bay
You are now equipped with the insider knowledge to experience the very best festivals in San Francisco. From the ancient traditions of the Lunar New Year to the modern celebrations of Pride and the festive magic of Christmas in Union Square, you have a clear path to immersing yourself in the events that truly define this incredible city. You no longer have to guess which events are worthwhile; you can now plan your trip with confidence, ready to create memories that will last a lifetime.
To take your planning to the next level and build a complete itinerary around these incredible events, explore our comprehensive Travel Guide. It’s packed with expert advice on everything from lodging and dining to transportation, ensuring your entire San Francisco adventure is as seamless as it is unforgettable.
Don't Miss Out! Subscribe for Exclusive Content
Subscribe


Comments 0
No comments yet
Be the first to share your experience!
Dont Miss Out! Subscribe for Exclusive Content

San Francisco Cherry Blossoms: A Local's Guide to the Blooms

Halloween SF: Haunts Without Horrors

Christmas SF: Lights & Wharf Wonders

SF Pride: 6 Route & Party Hacks

Chinese New Year SF: Parade Essentials

San Francisco Holidays: Bay Area Buzz
7 Best Travel Photography Blogs for Tips
TrekGuider @trekguider
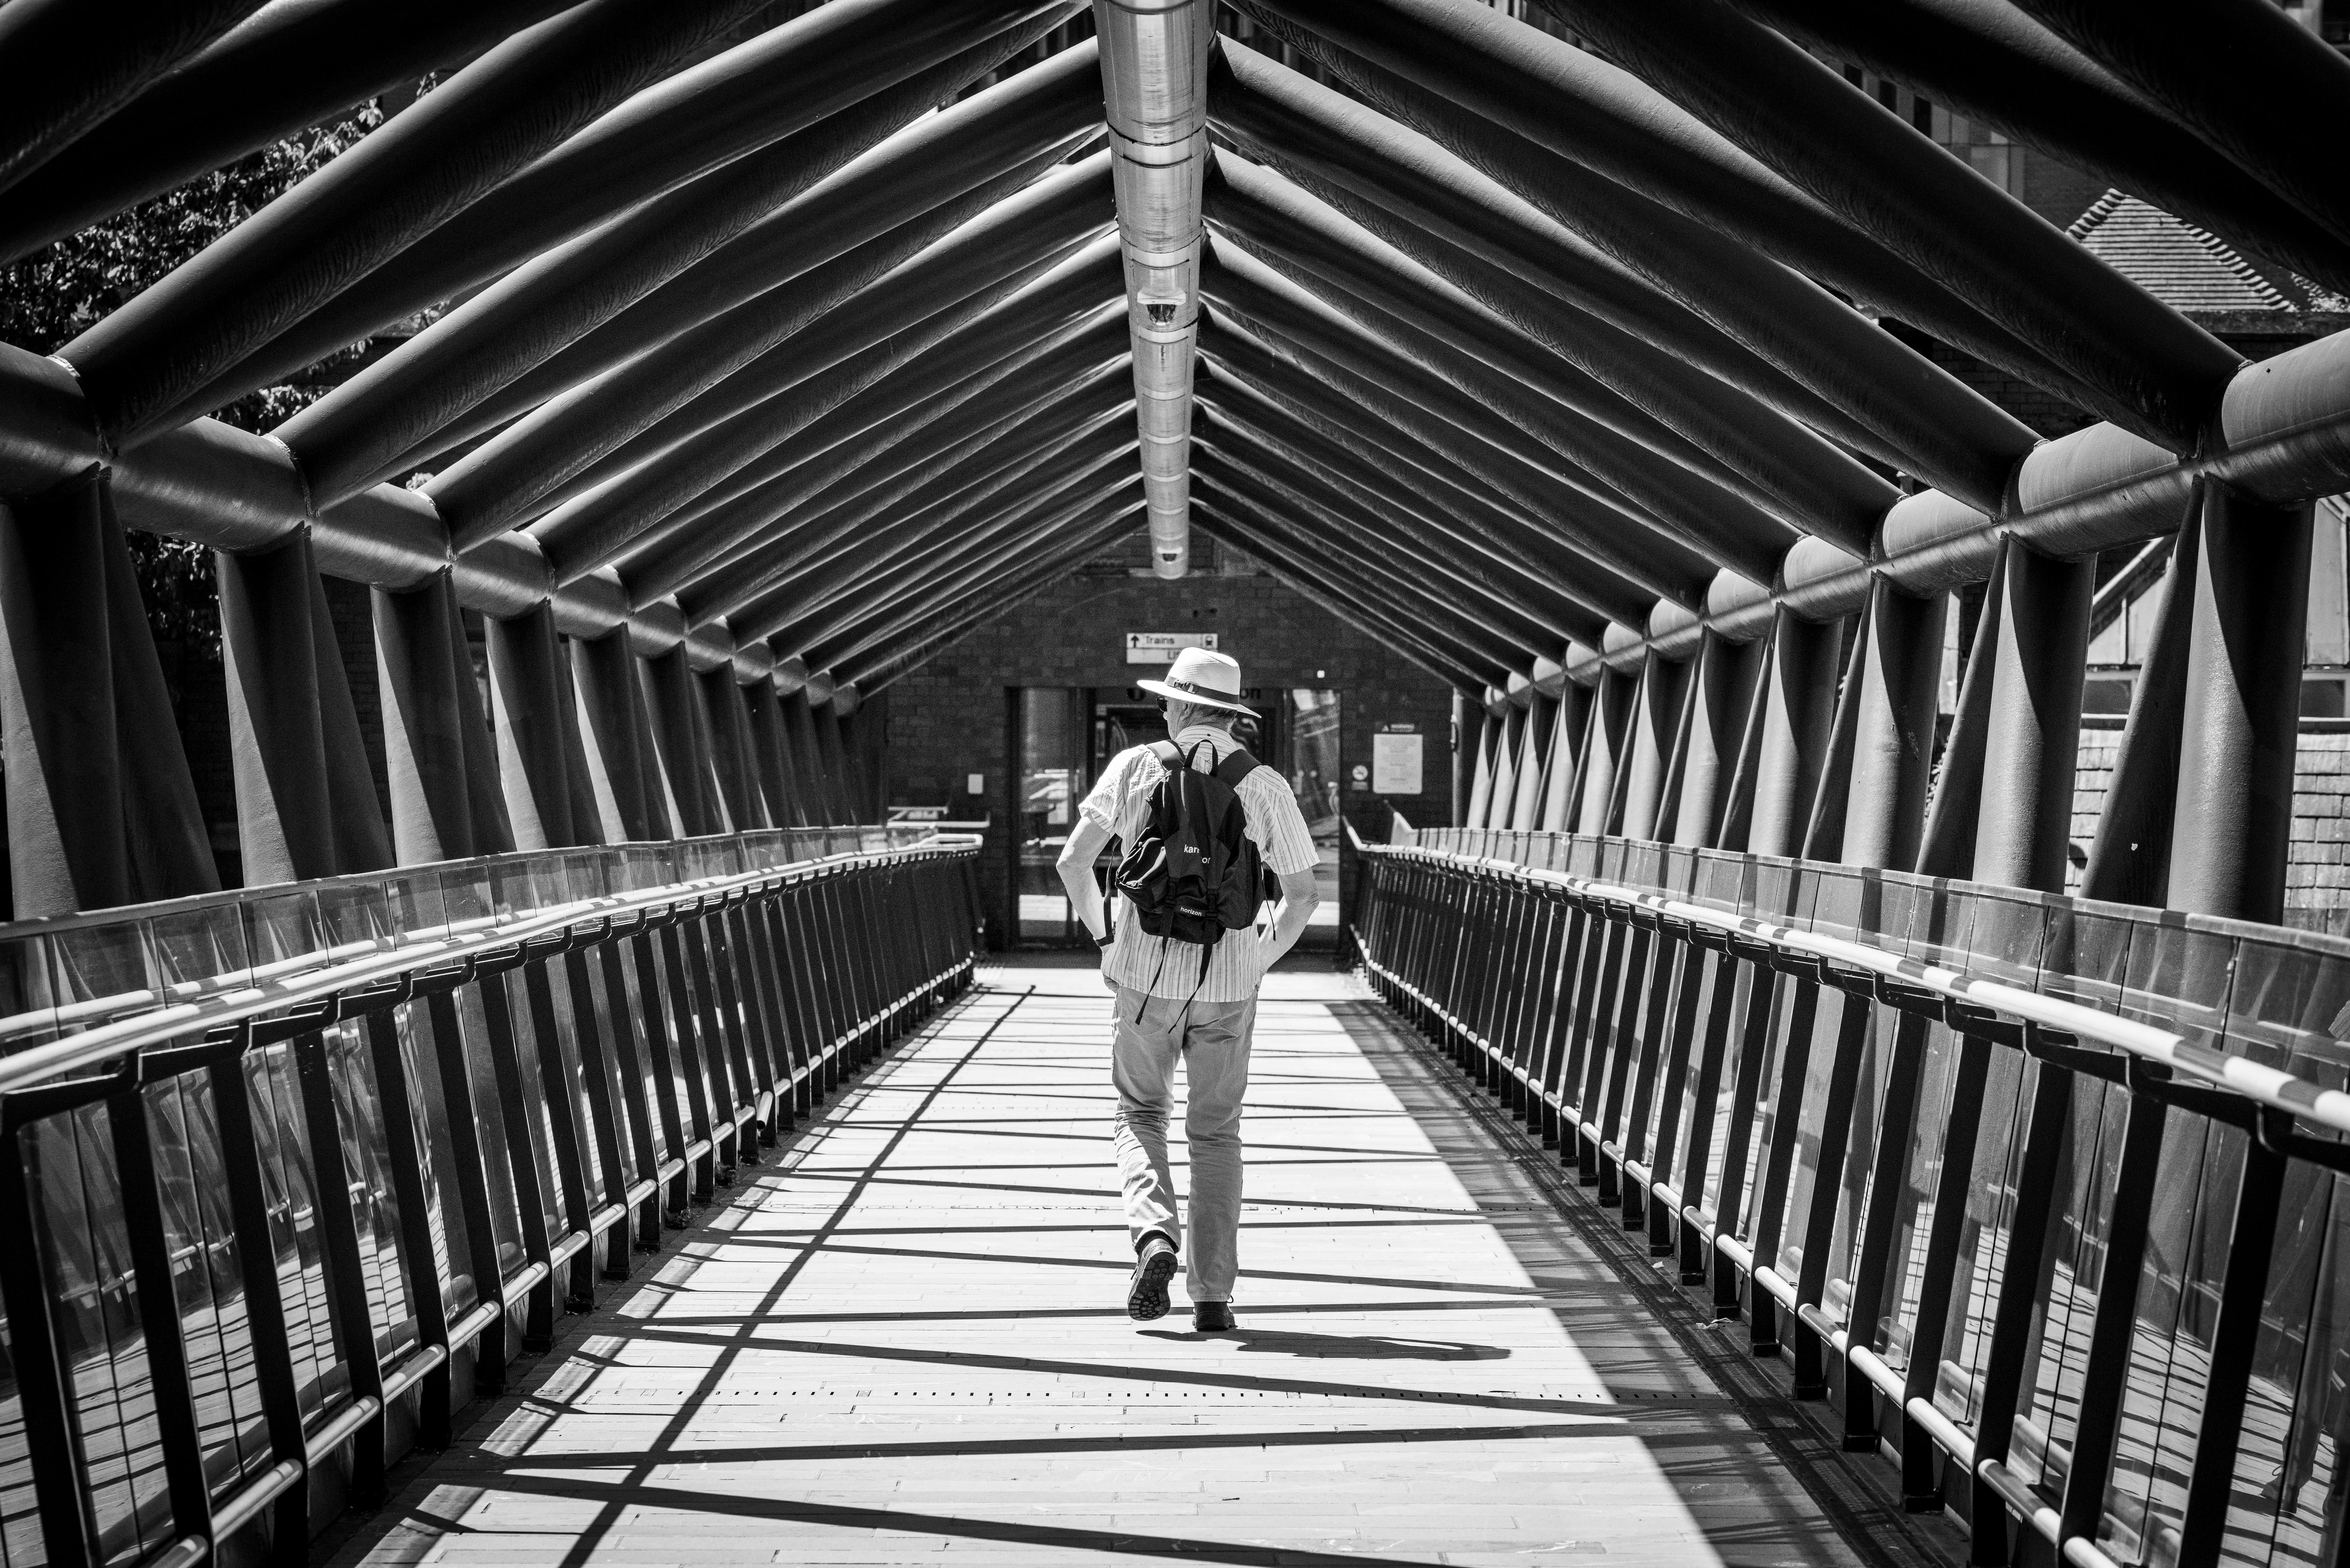
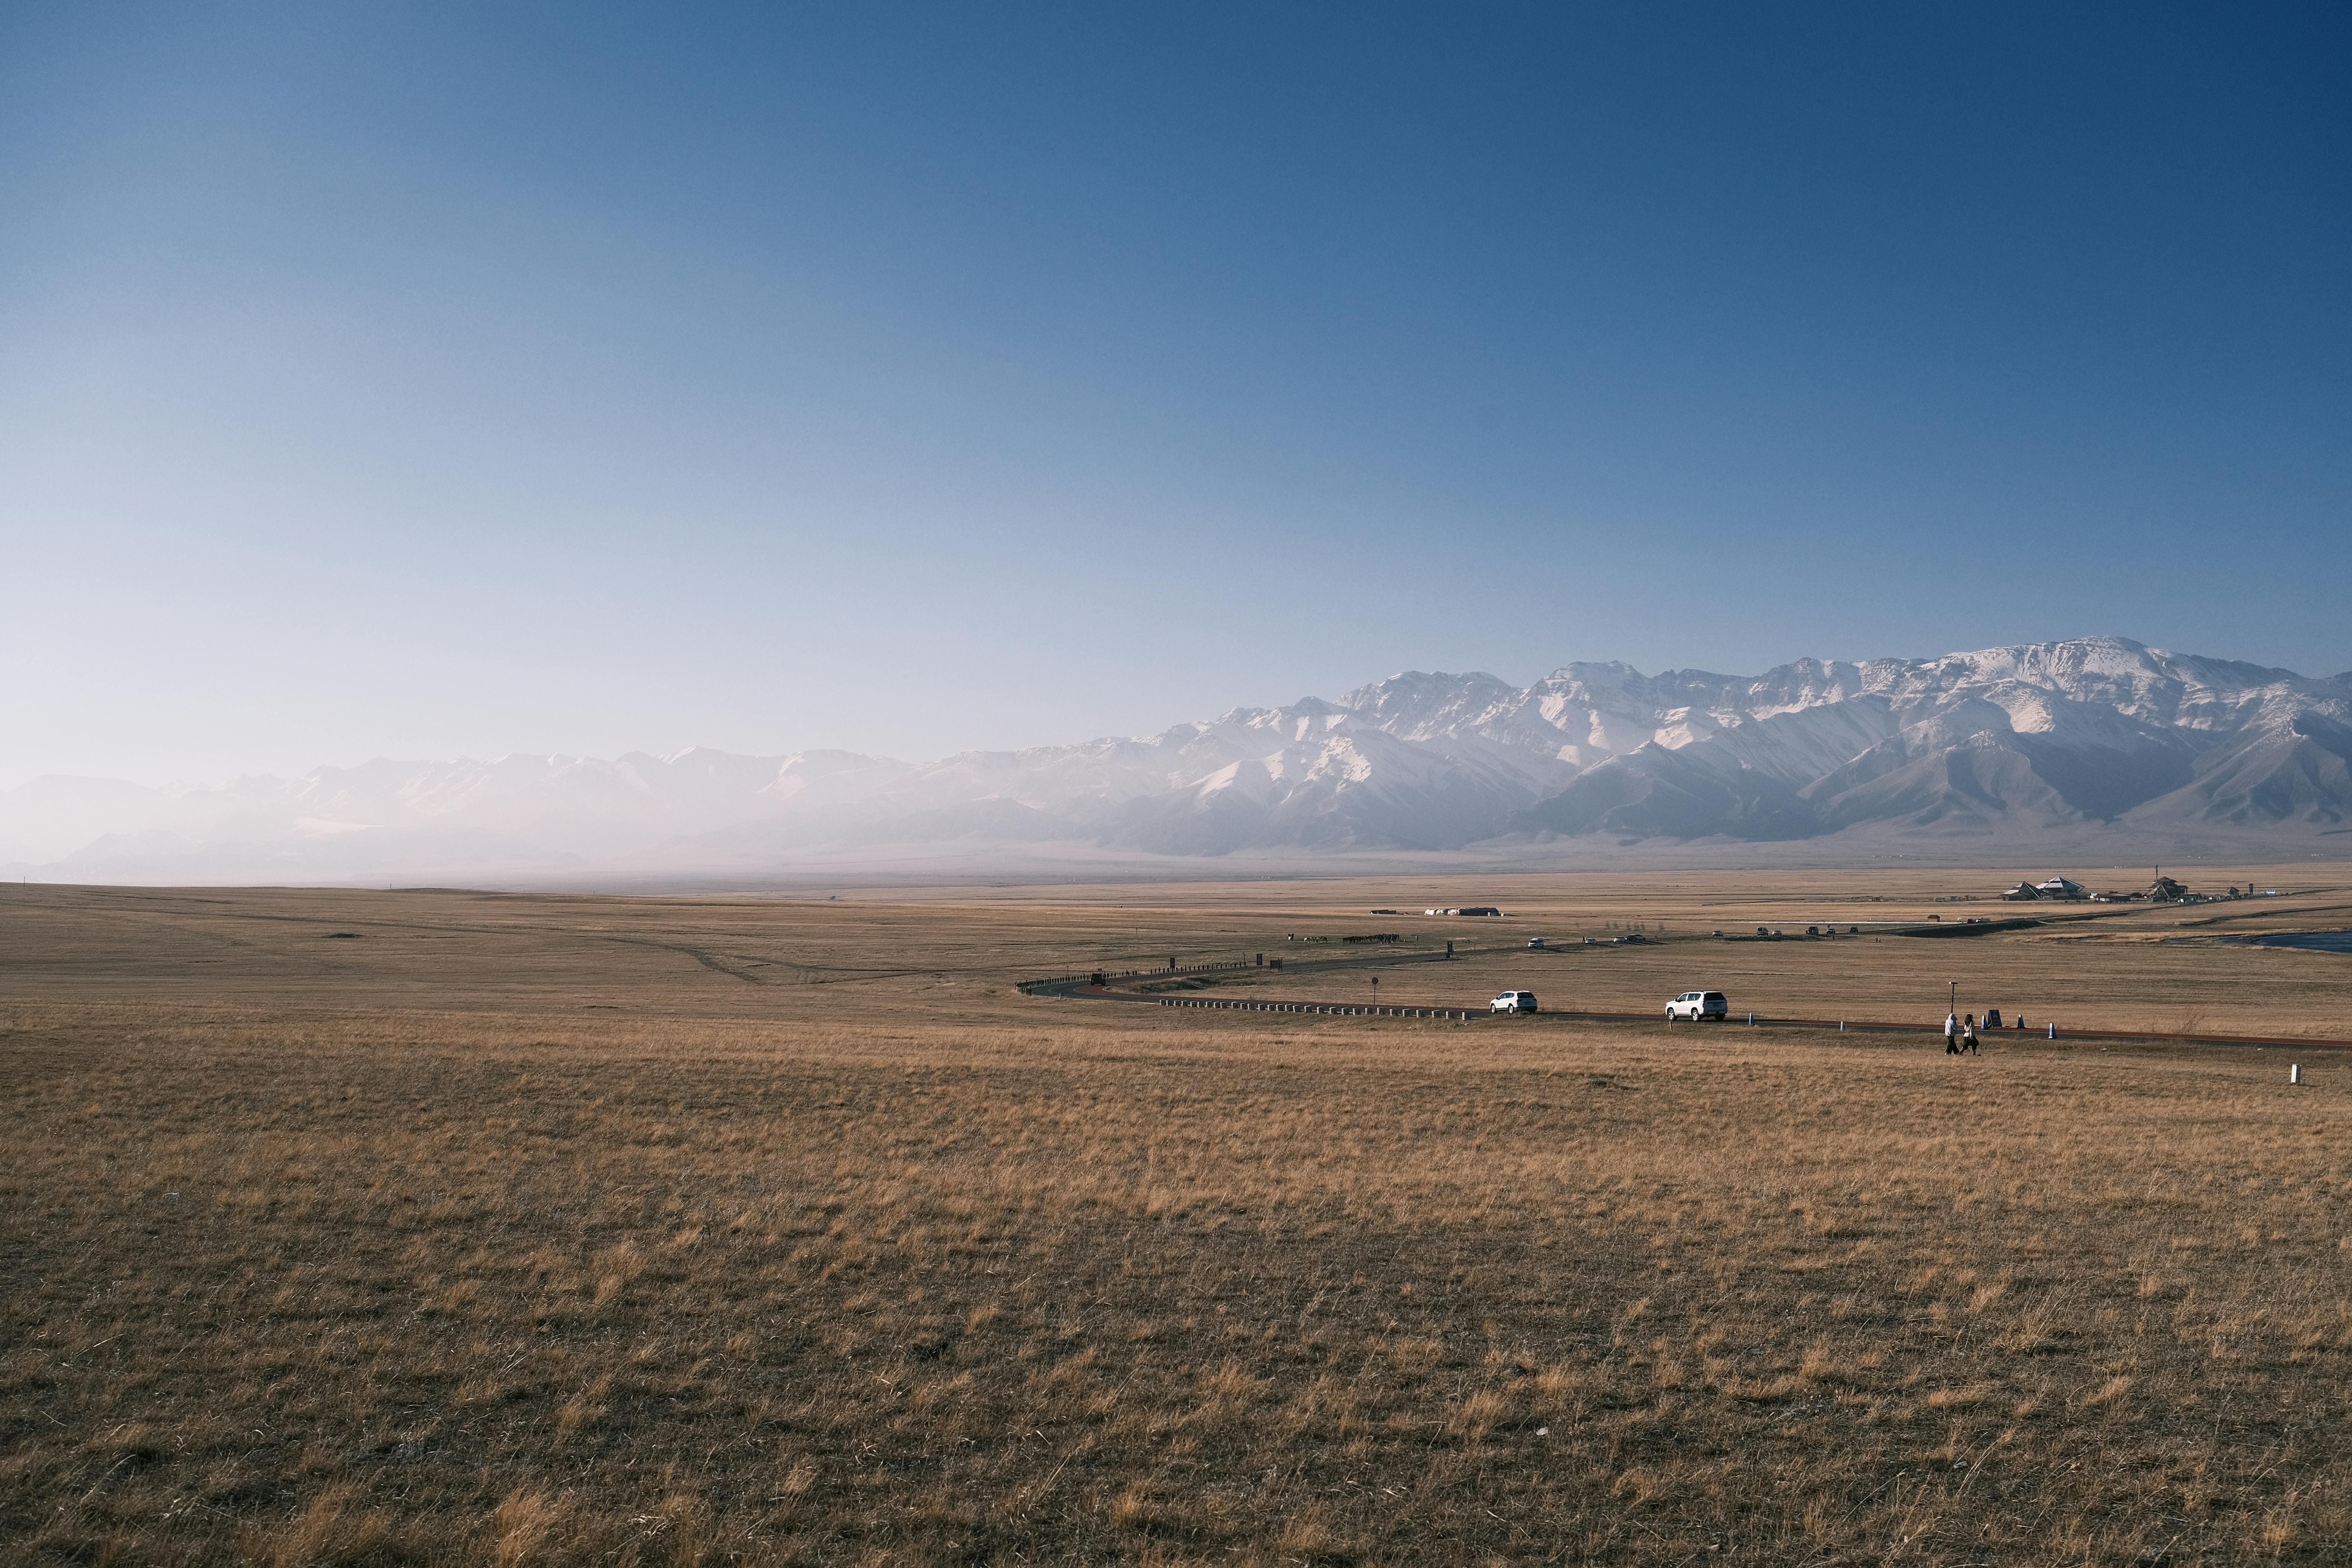
You know the feeling. You’re standing before a truly breathtaking scene—a fiery sunset melting into the ocean, a frenetic city street alive with energy, a mountain range so vast it stills your breath. You raise your camera, convinced you can bottle that magic. But when you get home, the photos on your screen are a pale imitation. The colors look washed out, the epic scale feels diminished, and the raw emotion of the moment is gone. It's the most common frustration in photography.
The gap between the photos you take and the professional shots you admire isn't about money or a more expensive camera. It's about knowledge. It's about seeing the world through a trained eye and understanding the techniques that transform a simple snapshot into a powerful story. The secret is learning from those who have already walked the path and mastered the craft. In a world saturated with social media portfolios, however, finding true educators can feel impossible.
That’s why we’ve sifted through the noise for you. We’ve identified the creators who are dedicated to teaching—the ones who provide the actionable advice, in-depth tutorials, and honest gear reviews that will actually make you a better photographer. If you’re ready to finally start creating travel photos that do your memories justice, you’re in the right place. These are the best travel photography blogs for real, practical tips. And for panoramic view of the top creators ac across every niche, our definitive guide to The Best Travel Blogs to Follow in 2026 is your essential starting point.
What Separates a Portfolio from a Powerhouse Educational Blog?
Before we dive in, let’s clarify our criteria. A gallery of beautiful photos is inspiring, but it won’t teach you how to improve. The blogs on this list were handpicked because they are exceptional educational platforms that empower their audience.
According to our 2026-2026 market analysis, the most authoritative blogs share key traits that set them apart. First is niche specificity and expertise; they establish themselves as deep experts in a specific domain, whether it’s adventure photography or post-processing. Second is the quality of writing and originality, allowing them to deconstruct complex topics—like the exposure triangle or advanced composition—into language anyone can understand. They are teachers, not just tastemakers.
The Top 7 Travel Photography Blogs for Actionable Advice
These seven blogs deliver on the promise of education. Each offers a unique perspective and a wealth of knowledge to help you improve your craft, whether you’re starting out or looking to refine your professional skills.
1. Expert Vagabond (Matthew Karsten)
For the photographer who thrives in the wild, there’s no better mentor than Matthew Karsten of Expert Vagabond. With over a decade of professional experience shooting in some of the world's most remote corners, Karsten doesn’t just show you the shot; he shows you the grit behind it. His gear guides are legendary for their depth, explaining not just what he uses, but why a particular piece of equipment is e essential for a specific environment. This is the ultimate resource for learning to create stunning images under rugged, challenging conditions.
2. Along Dusty Roads (Andrew & Emily)
Andrew and Emily are masters of mood. Their work has a distinct, cinematic quality, and their blog is an incredible resource for learning how to evoke emotion through imagery. While they offer detailed guides on photography techniques, their true genius lies in post-processing. Their Lightroom tutorials are models of clarity, focused on teaching you how to use editing to enhance the story of your image, not just apply a generic filter. They prove that the art happens just as much in the digital darkroom as it does in the camera.
3. BucketListly Blog (Pete R.)
If you love the tech behind the art, BucketListly Blog is your paradise. Pete’s gear reviews are exhaustive, moving far beyond spec sheets to deliver careful real-world performance analysis. He covers everything from the latest flagship mirrorless cameras to the best travel drones and action cameras. What makes his blog essential is its dual focus on both photography and videography, making it a one-stop shop for the modern hybrid creator who needs to produce elite content in multiple formats.
4. I Hit The Button (Andy Feliciotti)
The name says it all. This blog is laser-focused on the science and art of photography. Andy Feliciotti dives deep into the technical craft, offering detailed explorations of topics like long exposure, astrophotography, and advanced composition. This is where you go when you’re ready to move beyond beginner tips and truly understand the why behind a great photo. It’s the perfect resource for the photographer who loves to geek out on the details and push their creative boundaries.

5. The Blonde Abroad (Kiersten Rich)
Kiersten Rich is a powerhouse in the travel industry, and her photography is a masterclass in creating a vibrant, aspirational brand. Her blog is an excellent resource for anyone looking to master lifestyle and portrait travel photography. She offers fantastic, practical tips on everything from styling and wardrobe choices to using presets to achieve a cohesive, professional aesthetic. Her content is especially helpful for solo travelers who want to learn how to take incredible photos of themselves.
6. The Planet D (Dave & Deb)
Dave and Deb have been exploring the world for over a decade, and their photography captures the sheer scale and grandeur of our planet's most epic landscapes. Their blog is a fantastic learning tool for anyone looking to improve their landscape and wildlife photography. They provide practical, field-tested advice on what lenses to use for sweeping vistas, how to shoot in harsh weather conditions (like Antarctica!), and how to tell a story of adventure through a series of powerful images.
7. The Lovers Passport (Stephen & Giselle)
Focused on couple’s travel, The Lovers Passport is an invaluable resource for anyone wanting to learn how to weave human elements into their photography. They excel at breaking down how to plan and execute an epic shot, from location scouting with Google Earth to posing subjects to create a compelling narrative. Their guides are packed with practical advice on making a destination feel both grand in scale and deeply intimate at the same time.
Decoding the Masters: Key Lessons from the Pros
Studying the work of these top-tier photographers reveals a set of shared principles. Their incredible images are not the result of magic, but a consistent application of three core pillars: strategic gear selection, timeless composition, and masterful post-processing.

It Starts with the Right Gear (But Not How You Think)
A unanimous philosophy among these pros is that the best camera for travel is the one you’re willing to carry. A bulky, heavy kit is a liability, not an asset. The market trend is toward smaller, lighter, yet incredibly powerful mirrorless systems.
Beyond the camera, your core kit should include a few essentials: a versatile "walk-around" lens (like a 24-70mm), extra batteries, and a solid camera bag.
Pro-Tip: A lightweight carbon fiber tripod is the single best investment for elevating your landscape photography. It allows you to shoot at "golden hour" with a low ISO for clean images and enables creative long exposures that are impossible handheld.
Mastering the Fundamentals of Composition
Gear is just a tool. The real art lies in arranging the elements within your frame. The best photographers use these timeless principles to tell a story.
Rule of Thirds: Mentally divide your frame into a 3x3 grid. By placing your subject along a line or at an intersection, you create a more balanced and visually engaging image than a simple centered shot.
Leading Lines: Use a road, river, or fence to create a line that guides the viewer's eye through the scene toward your main subject. This technique is a powerful way to create a sense of depth.

Shooting at Golden Hour: The hour after sunrise and before sunset offers soft, warm, directional light. This is far more flattering and dramatic than the harsh, flat light of midday.
Framing: Use foreground elements like an archway, a window, or tree branches to create a natural frame around your subject. This adds context and draws the viewer's focus.
Changing Perspective: Don't shoot everything from eye level. Get low to the ground to emphasize a foreground or find a high vantage point for a unique, sweeping overview. This simple shift can make a scene extraordinary.
Ready to Practice Your Composition Skills? Download the free Best NYC Photo Spots Map and start capturing incredible cityscapes today!
The Digital Darkroom: Post-Processing is Half the Battle
Every single professional photo you admire has been post-processed. Editing is not about "fixing" a bad photo; it's about enhancing a good one to fully realize your creative vision. The blogs we've highlighted consistently teach three key areas of editing in software like Adobe Lightroom.
Using Lightroom Presets: Presets are one-click settings that create a consistent aesthetic. They are excellent learning tools for understanding how different settings interact to create a professional look.
Editing Sunset Photos: This is a classic challenge that requires balancing the extreme dynamic range between the bright sky and the dark landscape. Tutorials will teach you how to use tools like graduated filters and the shadow/highlight sliders to balance the exposure and bring out the rich, vibrant colors.
Basic Color Grading: This is the art of adjusting the colors in your image to create a specific mood. Mastering the HSL (Hue, Saturation, Luminance) panel allows you to take full control, making the blues in the ocean deeper, the greens in a forest richer, or giving your entire photo a warm, autumnal feel. Destinations with distinct color palettes, like the neon-lit streets of Tokyo or the serene temples of Kyoto, are perfect places to practice these skills. If you're planning a trip, our Japan Travel Guide can help you find the most visually stunning locations.
Pro-Tip: When starting with post-processing, focus on mastering one tool at a time. The HSL panel in Lightroom is a great place to begin. Learning how to selectively adjust the hue, saturation, and luminance of individual colors can have a bigger impact on your photos than trying to learn every single tool at once.
Your Path to Better Travel Photos
Improving your travel photography is a journey, not a destination. It doesn't happen overnight. But by following the right guides, you can accelerate your progress and avoid common pitfalls. The path is simple: learn from the best travel photography blogs, focus on mastering the fundamental techniques of composition and light, and practice every chance you get. Pick one blog from this list to follow this week. Choose one composition technique to practice on your next outing, even if it's just in your own backyard. The more you shoot with intention, the faster you will begin to create images that truly capture the magic of your travels.
Meta Data Suggestions:
SEO Meta Title (56 characters): 7 Best Travel Photography Blogs for Tips (2026 Update)
URL Slug: best-travel-photography-blogs-tips
SEO Meta Description (154 characters): Want to take better travel photos? Discover the 7 best travel photography blogs that offer actionable tips on gear, composition, and editing from the pros.
Don't Miss Out! Subscribe for Exclusive Content
SubscribeComments 0
No comments yet
Be the first to share your experience!
Dont Miss Out! Subscribe for Exclusive Content

Ultimate USA Holidays Guide: Top Picks

FTC Affiliate Disclosure Essentials: Stay Compliant as a Travel Creator

Essential Affiliate Tools: From Tracking to Full Optimization

Avoid These 5 Affiliate Landing Page Mistakes for Better Conversions

Affiliate Keyword Research Mastery for Travel Blogs

Booking.com Affiliate Program Review: Pros, Cons, and Earnings Potential
Food & Water Safety Abroad: How to Avoid Getting Sick
TrekGuider @trekguider
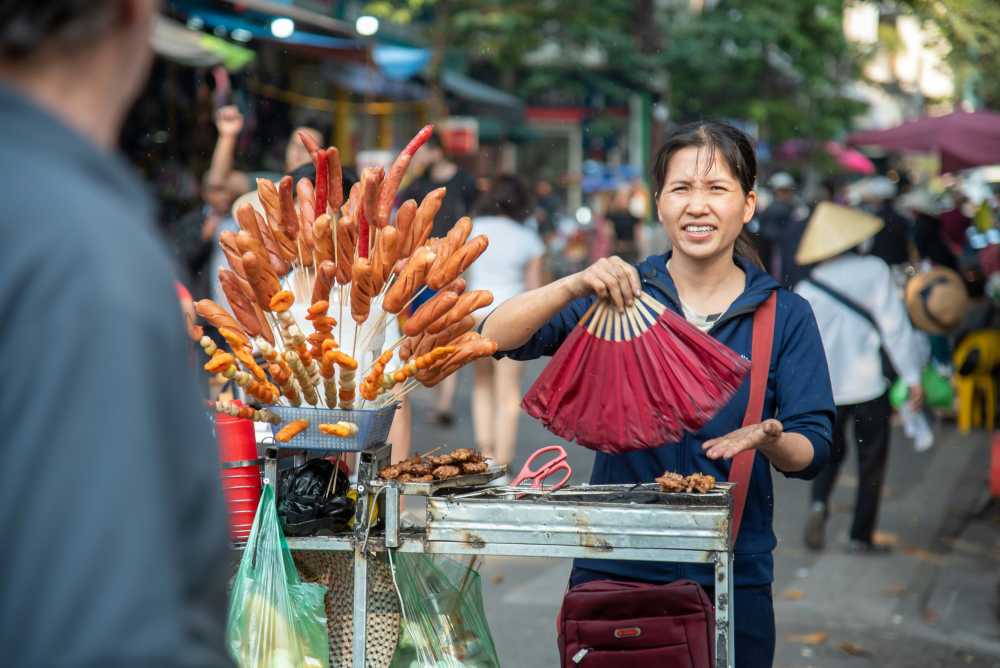
There’s a moment on every trip where the true magic happens: the first bite of a dish you can’t pronounce from a street cart buzzing with locals, the refreshing sip of a regional drink, the discovery of a flavor that will forever define a place in your memory. Food is culture, connection, and the fastest way to the heart of a destination. And that’s the traveler’s paradox, isn’t it? The very experiences that promise the most profound connection also carry a potent, gut-wrenching risk.
One bad meal or a single sip of contaminated water can derail your entire adventure, swapping days of discovery for days spent locked in a hotel room. This fear is agitated by horror stories from fellow travelers and the sheer unpredictability of an unfamiliar environment. It's a valid concern—traveler's diarrhea is unequivocally the most common travel-related illness, affecting up to 80% of international travelers depending on the destination. The fear of getting sick can make you timid, causing you to stick to bland, "safe" foods and miss out on the rich mix of flavors your destination has to offer. It can rob you of the very experiences you traveled so far to find.

But it doesn't have to be this way. This guide is your solution, a definitive and practical playbook for mastering food and water safety abroad. We’ve synthesized actionable advice from the world’s leading health organizations, including the Centers for Disease Control and Prevention (CDC) and the World Health Organization (WHO), to empower you to eat boldly and drink safely. This isn’t a list of things to fear; it’s a set of simple, memorable rules for prevention, identification, and, if necessary, management. This is a critical deep-dive into a core pillar of preparedness we cover in The Ultimate Guide to Travel Safety: A 2026 Playbook, designed to give you the confidence to dive fork-first into the heart of a culture.
The Golden Rule of Food and Water Safety: "Boil It, Cook It, Peel It, or Forget It"
If you remember only one thing from this guide, make it this simple, five-word mantra. Promoted by the CDC and other global health bodies, this single rule is a powerful and easy-to-use filter for nearly every culinary decision you'll make on the road. It’s the foundation of your entire food and water safety strategy.
Boil It: Your Safest Bet for Liquids
Pathogens like bacteria, viruses, and parasites are killed by heat. This makes boiling the most effective method for purifying liquids.
Examples: Drinking water that has been brought to a vigorous, rolling boil for at least one full minute. Hot beverages like tea or coffee that are served steaming hot are also generally safe. Any milk products you consume should be confirmed to be pasteurized or have been boiled.
Cook It: The Power of Heat
Thoroughly cooking food kills the harmful microorganisms that cause illness. The key is to ensure it is cooked all the way through and served hot.
Examples: Meat, poultry, or seafood that is well-cooked (not rare or raw) and served steaming hot to the touch. This is especially crucial for street food; dishes that are cooked fresh to order in front of you are a much safer bet than those that have been sitting out.
Peel It: Nature’s Own Packaging
For raw fruits and vegetables, the contamination is almost always on the outside surface. By peeling it yourself with clean hands, you remove the risk.
Examples: Fruits with a thick, peelable skin like bananas, oranges, mangoes, and avocados are your safest and best friends for a healthy snack. Similarly, vegetables you can peel, such as cucumbers, are also a great option.
Forget It: When in Doubt, Go Without
This is the most critical and sometimes most difficult part of the rule to follow. It requires discipline, but it’s your ultimate defense. If an item of food or drink doesn't meet one of the three criteria above, you must skip it.
Examples: Tap water and ice cubes made from tap water are the biggest culprits. Salads and raw leafy greens like lettuce are high-risk because they are difficult to clean thoroughly and may have been washed in contaminated water. You should also avoid fruits that cannot be peeled, such as grapes and berries, and any unpasteurized dairy products like milk or cheese. Finally, be very wary of any food served at room temperature, such as from a buffet.
Navigating the Streets: A Visual Guide to Spotting Unsafe Food
Street food is often the soul of a city's cuisine, but not all vendors are created equal. Your eyes are your best tool for vetting a stall. Before you order, take thirty seconds to perform a quick visual inspection. Look for these five clear signs of a safe or unsafe operation.
Poor General Cleanliness: This is the most obvious indicator. Red flags include dirty workstations with unwiped spills, visible food waste, rubbish on the ground, and the presence of pests like flies or wasps. The vendor themselves should also appear clean, with tidy clothes and hands.
Improper Food Temperatures: Food left in the "danger zone" (room temperature) is a breeding ground for bacteria. Avoid stalls where cooked food, especially meat, is sitting out in large trays. The safest option is always food that is cooked fresh to order, right in front of you. Hot food should be visibly steaming.
Obvious Cross-Contamination: Watch how the vendor handles ingredients. A major red flag is using the same cutting board, knife, or unwashed hands to handle raw meat and then touch ready-to-eat items like bread, salad, or cooked food.
Use of Contaminated Water: Look at the vendor’s water source. Rinsing dishes, utensils, or vegetables in a single bucket of murky, stagnant water is a sign of a high-risk operation. Likewise, avoid ice in your drinks unless you can confirm it was made from purified water (commercially bagged ice is usually a safe sign).
Lack of a Crowd (Especially Locals): A busy stall with a long line, particularly of local residents, is one of the best indicators of a trusted and safe food source. High customer turnover means the food is fresh and hasn't been sitting out for long. An empty stall is often empty for a reason.
Pro-Tip: Make "follow the locals" your street food mantra. A long line of residents is a walking, talking five-star review of a vendor's quality and safety. It's the most reliable seal of approval you can find.
Securing Your Water Supply: A Deep Dive into Hydration and Purification
Staying hydrated is non-negotiable for your health and energy while traveling, but assuming tap water is safe is one of the most common and dangerous mistakes a traveler can make. Here’s how to ensure every sip you take is safe.
Identifying Safe and Unsafe Drinking Water Sources
The CDC and WHO have clear guidelines. Unless you are in a country with a known, highly-developed sanitation system, you should assume all tap water is unsafe.
Safest Sources: Commercially bottled water in a factory-sealed, tamper-proof container is your most reliable option. Carbonated water is even safer, as a broken seal is immediately obvious. The second safest source is water that you have personally brought to a rolling boil for at least one minute.
Unsafe Sources to Avoid: Tap water, well water, ice made from tap water, fountain drinks mixed with tap water, and even water from clear mountain streams (which can contain germs) should all be avoided unless they have been purified.
Your Purification Playbook: The Top 3 Methods
When bottled or boiled water isn't available, you need a backup plan. Here are the top three recommended purification methods.
Boiling (The Gold Standard): This is consistently ranked by the CDC and WHO as the single most effective method. It kills all known disease-causing microorganisms, including viruses, bacteria, and parasites. Simply bring clear water to a rolling boil for 1 minute (or 3 minutes at elevations above 6,500 feet / 2,000 meters).
Filtration: A high-quality portable water filter is highly effective at removing bacteria and protozoan parasites like Giardia and Cryptosporidium. Look for a filter with an absolute pore size of 1 micron or smaller. The main limitation is that most portable filters do not remove viruses, so in high-risk areas, the CDC recommends following filtration with chemical disinfection.
Chemical Disinfection: Chlorine, iodine, or chlorine dioxide tablets/drops are a lightweight and easy way to kill viruses and bacteria. However, they are not consistently effective against the parasite Cryptosporidium and require a contact time of at least 30 minutes.
For in-depth planning on what gear to pack for every type of trip, from water filters to first-aid supplies, our all-encompassing Travel Guide is the only resource you'll ever need.
Damage Control: How to Manage Traveler's Diarrhea
But let’s be realistic: even the most diligent traveler can have a bad day. When that happens, knowing exactly what to do—and what not to do—can be the difference between a 24-hour nuisance and a trip-ruining ordeal. This is the damage control phase of your food and water safety plan.
The First and Most Critical Step: Oral Rehydration
According to travel medicine doctors, dehydration is the single most likely and dangerous complication of traveler's diarrhea. Replacing lost fluids and electrolytes is your absolute first priority.
Method: The best way to rehydrate is with a dedicated Oral Rehydration Solution (ORS), which comes in packets of salts and sugars that you mix with boiled or bottled water. In a pinch, sports drinks or clear soups can also be used.
Symptomatic Treatment for Mild to Moderate Cases
If the diarrhea is tolerable and not accompanied by a high fever or blood, over-the-counter medications can provide relief and help you get through a travel day.
Medications: An antimotility agent like Loperamide (the active ingredient in Imodium, a top pharmacist-recommended brand) can reduce the frequency of bowel movements. Bismuth Subsalicylate (found in Pepto-Bismol, another pharmacist favorite) can also help decrease the frequency and shorten the duration of the illness.
When to Use Standby Antibiotics (For Severe Cases)
If diarrhea is distressing, incapacitating, or contains blood or mucus, a prescribed antibiotic may be necessary.
Method: Before you travel, speak with your doctor or a travel medicine clinic. For travelers heading to high-risk destinations, they may provide a prescription for a standby antibiotic, such as Azithromycin, to carry with you. A single dose is often highly effective at treating severe cases.
Pro-Tip: Within your main travel first-aid kit, create a dedicated "Digestive Distress" module. Keep it in a separate, clearly-labeled zip-top bag containing a few packets of Oral Rehydration Salts, a strip of Loperamide, and a few antacids. This way, when you need it, you won't have to rummage through your entire kit.

Ready to Pack Like a Pro?
A smart food and water safety strategy is just one piece of your pre-trip preparation. To ensure you don't overlook a single essential item—from documents and finances to clothing and medical supplies—a master checklist is your most powerful tool. Our comprehensive, free checklist has you covered for every stage of your journey.
Download Your Free International Travel Checklist Now!
Food and Water Safety FAQs
A prepared mind is a safe mind. Here are expert answers to common questions that take your preparedness to the next level.
1. Besides traveler's diarrhea, what are the most common travel illnesses?
While traveler's diarrhea is number one, the CDC reports that other common issues include acute respiratory infections (like influenza or COVID-19, often acquired in transit), vector-borne fevers like Dengue and Malaria in tropical regions, and other food-borne illnesses like Hepatitis A and Typhoid Fever. Skin conditions from insect bites are also extremely common.
2. Is it safe to eat at a restaurant if I'm worried about street food?
Generally, restaurants can be safer, but the same principles apply. A busy restaurant full of locals is a great sign. Be cautious with the same high-risk items: salads, unpeeled fruits, and tap water or ice. If you want to find trusted, local-approved gems, explore the TrekGuider platform, where travel creators often share their own curated guides to safe and authentic eats.
3. Should I carry a standby antibiotic in my first-aid kit?
This is a question for your doctor or a travel medicine clinic. For travelers heading to high-risk destinations where severe traveler's diarrhea is common, many doctors will provide a prescription for a standby antibiotic like Azithromycin. It’s not for mild cases but can significantly shorten the duration of a severe bout of illness. Discuss your itinerary with your doctor to see if this is right for you.
Eat Boldly, Travel Well
The world of food is a world of incredible diversity and connection, and it deserves to be explored with an open mind and a curious palate. The goal of mastering food and water safety is not to build a wall of fear that separates you from authentic experiences. It is about building a foundation of knowledge that gives you the freedom to be adventurous. By internalizing the golden rule of "Boil it, cook it, peel it, or forget it," learning to trust your own visual assessment of a food stall, and knowing exactly what to do if you get sick, you replace anxiety with empowerment. You are now equipped with the skills to navigate the world's most exciting cuisines with confidence, ensuring your focus remains on the flavor, connection, and joy that every journey promises. Go explore, eat boldly, and travel well.

Meta Data Suggestions:
SEO Meta Title (Under 60 characters): Food & Water Safety Abroad: How to Avoid Getting Sick
URL Slug: food-water-safety-abroad
SEO Meta Description (Under 155 characters): Avoid traveler's diarrhea with our expert guide to food and water safety abroad. Learn the golden rules for eating street food, purifying water, and staying healthy.
Don't Miss Out! Subscribe for Exclusive Content
SubscribeComments 0
No comments yet
Be the first to share your experience!
Dont Miss Out! Subscribe for Exclusive Content

Chicago Beer Fests: Top 6 Tastings
Ultimate USA Holidays Guide: Top Picks
FTC Affiliate Disclosure Essentials: Stay Compliant as a Travel Creator
Essential Affiliate Tools: From Tracking to Full Optimization
Booking.com Affiliate Program Review: Pros, Cons, and Earnings Potential

Decoding Affiliate Commission Rates: Benchmarks for Travel Creators
Solo Travel in the USA: 10 Incredible Itinerary Ideas
TrekGuider @trekguider
The sheer scale of the United States is both its greatest allure and its most intimidating feature. You see the photos and feel the pull—the sun-drenched coast of California, the majestic canyons of Zion, the vibrant rhythm of New Orleans. The dream of a great American adventure is powerful, but it’s often followed by a wave of logistical anxiety. How do you even begin to plan a trip across a country with such staggering diversity? You worry about the complexities of a solo road trip, the safety of hiking alone in vast national parks, and the overwhelming number of choices. The dream feels big, but the planning feels bigger, turning wanderlust into a source of stress.

This guide is your solution—the antidote to overwhelm. It’s a strategic blueprint designed to transform your dream of solo female travel USA into a confident, actionable plan. We’re moving beyond general advice to give you ten distinct, road-tested itinerary ideas, each packed with US-specific logistical tips to empower your journey. This isn't just about seeing the USA; it's about discovering its landscapes, its cultures, and your own boundless capability along the way. While this guide dives deep into American itineraries, your journey to becoming a confident globetrotter starts with the essentials we cover in our comprehensive pillar article, The Ultimate Guide to Solo Female Travel (15 Essential Tips).
The Call of the Open Road: Mastering USA Solo Trip Logistics
Before you pick a destination, it’s crucial to understand the unique challenges and opportunities of a US-based solo trip. Unlike Europe with its dense train networks, much of America is built around the automobile. Mastering a few key logistics is the first step to a smooth, safe, and stress-free adventure.
Navigating the Car Rental Maze
A solo road trip is an iconic journey of freedom, but it comes with specific hurdles.
One-Way Fees: Renting a car in one city and dropping it off in another almost always incurs a "drop charge." This fee can add hundreds of dollars to your cost. The most effective strategy is to plan your road trips as loops that begin and end in the same city. If a one-way trip is unavoidable, compare prices across multiple agencies and book as far in advance as possible.
Insurance Coverage: Car rental insurance is a common point of confusion. Before your trip, call both your personal auto insurance provider and your credit card company to get a clear, written explanation of your existing coverage. Many credit cards offer secondary rental car insurance, but understanding its limitations is key to avoiding the expensive Collision Damage Waiver (CDW) offered at the counter.
Finding Your Safe Haven: A Solo Traveler's Guide to Lodging
For a solo road tripper, finding lodging that is not only affordable but also safe matters most, especially when arriving in an unfamiliar town after dark.
Vet the Location Digitally: Before booking, use Google Maps and its Street View feature to visually inspect the hotel's neighborhood. Look for well-lit streets, a well-maintained area, and proximity to main roads. Be wary of motels with exterior-facing room doors in poorly lit areas.
Leverage Solo Traveler Reviews: On booking platforms, use the review filters to see feedback specifically from "solo travelers." Their comments often directly address feelings of safety and the suitability of the location for a person traveling alone.
Prioritize Interior Corridors: For roadside lodging, hotels with rooms that open onto an interior hallway are generally more secure than motels where every room door opens directly to the parking lot.
Book Your Next Stop in Advance: One of the biggest safety risks is arriving in a new town late at night with no reservation. Always book at least the next night's accommodation before you start your day's drive to avoid a stressful search in the dark.
Once you have your lodging strategy locked down, you can turn your attention from the nation’s highways to its wild heart: the National Parks. These breathtaking landscapes are central to many of the best solo female travel USA itineraries, but they demand a unique approach to safety.

Wild and Safe: Essential Protocols for National Park Adventures
Many of the best itineraries for solo female travel USA involve our stunning national parks. These wild spaces offer unparalleled solitude and beauty but require specific preparation distinct from urban travel.
Establish a Redundant Communication & Navigation Plan: Cell service in most national parks is unreliable at best and completely non-existent in most backcountry areas. Before you go, download offline maps of the entire region onto your phone using an app like Google Maps or AllTrails. As a critical backup, always carry a physical, waterproof map of the park and a compass, and know how to use them. For any remote travel, a satellite messaging device (like a Garmin inReach) is an essential piece of gear, allowing you to send "I'm okay" messages or trigger an SOS alert in a true emergency.
Inform a Ranger and a Friend of Your Itinerary: Leave a detailed copy of your itinerary with a trusted friend. Upon arriving at the park, make your first stop the visitor center. Speak with a ranger about your plans. They can provide invaluable, up-to-the-minute information on trail conditions, weather, and recent wildlife activity.
Adhere to Strict Wildlife Protocol: In bear country, carrying bear spray and knowing how to deploy it is non-negotiable. It's not a suggestion; it's essential safety equipment. Make consistent noise while hiking solo to avoid surprising an animal—talk aloud to yourself, sing, or attach a bear bell to your pack. Never store food or any scented items (including toiletries) in your tent; use designated bear-proof food lockers at campsites or a proper bear canister.
Your Ultimate Park Planning Tool
Ready to hit the trails with confidence? A solid plan is the key to a safe and unforgettable adventure in America's wild spaces. Our checklist covers everything from gear essentials to wildlife safety protocols, ensuring you're prepared for the trail ahead.
Download Your Free National Park Road Trip Checklist Here
10 Incredible Itineraries for Your Solo Female Travel USA Adventure
With the core logistics covered, it's time for the fun part: choosing your adventure. Each of these itineraries is designed with a solo traveler in mind, offering a perfect mix of exploration, safety, and unforgettable moments.
1. The Classic California Dream: Pacific Coast Highway
Best for: Scenery, Adventure, Photography
Duration: 5-7 Days
Route: San Francisco -> Carmel-by-the-Sea -> Big Sur -> Santa Barbara -> Los Angeles
This is the quintessential American road trip. Fly into San Francisco, rent a car (a convertible is worth the splurge!), and wind your way south on the dramatic coastal Highway 1. The drive itself is the destination, with countless turnoffs for breathtaking photos. As a solo traveler, you have the ultimate freedom to stop whenever a view strikes you. The route is well-traveled and has reliable cell service for most of its length, making it a very manageable and safe first solo road trip.
2. The New England Historical Tour
Best for: History, Culture, Walkability
Duration: 4-5 Days
Route: Boston with day trips to Salem and Concord/Lexington
For the history buff who’d rather trace Paul Revere’s ride on foot than battle Boston traffic, this car-free itinerary is a dream come true. Base yourself in Boston and spend a few days exploring the city's Freedom Trail and world-class museums. The city is compact and safe to navigate. Then, use the efficient and easy-to-use commuter rail for day trips. You can explore the infamous witch trials history in Salem or stand on the very ground where the American Revolution began in Concord and Lexington, all without the stress of driving or parking.
3. The Southern Culinary & Music Trail
Best for: Food, Music, Culture
Duration: 7 Days
Route: Nashville -> Memphis -> New Orleans
This road trip is a feast for the senses. Start in Nashville, the heart of country music, for live shows and legendary hot chicken. Drive to Memphis to experience the raw, soulful blues on Beale Street and pay homage to The King at Graceland. End your journey in New Orleans, where the air is thick with the sounds of jazz and the scent of Creole cuisine. These cities are incredibly welcoming, and sitting alone at a bar to listen to music is a common and celebrated activity.
4. The Southwest National Parks Loop
Best for: Nature, Hiking, Epic Landscapes
Duration: 7-10 Days
Route: Las Vegas -> Zion National Park -> Bryce Canyon National Park -> Grand Canyon -> Las Vegas
This is an epic loop for the avid hiker. Fly into Las Vegas (a cheap flight hub), rent a car, and prepare to be awestruck. The proximity of these three iconic parks makes for a visually stunning and logistically manageable itinerary. From the majestic canyon hikes in Zion to the otherworldly hoodoos of Bryce Canyon and the sheer scale of the Grand Canyon, this trip offers profound moments of solitude in nature.
Pro-Tip: National Park lodging books up almost a year in advance. If you can't get a room inside the park, look for accommodations in nearby gateway towns like Springdale (for Zion) or Tusayan (for the Grand Canyon).
5. The Rocky Mountain High
Best for: Outdoor Adventure, Wellness
Duration: 4-5 Days
Route: Base in Boulder, Colorado, with a day trip to Rocky Mountain National Park
Combine a vibrant, safe, and progressive city with majestic mountain scenery. Base yourself in Boulder, a city known for its wellness culture and pedestrian-friendly Pearl Street Mall. Spend your days hiking the iconic Flatirons that form the city's backdrop. Then, take an easy and scenic day trip into the heart of the Rockies to drive the Trail Ridge Road (in summer) and spot wildlife in Rocky Mountain National Park.
6. The Florida Keys Escape
Best for: Relaxation, Beaches, Scenery
Duration: 5 Days
Route: Miami -> Key Largo -> Islamorada -> Key West
For a laid-back trip focused on decompressing, this is paradise. Fly into Miami, rent that convertible, and drive the scenic Overseas Highway down to the continental USA's southernmost point. The journey is the experience, with endless opportunities to stop for snorkeling in Key Largo, fresh seafood in Islamorada, and a slice of key lime pie anywhere you can find it. The Keys have a unique, relaxed, and safe culture perfect for unwinding solo.
7. The Pacific Northwest Vibe
Best for: Urban Exploration, Nature, Food
Duration: 6 Days
Route: Portland, Oregon -> Seattle, Washington
Experience two of America's most unique cities in one car-free trip. Start in Portland, exploring its incredible food cart scene, wandering through Powell's City of Books, and soaking in its quirky, independent vibe. Then, take a scenic and comfortable 3-hour Amtrak train ride to Seattle. Explore the famous Pike Place Market, the original Starbucks, and the beautiful waterfront. Both cities are surrounded by nature, offering easy escapes for a hike.
8. The Charleston & Savannah Southern Charm
Best for: Architecture, Food, History
Duration: 5-6 Days
Route: Charleston, South Carolina -> Savannah, Georgia
Immerse yourself in the beauty and history of the Old South. Start in Charleston, exploring its acclaimed culinary scene, fine art galleries, and historic cobblestone streets. Then take a short 2-hour drive to Savannah to wander its famous, moss-draped squares and explore the historic riverfront. Both cities are incredibly walkable and renowned for their hospitality, making them a comfortable and enchanting solo trip.
Pro-Tip: The best way to get your bearings and learn the rich history of these cities is by joining a walking tour on your first day. It's also a low-pressure way to chat with other travelers.
9. The Arizona Wellness & Spirituality Retreat
Best for: Wellness, Scenery, Relaxation
Duration: 4 Days
Route: Base in Sedona, Arizona
This itinerary is less about doing and more about being. Sedona is world-renowned for its stunning red rock landscapes, which many believe are centers of spiritual energy called vortexes. This trip is focused on rejuvenation. Plan for spa treatments, gentle hikes among the red rocks, yoga classes, and exploring the town's vibrant new-age community. It's the perfect destination to reconnect with yourself in a serene and stunningly beautiful environment.
10. The Chicago Architectural Immersion
Best for: Urban Exploration, Arts, Architecture
Duration: 4 Days
Route: Base in Chicago, Illinois
For the city lover, this is a deep dive into one of America's greatest urban centers. This itinerary is built around Chicago's world-class architecture. An absolute must-do is the Chicago Architecture Center River Cruise. Spend your days visiting Frank Lloyd Wright's homes, exploring Millennium Park, and visiting world-class museums like the Art Institute of Chicago. In the evenings, you can catch a show in the Theater District or listen to live music at a legendary blues club.

Frequently Asked Questions for a USA Solo Trip
Even the most prepared traveler has questions. Here are answers to some of the most common concerns for a solo trip in the States.
What's the best way to stay safe on a solo US road trip?
Safety is about preparation and awareness. Always share your detailed itinerary with a friend. For your car, have a roadside emergency kit and know your rental company's assistance number. When driving, stick to main highways and well-lit gas stations, especially at night. In your lodging, always use the deadbolt and chain lock. Above all, trust your intuition—if a place or situation feels wrong, leave immediately.
Is it expensive to travel solo in the USA?
It can be, but it doesn't have to be. The biggest costs are lodging and transportation. Save money by planning loop road trips to avoid one-way car rental fees, staying in well-reviewed budget hotels or private rooms in hostels, and preparing your own meals. Visiting national parks is very affordable; an annual "America the Beautiful" pass is just $80 and grants access to all of them. To get an idea of real-world costs, check out the itineraries and guides published by other solo travelers on the TrekGuider platform for real-world budget examples.
How do I handle long, lonely driving days?
Embrace the solitude! This is your time. Create an epic playlist or download a queue of fascinating podcasts and audiobooks. Plan interesting stops along your route—a quirky roadside attraction, a scenic overlook, a local diner—to break up the drive. A long driving day is less about endurance and more about curating a perfect personal experience.
Are there good alternatives to driving for solo travel in the US?
Yes! While not as comprehensive as in Europe, the US has options. Amtrak train routes offer scenic journeys, especially on routes like the California Zephyr (Chicago to San Francisco) or the Pacific Surfliner. For travel between major cities on the East Coast (e.g., Boston, NYC, D.C.), the train is often faster and more convenient than flying. For long distances, combining flights with ride-shares in your destination city is also a great car-free strategy.
Your Journey Awaits
The United States offers a vast and rewarding landscape for the solo female traveler. It’s a country built for the open road, for discovery, and for the kind of freedom that can only be found when you are the sole captain of your journey. With these ten incredible itinerary ideas and the logistical know-how to tackle them, your dream of a great American adventure is no longer an intimidating fantasy—it’s a plan waiting to be executed. The confidence and self-reliance you build on a solo female travel USA trip will last a lifetime. The open road is calling.

For even more detailed planning on destinations around the globe, explore our collection of expert-written Travel Guide resources.
Meta Data Suggestions:
SEO Meta Title (58 characters): Solo Travel USA: 10 Epic Itinerary Ideas for 2026
URL Slug: solo-female-travel-usa-itinerary-ideas
SEO Meta Description (154 characters): Planning a solo female travel USA adventure? Discover 10 incredible, safe, and unforgettable itinerary ideas, from epic national park road trips to city escapes.
Don't Miss Out! Subscribe for Exclusive Content
SubscribeComments 0
No comments yet
Be the first to share your experience!
Dont Miss Out! Subscribe for Exclusive Content
San Francisco Cherry Blossoms: A Local's Guide to the Blooms
Halloween SF: Haunts Without Horrors

SF Festivals: 7 Must-See Lineups
Christmas SF: Lights & Wharf Wonders
SF Pride: 6 Route & Party Hacks