CA Family Beach Vacations: A Pro's Planning Guide
TrekGuider @trekguider
Staring at a map of California's 840-mile coastline can feel overwhelming. You're searching for one perfect stretch of sand that pleases everyone—from toddlers who need calm water to teens who crave adventure. The fear of choosing wrong is real: a trip ruined by unsafe surf, zero parking, or the dreaded "I'm bored" can turn a dream vacation into a stressful ordeal.
This guide is your antidote to that analysis paralysis. We'll give you a clear framework for picking the right beach for your family's unique needs, ensuring your trip is filled with golden-hour memories, not logistical nightmares.
Choosing the right destination is the first step in planning an amazing trip, a core principle we cover in our comprehensive guide to Family Travel Ideas: The 2026 Guide to Unforgettable Trips. This playbook will give you the California-specific details you need to make the perfect choice.

First, Define Your Perfect Beach: A 4-Point Framework for California
California's coastline is stunningly diverse. The secret to a successful trip is finding a beach that suits your family's needs. Before looking at a map, use this framework to determine your family's “beach DNA” and find the perfect option.
Type 1: Calm & Shallow Waters (Best for Toddlers & Cautious Swimmers)
Let's be honest—when you're traveling with toddlers, 'safety' isn't just a priority; it's the entire game. You need waters that are less 'crashing surf' and more 'gentle bathwater.' These beaches are characterized by gentle, lapping waves, shallow entry points, and natural protections like coves or bays.
Top California Picks: La Jolla Shores (San Diego), Coronado Central Beach (San Diego), Avila Beach (Central Coast).
Type 2: Active & Adventurous Shores (Best for Kids & Teens)
If your crew gets restless just sitting on the sand, you need a destination with built-in action. These are the hubs for boogie boarding, learning to surf, pier fishing, and boardwalk cycling. The energy here is palpable, and there's always something to do.
Top California Picks: Huntington Beach ("Surf City USA"), Santa Monica State Beach (Los Angeles), Pismo Beach (Central Coast).
Type 3: Full-Service & Amenity-Rich (For Maximum Convenience)
These are the beaches for families who want everything at their fingertips. Think easy parking, clean restrooms, on-duty lifeguards, nearby playgrounds, and plenty of places to grab a snack or rent equipment. They are designed to minimize friction and maximize relaxation.
Top California Picks: Moonlight State Beach (Encinitas), Main Beach (Laguna Beach), Carmel Beach (Carmel-by-the-Sea).
Type 4: Natural & Unspoiled Coasts (For Exploration & Wildlife)
For families who want to escape the crowds and connect with nature, these beaches offer tide pools teeming with life, scenic hiking trails, and the chance to spot wildlife, from barking sea lions to migrating whales.
Top California Picks: Leo Carrillo State Park (Malibu), Point Dume State Beach (Malibu), Stinson Beach (Marin County).

Southern California (SoCal): A Deep Dive into Family Beach Vacations
SoCal is the classic choice for family beach vacations for a reason: it delivers iconic sunshine, relatively warm water, and an unmatched density of attractions. From San Diego to Malibu, this region packs in a staggering variety of coastal experiences.

San Diego County: America's Finest Family Beaches
Often considered the gold standard, San Diego offers a perfect equilibrium between pristine beaches and world-class attractions.
La Jolla Shores: This is arguably the best beach in California for families with toddlers. A mile-long sandy expanse with some of the gentlest waves on the West Coast, it's perfect for splashing and sandcastle construction. The adjacent Kellogg Park has a fantastic playground.
Don't Miss: Book a guided kayak tour to paddle over the La Jolla Underwater Park—you'll see sea lions, bright orange Garibaldi fish, and (harmless) leopard sharks swimming right below you. It's an unforgettable experience for kids ages 6 and up.
Coronado Central Beach: Famous for its iconic Hotel del Coronado backdrop and shimmering, mica-infused sand, Coronado is wide, flat, and impeccably clean. The surf is typically gentle, and the sheer size means you can always find your own space.
Insider Tip: At low tide, fantastic tide pools emerge at the southernmost end of the beach, offering a great, free activity for curious kids.
Moonlight State Beach (Encinitas): For the family that values pure, unadulterated convenience, this beach in the surf town of Encinitas is your holy grail. It features a large, dedicated parking lot, clean restrooms, a snack bar, and a great playground right on the sand.
Insider Tip: The beach is situated in a natural bowl, which keeps it somewhat protected from the wind, making it a comfortable spot to spend the entire day.
Orange County: From "Surf City" to Art Coves
The OC offers a more polished, upscale beach experience, with beautifully maintained towns and legendary surf breaks.
Huntington Beach: Known globally as "Surf City USA," this is the place for an active family. The energy is infectious.
Don't Miss: Beyond surf lessons, rent a multi-person surrey bike and cruise the 10-mile paved beach path. At night, grab a fire pit (first-come, first-served) for the ultimate s'mores experience.
Newport Beach: Centered around the Balboa Peninsula, Newport offers two distinct experiences. The ocean side has bigger waves perfect for boogie boarding, while the bay side (at the Balboa Fun Zone) offers calm waters, boat rentals, and a classic Ferris wheel.
Insider Tip: Take the historic Balboa Island Ferry for a charming, scenic trip across the harbor. Kids love it, and it’s a budget-friendly thrill.
Main Beach (Laguna Beach): Nestled in a charming, artsy town, Main Beach has a "Coke commercial" vibe with its central lifeguard tower and boardwalk.
Don't Miss: The real magic of Laguna lies in its many small coves. A short walk south brings you to Treasure Island Beach, which has some of the most accessible and vibrant tide pools in all of SoCal.

Los Angeles County: Iconic Piers and Urban Shores
LA's beaches are vibrant and full of character, offering everything from entertainment hubs to quiet, natural retreats.
Santa Monica State Beach: The Santa Monica Pier, with its amusement park and aquarium, makes this a can't-miss destination. The beach itself is massive, providing ample room for everyone.
Don't Miss: Renting bikes and riding south to the Venice Beach Boardwalk is a quintessential LA family experience, filled with street performers and unique sights.
Leo Carrillo State Park (Malibu): For a completely different vibe, head north to Leo Carrillo. This stunning beach is famous for its sea caves and fascinating tide pools. It's a place for exploration, where kids can hunt for sea stars, crabs, and anemones.
Insider Tip: Check the tide charts before you go. The sea caves are only accessible and safe to explore during low tide.
Pro-Tip: Southern California experiences a weather pattern known as "May Gray" and "June Gloom," where a persistent marine layer can keep the coast cloudy and cool until the early afternoon. If you're planning a trip during these months, schedule other activities for the morning and plan for your main beach time after lunch when the sun typically breaks through.
When to Go: A Seasonal Guide to the California Coast
Choosing the right time to visit can make or break your trip. Here’s a breakdown:
Summer (June-August): The classic choice with the warmest weather and water temperatures. Pros: Everything is open, and the vibe is energetic. Cons: Massive crowds and peak pricing for flights and lodging.
Fall (September-October): This is the locals' secret. Pros: The best weather of the year, with warm, sunny days and far fewer crowds. Water is still warm from the summer. Cons: Kids are back in school, making it tougher for families.
Winter (November-February): A great time for a different kind of beach trip. Pros: Lowest prices and no crowds. It's also the best time for whale watching. Cons: Water is too cold for swimming without a wetsuit, and you might get some rain.
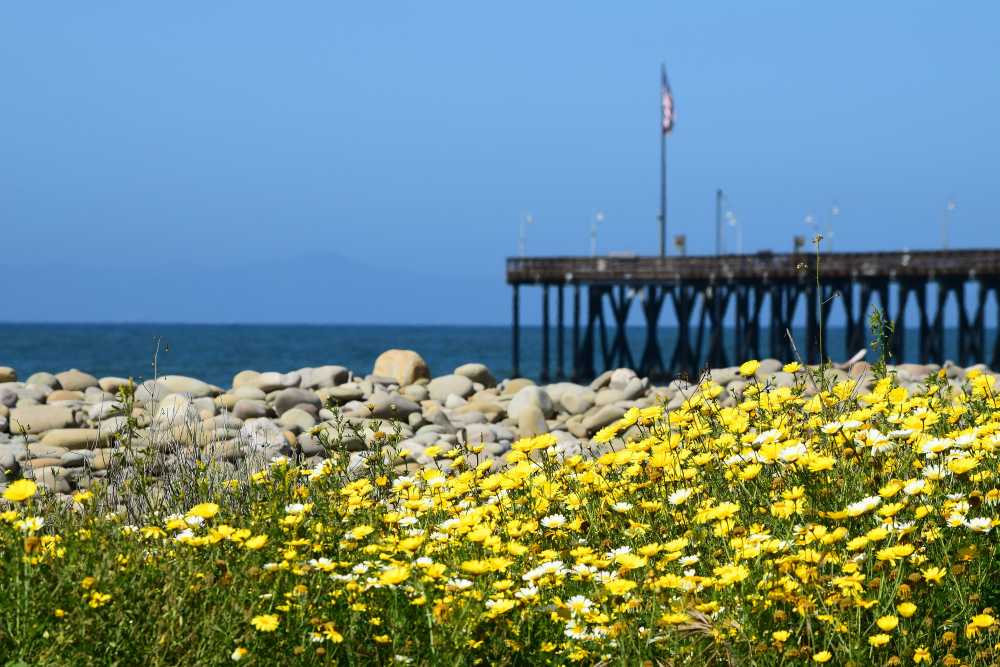
Spring (March-May): A mixed bag. Pros: Beautiful wildflowers, pleasant weather for non-swimming activities. Cons: The weather can be unpredictable, and the water is still very cold. "June Gloom" can start as early as May.
Central Coast & Northern California: Unspoiled Beauty
For families seeking a more tranquil and nature-focused trip, the coasts north of LA offer dramatic scenery, charming small towns, and a welcome escape from the crowds.

The Central Coast: A Slower Pace of Life
Pismo Beach: A classic California beach town, Pismo is famous for its long fishing pier and being the "Clam Capital of the World."
Don't Miss: It's one of the few places where you can legally drive on the beach (in designated areas), making it a hub for ATV rentals and a unique family adventure.
Avila Beach: Tucked into a sunny cove, Avila is often warmer and less windy than its neighbors. The calm waters of the bay are perfect for paddleboarding and kayaking.
Insider Tip: Walk to the end of the Harford Pier to see sea lions lounging and barking up close.
The Bay Area & North: Boardwalks and Rugged Coastlines
Santa Cruz Main Beach: Home to the West Coast's oldest seaside amusement park, the Santa Cruz Beach Boardwalk is a paradise for kids and teens. The combination of classic roller coasters, arcade games, and a wide sandy beach is unbeatable.
Insider Tip: Buy your ride tickets online in advance to save money and skip the ticket lines.
Stinson Beach (Marin County): Just a spectacular drive from the Golden Gate Bridge, Stinson is a vast expanse of white sand with relatively calm water for a NorCal beach. It feels like a world away from the city.
Insider Tip: The drive on Highway 1 to get there is gorgeous but winding. If anyone in your family is prone to car sickness, be prepared. It's a key part of what we cover in The Sanity-Saving System for Your Next Family Road Trip.
Explore California's Iconic Coastline
Planning to drive the dramatic coast around Big Sur? Don't leave it to chance. Download our free Big Sur Map & Itinerary for a curated route, must-see stops, and insider tips to make the most of this unforgettable drive.
Your California Beach Trip Playbook
A great plan is what separates a stressful trip from a relaxing one. Here’s how to manage the practical side of your California family beach vacation. For a deeper dive into simplifying the entire process, check out our guide on How to Make Family Travel Planning Actually Easy.
Step 1: Budgeting for the Golden State
Lodging: Vacation rentals are often more cost-effective than hotels for families. Book 3-6 months in advance.
Food: Pack a cooler for your beach days. This can save you $50-$100 per day.
Parking: Beach parking can range from $10-$30. Look for free residential parking a few blocks away.
Activities: Focus on free fun! Sandcastle building, tide pooling, and pier strolling cost nothing.
Sample 5-Day SoCal Budget (Family of 4)
Step 2: The Essential California Beach Packing List

The key is layers. Coastal weather can change in an instant.
Sun Protection: High-SPF sunscreen (reef-safe), wide-brimmed hats, sunglasses, and a rash guard for each child.
The Layers: In addition to swimsuits, everyone needs a sweatshirt or fleece.
Beach Gear: A lightweight beach tent or umbrella, sand toys, boogie boards, and a good cooler.
Footwear: Flip-flops and comfortable walking shoes.
First-Aid Kit: Include bandages, antiseptic wipes, pain reliever, and aloe vera gel.
Pro-Tip: For notoriously difficult parking areas like Santa Monica or Laguna Beach, use an app like SpotHero or ParkWhiz to reserve a parking spot in a nearby garage ahead of time. It can save you an immense amount of stress.
Frequently Asked Questions
What is the best month for a California family beach vacation?
September and October are often considered the best months. You'll enjoy warm, sunny weather and ocean temperatures held over from summer, but with significantly fewer crowds. While summer is classic, it brings peak prices and packed beaches.
Which California beach is the absolute best for toddlers?
La Jolla Shores in San Diego is widely considered the top choice for families with toddlers. Its waves are exceptionally gentle, the sandy shoreline has a very gradual slope, and the adjacent Kellogg Park offers a convenient playground.
Is it better to stay in San Diego or Orange County for a family trip?
It depends on your priorities. San Diego is ideal for families with younger kids, offering calmer beaches like La Jolla and world-class attractions. Orange County offers a more polished experience and is great for active families with older kids or teens, with hubs like Huntington Beach for surfing.
Besides swimsuits, what is one essential item to pack for a California beach day?
Layers, specifically a sweatshirt or fleece for everyone in the family. California's coastal weather can change quickly, with cool marine fog in the morning and breezy afternoons. Having a warm layer ensures you'll be comfortable all day long.
Conclusion
A successful California family beach vacation isn't about finding a secret spot—it's about matching the right beach to your family's unique travel style. Whether you need the gentle bays of San Diego for a toddler's first splash or the vibrant energy of Santa Cruz for your teens, the Golden State has the perfect patch of sand waiting for you.
You now have the framework and destination intelligence to move from planning to action. With this playbook, you're ready to choose your spot, pack your bags, and make this the trip that actually happens. To help you with the bigger picture, see our guide on How to Plan a US Family Vacation That Actually Happens.
Don't Miss Out! Subscribe for Exclusive Content
Subscribe


Comments 0
No comments yet
Be the first to share your experience!
Dont Miss Out! Subscribe for Exclusive Content

Ultimate USA Holidays Guide: Top Picks

FTC Affiliate Disclosure Essentials: Stay Compliant as a Travel Creator

Essential Affiliate Tools: From Tracking to Full Optimization

Booking.com Affiliate Program Review: Pros, Cons, and Earnings Potential

Decoding Affiliate Commission Rates: Benchmarks for Travel Creators

Amazon Associates for Travel: Strategies to Maximize Commissions
Halloween NYC: 5 Spooky Parades
TrekGuider @trekguider
The air in New York City crackles with a different kind of energy in October. The familiar city hum deepens into a mysterious, thrilling whisper as a tangible sense of mischief descends upon the five boroughs. You’re here to experience the legend of a New York Halloween, but the sheer volume of options is a paralyzing paradox of choice. You’ve seen the movies and heard the stories—the epic parties, the haunted houses, the city-wide transformation—but you’re determined to avoid a generic, tourist-trap experience.
The fear of missing out is palpable. A poorly planned evening during Halloween in New York City can quickly devolve from a dream into a logistical nightmare of impenetrable crowds, dead-end queues, and parties that are all hype and no soul. You risk wasting precious time and money on experiences that fail to deliver the spooky, spectacular magic you came for. With Halloween 2026 falling on a Friday, the energy will be at an absolute fever pitch, making a solid plan more critical than ever.
So, let's cut through the noise. Forget the endless blog posts and conflicting advice. This is your tactical guide to the city's electric Halloween spirit, distilled into five core experiences that deliver the spooky, spectacular magic you came for. From the world’s most famous public procession to exclusive rooftop spectacles, this blueprint will ensure your NYC Halloween is not just successful, but legendary. This is your ticket to the very heart of the city's spooky season, a key element celebration among the many incredible festivities we detail in our complete guide to New York Holidays: 10 Must-Do Events.

1. The Main Event: Conquering the Village Halloween Parade
When people talk about Halloween in NYC, they are almost always picturing the Village Halloween Parade. This isn’t just a parade; it’s a cultural institution, a vibrant, chaotic, and utterly breathtaking spectacle of creativity that has been marching through Greenwich Village for nearly half a century. It is, without a doubt, the single most important event on the city’s Halloween calendar.
What Makes It Legendary?
What began in 1974 as a humble neighborhood walk led by a local mask maker has exploded into a televised extravaganza drawing millions of spectators and over 50,000 costumed participants. Its defining feature is its radical inclusivity. This is a parade for the people, by the people. The procession is a mesmerizing river of giant puppets, hundreds of live bands, dancers, and, most importantly, thousands of New Yorkers in some of the most elaborate and imaginative costumes you will ever witness. The energy is infectious, a pure, uninhibited celebration of artistry and the macabre.

How to Participate vs. How to Watch
This is the most critical decision you’ll make. Unlike other parades, the Village Halloween Parade has one simple, golden rule: No Costume, No Marching.
To Participate: If you want to be in the parade, a costume is your non-negotiable ticket. This is your chance to unleash your creativity—the more unique and ambitious, the better. Marchers officially line up on 6th Avenue between Canal Street and Spring Street. The procession kicks off at 7:00 PM sharp on October 31st, but you’ll want to arrive at the lineup area by 6:00 PM to soak in the incredible pre-parade atmosphere and see the costumes up close.
To Watch: If you’d rather be a spectator, your mission is to find a prime viewing spot along the 6th Avenue route, which runs straight north from Spring Street to 16th Street. The sidewalks become incredibly packed, so arriving by 5:30 PM is essential, especially for spots between Bleecker Street and 14th Street, which are the most congested.
Pro-Level Viewing Strategy
For the best experience, avoid the intense crush of the central Village. Head further north on the route, closer to the 14th Street or 16th Street end. The crowds tend to thin out slightly here, giving you a bit more breathing room. Alternatively, find a spot on a cross-street corner, which can offer a slightly better vantage point as the parade turns or passes. Remember that public transportation is your best friend; the subway will be running, but expect crowded stations around the West 4th Street and 14th Street stops.
2. The High-Altitude Parade: Exclusive Rooftop Costume Parties
While the Village Halloween Parade owns the streets, a more exclusive and glamorous kind of procession takes place high above the city: the rooftop party. These events offer a different but equally thrilling version of Halloween in New York City, trading street-level chaos for breathtaking skyline views, curated music, and a parade of high-fashion costumes.
Why a Rooftop Party is a Must-Do
Imagine sipping a smoked old-fashioned while looking out over the glittering lights of the Manhattan skyline, surrounded by people in chic, clever, and sometimes terrifying attire. Rooftop parties provide a controlled, comfortable, and often luxurious environment to celebrate. You get the festive atmosphere without the overwhelming crowds of a public event. It’s the perfect way to see and be seen, offering some of the most photogenic Halloween moments imaginable.

The Unspoken Rules of the Rooftop Parade
This isn't a casual affair. To join this high-altitude parade, you need to plan ahead.
Book Early: Tickets for the best rooftop parties (think venues in the Meatpacking District or with views of the Empire State Building) sell out weeks, sometimes even a month, in advance. Do your research in early October and secure your spot.
Confirm the Dress Code: While it’s Halloween, many high-end venues still maintain a dress code. Your costume should be creative, but it also needs to be classy. Some venues may have specific themes, so read the event details carefully to ensure your costume fits the vibe.
Understand the Cost: These parties are a premium experience. Expect to pay a significant ticket price, which may or may not include drinks. Budget accordingly for a night of upscale revelry.
Pro-Tip: For travelers, especially those exploring the city's nightlife alone, safety matters most. Always let someone know your plans and be mindful of your surroundings. For a complete set of strategies on navigating new places with confidence, our Solo Female Travel Safety Guide offers invaluable, expert-approved advice that applies to any urban adventure.
3. The Parade of Screams: Navigating NYC's Premier Haunted Houses
Not all parades are about celebration; some are about pure, unadulterated fear. The experience of walking through a top-tier haunted house is its own kind of procession—a conga line of terror where every corner reveals a new nightmare. In New York City, this experience is elevated to a high-art horror show.
Inside Blood Manor: What to Expect
Blood Manor is consistently ranked as one of the city’s most intense and terrifying haunted attractions. This isn't a charming ghost tour; it's a full-frontal assault on your senses. You and your group will parade through a labyrinth of themed rooms, corridors, and chambers, each populated by professional actors dedicated to making you scream. The production value is immense, with Hollywood-level sets, gruesome special effects, and a palpable sense of dread that follows you from the moment you enter. You aren't just observing the horror; you are marching directly through its heart.

The Smart Way to Get Scared
The popularity of attractions like Blood Manor means that lines can be monstrous, eating up hours of your night. The single biggest rookie mistake is showing up without a plan. The only way to do this right is to buy timed tickets online in advance. This allows you to select a specific entry window, bypassing the hours-long general admission queue and saving you a massive headache. Arrive about 15-20 minutes before your scheduled time slot to check in.
Pro-Tip: When you’re inside, stick together. The actors are masters of their craft and are trained to identify and isolate the most scared members of a group. Hold onto your friends and move through as a unit. If you get genuinely overwhelmed, look for the designated "exit" signs within the attraction—there's no shame in tapping out if the parade of screams becomes too much.
4. The Family Parade: Charming Neighborhood Trick-or-Treating Processions
For those traveling with family or simply seeking a more wholesome and community-focused Halloween experience, the city’s neighborhood trick-or-treating events are a must. These are informal parades of the cutest kind, where streets are filled with tiny ghosts, goblins, superheroes, and fairies marching from brownstone to brownstone in search of candy.
Where to Find the Best Family-Friendly Atmosphere
While you can find trick-or-treating in many areas, some neighborhoods are famous for going all out. For the quintessential experience, head to the residential blocks of the Upper West Side and the Upper East Side, or cross the bridge to Brooklyn's Park Slope and Cobble Hill. Residents in these areas often decorate their stoops lavishly and are well-prepared for the annual procession of costumed children. Many local community groups and parks also organize specific Halloween "walks" or "rags" that provide a safe and festive environment for families.

Essential Safety for the Little Ghouls
Navigating the city with children on Halloween requires extra vigilance. The general safety rules are more important than ever:
Be Seen: Use reflective tape on costumes and candy bags to ensure children are visible to traffic after dusk. It's a simple step that makes a huge difference.
Stay Together: Adult supervision is non-negotiable. Keep a close eye on your children and establish clear rules about not running ahead.
Plan Your Route: Map out your trick-or-treating path in advance. Stick to well-lit streets and familiar neighborhoods.
Check the Candy: Before anyone eats their treats, inspect the candy at home to ensure everything is sealed and safe.
This charming, family-focused parade is a wonderful way to experience the heartwarming, community-driven side of a New York Halloween, proving that not all of the city’s festivities have to be frightening.
5. The DIY Parade: Crafting Your Own Spooky Pub Crawl
Sometimes the best parade is the one you create yourself. Organizing a themed pub crawl with your friends is a fantastic way to explore different neighborhoods and experience the city’s festive bar scene. This is your chance to be the grand marshal of your own personal procession, charting a course through the city’s most spirited watering holes.
Planning Your Route: From Greenwich Village to the East Village
The key to a successful pub crawl is a well-planned, walkable route. You don’t want to spend your night trekking long distances between stops. Choose a neighborhood with a high density of bars and a vibrant Halloween atmosphere.
Greenwich Village: After watching the main parade, you can easily transition into a crawl here. The area will be buzzing, and nearly every bar will have decorations and drink specials.
The East Village: Known for its edgier, more eclectic vibe, the East Village is packed with unique bars, from historic pubs to modern cocktail lounges. It’s a perfect landscape for a spooky-themed crawl.
Lower East Side: This area offers a fantastic mix of trendy bars and old-school dives, all of which embrace the Halloween spirit with gusto.

Staying Connected and Safe
When your group is on the move, staying safe and connected is crucial. Before you head out, make it a rule that everyone in your group shares their live location with each other using a mobile app. This simple step makes it incredibly easy to find anyone who gets separated from the group in a crowded bar or on a busy street. It’s a modern safety essential for any group outing in a big city.
This DIY approach allows you to fully customize your night, ensuring you experience the exact vibe you’re looking for, making your Halloween in New York City a truly personal and unforgettable adventure.
Your Ultimate Halloween Blueprint
You are now armed with the ultimate insider’s guide. You know how to march in the world’s greatest Halloween parade, how to ascend to an exclusive rooftop party, how to brave a parade of manufactured terror, and how to create your own festive procession through the city’s most iconic neighborhoods. The overwhelming chaos of Halloween in New York City has been distilled into a clear, actionable battle plan. You are no longer just a visitor; you are a participant, ready to dive into the very heart of the magic and madness.
This is just one of the many incredible experiences the city has to offer. To build out your entire trip with the same level of expert insight, from finding the best holiday markets to securing the perfect New Year's Eve spot, explore our comprehensive Travel Guide. It’s the only resource you’ll need to transform your travels from ordinary to extraordinary.
Don't Miss Out! Subscribe for Exclusive Content
SubscribeComments 0
No comments yet
Be the first to share your experience!
Dont Miss Out! Subscribe for Exclusive Content

San Francisco Cherry Blossoms: A Local's Guide to the Blooms

Halloween SF: Haunts Without Horrors

SF Festivals: 7 Must-See Lineups

Christmas SF: Lights & Wharf Wonders

SF Pride: 6 Route & Party Hacks

Chinese New Year SF: Parade Essentials
The Ultimate Solo Travel Packing List: A Modular Checklist
TrekGuider @trekguider
Staring at an empty suitcase can be overwhelming. This is not another generic article; this is your definitive, actionable solo travel packing list. It’s a methodical system designed to transform packing from a chore into an act of empowerment. We’ve built this checklist on a "Core + Modules" framework: a non-negotiable foundation of essentials, plus optional modules you can add for specific types of travel.
This tactical checklist is your "what." Before you dive into the specific items, we highly recommend reading our guide to to understand the minimalist systems and philosophy that make this list so powerful. Understanding the "why" will make packing the "what" intuitive and stress-free.
Your Core Essentials
Every trip, regardless of destination or duration, starts here. These are the non-negotiable items that form the base of any smart solo travel plan. Do not leave home without them.
Your Access to Everything
Your ability to move, transact, and prove your identity matters most. Build redundancy into your document strategy.
Passport/Visa: Check that your passport has at least six months of validity from your planned return date.
Digital & Physical Copies: Store a physical photocopy of your passport and driver's license in a separate bag from the originals. Keep high-quality photos of them in a secure cloud service (Google Drive, Dropbox) and in your email.
Travel Insurance Details: Carry a printed copy of your policy and save a PDF to your phone for offline access.
Multiple Bank Cards: Pack at least two different credit cards and one debit card. Store them in separate locations (e.g., one in your wallet, one in your daypack).
Emergency Cash: Hide $100-$200 USD deep within your main bag as a final safety net.
Bank Travel Notifications: Log into your banking apps and set a travel notice for your specific destinations and dates. This five-minute task prevents your accounts from being frozen for suspected fraud.
Your On-the-Go Wellness Kit
Stay healthy and comfortable on the road. The goal is a compact, leak-proof, and comprehensive kit.
Prescription Medications: Pack enough for your entire trip in their original, labeled containers. Bring a copy of the prescription itself.
Mini First-Aid Kit:
Pain relievers (Ibuprofen/Acetaminophen)
Assorted adhesive bandages
Antiseptic wipes
Blister treatment (e.g., Compeed)
Anti-diarrhea medication (e.g., Imodium)
Solid Toiletries: The ultimate packing hack. Eliminates liquid restrictions, prevents leaks, and lasts longer.
Solid shampoo bar
Solid conditioner bar
Solid soap bar
The Basics:
Toothbrush
Solid toothpaste tablets
Deodorant
Your Digital Lifeline
Your smartphone is your navigator, translator, and connection to the world. Keeping it powered is mission-critical.
Smartphone: Your all-in-one command center. Download offline maps for your destination.
Portable Power Bank: A non-negotiable safety item. Choose a 10,000mAh+ model from a reliable brand like Anker to guarantee 2-3 full phone charges. Keep it charged.
Universal Power Adapter: Invest in one high-quality universal adapter with multiple USB ports. This allows you to charge all your devices from a single outlet.
Noise-Canceling Headphones: Essential for focus and peace on loud flights, trains, or in shared hostel rooms.

Essential Solo Travel Safety Gear
This module proactively addresses the "what-if" scenarios, allowing you to explore with confidence and sleep soundly. The gear here is your first line of defense, but true confidence comes from preparation. For a complete guide to situational awareness and navigating new environments securely, our comprehensive article, Anxious to Adventurous: Solo Travel Tips for Confidence, is required reading.

For Your Accommodation
Portable Door Lock (e.g., Addalock): A small, lightweight device that braces your door from the inside, making it impossible to open even with a key.
Door Stop Alarm: A wedge that slides under your door. If opened, it physically blocks the door while emitting a piercingly loud alarm.
For When You're Out & About
Anti-Theft Daypack (e.g., Pacsafe, Travelon): Choose a crossbody bag or backpack with slash-proof straps, lockable zippers, and RFID-blocking pockets.
Personal Safety Alarm: A keychain device that emits an ear-splitting siren and flashing strobe light to attract attention and disorient an attacker.
RFID-Blocking Wallet: Protects your passport and credit cards from electronic "skimming."
The 5-4-3-2-1 Formula
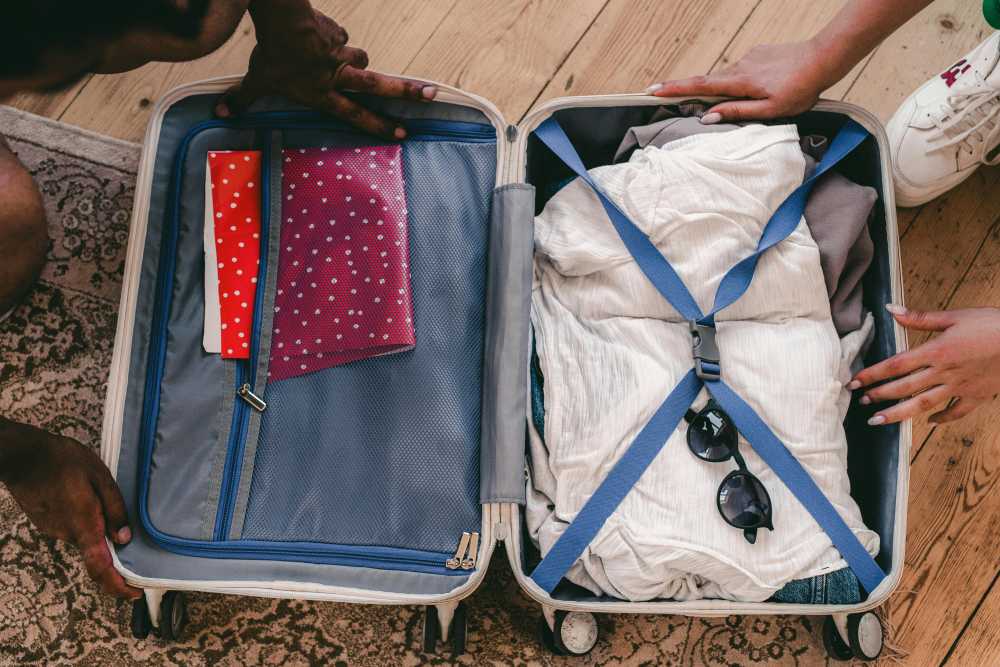
Pack less and wear more with a strategic, versatile wardrobe built on mix-and-match essentials. Choose a neutral color palette (black, gray, navy) for core items.

The 5-4-3-2-1 Formula (1-Week Framework)
5 Tops: Focus on wrinkle-resistant, odor-resistant fabrics. At least one should be merino wool—the ultimate travel fabric for temperature regulation and multi-day wear.
4 Bottoms: A typical mix includes one pair of comfortable travel pants, one pair of jeans or chinos, and one skirt or pair of shorts.
3 Accessories: A lightweight scarf or sarong is incredibly versatile (fashion, beach cover-up, towel, head covering).
2 Pairs of Shoes:
Pair 1: Supremely comfortable, broken-in walking shoes.
Pair 2: A versatile, slightly dressier option (flats, loafers, clean leather sneakers).
1 Jacket: A waterproof, windproof outer shell. Layer with a fleece or sweater for warmth as needed.
Climate Sub-Modules (Choose One)
Cold Climate Add-ons: One set of thermal base layers (top and bottom), a warm hat, gloves, and wool socks.
Tropical Climate Add-ons: A swimsuit, a quick-dry microfiber towel, a wide-brimmed sun hat, and sunglasses.
Digital Nomad's Checklist
This module is for anyone working on the road. It focuses on creating an efficient, ergonomic, and connected remote workstation.

Lightweight Laptop: An ultrabook (e.g., MacBook Air) offers the best balance of power and portability.
Portable Laptop Stand (e.g., Roost, Nexstand): The single best way to prevent neck and back pain.
Ergonomic Peripherals: A slim, portable keyboard (e.g., Logitech K380) and a portable mouse (e.g., Logitech MX Anywhere).
High-Quality Headphones with Mic: Essential for calls and focus in noisy environments.
eSIM: Use an app like Airalo to purchase and install a digital SIM card before you leave. Get connected the moment you land.
High-Capacity "PD" Power Bank: Ensure your power bank is "Power Delivery" rated and has enough capacity to charge your laptop, not just your phone.
What NOT to Pack
Knowing what to leave behind is as important as knowing what to bring.

Expensive or Sentimental Jewelry: Don't bring anything you would be devastated to lose.
Full-Sized Towel: Most accommodations provide them. If needed, a quick-dry travel towel is a superior option.
Multiple "Good" Outfits: Stick to versatile pieces that can be dressed up or down.
Physical Books: An e-reader provides an entire library at a fraction of the weight.
"Just in Case" Items: Unless you're traveling to a very remote location, you can buy most basic items at your destination.
Your Questions Answered
What should a solo female traveler add? Many add a versatile sarong (for modesty at religious sites), a silicone doorstop for extra security, and some opt for a fake wedding ring to deter unwanted attention.
How do I pack for a long-term trip in a carry-on? Commit to doing laundry. Pack one week's worth of clothing using the capsule method and plan to do laundry every 7-10 days.
What are the best shoes for solo travel? The ones you can walk in comfortably for 8+ hours. Never bring new, unbroken-in shoes on a trip.

By starting with the Core Essentials and adding modules tailored to your journey, you have now built the perfect solo travel packing list. This system eliminates guesswork, ensures you are prepared for your adventure, and empowers you to travel with the confidence of a pro.
Don't Miss Out! Subscribe for Exclusive Content
SubscribeComments 0
No comments yet
Be the first to share your experience!
Dont Miss Out! Subscribe for Exclusive Content
Ultimate USA Holidays Guide: Top Picks
FTC Affiliate Disclosure Essentials: Stay Compliant as a Travel Creator
Essential Affiliate Tools: From Tracking to Full Optimization
Booking.com Affiliate Program Review: Pros, Cons, and Earnings Potential
Decoding Affiliate Commission Rates: Benchmarks for Travel Creators