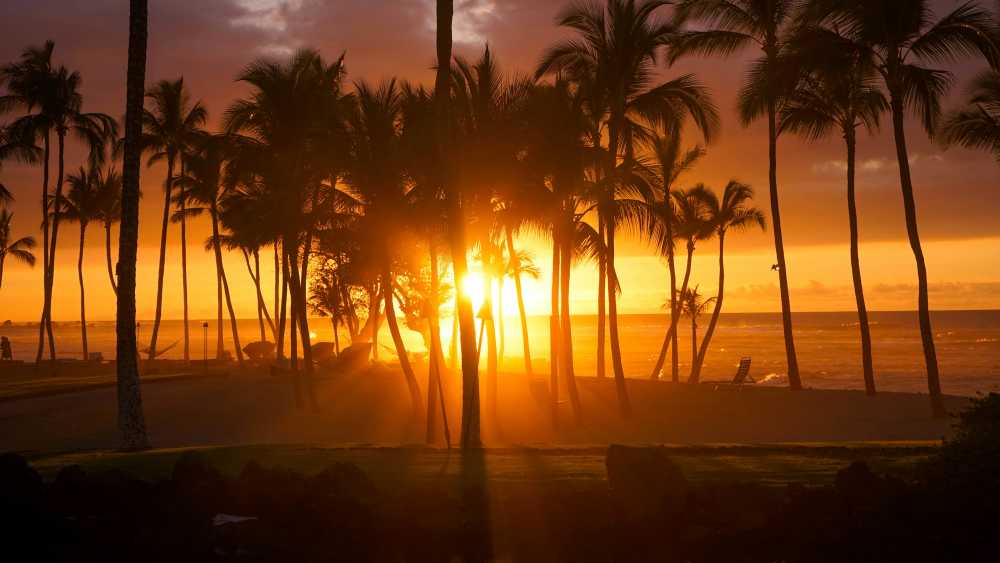
How to Plan a Stress-Free Hawaii Family Trip
TrekGuider @trekguider
Planning a family trip to Hawaii should feel exciting, but the reality can be overwhelming. You're juggling how to pack for unpredictable weather, what activities will actually entertain everyone from toddlers to teens, and how to manage the logistics without losing your mind. The fear of getting it wrong—forgetting something crucial or planning a day that ends in meltdowns—can quickly overshadow the promise of paradise.

Imagine arriving on Maui only to realize you’ve forgotten the reef-safe sunscreen now required by law, forcing a frantic, expensive search. Picture the meltdowns—from kids and adults alike—when a carefully planned beach day is met with groans of boredom, or the crushing disappointment of discovering the lūʻau you dreamed of has been sold out for weeks. Without a strategic plan, the logistical details can overshadow the magic you’re seeking.
This guide is the antidote to that anxiety. It’s your strategic playbook, crafted from hard-won experience to eliminate the guesswork and transform your planning process into an exciting prelude to your adventure. While this article drills down into Hawaii-specifics, it's part of our complete library of Family Travel Ideas: The 2026 Guide to Unforgettable Trips. Consider this your roadmap to a seamless, stress-free, and truly magical Hawaiian escape.
What to Bring and What to Leave Behind
A successful packing strategy for Hawaii isn't about bringing everything; it's about bringing the right things. The islands’ unique environment—from intense equatorial sun to sudden tropical showers—demands a thoughtful approach. For a deep dive into the core principles, our How to Pack Light Guide is a great resource. This Hawaii-specific blueprint ensures you’re prepared for every possibility without hauling unnecessary weight across the Pacific.
Your In-Flight & First-Day Survival Kit
Think of your carry-on bag as your mission-critical command center. If your checked luggage gets delayed, this bag should contain everything you need to not just survive, but thrive for the first 24 hours.
A Complete Change of Clothes for Everyone: One full, lightweight outfit per person. Don't forget underwear and socks.
Swimsuits: This is non-negotiable. You can change in the lobby restroom and head straight to the pool, starting your vacation immediately.
Essential Medications: All prescription medications, plus a small first-aid kit with children’s pain relievers, allergy medicine, band-aids, and antibacterial ointment.
Documents & Valuables: IDs, credit cards, and digital or printed copies of your key reservations (hotel, rental car, first big tour).
The "Boredom Buster" Kit: Fully charge all electronics and pre-load them with movies and games. For younger kids, pack a small bag with a new coloring book or a few wrapped dollar-store toys to reveal mid-flight.
A Feast of Snacks: Pack more than you think you’ll need to combat travel delays and grumpy tummies.
Empty Reusable Water Bottles: Fill them up post-security to stay hydrated and save money.
Your Flight Plan for Happy Kids
The long flight to Hawaii is often the most dreaded part of the trip. To make it a breeze, download our free, sanity-saving checklist.
Stress-Free Flying with Kids Guide
It's packed with simple, actionable tips to keep kids of all ages happy and occupied from takeoff to landing.
The Checked Luggage
Chaos is the enemy of a relaxing vacation. To combat this, we rely on a modular system built around packing cubes. This simple technique transforms your luggage from a chaotic pit into a structured, mobile dresser where everything has its place.

The Clothing System (Lightweight & Layered): Hawaii’s climate is defined by humidity and trade winds. Pack lightweight, breathable fabrics like cotton and linen. Focus on mix-and-match pieces. For a week, plan on 5-6 tops and 3-4 bottoms per person. Everyone should have a light jacket or cardigan for breezy evenings and a packable rain jacket.
The Beach Gear System (Protect & Play): This is the core of your Hawaii packing.
Reef-Safe Sunscreen: An absolute must. Pack at least one large tube of mineral-based (zinc oxide or titanium dioxide) sunscreen lotion.
Total Sun Protection: Wide-brimmed sun hats, UV-protective sunglasses, and long-sleeved rash guards for every family member.
Minimalist Beach Toys: A collapsible bucket and a few small shovels are all you need.
Goggles: For kids who love to put their face in the water, a good pair of goggles is invaluable.
The Footwear System (The Rule of Three): You only need three pairs of shoes per person.
Water Shoes/Aqua Socks: Essential for exploring rocky tide pools or beaches with sharp lava rock.
Sandals/Flip-Flops: For the beach, pool, and casual strolls.
Closed-Toe Shoes: A comfortable pair of sneakers for travel days, hikes, or activities like ziplining.
What to Leave at Home (And Rent or Buy in Hawaii)
Beach Towels: Every hotel and condo complex will provide these.
Bulky Floaties and Pool Noodles: Buy them there and leave them for another family when you depart.
Full-Sized Snorkel Sets: Renting high-quality, sanitized equipment on the island is far more convenient.
Formal Wear: Hawaii is overwhelmingly casual. A sundress or a collared shirt with nice shorts is as dressed-up as you’ll need to get.
Pro-Tip: Assign each family member a specific color of packing cubes. This simple trick makes it incredibly easy to identify whose clothes are whose.
Crafting Your Perfect Itinerary for Family Beach Vacations in Hawaii
While building sandcastles is a rite of passage, the true magic of Hawaii lies in its diverse experiences. Tailoring activities to your children's developmental stage is the secret to a trip that engages everyone. And to keep it all organized, our Travel Itinerary Template is a game-changer.
For Families with Toddlers & Preschoolers (Ages 0-5)
At this age, the goals are safety, sensory engagement, and maintaining routines. Focus on manageable outings that spark wonder without causing overstimulation.
Master the Art of the Lagoon: The man-made lagoons of Ko Olina on Oahu are a toddler parent’s paradise. The water is virtually waveless, creating a giant, safe saltwater pool. On Kauai, Lydgate Beach Park offers similarly protected swimming.
Meet the Marine Life (Up Close): The Maui Ocean Center is a world-class aquarium with a walk-through tunnel and touch pools. The Waikiki Aquarium on Oahu is smaller but equally captivating.
Discover the Magic of Shave Ice: Don't underestimate the joy of this simple treat. Trying authentic Hawaiian shave ice is a core memory on a hot afternoon.

For School-Aged Kids (Ages 6-12)
This is the golden age of family travel. Kids are old enough for bigger activities and to truly learn from their experiences.
Become a Junior Snorkeler: This is the perfect age to introduce kids to the underwater world. Start at an ultra-calm spot like Kapalua Bay on Maui or Hanauma Bay on Oahu (reservations required!).
Experience a Family Lūʻau: A lūʻau is a quintessential Hawaiian experience. Opt for one known for being family-friendly, like the Smith Family Garden Lūʻau on Kauai.
Become a Volcano Voyager: On the Big Island, a visit to Hawaiʻi Volcanoes National Park is like a real-life science lesson. Pick up a Junior Ranger booklet to transform your kids into active explorers.
For Teenagers (Ages 13-18)
For teenagers, the key is balancing family time with a sense of independence and adventure. Involve them in the planning.
Learn to Surf: Book a group lesson from a reputable surf school in a beginner-friendly area like Waikiki on Oahu or Kihei on Maui.
Conquer an Epic Hike: Challenge your teens with an iconic hike like the summit of Diamond Head on Oahu, which offers panoramic vistas of Waikiki.
Zipline Through Paradise: Soaring through the rainforest canopy on a zipline is a pure adrenaline rush that provides a thrilling adventure for the whole family.

Pro-Tip: The most popular activities in Hawaii—especially lūʻaus, timed-entry parks like Hanauma Bay, and surf lessons—book up weeks, if not months, in advance. Make your reservations the moment you have your travel dates confirmed.
The Aloha Code: Essential Rules for a Safe and Respectful Trip
A little local knowledge goes a long way. These are the non-negotiable rules for any family visiting the islands.
Ocean Safety Comes First
The Pacific Ocean is powerful. The most important rule in Hawaii is "Never turn your back on the ocean." Rogue waves can appear on even the calmest-looking days.
Swim at Lifeguarded Beaches: Whenever possible, choose a beach with a lifeguard on duty.
Understand Shore Break: Many Hawaiian beaches have a powerful shore break, where waves crash directly onto the sand. This can be dangerous for young children.
Respect the Warnings: Pay attention to all posted warning signs regarding strong currents, high surf, or dangerous marine life.
Protecting the 'Āina (Land)
Hawaii's coral reefs are fragile, living ecosystems. Protecting them is not just a suggestion; it's the law.

Use Mineral-Based LOTION Only: By law, you must only use sunscreens with zinc oxide or titanium dioxide. Critically, avoid aerosol sprays. Even "reef-safe" sprays settle on the sand and wash into the ocean, harming the reef.
Apply Early and Often: Apply sunscreen 20 minutes before sun exposure and reapply every two hours, or immediately after swimming.
Respecting the Wildlife
Hawaii is home to the Hawaiian green sea turtle (honu) and the endangered Hawaiian monk seal.

Keep Your Distance—It's the Law: You must maintain a distance of at least 10 feet (3 meters) from sea turtles and 50 feet (15 meters) from monk seals. It is illegal to touch, chase, or harass them.
View Responsibly: Use a zoom lens for photos. If an animal approaches you, calmly and slowly move away.
Frequently Asked Questions
What is the single most important thing to pack for a Hawaii family trip?
The most crucial item is reef-safe, mineral-based sunscreen LOTION. Sunscreens containing oxybenzone and octinoxate are banned in Hawaii to protect the coral reefs, and aerosol sprays are highly discouraged as they pollute the sand and water.
Is Hawaii a safe destination for toddlers and young children?
Absolutely. Many beaches are perfect for little ones, especially the man-made lagoons at Ko Olina on Oahu or the protected rock ponds at Lydgate Beach Park on Kauai, which have calm, waveless water perfect for safe splashing.
Do I really need to book Hawaiian activities in advance?
Yes, it is critical. Popular activities like lūʻaus, boat tours, surf lessons, and timed-entry parks like Hanauma Bay on Oahu often sell out weeks or even months in advance. Booking ahead is essential to avoid disappointment.
What are the essential types of shoes to bring to Hawaii?
You only need three pairs per person: water shoes for rocky beaches and tide pools, comfortable sandals or flip-flops for the beach and pool, and a pair of closed-toe sneakers for travel days and hiking.
Conclusion
The key to crafting the perfect trip isn’t about finding a secret beach; it’s about making a series of smart, informed choices. By implementing a strategic packing system and thoughtfully selecting age-appropriate activities, you transform the stress of planning into the joy of anticipation. You now have the framework to pack with confidence and design an itinerary that weaves together relaxation, adventure, and connection. This is how you create the legendary Hawaiian family vacation that becomes a key part of your family's story. For even more in-depth strategies on planning unforgettable trips anywhere in the world, explore our comprehensive Travel Guide. Aloha.
Read the full guide: Family Travel Ideas: The 2026 Guide to Unforgettable Trips
Don't Miss Out! Subscribe for Exclusive Content
Subscribe


Comments 0
No comments yet
Be the first to share your experience!
Dont Miss Out! Subscribe for Exclusive Content

Ultimate USA Holidays Guide: Top Picks

FTC Affiliate Disclosure Essentials: Stay Compliant as a Travel Creator

Essential Affiliate Tools: From Tracking to Full Optimization

Booking.com Affiliate Program Review: Pros, Cons, and Earnings Potential

Decoding Affiliate Commission Rates: Benchmarks for Travel Creators

Amazon Associates for Travel: Strategies to Maximize Commissions
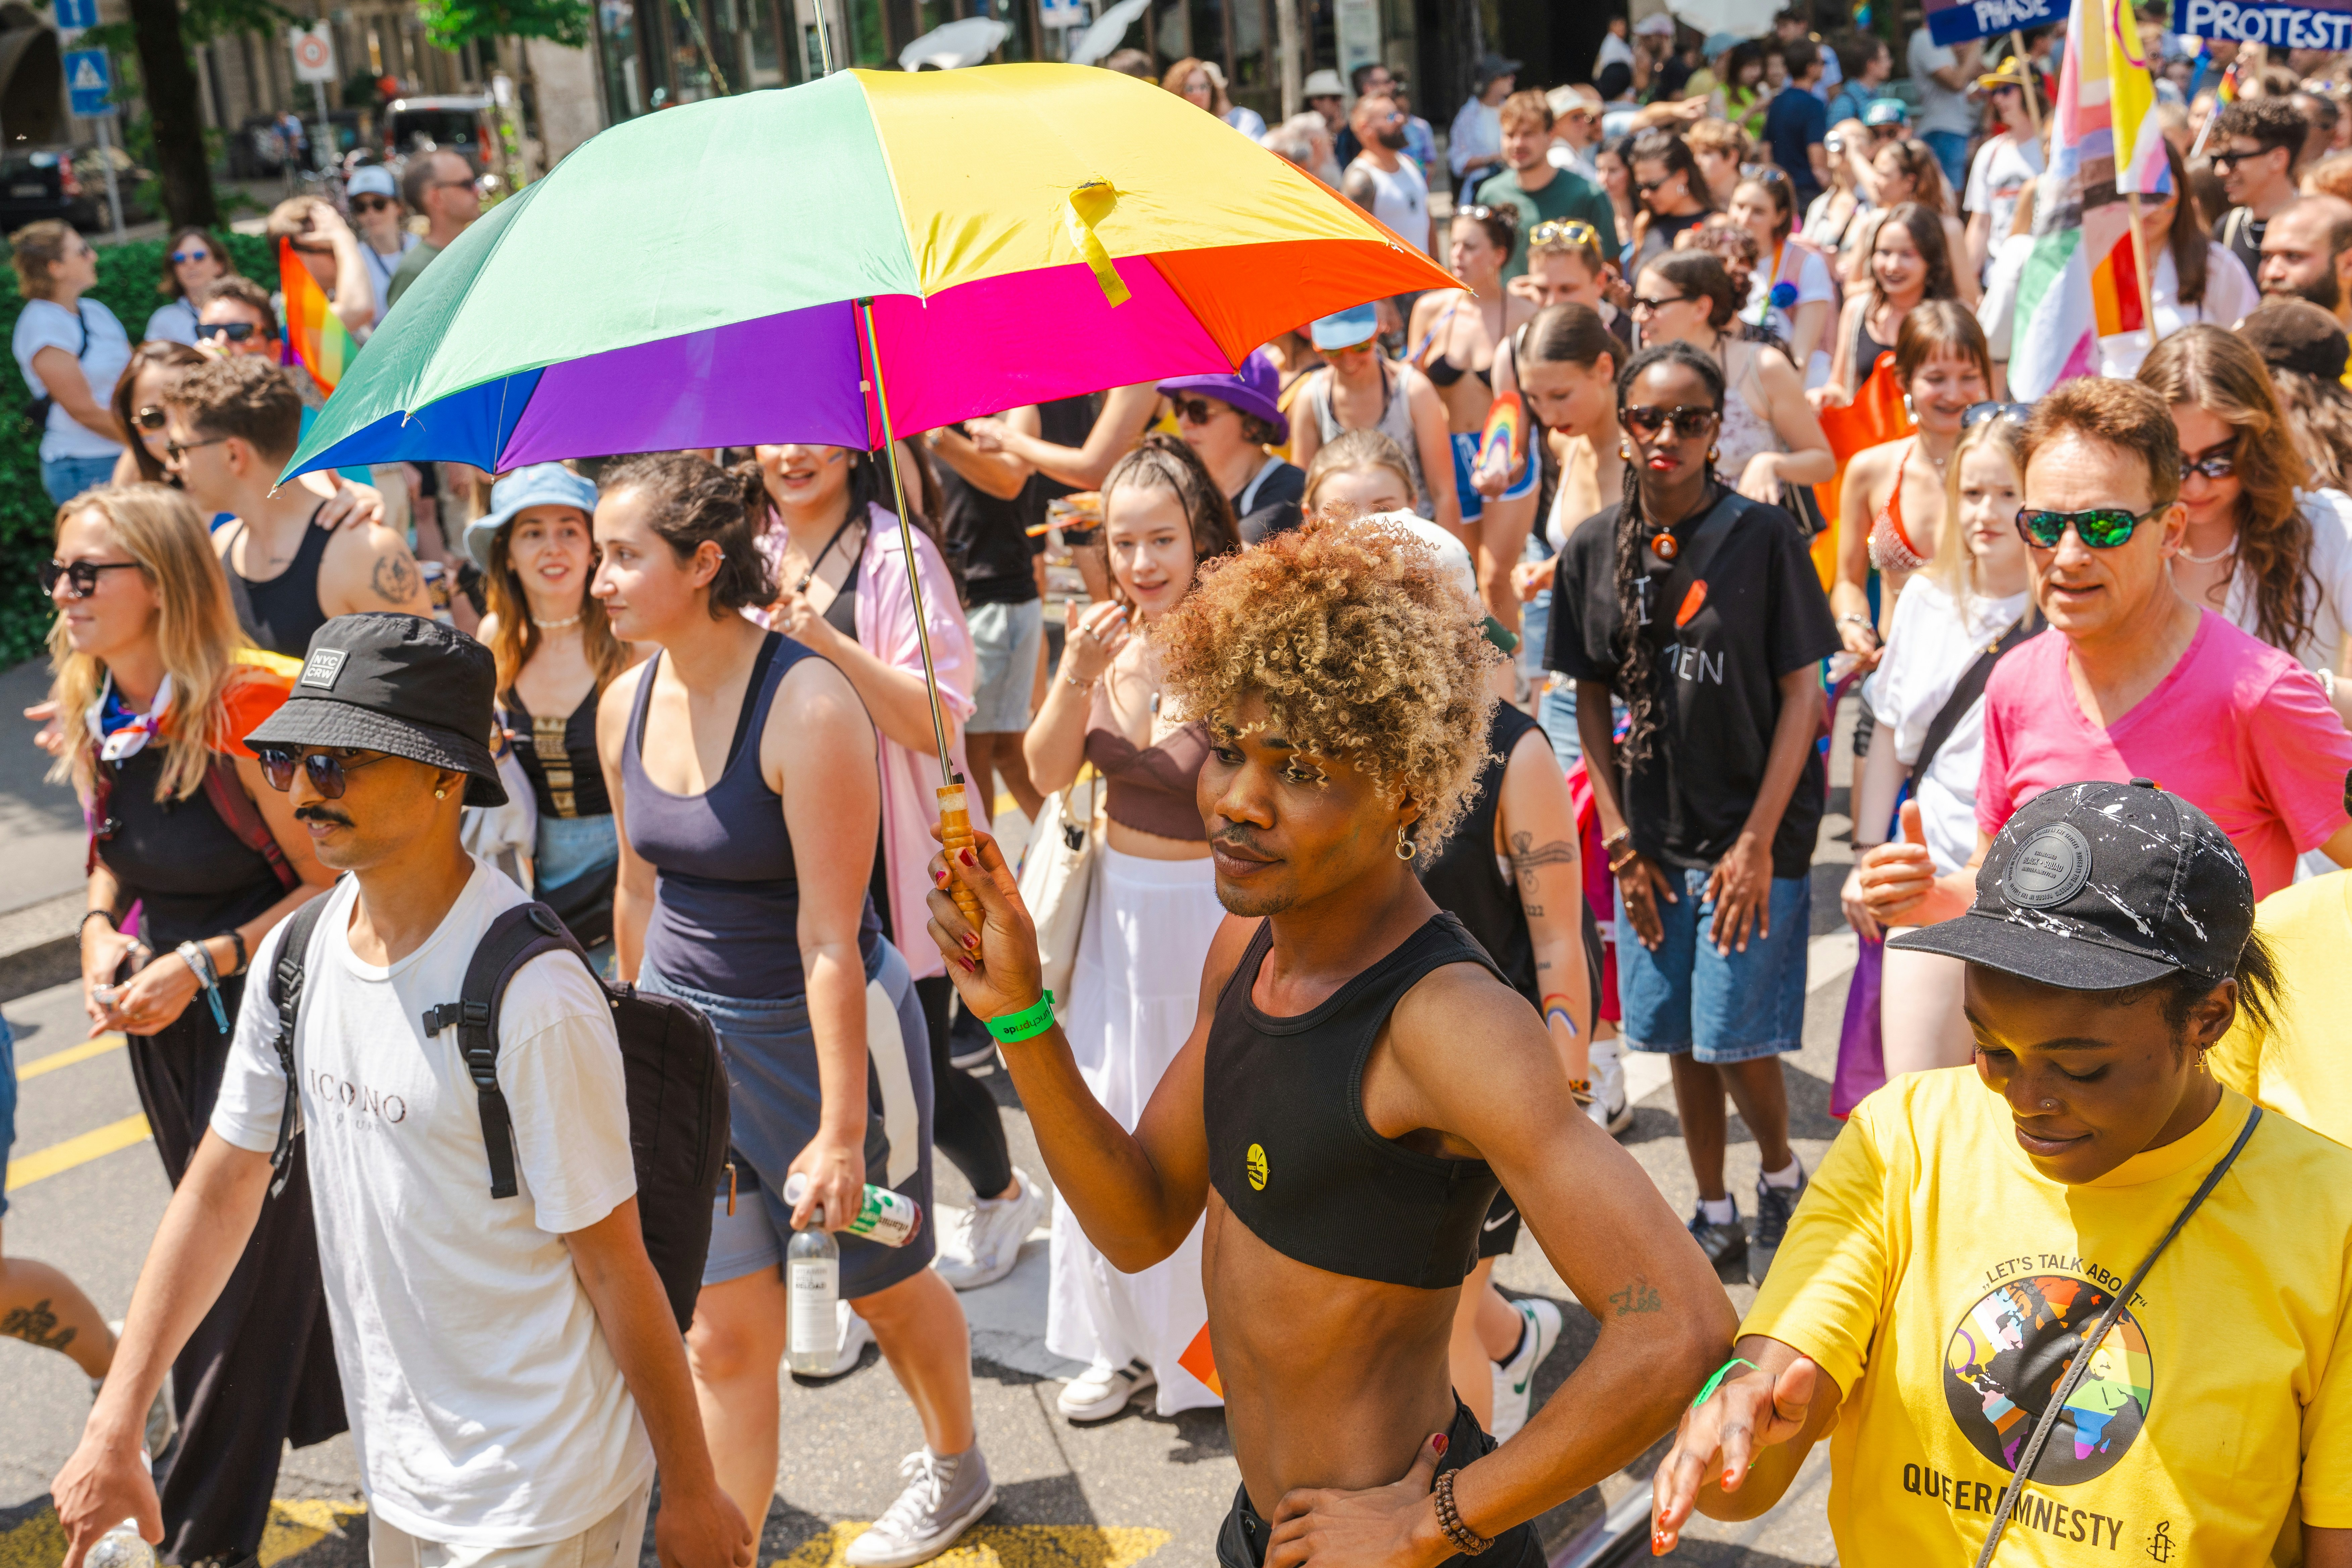
NYC Pride: Parade Route Essentials
TrekGuider @trekguider
The air crackles with anticipation. You feel the bass from a distant float thumping in your chest, a rhythmic heartbeat for a city ready to explode in a celebration of love, identity, and history. The NYC Pride Parade is one of the most iconic, life-affirming events on the planet. But as you picture the cascade of rainbow flags, a knot of logistical questions tightens in your stomach. With millions of people flooding Manhattan, where do you even begin? How early is early enough? How do you navigate a multi-mile route to actually see the parade without getting swallowed by the crowd?
Without a smart plan, the dream experience can dissolve into a logistical nightmare. You risk being stuck ten-deep behind a wall of people, catching only glimpses of the spectacle. You could spend hours feeling overwhelmed, battling for a sliver of sidewalk instead of immersing yourself in the powerful current of community and celebration. The line between an unforgettable day of joy and a frustrating ordeal is drawn by preparation.
This is your definitive playbook for conquering the chaos. Forget the guesswork. We are breaking down the entire pride parade New York route, section by section, arming you with insider strategies and actionable essentials. From the electric energy of the formation zone to the historic heart of the Village, this guide will help you navigate the day like a seasoned pro. Get ready to transform potential stress into pure, unadulterated Pride.

The Heartbeat of Pride: A Journey from Protest to Celebration
But to truly appreciate the river of rainbow flags and joyous noise, you have to understand its source. This isn’t just a party; it’s a pilgrimage. The modern NYC Pride Parade is the direct descendant of the Christopher Street Liberation Day March, first held in 1970, exactly one year after the Stonewall Uprising of 1969. That rebellion, a series of spontaneous and defiant demonstrations against a police raid on the Stonewall Inn, was the flashpoint that ignited the modern gay rights movement.
What began as a protest march has evolved over decades into a powerful dual-purpose event: a joyous celebration of identity and a formidable platform for activism. In the 1980s, as the AIDS crisis devastated the community, the parade became a vital and visible front line for raising awareness and demanding action, cementing its role as the community's conscience and its loudest voice. Its deep historical roots and unwavering commitment to progress make it a key element event—and for good reason, a non-negotiable highlight in our definitive guide to New York Holidays: 10 Must-Do Events. Understanding this legacy enriches the entire experience, transforming you from a spectator into a participant in living history.
Mark Your Calendar: 2026 NYC Pride Parade Date and Time
Precision is your best friend when planning for an event of this magnitude. Get these details locked into your calendar now.
Date: Sunday, the last Sunday of June
Start Time: The parade officially kicks off between 11:00 AM and 12:00 PM.
A word of caution: Do not mistake the start time for your arrival time. The parade route is miles long, and the best viewing spots are claimed hours in advance. For a prime location, especially in the more popular sections, you should be in position no later than 9:00 AM. For the truly iconic spots, even earlier is better.

Deconstructing the Route: A Mile-by-Mile Guide to the Pride Parade New York
The official route for the pride parade New York is a journey through the city's cultural and historical soul. Each segment offers a distinct atmosphere and viewing experience. Your perfect spot depends entirely on the vibe you’re seeking.
The Kick-Off: 26th Street and 5th Avenue (The Formation Zone)
The Vibe: This is the epicenter of pure, unharnessed anticipation. The energy here is electric, a fascinating mix of organized chaos and raw excitement. You’ll see floats getting their final sound checks, dance troupes running through their choreography one last time, and thousands of marchers buzzing with adrenaline before they take their first official step. It’s less of a polished performance and more of an authentic, behind-the-scenes look at the massive human effort powering the event.
Viewing Advice: Standing near the start means you see every contingent at its absolute freshest. The costumes are pristine, the energy is at its peak, and the performances are sharp. It’s a fantastic spot for photographers wanting to capture candid moments and fine details. The crowds here are intense as everyone jockeys for that first glimpse.
Logistics: Arrive extra early—think 8:00 AM—to secure a spot with a clear line of sight. Amenities are scarcer here compared to further down the route. Pack what you need for the morning, as ducking into a local shop will be a major, time-consuming undertaking.
The Main Artery: South on 5th Avenue (The Spectator Hub)
The Vibe: As the parade marches down the world-famous 5th Avenue, it hits its full, spectacular stride. This is the quintessential big-city parade experience. The avenue is wide, the crowds are massive, and the backdrop is pure New York City grandeur. The sound of music and cheering reverberates off the tall buildings, creating an immersive wall of sound. You’ll be surrounded by a diverse mix of families, tourists, and locals, all united in a shared celebration.
Viewing Advice: This is the longest stretch of the parade and where most spectators naturally congregate. For a slightly less condensed crowd, try to find a spot further north, perhaps in the high 30s or 40s. The closer you get to the Village, the exponentially denser the crowds become.
Logistics: This section offers the best access to delis, coffee shops, and stores for restrooms and refreshments. However, be prepared for long lines for absolutely everything. Public transportation is your best friend here; the numerous subway stops along 6th Avenue run parallel to the route, making access relatively straightforward.
The Historic Turn: 8th Street to Christopher Street (The Soul of Pride)
The Vibe: This is the emotional and historical heart of the entire parade. As the route makes its key turn off 5th Avenue and winds through the narrower streets of Greenwich Village towards the Stonewall National Monument, the atmosphere shifts. It becomes more intimate, more intense, and deeply resonant. The sense of history is palpable. This is where the cheers often feel the loudest and the connection between the marchers and the crowd feels most profound.
Viewing Advice: This is, without question, the most meaningful and popular place to watch the parade. Consequently, it is the most crowded. To get a spot here, you must be committed. Arrive by 8:00 AM at the absolute latest, and be prepared to hold your ground for hours. The experience, however, is powerful and unparalleled.
Logistics: Once you’re in a spot here, you’re in for the duration. The narrow streets and dense crowds make movement nearly impossible. Pack everything you need for several hours. There are fewer commercial establishments directly on these streets, so plan accordingly.

Pro-Tip: For a less obstructed view, look for spots near intersections on the opposite side of the street from the parade's direction of travel. Crowd density is often slightly lower there as people tend to cluster on the inside of the turns.
The Grand Finale: Finishing Near 15th Street and 7th Avenue (The Dispersal Zone)
The Vibe: The energy at the end of the route is one of joyous exhaustion and collective accomplishment. Marchers, who have been on their feet for hours, are often interacting more freely with the crowd as they complete their long journey. It’s less of a formal procession and more of a massive, mobile street party winding down into its final, celebratory moments.
Viewing Advice: This is by far the least crowded section of the route, making it an excellent choice for families, those with accessibility concerns, or anyone who couldn't arrive at the crack of dawn. You’ll still see every float and group, but with significantly more room to breathe and move.
Logistics: This area offers the easiest exit strategy. With the parade dispersing, streets begin to reopen sooner, and access to multiple subway lines on 7th Avenue (like the 1, 2, and 3 trains) makes for a quicker trip home or to your next destination.
Your Strategic Viewing Plan: 7 Essential Tips for the Best Experience
A little strategy goes a long way in a crowd of millions. Follow these essential tips to ensure your day is smooth, safe, and spectacular.
Arrive Early, Then Arrive Earlier: This cannot be overstated. For a front-row spot anywhere south of 23rd Street, 9:00 AM is a good baseline. For a coveted spot in the West Village or near Christopher Street, you need to be thinking 7:30 AM or 8:00 AM. The most dedicated spectators arrive with breakfast and a blanket.
Pack Your Urban Survival Kit: You are essentially setting up a base camp for the day. Your kit should include: a large, reusable water bottle (staying hydrated is non-negotiable), high-SPF sunscreen, a portable phone charger, and plenty of snacks. Relying on local bodegas is a rookie mistake; they will be overwhelmed and may run out of supplies.
Master Public Transit: Driving is not an option. Street closures are extensive and begin in the early morning. The subway is your only logical choice. Use lines that run along 6th Avenue (B, D, F, M) or Lexington Avenue (4, 5, 6) and walk west. Avoid stations directly on the route, as they will be dangerously crowded.
Choose Your Vibe, Not Just a Spot: Before you pick a location, decide what kind of experience you want. Do you crave the high-energy launch? The massive midtown spectacle? The deeply emotional historic heart? Or the relaxed, celebratory finish? Matching the location to your desired vibe is the secret to a perfect day.
Stay Connected (But Have a Backup): With millions of people in one area, cell service can be notoriously unreliable. While you should keep your phone charged, don’t depend on it for communication. Use a buddy system, and if you’re with a group, establish a clear, physical meeting point and time in case you get separated.
Prioritize Accessibility: Organizers are continually working to make the event more accessible. Check the official NYC Pride website in the weeks leading up to the parade for detailed information on designated viewing areas for people with disabilities. These locations offer better sightlines and a less congested environment.
Embrace the Virtual Experience: If you can't make it in person or prefer to avoid massive crowds, don't worry. The NYC Pride Parade is live-streamed across multiple platforms. You can catch all the action from the comfort of your home, a powerful option for those who want to participate from afar.
Pro-Tip: The blocks just after the parade turns off 5th Avenue onto 8th Street can be a strategic viewing sweet spot. The crowd thins slightly as it navigates the corner, offering a brief window for better photos and a bit more breathing room before it swells again towards Christopher Street.
Beyond the Sidelines: Documenting Your Day
The spirit of Pride is participation. Even as a spectator, you are a vital part of the event. Wear your brightest colors, create a supportive sign, and cheer loudly for the groups that resonate with you. Your energy is what fuels the marchers on their long walk.
For many, capturing the day is part of the experience. The vibrant colors, powerful emotions, and incredible stories of the pride parade New York make it a content creator's dream. If you're looking to capture and share the experience like a pro, preparation is everything. To elevate your storytelling, our The Travel Creator's Toolkit provides the essential checklists and guides to turn your passion into compelling content that does justice to this incredible event.

Planning the Perfect Pride Weekend in NYC
The parade is the magnificent centerpiece of a city-wide, month-long celebration. Pride Month in New York is packed with parties, cultural events, and community gatherings. Don’t limit your experience to just a few hours on a Sunday afternoon. Make it the anchor of an unforgettable weekend or a longer trip to the city.
Navigating the parade is just one piece of an unforgettable trip. To build a complete itinerary—from finding the best LGBTQ+-friendly hotels in Chelsea or Hell's Kitchen to exploring other iconic city sights that have shaped queer history—our comprehensive Travel Guide is the ultimate resource for planning your entire New York adventure. It helps you weave the parade into a broader, richer travel experience.
Your Mission: Experience Pride to the Fullest
You are now armed with the essential knowledge to navigate the pride parade New York not just as a spectator, but as an informed participant in a powerful celebration. You know the history that fuels the march, the unique vibe of each section of the route, and the practical strategies to make your day a resounding success. The parade is more than a route on a map; it's a journey through history, proof of resilience, and an explosion of pure joy.
So pick your spot, pack your survival kit, and get ready to experience the love, history, and unbreakable community of NYC Pride. Go with an open heart, a loud voice, and a solid plan.
Meta Data Suggestions:
SEO Meta Title: NYC Pride Parade Route Guide: Best Viewing Spots & Tips 2026
URL Slug: /nyc-pride-parade-route-essentials
SEO Meta Description: Your ultimate guide to the 2026 NYC Pride Parade. Discover the best viewing spots, route map, start times, and essential tips to navigate the crowds.
Don't Miss Out! Subscribe for Exclusive Content
SubscribeComments 0
No comments yet
Be the first to share your experience!
Dont Miss Out! Subscribe for Exclusive Content

San Francisco Cherry Blossoms: A Local's Guide to the Blooms

Halloween SF: Haunts Without Horrors

SF Festivals: 7 Must-See Lineups

Christmas SF: Lights & Wharf Wonders

SF Pride: 6 Route & Party Hacks

Chinese New Year SF: Parade Essentials
How to Start a Travel Blog (And Get Noticed)
TrekGuider @trekguider
You have a passion for travel that borders on obsession. Your camera roll is a treasure map of untold stories, and your notes app is filled with the kind of hard-won wisdom that could save a fellow traveler time, money, and stress. The idea of starting a travel blog feels like the perfect way to share it all—a potential path to a life with more freedom and adventure.
But there’s a problem. The moment you consider the "how," a wave of technical overwhelm washes over you. Domains, hosting, WordPress, plugins, SEO—it’s a foreign language, a dense fog of conflicting advice that makes the entire project feel intimidating and out of reach. You see other creators living the dream, and you're stuck in analysis paralysis, believing you need to be a web developer just to get started. Every day you wait, you feel the immense opportunity of the creator economy—a market projected to swell from $250 billion to nearly $500 billion by 2027—slipping through your fingers.
Forget the confusion. This is the guide that cuts through the noise. The old way of starting a travel blog is dead. You don't need to build a website from scratch. This is your chronological, step-by-step playbook that will show you how to start a travel blog presence on a powerful marketplace, letting you focus on what you do best: creating. We'll walk you through building a professional home for your brand in minutes, not months. This is your A-to-Z blueprint for building the foundational asset of your future business. Once this home base is built, you can begin the journey of transforming it into a real enterprise, a journey we map out in our ultimate guide to How to Make Money Online: A Creator's Guide for 2026.

Why a Marketplace? The Smarter Foundation for Your Creator Empire
Before we dive in, it's critical to understand why starting on a creator marketplace like TrekGuider is a fundamentally better strategy than building a self-hosted blog from scratch. While owning a website was once the only path, today it's a detour filled with technical headaches, maintenance costs, and the slow, grinding challenge of building traffic from zero.
The most resilient and profitable creators still operate on a "Hub-and-Spoke" model, but the "hub" has evolved.
The Old Hub: A self-hosted blog you have to build, manage, and secure yourself.
The New Hub: Your professional creator page on a marketplace like TrekGuider. This is the core business asset you control, supercharged with a built-in audience, e-commerce tools, and the collective SEO power of the entire platform.
The Spokes: Social media platforms remain your powerful distribution channels, used to capture attention and drive traffic back to your new, high-powered hub.
Starting on a marketplace isn't just about creating a profile; it's about plugging into a pre-built ecosystem designed for your success. You get to skip the entire technical setup and focus day-one on content and commerce.

The Strategic Blueprint – Nailing Your Niche
Even on a powerful platform, the single biggest real advantage you can give yourself is specificity. Trying to be a travel expert for "everyone" is a recipe for getting lost in the noise. Choosing a well-defined niche allows you to build authority faster, attract a dedicated audience, and stand out in a catalog of creators.
How to Find a Profitable Niche
A successful niche sits at the intersection of three circles: your genuine passion, your audience's pressing problems, and its potential for profitability. Before you commit, you must validate your idea.
Keyword & Platform Search: Use keyword research tools to check Google search volume, but also search within the marketplace itself. Are other creators successfully selling products in this niche? Is there a healthy amount of interest? This is your data-driven sign of audience demand.
Competitor & Market Analysis: The presence of a few successful creators in your niche is a good thing; it proves a market exists. Analyze their products, articles, and pricing. If others are generating revenue, it validates the niche's commercial potential.
5 Promising Travel Blog Niche Ideas to Spark Inspiration
To get your brainstorming started, here are five less-saturated niches with huge potential for 2026:
Eco-Friendly & Sustainable Travel: Focus on low-impact tourism, conservation-focused experiences, and green-certified brands. This niche attracts a passionate, value-driven audience.
Remote Work & "Workation" Travel: Become the go-to resource for digital nomads by creating guides on finding reliable WiFi, navigating visa requirements, and discovering the best long-term accommodations.
Culinary Tourism (Hyper-Niche): Don't just be a "food travel" blog. Go deeper. Focus on a specific cuisine (e.g., "Exploring the Regional Cuisines of Southern Italy") or a dietary need (e.g., "A Vegan's Guide to Japan").
Accessible Travel: A critically underserved and deeply important niche. Create practical guides and resources for travelers with disabilities, focusing on wheelchair-accessible hotels, attractions, and transportation.
Micro-Destination Blog: Instead of trying to cover the world, become the undisputed expert on a single city, region, or small country (e.g., "The Ultimate Guide to Visiting Malta"). You can dominate local affiliate partnerships and product sales for that area.
How to Start a Travel Blog on a Marketplace – Your 10-Minute Setup
This is where you leapfrog months of technical work. Instead of wrestling with hosting and code, you'll build a professional home for your brand in less time than it takes to drink a cup of coffee.

Step 1: Claim Your Professional Creator Page
Getting started is simple. Navigate to the TrekGuider marketplace and register. The platform is actively creating pages for established bloggers using public data, so your first step is to search the author catalog to see if a page already exists for you.
If you find your page, you can claim it and gain full control.
If not, you can create a new one from scratch in minutes.
Step 2: Customize Your Digital Home Base
Your creator page is your professional landing page. It's designed to be your central hub, consolidating your entire brand in one place. Fill out every section to build trust and showcase your expertise:
Basic Information: Add a high-quality photo and a compelling bio that tells your story and explains who you help.
Social & External Links: Integrate your social media profiles and link out to any other personal websites or online stores you may have.
Monetization Tools: Enable the donation feature to allow your most loyal fans to support you through one-time payments or recurring subscriptions.
Step 3: Build Your Product Showcase
This is your integrated storefront. You don't need to install any clunky e-commerce plugins. Simply start uploading the digital products you want to sell:
Guides and E-books
Custom Maps and Routes
Itinerary Templates
The platform handles secure payment processing (via Stripe) and instant digital delivery, so you can focus on creating, not logistics.
The Foundational Content – Publishing on the Platform
With your digital home base established, it's time to furnish it with value. On a marketplace, you don't need to worry about building a blog from zero. Your mission is to publish 5-10 high-quality, in-depth articles directly to the platform's article section. This is your primary strategy for getting discovered.

Why Publishing on the Marketplace is a Superpower
Instant Audience: You tap into the marketplace's existing audience of passionate travelers who are already there to read articles and buy products.
Shared SEO Authority: You benefit from the domain authority of the entire platform, giving your articles a better chance to rank on Google much faster than a brand-new website.
Direct Traffic to Your Products: Every article you publish is linked back to your creator page, acting as a powerful, built-in funnel that drives readers directly to your product showcase and donation buttons.
Writing Your First Authority-Building Articles
Your first articles should be "key elements"—long, in-depth, evergreen posts that solve a major problem for your niche audience. Examples include:
A definitive guide to your niche destination (e.g., "The Ultimate First-Timer's Guide to Visiting Bali").
An exhaustive packing list (e.g., "What to Pack for a 2-Week Trip to Italy").
A detailed "how-to" post (e.g., "How to Plan a Trip to Japan on a Budget").
Feeling Overwhelmed by Trip Planning?
Creating a detailed itinerary is one of the most time-consuming parts of travel planning. To help you streamline the process for your own adventures—and to give you an example of a high-value resource you can one day create for your own readers—we've built the ultimate tool. Our comprehensive, plug-and-play itinerary template takes the stress out of organizing your next trip.
Download Your Free Plug-and-Play Itinerary Template Now
This type of high-value resource is exactly what your audience is looking for. Once you've created a helpful freebie, the next step is to package your unique expertise into a premium Travel Guide, which you can sell directly on your TrekGuider creator page to a global audience of passionate travelers.
Getting Noticed – The Basics of Promotion
With your page set up and a foundation of great content published, you can finally shift your focus to promotion.

Master Marketplace SEO From Day One
SEO is still your most critical long-term strategy, but now you apply it to the articles you publish on TrekGuider. For every post you write, you should:
Target a Keyword: Choose a specific phrase your ideal reader would search for.
Use the Keyword: Place your keyword naturally in the article's title, the first paragraph, and at least one subheading.
Optimize Images: Use descriptive file names and add "alt text" to every image.
Use Social Media as Your Amplifier
Your social media channels are your "spokes." Their job is to drive traffic back to your TrekGuider "hub." Share your newly published articles and link directly to your creator page or specific products in your social profiles. This creates a powerful feedback loop, funneling your existing audience to the place where they can best support you and buy your products.
Pro-Tip: Your creator page bio is your elevator pitch. It's the first thing a potential customer will read. Use it to tell a compelling story, clearly state who you serve, and explain the unique value you provide. This builds an instant, human connection that turns a casual browser into a loyal follower.
Frequently Asked Questions About Starting a Travel Blog
1. Is it free to start a travel blog on TrekGuider?
Yes. Creating your personal author page, publishing articles, and listing products is free. The platform makes money by taking a small, transparent commission on the products you sell, so we only succeed when you succeed.
2. Do I need my own website to use the marketplace?
No, and that's the biggest advantage. TrekGuider provides you with your own professional landing page, so you can have a credible, feature-rich home for your brand without any of the costs or technical hassles of building and maintaining your own site.
3. How does the platform help me get discovered?
The marketplace helps in two key ways: First, your articles and products are showcased to the platform's entire audience of travelers. Second, by publishing on a high-authority domain, your content has a much better chance of ranking on search engines like Google, attracting new users to the platform and, ultimately, to your page.
Your Journey Starts Now
The path from a vague dream to a published, professional travel blog presence is no longer a fog. It's a clear, actionable checklist. You now have the complete blueprint that details how to start a travel blog the modern, smarter way—by leveraging the power of a creator marketplace.
The most challenging part of any great journey is taking the first step. You have the map to a faster, more direct route. The only thing left to do is to begin your adventure.
SEO Meta Data Suggestions:
SEO Meta Title (58 characters): How to Start a Travel Blog in 2026 (Beginner's Guide)
URL Slug: how-to-start-a-travel-blog
SEO Meta Description (154 characters): A step-by-step guide for beginners on how to start a travel blog. Learn how to choose a niche, set up your creator page, and publish content that gets noticed.
Read the full guide: The Travel Blog Business Plan: How to Make Real Money in 2026
Don't Miss Out! Subscribe for Exclusive Content
SubscribeComments 0
No comments yet
Be the first to share your experience!
Dont Miss Out! Subscribe for Exclusive Content
FTC Affiliate Disclosure Essentials: Stay Compliant as a Travel Creator
Essential Affiliate Tools: From Tracking to Full Optimization

Avoid These 5 Affiliate Landing Page Mistakes for Better Conversions

Affiliate Keyword Research Mastery for Travel Blogs
Booking.com Affiliate Program Review: Pros, Cons, and Earnings Potential