How to Create a Digital Travel Guide People Will Buy
TrekGuider @trekguider
You’re a travel expert. Your notes are filled with hidden gems, your camera roll is a treasure trove of untold stories, and your advice could save fellow travelers hundreds of dollars and hours of stress. You know your expertise has value, but packaging it into a real, scalable income stream feels like a monumental task. Relying on the slow trickle of ad revenue or the unpredictability of affiliate sales is a frustrating grind, keeping your dream of a truly independent business just out of reach.
This uncertainty keeps you on the content treadmill, trading your valuable time for pennies. You see other creators launching their own products and achieving a level of financial freedom that feels like a distant fantasy. The path forward is a confusing fog of questions about design, content, pricing, and technology, leaving you stuck in analysis paralysis while the immense opportunity of the creator economy—a market projected to nearly double from $250 billion to almost $500 billion by 2027—passes you by.
It’s time to stop trading hours for dollars and start building assets. This is your chronological, step-by-step playbook. We will demystify the entire process and show you exactly how to create a digital travel guide that people will not only buy but will also love and recommend. This is your complete workflow for transforming your hard-won expertise into a polished, professional product that generates passive income for years to come. Think of this as a critical chapter in your business plan; for the complete blueprint on building a modern creator enterprise, be sure to read our ultimate guide to How to Make Money Online: A Creator's Guide for 2026.

Why a Digital Guide is Your Ultimate Scalable Asset
Before diving into the "how," it's critical to understand the "why." Transitioning from promoting others' products to creating and selling your own is the single most powerful step you can take toward building a profitable, independent business. While ads and affiliate links have their place, digital products offer a level of control and scalability that other models simply can't match.
The advantages are transformative:
Infinite Scalability: Digital products operate on a "create once, sell forever" model. Whether you sell 10 copies or 10,000, your workload remains the same. There is no inventory to manage and no shipping to worry about.
Exceptionally High Profit Margins: With no manufacturing or distribution costs, the profit margins are extraordinary. Once you recoup your initial time investment, nearly every sale is pure profit.
Full Ownership and Control: When you sell your own guide, you own the entire process. You control the product, the pricing, the marketing, and the customer relationship. You are no longer dependent on an affiliate partner’s commission rates or an ad network's traffic requirements.
Solidifies Your Authority: Creating and selling a high-quality product instantly positions you as an expert. It builds deep trust with your audience, as you are no longer just recommending other people's stuff—you are standing behind your own valuable creation.
The market reflects this opportunity. The e-learning sector alone, a huge component of the digital product world, is projected to surge to an incredible $848 billion by 2030. This isn't a fleeting trend; it's a fundamental shift in how creators build resilient businesses.
The Blueprint – Research and Validation
The costliest mistake a creator can make is to spend months building a product nobody asked for. Thorough research and validation aren't optional; they are the foundation upon which a profitable product is built.
Identify Audience Needs and Define a Specific Niche
Your first job isn't to be a brilliant inventor; it's to be a sharp detective, uncovering the real, recurring problems your audience is desperate to solve.
Listen to Your Audience: The best ideas are hidden in plain sight. Dive into your blog comments, email replies, and social media DMs. What destinations are people constantly asking about? What part of the travel planning process do they find most challenging or stressful? Their recurring questions are your product ideas.
Define a Hyper-Specific Niche: Avoid creating a generic guide. A broad guide to "Mexico" will get lost in a sea of competition. A highly specific product like "A First-Timer's Foodie Guide to Mexico City's Roma Norte Neighborhood" is more valuable, easier to market, and instantly positions you as a niche expert.
Conduct Keyword and Market Research to Validate Demand
Once you have an idea, you must validate it with data.
Analyze Search Volume: Use an SEO tool to check the search volume for terms related to your guide idea. High search volume for long-tail keywords like "7-day Japan itinerary for foodies" or "what to do in Lisbon with kids" is a strong data signal that a ready market exists for a guide on that topic.
Conduct Competitor Analysis: Find 3-5 comparable digital travel guides in your niche. Your goal isn’t to copy them, but to identify a gap in the market. Analyze their price points, what they include, and, most importantly, read their reviews. What are customers praising? What are they complaining about? This will show you exactly how to create a superior product.
Pro-Tip: True validation comes from the intersection of qualitative and quantitative data. A great product idea is one that your audience is asking for (qualitative) and that a significant number of people are searching for online (quantitative).

The Core – Outlining and Content Creation
With a validated idea, it’s time to build the heart of your product: the content. This is where your unique expertise, voice, and experience shine.
Develop a Logical Structure
A good guide flows intuitively and is easy to navigate. Before you write a single word, create a detailed table of contents. This will be your roadmap and ensure you don't miss any crucial information. A typical structure includes:
Introduction: A brief overview of the destination, essential facts (currency, language), and why your guide is the ultimate resource.
Logistics: The practical nuts and bolts—getting there, getting around, visa requirements, and curated recommendations on where to stay for different budgets.
Experiences: The core of your guide. This includes top attractions, detailed daily itineraries, and deep dives into your niche (e.g., food and drink recommendations, hiking trails, photo spots).
Practicalities: The crucial final details like safety tips, packing lists, a budget breakdown, and useful local phrases.
Write Compelling and Useful Content
This is where you go beyond the generic advice found on a thousand other blogs.
Gather Your Assets: Compile all of your personal notes, journal entries, and high-quality photographs from your travels to the destination. Your first-hand experience and unique visuals are your primary competitive advantage.
Be Both Inspirational and Intensely Practical: Write in an engaging, personal tone. Share anecdotes and insider tips that bring the destination to life. Go beyond simply listing facts; tell your readers why a place is special. Share the hard-won wisdom that can't be found elsewhere, like "skip the line at the Colosseum by booking this specific tour" or "the best gelato is actually found two blocks away from the main square at this tiny shop."
With your raw content compiled, the next step is to give it a professional polish that signals its immense value.

The Polish – Professional Design for Non-Designers
Your guide's content may be brilliant, but in the digital world, packaging matters. A professional, user-friendly design signals quality and dramatically improves the customer experience.
Select a User-Friendly Design Tool
You don't need to be a graphic designer to create a stunning product. For a travel blogger whose primary goal is to efficiently create a static PDF travel guide, a template-based tool like Canva is the strategically superior choice. While powerful professional software like Figma or Adobe Illustrator has a steep learning curve that can delay your launch by weeks, Canva is built specifically for this type of project. Its intuitive, drag-and-drop interface is designed to help non-designers produce high-quality visuals quickly.
Feeling inspired to build your own assets but not sure where to begin? Creating high-value products is the core of a modern creator business. To accelerate your journey, we've bundled together some of our most powerful resources. The Travel Creator's Toolkit is a free collection of checklists, templates, and guides designed to help you streamline your workflow and build your business faster.
5 Essential Mobile-First Design Principles for a User-Friendly Guide
Your guide will almost certainly be used on a mobile phone while your customer is in-destination. Designing with a mobile-first user experience (UX) is not an option; it is essential for your product to be functional and valuable.
Prioritize Legibility and High Contrast: The content must be effortlessly readable on a small screen, often in bright sunlight. Use a clean, simple font of at least 11 points so users don't need to pinch-and-zoom. Crucially, ensure a high contrast ratio between the text and background—at least 4.5:1 as recommended by Web Content Accessibility Guidelines (WCAG)—to maintain readability.
Implement Simplified Navigation: The single most important navigation element is a hyperlinked Table of Contents at the beginning of the document. This allows users to jump directly to the section they need with a single tap, which is crucial when they're trying to find information quickly on a busy street.
Design for Touch with Finger-Friendly Targets: Any included hyperlinks (e.g., a link to a restaurant's website or a Google Maps location) must have a clickable area large enough to be easily tapped with a finger—the industry standard is a minimum touch target size of 44x44 points (approximately 7-10mm).
Minimize Cognitive Load by Eliminating Clutter: Mobile users are often distracted. Their interaction with a guide is typically in short bursts or "micro-tasks". To accommodate this, use short paragraphs, bulleted lists, bolded text for key information, and generous white space. A clean, uncluttered interface helps users find what they need with minimum effort.
Optimize for Performance and Portrait Orientation: The vast majority (94%) of mobile users hold their phones vertically. Your guide must be designed with a portrait layout (e.g., A4 or US Letter size). Crucially, keep the final PDF file size as small as possible by compressing all images before inserting them into your document. A large file will download slowly on a weak cellular connection, creating a poor user experience.

The Launchpad – How to Create a Digital Travel Guide for Sale
You've created a valuable, beautifully designed resource. The final phase is to package it, price it for profit, and get it into the hands of your customers.
How to Price Your First Digital Product
Pricing is one of the most challenging decisions. The most effective strategy for a knowledge-based product is value-based pricing. Instead of focusing on your production costs, price your product based on the transformation it provides to the customer. If your guide saves a user 20 hours of stressful research and helps them discover priceless experiences they would have otherwise missed, its value is immense.
A practical process for setting your price:
Step 1: Research the Market: Identify 3-5 comparable digital travel guides in your niche to establish a realistic market range.
Step 2: Articulate the Value: Make a specific list of the tangible outcomes your guide provides (e.g., "Saves over 15 hours of planning," "Includes a pre-planned 7-day itinerary worth over $100 in planning fees").
Step 3: Set an Initial Price and Test: For a high-quality, first-time travel guide, a price point between $19 and $49 is a strong starting position. It communicates significant value without creating sticker shock for the buyer.
Choose a Sales Platform That Works for You
You need a platform to handle the sale and secure digital delivery of your product. While you can use e-commerce plugins on your own blog, the smartest strategy is to leverage a platform that puts you in front of a built-in audience of motivated buyers.
Pro-Tip: Don't just build a product; build your business inside an ecosystem. A specialized marketplace like TrekGuider is the ideal place to sell your high-quality Travel Guide. It provides a professional, ready-made storefront and connects you with a global audience of passionate travelers who are actively searching for expert resources. You can publish articles to attract new customers directly on the platform, creating a powerful marketing funnel that leads right back to your product page.
Frequently Asked Questions (FAQ)
1. How long should my digital travel guide be?
Value is not measured in page count. A concise, 50-page guide packed with unique, actionable advice is far more valuable than a rambling 200-page guide filled with generic information. Focus on comprehensively solving the specific problem your niche audience has.
2. Do I need to have visited the destination very recently?
While recent, first-hand experience is ideal, an "evergreen" guide focused on core attractions, culture, and logistics can have a long shelf life. The key is transparency. Be clear about when you last visited and focus on information that doesn't change rapidly. You can always update your guide with new editions.
3. What if I'm not a professional writer or photographer?
You don't need to be. Your audience values authenticity and expertise over perfect prose. Write in your natural, conversational voice, as if you were giving advice to a friend. For photos, a modern smartphone can capture high-quality images. The goal is to be clear, helpful, and genuine.
Your Journey from Expert to Entrepreneur Starts Now
You now have the complete, A-to-Z workflow. You've moved from the vague idea of a product to a concrete, actionable blueprint that covers research, content creation, professional design, and a smart launch strategy. The path from being a passionate travel expert to a successful digital entrepreneur is no longer a fog of confusion.
You have the definitive answer to the question of how to create a digital travel guide that provides immense value and generates a sustainable income. The only thing left to do is take the first step. Start the research, outline your expertise, and begin building the asset that will power your business and fund your adventures for years to come.
SEO Meta Data Suggestions:
SEO Meta Title (58 characters): How to Create a Digital Travel Guide People Will Actually Buy
URL Slug: how-to-create-digital-travel-guide
SEO Meta Description (154 characters): A step-by-step playbook for travel creators on how to create a digital travel guide, from research and writing to design, pricing, and selling your product.
Read the full guide: The Travel Blog Business Plan: How to Make Real Money in 2026
Don't Miss Out! Subscribe for Exclusive Content
Subscribe


Comments 0
No comments yet
Be the first to share your experience!
Dont Miss Out! Subscribe for Exclusive Content

FTC Affiliate Disclosure Essentials: Stay Compliant as a Travel Creator

Essential Affiliate Tools: From Tracking to Full Optimization

Avoid These 5 Affiliate Landing Page Mistakes for Better Conversions

Affiliate Keyword Research Mastery for Travel Blogs

Booking.com Affiliate Program Review: Pros, Cons, and Earnings Potential

Decoding Affiliate Commission Rates: Benchmarks for Travel Creators
5 Ways to Confidently Eat Alone While Traveling
TrekGuider @trekguider
You’ve done it. You’ve booked the flight, mapped out the museums, and conquered the logistics of your solo adventure. But a single, persistent scenario keeps playing out in your mind, a small moment that feels disproportionately terrifying: walking into a restaurant, meeting the host’s gaze, and uttering the three quietest, loudest words in the English language: "Table for one."
For countless aspiring and even experienced solo travelers, this is the final boss of social anxiety. It’s a fear so potent it can dictate an entire trip. A recent study confirmed that for many first-timers, the thought of dining alone is a major source of apprehension, ranking among top concerns like safety and loneliness.
This fear is a thief. It doesn’t just steal your appetite; it steals your access to the very soul of a destination—the vibrant, chaotic, delicious culture that happens around the dinner table. It convinces you that a sad takeaway eaten on the edge of your hotel bed is preferable to the perceived judgment of a room full of strangers. It whispers that your solitude is a spotlight.
But what if that spotlight was actually a stage, and a table for one was the best seat in the house?

This guide is your step-by-step plan to reframe that narrative. These aren’t just tips; they are five actionable, confidence-building strategies designed to transform the experience of eating alone while traveling from a source of dread into an empowering, delicious, and deeply memorable ritual. For a complete roadmap of your entire journey, start with our foundational pillar guide, The Ultimate Guide to Solo Female Travel (15 Essential Tips).
Strategy #1: Master the Art of the Bar Seat
The single most effective way to immediately diffuse the anxiety of solo dining is to bypass the traditional tables altogether and make a beeline for the bar or counter. This isn't a compromise; it's a strategic upgrade to your dining experience, a universally accepted and comfortable spot for any solo diner.
Sitting at a two- or four-top table by yourself can sometimes feel like you’re occupying "empty" space, drawing attention to your solo status. The bar, however, is a fundamentally different social landscape. It's a dynamic, linear space designed for individuals and pairs. Here, you are not "alone"; you are simply another patron in a row of patrons, part of the restaurant's fluid, buzzing energy.
This vantage point offers a multitude of benefits. It often provides a front-row seat to the theater of the restaurant—the craft of the bartender mixing cocktails, the rhythm of the kitchen, the flow of patrons coming and going. It’s an environment that provides endless built-in entertainment. More importantly, it creates a low-pressure opportunity for social connection if you want it. The bartender is a professional at conversation, often happy to offer menu recommendations or share local insights. You might strike up a casual chat with the person next to you, or you can remain comfortably anonymous, absorbed in the ambiance. The choice is entirely yours, and that control is empowering.
Pro-Tip: When researching restaurants, specifically look for photos of the interior that show a substantial bar or counter seating area. Places like tapas bars in Spain, ramen counters in Japan, and classic bistros in France are almost always designed with excellent bar seating, making them perfect venues for a comfortable solo meal.

Strategy #2: Arm Yourself with a Purposeful Prop
One of the biggest sources of anxiety when eating alone while traveling is the fear of just sitting there with nothing to do during the lulls of the meal, such as after you’ve ordered and are waiting for your food. This is where a "prop" becomes your most valuable tool. Having a purposeful object with you completely reframes the narrative, both for any observer and, more importantly, for yourself.
A prop signals that you are not passively waiting for a companion or feeling lonely; you are actively and contentedly engaged in your own company. It fills the silence and gives your hands and eyes a focus, instantly dissolving any feelings of awkwardness. The key is to choose your prop with intention.
A Travel Journal: This is perhaps the ultimate solo dining companion. Use the time to write about your day's adventures, document the sights and sounds around you, or sketch the street scene outside the window. It turns your meal into a productive, reflective, and creative session.
A Good Book: Getting lost in a compelling story is a timeless pleasure. A book is an unambiguous sign that you are happily occupied and content in your solitude.
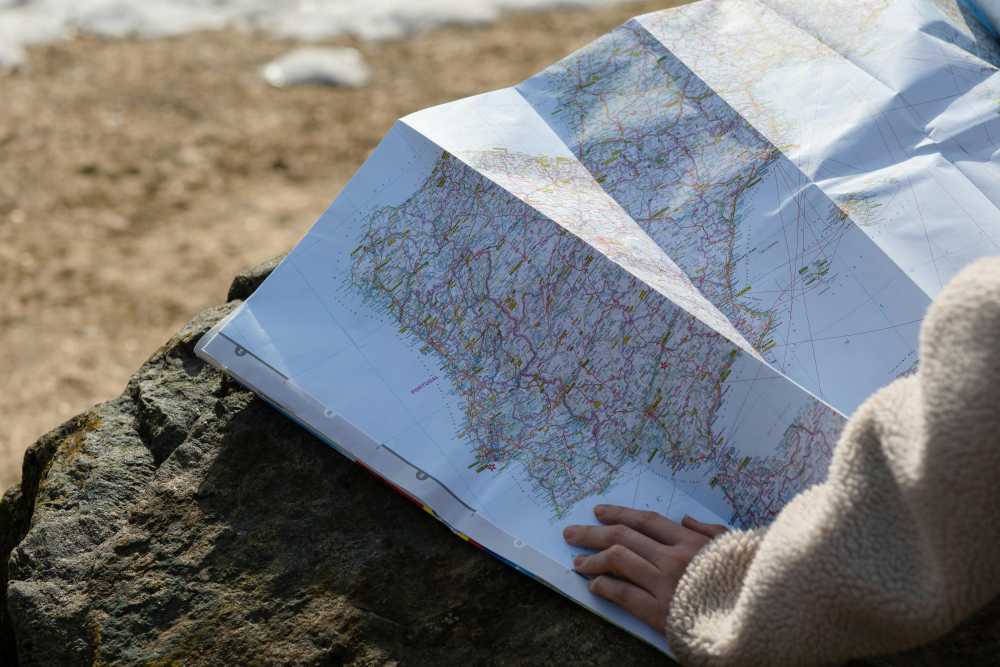
A Map or Guidebook: Spreading out a map to plan the next leg of your journey is a classic traveler move. It’s practical, engaging, and makes you look like a seasoned, confident explorer engrossed in your adventure.
The Psychology Behind the Prop
It’s a psychological pattern interrupt. When you feel anxious, your brain looks for evidence to support that feeling—you scan the room for people looking at you, you interpret neutral expressions as judgmental. A prop gives you an alternative focus. You are consciously giving your brain a different task to focus on, preventing it from spiraling into self-conscious thoughts. By bringing a prop, you transform your "table for one" into your personal command center, a space for reflection, planning, or escape. You're no longer just a person eating alone; you're a writer, a reader, an adventurer deep in thought.
Strategy #3: Become a Master of Timing
The ambiance of a restaurant can change dramatically depending on the time of day. A chaotic, packed dining room at the peak of the dinner rush can feel overwhelming and intensify feelings of self-consciousness. By strategically choosing when you dine, you can curate a much more relaxed and enjoyable experience for yourself.
Dining during "off-peak" hours is a simple but incredibly effective tactic. Arriving for a late lunch around 2:30 PM or an early dinner at 6:00 PM, before the main crowds descend, offers several advantages. The restaurant will be calmer and quieter, allowing you to choose a desirable table—perhaps one tucked into a cozy corner or with a great view for people-watching. The service staff will likely be less rushed and more attentive, giving you the space to ask questions about the menu and savor your meal without feeling hurried.
This strategy is particularly effective in countries with distinct dining schedules. In Italy, for example, locals often don't eat dinner until 8:00 PM or later. Arriving at a trattoria at 7:00 PM means you'll have the place almost to yourself, allowing you to build your confidence in a low-stakes environment. This deep understanding of local rhythms is something we explore in our comprehensive Italy Guide, which is packed with the kind of insider knowledge that makes a solo trip seamless and authentic.
Before you start scouting trattorias, let's get your master plan organized.
Your Ultimate Planning Companion
A great solo dining experience starts with a great plan. Knowing which restaurants you want to try and when to go is a key part of building a confident itinerary. Our free, downloadable template is the perfect tool to help you organize every aspect of your trip, from your daily schedule to your must-try foodie destinations.
Download your free Travel Itinerary Template here!
Strategy #4: Choose Your Venue with Intention
Not all restaurants are created equal when it comes to the solo dining experience. The venue you choose plays an enormous role in your comfort level. Actively seeking out establishments with a solo-friendly ambiance and avoiding those geared toward formal or romantic occasions can make all the difference.
Your mission is to find places that are inherently lively, casual, and built for a fluid mix of patrons. Here’s what to look for:
Casual Bistros and Cafes: These are often the lifeblood of a neighborhood, with a constant, friendly buzz. Outdoor seating is a huge bonus, as it turns your table into a front-row seat for people-watching—the ultimate solo-dining pastime.
Bustling Food Halls and Markets: These are a solo traveler’s paradise. With a multitude of vendors and communal seating, the entire environment is built around individual choice and a dynamic, social-but-anonymous atmosphere. You can sample a wide variety of local dishes without the formality of a traditional restaurant.
Restaurants with Communal Tables: Many modern eateries feature large, shared tables. Choosing to sit at one of these signals an openness to interaction and creates a natural opportunity for conversation to spark with fellow diners, if you’re in the mood.
Ethnic Restaurants: Places like sushi bars, ramen shops, pho counters, or tapas bars are often culturally geared toward individual diners and counter service, making them incredibly comfortable and natural-feeling environments for eating alone.
Pro-Tip: Use Google Maps and restaurant review sites to do some digital reconnaissance before you head out. Don’t just read the reviews; look at the photos uploaded by patrons. You can get a great feel for the restaurant's layout, see if it has a good bar or counter, and gauge the overall vibe to see if it aligns with what will make you feel most at ease.

Strategy #5: Start with a "Gateway" Food Tour
If the idea of a full, sit-down meal by yourself still feels like too big a leap, then start with a "gateway drug" to confident solo dining: a food tour. Joining a small-group food tour on your first or second day in a new city is one of the most effective and enjoyable ways to build your culinary confidence.
A food tour is a structured, social, and low-pressure experience. You get to sample a wide variety of local specialties from different vendors and restaurants, but you do it as part of a small, friendly group. This immediately removes the "all eyes on me" feeling and replaces it with a fun, shared experience.
This approach is powerful for several reasons. First, it demystifies the local cuisine and ordering process, giving you the knowledge and vocabulary to feel more confident on your own later. Second, it's a fantastic way to meet other travelers and get their recommendations. Third, and most importantly, it provides you with a vetted list of fantastic, friendly restaurants. The casual street food stall or family-run bakery you visit on the tour can become a place you feel completely comfortable returning to on your own, because you've already been there and established a positive connection. It’s a confidence-building exercise disguised as a delicious adventure.
Frequently Asked Questions About Dining Solo
Even with a solid plan, a few lingering questions can cause anxiety. Here are the answers you need.
What if I don't drink alcohol? Is it still okay to sit at the bar?
Absolutely. A modern bar is a full-service part of the restaurant. It's completely normal to sit at the bar and order a mocktail, a soda, or even just a glass of water while you enjoy a full meal. The bartender's job is to serve all patrons, and they will be more than happy to accommodate you.
How do I handle getting a bad table (e.g., right by the kitchen or bathroom)?
As a solo diner, you have the right to be just as comfortable as any other guest. If you're led to a table you don't like, it is perfectly acceptable to politely ask if another is available. A simple, "I was hoping for something a little quieter, is one of the tables by the window available?" is all it takes. Most restaurants will gladly accommodate a reasonable request.
How much should I budget for dining alone?
This varies dramatically by destination and your travel style. A meal in Portugal can be a third of the price of a similar meal in Switzerland. The best approach is to find real-world examples. On the TrekGuider marketplace, you can explore detailed itineraries and guides published by seasoned solo travelers, many of whom include specific restaurant recommendations and budget breakdowns from their own trips.
Your Table is Waiting
The fear of eating alone while traveling is valid, but it is not a permanent barrier. It is a skill waiting to be learned, a confidence muscle waiting to be built. By being strategic—by choosing the bar seat, bringing a journal, dining early, selecting a casual venue, or starting with a food tour—you systematically dismantle the anxiety and replace it with a sense of mastery and enjoyment.
You will soon discover that dining solo is not a consolation prize; it is a unique and powerful way to experience the world. It’s a moment for quiet reflection, a front-row seat to a new culture, and an unfiltered connection to the taste and rhythm of a place. It is an act of radical self-reliance and a declaration of your right to be there, to take up space, and to savor every last bite. Your journey to becoming a confident solo diner is one of the most rewarding parts of the adventure, proving that the best company you can have at the table is often your own.
Meta Data Suggestions:
SEO Meta Title (59 characters): Confidently Eat Alone While Traveling: 5 Expert Tips
URL Slug: confidently-eat-alone-traveling
SEO Meta Description (154 characters): Nervous about dining solo? Our guide offers 5 practical ways to confidently eat alone while traveling, turning social anxiety into an empowering experience.
Don't Miss Out! Subscribe for Exclusive Content
SubscribeComments 0
No comments yet
Be the first to share your experience!
Dont Miss Out! Subscribe for Exclusive Content

Chicago Beer Fests: Top 6 Tastings

Ultimate USA Holidays Guide: Top Picks
FTC Affiliate Disclosure Essentials: Stay Compliant as a Travel Creator
Essential Affiliate Tools: From Tracking to Full Optimization
Booking.com Affiliate Program Review: Pros, Cons, and Earnings Potential
Decoding Affiliate Commission Rates: Benchmarks for Travel Creators
Mardi Gras: 6 Parade Survival Tips
TrekGuider @trekguider
You’ve seen the photos—a blizzard of purple, green, and gold beads flying through the air. You’ve heard the stories of jazz music spilling onto streets packed with revelers. The dream of Mardi Gras in New Orleans is a powerful one, a siren call to the world’s greatest free party. It’s a bucket-list spectacle of dazzling floats, complex costumes, and pure, unadulterated joy. But let’s be honest: the reality behind that dream can be intimidating. The sheer scale of the crowds, the labyrinthine parade schedules, and the logistical hurdles can turn a fantasy trip into a frantic mess.
Without a battle plan, you risk becoming just another overwhelmed tourist. Imagine traveling all that way only to be stuck ten rows deep, craning your neck for a fleeting glimpse of a float. Picture the rising panic of losing your friends in a sea of humanity with zero cell service, or the bone-deep exhaustion that sets in after hours on your feet, unprepared. The magic of Carnival can fade fast when you’re fighting the chaos instead of embracing it.
This is where you stop worrying. Consider this your official playbook for not just surviving, but thriving at the parades. We’re going to arm you with the insider knowledge to navigate the festivities like a seasoned pro. These six essential survival tips will transform your Mardi Gras New Orleans experience from stressful to unforgettable. This is just one of the incredible cultural celebrations we explore in our complete guide to New Orleans Holidays: Cultural Feasts, but for now, let’s master the art of the parade.

Tip 1: Decode the Schedule & Choose Your Krewes Like a Local
First, let’s clear up a common misconception: Mardi Gras isn't just one day. It's an entire season, a cultural crescendo that officially begins on January 6th and leads to the city-wide blowout of "Fat Tuesday." The parades, organized by social clubs known as "krewes," are the lifeblood of the celebration, and they hit a fever pitch in the final two weeks. Knowing which parades to see—and when—is the first step to crafting your perfect experience.
The final weekend before Fat Tuesday is when the legendary "super-krewes" roll, drawing the biggest crowds and delivering the most spectacular shows. For 2026, these are the dates to circle in red on your calendar:
Saturday, the weekend before Mardi Gras: A marathon day featuring the massive Krewe of Endymion, an evening parade so spectacular it feels like a rolling blockbuster.
Sunday, the days leading up to Fat Tuesday: The Krewe of Bacchus, another titan of Carnival, hits the streets at 5:15 PM with its own celebrity monarch and jaw-dropping floats.
Monday, the Monday before Mardi Gras (Lundi Gras): Witness history with the Krewes of Proteus and Orpheus, two stunning nighttime parades that light up the city.
Tuesday, late February (dates shift each year—check nola.com for the exact schedule) (Fat Tuesday): The grand finale. The day kicks off with the Krewe of Zulu at 8:00 AM, famous for its coveted hand-painted coconut throws, followed by the regal Krewe of Rex at 10:30 AM, whose leader is the official "King of Carnival."
Not all krewes offer the same experience. Daytime parades often have a more relaxed, family-centric vibe. Nighttime parades are a different animal entirely—lit by historic gaslight torches called "flambeaux," they are dazzling, high-energy spectacles that draw a more party-oriented crowd. Do a little research on each krewe's theme and history to find the ones that match your style.
Pro-Tip: Before you even leave your hotel, download a real-time parade tracker app from a local New Orleans news station. These GPS-powered apps show you the exact location of the parade's lead float, giving you the intel to know if you have time for a bathroom break or a food run before the action reaches you.

Tip 2: Location is Everything: How to Claim Your Parade Turf
Your viewing spot will define your entire parade experience. The primary routes snake through the stately Uptown/St. Charles Avenue corridor and along the edge of the French Quarter. For a more traditional, family-friendly atmosphere, plant yourself along St. Charles Avenue. Under the canopy of ancient oak trees, you’ll find generations of families who have claimed the same spot for decades. For a more intense, high-octane experience, the sections of the route closer to Canal Street are where the crowds roar loudest.
Let’s be clear: the golden rule of securing a good spot is to arrive obscenely early. For a super-krewe on that final weekend, we’re not talking 30 minutes ahead—we’re talking hours. This is a marathon of patience. You’ll see locals set up their full camp—chairs, coolers, and ladders—long before the first siren wails. About those ladders: you’ll see many custom-built ladder seats designed to give kids a safe, elevated view. It’s a brilliant tradition, but if you use one, follow the local etiquette: place it at least six feet back from the curb to avoid obstructing the view of those in front and to stay clear of the massive floats.
Remember, the major parades do not go through the narrow, historic streets of the French Quarter. While Bourbon Street is its own unique Mardi Gras spectacle, it is not the place to watch the krewes roll.

Tip 3: Master the Art of the "Throw" for Your Mardi Gras New Orleans Haul
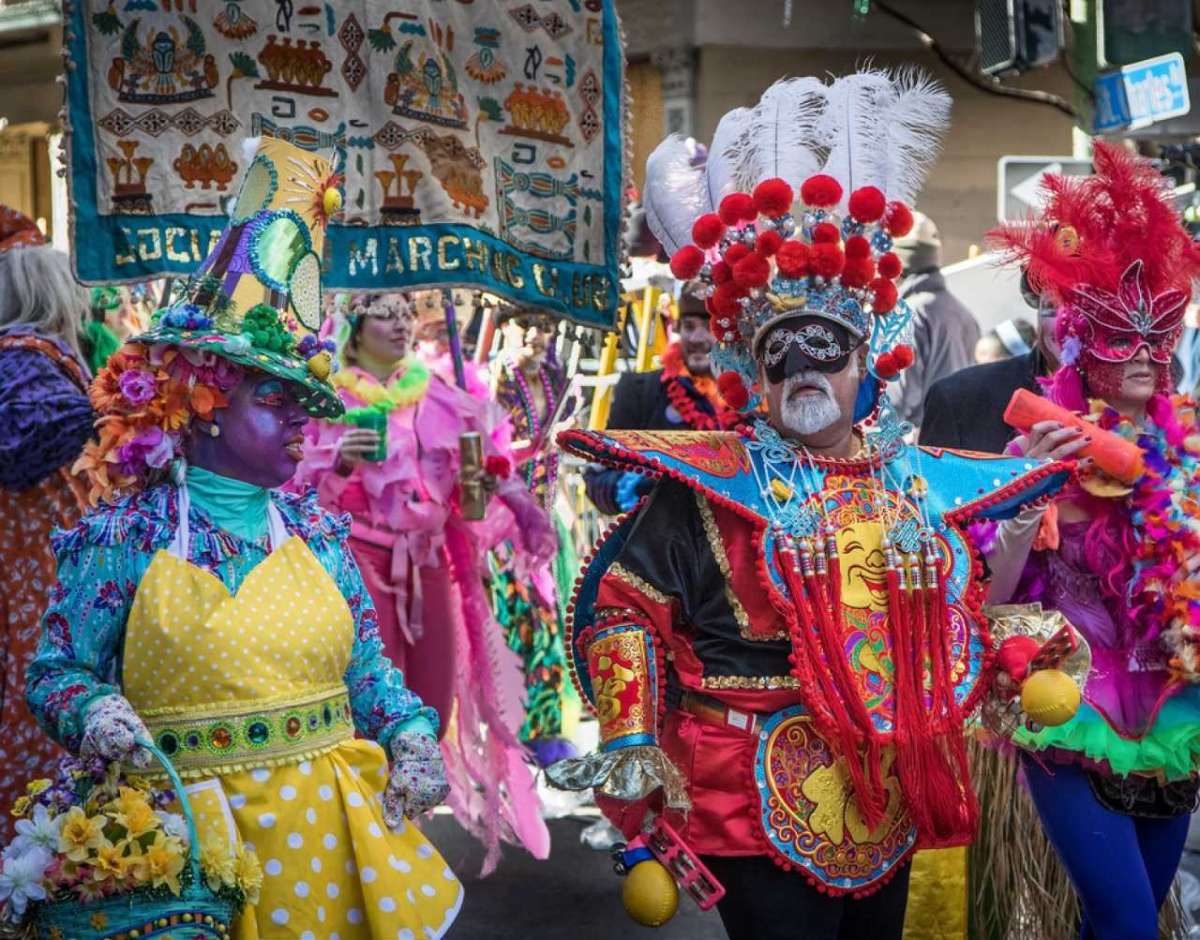
The quintessential Mardi Gras New Orleans experience is reaching up and catching a string of colorful beads. These items, tossed from the floats by krewe members, are called "throws," and they are the currency of Carnival. But it’s so much more than just beads. Each krewe has its own signature throws, from decorated plastic cups and doubloon coins to light-up toys and stuffed animals. Some are true collector's items, like the exquisitely hand-decorated shoes from the all-female Krewe of Muses or the legendary painted coconuts from Zulu.
Catching the best stuff is a skill. Here’s how to improve your odds:
Engage and Make Eye Contact: Float riders are scanning the crowd for energy. Wave your arms, smile, and yell the classic line: "Throw me something, mister!" They are more likely to toss something special to someone who is clearly having a great time.
Practice Good Karma: Be aware of the people around you, especially children. If a coveted throw lands near a kid, let them have it. The spirit of Mardi Gras is communal joy, not competition.
Bring a Designated Bag: You will catch far more than you can wear or carry. A simple tote bag or small backpack is essential for stashing your loot.
Above all, be safe. The number one rule is never, ever run into the street or chase a float for a throw. These floats are enormous, pulled by tractors with limited visibility. Wait for the throws to come to you and never reach under a float. No plastic necklace is worth the risk.
Tip 4: Pack Your Ultimate Parade Survival Kit
A day on the parade route is an urban endurance event. You’ll be on your feet for hours, exposed to the elements, and a long way from your home base. A well-packed day bag is non-negotiable. Being prepared for any great American adventure requires the right checklist, and just as you’d use our National Park Road Trip Checklist to prepare for the wild, this kit will ensure you conquer the urban jungle of Carnival.
These are the absolute essentials for your Mardi Gras survival kit:
Hydration: Pack more water than you think you need. Staying hydrated is critical.
Fuel: High-energy, easy-to-carry snacks like protein bars, trail mix, and pretzels will keep your energy levels up.
Sun & Rain Gear: New Orleans weather is fickle. Pack sunscreen, a hat, and sunglasses for daytime parades, but also throw in a cheap poncho. A sudden downpour can’t ruin your day if you’re prepared for it.
Layers: A sunny 70-degree afternoon can plummet to a chilly 50 degrees after sunset. Wear layers you can easily shed or add.
Portable Power Bank: Between taking photos, coordinating with friends, and running a parade tracker, your phone battery will vanish. A portable charger is a modern-day necessity.
Sanitation Supplies: Public restrooms are of the port-a-potty variety and see heavy use. A travel-sized pack of tissues and a bottle of hand sanitizer will feel like pure luxury.
A Throw Bag: A lightweight, foldable tote is perfect for your haul.
Tip 5: Navigate the Crowds & Stay Safe Like a Pro
The sheer scale of the crowds can be staggering—this is, after all, an event that generated an $891 million economic impact in 2024. Navigating this joyful mass of humanity requires a proactive approach to safety.
First, the buddy system is not optional. Stick with your group. Before you even head out, establish a non-obvious, hyper-specific meeting point. "Under the clock at the hotel" is good. "The corner of Canal and St. Charles" is a recipe for disaster. Cell service will be spotty at best, so you cannot rely on your phone to reunite.
When it comes to getting around, forget driving. Street closures and traffic make it a nightmare. Parking, if you can find it, will be exorbitant—reserve a spot in a garage well in advance if you must bring a car. Your best bets are walking, using public transit, or grabbing a rideshare, but be prepared for surge pricing and long waits after a parade.
Pro-Tip: To move through a thick crowd, don't try to bull your way through the middle. The pro move is to retreat one block off the parade route, walk parallel to it in the direction you want to go, and then cut back in. It’s a slightly longer walk that will save you immense time and frustration.
Tip 6: Embrace the Spirit of "Laissez les Bons Temps Rouler"
Finally, the most crucial tip of all: embrace the official motto of Mardi Gras, Laissez les bons temps rouler—Let the good times roll. This isn't just a slogan; it's the city's philosophy. This celebration is a profound expression of New Orleans' unique Creole heritage, a season defined by king cake feasts, brass bands, and an unbreakable sense of community. Don't get so wrapped up in logistics that you forget to be present.
Strike up a conversation with the family next to you. Compliment a stranger's incredible costume. Share your snacks. New Orleanians are famously hospitable and love sharing their traditions. Participate in the culture, don't just observe it. To truly understand the soul of this festival and others like it, our comprehensive Travel Guide offers a deep dive into the cultural fabric of America's most fascinating cities, providing the context that turns a great trip into a meaningful one.
Your Mission: Go Forth and Conquer Carnival
You are now officially prepared. Armed with these insider strategies, you can confidently tackle your Mardi Gras New Orleans adventure. You have the knowledge to decode the schedule, claim the best spots, pack for success, and stay safe in the joyous chaos. You are no longer just a tourist hoping for the best; you are an informed participant, ready to dive into the heart of one of the world's greatest cultural spectacles.
So book the ticket, pack your most festive attire, and get ready to let the good times roll. The magic of Mardi Gras is waiting for you.
Don't Miss Out! Subscribe for Exclusive Content
SubscribeComments 0
No comments yet
Be the first to share your experience!
Dont Miss Out! Subscribe for Exclusive Content

San Francisco Cherry Blossoms: A Local's Guide to the Blooms

Halloween SF: Haunts Without Horrors

SF Festivals: 7 Must-See Lineups

Christmas SF: Lights & Wharf Wonders

SF Pride: 6 Route & Party Hacks
