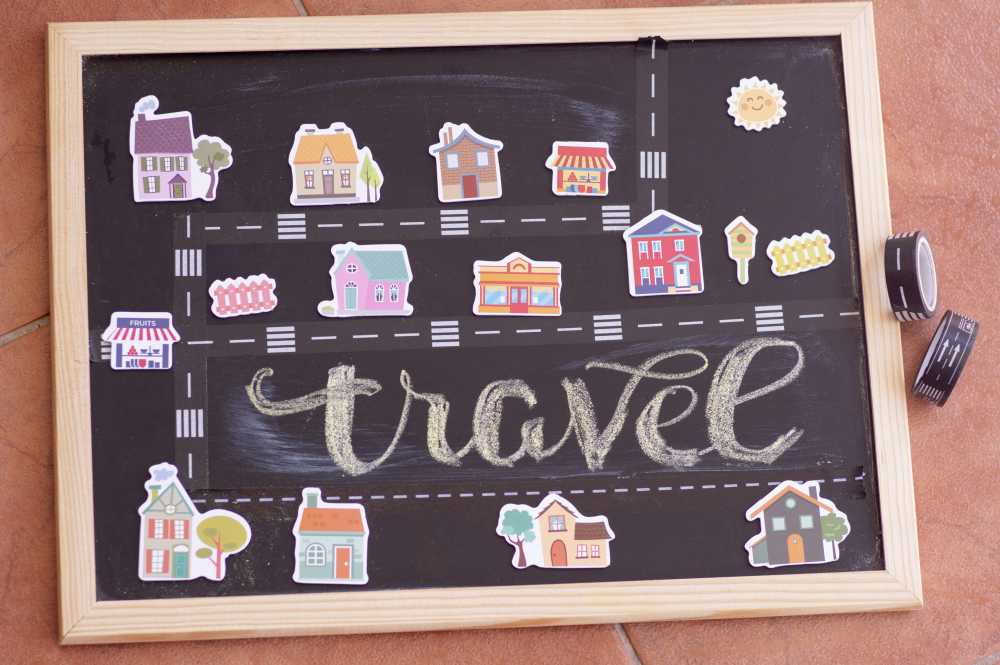
How to Make a Solo Travel Budget (That You'll Actually Keep)
TrekGuider @trekguider
You have the destination pinned on a map, the screenshots saved, the dream of a life-changing solo trip burning bright. But a huge, intimidating question mark looms over the entire fantasy: the money. You have no real idea how much it costs, how to save for it, or how you’ll manage it all on your own. This financial uncertainty is paralyzing, isn't it? It’s the anchor that keeps your dream moored in the harbor of "someday," while you watch others set sail. You worry that you’ll either never save enough or, even worse, that you’ll miscalculate and run out of money halfway through your adventure, turning a dream trip into a stressful nightmare.
This guide is your anchor chain cutter. It is the definitive, step-by-step system to create a realistic, achievable, and stress-free financial plan for your adventure. We’re going to demystify the process of how to budget for solo travel, breaking down every potential cost, from pre-flight essentials to daily gelato. This isn't about restriction; it's about empowerment. It's about giving you the clarity and control to turn "someday" into a firm departure date. For a complete roadmap of your entire journey, start with our foundational pillar article, The Ultimate Guide to Solo Female Travel (15 Essential Tips).
The "Why" Before the "How": A Solo Traveler's Financial Mindset
Before we open a single spreadsheet, let's establish a crucial mindset shift. For a solo traveler, a budget is not a cage—it is the key that unlocks the cage. When you travel with others, costs are often shared or split. When you travel alone, you bear 100% of the financial responsibility for every room, ride, and meal. While this may seem daunting, it grants you an unparalleled superpower: absolute financial agility and control.
You, and you alone, decide where to splurge and where to save. You can choose a hostel in Prague to save for a Michelin-starred meal in Paris. This level of autonomy is a core part of the solo travel experience, a movement dominated by women who make up a staggering 84% of the market. Mastering your budget is the first and most critical step in mastering the art of traveling on your own terms.
From Dream to Departure: Your Step-by-Step Guide on How to Budget for Solo Travel
Creating a comprehensive travel budget isn't guesswork; it's a systematic process that transforms a vague dream into an actionable financial goal. Follow these four steps to build a plan you can trust.
Step 1: Research and Estimate Your "Big Three" Costs
Your first task is to get a realistic, high-level estimate of what your trip will cost. Focus your research on the three largest categories of expense that will form the foundation of your budget.
Pre-Trip Fixed Costs: These are the one-time expenses you'll incur before you even leave home. This category includes things like necessary visas, travel insurance (an absolute non-negotiable), essential gear you need to buy (like a good backpack or walking shoes), and any required vaccinations.
Major Transportation: For most trips, this will be your round-trip flight to and from your destination region. Use tools like Google Flights or Skyscanner and search with flexible dates to get a ballpark figure for this significant cost.
Average Daily On-the-Ground Cost: This is the most variable part of your budget, and it's heavily influenced by your destination and travel style. Research is key here. As we'll see below, the difference between regions is dramatic. A budget-conscious solo traveler could comfortably explore Prague on around €65 per day, while maintaining a similar travel style in Paris would require at least €115 per day, according to cost-of-living data.

Step 2: Build Your Master Budget Spreadsheet
Once you have your "Big Three" estimates, it's time to get granular. Create a detailed spreadsheet or use a budgeting app to break down your total estimated cost into specific, itemized categories. This detailed view is crucial because it shows you exactly where your money is going and helps you identify areas where you can potentially cut back.
Your spreadsheet should include the following categories:
Pre-Trip Costs: (Visa fees, travel insurance, vaccinations, new gear)
International Transport: (Flights, long-distance trains)
Daily Lodging: (Your estimated nightly cost x number of nights)
Daily Food: (Your estimated daily cost x number of days)
Daily Activities: (Museum tickets, tours, special experiences)
Local Transport: (Subway passes, buses, occasional taxis)
Miscellaneous: (Souvenirs, laundry, toiletries)
Your Ultimate Planning Companion
A great budget is the foundation of a great itinerary. To help you organize every aspect of your trip, from flight details and accommodation confirmations to your daily spending plan, we've created the perfect tool to put this plan into action.
Download your free Travel Itinerary Template now! This comprehensive template will help you keep all your essential information in one organized place, making your planning process seamless and stress-free.
Step 3: Set a Savings Goal and Automate Your Success
With a tangible number in your sights, the path to your departure date sharpens from a hazy dream into simple, motivating math. Divide the total cost by the number of months you have until your departure. This number is your required monthly savings target.
The single most effective strategy for hitting this target is automation. Don't rely on willpower. Set up an automatic, recurring transfer from your checking account to a dedicated high-yield savings account for the day after you get paid. By treating your travel savings as a non-negotiable monthly bill, you pay your future self first and ensure you stay on track without having to think about it.
Step 4: The Golden Rule: Build a 15-20% Contingency Fund
This is the most crucial, and most often overlooked, step in building a resilient budget. After you’ve calculated your total estimated trip cost, add a buffer of 15% to 20% on top of that total. This is your contingency fund.
This fund is not just for emergencies like a missed flight or a medical issue. It is also your "opportunity fund." It’s the financial freedom to say "yes" to a spontaneous, can't-miss experience—like a last-minute ticket to the opera or a day trip with new friends from your hostel. This buffer is what prevents financial stress on the road and allows you to travel with confidence and flexibility.
The Cost of Style: Decoding Daily Expenses for Three Travel Tiers
That four-step framework gives you the how, but the biggest variable will always be the where and the what. To give you tangible financial targets, let's break down what those "on-the-ground costs" actually look like across three distinct travel styles, based on global averages for popular destinations. These figures are for a single person in USD and do not include major pre-trip costs like international flights.

The Budget Backpacker: Stays in hostel dorms, primarily eats street food or cooks in the hostel kitchen, and focuses on free activities like walking tours.
The Mid-Range Comfort Seeker: Stays in private hostel rooms or budget hotels, eats a mix of cafe meals and local restaurants, and enjoys a paid activity each day.
The Affordable Luxury Traveler: Stays in boutique hotels, dines out for most meals, uses ride-shares, and books multiple guided tours or unique experiences.
To see these numbers in action, explore the Travel Guide marketplace on TrekGuider. Many of our expert guides, published by seasoned solo travelers, include detailed budget breakdowns from their own trips, giving you invaluable real-world insight.
Hacking the System: 5 Actionable Tips for Slashing Your Biggest Costs
For a solo traveler, flights and accommodation are the two largest line items in the budget. Employing a few savvy strategies can dramatically reduce these costs, freeing up more of your hard-earned money for actual experiences.
Travel in the Shoulder Season: The months just before and after peak tourist season (typically spring and autumn) are the sweet spot. You’ll enjoy pleasant weather, fewer crowds, and flight and accommodation costs that can be 25-50% cheaper than in peak summer.
Embrace Modern Hostels (and Their Private Rooms): The stereotype of dingy dorms is long gone. Many modern hostels are stylish, social hubs that offer private rooms with ensuite bathrooms at a fraction of the cost of a hotel. You get privacy plus access to money-saving amenities like a communal kitchen.
Filter for Single Rooms: When searching on booking sites, specifically look for "single rooms" or studios. Many traditional European guesthouses offer smaller rooms designed for one person at a lower price than a standard double.
Use Flight Scanners with Flexible Date Searches: Instead of searching for a specific date on Google Flights or Skyscanner, use their calendar or "whole month" functions. You’ll often find that shifting your departure by just a day or two can result in massive savings.
Leverage Loyalty Programs: Before your trip, sign up for the free loyalty programs of the airlines and hotel chains you plan to use. More significantly, using a travel-focused credit card to pay for your trip expenses can earn valuable points and miles for free flights and hotel stays in the future.

How to Budget for Solo Travel and Avoid the "Budget Busters"
Even a perfect plan can be derailed by unexpected expenses. Being aware of these common "hidden" costs allows you to account for them in your contingency fund from the start.
The Single Supplement: The most notorious cost for solo travelers. Many tours and cruises base their pricing on double occupancy and charge extra for a single person. Always look for companies that cater to solo travelers or offer to pair you with a roommate to waive this fee.
ATM and Foreign Transaction Fees: This is death by a thousand cuts. Using the wrong card can mean paying a 3% fee on every purchase and $5-$10 for every cash withdrawal.
Baggage Fees: Budget airlines are famous for their exorbitant fees for both checked and carry-on luggage. Always read the fine print on baggage allowances before booking.
Local Tourist Taxes: Many cities charge a small tourist tax per person, per night, that is often not included in your prepaid booking price and must be paid in cash at your hotel.
International Data: Relying on your home carrier's roaming plan can be incredibly expensive. Budget for a local SIM card or an eSIM to ensure affordable connectivity.
Pro-Tip: Your most powerful tool against hidden fees is a strategic financial setup. Travel with two key products: a credit card that has no foreign transaction fees (like the Chase Sapphire Preferred®) and a debit card from a bank that offers worldwide ATM fee reimbursements (like the Charles Schwab Bank High Yield Investor Checking Account). This combination alone can save you hundreds of dollars.
Pro-Tip: Before you leave, create a "financial lifeline." Photocopy the front and back of every credit and debit card you plan to carry. Leave one copy with a trusted emergency contact at home and keep a digital copy in a secure cloud storage service. If your wallet is lost or stolen, having the card numbers and the international toll-free numbers on the back will make the cancellation process infinitely smoother.
Frequently Asked Questions About Solo Travel Budgeting
How far in advance should I start budgeting for a big solo trip?
Ideally, start your high-level research 9-12 months out. This gives you plenty of time to track flight deals, understand seasonal price shifts, and, most importantly, allows you to set a smaller, less intimidating monthly savings goal over a longer period.
Is it better to bring a lot of cash or just use cards?
Never carry large amounts of cash. The best strategy is a multi-pronged approach. Use a no-foreign-transaction-fee credit card for the majority of your purchases (hotels, restaurants, tours) to maximize security and rewards. Use a fee-reimbursing debit card to withdraw small amounts of local currency every few days for things like small market purchases, tips, or cash-only street food.
The 15-20% contingency fund seems like a lot. Is it really necessary?
Absolutely. Think of it as buying peace of mind. On a $3,000 trip, a 15% buffer is $450. That single fund could cover a last-minute flight change, a necessary trip to a doctor, or the spontaneous decision to take a ferry to a Greek island with new friends. Without it, any unexpected event becomes a major crisis. With it, it’s just a manageable part of the adventure.
Your Journey to Financial Freedom Awaits
A budget is not about what you can't do; it's about empowering everything you can do. It transforms a vague, anxiety-inducing dream into a clear, tangible, and achievable goal. By following this systematic approach, you now have the tools to build a financial plan that is not just a spreadsheet of numbers, but a roadmap to the world. You have a framework for how to budget for solo travel that puts you in complete control of your adventure.
This financial competence is the foundation upon which the most incredible solo journeys are built. With your budget sorted, you can focus on the real magic: planning your itinerary, discovering new cultures, and, most importantly, discovering yourself.

SEO Meta Data Suggestions:
SEO Meta Title (59 characters): How to Make a Solo Travel Budget You'll Actually Stick To
URL Slug: /how-to-budget-for-solo-travel
SEO Meta Description (154 characters): A step-by-step guide on how to budget for solo travel. Learn to estimate costs, save effectively, and avoid hidden fees for your next adventure.
Don't Miss Out! Subscribe for Exclusive Content
Subscribe


Comments 0
No comments yet
Be the first to share your experience!
Dont Miss Out! Subscribe for Exclusive Content

Ultimate USA Holidays Guide: Top Picks

FTC Affiliate Disclosure Essentials: Stay Compliant as a Travel Creator

Essential Affiliate Tools: From Tracking to Full Optimization

Booking.com Affiliate Program Review: Pros, Cons, and Earnings Potential

Decoding Affiliate Commission Rates: Benchmarks for Travel Creators

Top 11 High-Paying Affiliate Programs for Travel Bloggers
50+ Travel Blog Name Ideas (And How to Choose)
TrekGuider @trekguider
You feel it in your bones—the burning desire to turn your travel adventures into something more. You're ready to build a brand, share your stories, and launch the travel blog you've been dreaming of. But you’re stuck. You’re staring at a blank screen, trapped by the single most paralyzing question every creator faces: What do I call it?
The pressure to find the perfect name is immense. Every brilliant idea you have feels either too generic, too cheesy, or, most frustratingly, already taken. You worry about choosing a name you’ll outgrow or one that fails to capture the essence of your vision, and this single decision is holding you back from ever hitting "publish."
Forget the endless, frustrating brainstorming sessions. This guide is your definitive branding workshop. We’re not just going to give you a list of generic travel blog name ideas; we’re going to equip you with a proven, step-by-step framework for brainstorming, vetting, and choosing a powerful, memorable, and—most importantly—available brand name. Consider this the final resource you’ll need to overcome the naming hurdle and finally launch your travel media business.

Why Your Blog’s Name is a Critical Business Decision
In the competitive world of travel content, your blog's name is far more than just a URL; it’s the foundation of your entire brand. It’s the first impression you make on a potential reader, a signal of your niche, and a promise of the value you provide. The right name can convey authority, personality, and trustworthiness in a split second.
As the digital world becomes more crowded, a unique and memorable name is a key differentiator that helps you stand out and build a loyal community. Choosing the right name is the very first step in joining the ranks of The Best Travel Blogs to Follow in 2026, transforming your passion from a simple hobby into a legitimate media brand. It sets the tone for your content, guides your visual identity, and becomes the anchor for the entire business you are about to build.
The 5-Step Framework for Choosing the Perfect Travel Blog Name
Treat this framework as your strategic playbook. By following these five steps systematically, you’ll move from a state of overwhelming uncertainty to one of confident clarity, ensuring you select a name that is not only creative but also commercially viable.

Step 1: The Foundation — Brainstorm Core Keywords
Before you can think of a single name, you must first define what your brand is about. This initial step is all about creating a "word bank" of concepts that are central to your blog. Don’t self-censor here; just write.
Create lists of words associated with these four categories:
Your Niche: Are you focused on luxury, budget, adventure, family, food, or solo travel? List every related term. For example, a family adventure blog might list: family, kids, teens, journey, trek, quest, wild, explore, outdoors.
Your Target Audience: Who are you writing for? Digital nomads, parents, retirees, college students? List words that describe them or resonate with them. For example: nomad, creator, parent, wanderer, seeker, adventurer.
Your Tone & Voice: What feeling do you want to evoke? Is your brand inspiring, funny, practical, sophisticated, or rugged? List adjectives. For example: witty, curious, bold, serene, classic, heirloom, luxe.
Travel & Exploration Verbs/Nouns: List general travel-related words that you like the sound of. For example: atlas, compass, globe, passport, voyage, roam, wander, seek, journey, passage, trail.
At the end of this exercise, you’ll have a rich palette of keywords to work with in the next steps.
Step 2: The Spark — Apply Proven Naming Formulas
Now, take the keywords from your word bank and start combining them using these common, effective naming formulas. This is where the magic happens.
The Alliteration Formula (Same Letter): This technique makes names catchy and memorable.
Examples: Roaming Roads, Compass Chronicles, Summit Stories.
The Portmanteau Formula (Blend Words): Combine two words to create a new, unique one.
Examples: Foodventure (Food + Adventure), Staycationist (Stay + Vacation), Technomad (Tech + Nomad).
The "Your Name" Formula (Personal Brand): Using your own name builds a personal connection and positions you as the expert.
Examples: Adventurous Kate, Nomadic Matt, Travels with Taylor.
The "Adjective + Noun" Formula (Descriptive): This is a classic, straightforward approach.
Examples: The Wandering Wagars, The Broke Backpacker, The Travel Bite.
Experiment by mixing and matching words from your Step 1 list into these formulas. Generate a long list of 20-30 potential names without judgment.
Step 3: The Inspiration — Use Blog Name Generators (Wisely)
Online blog name generators can be helpful, but they should be used for inspiration, not as a final answer. Input your top keywords from Step 1 into a few of these tools. Most of the suggestions will be generic or unusable, but occasionally, a generator can spark a new idea or a creative word combination you hadn't considered. Add any interesting options to your long list.
Pro-Tip: Think five or ten years into the future. Will the name you choose still fit if your travel style evolves? A name like "Backpacking a Twenty-Something" might feel perfect now, but it has a built-in expiration date. Aim for a name that allows your brand to grow with you.

Step 4: The Reality Check — Verify Availability
This is the most critical and often most disheartening step, but it’s non-negotiable. You must thoroughly check if your favorite names are available.
Check the Domain: Your primary goal is to secure a .com domain. Our market analysis consistently shows that a professional, easy-to-navigate website is a direct signal of brand investment. A .com domain is at the heart of that perception, inspiring a level of trust that other extensions simply don't. Use a domain registrar like Namecheap or GoDaddy to see if YourBlogName.com is available. If it’s taken, you should strongly consider moving on to the next name on your list.
Check Social Media Handles: Once you find an available .com, immediately check if the name is available as a consistent handle across your target social media platforms (e.g., Instagram, TikTok, Pinterest, YouTube). Having @YourBlogName everywhere is crucial for brand consistency.
If your top name passes both checks, put it on your shortlist. If not, cross it off and move on. Do not get emotionally attached to a name you can't own outright.
Step 5: The Final Hurdle — Conduct a Conflict Check
Before you purchase the domain, perform one last check to avoid future headaches.
Google It: Do a simple Google search for your chosen name. Is another brand, especially in a related industry, already using it? Even if the .com is available, you don’t want to compete with an established brand for name recognition.
Check Trademarks: For extra diligence, perform a basic search on the U.S. Patent and Trademark Office (USPTO) database. This can help you avoid obvious trademark conflicts down the road.
The name that makes it through all five steps is your winner.
Ready to Build Your Brand?
Choosing a name is the first step. Building a successful travel blog requires a full suite of tools for content creation, SEO, and monetization. Get a head start with our comprehensive, expert-curated toolkit.
The Travel Creator's Toolkit
75+ Travel Blog Name Ideas to Spark Your Creativity
To help you with Step 1 and 2, here is a categorized list of over 75 travel blog name ideas. Use these as a starting point to fuel your own unique combinations.

Puns & Wordplay
In Tents Exploration
The Globe Trotters
Suitcase Stories
Miles and Smiles
Pretty Plane Sailing
Frequent Flier Finds
Life is a Trip
Home is Where the Bag is
Have Luggage, Will Travel
Check-In & Check-Out
Alliteration & Rhyme
Roaming Roads
Compass Chronicles
Voyage Vision
Summit Stories
Passage Planner
Wayward Wanderings
The Travel Tribe
Seeker’s Saga
Trekking Threads
The Global Guide
Niche-Specific Names
Family: The Family Fold, Park Pack, Teen Travel Tribe, Little Luggage Life, The Wandering Weans
Solo: Solo Sphere, One Woman’s World, The Independent Itinerary, Just Me Journeys, The Singular Seeker
Luxury: The Gilded Getaway, First Class Compass, The Curated Journey, Velvet Atlas, Heritage & Hideaways
Budget: The Frugal Flier, Penny-Wise Passage, The Backpacker's Billfold, Thrifty Trails, The Value Voyager
Adventure: Adventure Atlas, Summit & Scale, The Adrenaline Almanac, Off-Grid Odyssey, The Wild Wayfarer
Action-Oriented & Evocative
Chase the Horizon
Seek the Summit
Beyond the Map
Find Your Path
Cross the Meridian
The Saffron Trail
Saltwater Soul
Alpenglow Atlas
Terra Incognita
The Far-Flung
Modern & Simple
The Travel Edit
Wayward Co.
Compass Collective
The Getaway Guide
Trip Theory
Atlas & Anchor
Itinerary & Ink
The Local Lens
Foreign & Familiar
The Departure Desk
Food Travel
Feast Finder
Culinary Compass
The Hungry Horizon
Fork & Globe
Spice Routes
The Traveling Table
Street Food Stories
Plates & Passports
The Foodie Flight
Cravings & Capitals
Photography Travel
The Shutter Sphere
Aperture Abroad
Focus Finder
The Framing Fellow
Light & Landmark
Pixel Passport
The Wandering Lens
ISO Elsewhere
The Photo Trekker
Viewfinder Voyages

Frequently Asked Questions About Naming Your Blog
Should my blog name include my destination niche (e.g., "Awesome Italy")?
It can be a powerful strategy for building authority quickly. It tells readers and search engines exactly what you're about. However, it can be limiting if you decide to travel elsewhere. If you're certain you'll focus on one area for years, go for it. If you think you might expand, a broader name offers more long-term flexibility.
What if the .com for my name is taken, but .net or .co is free?
We strongly advise against it. As mentioned, the .com extension is the gold standard; it conveys professionalism and trust. Other extensions can appear less credible and are harder for people to remember. Your audience will instinctively type .com, and you don’t want to send your hard-earned traffic to another website. It’s better to find a new name with an available .com.
Is it a bad idea to use my own name for my travel blog?
Not at all! Using your own name is an excellent way to build a personal brand, positioning yourself as the face of your business. Industry leaders like Nomadic Matt and Adventurous Kate have done this with massive success. The only downside is a potential lack of privacy, so be sure you're comfortable with putting your name out there publicly.
How important is having a keyword in my blog name for SEO?
It's less important than it used to be. Today, search engines prioritize the quality of your content over having an exact-match keyword in your domain. Focus on choosing a name that is memorable, unique, and brandable. A strong brand name is far more valuable for long-term SEO than a clunky, keyword-stuffed domain.
The Final Step: From Name to Brand
Once you’ve successfully navigated the framework and chosen your perfect name, act immediately. The internet moves fast, and you don’t want someone else to grab your idea.

Pro-Tip: As soon as you decide on a name that is available, purchase the .com domain and claim the social media handles on all relevant platforms. Do this immediately, even before you have a website built. Owning these assets is the first real step in making your brand a reality.
With your name secured, you’re no longer just dreaming; you’re building. The next step is to create a platform where you can share your expertise and begin monetizing your content. While traditional methods like advertising exist, the most profitable and sustainable path is to sell your own unique digital products—like itineraries, guides, or workshops. This is where you transition from being a content creator to a media entrepreneur. The TrekGuider Platform is the ultimate ecosystem designed for creators like you, providing the tools and marketplace to sell your digital products and build a thriving business from day one.
Your Journey Starts Now
Choosing a name for your travel blog can feel like an insurmountable obstacle, but it doesn’t have to be. By shifting your mindset from searching for a "cool name" to executing a strategic branding process, you can move forward with confidence and clarity. You now have a repeatable framework and a wealth of travel blog name ideas to break through the creative block that has been holding you back.
The perfect name is a strategic blend of personal expression and practical verification. You are equipped with the knowledge to find it. You're no longer just a traveler with an idea; you're a founder. Go claim your name, and start building your empire.
Meta Data Suggestions:
SEO Meta Title (58 characters): 75+ Travel Blog Name Ideas & How to Choose the Perfect One
URL Slug: travel-blog-name-ideas
SEO Meta Description (154 characters): Stuck on naming your travel blog? Get unstuck with our 5-step framework and 75+ creative travel blog name ideas to find the perfect brand name for you today.
Don't Miss Out! Subscribe for Exclusive Content
SubscribeComments 0
No comments yet
Be the first to share your experience!
Dont Miss Out! Subscribe for Exclusive Content
Ultimate USA Holidays Guide: Top Picks
FTC Affiliate Disclosure Essentials: Stay Compliant as a Travel Creator
Essential Affiliate Tools: From Tracking to Full Optimization

Avoid These 5 Affiliate Landing Page Mistakes for Better Conversions

Affiliate Keyword Research Mastery for Travel Blogs
Booking.com Affiliate Program Review: Pros, Cons, and Earnings Potential
Halloween NYC: 5 Spooky Parades
TrekGuider @trekguider
The air in New York City crackles with a different kind of energy in October. The familiar city hum deepens into a mysterious, thrilling whisper as a tangible sense of mischief descends upon the five boroughs. You’re here to experience the legend of a New York Halloween, but the sheer volume of options is a paralyzing paradox of choice. You’ve seen the movies and heard the stories—the epic parties, the haunted houses, the city-wide transformation—but you’re determined to avoid a generic, tourist-trap experience.
The fear of missing out is palpable. A poorly planned evening during Halloween in New York City can quickly devolve from a dream into a logistical nightmare of impenetrable crowds, dead-end queues, and parties that are all hype and no soul. You risk wasting precious time and money on experiences that fail to deliver the spooky, spectacular magic you came for. With Halloween 2026 falling on a Friday, the energy will be at an absolute fever pitch, making a solid plan more critical than ever.
So, let's cut through the noise. Forget the endless blog posts and conflicting advice. This is your tactical guide to the city's electric Halloween spirit, distilled into five core experiences that deliver the spooky, spectacular magic you came for. From the world’s most famous public procession to exclusive rooftop spectacles, this blueprint will ensure your NYC Halloween is not just successful, but legendary. This is your ticket to the very heart of the city's spooky season, a key element celebration among the many incredible festivities we detail in our complete guide to New York Holidays: 10 Must-Do Events.

1. The Main Event: Conquering the Village Halloween Parade
When people talk about Halloween in NYC, they are almost always picturing the Village Halloween Parade. This isn’t just a parade; it’s a cultural institution, a vibrant, chaotic, and utterly breathtaking spectacle of creativity that has been marching through Greenwich Village for nearly half a century. It is, without a doubt, the single most important event on the city’s Halloween calendar.
What Makes It Legendary?
What began in 1974 as a humble neighborhood walk led by a local mask maker has exploded into a televised extravaganza drawing millions of spectators and over 50,000 costumed participants. Its defining feature is its radical inclusivity. This is a parade for the people, by the people. The procession is a mesmerizing river of giant puppets, hundreds of live bands, dancers, and, most importantly, thousands of New Yorkers in some of the most elaborate and imaginative costumes you will ever witness. The energy is infectious, a pure, uninhibited celebration of artistry and the macabre.

How to Participate vs. How to Watch
This is the most critical decision you’ll make. Unlike other parades, the Village Halloween Parade has one simple, golden rule: No Costume, No Marching.
To Participate: If you want to be in the parade, a costume is your non-negotiable ticket. This is your chance to unleash your creativity—the more unique and ambitious, the better. Marchers officially line up on 6th Avenue between Canal Street and Spring Street. The procession kicks off at 7:00 PM sharp on October 31st, but you’ll want to arrive at the lineup area by 6:00 PM to soak in the incredible pre-parade atmosphere and see the costumes up close.
To Watch: If you’d rather be a spectator, your mission is to find a prime viewing spot along the 6th Avenue route, which runs straight north from Spring Street to 16th Street. The sidewalks become incredibly packed, so arriving by 5:30 PM is essential, especially for spots between Bleecker Street and 14th Street, which are the most congested.
Pro-Level Viewing Strategy
For the best experience, avoid the intense crush of the central Village. Head further north on the route, closer to the 14th Street or 16th Street end. The crowds tend to thin out slightly here, giving you a bit more breathing room. Alternatively, find a spot on a cross-street corner, which can offer a slightly better vantage point as the parade turns or passes. Remember that public transportation is your best friend; the subway will be running, but expect crowded stations around the West 4th Street and 14th Street stops.
2. The High-Altitude Parade: Exclusive Rooftop Costume Parties
While the Village Halloween Parade owns the streets, a more exclusive and glamorous kind of procession takes place high above the city: the rooftop party. These events offer a different but equally thrilling version of Halloween in New York City, trading street-level chaos for breathtaking skyline views, curated music, and a parade of high-fashion costumes.
Why a Rooftop Party is a Must-Do
Imagine sipping a smoked old-fashioned while looking out over the glittering lights of the Manhattan skyline, surrounded by people in chic, clever, and sometimes terrifying attire. Rooftop parties provide a controlled, comfortable, and often luxurious environment to celebrate. You get the festive atmosphere without the overwhelming crowds of a public event. It’s the perfect way to see and be seen, offering some of the most photogenic Halloween moments imaginable.

The Unspoken Rules of the Rooftop Parade
This isn't a casual affair. To join this high-altitude parade, you need to plan ahead.
Book Early: Tickets for the best rooftop parties (think venues in the Meatpacking District or with views of the Empire State Building) sell out weeks, sometimes even a month, in advance. Do your research in early October and secure your spot.
Confirm the Dress Code: While it’s Halloween, many high-end venues still maintain a dress code. Your costume should be creative, but it also needs to be classy. Some venues may have specific themes, so read the event details carefully to ensure your costume fits the vibe.
Understand the Cost: These parties are a premium experience. Expect to pay a significant ticket price, which may or may not include drinks. Budget accordingly for a night of upscale revelry.
Pro-Tip: For travelers, especially those exploring the city's nightlife alone, safety matters most. Always let someone know your plans and be mindful of your surroundings. For a complete set of strategies on navigating new places with confidence, our Solo Female Travel Safety Guide offers invaluable, expert-approved advice that applies to any urban adventure.
3. The Parade of Screams: Navigating NYC's Premier Haunted Houses
Not all parades are about celebration; some are about pure, unadulterated fear. The experience of walking through a top-tier haunted house is its own kind of procession—a conga line of terror where every corner reveals a new nightmare. In New York City, this experience is elevated to a high-art horror show.
Inside Blood Manor: What to Expect
Blood Manor is consistently ranked as one of the city’s most intense and terrifying haunted attractions. This isn't a charming ghost tour; it's a full-frontal assault on your senses. You and your group will parade through a labyrinth of themed rooms, corridors, and chambers, each populated by professional actors dedicated to making you scream. The production value is immense, with Hollywood-level sets, gruesome special effects, and a palpable sense of dread that follows you from the moment you enter. You aren't just observing the horror; you are marching directly through its heart.

The Smart Way to Get Scared
The popularity of attractions like Blood Manor means that lines can be monstrous, eating up hours of your night. The single biggest rookie mistake is showing up without a plan. The only way to do this right is to buy timed tickets online in advance. This allows you to select a specific entry window, bypassing the hours-long general admission queue and saving you a massive headache. Arrive about 15-20 minutes before your scheduled time slot to check in.
Pro-Tip: When you’re inside, stick together. The actors are masters of their craft and are trained to identify and isolate the most scared members of a group. Hold onto your friends and move through as a unit. If you get genuinely overwhelmed, look for the designated "exit" signs within the attraction—there's no shame in tapping out if the parade of screams becomes too much.
4. The Family Parade: Charming Neighborhood Trick-or-Treating Processions
For those traveling with family or simply seeking a more wholesome and community-focused Halloween experience, the city’s neighborhood trick-or-treating events are a must. These are informal parades of the cutest kind, where streets are filled with tiny ghosts, goblins, superheroes, and fairies marching from brownstone to brownstone in search of candy.
Where to Find the Best Family-Friendly Atmosphere
While you can find trick-or-treating in many areas, some neighborhoods are famous for going all out. For the quintessential experience, head to the residential blocks of the Upper West Side and the Upper East Side, or cross the bridge to Brooklyn's Park Slope and Cobble Hill. Residents in these areas often decorate their stoops lavishly and are well-prepared for the annual procession of costumed children. Many local community groups and parks also organize specific Halloween "walks" or "rags" that provide a safe and festive environment for families.

Essential Safety for the Little Ghouls
Navigating the city with children on Halloween requires extra vigilance. The general safety rules are more important than ever:
Be Seen: Use reflective tape on costumes and candy bags to ensure children are visible to traffic after dusk. It's a simple step that makes a huge difference.
Stay Together: Adult supervision is non-negotiable. Keep a close eye on your children and establish clear rules about not running ahead.
Plan Your Route: Map out your trick-or-treating path in advance. Stick to well-lit streets and familiar neighborhoods.
Check the Candy: Before anyone eats their treats, inspect the candy at home to ensure everything is sealed and safe.
This charming, family-focused parade is a wonderful way to experience the heartwarming, community-driven side of a New York Halloween, proving that not all of the city’s festivities have to be frightening.
5. The DIY Parade: Crafting Your Own Spooky Pub Crawl
Sometimes the best parade is the one you create yourself. Organizing a themed pub crawl with your friends is a fantastic way to explore different neighborhoods and experience the city’s festive bar scene. This is your chance to be the grand marshal of your own personal procession, charting a course through the city’s most spirited watering holes.
Planning Your Route: From Greenwich Village to the East Village
The key to a successful pub crawl is a well-planned, walkable route. You don’t want to spend your night trekking long distances between stops. Choose a neighborhood with a high density of bars and a vibrant Halloween atmosphere.
Greenwich Village: After watching the main parade, you can easily transition into a crawl here. The area will be buzzing, and nearly every bar will have decorations and drink specials.
The East Village: Known for its edgier, more eclectic vibe, the East Village is packed with unique bars, from historic pubs to modern cocktail lounges. It’s a perfect landscape for a spooky-themed crawl.
Lower East Side: This area offers a fantastic mix of trendy bars and old-school dives, all of which embrace the Halloween spirit with gusto.

Staying Connected and Safe
When your group is on the move, staying safe and connected is crucial. Before you head out, make it a rule that everyone in your group shares their live location with each other using a mobile app. This simple step makes it incredibly easy to find anyone who gets separated from the group in a crowded bar or on a busy street. It’s a modern safety essential for any group outing in a big city.
This DIY approach allows you to fully customize your night, ensuring you experience the exact vibe you’re looking for, making your Halloween in New York City a truly personal and unforgettable adventure.
Your Ultimate Halloween Blueprint
You are now armed with the ultimate insider’s guide. You know how to march in the world’s greatest Halloween parade, how to ascend to an exclusive rooftop party, how to brave a parade of manufactured terror, and how to create your own festive procession through the city’s most iconic neighborhoods. The overwhelming chaos of Halloween in New York City has been distilled into a clear, actionable battle plan. You are no longer just a visitor; you are a participant, ready to dive into the very heart of the magic and madness.
This is just one of the many incredible experiences the city has to offer. To build out your entire trip with the same level of expert insight, from finding the best holiday markets to securing the perfect New Year's Eve spot, explore our comprehensive Travel Guide. It’s the only resource you’ll need to transform your travels from ordinary to extraordinary.
Don't Miss Out! Subscribe for Exclusive Content
SubscribeComments 0
No comments yet
Be the first to share your experience!
Dont Miss Out! Subscribe for Exclusive Content

San Francisco Cherry Blossoms: A Local's Guide to the Blooms

Halloween SF: Haunts Without Horrors

SF Festivals: 7 Must-See Lineups

Christmas SF: Lights & Wharf Wonders

SF Pride: 6 Route & Party Hacks
