Travel Insurance Guide: Avoid Mistakes & Travel Worry-Free
TrekGuider @trekguider
You’ve spent weeks, maybe even months, planning the perfect getaway. You’ve booked the flights, reserved the hotel, and your itinerary is a masterpiece of exploration and relaxation. But there’s one final task that feels more like a chore than an exciting step: buying travel insurance. The whole process is a minefield of confusing jargon, endless fine print, and the nagging fear that you’re either overpaying for coverage you don’t need or, worse, buying a worthless policy that will abandon you when you need it most. This is where our guide to choosing travel insurance comes in.

This isn't just a minor administrative headache; it's a high-stakes decision. A sudden illness in a foreign country can lead to six-figure medical bills that your domestic health plan won't cover. A last-minute trip cancellation could mean losing thousands of dollars in non-refundable deposits. Relying on the "free" insurance from your credit card often leaves critical gaps in coverage, especially for medical emergencies. The anxiety is real because the horror stories of denied claims are everywhere, leaving travelers financially and emotionally stranded. For any traveler, this financial safety net is non-negotiable, forming a core part of the playbook we lay out in our ultimate .
It’s time to trade that anxiety for absolute confidence. This guide will demystify the entire process. We will translate the arcane language of insurance into simple, actionable advice. We’ll provide you with a powerful, step-by-step framework to help you analyze your needs, compare policies like a pro, and identify the red flags that most people miss. By the end of this article, you won't just buy a travel insurance policy; you will strategically select the perfect coverage that empowers you to travel with true, unshakeable peace of mind.
Why Travel Insurance is Your Trip's Most Important Investment
Let's reframe the conversation. Travel insurance isn't an annoying expense; it is the foundational investment that protects the value of every other dollar you've spent on your trip. This isn't a niche product anymore; American travelers spent a staggering $5.56 billion on travel protection in 2024, a 46% increase from pre-pandemic levels, signaling a major shift in how we prepare for travel.
The cost of a strong policy typically falls between 5% and 10% of your total non-refundable trip costs. So, for a $4,000 vacation, you might pay between $200 and $400 for a policy.
Now, weigh that against the potential for catastrophic financial loss:
Medical Emergencies Abroad: An unexpected hospital stay in many countries can easily exceed $50,000. One uninsured traveler faced a $130,000 bill for a coronary bypass in the U.S.
Medical Evacuation: If you're injured in a remote location and need to be transported to a modern hospital or flown back home, the bill for an air ambulance can soar past $100,000.

Here's a hard truth every American traveler must understand: your domestic health insurance, including Medicare, becomes virtually useless the moment you cross the border. This makes dedicated travel medical insurance an absolute necessity for international journeys. Viewing your premium as the "price of certainty" is the first step. The next is understanding exactly what that certainty buys you.
The 6 Core Types of Coverage You Need to Understand
A comprehensive policy is a bundle of different coverages. Understanding what each piece does is the first step in choosing the right plan. Here’s a breakdown of the essential components.
1. Trip Cancellation
This is your primary defense against losing your prepaid, non-refundable deposits. It reimburses you if you have to cancel your trip before you leave for a covered reason, like a sudden illness, a family emergency, or severe weather making your destination inaccessible.
Recommended Minimum: 100% of all your prepaid, non-refundable trip costs.
Who Needs It Most: Any traveler with significant upfront financial commitments, such as those who have booked organized tours, cruises, or non-refundable flights and accommodations.
2. Trip Interruption
This coverage kicks in after your trip has already started. If you have to cut your trip short and return home early due to a covered reason, it reimburses you for the unused portion of your trip and can cover the often-exorbitant cost of a last-minute flight home.
Recommended Minimum: 125% to 150% of your trip cost. The extra percentage is crucial for covering those expensive last-minute travel arrangements.
Who Needs It Most: Individuals on long, multi-stop, or particularly expensive journeys where ending the trip early would mean a massive financial loss.
3. Emergency Medical Expense
This is the most critical component for international travel. It covers your bills for medical treatment, hospital stays, and doctor’s services for an illness or injury that occurs during your trip.
Recommended Minimum: At least $50,000 for general international travel. Increase this to $100,000 for cruises or travel to remote destinations.
Who Needs It Most: All international travelers. This is non-negotiable.
4. Emergency Medical Evacuation & Repatriation
This covers the immense cost of transporting you to the nearest adequate medical facility or, if deemed medically necessary, all the way back to your home country. This is a separate benefit from your Emergency Medical coverage and is absolutely vital.
Recommended Minimum: At least $250,000. An air ambulance is incredibly expensive, and being underinsured here could be financially devastating.
Who Needs It Most: Travelers visiting remote or undeveloped areas, participating in adventure sports, or going on cruises where they may be far from high-quality medical facilities.
5. Baggage & Personal Effects / Baggage Delay
This provides two distinct benefits. Baggage & Personal Effects coverage reimburses you if your luggage is lost, stolen, or damaged. Baggage Delay coverage gives you a stipend to buy essential items like clothes and toiletries if your checked bags are delayed by the airline for a certain period (e.g., 6-12 hours).
Recommended Minimum: Check the per-item sub-limits. Coverage for expensive electronics or jewelry is often capped at a low amount like $250-$500.
Who Needs It Most: Travelers with multiple flight connections or those carrying essential or expensive equipment.
6. "Cancel For Any Reason" (CFAR) Upgrade
CFAR is the ultimate flexibility upgrade. It’s an optional add-on that lets you cancel your trip for any reason whatsoever—even reasons not covered by a standard policy, like a work conflict or simply changing your mind—and get a significant portion of your non-refundable costs back, typically 50% to 75%.
Who Needs It Most: Travelers with very expensive or complex trips, those with unpredictable personal situations, or anyone who desires the maximum possible protection against losing their travel investment.

Pro-Tip: "Cancel For Any Reason" coverage is extremely time-sensitive. You must purchase this add-on within a short window, usually 7 to 21 days, of making your very first trip payment or deposit. If you miss this window, the option is gone.
Your 5-Step Playbook for Choosing the Perfect Policy

Don't just pick the cheapest plan. Follow this strategic process to ensure the policy you buy is perfectly aligned with your trip and your needs.
Calculate Your Total Financial Risk.
Before you do anything else, open a spreadsheet and tally up every single prepaid, non-refundable expense for your trip. This includes flights, cruise payments, tour deposits, non-refundable hotel stays, and event tickets. The final number is your total trip cost, and it dictates the minimum amount of Trip Cancellation coverage you need.
Assess Your Personal Risk Profile.
Next, look beyond the numbers and evaluate your unique circumstances.
Health: Do you, a traveling companion, or a close family member at home have a pre-existing health condition that could flare up?
Destination: Are you traveling to a remote area with limited medical infrastructure where an evacuation might be necessary?
Activities: Will you be skiing, scuba diving, or mountain climbing? These often require special coverage.
Use Comparison Sites to Shortlist, Not to Buy.
Online aggregator sites like Squaremouth and InsureMyTrip are fantastic tools for the initial research phase. You can enter your trip details and get dozens of quotes from different providers in a side-by-side format. Use these sites to identify a shortlist of two or three well-priced plans from reputable companies that appear to meet your top-level needs (e.g., $100,000 in medical coverage).
Scrutinize the Actual Policy Document.
This is the most important step. For each policy on your shortlist, download the full "Certificate of Insurance" or "Policy Wording." This is the legal contract. Ignore the marketing brochures and summary pages. You are on a mission to find the definitions, limitations, and, most importantly, the exclusions. This is where you’ll discover if that "adventure activity" you've planned is actually covered.
Call the Provider Before You Buy.
The final step is to get on the phone with a licensed agent from the insurance company. Your goal is to get verbal confirmation on your most critical questions.
"My itinerary includes skiing in the Alps. Can you confirm that this policy provides full medical and evacuation coverage for injuries sustained while skiing?"
"Can you explain the 'look-back period' for pre-existing conditions and the exact requirements to get the waiver?"
"If I have a medical emergency, what is the exact procedure? Do I need to call you for pre-authorization before I go to a hospital?"
Red Flags and Fine Print: A Savvy Traveler's Guide to Choosing Travel Insurance

A policy is defined as much by what it excludes as what it covers. Be on the lookout for these common traps that lead to denied claims.
Pre-Existing Medical Conditions
This is a leading cause of claim denials. A pre-existing condition is any ailment you received treatment or medical advice for during a "look-back period" (usually 60-180 days) before buying your policy. To cover these conditions, you need a "pre-existing medical condition exclusion waiver." As mentioned, this is time-sensitive and typically requires you to buy your policy within a week or two of your initial trip deposit.
Adventure Sports & High-Risk Activities
Standard policies often exclude activities they deem "hazardous." This can include everything from bungee jumping to scuba diving. If you plan on doing anything more adventurous than swimming, you must either find a policy that specifically covers it or purchase an adventure sports add-on.
U.S. State Department Advisories
This is a critical, often-overlooked exclusion. Insurance companies monitor official government travel advisories.
WARNING: Most policies will provide ZERO coverage if you travel to a country that is under a "Level 4: Do Not Travel" advisory from the U.S. State Department. Your entire policy could be voided. Always check the official State Department website before booking and before departing.
Mental Health, Pandemics, and "Fear of Travel"
Standard trip cancellation does not cover changing your mind. Canceling a trip due to anxiety, fear of a pandemic, or other mental health concerns is generally not a covered reason. This is a scenario where only a "Cancel For Any Reason" (CFAR) policy would provide reimbursement.
Pro-Tip: When dealing with a claim, especially for a delay, get everything in writing. If a flight is canceled, don't just accept a verbal reason. Go to the airline desk and get a printed statement detailing the official cause of the cancellation. This piece of paper can be the difference between a paid claim and a denial.
Is Your Credit Card's "Free" Travel Insurance Good Enough?
Many premium travel credit cards, like the Chase Sapphire Reserve or The Platinum Card from American Express, advertise travel insurance as a key benefit. But this "free" coverage has significant gaps and should be seen as a supplement, not a substitute for a real policy.
The Pros: Credit card coverage is often decent for things like trip delays, baggage delays, and rental car damage waivers.
The Critical Gaps:
Emergency Medical Coverage: This is the biggest weakness. Most cards offer little to no emergency medical coverage.
Emergency Evacuation: This is almost never included, leaving you exposed to a massive financial risk.
Low Cancellation Limits: The trip cancellation benefit is often capped at a level (e.g., $10,000 per trip) that may be insufficient for more expensive journeys.
Secondary vs. Primary Coverage: Much of the coverage is "secondary," meaning you have to file with any other insurance you have first, creating a complicated and lengthy claims process. A standalone policy provides "primary" coverage that pays first.
The Verdict: For any international trip, or any domestic trip with significant non-refundable costs, a dedicated, comprehensive policy with high primary medical and evacuation limits is the only prudent choice.
Choosing travel insurance is not a gamble; it is a strategic act of preparation that transforms hope into confidence. In today's world, a proactive approach to risk management is the key to true peace of mind. You are now armed with the knowledge to decode policy language, identify critical exclusions, and follow a proven framework for selecting the right coverage. By using this guide to choosing travel insurance, you can move forward with your planning, fully empowered and secure in the knowledge that you have a strong financial safety net in place. Your investment, your health, and your adventure are protected.
Read the full guide: Anxious to Adventurous: The Ultimate Guide to Solo Travel Confidence
Don't Miss Out! Subscribe for Exclusive Content
Subscribe


Comments 0
No comments yet
Be the first to share your experience!
Dont Miss Out! Subscribe for Exclusive Content

Ultimate USA Holidays Guide: Top Picks

FTC Affiliate Disclosure Essentials: Stay Compliant as a Travel Creator

Essential Affiliate Tools: From Tracking to Full Optimization

Booking.com Affiliate Program Review: Pros, Cons, and Earnings Potential

Decoding Affiliate Commission Rates: Benchmarks for Travel Creators

Amazon Associates for Travel: Strategies to Maximize Commissions
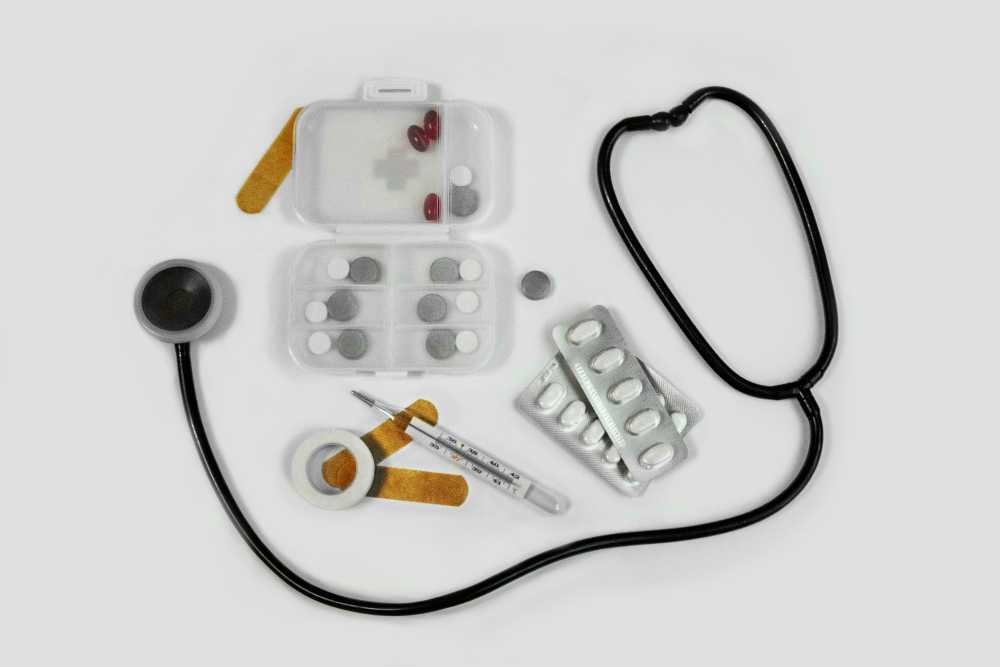
The Ultimate Travel First Aid Kit Checklist (2026)
TrekGuider @trekguider
But it doesn’t have to be that way. The single most powerful tool for ensuring a healthy, stress-free journey is one you create before you even leave home: a comprehensive travel first aid kit. This isn’t just a box of bandages; it’s a personalized arsenal of preparedness that empowers you to handle common health issues with confidence and ease. Building your own kit is at the heart of the proactive mindset we cover in our comprehensive The Ultimate Guide to Travel Safety: A 2026 Playbook. Think of this guide less as a simple shopping list and more as a masterclass in preparedness, backed by pharmacist-approved advice to help you build the ultimate defense against travel’s minor medical curveballs.
DIY vs. Pre-Made: Which Travel First Aid Kit is Right for You?
Before we dive into the specific items, it’s worth considering whether to build your kit from scratch or buy a pre-made one.
Pre-Made Kits: These offer undeniable convenience. They come in a compact case and provide a decent baseline of supplies. However, they are often filled with low-quantity, generic items and may lack the specific medications you need for your trip.
DIY Kits: Building your own kit requires a bit more effort upfront but is superior in every other way. It allows you to choose high-quality brands, pack sufficient quantities, and tailor the contents specifically to your destination, your planned activities, and your personal health needs.
Our recommendation? Start with a high-quality pre-made kit as your base and then use this checklist to supercharge it, swapping out generic items and adding the crucial medications and tools it’s missing. This hybrid approach gives you the best of both worlds.
The Core Components of Your Ultimate Travel First Aid Kit
A truly effective travel first aid kit is organized like a mobile clinic, with specific supplies to treat the most common categories of travel-related ailments. Here is the definitive breakdown of what you need.
Wound & Burn Care: For Life's Little Scrapes
From a papercut to a scraped knee on a cobblestone street, any break in the skin is an open invitation for infection, especially in new environments. Here’s how you shut that door, fast.
Antiseptic Wipes (BZK or alcohol-based): For cleaning wounds, scrapes, and your hands before providing treatment. Individual packets are perfect for travel.
Antibiotic Ointment (e.g., bacitracin): A crucial step to prevent infection in minor cuts, scrapes, and burns after cleaning.
Assorted Adhesive Bandages: Pack a variety of sizes. Fabric bandages are generally more durable and flexible than plastic ones.
Butterfly Bandages / Wound-Closure Strips: Essential for taping the edges of a minor cut together to help it heal cleanly.
Sterile Gauze Pads and a Roll of Gauze: For dressing larger wounds or as a compress to control bleeding. Pack a few different sizes.
Medical Adhesive Tape: To secure gauze and bandages in place.
Moleskin or Blister Treatment Pads: An absolute lifesaver for any trip involving significant walking or hiking. Apply it as soon as you feel a "hot spot" to prevent a blister from forming.
Aloe Vera Gel: Provides soothing relief for minor sunburns.
Pain, Fever & Sprains: Managing Aches and Injuries
Long days of sightseeing, sleeping in unfamiliar beds, and carrying luggage can lead to aches and pains. Be prepared to manage them effectively so they don't slow you down.
Pain Relievers/Fever Reducers: Pack both an ibuprofen-based and an acetaminophen-based option. Pharmacists consistently recommend trusted brands like Advil/Motrin (Ibuprofen) for inflammation and pain, and Tylenol (Acetaminophen) for general pain and fever.
Aspirin: While not for general pain relief for everyone, a dose of aspirin can be life-saving for an adult experiencing symptoms of a heart attack.
Elastic Wrap Bandage: Invaluable for providing support and compression to a sprained ankle, wrist, or knee.
Instant Cold Packs: These single-use packs are activated by squeezing them and are excellent for reducing swelling from sprains, strains, and other minor injuries in the first 24-48 hours.
Pro-Tip: Decant pills into small, clearly labeled travel containers to save space, but take a photo of the original packaging first. This helps you remember dosages and provides information for pharmacists or doctors abroad if needed.

Digestive Issues: Your Defense Against Traveler's Diarrhea
Let’s be direct: traveler’s diarrhea is the single most common illness to strike travelers, affecting up to 80% of visitors in some destinations. Having a dedicated section in your kit to manage digestive distress is absolutely critical.
Anti-diarrhea Medication: To manage symptoms when you need to travel or get through a planned activity. The top pharmacist-recommended brand is Imodium (Loperamide).
Antacids: For relief from indigestion, heartburn, and general upset stomach. Pepto-Bismol is another pharmacist-favorite that can also help with mild diarrhea.
Oral Rehydration Salts: This is arguably the most important item in this section. Dehydration is the primary risk of diarrhea and vomiting. These pre-measured packets mix with safe, bottled water to replenish the essential fluids and electrolytes your body has lost.
Anti-nausea or Motion Sickness Medication: Essential if you’re prone to motion sickness on planes, boats, or winding bus rides.
Allergies, Bites & Skin: Soothing Irritations
New environments mean new pollens, unfamiliar insects, and different plants. Be ready to tackle itches, rashes, and allergic reactions before they become a major annoyance.
Antihistamine (e.g., diphenhydramine): For treating allergic reactions, hives, and severe itching. Note that some antihistamines can cause drowsiness.
Hydrocortisone Cream (1%): A topical steroid cream that provides fast relief from the irritation and itching of rashes and insect bites.
Insect Repellent: In any region with mosquito-borne illnesses like Dengue or Malaria, this is as important as your passport. Choose a repellent with an effective active ingredient like DEET or Picaridin.
Epinephrine Auto-Injector (e.g., EpiPen): This requires a prescription and is absolutely essential for travelers with a history of severe allergic reactions (anaphylaxis).
Ready to Pack Like a Pro?
Your travel first aid kit is a critical piece of your travel puzzle, but it's not the only one. To ensure you don't overlook a single essential item—from documents and finances to clothing and gear—you need a master list. Our comprehensive, free checklist has you covered.
Download Your Free International Travel Checklist Now!
Essential Tools & Personal Medications
The final layer of your kit includes the tools to use your supplies effectively and your own personal health necessities.
Fine-Point Tweezers: For removing splinters, ticks, or other foreign objects from the skin.
Small, Rounded-Tip Scissors: For cutting medical tape, gauze, or moleskin. (Ensure they meet TSA guidelines if packing in a carry-on).
Disposable Non-Latex Gloves: To protect your hands and prevent infection when treating a wound on yourself or someone else.
Digital Thermometer: For accurately checking for fever.
Personal Medications: This is the most critical category. Pack a sufficient supply for your entire trip, plus at least a few extra days' worth in case of delays. Always keep your personal medications in your carry-on luggage in their original, labeled containers.
Pro-Tip: Before you leave, ask your doctor for a letter describing your condition and the medications you take, including their generic names. Keep a digital copy of this and your prescriptions on your phone. This can be invaluable if your medication is lost or you need to see a doctor abroad.

Beyond the Basics: Customizing Your Kit
The ultimate travel first aid kit is not one-size-fits-all. Once you have the core components, elevate your preparedness by customizing it for your specific journey.
By Destination:
Tropical/Developing Countries: Add anti-fungal cream, more insect repellent, and potentially a prescription for a standby antibiotic for severe traveler's diarrhea (consult your doctor).
High-Altitude Destinations: Speak with your doctor about medication to prevent altitude sickness.
By Activity:
Hiking/Trekking: Double down on blister care (moleskin, gel pads), pack an elastic wrap for sprains, and add pain-relieving gel.
Beach Vacation: Add extra aloe vera gel, sting-relief spray, and waterproof bandages.
By Traveler:
With Children: Include children’s formulations and dosages of pain/fever reducers, kid-friendly bandages, and any specific allergy medications they need.
Travel First Aid Kit FAQs
A great kit anticipates problems. Here are answers to common questions that take your preparedness to the next level.
1. What’s the first thing I should do if I get traveler’s diarrhea?
According to the CDC and travel medicine doctors, the first and most important step is oral rehydration. Dehydration is the biggest risk. Start sipping an Oral Rehydration Solution (ORS), sports drinks, or clear broths immediately. For mild to moderate cases that don't have a high fever or blood, an antimotility drug like Loperamide (Imodium) can help manage the symptoms. If symptoms are severe, incapacitating, or include a high fever or blood, it's time to consider a prescribed standby antibiotic and seek medical advice.
2. Should I pack a standby antibiotic in my kit?
This is a question for your doctor or a travel medicine clinic. For travelers heading to high-risk destinations where severe traveler's diarrhea is common, many doctors will provide a prescription for a standby antibiotic like Azithromycin. It’s not for mild cases but can significantly shorten the duration of a severe bout of illness. Discuss your itinerary with your doctor to see if this is right for you.
3. Is it okay to pack medications outside their original bottles to save space?
While it's tempting, it's safest to keep prescription medications in their original, clearly labeled containers. This avoids any confusion or legal issues with customs officials. For over-the-counter pills, you have more flexibility. If you use a travel pill organizer, consider taking a photo of the original packaging so you have the dosage information and ingredients handy.

Pack Confidence for Every Journey
A carefully assembled travel first aid kit does more than just prepare you for minor medical issues; it provides profound peace of mind. It transforms you from a worried passenger into a self-sufficient, empowered traveler, ready to handle the small bumps in the road so you can stay focused on the incredible experiences ahead. By following this checklist, you’re not just packing supplies—you’re packing the confidence to explore the world freely and fully.
Now that your health and safety are covered, you can focus on the other details that make a trip unforgettable. For a complete, deep-dive into every facet of trip planning, from health and safety to budgeting and logistics, our comprehensive Travel Guide is the only resource you'll ever need.
Meta Data Suggestions:
SEO Meta Title (55 characters): The Ultimate Travel First Aid Kit Checklist (2026)
URL Slug: travel-first-aid-kit-checklist
SEO Meta Description (154 characters): Build the perfect travel first aid kit. Our 2026 checklist, with pharmacist-approved tips, covers everything from wound care to stomach issues. Be prepared.
Don't Miss Out! Subscribe for Exclusive Content
SubscribeComments 0
No comments yet
Be the first to share your experience!
Dont Miss Out! Subscribe for Exclusive Content
Ultimate USA Holidays Guide: Top Picks
FTC Affiliate Disclosure Essentials: Stay Compliant as a Travel Creator
Essential Affiliate Tools: From Tracking to Full Optimization
Booking.com Affiliate Program Review: Pros, Cons, and Earnings Potential
Decoding Affiliate Commission Rates: Benchmarks for Travel Creators
Amazon Associates for Travel: Strategies to Maximize Commissions
How to Make Money Blogging (From $0 to $10k/mo)
TrekGuider @trekguider
You’ve poured your heart into creating a travel blog. You’ve published articles, shared your photos, and built something you’re proud of. But there’s a nagging problem: it isn’t making any money. The dream of funding your travels or even earning a full-time living from your passion feels impossibly distant, a goal reserved for a select few.
You see other creators hitting five-figure months and wonder what secret they know that you don’t. The path forward is a confusing fog of conflicting advice. Should you focus on ads? Affiliate marketing? Digital products? It's overwhelming, and the immense effort you're putting in isn't translating into income, leaving you stuck and frustrated.
Forget the confusion. This is your chronological playbook. We are going to demystify the entire process of how to make money blogging by breaking it down into a proven, four-phase financial roadmap. This isn't a list of vague tips; it's a step-by-step guide that outlines the exact strategies, milestones, and mindset shifts required to take your blog from $0 to a sustainable $10,000 per month and beyond. Think of this as one chapter in your new business plan; for the complete blueprint on building a modern creator business, be sure to read our ultimate guide to How to Make Money Online: A Creator's Guide for 2026. Welcome to your journey from blogger to business owner.

The First $100 (Months 1-6): Proving the Concept
In the first six months, your primary goal is not significant income; it's validation. This is the foundational phase where you lay the groundwork for your entire business. The financial target is simply to prove that earning money from your blog is possible. Forget about optimizing for revenue and focus relentlessly on creating a high-quality home base.
Your mission is to build a library of 20-30 exceptional, in-depth articles. This foundational content is what will eventually attract search engine traffic and establish your authority. During this time, your second priority is to learn the absolute basics of Search Engine Optimization (SEO). You don’t need to be an expert, but you must understand how to research keywords and optimize your posts to give them a fighting chance of being discovered by Google.
The first income you earn will likely be small and sporadic. This might be a single affiliate sale from a piece of travel gear you recommended, earning you a commission that’s as real as it is small—maybe just $7.30. Or, you might leverage a professional skill to complete a single freelance writing gig for another brand.
This first $100 is psychologically monumental. It’s the tangible proof that your words have value and that the creator economy—projected to nearly double from $250 billion to almost $500 billion by 2027—is a real and accessible arena. This small win provides the critical motivation to push through to the next, more significant phase of growth.

The Path to $1,000/Month (Months 6-18): Mastering Traffic
With the concept proven, your focus now shifts entirely to the first pillar of a successful blog: traffic. This phase is characterized by a relentless dedication to audience growth, primarily through SEO. Your goal is to achieve the traffic thresholds required by premium ad networks, which represents the first major income leap for most bloggers.
The SEO Engine: Your Key to Passive Traffic
Sustainable blog income is built on the back of consistent, organic traffic from search engines. This is where your foundational knowledge of SEO evolves into a core business activity. Your strategy should be built around two key components:
Long-Tail Keywords: Instead of trying to rank for hyper-competitive terms like "travel blog," you’ll target longer, more specific phrases like "best family-friendly resorts in southern Spain." These keywords have less competition and attract a highly motivated audience that is closer to making a decision.
On-Page SEO: This involves optimizing every article you publish. It means placing your target keyword in your title, in the first paragraph, and in a few subheadings. It also means writing compelling meta descriptions to encourage clicks from search results and optimizing your images to ensure your site loads quickly.

Unlocking Your First Major Paycheck: Premium Ad Networks
The single most significant milestone in this phase is qualifying for a premium ad network. This is a transformative event that can take a blog’s income from less than $100 to over $1,000 per month, almost overnight. These networks fill your site with high-quality display ads, paying you for every person who sees them.
The two main players in the travel blogging space are:
Mediavine: Requires a minimum of 50,000 sessions (visits) in the previous 30 days.
Raptive (formerly Adthrive): Requires a minimum of 100,000 pageviews in the previous 30 days.
Hitting these traffic numbers becomes your primary objective. Once you are accepted, you unlock your first truly passive and reliable income stream. This ad revenue provides the financial cushion and confidence to move on to the next level of monetization.
Pro-Tip: Don't apply to Google AdSense at the beginning. The payout is extremely low for new sites and can slow your site down. It's far more strategic to wait until you can qualify for a premium network like Mediavine, as the revenue difference is monumental.
Scaling to $5,000/Month (Months 18-36): Diversification is How to Make Money Blogging Long-Term
At this stage, your blog has consistent traffic and a stable income from advertising and affiliate marketing. However, relying solely on these two streams will eventually lead to an income plateau. Significant growth from here requires diversification and, most importantly, taking ownership of your revenue by creating and selling your own products. This is where you transition from a blogger to a true entrepreneur.
The Power of Ownership: Launching Your First Digital Product
Launching your first digital product is the key milestone of this phase. While it requires a significant upfront investment of time, it is the shortest path to higher income levels. Consider this powerful data point: to make $10,000 in a month, you would need millions of pageviews to generate that from ads alone. However, you would only need to sell 100 copies of a $100 digital product to reach the same goal. For a blog with an established, trusting audience, the latter is far more attainable.
Your first product should solve a specific, painful problem for your audience. For travel bloggers, this could be:
An in-depth eBook guide to a specific destination.
A set of customizable trip planning templates.
A bundle of Lightroom presets for editing photos.

Free Resource: The Ultimate Travel Itinerary Template
Feeling overwhelmed by trip planning? We’ve created a comprehensive, plug-and-play itinerary template that takes the stress out of organizing your next adventure. This isn't just a checklist; it's a complete system for managing your budget, tracking bookings, and planning your daily activities.
Download Your Free Travel Itinerary Template Now
This lead magnet is a perfect example of a small digital product that provides immense value. Once you've validated an idea with a freebie, you can develop a more comprehensive paid product, like a complete Travel Guide. You can then sell directly to your audience or on a specialized marketplace. A platform like TrekGuider becomes an invaluable partner here, giving every creator a professional, customizable storefront to connect with travelers who are actively searching for expert resources.
Building Your Most Valuable Asset: The Email List
You cannot have a successful product launch without an email list. An email list is the only audience you truly own, independent of Google's algorithms or social media platform changes. Throughout this phase, building your list becomes a top priority. By offering a valuable free resource (a "lead magnet") like the itinerary template above, you can convert casual readers into loyal subscribers who know, like, and trust you—and who will be ready to buy when you launch your first product.
Reaching $10,000/Month and Beyond (Year 3+): The Creator as CEO
Achieving and sustaining a five-figure monthly income signifies the final transition from a blog to a mature digital business. This level of success is almost never achieved through a single income stream. Instead, it’s the result of operating as a "Creator CEO," strategically managing a diversified portfolio of revenue sources and focusing on high-level growth.

Building a Diversified Monetization Portfolio
Your business now operates as a well-oiled machine with multiple, combined income streams working together. This diversified portfolio will likely include:
Stable Ad Revenue: Your traffic is now high enough that display ads provide a significant and reliable monthly income floor.
A Strong Affiliate Strategy: You have moved beyond simple links to build strategic partnerships with multiple affiliate programs that align perfectly with your audience.
A Suite of Digital Products: You no longer have just one product. You have an ecosystem of offerings, perhaps a beginner-friendly eBook and a more advanced video course, that cater to different segments of your audience.
High-Value Brand Sponsorships: With a large and engaged audience, brands will now pay premium rates to partner with you on sponsored content.
This isn’t just theory; it’s the proven playbook of the industry’s top earners. One blogger’s public income reports, for instance, tell the story perfectly: their income grew from $0 in year one to over $11,000 in year two, $27,000 in year three, and an incredible $53,000 in year four, primarily driven by a smart mix of affiliate marketing and their own eBooks.
Pro-Tip: At this level, data is everything. Use analytics to understand which content drives the most affiliate revenue and which email sequences lead to the most product sales. Double down on what's working and eliminate what isn't.
Scaling Your Operations, Not Just Your Income
You can’t do everything yourself anymore. To continue growing, you must start thinking like a CEO and focus your time on the highest-leverage activities. This means outsourcing and building systems. You might hire a virtual assistant to manage your social media, a writer to help update old content, or an editor to polish your posts. By delegating lower-value tasks, you free up your time to focus on creating new products, building strategic partnerships, and steering the overall direction of your business.
Frequently Asked Questions About How to Make Money Blogging
1. How long does it really take to make significant money from a blog?
While a small first income can happen within six months, reaching a significant, life-changing income (e.g., $1,000+/month) typically takes 12-18 months of consistent, strategic effort. The key drivers are building a content library and gaining traction with SEO, which is a long-term game.
2. Do I need a lot of money to start a travel blog?
No. One of the biggest advantages of blogging is its low startup cost. Your primary expenses are a domain name (around $15/year, often free for the first year) and web hosting (which can be as low as $3-$5/month). You can start a professional blog for under $100 for the entire first year.
3. Is it too late to start a travel blog in 2026?
Absolutely not. While the space is more competitive, the opportunity is also larger than ever. The key to success today is niching down. Instead of a general travel blog, start a blog focused on a specific niche like "accessible travel in Europe" or "culinary travel in Southeast Asia." A specific focus allows you to build authority and an audience much faster.

Your Roadmap to a Profitable Future
The journey from a hobby blog to a six-figure business is a marathon, not a sprint. It is a deliberate, phased process that requires patience, strategy, and a relentless focus on providing value to your audience. You now have the complete roadmap: start by proving the concept and earning your first dollar, then master SEO to build traffic for ad revenue, diversify with your own products, and finally, scale your operations as a true CEO. This playbook provides the definitive answer to the question of how to make money blogging. The path is clear. Your journey starts now.
Meta Data Suggestions:
SEO Meta Title (58 characters): How to Make Money Blogging: A 4-Step Plan to $10k/Month
URL Slug: how-to-make-money-blogging
SEO Meta Description (154 characters): A proven, step-by-step playbook for making money blogging. Learn the 4-phase journey to take your blog from $0 to a sustainable $10,000/month business.
Read the full guide: The Travel Blog Business Plan: How to Make Real Money in 2026
Don't Miss Out! Subscribe for Exclusive Content
SubscribeComments 0
No comments yet
Be the first to share your experience!
Dont Miss Out! Subscribe for Exclusive Content
FTC Affiliate Disclosure Essentials: Stay Compliant as a Travel Creator
Essential Affiliate Tools: From Tracking to Full Optimization

Avoid These 5 Affiliate Landing Page Mistakes for Better Conversions

Affiliate Keyword Research Mastery for Travel Blogs
Booking.com Affiliate Program Review: Pros, Cons, and Earnings Potential