Halloween SF: Haunts Without Horrors
TrekGuider @trekguider
Let’s be honest: the hunt for the perfect Halloween vibe is a nightmare of its own. You’re craving that electric, creative buzz, but your search is clogged with two extremes: haunted houses that promise sleepless nights or tame pumpkin patches that feel like a grade-school field trip. You want the magic, not the mundane or the macabre. The search for memorable Halloween activities often leads to a dead end of generic parties and overcrowded attractions that prioritize jump scares over genuine atmosphere.
You dream of diving into the spirit of a San Francisco Halloween, a city legendary for its theatrical flair and vibrant culture. Yet, you worry you’ll miss the truly unique experiences—the ones that capture the city’s soul. When you search for the best Halloween events USA has to offer, the results are often dominated by theme park horror nights, leaving you wondering where the quirky, enchanting, and spirited celebrations are hiding. You deserve a Halloween that’s more about spectacle and spirit than stress and scares.
This guide is your key to unlocking that spectacle. We’re pulling back the velvet curtain on the city’s most captivating celebrations, where creativity is king and the atmosphere is pure magic. From the dazzling, unofficial street festivities in the world-famous Castro District to the architectural mysteries of a legendary mansion, you’ll discover how to experience all the haunts without the horrors. It’s a key part of the city's vibrant seasonal calendar, which we explore in full in our comprehensive guide to San Francisco Holidays: Bay Area Buzz. Get ready to craft a Halloween adventure that is uniquely, unforgettably San Francisco.

Why San Francisco Is a Top Destination for Unique Halloween Events USA-Wide
San Francisco doesn't just celebrate Halloween; it performs it. In a city defined by its pioneering spirit and artistic soul, the holiday transforms into a city-wide stage for radical self-expression. Unlike destinations that lean heavily on fear, SF’s Halloween is built on a foundation of community, spectacle, and participation. The city’s iconic Victorian architecture, often shrouded in the cool bay mist, provides a naturally dramatic backdrop for festivities that feel both historic and thrillingly modern.
Here, the holiday is less about manufactured scares and more about organic, grassroots celebrations that reflect the distinct personality of its neighborhoods. It’s a place where tech-infused artistry meets old-world charm, creating a Halloween experience that stands apart. It’s about being part of the show, not just watching it from the sidelines. With Halloween falling on a Friday in 2026 and a Saturday in 2026, San Francisco is primed for full-weekend celebrations, making it the perfect destination for a multi-day festive getaway.
The Castro: Ground Zero for Creative Spectacle
When the sun sets on October 31st, the heart of San Francisco's Halloween celebration beats strongest in the Castro District. For decades, this historic neighborhood has been the unofficial epicenter of a massive, informal street party. While the official, city-sanctioned event has been discontinued, the spirit of flamboyant celebration is inextinguishable, making it a must-see spectacle for those seeking atmosphere over anxiety.
A Legacy of Theatrical Celebration
The Castro's reputation as a hub for celebration is deeply woven into its identity as a global icon for the LGBTQ+ community. This legacy of pride, resilience, and theatricality naturally extends to Halloween, which has long been an occasion for lavish costumes and uninhibited self-expression. The neighborhood’s streets transform into a runway of pure imagination, where locals and visitors alike come together to see and be seen. It’s this powerful sense of community and freedom that makes Halloween in the Castro an experience rooted in joy and connection.
What to Expect: A Masterclass in Costume Art
A night in the Castro on Halloween is a feast for the senses. The focus here is squarely on the costumes—and they are legendary. Expect to see everything from breathtakingly elaborate, hand-crafted creations that look like they belong on a movie set to hilarious, pop-culture-inspired group ensembles.
Unrivaled People-Watching: Find a spot along Castro Street and simply take in the parade of creativity. The energy is infectious, fueled by music, laughter, and the collective awe of the incredible artistry on display.
A Festive, Open-Air Vibe: While the area gets crowded, the atmosphere is generally light and celebratory. It’s less of a chaotic party and more of a vibrant, open-air gallery of costume art.
Focus on Fun, Not Fear: This is the essence of "Haunts Without Horrors." The thrill comes from the dazzling creativity and the electric atmosphere, not from things that jump out of the dark.
How to Navigate the Castro Pub Crawls Like a Pro
The neighborhood's many bars and pubs are a central part of the evening, with many participating in informal pub crawls. If you choose to partake, a little planning goes a long way in ensuring a smooth and safe night.
Assemble Your Krewe: The buddy system is non-negotiable. Stick with your friends, establish a clear meeting point (like a specific intersection or storefront) in case you get separated, and use a location-sharing app on your phones.
Strategize Your Stops: Have a few destinations in mind rather than wandering aimlessly. Check social media in the days leading up to see if any bars are advertising special events, themes, or cover charges.
Pace for the Long Haul: The night is a marathon, not a sprint. Stay hydrated with water between drinks and know your limits. The goal is to remember the amazing costumes, not to forget the entire night.
Master Your Exit Plan: As the Master Brief confirms, using rideshares is the smartest and safest way to get home. Book your ride a few blocks away from the most congested intersections on Castro or Market Street to make pickup faster and easier for your driver.
Pro-Tip: To experience the best of the Castro's atmosphere without the most intense crowds, aim to arrive in the early evening (around 7-8 PM). You'll get to see the incredible costumes and soak in the festive energy before the streets reach their peak capacity later in the night.

The Winchester Mystery House: A Haunt of a Different Kind
For a different kind of chill—one steeped in history, mystery, and architectural absurdity—a trip to the Winchester Mystery House is an essential part of the Bay Area Halloween experience. Located a short drive from San Francisco, this sprawling mansion is famous not for ghosts, but for its baffling and bizarre construction. It’s the perfect "haunt without horror" because the unease comes from its unsettling, real-life story, not from manufactured scares.
More Architectural Anomaly Than Haunted House
The legend of the Winchester Mystery House is as captivating as its design. It is said that Sarah Winchester, heiress to the Winchester rifle fortune, was instructed by a medium to continuously build onto her home 24/7 for 38 years to appease the spirits of those killed by her family's famous rifles. The result is a sprawling 160-room mansion filled with architectural oddities designed to confuse any spirits that might be lurking.
Staircases to Nowhere: Discover stairways that ascend directly into the ceiling.
Doors Opening to Nothing: Find doors that serve no purpose, opening onto solid walls or, more alarmingly, two-story drops.
A Labyrinthine Layout: The house was intentionally designed to be a maze, with winding hallways, secret passages, and a dizzying number of rooms.
Exploring the mansion is an exercise in psychological curiosity. The unsettling feeling comes from trying to comprehend the obsessive, labyrinthine logic behind its construction. It’s a historical puzzle box that you can walk through, making it a fascinating and slightly spooky destination that engages the mind rather than just the adrenaline glands.
Planning Your Visit: An Insider's Itinerary
A visit to the Winchester Mystery House requires a bit of planning to make the most of the experience, especially during the popular Halloween season.
Book Tickets in Advance: This is non-negotiable. Halloween season is peak time. Secure your tour tickets online well in advance to avoid a sold-out disappointment.
Choose Your Tour Wisely: The mansion typically offers several types of tours, from a general estate tour to more specialized, seasonally themed explorations. Review the options to find the one that best fits your interest in history, architecture, or paranormal lore.
Give Yourself Time: Don't rush it. Besides the house tour itself, the estate has beautiful gardens and historical exhibits to explore. Plan for at least half a day for the entire experience, including travel time from San Francisco.
Packing for a day trip that combines city exploration with a visit to a historic estate can be a challenge. You need to be prepared for changing temperatures and long periods of walking. Our How to Pack Light Guide provides essential tips for creating a versatile daypack with everything you need, ensuring you stay comfortable without being weighed down.

A Practical Guide to the Best Halloween Events USA Offers in SF
Mastering Halloween in San Francisco is about more than just knowing where to go; it’s about navigating the city like a local. From transportation tricks to costume considerations, these practical tips will ensure your night is all treat and no trick.
Transportation Triumphs: Getting Around the City
On Halloween night, the city's streets can be congested, especially in popular neighborhoods.
Embrace Public Transit: Muni and BART are your best friends. They are cost-effective and eliminate the stress of finding (and paying for) parking. Plan your route ahead of time and check for any holiday schedule changes.
Rideshares Require Strategy: While convenient, surge pricing will be in effect. If you use a rideshare app, walk a few blocks away from the main crowds to a less chaotic side street. This makes your pickup location easier for your driver to find and can sometimes lower the fare.
Walk with Purpose: San Francisco is a fantastic walking city, but be prepared for its famous hills. Wear comfortable shoes, even if they clash with your costume. Your feet will thank you at 2 AM.
Costume Craft: Dressing for SF's Fickle Climate
San Francisco's weather is a character in itself. A sunny afternoon can quickly give way to a cold, foggy evening, a phenomenon locals lovingly call "Karl the Fog."
Layers Are Your Superpower: The golden rule of dressing in SF applies even on Halloween. Design your costume with layers in mind. A stylish jacket, a dramatic cape, or thermal undergarments can be a lifesaver when the temperature drops.
Comfort Is King (or Queen): You'll likely be doing a lot of walking or standing. Prioritize comfortable footwear above all else. Nothing ruins a fun night faster than painful blisters.
Pro-Tip: Weave safety directly into your costume design. Use reflective fabrics, glow-in-the-dark paint, or battery-powered LED lights. Not only will you be more visible crossing the city's busy streets, but you'll also add a cool, tech-forward element to your look that feels perfectly at home in San Francisco.
Beyond the Main Events: Finding SF's Hidden Halloween Charm
San Francisco’s Halloween magic isn’t confined to just one or two locations. The city’s innovative and nature-loving spirit means you can find festive touches in the most unexpected places.
Atmospheric Lights in Golden Gate Park
Drawing inspiration from the city’s love of blending tech and nature, keep an eye out for special light installations or themed events in Golden Gate Park. As dusk falls, the park’s misty groves and winding paths take on a naturally spooky ambiance. It’s the perfect setting for a low-key, atmospheric evening walk before heading to more lively celebrations.
Artisan Markets with a Spooky Twist
San Francisco is home to countless local artisan markets. During October, many of these markets embrace the season, offering Halloween-themed crafts, gourmet treats, and local art. It’s a fantastic way to find a unique souvenir and experience the city’s creative community on a more intimate level, often with stunning bay views as a backdrop.
The Ultimate Resource for Your Entire Trip
A single holiday is just a snapshot of what this incredible city has to offer. To truly unlock the best of the Bay Area, from its iconic landmarks to its hidden neighborhood gems, a comprehensive resource is essential. To discover even more seasonal secrets and plan the perfect trip any time of year, our comprehensive Travel Guide is the ultimate resource for exploring San Francisco and beyond.

Conclusion: Embrace the Unforgettable Spirit of a San Francisco Halloween
San Francisco offers a Halloween experience that is as unique as the city itself—one that champions creativity, community, and atmosphere over cheap thrills and jump scares. It’s a place where you can marvel at the incredible costume artistry in the Castro, ponder the architectural riddles of a mysterious mansion, and soak in the festive energy of a city that truly knows how to celebrate. From the Castro's vibrant streets to mysterious mansions, the city provides some of the most memorable Halloween events USA has to offer by focusing on what truly matters: community, creativity, and unforgettable fun.
You now have the insider knowledge to craft a Halloween adventure that's perfectly spirited and uniquely San Francisco. You can confidently navigate the city's biggest celebrations and discover its hidden charms, creating memories that will last a lifetime.
What are you most excited to experience? Share your San Francisco Halloween plans in the comments below
Don't Miss Out! Subscribe for Exclusive Content
Subscribe


Comments 0
No comments yet
Be the first to share your experience!
Dont Miss Out! Subscribe for Exclusive Content

San Francisco Cherry Blossoms: A Local's Guide to the Blooms

SF Festivals: 7 Must-See Lineups

Christmas SF: Lights & Wharf Wonders

SF Pride: 6 Route & Party Hacks

Chinese New Year SF: Parade Essentials

San Francisco Holidays: Bay Area Buzz
How to Start a Travel Blog in 2026 (For Profit)
TrekGuider @trekguider
Do you find yourself endlessly scrolling through travel photos, dreaming of turning your own adventures into something more? The idea of starting a travel blog is captivating—a path to sharing your stories, connecting with a global community, and building a life of freedom. But that initial spark is often extinguished by a wave of overwhelm. The market seems impossibly crowded, the technical steps feel like learning a new language, and the road from passion project to profitable business is shrouded in mystery.
You see other creators living the dream, and you know you have the stories and the drive. But the fear of pouring your heart, time, and savings into a simple online diary that never earns a dime is paralyzing. You're not looking to build a hobby; you're looking to build a real asset, a brand, a business. You need more than just another checklist—you need a battle-tested business plan.
This is that plan. Forget the outdated advice. This is your comprehensive, step-by-step playbook on how to start a travel blog that is engineered for profit from day one. We’ll move beyond the basics of setting up a website and dive deep into the strategy of building a modern media brand. The goal isn't just to get you a byline; it's to get you paid. Before you can join the ranks of The Best Travel Blogs to Follow in 2026, you need a rock-solid foundation, and that’s exactly what we’re going to build—right now.
Why Start a Travel Blog in 2026? The Shift to Media Entrepreneur
Let's address the elephant in the room: is travel blogging still a viable business? The answer is an emphatic yes, but the game has fundamentally changed. The global travel blogging market, valued at an impressive $4.5 billion in 2026, is projected to double to $9 billion by 2032. That growth isn't for hobbyists; it's for savvy creators who understand the key market shift.

Success is no longer about simply documenting your trips. The most successful bloggers are evolving from content creators into media entrepreneurs. They are building focused, niche brands that serve a specific audience with unparalleled expertise. They understand that their blog is not the final product; it is the marketing engine for their actual products. This guide is built on that modern, profitable philosophy.
Phase 1: Building Your Brand Foundation (Before You Touch a Computer)
The single biggest mistake new bloggers make is rushing the technical setup. In 2026, the strategic barriers to success are significantly higher than the technical ones. Dedicate 80% of your initial effort to this phase, and you’ll be miles ahead of the competition.

Step 1: Niche Down to Stand Out
The era of the generalist travel blog is over. To succeed, you cannot be everything to everyone. You must become the undisputed, go-to expert for a specific audience. This is called "niching down," and frankly, it’s the most critical strategic decision you'll make. A narrow focus allows you to build deep expertise, attract a loyal and targeted audience, and charge premium prices for your knowledge.
Based on current market trends, here are five sub-niches with significant growth and commercial potential for 2026:
Accessible Travel: This historically underserved market caters to travelers with disabilities, offering content on wheelchair-friendly destinations and sensory-friendly experiences.
National Parks for Families: This niche combines the booming interest in outdoor, domestic travel with the evergreen family market, providing guides on kid-friendly hikes and lodging.
Vegan Food Travel: A highly specific subset of the food travel niche, this area serves a passionate and growing demographic with guides to plant-based restaurants and cooking classes worldwide.
Digital Nomad & Remote Work Lifestyle: With the explosion of remote work, this niche focuses on the logistics of the lifestyle—managing visas, finding reliable WiFi, and balancing work with travel.
Sustainable & Eco-Tourism: Driven by a powerful wave of consumer consciousness, this niche highlights eco-friendly accommodations, low-impact tours, and tips for responsible travel.
Step 2: Define Your Ideal Reader
Once you have your niche, get granular. Create a detailed profile of your ideal reader. Don't just think about demographics; think about psychographics.
What are their biggest travel-related frustrations?
What does their dream trip look like, and what's stopping them from taking it?
What kind of budget are they working with?
What questions do they type into Google at 11 PM while trip planning?
Understanding their pain points is the key to creating content and products they will feel were made just for them.
Step 3: Choose a Brandable Blog Name
Your blog name is a critical piece of your brand identity. It should be memorable, easy to spell, and hint at what your blog is about. Follow this practical framework to find the perfect name:
Keyword Brainstorming: List words associated with your niche, tone, and audience. For a "Sustainable & Eco-Tourism" blog, you might list: Green, Conscious, Atlas, Compass, Earth, Kind, Trek, Journey, Collective.
Apply Naming Formulas: Experiment with common conventions using your keywords.
Niche-Specific: The Vegan Voyager, The Frugal Flier
Alliteration: Roaming Roads, Compass Chronicles
Evocative & Abstract: The Saffron Trail, Velvet Atlas
Modern & Simple: The Travel Edit, Trip Theory
Verify Availability: This is non-negotiable. Your chosen name must be available as a .com domain. A ".com" is the universal standard and signals professionalism. Simultaneously, check if the name is available as a consistent handle on your primary social media platforms (Instagram, TikTok, Pinterest, etc.).
Conduct Conflict Avoidance: Do a quick Google search to ensure the name isn't already heavily associated with another major brand.
Pro-Tip: Your blog name is your brand's first impression. A short, memorable, and easily pronounceable name with an available .com domain is the gold standard for building a serious online business.
Step 4: Secure Your Digital Real Estate
Found a name that's available? Don't wait. Immediately purchase the .com domain and create the social media accounts. This secures your brand identity across the web, even if you don't plan to use all the platforms right away.
Phase 2: The Smart Launchpad — Build Your Business, Not Just a Website
With your brand strategy set, it's time to build your blog's home. For years, this meant wrestling with web hosting, WordPress installations, themes, and a dozen plugins before you could even write a word. This was the slow, expensive, and technically frustrating path.
In 2026, the smartest creators are skipping that entire phase. Instead of building a house from scratch on an empty plot of land, they're launching their business from a penthouse suite in a bustling city. They are plugging directly into a marketplace ecosystem like TrekGuider, which is designed specifically for travel entrepreneurs. This approach lets you bypass the technical headaches and focus on what actually drives your business forward: creating high-value content and selling digital products.

Step 5: Launch Your Professional Creator Page in Minutes
Instead of buying a domain and hosting, your first step is to set up your professional creator page on the TrekGuider marketplace. This is your new home base, a beautiful, pre-built landing page that establishes your brand's credibility from day one—no coding or design skills required. Within minutes, you can have:
A professional bio and profile photo that tells your story.
A showcase for your digital products, front and center.
A feed of your latest articles published on the platform.
Direct links to all your social media channels.
A built-in donation feature for your audience to support you directly.
Step 6: Upload Your Digital Products and Start Selling
The old way involved researching and configuring complex e-commerce plugins. The TrekGuider way is to simply upload your digital products. Whether you've created a custom map, an in-depth city guide, a PDF itinerary, or an e-book, our platform is built to handle the sale and delivery. You can start monetizing your expertise immediately by listing your products in our catalog, where they're discoverable by a global audience of travelers ready to buy.
Step 7: Publish Your First Articles and Tap into a New Audience
Forget worrying about SEO plugins and site speed. Your blog now lives within our Articles and News section. You can publish your high-quality, long-form content directly onto the platform. Every article you publish is automatically featured on your creator page and becomes discoverable to the entire TrekGuider community. You're not just writing for your existing audience; you're tapping into a built-in stream of traffic from day one, dramatically accelerating your growth.
Step 8: Focus on Creation, Not Maintenance
By building your presence on our marketplace, you eliminate the hidden work that plagues self-hosted bloggers: website security, plugin updates, theme compatibility issues, and performance optimization. We handle the entire technical infrastructure. Your time is freed up to focus on the only two things that will grow your income: creating exceptional content that helps travelers and developing valuable digital products they want to buy. This is the ultimate accelerator for building a travel blog for profit.
Phase 3: Content Strategy & Launching for Profit
With your brand strategy in place and your website built, you're ready to focus on the two things that will actually grow your business: creating world-class content and intelligent monetization.
Step 9: Develop Your Foundational Content Strategy
Before you write a single word, plan your first 10-20 "pillar" articles. These are in-depth, foundational posts that cover the core topics of your niche. A solid content strategy ensures you are purposefully creating assets that will attract your ideal reader and rank in search engines. This is the real secret behind how to start a travel blog that gets traffic. For example, if your niche is "National Parks for Families," your pillar posts might be "The Ultimate Guide to Visiting Yellowstone with Kids" and "10 Best Toddler-Friendly Hikes in Zion National Park."
Step 10: Writing and Publishing Your First Posts
With your content plan in place, it's time to create. Focus on producing the highest quality content possible. Your goal is to be so incredibly helpful that your readers feel like they've struck gold. Write in-depth, solve their problems, and let your unique personality shine through. Publish at least 5-10 of your pillar articles before you officially "launch" your blog to the world.
Step 11: Monetization: Planning for Profit from Day One
A profitable blog diversifies its income. While there are five primary monetization models, one stands far above the rest for long-term, scalable profit.
The future is selling your own digital products.
While display ads seem like the easiest path, they are the least profitable. To make a significant income, you need massive traffic. Digital products, on the other hand, allow you to generate substantial revenue with a much smaller, more engaged audience. The data is clear: recent blogger surveys show the average revenue per 1,000 visitors (RPM) for digital products can be as high as $283.64, compared to just $33.80 for ads.

A simple calculation shows that if just 0.2% of 50,000 monthly visitors (100 people) buy your $30 digital product, you earn $3,000. That same traffic might only generate $1,000-$2,000 from ads. This is the core of the modern travel creator's business model. Instead of earning pennies from ads, you build valuable assets that solve your audience's problems directly.
A few examples of high-value digital products include:
A hyper-detailed "7-Day Off-the-Beaten-Path Itinerary for Kyoto."
A Lightroom "Tropical Blues & Greens" preset pack.
A comprehensive travel planning template for Notion or Google Sheets.
An e-book like "The Ultimate Guide to Travel Hacking."
And when you're ready to sell your own itineraries, templates, or photo presets, a platform like the TrekGuider Platform gives you the tools to build your own digital storefront, connect directly with your customers, and build a sustainable business you control.
Frequently Asked Questions
How much does it really cost to start a travel blog?
While you can start for a very low cost, plan for a realistic initial investment of $150-$200 for your first year. This covers three years of quality hosting (like Hostinger, to lock in low rates), your domain name, and a premium theme. Think of it as the startup cost for your business.
How long does it take to make money travel blogging?
Treat it like a business, not a get-rich-quick scheme. It typically takes 6-12 months of consistent, high-quality content creation and promotion before you start seeing meaningful traffic from search engines. Most bloggers start earning their first significant income in the 12-24 month range.
Do I need to be traveling full-time to have a travel blog?
Absolutely not. Some of the most successful blogs are run by people with full-time jobs who are experts on a specific destination or travel style (e.g., weekend trips, maximizing vacation days). Your expertise and the value you provide are far more important than being a full-time nomad.
Your Journey as a Creator Starts Now
Starting a travel blog in 2026 is less about being a writer and more about being an entrepreneur. It's about building a focused brand, serving a specific audience with undeniable value, and creating assets that generate income long after you've hit "publish." You are no longer just a traveler; you are the CEO of your own media company.
The path from dreamer to doer is paved with strategic action. You now have the complete playbook for how to start a travel blog for profit in 2026. The overwhelm is gone, replaced by a clear, step-by-step plan.
Your journey starts now. Take the first step, choose your niche, and start building the travel media brand of your dreams.
Meta Data Suggestions:
SEO Meta Title (59 characters): How to Start a Travel Blog in 2026 (For Profit)
URL Slug: how-to-start-a-travel-blog
SEO Meta Description (154 characters): A step-by-step business playbook for aspiring creators. Learn how to start a travel blog for profit, from niche selection and tech setup to monetization.
Don't Miss Out! Subscribe for Exclusive Content
SubscribeComments 0
No comments yet
Be the first to share your experience!
Dont Miss Out! Subscribe for Exclusive Content

FTC Affiliate Disclosure Essentials: Stay Compliant as a Travel Creator

Essential Affiliate Tools: From Tracking to Full Optimization

Avoid These 5 Affiliate Landing Page Mistakes for Better Conversions

Affiliate Keyword Research Mastery for Travel Blogs

Booking.com Affiliate Program Review: Pros, Cons, and Earnings Potential

Decoding Affiliate Commission Rates: Benchmarks for Travel Creators
Thanksgiving Parade: 6 Prime Spots
TrekGuider @trekguider
You’ve seen it on television your whole life: colossal cartoon characters floating between skyscrapers, world-class marching bands sending echoes through the avenues, and the final, festive arrival of Santa Claus himself. The Macy's Thanksgiving Day Parade is an American institution, the magical kick-off to the holiday season. But the dream of seeing it in person is often haunted by a logistical nightmare. You’re worried about battling millions for a tiny patch of sidewalk, only to have your view blocked, your kids get restless, and the entire enchanting experience devolve into a cold, stressful ordeal.
That anxiety is completely valid. Every year, over 3.5 million people descend on the route, and without a rock-solid plan, you’ll see more of the back of someone’s head than you will of the giant Snoopy balloon. You risk waking up before dawn only to find every good spot claimed, leaving your family disappointed and shivering. The magic you traveled for feels impossibly out of reach, lost in a sea of chaos. You deserve to experience the wonder, not the worry.
Forget the frustration. This is your strategic blueprint for success. We’re going to bypass the chaos and transform you into a parade-viewing expert. We’ll unveil the six prime spots to watch the spectacle, complete with insider strategies on timing, what to pack, and how to navigate the city like a local. This is your definitive plan for conquering the Thanksgiving parade in New York and creating memories that will last a lifetime. It’s one of the most iconic events in the city, a true highlight that we cover in our broader guide to New York Holidays: 10 Must-Do Events.
Understanding the Parade Route: Your Strategic Map
Before you can pick your spot, you need to understand the battlefield. The Macy's Thanksgiving Day Parade is a massive operation, and its route is the key to everything. Knowing the path, the timing, and—most importantly—the restricted zones will give you a powerful advantage.
The parade officially kicks off at 8:30 AM sharp on Thanksgiving morning, Thursday, the fourth Thursday of November. It begins on the Upper West Side and marches for 2.5 miles, concluding around noon.
Here’s the official step-by-step route:
Starts: 77th Street & Central Park West at 8:30 AM.
Travels South: Proceeds down Central Park West to Columbus Circle.
Turns: At Columbus Circle, it turns onto Broadway.
Continues South: It follows Broadway through the heart of Midtown.
Ends: The parade concludes around noon at the iconic Macy's Herald Square on 34th Street.
Our internal research confirms two critical areas to avoid at all costs: the start zone around 77th Street and the finish zone near Herald Square (from 34th to 38th Street). These areas have heavily restricted public viewing and are reserved for television broadcasting. Trying to watch from here is a rookie mistake that guarantees disappointment. Your strategy must focus on the long stretches in between.
The 6 Prime Viewing Spots for the Thanksgiving Parade in New York
Now for the main event. Choosing your location is the single most important decision you’ll make. Each of these six spots offers a unique advantage, whether it’s fewer crowds, better photo opportunities, or more family-friendly conditions.
1. The Upper West Side: The Classic Family Choice
Location: Along Central Park West, from 77th Street down to Columbus Circle (specifically the west side of the street).
Why It’s Prime: As the parade’s very first leg, this 16-block stretch is where the magic is freshest. The performers are electric with energy, the marching bands are at their most thunderous, and the balloon handlers are still wrangling their colossal characters into perfect formation. Because it's more residential, the crowds feel slightly more manageable and family-oriented than in the commercial chaos of Midtown. The backdrop of Central Park on one side and historic apartment buildings on the other makes for stunning photos.
Your Strategy:
Timing is Everything: You must arrive by 6:00 AM. The front-row spots are often claimed by locals before the sun is up. By 6:30 AM, the area will be packed several rows deep.
Positioning: Plant yourself on the west side of Central Park West. This gives you a direct, unobstructed view as the parade marches south.
What to Expect: It will be cold and dark when you arrive. This spot requires a commitment to waiting, but the payoff is a fantastic, high-energy viewing experience.
2. The Shops at Columbus Circle: The VIP Indoor View
Location: The second and third floors of The Shops at Columbus Circle, overlooking the parade’s turn from Central Park West onto Broadway.
Why It’s Prime: This is the ultimate parade hack for those who want to avoid the cold and the crowds. You get a warm, elevated, bird’s-eye view of the entire spectacle. Plus, you have immediate access to restrooms, coffee, and food—luxuries that are unthinkable for those on the street.
Your Strategy:
This Isn't Free: This is not a public viewing area. Access is typically granted to customers of the shops and restaurants within the mall.
Plan Months Ahead: Check with stores like Williams-Sonoma or restaurants with windows facing the circle. Many host private, ticketed viewing events that sell out far in advance.
Be Prepared to Spend: You will need to make a purchase or pay for a breakfast event to gain entry. Consider it the price of unparalleled comfort and convenience.

3. The Sixth Avenue Stretch: The Urban Canyon Experience
Location: Along Sixth Avenue (Avenue of the Americas) from 59th Street down to 38th Street.
Why It’s Prime: This is the longest and straightest portion of the route, offering dozens of blocks for potential viewing. Watching the giant balloons squeeze between the towering skyscrapers of Midtown is a uniquely New York experience. The sheer scale of the buildings creates a dramatic "urban canyon" effect that makes the parade feel even more grand.
Your Strategy:
Arrive Early: The secret is out on this spot. To get a decent view, be in position by 6:30 AM at the latest. The blocks closest to Central Park (59th to 50th) fill up the fastest.
Avoid Corners: Set up in the middle of a block. Corners are notoriously crowded and chaotic, with people constantly moving and blocking views.
Look for Scaffolding: Sometimes, construction scaffolding can be a blessing in disguise, creating a covered area that offers some protection from the elements and can deter massive crowds from forming in that exact spot.
Pro-Tip: The area between 70th and 75th streets on Central Park West offers a slightly wider sidewalk, giving you a little more breathing room. Pack a thermos of hot chocolate to stay warm while you wait—it’s a game-changer.
4. The "Quiet Zone" Near Radio City Music Hall
Location: The stretch of Sixth Avenue between 49th and 51st Streets.
Why It’s Prime: While no part of the route is truly "quiet," this section is designated as a no-marching-band-performance zone to accommodate the national television broadcast headquartered at Radio City. This means you get a brief respite from the loudest musical numbers—a great option for families with young children or those with sensory sensitivities.
Your Strategy:
Know the Trade-Off: You will see all the floats and balloons perfectly, but you will miss the live performances from the marching bands as they pass this specific area.
Use the Location: This spot is fantastic for its iconic backdrop. You can capture incredible photos of the balloons with the famous Radio City Music Hall marquee in the background.
Post-Parade Plans: You are perfectly positioned to see the Rockettes' Christmas Spectacular later in the day or head over to Rockefeller Center.

5. The South Side of 38th Street: The Late-Arrival Lifeline
Location: The blocks along Sixth Avenue from 40th Street down to 38th Street.
Why It’s Prime: Let's be realistic: not everyone can wake up at 4 AM. If you’re running late, this is your last best chance. As the parade nears its end at 34th Street, the area becomes a restricted broadcast zone. Therefore, the blocks just before this cutoff are the final public viewing areas.
Your Strategy:
Manage Expectations: You will not get a front-row view here. This is a spot for seeing the tops of the balloons and catching the general energy of the event.
Look Up: Your view will be mostly vertical. It’s less about seeing the performers on the street and more about witnessing the spectacle of the giant balloons against the sky.
Quick Exit: The advantage of being near the end of the route is that you can make a quick exit once the final float passes, beating some of the mass exodus heading for the subway.
6. The Virtual View: Your Hotel Room Perch
Location: Any hotel with rooms directly overlooking the parade route on Central Park West or Sixth Avenue.
Why It’s Prime: This is the most comfortable, stress-free, and luxurious way to experience the Thanksgiving parade in New York. You can watch the entire event from the warmth of your room, in your pajamas, with a cup of coffee in hand. You have your own bathroom, your own food, and an unbeatable, unobstructed view.
Your Strategy:
Book a Year in Advance: Rooms with parade views are often booked a year or more ahead and come at a significant premium.
Confirm the View: When booking, you must call the hotel directly to confirm that your specific room has a "parade view." An "avenue view" is not always sufficient.
Notable Hotels: Some hotels famous for their parade views include the JW Marriott Essex House, the Mandarin Oriental, New York, the Warwick New York, and the New York Hilton Midtown.
Pro-Level Survival Guide for Parade Day
Securing a great spot is only half the battle. You need a solid plan for the hours you’ll spend waiting. Follow these tips to ensure your experience is comfortable and memorable for all the right reasons.
The Ultimate Timing Strategy
The golden rule, confirmed by years of experience, is to arrive by 6:00 AM. This is non-negotiable for a front-row or second-row spot along Central Park West or the prime stretches of Sixth Avenue. By 6:30 AM, these areas are typically full. By 7:00 AM, you’ll be lucky to find a spot where you can see anything at all. Set your alarm, bundle up, and get there early. The early bird gets the best view of the parade.
What to Wear and Pack: The Family Checklist
New York in late November is cold. Standing still for hours makes it feel even colder.
Dress in Layers: Start with a thermal base layer, add a fleece or sweater, and top it off with a warm, wind-resistant winter coat. Don't forget a hat, gloves, and a scarf.
Comfortable Footwear: Wear warm, waterproof boots. Your feet will thank you.
The Essentials Bag: Pack a backpack with:
Snacks and Drinks: A thermos of hot chocolate or coffee is a must. Bring water and easy-to-eat snacks like granola bars and fruit.
Entertainment: A book, a deck of cards, or a fully charged phone with headphones can help pass the time.
Portable Phone Charger: Your battery will drain faster in the cold.
Small Folding Stools: If you have space, these can be a lifesaver for your back and legs.
For a comprehensive list of what to bring on any family adventure, our National Park Road Trip Checklist has you covered, with tips that apply just as well to an urban expedition.

Navigating the Crowds with Kids
The parade is a magical experience for children, but the crowds and waiting can be tough.
Avoid Strollers: In the most crowded areas, strollers are more of a liability than a help. They are difficult to maneuver and take up valuable space. A carrier is a much better option for very young children.
Establish a Meeting Point: As soon as you claim your spot, pick a clear, fixed landmark (e.g., a specific lamppost, a store entrance) as your family's meeting point in case you get separated.
Use a Buddy System: Ensure everyone has a partner.
Ladders: You will see people with small ladders for their kids to see over the crowd. If you bring one, be sure to place it a safe distance from the street and be courteous to those around you.
Pro-Tip: Skip the car. Public transportation is your best friend. The subway will be running on a holiday schedule, but expect crowded stations near the route. Plan your subway route in advance and buy your MetroCard the day before to avoid long lines at the machines on Thanksgiving morning.
Beyond the Parade: Making it a Full Thanksgiving Experience
Remember, the parade ends around noon, leaving you with a full day to enjoy the city. Many people head straight to a Thanksgiving dinner. If you plan to eat out, you must make reservations weeks, if not months, in advance. New York City is one of the world's culinary capitals, and a festive meal is the perfect way to cap off a magical morning.
Planning the perfect holiday trip, from the parade to the feast, requires expert knowledge. Our comprehensive Travel Guide provides detailed itineraries and booking advice for major US cities, ensuring your entire vacation is seamless and spectacular.

Your Mission, Should You Choose to Accept It
Watching the Macy's Thanksgiving Day Parade in person is a bucket-list dream, and with this guide, it’s a dream you can turn into a flawless reality. You now have the route, the prime locations, and the pro-level strategies to outsmart the crowds and secure a fantastic viewing experience. You’re no longer a tourist hoping for a glimpse; you’re a prepared strategist ready to claim your prime spot and soak in every moment of the magic. The Thanksgiving parade in New York is waiting for you.
Now go make those once-in-a-lifetime memories!
Meta Data Suggestions:
SEO Meta Title: 6 Prime Spots for the NYC Thanksgiving Day Parade (2026)
URL Slug: thanksgiving-parade-new-york-viewing-spots
SEO Meta Description: Don't just watch the Thanksgiving parade in New York, conquer it. Our guide reveals 6 prime viewing spots and insider tips for a stress-free family experience.
Don't Miss Out! Subscribe for Exclusive Content
SubscribeComments 0
No comments yet
Be the first to share your experience!
Dont Miss Out! Subscribe for Exclusive Content
San Francisco Cherry Blossoms: A Local's Guide to the Blooms

Halloween SF: Haunts Without Horrors
SF Festivals: 7 Must-See Lineups
Christmas SF: Lights & Wharf Wonders
SF Pride: 6 Route & Party Hacks
Chinese New Year SF: Parade Essentials
4 Unforgettable National Park Family Travel Ideas
TrekGuider @trekguider
Struggling to find a family vacation that pulls your kids away from screens and creates genuine memories, not just stress? You're not alone. The pressure to plan the perfect, budget-friendly trip often leads to analysis paralysis amid an overwhelming sea of options and the fear of getting it all wrong. This guide cuts through the noise.
This is where the timeless majesty of America’s national parks comes in. They are the ultimate solution—vast playgrounds of natural wonder that offer a powerful antidote to the digital saturation of modern life. Forget generic resort packages; this guide is a strategic playbook for crafting an unforgettable national park adventure. We’ll transform the daunting task of planning into an exciting journey.
As we explore these specific parks, remember they represent just one path to an amazing trip. For a complete overview of destinations for every budget and travel style, our Family Travel Ideas: The 2026 Guide to Unforgettable Trips is your ultimate resource. This article is your specialized map to sun-drenched trails, awe-inspiring wildlife, and the kind of shared experiences that strengthen family bonds for years to come.
Why National Parks are the Ultimate Family Travel Ideas for Summer
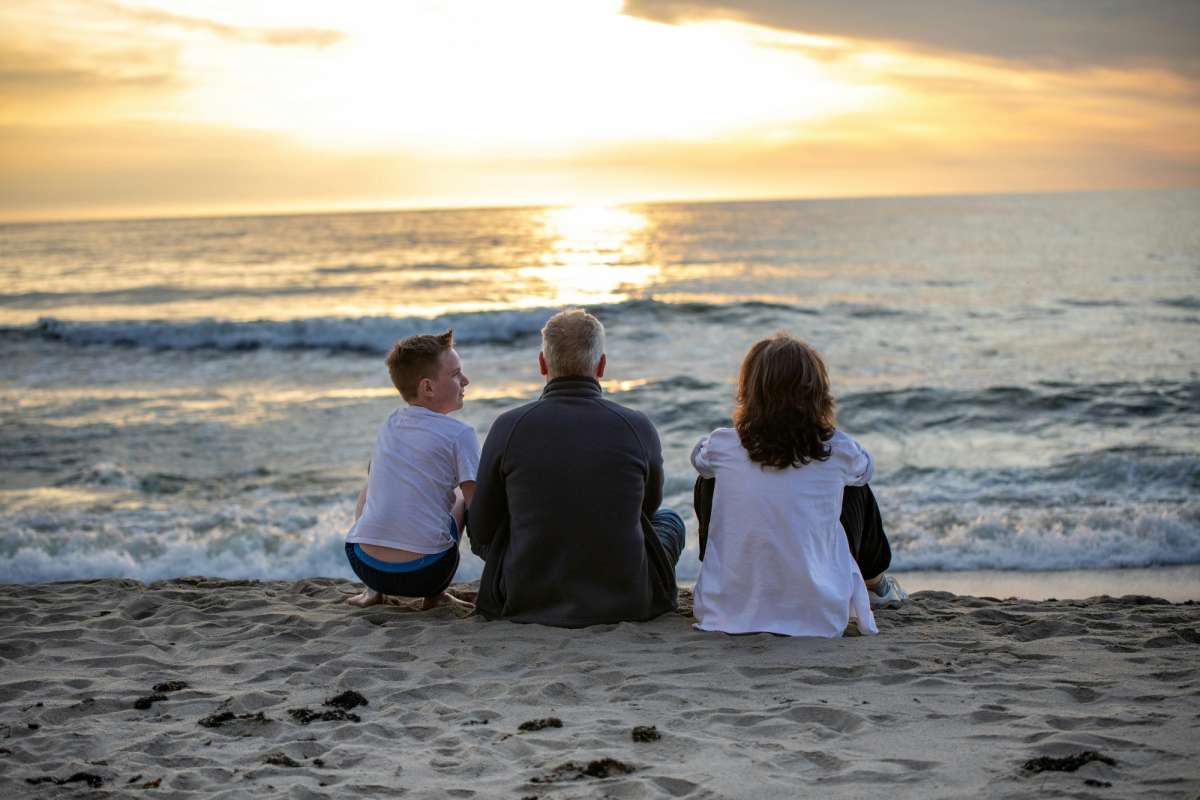
In a world of manufactured entertainment, national parks offer something profoundly real. They are living classrooms, natural gymnasiums, and sanctuaries for the soul. For families, they present a unique opportunity to disconnect from daily routines and reconnect with each other in a meaningful way.
Unmatched Educational Value: Where else can your child see the geological forces that shaped our planet firsthand at the Grand Canyon, or watch a bison herd thunder across the plains of Yellowstone? These parks are immersive, multi-sensory learning environments that bring textbook concepts to vivid life.
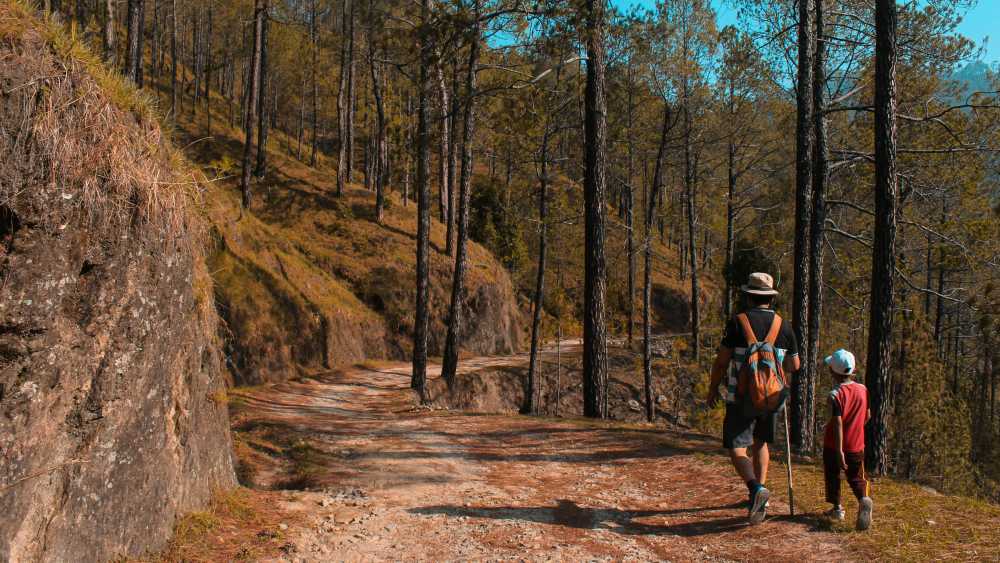
Built-in Adventure: From gentle, toddler-friendly nature walks to more challenging hikes for teens, the parks are structured for adventure at every skill level. The thrill is in the discovery—spotting a bald eagle, identifying a new wildflower, or conquering a trail together.
Remarkable Affordability: Compared to theme parks or international travel, a national park vacation can be incredibly budget-friendly. An annual "America the Beautiful" pass grants access to all parks for just $80 per vehicle. With options for camping or lodging in nearby towns, you can tailor the trip to your exact financial comfort level.
A Cure for Nature Deficit Disorder: Experts increasingly recognize that time spent in nature is critical for a child's physical and mental development. It reduces stress, improves focus, and fosters creativity. A week in the woods can be the most effective reset button you’ll ever press for your family.
They are, quite simply, America's best idea, and they are waiting to be the backdrop for your family's next great story.
Your National Park Summer Adventure Playbook
Success in the wild begins with careful planning at home. The immense popularity of national parks during the summer means that spontaneity can lead to sold-out signs and disappointment. Following a proven framework is key to a smooth and memorable trip.
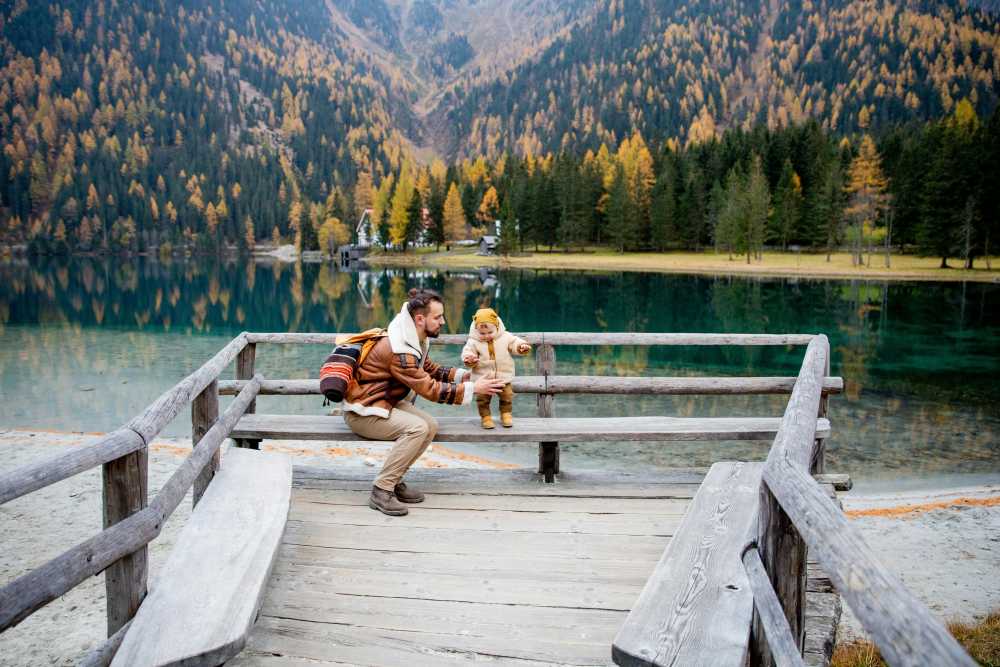
Step 1: The 6-12 Month Countdown - Booking Your Basecamp
Let’s start with a non-negotiable truth: if you only get one thing right in your planning, make it your lodging. In-park accommodations and popular campsites are often booked solid the day they become available, sometimes a full year in advance.
Define Your Lodging Style:
In-Park Lodges: Offer unparalleled convenience and historic charm (think the Old Faithful Inn). They are the most expensive option and require the earliest booking.
Campgrounds: Provide the most immersive nature experience. Services range from primitive sites to full RV hookups. Reservations are typically made through Recreation.gov.
Gateway Towns: Towns just outside park entrances (like West Yellowstone, MT, or Springdale, UT) offer a wide range of hotels, motels, and vacation rentals. They provide more flexibility and amenities but require daily travel into the park.
Set Your Alarms: Identify the exact date and time that reservations open for your target dates and lodging. Be online and ready to book the second they become available.
Have Backup Plans: Research and be ready to book your second and third choices immediately if your first is unavailable.
Pro-Tip: How to Actually Win the Campground Lottery
Booking a popular national park campsite on Recreation.gov is a competitive sport. Here’s how to win: a few days before your booking day, log into your account, find your desired campground, and add it to your cart to confirm the exact release time (usually 10 a.m. ET). On the day, log in 10 minutes early, sync your computer clock to the official U.S. time (time.gov), and have all your information ready. Refresh your screen precisely at the release time and complete the booking in seconds.
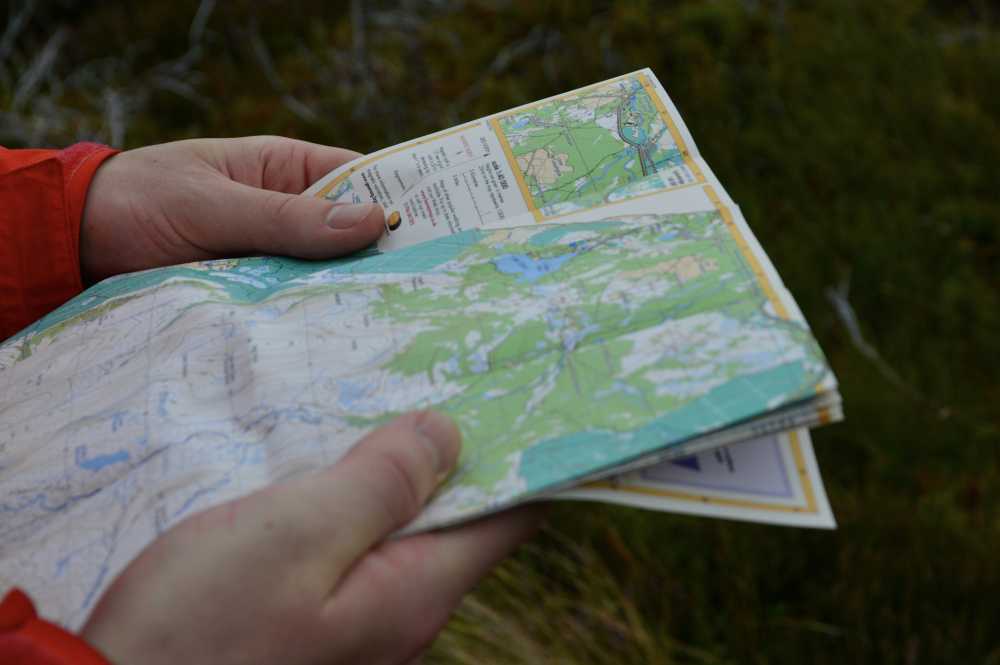
Step 2: The 2-3 Month Check-In - Crafting Your Itinerary
With your basecamp secured, you can now build your daily plan. The key is to balance iconic sights with downtime to avoid burnout. Our guide on How to Make Family Travel Planning Actually Easy dives even deeper into this process.
Cluster Your Activities: Parks are huge. Study the park map and group your desired activities by geographic area. Dedicate full days to specific regions, like the Yellowstone Lake area or the Tioga Road in Yosemite, to minimize driving time.
Prioritize the "Must-Sees": Identify the 2-3 iconic experiences your family absolutely cannot miss. Plan to visit these popular spots early in the morning (before 9 a.m.) or later in the afternoon (after 4 p.m.) to avoid the worst crowds and midday heat.
Involve the Kids: Give your children, especially older ones, a voice in the planning. Let them research and choose a specific trail they want to hike or a Ranger Program they want to attend. This ownership fosters excitement and cooperation.
Stay Organized from Start to Finish
A great road trip has a lot of moving parts. Our free checklist is designed to help you track everything from reservations to packing lists, ensuring nothing gets missed.
Download the free National Park Road Trip Checklist
Top National Parks for Summer Family Adventures (And What to Do There)
While every park is special, some are exceptionally well-suited for families during the summer months. Here are our top picks for incredible family travel ideas for summer in the national parks.
Yellowstone National Park: The Geothermal Wonderland
Best For: Ages 6+. The sheer scale and geothermal wonders are captivating for school-aged children and teens.
Can't-Miss Activities:
Watch Old Faithful Erupt: It’s iconic for a reason. Check the posted eruption times and find a spot on the boardwalk.
Explore the Grand Prismatic Spring: The vibrant colors of this massive hot spring are otherworldly. The best view is from the elevated overlook on the Fairy Falls Trail.
Wildlife Safari in Hayden Valley: Drive through this vast, open valley at dawn or dusk for the best chances of spotting bison, elk, grizzly bears, and even wolves.
Kid-Friendly Hike: The Storm Point Loop Trail is a relatively flat 2.3-mile loop that leads through forest to a scenic point on Yellowstone Lake.
Zion National Park: The Majestic Canyon Sanctuary
Best For: All ages, but especially families with active kids and teens.
Can't-Miss Activities:
Ride the Park Shuttle: During peak season, the mandatory shuttle is an experience in itself, offering narrated guidance and stunning views.
Walk The Narrows (Bottom-Up): Wading through the Virgin River in a 1,000-foot-deep canyon is the quintessential Zion experience. Rent proper water shoes from an outfitter in Springdale—it's a game-changer.
Hike to Emerald Pools: This series of trails leads to lush, spring-fed pools and waterfalls. The Lower Pool trail is paved and accessible for strollers.
Kid-Friendly Hike: The Pa'rus Trail is a 3.5-mile paved trail that follows the Virgin River. It's perfect for strollers, wheelchairs, and bikes.
Acadia National Park: The Coastal Gem of New England
Best For: All ages. The diversity of landscapes makes it a perfect fit for multi-generational trips.
Can't-Miss Activities:
Drive the Park Loop Road: This 27-mile road hits many of the park's highlights, including Sand Beach, Thunder Hole, and Otter Cliff.
Watch the Sunrise from Cadillac Mountain: Be one of the first people in the United States to see the sunrise. Vehicle reservations are now required and must be booked in advance.
Explore the Tide Pools: At low tide, the rocky coastline near Wonderland Trail reveals a fascinating world of sea stars, crabs, and anemones.
Kid-Friendly Hike: The Jordan Pond Path is a 3.3-mile loop around a crystal-clear pond, best capped off with popovers at the Jordan Pond House.
Olympic National Park: A World of Ecosystems

Best For: Families who crave variety and have kids aged 7+. Olympic is like visiting three parks in one.
Can't-Miss Activities:
Explore the Hoh Rainforest: Walk the Hall of Mosses Trail (.8 miles), an easy loop that immerses you in a temperate rainforest dripping with green. It’s pure magic.
Discover Rialto Beach: This is the iconic Pacific Northwest coastline. Explore tide pools, admire giant driftwood, and hike to the Hole-in-the-Wall sea arch (check tide charts!).
Drive to Hurricane Ridge: Ascend nearly a mile in elevation for breathtaking panoramic views of the Olympic Mountains.
Kid-Friendly Hike: Sol Duc Falls Nature Trail is a 1.6-mile roundtrip hike through a stunning old-growth forest to a powerful, picturesque waterfall.
Common Pitfalls and How to Avoid Them
The "Too Much, Too Fast" Itinerary: Don't try to see an entire park in two days. You’ll end up with cranky kids and only see the park through a car window. Embrace a slower pace. For more on this, explore The Sanity-Saving System for Your Next Family Road Trip.
Ignoring the Junior Ranger Program: This is a mistake. The free activity booklets available at any visitor center are the single best way to engage kids aged 5-12. It transforms them from passive passengers into active explorers.
Underestimating Wildlife Safety: Seeing a bear or bison is a thrill, but these are powerful wild animals. Know and respect the rules: stay at least 100 yards from bears and wolves, and 25 yards from all other large animals. Never, ever feed wildlife.
Pro-Tip: Download the official NPS (National Park Service) app before your trip. You can save park maps and content for offline use, a lifesaver in areas with no cell service.
Packing and In-Trip Strategies
Your gear and daily approach can make or break the experience. Focus on comfort, preparedness, and flexibility.
The Essential Family Packing List:

Layered Clothing: Summer weather in the mountains is notoriously unpredictable. Pack lightweight layers—t-shirts, fleeces, and a waterproof rain jacket—for everyone.
Sturdy Footwear: Do not attempt hikes in flip-flops. Everyone needs comfortable, broken-in shoes with good traction.
Sun Protection: The sun is more intense at higher elevations. Bring wide-brimmed hats, sunglasses, and high-SPF sunscreen.
Reusable Water Bottles: Staying hydrated is critical. A large water bladder for each adult and a reusable bottle for each child is a must.
A "Go-Bag" for the Car: Keep a small backpack in the car with essentials: a first-aid kit, endless snacks, binoculars, a physical park map, and wet wipes.
Frequently Asked Questions
What is the best time of year for a national park family vacation?
While summer offers the most accessible weather and open facilities, it's also the most crowded. For fewer crowds and beautiful scenery, consider the "shoulder seasons" of late spring (May-June) and early fall (September-October). Always check specific park conditions, as weather varies greatly by region.
How far in advance should I book lodging for a national park trip?
For popular in-park lodges, you should book 12 months in advance—often the day reservations become available. For campsites, the booking window is typically 6 months in advance. Planning this far ahead is crucial for securing the best locations.
Are national parks a good vacation idea for families with toddlers?
Absolutely! Many parks feature paved, stroller-friendly trails like the Pa'rus Trail in Zion or accessible boardwalks around Yellowstone's geysers. The key is to choose the right activities, keep hikes short, and take advantage of the Junior Ranger programs, which have activities for younger children.
What's the most important thing to pack for a national park trip?
Beyond your camera, the most critical items are layered clothing and proper footwear. Mountain weather can change in an instant, so having layers ensures everyone stays comfortable. Sturdy, broken-in shoes are essential for preventing blisters and navigating uneven trails safely.
Conclusion
The beauty of a national park vacation lies in its simplicity and its power. By investing in careful planning, you are not just organizing a trip; you are building a framework for connection and creating a reservoir of shared memories that your family will draw upon for a lifetime. These family travel ideas for summer are more than just a vacation—they are an investment in your family's story.
So, use this guide to book with confidence, pack with purpose, and get ready to discover the incredible wonders waiting in your own backyard.

Read the full guide: Family Travel Ideas: The 2026 Guide to Unforgettable Trips
Don't Miss Out! Subscribe for Exclusive Content
SubscribeComments 0
No comments yet
Be the first to share your experience!
Dont Miss Out! Subscribe for Exclusive Content
San Francisco Cherry Blossoms: A Local's Guide to the Blooms
Halloween SF: Haunts Without Horrors
SF Festivals: 7 Must-See Lineups
Christmas SF: Lights & Wharf Wonders
SF Pride: 6 Route & Party Hacks