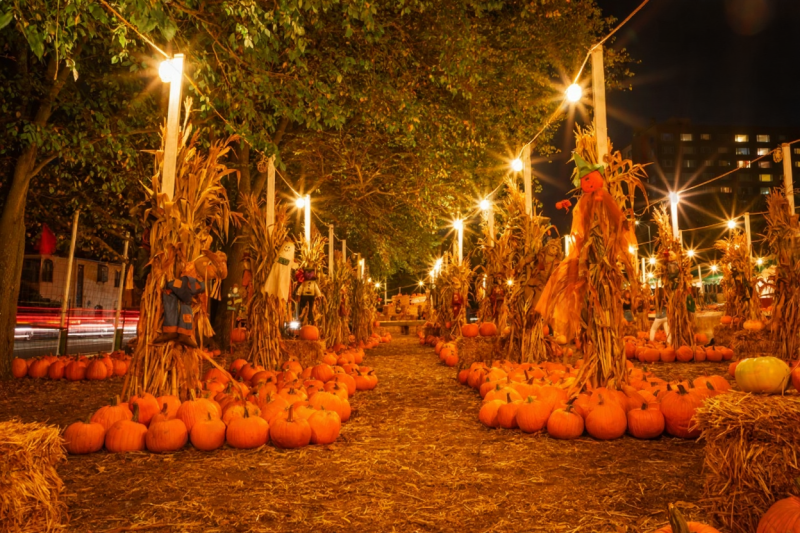
Halloween SF: Haunts Without Horrors
TrekGuider @trekguider
Let’s be honest: the hunt for the perfect Halloween vibe is a nightmare of its own. You’re craving that electric, creative buzz, but your search is clogged with two extremes: haunted houses that promise sleepless nights or tame pumpkin patches that feel like a grade-school field trip. You want the magic, not the mundane or the macabre. The search for memorable Halloween activities often leads to a dead end of generic parties and overcrowded attractions that prioritize jump scares over genuine atmosphere.
You dream of diving into the spirit of a San Francisco Halloween, a city legendary for its theatrical flair and vibrant culture. Yet, you worry you’ll miss the truly unique experiences—the ones that capture the city’s soul. When you search for the best Halloween events USA has to offer, the results are often dominated by theme park horror nights, leaving you wondering where the quirky, enchanting, and spirited celebrations are hiding. You deserve a Halloween that’s more about spectacle and spirit than stress and scares.
This guide is your key to unlocking that spectacle. We’re pulling back the velvet curtain on the city’s most captivating celebrations, where creativity is king and the atmosphere is pure magic. From the dazzling, unofficial street festivities in the world-famous Castro District to the architectural mysteries of a legendary mansion, you’ll discover how to experience all the haunts without the horrors. It’s a key part of the city's vibrant seasonal calendar, which we explore in full in our comprehensive guide to San Francisco Holidays: Bay Area Buzz. Get ready to craft a Halloween adventure that is uniquely, unforgettably San Francisco.

Why San Francisco Is a Top Destination for Unique Halloween Events USA-Wide
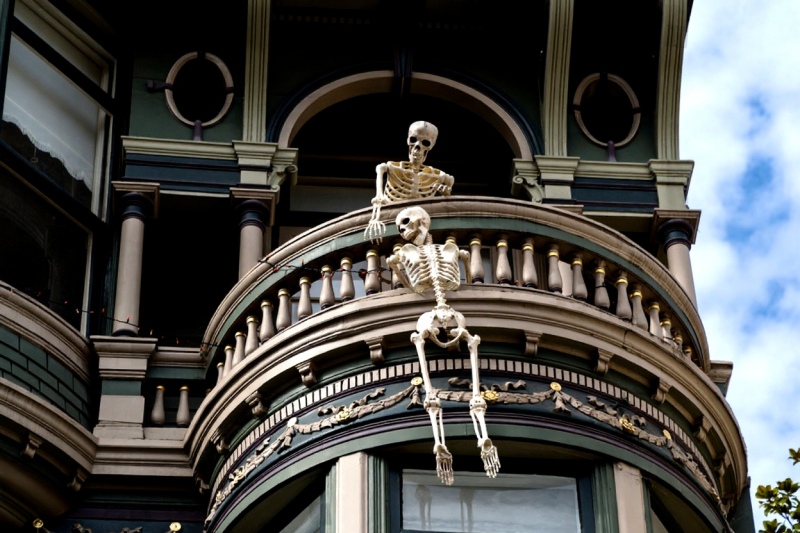
San Francisco doesn't just celebrate Halloween; it performs it. In a city defined by its pioneering spirit and artistic soul, the holiday transforms into a city-wide stage for radical self-expression. Unlike destinations that lean heavily on fear, SF’s Halloween is built on a foundation of community, spectacle, and participation. The city’s iconic Victorian architecture, often shrouded in the cool bay mist, provides a naturally dramatic backdrop for festivities that feel both historic and thrillingly modern.
Here, the holiday is less about manufactured scares and more about organic, grassroots celebrations that reflect the distinct personality of its neighborhoods. It’s a place where tech-infused artistry meets old-world charm, creating a Halloween experience that stands apart. It’s about being part of the show, not just watching it from the sidelines. With Halloween falling on a Friday in 2026 and a Saturday in 2026, San Francisco is primed for full-weekend celebrations, making it the perfect destination for a multi-day festive getaway.
The Castro: Ground Zero for Creative Spectacle
When the sun sets on October 31st, the heart of San Francisco's Halloween celebration beats strongest in the Castro District. For decades, this historic neighborhood has been the unofficial epicenter of a massive, informal street party. While the official, city-sanctioned event has been discontinued, the spirit of flamboyant celebration is inextinguishable, making it a must-see spectacle for those seeking atmosphere over anxiety.
A Legacy of Theatrical Celebration
The Castro's reputation as a hub for celebration is deeply woven into its identity as a global icon for the LGBTQ+ community. This legacy of pride, resilience, and theatricality naturally extends to Halloween, which has long been an occasion for lavish costumes and uninhibited self-expression. The neighborhood’s streets transform into a runway of pure imagination, where locals and visitors alike come together to see and be seen. It’s this powerful sense of community and freedom that makes Halloween in the Castro an experience rooted in joy and connection.
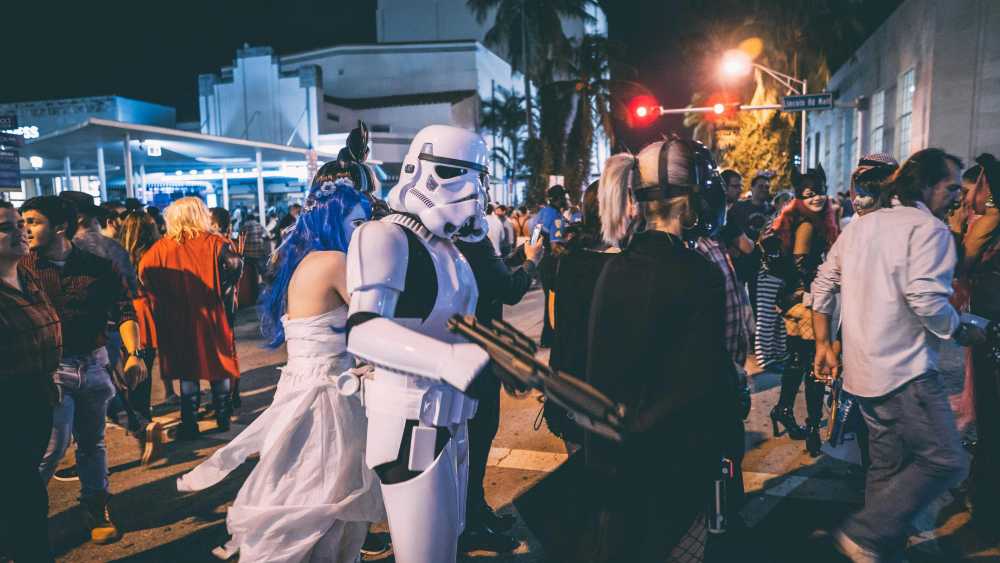
What to Expect: A Masterclass in Costume Art
A night in the Castro on Halloween is a feast for the senses. The focus here is squarely on the costumes—and they are legendary. Expect to see everything from breathtakingly elaborate, hand-crafted creations that look like they belong on a movie set to hilarious, pop-culture-inspired group ensembles.
Unrivaled People-Watching: Find a spot along Castro Street and simply take in the parade of creativity. The energy is infectious, fueled by music, laughter, and the collective awe of the incredible artistry on display.
A Festive, Open-Air Vibe: While the area gets crowded, the atmosphere is generally light and celebratory. It’s less of a chaotic party and more of a vibrant, open-air gallery of costume art.
Focus on Fun, Not Fear: This is the essence of "Haunts Without Horrors." The thrill comes from the dazzling creativity and the electric atmosphere, not from things that jump out of the dark.
How to Navigate the Castro Pub Crawls Like a Pro
The neighborhood's many bars and pubs are a central part of the evening, with many participating in informal pub crawls. If you choose to partake, a little planning goes a long way in ensuring a smooth and safe night.
Assemble Your Krewe: The buddy system is non-negotiable. Stick with your friends, establish a clear meeting point (like a specific intersection or storefront) in case you get separated, and use a location-sharing app on your phones.
Strategize Your Stops: Have a few destinations in mind rather than wandering aimlessly. Check social media in the days leading up to see if any bars are advertising special events, themes, or cover charges.
Pace for the Long Haul: The night is a marathon, not a sprint. Stay hydrated with water between drinks and know your limits. The goal is to remember the amazing costumes, not to forget the entire night.
Master Your Exit Plan: As the Master Brief confirms, using rideshares is the smartest and safest way to get home. Book your ride a few blocks away from the most congested intersections on Castro or Market Street to make pickup faster and easier for your driver.
Pro-Tip: To experience the best of the Castro's atmosphere without the most intense crowds, aim to arrive in the early evening (around 7-8 PM). You'll get to see the incredible costumes and soak in the festive energy before the streets reach their peak capacity later in the night.
The Winchester Mystery House: A Haunt of a Different Kind
For a different kind of chill—one steeped in history, mystery, and architectural absurdity—a trip to the Winchester Mystery House is an essential part of the Bay Area Halloween experience. Located a short drive from San Francisco, this sprawling mansion is famous not for ghosts, but for its baffling and bizarre construction. It’s the perfect "haunt without horror" because the unease comes from its unsettling, real-life story, not from manufactured scares.
More Architectural Anomaly Than Haunted House
The legend of the Winchester Mystery House is as captivating as its design. It is said that Sarah Winchester, heiress to the Winchester rifle fortune, was instructed by a medium to continuously build onto her home 24/7 for 38 years to appease the spirits of those killed by her family's famous rifles. The result is a sprawling 160-room mansion filled with architectural oddities designed to confuse any spirits that might be lurking.
Staircases to Nowhere: Discover stairways that ascend directly into the ceiling.
Doors Opening to Nothing: Find doors that serve no purpose, opening onto solid walls or, more alarmingly, two-story drops.
A Labyrinthine Layout: The house was intentionally designed to be a maze, with winding hallways, secret passages, and a dizzying number of rooms.
Exploring the mansion is an exercise in psychological curiosity. The unsettling feeling comes from trying to comprehend the obsessive, labyrinthine logic behind its construction. It’s a historical puzzle box that you can walk through, making it a fascinating and slightly spooky destination that engages the mind rather than just the adrenaline glands.
Planning Your Visit: An Insider's Itinerary
A visit to the Winchester Mystery House requires a bit of planning to make the most of the experience, especially during the popular Halloween season.
Book Tickets in Advance: This is non-negotiable. Halloween season is peak time. Secure your tour tickets online well in advance to avoid a sold-out disappointment.
Choose Your Tour Wisely: The mansion typically offers several types of tours, from a general estate tour to more specialized, seasonally themed explorations. Review the options to find the one that best fits your interest in history, architecture, or paranormal lore.
Give Yourself Time: Don't rush it. Besides the house tour itself, the estate has beautiful gardens and historical exhibits to explore. Plan for at least half a day for the entire experience, including travel time from San Francisco.
Packing for a day trip that combines city exploration with a visit to a historic estate can be a challenge. You need to be prepared for changing temperatures and long periods of walking. Our How to Pack Light Guide provides essential tips for creating a versatile daypack with everything you need, ensuring you stay comfortable without being weighed down.
A Practical Guide to the Best Halloween Events USA Offers in SF
Mastering Halloween in San Francisco is about more than just knowing where to go; it’s about navigating the city like a local. From transportation tricks to costume considerations, these practical tips will ensure your night is all treat and no trick.
Transportation Triumphs: Getting Around the City
On Halloween night, the city's streets can be congested, especially in popular neighborhoods.
Embrace Public Transit: Muni and BART are your best friends. They are cost-effective and eliminate the stress of finding (and paying for) parking. Plan your route ahead of time and check for any holiday schedule changes.
Rideshares Require Strategy: While convenient, surge pricing will be in effect. If you use a rideshare app, walk a few blocks away from the main crowds to a less chaotic side street. This makes your pickup location easier for your driver to find and can sometimes lower the fare.
Walk with Purpose: San Francisco is a fantastic walking city, but be prepared for its famous hills. Wear comfortable shoes, even if they clash with your costume. Your feet will thank you at 2 AM.
Costume Craft: Dressing for SF's Fickle Climate
San Francisco's weather is a character in itself. A sunny afternoon can quickly give way to a cold, foggy evening, a phenomenon locals lovingly call "Karl the Fog."
Layers Are Your Superpower: The golden rule of dressing in SF applies even on Halloween. Design your costume with layers in mind. A stylish jacket, a dramatic cape, or thermal undergarments can be a lifesaver when the temperature drops.
Comfort Is King (or Queen): You'll likely be doing a lot of walking or standing. Prioritize comfortable footwear above all else. Nothing ruins a fun night faster than painful blisters.
Pro-Tip: Weave safety directly into your costume design. Use reflective fabrics, glow-in-the-dark paint, or battery-powered LED lights. Not only will you be more visible crossing the city's busy streets, but you'll also add a cool, tech-forward element to your look that feels perfectly at home in San Francisco.
Beyond the Main Events: Finding SF's Hidden Halloween Charm
San Francisco’s Halloween magic isn’t confined to just one or two locations. The city’s innovative and nature-loving spirit means you can find festive touches in the most unexpected places.
Atmospheric Lights in Golden Gate Park
Drawing inspiration from the city’s love of blending tech and nature, keep an eye out for special light installations or themed events in Golden Gate Park. As dusk falls, the park’s misty groves and winding paths take on a naturally spooky ambiance. It’s the perfect setting for a low-key, atmospheric evening walk before heading to more lively celebrations.
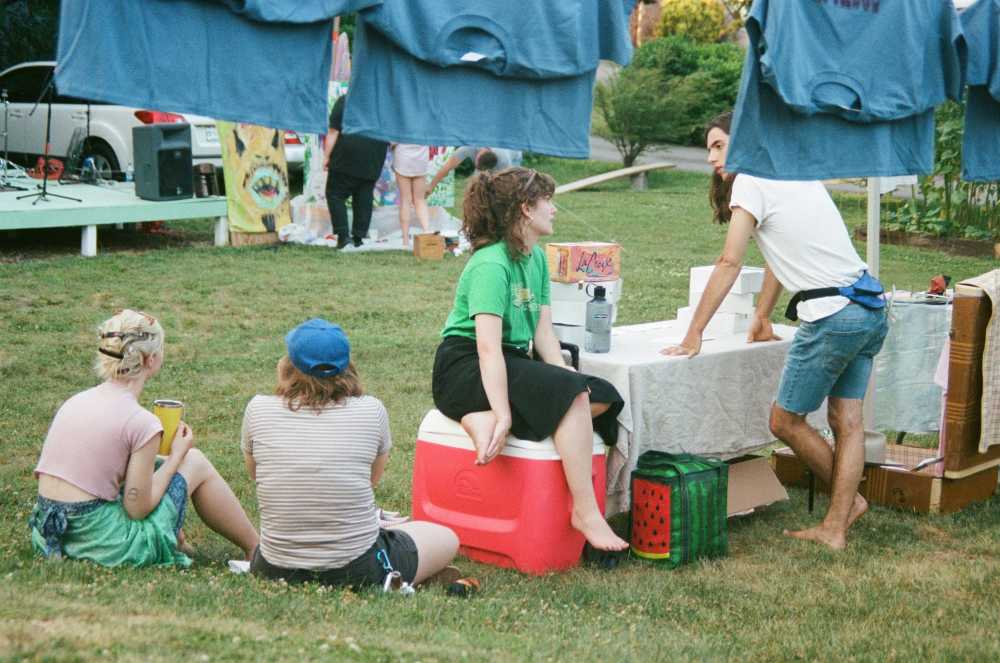
Artisan Markets with a Spooky Twist
San Francisco is home to countless local artisan markets. During October, many of these markets embrace the season, offering Halloween-themed crafts, gourmet treats, and local art. It’s a fantastic way to find a unique souvenir and experience the city’s creative community on a more intimate level, often with stunning bay views as a backdrop.
The Ultimate Resource for Your Entire Trip
A single holiday is just a snapshot of what this incredible city has to offer. To truly unlock the best of the Bay Area, from its iconic landmarks to its hidden neighborhood gems, a comprehensive resource is essential. To discover even more seasonal secrets and plan the perfect trip any time of year, our comprehensive Travel Guide is the ultimate resource for exploring San Francisco and beyond.

Conclusion: Embrace the Unforgettable Spirit of a San Francisco Halloween
San Francisco offers a Halloween experience that is as unique as the city itself—one that champions creativity, community, and atmosphere over cheap thrills and jump scares. It’s a place where you can marvel at the incredible costume artistry in the Castro, ponder the architectural riddles of a mysterious mansion, and soak in the festive energy of a city that truly knows how to celebrate. From the Castro's vibrant streets to mysterious mansions, the city provides some of the most memorable Halloween events USA has to offer by focusing on what truly matters: community, creativity, and unforgettable fun.
You now have the insider knowledge to craft a Halloween adventure that's perfectly spirited and uniquely San Francisco. You can confidently navigate the city's biggest celebrations and discover its hidden charms, creating memories that will last a lifetime.
What are you most excited to experience? Share your San Francisco Halloween plans in the comments below
Don't Miss Out! Subscribe for Exclusive Content
Subscribe


Comments 0
No comments yet
Be the first to share your experience!
Dont Miss Out! Subscribe for Exclusive Content

San Francisco Cherry Blossoms: A Local's Guide to the Blooms

SF Festivals: 7 Must-See Lineups

Christmas SF: Lights & Wharf Wonders

SF Pride: 6 Route & Party Hacks

Chinese New Year SF: Parade Essentials

San Francisco Holidays: Bay Area Buzz
Lollapalooza: 7 Stage-Hopping Tips
TrekGuider @trekguider
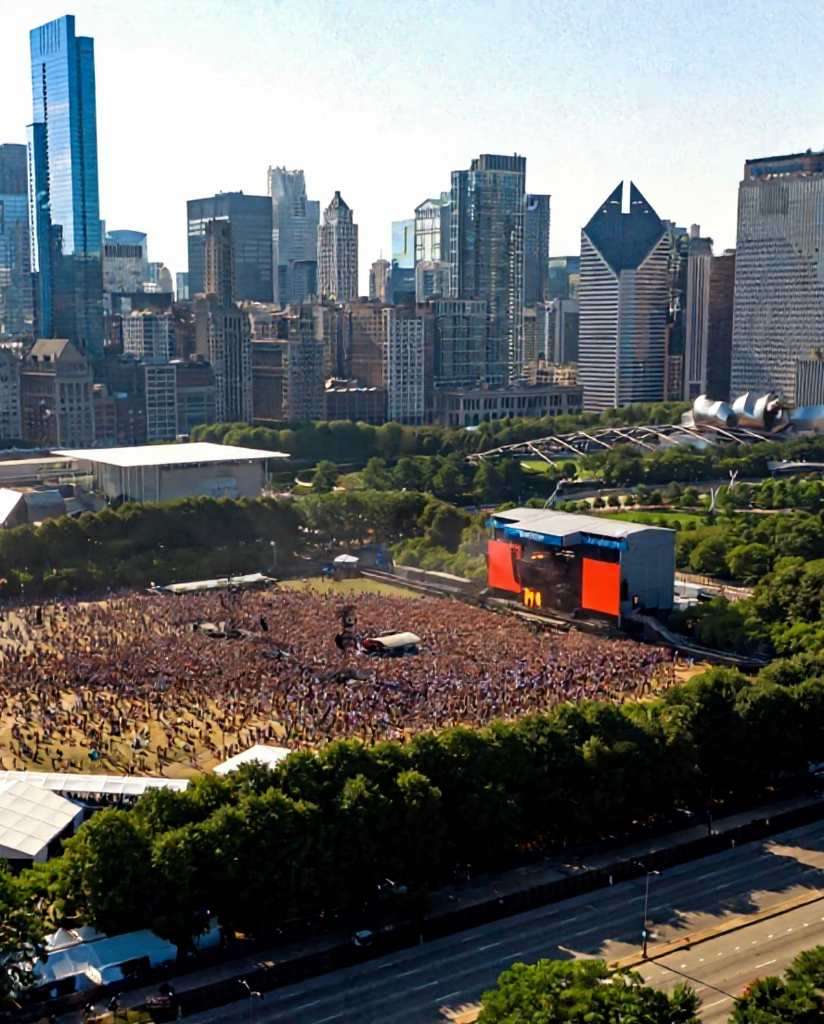
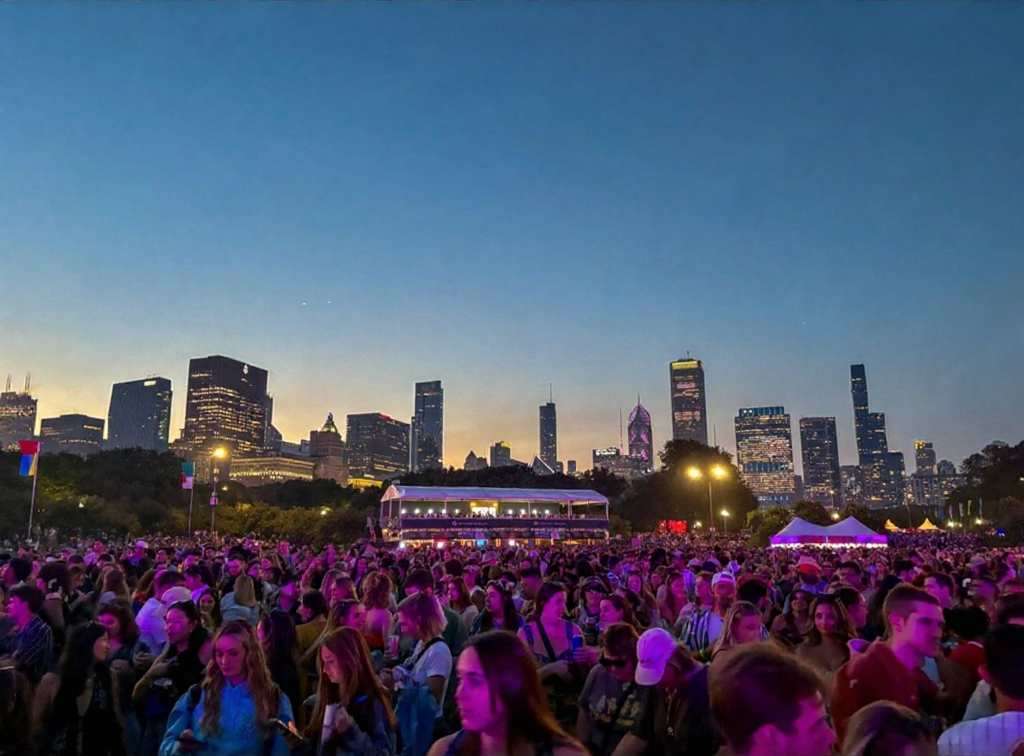
You’ve done it. You scored the golden ticket to Lollapalooza, the four-day musical marathon that transforms Chicago’s Grant Park into the center of the universe. But now, staring at a schedule that looks more like a complex circuit board than a concert lineup, the reality sets in. Dozens of artists you’re dying to see are scattered across a dozen stages, their set times overlapping in a cruel twist of fate. The sheer scale of the festival, with its massive crowds and sprawling grounds, suddenly feels less like a dream and more like a daunting logistical nightmare.
The anxiety begins to bubble. You picture yourself spending half the day trudging from the T-Mobile stage at the south end to the Bud Light stage at the north, only to arrive sweaty, exhausted, and just in time to hear the final chords of your favorite song. The fear of missing out becomes a palpable threat, turning the promise of unforgettable musical moments into a frantic race against the clock. Without a rock-solid plan, your festival experience could be defined by endless walks, missed opportunities, and the nagging feeling of being perpetually in the wrong place. This isn't just about seeing bands; it's about conquering one of the keystone events in a city known for its epic celebrations, a true highlight among the many experiences we cover in our definitive guide to Chicago Holidays: Windy City Thrills.
Forget the stress. This guide is your strategic playbook for navigating the glorious chaos of Lollapalooza Chicago. We’re breaking down the art of stage-hopping into seven actionable, pro-level tips that will transform you from a frantic fan into a festival veteran. From mastering the map before you even step foot in Grant Park to planning a seamless exit, these strategies will ensure you maximize your time, conserve your energy, and catch every single performance on your must-see list.
1. Become a Pre-Festival Master of the Map & Schedule
The biggest mistake a Lollapalooza rookie can make is showing up and trying to figure it all out on the fly. Grant Park is a massive urban oasis, and when it’s filled with stages, vendors, and hundreds of thousands of people, it becomes a complex, pulsating labyrinth. Your success begins long before you scan your wristband.
Download the Official App Immediately
Long before you even think about packing, your first move is to download the official Lollapalooza app. Consider it your digital command center for the entire weekend, running from July 31 to the final day of the festival. The app provides the most up-to-date schedule, a detailed festival map, and, most importantly, real-time push notifications. If a set time changes, a stage is delayed, or a surprise guest appears, the app will be the first to tell you. It also sends out crucial emergency alerts, making it an indispensable tool for staying safe and informed.
Create Your Artist Tiers
Once the full schedule drops, it’s time for strategy. Open the lineup—featuring titans like Olivia Rodrigo, Tyler the Creator, Sabrina Carpenter, and A$AP Rocky for the 2026 festival—and categorize every artist into two simple lists:
Tier 1 (Must-See): These are your non-negotiables. The artists you bought the ticket for. You will be at their set, no matter what.
Tier 2 (Nice-to-See): These are the artists you’d love to catch if the timing and location work out. They are your flexible options, the happy bonuses.
This simple act of prioritization is the bedrock of your stage-hopping plan. It allows you to build your day around your top-tier artists and fill the gaps with others, preventing the decision paralysis that comes from having too many choices.
Internalize the Grant Park Layout
Study the festival map like you’re planning a heist. The two main stages are typically located at the far north and south ends of Grant Park, a walk that can easily take 20-30 minutes through a thick crowd. Identify the locations of your Tier 1 artists and mentally map the routes between them. Note the locations of smaller stages, food courts (Chow Town), and, critically, the free water stations. Understanding the physical distances involved will help you make realistic calls about which back-to-back sets are doable and which are pure fantasy.

2. Master the "Perimeter Path" to Navigate Crowds
The center of any festival crowd is a slow-moving, densely packed sea of humanity. Trying to cut directly through the middle to get from one stage to another is a rookie move that wastes time and energy. The secret to swift movement is to think like a river, flowing where the resistance is lowest.
Stick to the Arteries
The most effective way to navigate Lollapalooza Chicago is by using the perimeter paths. Instead of plunging into the heart of the crowd, stick to the designated walkways along the sides. These paths, often lining the edges of the park or separating vendor areas, are the festival's arteries. While they may look like the longer route on a map, they are almost always faster than trying to push through a stationary audience. Make a mental note of these pathways when you first arrive.
Live by the 15-Minute Rule
If your next Tier 1 artist is on a stage across the park, you need to be ruthless with your timing. Implement the 15-Minute Rule: leave the current set 15 minutes before it ends. This gives you a critical head start, allowing you to exit the immediate crowd before the mass exodus begins when the music stops. It might sting to walk away from the end of a great performance, but that small sacrifice ensures you’re in a good position for the next one, rather than hearing it faintly from a quarter-mile away.
3. Hydrate and Fuel Like a Seasoned Athlete
Stage-hopping is a sport. You’ll be on your feet for 10 hours a day, walking several miles under the summer sun. You’re not just attending a concert; you’re entering a temporary city that generates a staggering economic impact—estimated at over $440 million. That scale demands respect and a bit of preparation.
Make Water Your First Priority
Lollapalooza provides free water refill stations throughout the grounds. When you first enter Grant Park, make it your mission to locate the station nearest the entrance and the stages you’ll be frequenting. Dehydration is the number one enemy of the festival-goer; it saps your energy, causes headaches, and can ruin your entire weekend. Make it a personal rule to refill your water bottle every single time you pass a station.
Pro-Tip: Bring a collapsible water bottle or an empty hydration pack. It's light, complies with security rules, and allows you to carry more water than a standard bottle. This means fewer trips to the refill station and more time enjoying the music.
4. Dress for a Four-Day Marathon, Not a Fashion Sprint
While Lollapalooza is a prime spot for people-watching and showing off your style, practicality should be your guiding principle. Your fashion choices can make or break your physical ability to enjoy the festival.
Your Shoes Are Your Most Important Gear
You will be walking and standing on concrete, grass, and uneven ground for hours on end. This is not the time for brand-new boots that need breaking in, flimsy sandals, or anything with a heel. Your number one priority should be comfortable, supportive, and already broken-in sneakers or walking shoes. Your feet are your foundation for the entire weekend; treat them well.
Prepare for All Four Chicago Seasons in One Day
Chicago weather is famously unpredictable. A day that starts hot and sunny can quickly turn cool and rainy. The key is to dress in layers. Start with a lightweight, breathable base layer and bring a flannel, hoodie, or light jacket that you can tie around your waist during the day and put on after the sun goes down. Most importantly, pack a poncho. It’s small, light, and will be an absolute lifesaver if a sudden downpour occurs.
5. Establish a "Home Base" for Your Crew
Navigating Lollapalooza Chicago with friends is a core part of the experience, but it’s incredibly easy to get separated. Cell service is notoriously unreliable when tens of thousands of people are trying to use it at once, so you can’t count on a text message or call to find your group.
Why a Meeting Point is Non-Negotiable
Before you even think about splitting up to see different artists, establish a clear, specific, and easy-to-find meeting point. This is your group’s "home base." If anyone gets lost, their phone dies, or you just need to regroup, everyone knows exactly where to go.
How to Choose a Good Spot
Don’t pick a generic spot like "the fountain" or "the food court." Choose a unique and unmistakable landmark. A good meeting point is something like, "the giant silver sculpture near the Buckingham Fountain" or "the corner of the 'Deep Dish' pizza stand in Chow Town." Pick a spot that is slightly away from the main walkways to avoid being constantly jostled. Check in at your home base at pre-determined times to ensure everyone is safe and accounted for.

6. Embrace the Journey Between the Stages
Stage-hopping isn’t just a commute; it’s an opportunity. The journey from one performance to another is part of the festival experience itself. Instead of seeing it as a chore, reframe it as a chance for discovery and inspiration.
Discover Your Next Favorite Band
As you walk the perimeter paths, you’ll pass smaller stages where artists you’ve never heard of are playing. Pause for a few minutes and listen. This is how you stumble upon incredible new music. Some of the most memorable Lollapalooza moments happen not at the massive headliner stages, but in the intimate settings of the BMI or Grove stages. Let your ears guide you.
Explore the Full Festival Experience
Lollapalooza is more than just a concert. It’s a massive cultural event filled with creativity. On your way from one stage to the next, take a detour through the art installations, check out the merch tents, or see what activations the sponsors have set up. This spirit of creative discovery is what fuels the best entrepreneurs. If you're feeling inspired by the artistry around you, channel that energy into your own project with our free Digital Product Ideas Guide. By exploring, you break up the monotony of walking and get a richer, more complete festival experience.

7. Plan Your Grand Escape in Advance
How you leave the festival is just as important as how you navigate it. At 10 PM, when the final headliner finishes, a massive wave of people will pour out of the Grant Park exits, creating a human traffic jam that can be overwhelming and slow.
Beat the Final Rush
Just as with the 15-Minute Rule for stage-hopping, consider leaving a few minutes before the absolute end of the night. Slipping out during the last song or just before the encore can save you up to an hour of being stuck in a slow-moving crowd. You’ll get to public transit or your rideshare pickup spot ahead of the main surge, which is a priceless advantage after a long day.
Know Your Public Transit Route Cold
The best way to get to and from Lollapalooza Chicago is by using the CTA rail system. Multiple downtown street closures make driving or using rideshares near the park a nightmare. Before the festival, identify the closest CTA station to your accommodation and memorize the route to and from the park exits. Having this plan locked in will prevent you from wandering aimlessly with a dead phone at the end of a long day.
Pro-Tip: If you must use a rideshare, set your pickup location several blocks away from the Grant Park exits. Walk away from the chaos and toward your pin. You'll escape the immediate surge pricing, and your driver will be able to find you much more easily than in the gridlock traffic near the festival grounds.
Your Blueprint for Lollapalooza Domination
The overwhelming scale of Lollapalooza can intimidate even the most enthusiastic music fan, but it doesn’t have to. With a strategic approach, the festival transforms from a logistical puzzle into the ultimate musical playground. By preparing in advance, navigating smartly, and taking care of your body, you shift from being a passive attendee to the master of your own experience. With these stage-hopping tips, you're now fully equipped with the knowledge of a seasoned pro, ready to conquer Lollapalooza Chicago and create a weekend of flawless, unforgettable memories.

Your Lollapalooza adventure is just one part of an incredible trip. To make the most of your time in the Windy City and beyond, check out our comprehensive Travel Guide. It’s packed with insider tips for exploring the best destinations across the USA.
Don't Miss Out! Subscribe for Exclusive Content
SubscribeComments 0
No comments yet
Be the first to share your experience!
Dont Miss Out! Subscribe for Exclusive Content
San Francisco Cherry Blossoms: A Local's Guide to the Blooms

Halloween SF: Haunts Without Horrors
SF Festivals: 7 Must-See Lineups
Christmas SF: Lights & Wharf Wonders
SF Pride: 6 Route & Party Hacks
Chinese New Year SF: Parade Essentials
Food & Water Safety Abroad: How to Avoid Getting Sick
TrekGuider @trekguider
There’s a moment on every trip where the true magic happens: the first bite of a dish you can’t pronounce from a street cart buzzing with locals, the refreshing sip of a regional drink, the discovery of a flavor that will forever define a place in your memory. Food is culture, connection, and the fastest way to the heart of a destination. And that’s the traveler’s paradox, isn’t it? The very experiences that promise the most profound connection also carry a potent, gut-wrenching risk.
One bad meal or a single sip of contaminated water can derail your entire adventure, swapping days of discovery for days spent locked in a hotel room. This fear is agitated by horror stories from fellow travelers and the sheer unpredictability of an unfamiliar environment. It's a valid concern—traveler's diarrhea is unequivocally the most common travel-related illness, affecting up to 80% of international travelers depending on the destination. The fear of getting sick can make you timid, causing you to stick to bland, "safe" foods and miss out on the rich mix of flavors your destination has to offer. It can rob you of the very experiences you traveled so far to find.

But it doesn't have to be this way. This guide is your solution, a definitive and practical playbook for mastering food and water safety abroad. We’ve synthesized actionable advice from the world’s leading health organizations, including the Centers for Disease Control and Prevention (CDC) and the World Health Organization (WHO), to empower you to eat boldly and drink safely. This isn’t a list of things to fear; it’s a set of simple, memorable rules for prevention, identification, and, if necessary, management. This is a critical deep-dive into a core pillar of preparedness we cover in The Ultimate Guide to Travel Safety: A 2026 Playbook, designed to give you the confidence to dive fork-first into the heart of a culture.
The Golden Rule of Food and Water Safety: "Boil It, Cook It, Peel It, or Forget It"
If you remember only one thing from this guide, make it this simple, five-word mantra. Promoted by the CDC and other global health bodies, this single rule is a powerful and easy-to-use filter for nearly every culinary decision you'll make on the road. It’s the foundation of your entire food and water safety strategy.
Boil It: Your Safest Bet for Liquids
Pathogens like bacteria, viruses, and parasites are killed by heat. This makes boiling the most effective method for purifying liquids.
Examples: Drinking water that has been brought to a vigorous, rolling boil for at least one full minute. Hot beverages like tea or coffee that are served steaming hot are also generally safe. Any milk products you consume should be confirmed to be pasteurized or have been boiled.
Cook It: The Power of Heat
Thoroughly cooking food kills the harmful microorganisms that cause illness. The key is to ensure it is cooked all the way through and served hot.
Examples: Meat, poultry, or seafood that is well-cooked (not rare or raw) and served steaming hot to the touch. This is especially crucial for street food; dishes that are cooked fresh to order in front of you are a much safer bet than those that have been sitting out.
Peel It: Nature’s Own Packaging
For raw fruits and vegetables, the contamination is almost always on the outside surface. By peeling it yourself with clean hands, you remove the risk.
Examples: Fruits with a thick, peelable skin like bananas, oranges, mangoes, and avocados are your safest and best friends for a healthy snack. Similarly, vegetables you can peel, such as cucumbers, are also a great option.
Forget It: When in Doubt, Go Without
This is the most critical and sometimes most difficult part of the rule to follow. It requires discipline, but it’s your ultimate defense. If an item of food or drink doesn't meet one of the three criteria above, you must skip it.
Examples: Tap water and ice cubes made from tap water are the biggest culprits. Salads and raw leafy greens like lettuce are high-risk because they are difficult to clean thoroughly and may have been washed in contaminated water. You should also avoid fruits that cannot be peeled, such as grapes and berries, and any unpasteurized dairy products like milk or cheese. Finally, be very wary of any food served at room temperature, such as from a buffet.
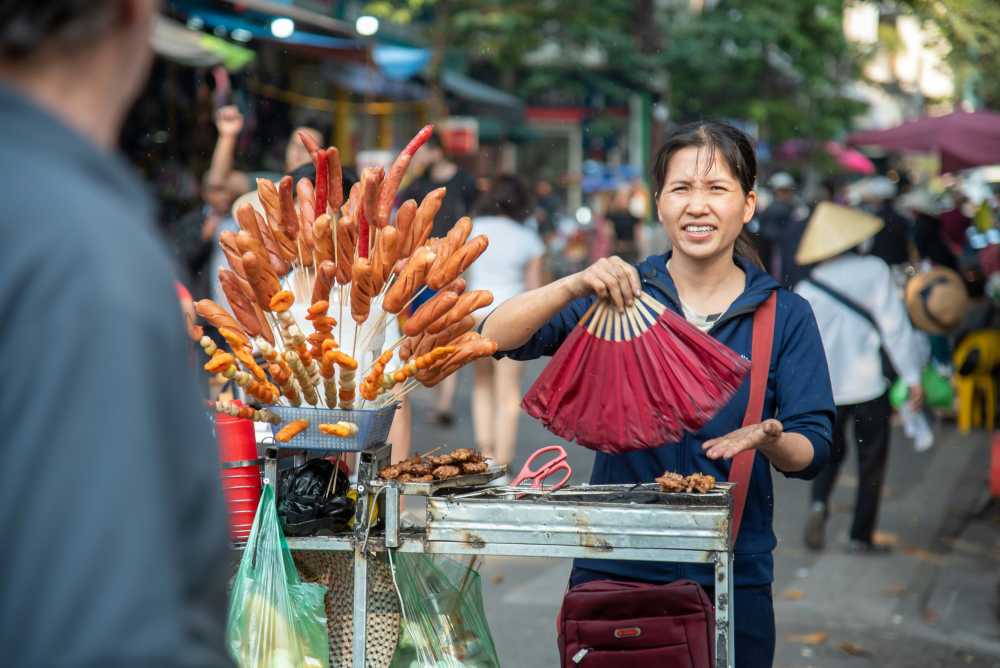
Navigating the Streets: A Visual Guide to Spotting Unsafe Food
Street food is often the soul of a city's cuisine, but not all vendors are created equal. Your eyes are your best tool for vetting a stall. Before you order, take thirty seconds to perform a quick visual inspection. Look for these five clear signs of a safe or unsafe operation.
Poor General Cleanliness: This is the most obvious indicator. Red flags include dirty workstations with unwiped spills, visible food waste, rubbish on the ground, and the presence of pests like flies or wasps. The vendor themselves should also appear clean, with tidy clothes and hands.
Improper Food Temperatures: Food left in the "danger zone" (room temperature) is a breeding ground for bacteria. Avoid stalls where cooked food, especially meat, is sitting out in large trays. The safest option is always food that is cooked fresh to order, right in front of you. Hot food should be visibly steaming.
Obvious Cross-Contamination: Watch how the vendor handles ingredients. A major red flag is using the same cutting board, knife, or unwashed hands to handle raw meat and then touch ready-to-eat items like bread, salad, or cooked food.
Use of Contaminated Water: Look at the vendor’s water source. Rinsing dishes, utensils, or vegetables in a single bucket of murky, stagnant water is a sign of a high-risk operation. Likewise, avoid ice in your drinks unless you can confirm it was made from purified water (commercially bagged ice is usually a safe sign).
Lack of a Crowd (Especially Locals): A busy stall with a long line, particularly of local residents, is one of the best indicators of a trusted and safe food source. High customer turnover means the food is fresh and hasn't been sitting out for long. An empty stall is often empty for a reason.
Pro-Tip: Make "follow the locals" your street food mantra. A long line of residents is a walking, talking five-star review of a vendor's quality and safety. It's the most reliable seal of approval you can find.
Securing Your Water Supply: A Deep Dive into Hydration and Purification
Staying hydrated is non-negotiable for your health and energy while traveling, but assuming tap water is safe is one of the most common and dangerous mistakes a traveler can make. Here’s how to ensure every sip you take is safe.
Identifying Safe and Unsafe Drinking Water Sources
The CDC and WHO have clear guidelines. Unless you are in a country with a known, highly-developed sanitation system, you should assume all tap water is unsafe.
Safest Sources: Commercially bottled water in a factory-sealed, tamper-proof container is your most reliable option. Carbonated water is even safer, as a broken seal is immediately obvious. The second safest source is water that you have personally brought to a rolling boil for at least one minute.
Unsafe Sources to Avoid: Tap water, well water, ice made from tap water, fountain drinks mixed with tap water, and even water from clear mountain streams (which can contain germs) should all be avoided unless they have been purified.
Your Purification Playbook: The Top 3 Methods
When bottled or boiled water isn't available, you need a backup plan. Here are the top three recommended purification methods.
Boiling (The Gold Standard): This is consistently ranked by the CDC and WHO as the single most effective method. It kills all known disease-causing microorganisms, including viruses, bacteria, and parasites. Simply bring clear water to a rolling boil for 1 minute (or 3 minutes at elevations above 6,500 feet / 2,000 meters).
Filtration: A high-quality portable water filter is highly effective at removing bacteria and protozoan parasites like Giardia and Cryptosporidium. Look for a filter with an absolute pore size of 1 micron or smaller. The main limitation is that most portable filters do not remove viruses, so in high-risk areas, the CDC recommends following filtration with chemical disinfection.
Chemical Disinfection: Chlorine, iodine, or chlorine dioxide tablets/drops are a lightweight and easy way to kill viruses and bacteria. However, they are not consistently effective against the parasite Cryptosporidium and require a contact time of at least 30 minutes.
For in-depth planning on what gear to pack for every type of trip, from water filters to first-aid supplies, our all-encompassing Travel Guide is the only resource you'll ever need.
Damage Control: How to Manage Traveler's Diarrhea
But let’s be realistic: even the most diligent traveler can have a bad day. When that happens, knowing exactly what to do—and what not to do—can be the difference between a 24-hour nuisance and a trip-ruining ordeal. This is the damage control phase of your food and water safety plan.
The First and Most Critical Step: Oral Rehydration
According to travel medicine doctors, dehydration is the single most likely and dangerous complication of traveler's diarrhea. Replacing lost fluids and electrolytes is your absolute first priority.
Method: The best way to rehydrate is with a dedicated Oral Rehydration Solution (ORS), which comes in packets of salts and sugars that you mix with boiled or bottled water. In a pinch, sports drinks or clear soups can also be used.
Symptomatic Treatment for Mild to Moderate Cases
If the diarrhea is tolerable and not accompanied by a high fever or blood, over-the-counter medications can provide relief and help you get through a travel day.
Medications: An antimotility agent like Loperamide (the active ingredient in Imodium, a top pharmacist-recommended brand) can reduce the frequency of bowel movements. Bismuth Subsalicylate (found in Pepto-Bismol, another pharmacist favorite) can also help decrease the frequency and shorten the duration of the illness.
When to Use Standby Antibiotics (For Severe Cases)
If diarrhea is distressing, incapacitating, or contains blood or mucus, a prescribed antibiotic may be necessary.
Method: Before you travel, speak with your doctor or a travel medicine clinic. For travelers heading to high-risk destinations, they may provide a prescription for a standby antibiotic, such as Azithromycin, to carry with you. A single dose is often highly effective at treating severe cases.
Pro-Tip: Within your main travel first-aid kit, create a dedicated "Digestive Distress" module. Keep it in a separate, clearly-labeled zip-top bag containing a few packets of Oral Rehydration Salts, a strip of Loperamide, and a few antacids. This way, when you need it, you won't have to rummage through your entire kit.

Ready to Pack Like a Pro?
A smart food and water safety strategy is just one piece of your pre-trip preparation. To ensure you don't overlook a single essential item—from documents and finances to clothing and medical supplies—a master checklist is your most powerful tool. Our comprehensive, free checklist has you covered for every stage of your journey.
Download Your Free International Travel Checklist Now!
Food and Water Safety FAQs
A prepared mind is a safe mind. Here are expert answers to common questions that take your preparedness to the next level.
1. Besides traveler's diarrhea, what are the most common travel illnesses?
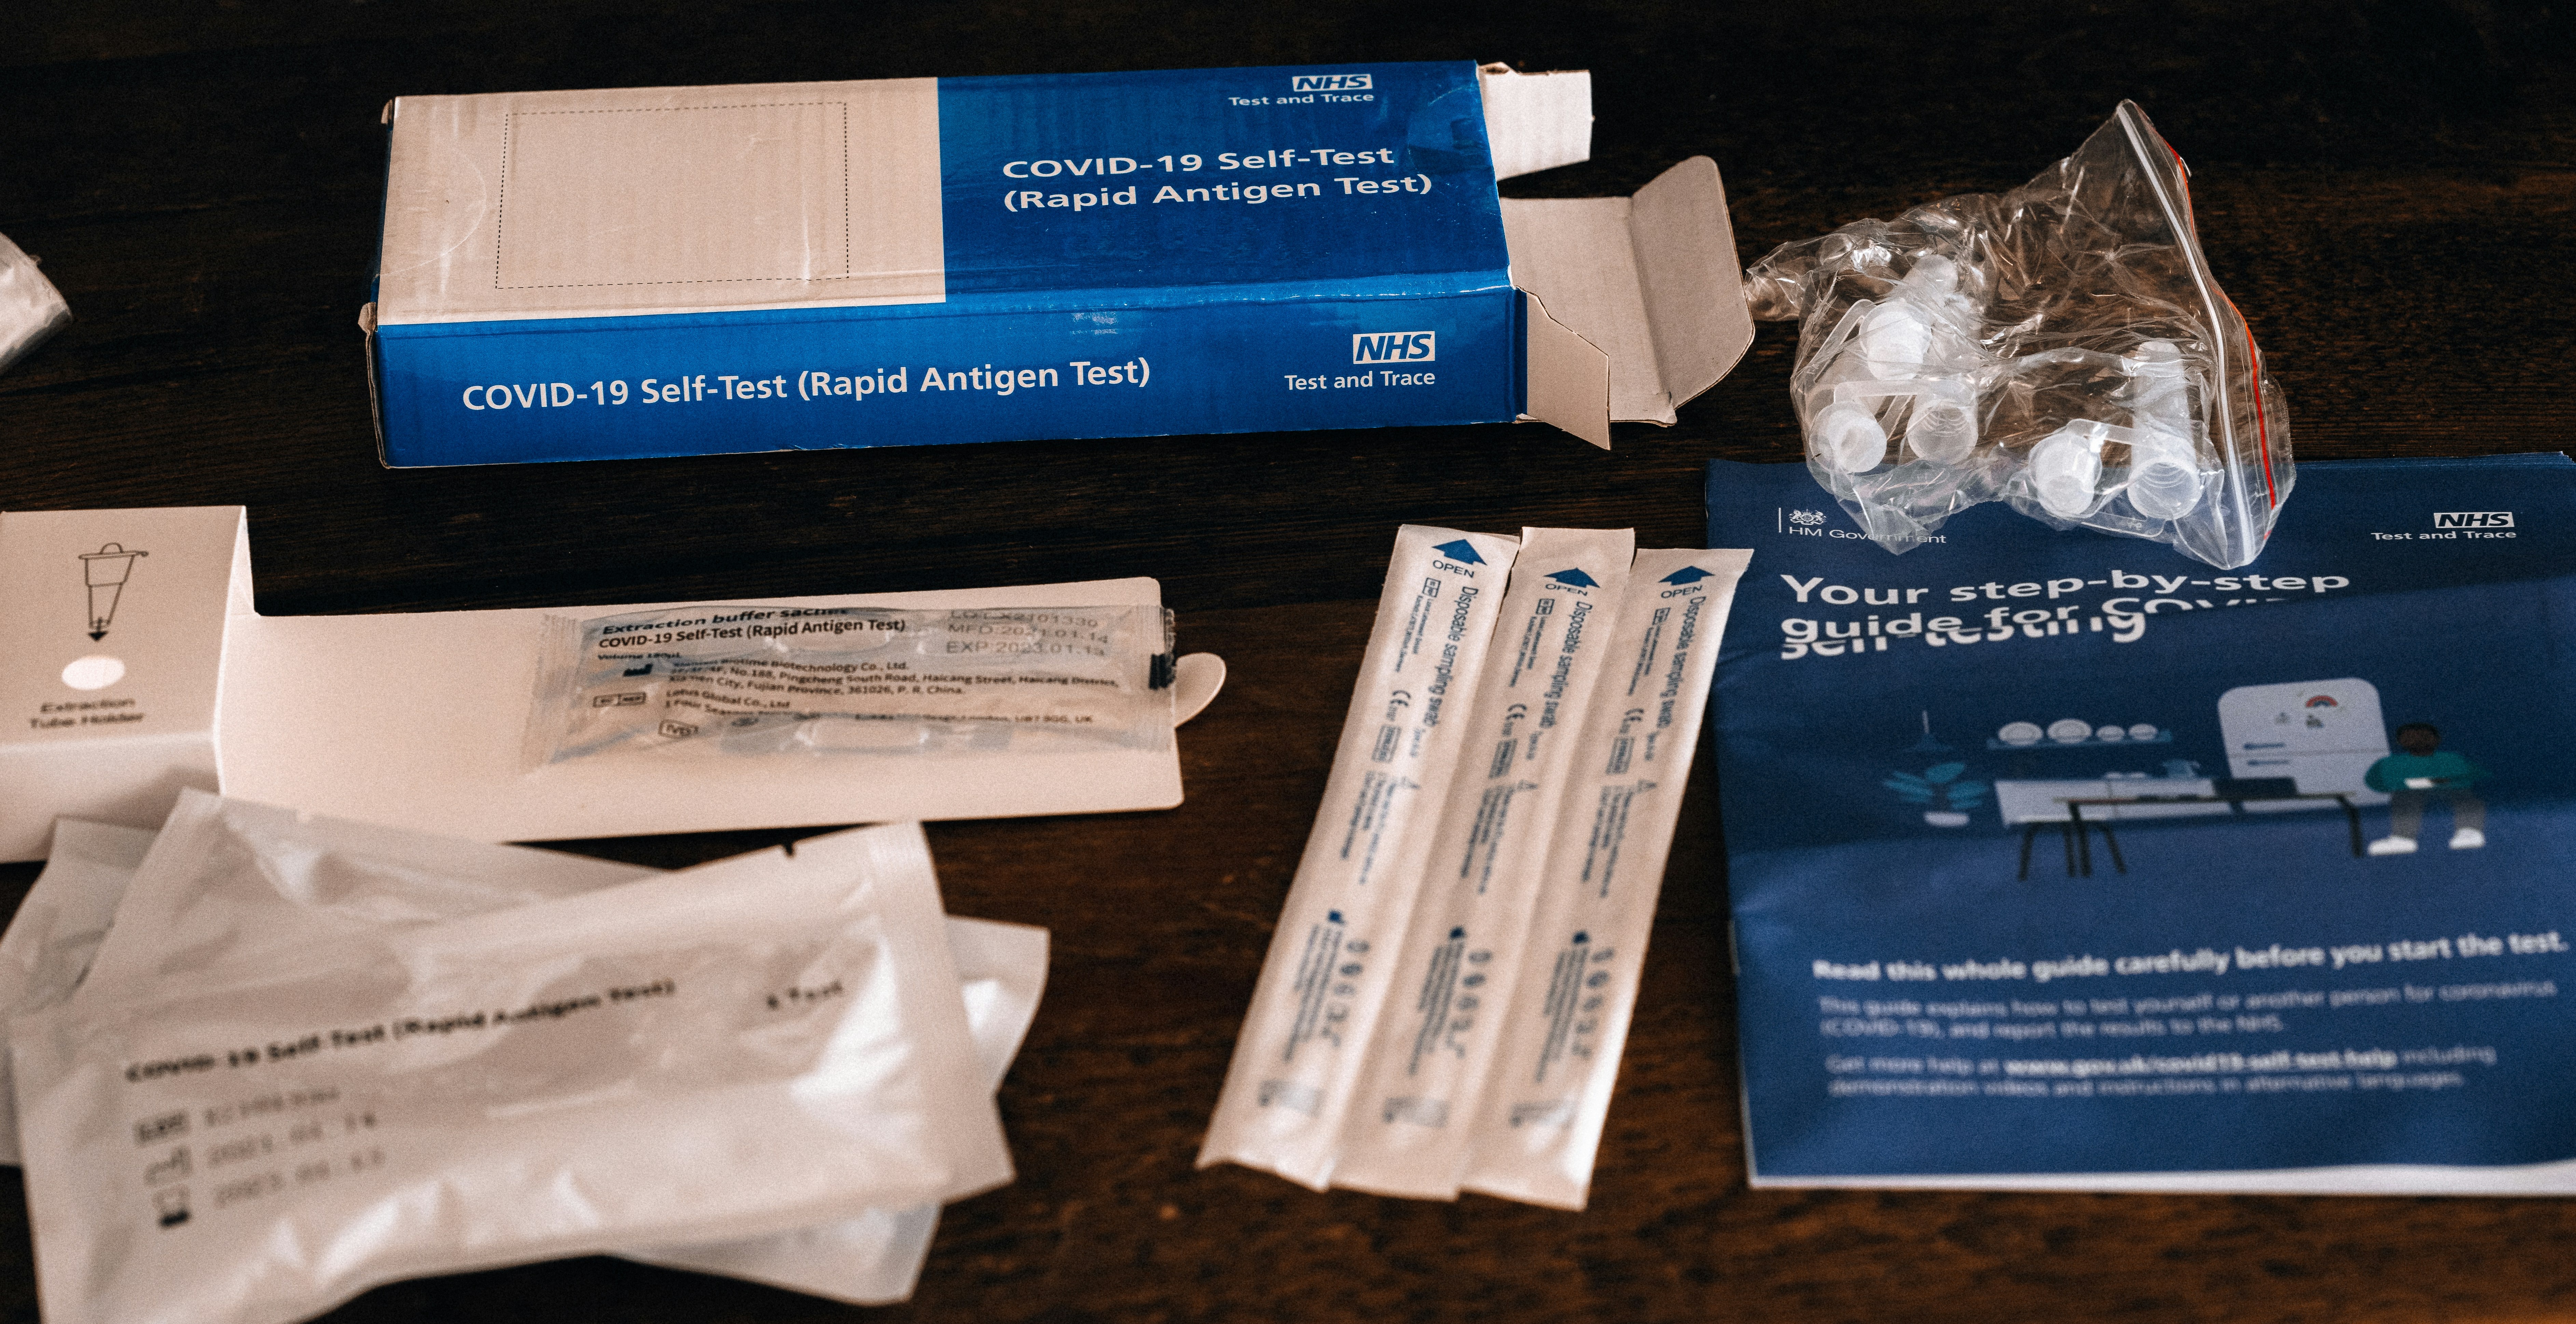
While traveler's diarrhea is number one, the CDC reports that other common issues include acute respiratory infections (like influenza or COVID-19, often acquired in transit), vector-borne fevers like Dengue and Malaria in tropical regions, and other food-borne illnesses like Hepatitis A and Typhoid Fever. Skin conditions from insect bites are also extremely common.
2. Is it safe to eat at a restaurant if I'm worried about street food?
Generally, restaurants can be safer, but the same principles apply. A busy restaurant full of locals is a great sign. Be cautious with the same high-risk items: salads, unpeeled fruits, and tap water or ice. If you want to find trusted, local-approved gems, explore the TrekGuider platform, where travel creators often share their own curated guides to safe and authentic eats.
3. Should I carry a standby antibiotic in my first-aid kit?
This is a question for your doctor or a travel medicine clinic. For travelers heading to high-risk destinations where severe traveler's diarrhea is common, many doctors will provide a prescription for a standby antibiotic like Azithromycin. It’s not for mild cases but can significantly shorten the duration of a severe bout of illness. Discuss your itinerary with your doctor to see if this is right for you.
Eat Boldly, Travel Well
The world of food is a world of incredible diversity and connection, and it deserves to be explored with an open mind and a curious palate. The goal of mastering food and water safety is not to build a wall of fear that separates you from authentic experiences. It is about building a foundation of knowledge that gives you the freedom to be adventurous. By internalizing the golden rule of "Boil it, cook it, peel it, or forget it," learning to trust your own visual assessment of a food stall, and knowing exactly what to do if you get sick, you replace anxiety with empowerment. You are now equipped with the skills to navigate the world's most exciting cuisines with confidence, ensuring your focus remains on the flavor, connection, and joy that every journey promises. Go explore, eat boldly, and travel well.

Meta Data Suggestions:
SEO Meta Title (Under 60 characters): Food & Water Safety Abroad: How to Avoid Getting Sick
URL Slug: food-water-safety-abroad
SEO Meta Description (Under 155 characters): Avoid traveler's diarrhea with our expert guide to food and water safety abroad. Learn the golden rules for eating street food, purifying water, and staying healthy.
Don't Miss Out! Subscribe for Exclusive Content
SubscribeComments 0
No comments yet
Be the first to share your experience!
Dont Miss Out! Subscribe for Exclusive Content

Chicago Beer Fests: Top 6 Tastings

Ultimate USA Holidays Guide: Top Picks

FTC Affiliate Disclosure Essentials: Stay Compliant as a Travel Creator

Essential Affiliate Tools: From Tracking to Full Optimization

Booking.com Affiliate Program Review: Pros, Cons, and Earnings Potential

Decoding Affiliate Commission Rates: Benchmarks for Travel Creators
Thanksgiving Parade: 6 Prime Spots
TrekGuider @trekguider
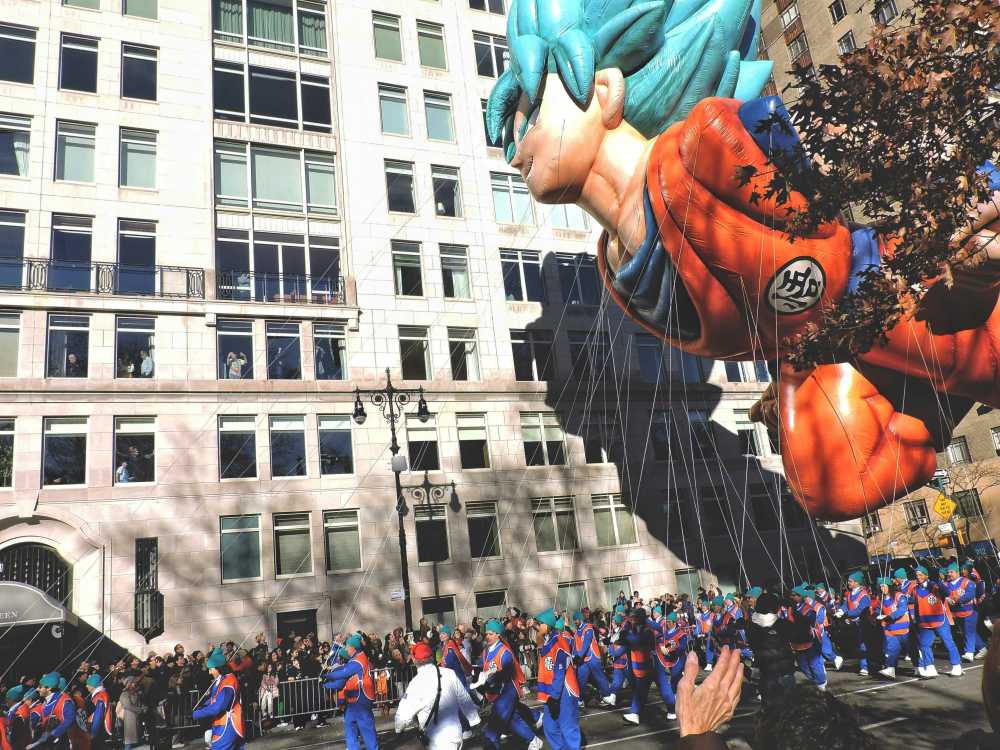
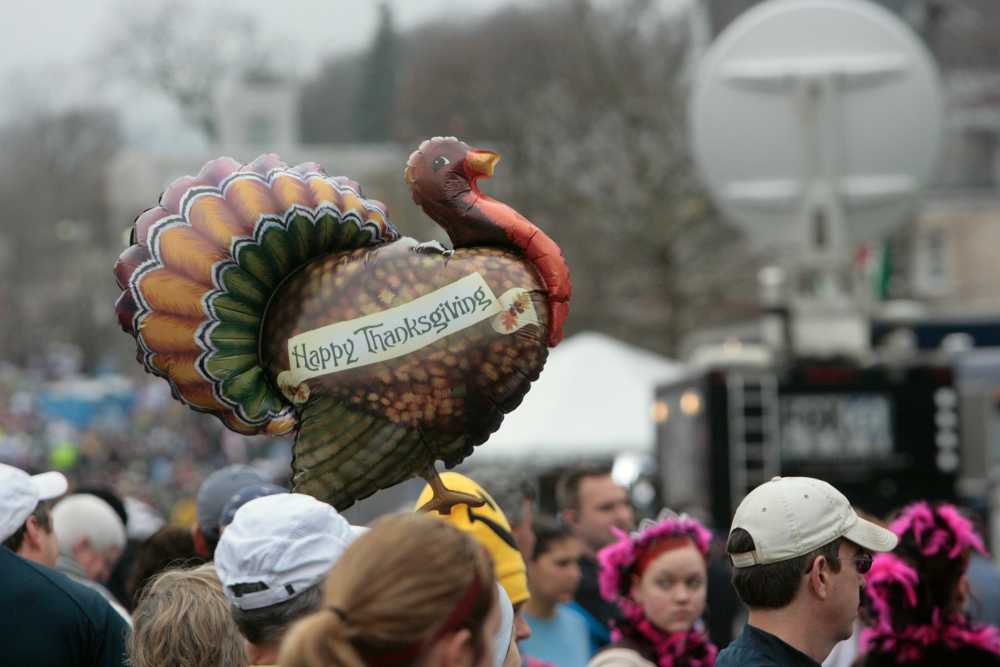
You’ve seen it on television your whole life: colossal cartoon characters floating between skyscrapers, world-class marching bands sending echoes through the avenues, and the final, festive arrival of Santa Claus himself. The Macy's Thanksgiving Day Parade is an American institution, the magical kick-off to the holiday season. But the dream of seeing it in person is often haunted by a logistical nightmare. You’re worried about battling millions for a tiny patch of sidewalk, only to have your view blocked, your kids get restless, and the entire enchanting experience devolve into a cold, stressful ordeal.
That anxiety is completely valid. Every year, over 3.5 million people descend on the route, and without a rock-solid plan, you’ll see more of the back of someone’s head than you will of the giant Snoopy balloon. You risk waking up before dawn only to find every good spot claimed, leaving your family disappointed and shivering. The magic you traveled for feels impossibly out of reach, lost in a sea of chaos. You deserve to experience the wonder, not the worry.
Forget the frustration. This is your strategic blueprint for success. We’re going to bypass the chaos and transform you into a parade-viewing expert. We’ll unveil the six prime spots to watch the spectacle, complete with insider strategies on timing, what to pack, and how to navigate the city like a local. This is your definitive plan for conquering the Thanksgiving parade in New York and creating memories that will last a lifetime. It’s one of the most iconic events in the city, a true highlight that we cover in our broader guide to New York Holidays: 10 Must-Do Events.
Understanding the Parade Route: Your Strategic Map
Before you can pick your spot, you need to understand the battlefield. The Macy's Thanksgiving Day Parade is a massive operation, and its route is the key to everything. Knowing the path, the timing, and—most importantly—the restricted zones will give you a powerful advantage.
The parade officially kicks off at 8:30 AM sharp on Thanksgiving morning, Thursday, the fourth Thursday of November. It begins on the Upper West Side and marches for 2.5 miles, concluding around noon.
Here’s the official step-by-step route:
Starts: 77th Street & Central Park West at 8:30 AM.
Travels South: Proceeds down Central Park West to Columbus Circle.
Turns: At Columbus Circle, it turns onto Broadway.
Continues South: It follows Broadway through the heart of Midtown.
Ends: The parade concludes around noon at the iconic Macy's Herald Square on 34th Street.
Our internal research confirms two critical areas to avoid at all costs: the start zone around 77th Street and the finish zone near Herald Square (from 34th to 38th Street). These areas have heavily restricted public viewing and are reserved for television broadcasting. Trying to watch from here is a rookie mistake that guarantees disappointment. Your strategy must focus on the long stretches in between.
The 6 Prime Viewing Spots for the Thanksgiving Parade in New York
Now for the main event. Choosing your location is the single most important decision you’ll make. Each of these six spots offers a unique advantage, whether it’s fewer crowds, better photo opportunities, or more family-friendly conditions.
1. The Upper West Side: The Classic Family Choice
Location: Along Central Park West, from 77th Street down to Columbus Circle (specifically the west side of the street).
Why It’s Prime: As the parade’s very first leg, this 16-block stretch is where the magic is freshest. The performers are electric with energy, the marching bands are at their most thunderous, and the balloon handlers are still wrangling their colossal characters into perfect formation. Because it's more residential, the crowds feel slightly more manageable and family-oriented than in the commercial chaos of Midtown. The backdrop of Central Park on one side and historic apartment buildings on the other makes for stunning photos.
Your Strategy:
Timing is Everything: You must arrive by 6:00 AM. The front-row spots are often claimed by locals before the sun is up. By 6:30 AM, the area will be packed several rows deep.
Positioning: Plant yourself on the west side of Central Park West. This gives you a direct, unobstructed view as the parade marches south.
What to Expect: It will be cold and dark when you arrive. This spot requires a commitment to waiting, but the payoff is a fantastic, high-energy viewing experience.
2. The Shops at Columbus Circle: The VIP Indoor View
Location: The second and third floors of The Shops at Columbus Circle, overlooking the parade’s turn from Central Park West onto Broadway.
Why It’s Prime: This is the ultimate parade hack for those who want to avoid the cold and the crowds. You get a warm, elevated, bird’s-eye view of the entire spectacle. Plus, you have immediate access to restrooms, coffee, and food—luxuries that are unthinkable for those on the street.
Your Strategy:
This Isn't Free: This is not a public viewing area. Access is typically granted to customers of the shops and restaurants within the mall.
Plan Months Ahead: Check with stores like Williams-Sonoma or restaurants with windows facing the circle. Many host private, ticketed viewing events that sell out far in advance.
Be Prepared to Spend: You will need to make a purchase or pay for a breakfast event to gain entry. Consider it the price of unparalleled comfort and convenience.

3. The Sixth Avenue Stretch: The Urban Canyon Experience
Location: Along Sixth Avenue (Avenue of the Americas) from 59th Street down to 38th Street.
Why It’s Prime: This is the longest and straightest portion of the route, offering dozens of blocks for potential viewing. Watching the giant balloons squeeze between the towering skyscrapers of Midtown is a uniquely New York experience. The sheer scale of the buildings creates a dramatic "urban canyon" effect that makes the parade feel even more grand.
Your Strategy:
Arrive Early: The secret is out on this spot. To get a decent view, be in position by 6:30 AM at the latest. The blocks closest to Central Park (59th to 50th) fill up the fastest.
Avoid Corners: Set up in the middle of a block. Corners are notoriously crowded and chaotic, with people constantly moving and blocking views.
Look for Scaffolding: Sometimes, construction scaffolding can be a blessing in disguise, creating a covered area that offers some protection from the elements and can deter massive crowds from forming in that exact spot.
Pro-Tip: The area between 70th and 75th streets on Central Park West offers a slightly wider sidewalk, giving you a little more breathing room. Pack a thermos of hot chocolate to stay warm while you wait—it’s a game-changer.
4. The "Quiet Zone" Near Radio City Music Hall
Location: The stretch of Sixth Avenue between 49th and 51st Streets.
Why It’s Prime: While no part of the route is truly "quiet," this section is designated as a no-marching-band-performance zone to accommodate the national television broadcast headquartered at Radio City. This means you get a brief respite from the loudest musical numbers—a great option for families with young children or those with sensory sensitivities.
Your Strategy:
Know the Trade-Off: You will see all the floats and balloons perfectly, but you will miss the live performances from the marching bands as they pass this specific area.
Use the Location: This spot is fantastic for its iconic backdrop. You can capture incredible photos of the balloons with the famous Radio City Music Hall marquee in the background.
Post-Parade Plans: You are perfectly positioned to see the Rockettes' Christmas Spectacular later in the day or head over to Rockefeller Center.

5. The South Side of 38th Street: The Late-Arrival Lifeline
Location: The blocks along Sixth Avenue from 40th Street down to 38th Street.
Why It’s Prime: Let's be realistic: not everyone can wake up at 4 AM. If you’re running late, this is your last best chance. As the parade nears its end at 34th Street, the area becomes a restricted broadcast zone. Therefore, the blocks just before this cutoff are the final public viewing areas.
Your Strategy:
Manage Expectations: You will not get a front-row view here. This is a spot for seeing the tops of the balloons and catching the general energy of the event.
Look Up: Your view will be mostly vertical. It’s less about seeing the performers on the street and more about witnessing the spectacle of the giant balloons against the sky.
Quick Exit: The advantage of being near the end of the route is that you can make a quick exit once the final float passes, beating some of the mass exodus heading for the subway.
6. The Virtual View: Your Hotel Room Perch
Location: Any hotel with rooms directly overlooking the parade route on Central Park West or Sixth Avenue.
Why It’s Prime: This is the most comfortable, stress-free, and luxurious way to experience the Thanksgiving parade in New York. You can watch the entire event from the warmth of your room, in your pajamas, with a cup of coffee in hand. You have your own bathroom, your own food, and an unbeatable, unobstructed view.
Your Strategy:
Book a Year in Advance: Rooms with parade views are often booked a year or more ahead and come at a significant premium.
Confirm the View: When booking, you must call the hotel directly to confirm that your specific room has a "parade view." An "avenue view" is not always sufficient.
Notable Hotels: Some hotels famous for their parade views include the JW Marriott Essex House, the Mandarin Oriental, New York, the Warwick New York, and the New York Hilton Midtown.
Pro-Level Survival Guide for Parade Day
Securing a great spot is only half the battle. You need a solid plan for the hours you’ll spend waiting. Follow these tips to ensure your experience is comfortable and memorable for all the right reasons.
The Ultimate Timing Strategy
The golden rule, confirmed by years of experience, is to arrive by 6:00 AM. This is non-negotiable for a front-row or second-row spot along Central Park West or the prime stretches of Sixth Avenue. By 6:30 AM, these areas are typically full. By 7:00 AM, you’ll be lucky to find a spot where you can see anything at all. Set your alarm, bundle up, and get there early. The early bird gets the best view of the parade.
What to Wear and Pack: The Family Checklist
New York in late November is cold. Standing still for hours makes it feel even colder.
Dress in Layers: Start with a thermal base layer, add a fleece or sweater, and top it off with a warm, wind-resistant winter coat. Don't forget a hat, gloves, and a scarf.
Comfortable Footwear: Wear warm, waterproof boots. Your feet will thank you.
The Essentials Bag: Pack a backpack with:
Snacks and Drinks: A thermos of hot chocolate or coffee is a must. Bring water and easy-to-eat snacks like granola bars and fruit.
Entertainment: A book, a deck of cards, or a fully charged phone with headphones can help pass the time.
Portable Phone Charger: Your battery will drain faster in the cold.
Small Folding Stools: If you have space, these can be a lifesaver for your back and legs.
For a comprehensive list of what to bring on any family adventure, our National Park Road Trip Checklist has you covered, with tips that apply just as well to an urban expedition.

Navigating the Crowds with Kids
The parade is a magical experience for children, but the crowds and waiting can be tough.
Avoid Strollers: In the most crowded areas, strollers are more of a liability than a help. They are difficult to maneuver and take up valuable space. A carrier is a much better option for very young children.
Establish a Meeting Point: As soon as you claim your spot, pick a clear, fixed landmark (e.g., a specific lamppost, a store entrance) as your family's meeting point in case you get separated.
Use a Buddy System: Ensure everyone has a partner.
Ladders: You will see people with small ladders for their kids to see over the crowd. If you bring one, be sure to place it a safe distance from the street and be courteous to those around you.
Pro-Tip: Skip the car. Public transportation is your best friend. The subway will be running on a holiday schedule, but expect crowded stations near the route. Plan your subway route in advance and buy your MetroCard the day before to avoid long lines at the machines on Thanksgiving morning.
Beyond the Parade: Making it a Full Thanksgiving Experience
Remember, the parade ends around noon, leaving you with a full day to enjoy the city. Many people head straight to a Thanksgiving dinner. If you plan to eat out, you must make reservations weeks, if not months, in advance. New York City is one of the world's culinary capitals, and a festive meal is the perfect way to cap off a magical morning.
Planning the perfect holiday trip, from the parade to the feast, requires expert knowledge. Our comprehensive Travel Guide provides detailed itineraries and booking advice for major US cities, ensuring your entire vacation is seamless and spectacular.

Your Mission, Should You Choose to Accept It
Watching the Macy's Thanksgiving Day Parade in person is a bucket-list dream, and with this guide, it’s a dream you can turn into a flawless reality. You now have the route, the prime locations, and the pro-level strategies to outsmart the crowds and secure a fantastic viewing experience. You’re no longer a tourist hoping for a glimpse; you’re a prepared strategist ready to claim your prime spot and soak in every moment of the magic. The Thanksgiving parade in New York is waiting for you.
Now go make those once-in-a-lifetime memories!
Meta Data Suggestions:
SEO Meta Title: 6 Prime Spots for the NYC Thanksgiving Day Parade (2026)
URL Slug: thanksgiving-parade-new-york-viewing-spots
SEO Meta Description: Don't just watch the Thanksgiving parade in New York, conquer it. Our guide reveals 6 prime viewing spots and insider tips for a stress-free family experience.
Don't Miss Out! Subscribe for Exclusive Content
SubscribeComments 0
No comments yet
Be the first to share your experience!
Dont Miss Out! Subscribe for Exclusive Content
San Francisco Cherry Blossoms: A Local's Guide to the Blooms
Halloween SF: Haunts Without Horrors
SF Festivals: 7 Must-See Lineups
Christmas SF: Lights & Wharf Wonders
SF Pride: 6 Route & Party Hacks