Essential Affiliate Tools: From Tracking to Full Optimization
TrekGuider @trekguider
You’re a creator, not an administrator. Yet, you find yourself drowning in a sea of administrative tasks. You’re manually copying and pasting ugly, mile-long affiliate links, toggling between a dozen different program dashboards to check your stats, and spending more time wrestling with spreadsheets than you do creating the travel content you love. Your affiliate "business" feels less like a streamlined operation and more like a chaotic, time-sucking hobby that isn't paying the bills.
This inefficiency is more than just frustrating—it's a silent killer of your income. Every hour you spend on manual, repetitive tasks is an hour you’re not creating the next piece of content that could generate revenue for years to come. You're flying blind, guessing which strategies are working, unable to see which links are converting, and which pages are actually profitable. The reported average income of $13,847 a month for travel affiliates feels like a distant fantasy when you’re stuck in this administrative quicksand.

This guide is your way out. It is your curated, creator-friendly tech stack—a definitive list of the essential affiliate marketing tools that will automate the tedious, provide crystal-clear data, and free you up to focus on growth. We’ll cover the entire workflow, from foundational link management and tracking to the advanced tools needed for full-scale optimization. This is how you transform your passion project into a professional, efficient, and profitable business. For a complete command of the entire affiliate landscape, our definitive pillar page, Travel Affiliate Programs: The 2026 Ultimate Guide, is your essential command center for mastering the entire ecosystem.
The Foundational Layer: Your Operational Command Center
Before you can optimize, you must organize. This first set of tools forms the non-negotiable foundation of any serious affiliate marketing business. They are your central nervous system for managing links, ensuring compliance, and tracking performance from a single source of truth.
Link Management Plugins (The Digital Quartermaster)
If you run your travel blog on WordPress, a link management plugin is the single most important tool you will install. These plugins take the long, ugly, and intimidating affiliate links provided by programs and "cloak" them into short, clean, branded URLs that are far more trustworthy to your audience.
Think of it as your command center. Instead of embarking on a digital scavenger hunt through year-old posts to update a single expired link, you change it once in a central dashboard, and the plugin deploys that change site-wide instantly. This functionality alone will save you hundreds of hours over the life of your business. Furthermore, a link like yourblog.com/recommends/osprey-backpack is infinitely more professional and trustworthy to a reader than a long URL filled with random tracking parameters, directly impacting your click-through rates.

Top Tools in This Category:
ThirstyAffiliates: A powerhouse plugin built specifically for affiliate marketers. It offers advanced features like autolinking (automatically turning specific keywords into affiliate links), proactive link checking to find broken links, and detailed click analytics.
Pretty Links: A slightly simpler but highly effective alternative. It excels at link cloaking, redirection, and providing basic click-tracking reports right from your WordPress dashboard.
Pro-Tip: The best link management plugins, like ThirstyAffiliates, can automatically add the required rel="sponsored" tag to all of your affiliate links. This is a critical feature that ensures you stay compliant with Google's guidelines for paid links, protecting your site from potential SEO penalties without you having to think about it.
Affiliate Tracking Tools (Your Source of Truth)
"What gets measured gets managed." To grow your affiliate income, you need a crystal-clear understanding of what’s working. While many creators start by manually checking each affiliate network’s dashboard, a dedicated approach to tracking provides a more holistic, actionable view.
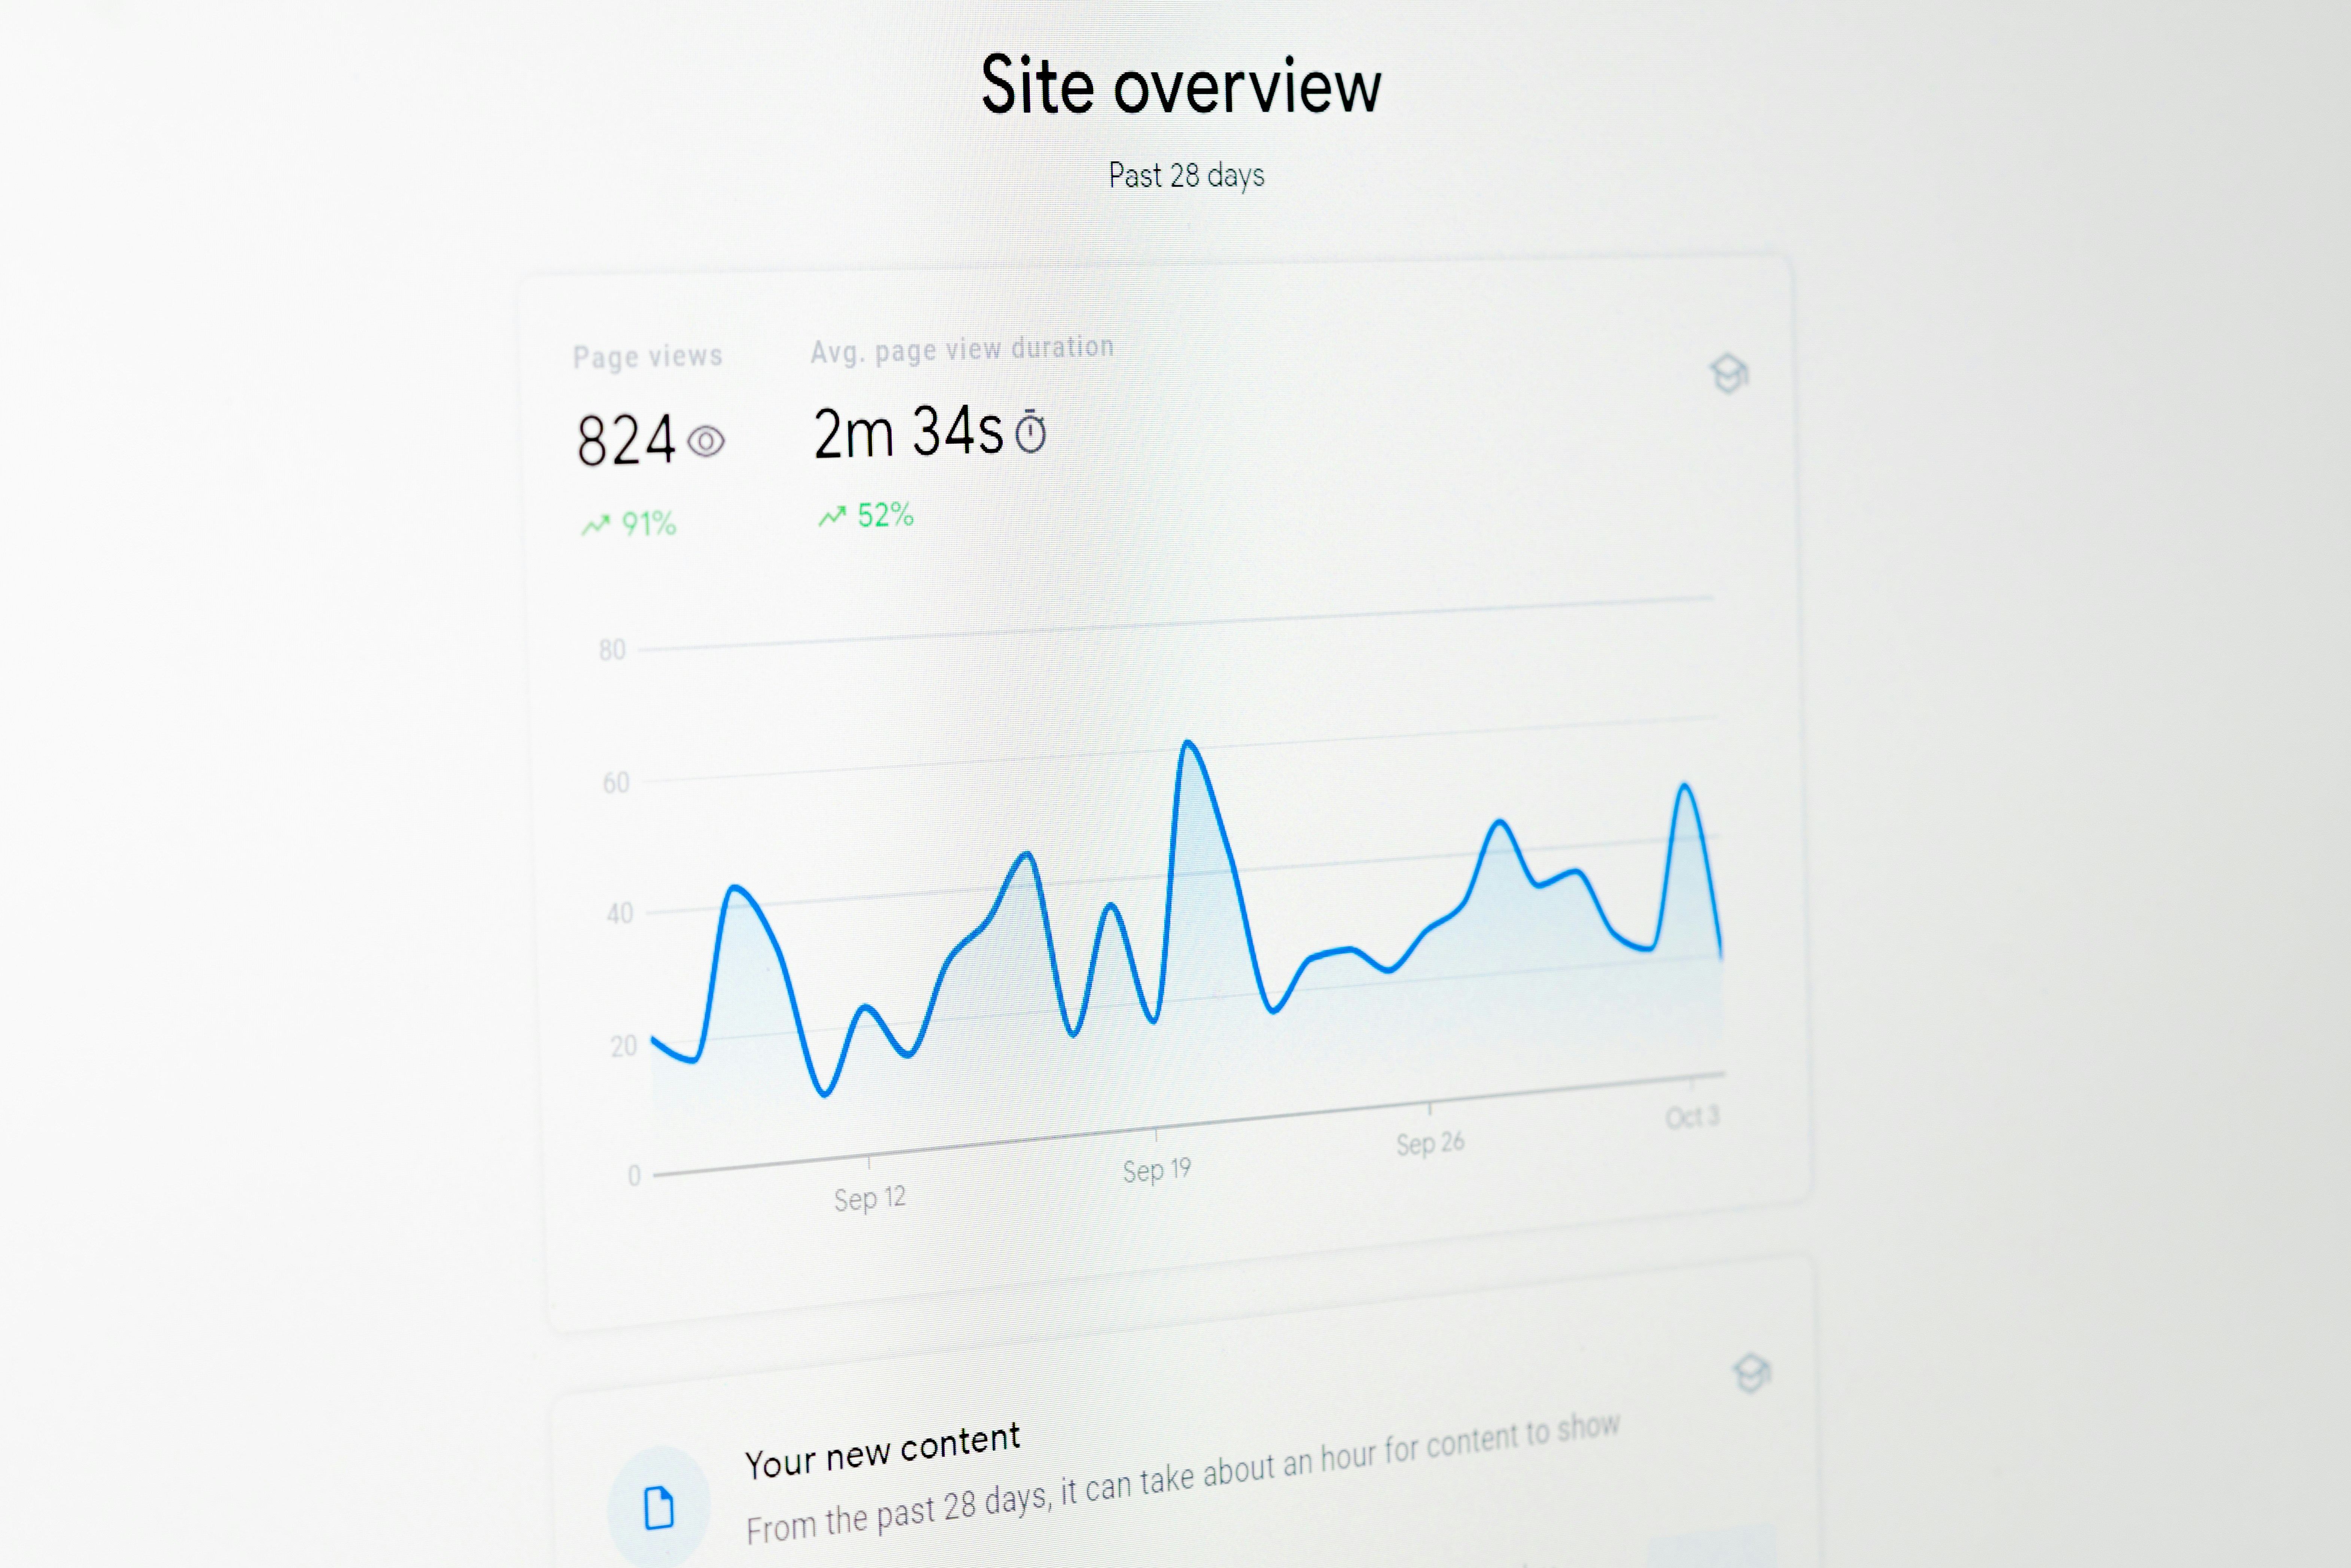
For most creators, your affiliate tracking tools will be a combination of your link management plugin’s analytics and the dashboards provided by your affiliate networks (like CJ Affiliate or Travelpayouts). These platforms show you crucial metrics like clicks, conversions, and commission earnings.
However, as your business matures, you'll want to track performance across different income models. For example, the TrekGuider Seller Platform includes a dedicated referral dashboard. This is a specialized tracking tool that shows you not just one-time sales, but the ongoing, passive income you’re earning from the new sellers you’ve brought to the platform. It’s a perfect example of how a modern platform provides the built-in affiliate tracking tools you need to monitor more sophisticated, high-margin income streams like revenue sharing.
The Growth Engine: Traffic & SEO Tools
With your operational house in order, the focus must pivot from organization to acquisition. A perfectly managed link is useless without a steady stream of the right people clicking on it. This is where your growth engine comes in—the tools designed to attract your ideal audience with precision.
SEO & Keyword Research Platforms
The most profitable affiliate content is created with intention. It targets keywords that signal a user is actively researching a purchase (e.g., "best carry-on luggage review"). SEO platforms are your treasure map for finding these "money" keywords and building a content strategy that attracts buyers, not just browsers.

These platforms are indispensable for:
Finding Profitable Keywords: Uncover what your audience is searching for, how many people are searching for it, and how difficult it will be to rank on Google.
Analyze the Competition: See exactly which keywords your competitors are ranking for and which pages are bringing them the most traffic.
Track Your Performance: Monitor your rankings for your target keywords over time to see what’s working and where you need to improve.
Top Tools in This Category:
Ahrefs: A comprehensive, professional-grade SEO toolkit. Its "Keywords Explorer" is second to none for finding high-value commercial investigation keywords, and its "Site Explorer" provides deep insights into any competitor's strategy.
SEMrush: Another all-in-one industry leader that offers a powerful suite of tools for keyword research, rank tracking, and competitive analysis.
Pro-Tip: Don't confine your keyword strategy to your blog. With video projected to account for a staggering 55% of all affiliate traffic by 2026, the same commercial-intent keywords you find for your articles are the exact titles you should be using for your YouTube videos and TikToks.
Analytics Platforms
While SEO tools help you get traffic, a web analytics platform tells you what that traffic does once it arrives. It’s essential for understanding your audience, diagnosing problems, and optimizing their journey from reader to buyer.
The Must-Have Tool:
Google Analytics: The free, industry-standard tool for website analytics. It's an incredibly powerful platform that provides all the data you need to understand user behavior, track conversions, and identify your top traffic sources, allowing you to double down on what works.
The Conversion Toolkit: Optimization & Social Media Tools
Attracting traffic is only half the battle. The final, crucial step is converting that traffic into clicks and commissions. This set of tools is designed to streamline your workflow and optimize your content for maximum impact.
"Link in Bio" Tools (For Social Dominance)
Platforms like Instagram and TikTok are powerful for audience building, but they famously limit your ability to use clickable links. A "link in bio" tool solves this by creating a simple, mobile-friendly landing page that can house all of your most important affiliate links, blog posts, and offers.

Top Tools in This Category:
Linktree: The most well-known tool in this space, offering a simple and effective way to create a micro-landing page for your social media bio.
Later: While primarily a social media scheduling tool, Later’s "Link in Bio" feature is excellent, allowing you to create a clickable grid of your Instagram posts, driving traffic directly to relevant blog posts and affiliate offers.
The Amazon Workflow Accelerator
For nearly every travel creator, Amazon Associates is a core part of their affiliate strategy. However, creating links for individual products can be a slow, manual process.
The Must-Have Tool:
Amazon SiteStripe: This is a free, official toolbar from Amazon that appears at the top of your browser whenever you’re on Amazon.com. It allows you to generate a custom affiliate link (text, image, or both) for any product page with a single click, dramatically speeding up your content creation workflow.
Your Strategy Blueprint: The Travel Creator's Toolkit
Feeling overwhelmed by the options? A powerful tech stack is only as good as the strategy behind it. To help you organize your entire affiliate marketing plan—from keyword research to content creation and promotion—we've created the ultimate resource bundle. It’s packed with the checklists, templates, and guides you need to build a professional and profitable system.
Download Your Free Bundle: The Travel Creator's Toolkit Today!
Frequently Asked Questions (FAQ)
1. Do I really need all these tools when I'm just starting out? When you're starting, focus on the foundation. A WordPress site with a link management plugin (like Pretty Links) and Google Analytics is your essential starting stack. This is a low-cost setup that allows you to organize your links and track your traffic from day one. You can invest in a premium SEO tool like Ahrefs once your site is generating enough revenue to justify the cost.
2. Are there any good free affiliate marketing tools? Absolutely. Google Analytics is free and non-negotiable. Amazon SiteStripe is also free. For keyword research, you can start with free tools like Google Keyword Planner or the free versions of various SEO tools, though they are more limited. The free versions of "link in bio" tools like Linktree are also perfectly sufficient for most creators.
3. How do these tools help with tracking beyond just clicks? Advanced tracking involves connecting data points. For instance, by using UTM parameters (which you can add manually or with some plugins), you can see in Google Analytics not just that someone came from your blog, but that they came from the specific button in your review of the Osprey backpack. This level of detail is what allows you to A/B test different calls-to-action and truly optimize your pages for conversion.
Conclusion: From Hobbyist to CEO
The difference between a creator earning a few dollars a month and one earning a full-time income often comes down to their systems. Top earners don't waste time on manual, low-value tasks. They leverage technology to work smarter, not harder. They treat their content not as a hobby, but as a business.

You now have a curated list of the best affiliate marketing tools to build your own professional tech stack. Start with the foundation: a link management plugin to organize and track your links. Then, layer in SEO and analytics tools to build a predictable stream of traffic. Finally, use optimization and workflow tools to convert that traffic with maximum efficiency.
These affiliate tracking tools and optimization platforms are not an expense; they are an investment in your own efficiency, professionalism, and profitability. By implementing this toolkit, you take a definitive step away from being a hobbyist and become the CEO of your own thriving travel content business.
Meta Data Suggestions:
SEO Meta Title (58 characters): 9 Essential Affiliate Marketing Tools for Travel Creators
URL Slug: essential-affiliate-marketing-tools
SEO Meta Description (154 characters): Discover the top affiliate marketing tools for travel creators. From link tracking to SEO, this guide covers the essential tech stack to automate and grow your income.
Read the full guide: The Travel Blogger's Playbook to Affiliate Marketing Mastery
Don't Miss Out! Subscribe for Exclusive Content
Subscribe


Comments 0
No comments yet
Be the first to share your experience!
Dont Miss Out! Subscribe for Exclusive Content

Ultimate USA Holidays Guide: Top Picks

FTC Affiliate Disclosure Essentials: Stay Compliant as a Travel Creator

Avoid These 5 Affiliate Landing Page Mistakes for Better Conversions

Affiliate Keyword Research Mastery for Travel Blogs

Booking.com Affiliate Program Review: Pros, Cons, and Earnings Potential

Decoding Affiliate Commission Rates: Benchmarks for Travel Creators
Solo Travel Blog Monetization: Turning Stories into Income
TrekGuider @trekguider
You've seen the Instagram posts tagged '#digitalnomad' and wondered if it's actually real. Can a solo travel blog—your solo travel blog—truly become a source of income, or is it just a path to burnout? The truth is, most new bloggers fail because they follow a random list of 'monetization ideas.' They're missing the most critical element: a strategic, time-based plan. This is not a list of ideas. This is your 24-month roadmap, grounded in real data from six-figure bloggers, showing you exactly what to do, when to do it, and the income you can realistically expect at each stage. This is your guide to successful solo travel blog monetization.

Moving from Hobbyist to Business Owner
The first and most critical shift you must make is mental. Your blog is no longer just a personal travel diary; it is the central asset of a new business. Every decision, from the topics you cover to the way you structure your articles, must be made with a clear purpose: to provide immense value to a specific audience. Before you can monetize effectively, you must provide that value, which starts with mastering the fundamentals. For a complete playbook on creating world-class content and navigating your journey, review our comprehensive .
This business-oriented mindset means prioritizing the single most important driver of revenue: Search Engine Optimization (SEO). While social media can provide fleeting traffic spikes, SEO delivers a consistent, sustainable stream of readers who are actively searching for the solutions you provide. These are the people who will click your links, book tours, and buy your products. From this day forward, think of yourself not as a blogger, but as the CEO of a media company whose primary asset is high-ranking, helpful content.
What to Expect and When
Forget the overnight success stories. Building a profitable blog is a marathon, not a sprint. Having a realistic timeline prevents discouragement and keeps you focused on the right tasks at the right time.

Year 1 Expectations: Building Traffic and Earning Your First ~$2,000
The first year is all about laying the foundation. Your primary goal is not to make a full-time income, but to publish a critical mass of high-quality, SEO-optimized content and establish topical authority in your niche. You'll spend the first few months writing and publishing consistently without seeing much traffic, and that's completely normal.
Data from established bloggers shows that you can expect to make your first affiliate sale around month four or five. By the end of the first year, a dedicated blogger can realistically earn between $1,000 and $5,000. This income will come almost exclusively from strategic affiliate marketing.
Year 2 Expectations: Scaling to a Viable Income ($20,000 - $40,000)
Year two is the scaling phase. The content you published in your first year begins to mature and rank higher in Google search results, leading to a significant increase in traffic. This is the year you'll likely cross the critical threshold needed to qualify for premium ad networks. This combination of escalating affiliate commissions and new, high-earning display ad revenue is what transforms your blog from a side hustle into a viable business. It's not uncommon for bloggers who were earning $200/month at the end of year one to be earning $2,000-$4,000/month by the end of year two.
(Months 1-6): Laying the Foundation for Your Solo Travel Blog Monetization
Welcome to the grind. In this foundational phase, you are building the powerful engine of your business long before you see significant fuel (i.e., traffic). Success here isn't measured in dollars; it's measured in discipline and consistent output.
Your Primary Focus: Publishing High-Quality, SEO-Optimized Content
Think of high-quality content as the real estate upon which you'll build your entire business. It's the non-negotiable asset that makes all future income possible. In these first six months, your goal should be to publish 25-40 thoroughly researched, long-form articles that target specific keywords your audience is searching for. Every article should aim to be the single best resource on the internet for its given topic. This early library of content is what Google will eventually reward with traffic.
Method 1: Strategic Affiliate Marketing (The Best First Step)
Affiliate marketing is the practice of earning a commission by promoting another company's products or services. It is the perfect first monetization method because most programs have no minimum traffic requirements. You can, and should, include affiliate links from day one.
The key is to recommend products you genuinely use and trust. Your recommendations must be woven naturally into helpful content. Don't just list products; explain why a certain backpack is perfect for a carry-on-only trip or how a specific travel insurance policy saved you during an emergency. A crucial element of this is transparency. Always include a clear affiliate disclosure at the top of your posts. This isn't just an FTC requirement; it's a critical component of building long-term trust with your audience.
Choosing the Right Affiliate Platforms: A Data-Driven Comparison
Start with a mix of affiliate aggregators and direct programs to maximize your opportunities.
Travelpayouts: An excellent starting point. It's an aggregator that gives you access to dozens of travel brands like Booking.com, GetYourGuide, and Hostelworld through a single platform, making it easy to manage your links and payments.
Stay22: A powerful, map-based tool specifically for accommodations. It often has a higher conversion rate than other hotel affiliate links because it shows users a variety of options on a map, which is incredibly helpful in the travel planning process.
Direct Programs: Many essential travel brands have their own programs. Be sure to sign up for:
Amazon Associates: For all the physical gear you recommend, from packing cubes to portable chargers.
Booking.com / Agoda: The top platforms for hotel bookings worldwide.
GetYourGuide / Viator: The leaders in tours, activities, and attraction tickets.
Pro-Tip: Don't go back and add affiliate links later. Research and include relevant links in every article as you write it. This saves an immense amount of time and ensures your monetization efforts start from the moment you hit "publish."
(Months 7-18): Scaling Traffic and Unlocking Serious Income
With a solid foundation of content beginning to rank, you now shift your focus from pure production to growing the one metric that unlocks the next level of income: monthly sessions.
Your Primary Focus: Reaching 50,000+ Monthly Sessions
This is the magic number. Crossing the threshold of 50,000 monthly sessions (the number of visits to your site, as measured by Google Analytics) is the key inflection point where your income potential grows exponentially. It signals to premium ad networks that you have a substantial and engaged audience, making you a valuable partner. Reaching this level requires continued content production and a focus on building high-quality backlinks to your articles.

Method 2: Display Advertising (Unlocking Passive Income)
Display ads are the advertisements you see placed within the content of a website. When you have significant traffic, this becomes a powerful and almost entirely passive income stream. The key is to work with the right network.
The Ad Network Ladder: From Beginner to Premium
Not all ad networks are created equal. Your goal is to climb the ladder to a premium network as quickly as possible.
Avoid Google AdSense: Many new bloggers start here, which is a major mistake. AdSense pays extremely low rates, often resulting in an RPM (Revenue Per Mille, or earnings per 1,000 pageviews) of just $1-$3. It clutters your site for pennies.
Starter Networks (The Stepping Stone): Networks like Journey by Mediavine (requires 10,000 monthly sessions) or Ezoic offer a significant step up from AdSense. They are a great intermediate goal.
Premium Networks (The Goal): This is where serious income begins.
Mediavine: The gold standard for many bloggers. They require a minimum of 50,000 monthly sessions. Mediavine is known for its incredible support and high RPMs, often in the $20 - $40+ range. They command higher rates from advertisers because of their high-quality publisher network and direct sales teams.
Raptive (formerly AdThrive): The top tier. Raptive requires 100,000 monthly sessions and is known for having some of the highest RPMs in the industry for the same reasons.
Getting accepted into Mediavine is a major milestone. For a blog with 50,000 sessions, a $25 RPM translates to $1,250 in passive income per month. This is in addition to your growing affiliate revenue.
(Months 19+): The CEO Phase—Building a Diversified Travel Brand
Once you have stable traffic and income from ads and affiliates, you can move into the final phase: maximizing profitability by leveraging your most valuable asset—your audience's trust.
Building Brand Authority and Audience Trust
At this stage, your readers see you as a trusted expert. They've followed your advice, booked hotels you recommended, and bought gear you reviewed. This trust is the asset you will now monetize directly, leading to the highest profit margins possible.
Method 3: Selling Your Own Digital Products (The Highest Profit Margin)
Creating and selling your own products is the holy grail of solo travel blog monetization. You control the price, the product, and you keep nearly 100% of the revenue. This requires a loyal audience that trusts your expertise, which is why it's an advanced strategy.

Examples of high-value digital products for a solo travel audience include:
Comprehensive E-books: A deep dive into a specific topic, like "The Ultimate Guide to Solo Female Travel in Southeast Asia."
Printable Destination Itineraries: Detailed day-by-day plans for cities like Rome, Tokyo, or Lisbon that your readers can purchase and download.
Trip Planning Templates: Customizable spreadsheets or Notion templates that help your readers organize their own trips.
Digital Packing Lists: Niche-specific checklists for different types of travel (e.g., carry-on only, winter travel, hiking).
Pro-Tip: Validate your product idea before you build it. Send a survey to your email list or poll your audience on social media, asking what they struggle with most. If dozens of people say "planning my Italy itinerary is overwhelming," you have a winning product idea.
Method 4: Sponsored Content and Brand Partnerships
Sponsored content, where a brand pays you for a dedicated article or mention, represents a shift from passive to active income. While it can be lucrative, with sponsored posts often fetching $1,000 or more, you shouldn't just wait for opportunities to land in your inbox. As your brand authority grows, you can proactively pitch partnerships. Create a professional media kit—a one-page PDF outlining your website traffic, audience demographics, and core values—and reach out to brands you already use and love with a specific collaboration idea.
Frequently Asked Questions (FAQ Section)
How much money can you make from a travel blog?
In your first year, aim for $1,000-$5,000. By the end of year two, $20,000-$40,000 is a realistic target for dedicated bloggers. Established, six-figure travel bloggers who have diversified into ads, affiliates, and digital products can earn well over $100,000 per year.
How long does it take to make $1000 a month blogging?
For most travel bloggers who consistently publish high-quality, SEO-optimized content, it takes between 12 and 18 months to consistently earn $1,000 per month. This milestone typically occurs after being accepted into a premium ad network like Mediavine.
Do I need a large social media following to make money?
No. This is a common and damaging myth. The most profitable travel blogs focus on SEO. You can make a full-time income from a travel blog with fewer than 1,000 Instagram followers if your website traffic from Google is high and consistent.
What are the initial costs of starting a profitable travel blog?
The essential startup costs are minimal. You'll need a domain name (around $15/year) and web hosting (around $5-$15/month). Investing in a premium WordPress theme ($60 one-time) and an SEO tool like Keysearch ($17/month) are highly recommended but not strictly necessary on day one.
Turning your passion for solo travel into a profitable business is not a dream; it's a project. It requires a strategic plan, immense dedication, and an unwavering focus on providing real value. This roadmap has shown you the what and the when. By following this phased approach to solo travel blog monetization, you move beyond wishful thinking and begin the methodical work of building a business that can fund your travels and your life. The journey is long, but the destination—a life of freedom and financial independence—is worth every step.
Read the full guide: Anxious to Adventurous: The Ultimate Guide to Solo Travel Confidence
Don't Miss Out! Subscribe for Exclusive Content
SubscribeComments 0
No comments yet
Be the first to share your experience!
Dont Miss Out! Subscribe for Exclusive Content
FTC Affiliate Disclosure Essentials: Stay Compliant as a Travel Creator

Essential Affiliate Tools: From Tracking to Full Optimization
Avoid These 5 Affiliate Landing Page Mistakes for Better Conversions
Affiliate Keyword Research Mastery for Travel Blogs
Booking.com Affiliate Program Review: Pros, Cons, and Earnings Potential
Decoding Affiliate Commission Rates: Benchmarks for Travel Creators
The Ultimate Travel First Aid Kit Checklist (2026)
TrekGuider @trekguider
But it doesn’t have to be that way. The single most powerful tool for ensuring a healthy, stress-free journey is one you create before you even leave home: a comprehensive travel first aid kit. This isn’t just a box of bandages; it’s a personalized arsenal of preparedness that empowers you to handle common health issues with confidence and ease. Building your own kit is at the heart of the proactive mindset we cover in our comprehensive The Ultimate Guide to Travel Safety: A 2026 Playbook. Think of this guide less as a simple shopping list and more as a masterclass in preparedness, backed by pharmacist-approved advice to help you build the ultimate defense against travel’s minor medical curveballs.
DIY vs. Pre-Made: Which Travel First Aid Kit is Right for You?
Before we dive into the specific items, it’s worth considering whether to build your kit from scratch or buy a pre-made one.
Pre-Made Kits: These offer undeniable convenience. They come in a compact case and provide a decent baseline of supplies. However, they are often filled with low-quantity, generic items and may lack the specific medications you need for your trip.
DIY Kits: Building your own kit requires a bit more effort upfront but is superior in every other way. It allows you to choose high-quality brands, pack sufficient quantities, and tailor the contents specifically to your destination, your planned activities, and your personal health needs.
Our recommendation? Start with a high-quality pre-made kit as your base and then use this checklist to supercharge it, swapping out generic items and adding the crucial medications and tools it’s missing. This hybrid approach gives you the best of both worlds.
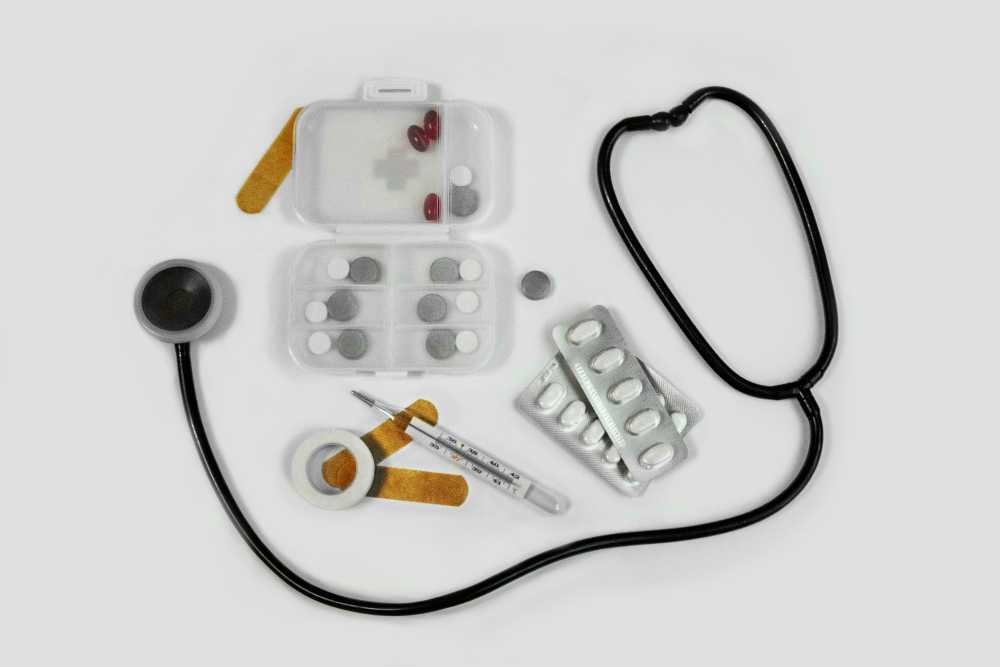
The Core Components of Your Ultimate Travel First Aid Kit
A truly effective travel first aid kit is organized like a mobile clinic, with specific supplies to treat the most common categories of travel-related ailments. Here is the definitive breakdown of what you need.
Wound & Burn Care: For Life's Little Scrapes
From a papercut to a scraped knee on a cobblestone street, any break in the skin is an open invitation for infection, especially in new environments. Here’s how you shut that door, fast.
Antiseptic Wipes (BZK or alcohol-based): For cleaning wounds, scrapes, and your hands before providing treatment. Individual packets are perfect for travel.
Antibiotic Ointment (e.g., bacitracin): A crucial step to prevent infection in minor cuts, scrapes, and burns after cleaning.
Assorted Adhesive Bandages: Pack a variety of sizes. Fabric bandages are generally more durable and flexible than plastic ones.
Butterfly Bandages / Wound-Closure Strips: Essential for taping the edges of a minor cut together to help it heal cleanly.
Sterile Gauze Pads and a Roll of Gauze: For dressing larger wounds or as a compress to control bleeding. Pack a few different sizes.
Medical Adhesive Tape: To secure gauze and bandages in place.
Moleskin or Blister Treatment Pads: An absolute lifesaver for any trip involving significant walking or hiking. Apply it as soon as you feel a "hot spot" to prevent a blister from forming.
Aloe Vera Gel: Provides soothing relief for minor sunburns.
Pain, Fever & Sprains: Managing Aches and Injuries
Long days of sightseeing, sleeping in unfamiliar beds, and carrying luggage can lead to aches and pains. Be prepared to manage them effectively so they don't slow you down.
Pain Relievers/Fever Reducers: Pack both an ibuprofen-based and an acetaminophen-based option. Pharmacists consistently recommend trusted brands like Advil/Motrin (Ibuprofen) for inflammation and pain, and Tylenol (Acetaminophen) for general pain and fever.
Aspirin: While not for general pain relief for everyone, a dose of aspirin can be life-saving for an adult experiencing symptoms of a heart attack.
Elastic Wrap Bandage: Invaluable for providing support and compression to a sprained ankle, wrist, or knee.
Instant Cold Packs: These single-use packs are activated by squeezing them and are excellent for reducing swelling from sprains, strains, and other minor injuries in the first 24-48 hours.
Pro-Tip: Decant pills into small, clearly labeled travel containers to save space, but take a photo of the original packaging first. This helps you remember dosages and provides information for pharmacists or doctors abroad if needed.

Digestive Issues: Your Defense Against Traveler's Diarrhea
Let’s be direct: traveler’s diarrhea is the single most common illness to strike travelers, affecting up to 80% of visitors in some destinations. Having a dedicated section in your kit to manage digestive distress is absolutely critical.
Anti-diarrhea Medication: To manage symptoms when you need to travel or get through a planned activity. The top pharmacist-recommended brand is Imodium (Loperamide).
Antacids: For relief from indigestion, heartburn, and general upset stomach. Pepto-Bismol is another pharmacist-favorite that can also help with mild diarrhea.
Oral Rehydration Salts: This is arguably the most important item in this section. Dehydration is the primary risk of diarrhea and vomiting. These pre-measured packets mix with safe, bottled water to replenish the essential fluids and electrolytes your body has lost.
Anti-nausea or Motion Sickness Medication: Essential if you’re prone to motion sickness on planes, boats, or winding bus rides.
Allergies, Bites & Skin: Soothing Irritations
New environments mean new pollens, unfamiliar insects, and different plants. Be ready to tackle itches, rashes, and allergic reactions before they become a major annoyance.
Antihistamine (e.g., diphenhydramine): For treating allergic reactions, hives, and severe itching. Note that some antihistamines can cause drowsiness.
Hydrocortisone Cream (1%): A topical steroid cream that provides fast relief from the irritation and itching of rashes and insect bites.
Insect Repellent: In any region with mosquito-borne illnesses like Dengue or Malaria, this is as important as your passport. Choose a repellent with an effective active ingredient like DEET or Picaridin.
Epinephrine Auto-Injector (e.g., EpiPen): This requires a prescription and is absolutely essential for travelers with a history of severe allergic reactions (anaphylaxis).
Ready to Pack Like a Pro?
Your travel first aid kit is a critical piece of your travel puzzle, but it's not the only one. To ensure you don't overlook a single essential item—from documents and finances to clothing and gear—you need a master list. Our comprehensive, free checklist has you covered.
Download Your Free International Travel Checklist Now!
Essential Tools & Personal Medications
The final layer of your kit includes the tools to use your supplies effectively and your own personal health necessities.
Fine-Point Tweezers: For removing splinters, ticks, or other foreign objects from the skin.
Small, Rounded-Tip Scissors: For cutting medical tape, gauze, or moleskin. (Ensure they meet TSA guidelines if packing in a carry-on).
Disposable Non-Latex Gloves: To protect your hands and prevent infection when treating a wound on yourself or someone else.
Digital Thermometer: For accurately checking for fever.
Personal Medications: This is the most critical category. Pack a sufficient supply for your entire trip, plus at least a few extra days' worth in case of delays. Always keep your personal medications in your carry-on luggage in their original, labeled containers.
Pro-Tip: Before you leave, ask your doctor for a letter describing your condition and the medications you take, including their generic names. Keep a digital copy of this and your prescriptions on your phone. This can be invaluable if your medication is lost or you need to see a doctor abroad.

Beyond the Basics: Customizing Your Kit
The ultimate travel first aid kit is not one-size-fits-all. Once you have the core components, elevate your preparedness by customizing it for your specific journey.
By Destination:
Tropical/Developing Countries: Add anti-fungal cream, more insect repellent, and potentially a prescription for a standby antibiotic for severe traveler's diarrhea (consult your doctor).
High-Altitude Destinations: Speak with your doctor about medication to prevent altitude sickness.
By Activity:
Hiking/Trekking: Double down on blister care (moleskin, gel pads), pack an elastic wrap for sprains, and add pain-relieving gel.
Beach Vacation: Add extra aloe vera gel, sting-relief spray, and waterproof bandages.
By Traveler:
With Children: Include children’s formulations and dosages of pain/fever reducers, kid-friendly bandages, and any specific allergy medications they need.
Travel First Aid Kit FAQs
A great kit anticipates problems. Here are answers to common questions that take your preparedness to the next level.
1. What’s the first thing I should do if I get traveler’s diarrhea?
According to the CDC and travel medicine doctors, the first and most important step is oral rehydration. Dehydration is the biggest risk. Start sipping an Oral Rehydration Solution (ORS), sports drinks, or clear broths immediately. For mild to moderate cases that don't have a high fever or blood, an antimotility drug like Loperamide (Imodium) can help manage the symptoms. If symptoms are severe, incapacitating, or include a high fever or blood, it's time to consider a prescribed standby antibiotic and seek medical advice.
2. Should I pack a standby antibiotic in my kit?
This is a question for your doctor or a travel medicine clinic. For travelers heading to high-risk destinations where severe traveler's diarrhea is common, many doctors will provide a prescription for a standby antibiotic like Azithromycin. It’s not for mild cases but can significantly shorten the duration of a severe bout of illness. Discuss your itinerary with your doctor to see if this is right for you.
3. Is it okay to pack medications outside their original bottles to save space?
While it's tempting, it's safest to keep prescription medications in their original, clearly labeled containers. This avoids any confusion or legal issues with customs officials. For over-the-counter pills, you have more flexibility. If you use a travel pill organizer, consider taking a photo of the original packaging so you have the dosage information and ingredients handy.

Pack Confidence for Every Journey
A carefully assembled travel first aid kit does more than just prepare you for minor medical issues; it provides profound peace of mind. It transforms you from a worried passenger into a self-sufficient, empowered traveler, ready to handle the small bumps in the road so you can stay focused on the incredible experiences ahead. By following this checklist, you’re not just packing supplies—you’re packing the confidence to explore the world freely and fully.
Now that your health and safety are covered, you can focus on the other details that make a trip unforgettable. For a complete, deep-dive into every facet of trip planning, from health and safety to budgeting and logistics, our comprehensive Travel Guide is the only resource you'll ever need.
Meta Data Suggestions:
SEO Meta Title (55 characters): The Ultimate Travel First Aid Kit Checklist (2026)
URL Slug: travel-first-aid-kit-checklist
SEO Meta Description (154 characters): Build the perfect travel first aid kit. Our 2026 checklist, with pharmacist-approved tips, covers everything from wound care to stomach issues. Be prepared.
Don't Miss Out! Subscribe for Exclusive Content
SubscribeComments 0
No comments yet
Be the first to share your experience!
Dont Miss Out! Subscribe for Exclusive Content
Ultimate USA Holidays Guide: Top Picks
FTC Affiliate Disclosure Essentials: Stay Compliant as a Travel Creator
Essential Affiliate Tools: From Tracking to Full Optimization
Booking.com Affiliate Program Review: Pros, Cons, and Earnings Potential
Decoding Affiliate Commission Rates: Benchmarks for Travel Creators

Amazon Associates for Travel: Strategies to Maximize Commissions
Jazz Fest: Ultimate Lineup Planner
TrekGuider @trekguider
The New Orleans Jazz & Heritage Festival is a titan of American culture, a sprawling, soulful celebration that transforms the Fair Grounds Race Course into the center of the musical universe. But with that iconic status comes an overwhelming challenge: with a dozen stages, hundreds of artists, and a menu of Louisiana’s finest cuisine that could take a lifetime to explore, how do you possibly see and taste it all? You’ve spent months dreaming of this, only to be handed a schedule so dense it feels impossible to crack.
Imagine the sinking feeling of hearing the distant roar of the crowd for a legend’s set while you’re stuck on the opposite side of the infield. You spend your day battling a sea of people, crisscrossing the grounds under a hot sun, only to miss the first three songs of a band you were dying to see. The fear of missing out becomes a tangible stress, turning a dream trip into a frantic race against the clock. Without a rock-solid strategy, you risk experiencing only a fraction of what this incredible event offers, leaving with a nagging regret over the missed bands and uneaten crawfish bread.
Forget the festival FOMO. This is your playbook for conquering the controlled chaos of the Fair Grounds, turning a dizzying schedule into a masterclass of music, food, and soul. We will break down everything you need to build a flawless plan, navigate the grounds like a local, and balance the world-class music with the equally legendary food. This is the ultimate lineup planner for Jazz Fest New Orleans, designed to ensure your time is spent soaking in the magic, not getting stuck in the mud.

Before You Go: Pre-Festival Prep for the Savvy Planner
A masterful Jazz Fest experience begins long before you step through the gates. The sheer scale of the event, which roars to life from April 24 to early May, demands a thoughtful approach. Smart preparation is the secret that separates the overwhelmed amateur from the festival pro who glides effortlessly from stage to stage. This is your foundational work, where you turn the festival’s massive schedule from an intimidating document into a personalized roadmap. As one of the crown jewels we celebrate in our definitive guide to New Orleans Holidays: Cultural Feasts, Jazz Fest is a cultural pilgrimage that richly rewards those who arrive with a plan.
Decoding the "Cubes": Your First Step to Lineup Mastery
In the lexicon of Jazz Fest veterans, the daily performance schedules are simply "the cubes." This grid-style layout is your bible, detailing who is playing where and when. Your first mission is to become fluent in its language.
Download the Official App: Weeks before the festival, the official New Orleans Jazz & Heritage Festival app becomes the most important app on your phone. Download it the moment it’s released. This digital tool contains the full "cubes," an interactive map, vendor lists, and, most critically, the ability to build your own personalized schedule.
Study the Grounds: Before you start picking artists, spend time with the festival map. Get a feel for the locations of the major stages—like the Festival Stage and the Gentilly Stage where headliners hold court—and the more intimate tents, such as the legendary Gospel Tent, the Blues Tent, and the Jazz Tent. Understanding the physical distance between stages is the key to realistic planning.
Star Your Favorites: Go through the lineup day by day and start "starring" or "favoriting" every single act that piques your interest. Don't hold back; this is your master list of possibilities. This year’s lineup already boasts a staggering collection of headliners like Pearl Jam, Dave Matthews Band, Luke Combs, and Lil Wayne & The Roots, so your list of must-sees will fill up fast.
Assembling Your Tiers: From "Must-See" to "Happy Accident"
With your initial list of favorited artists, it's time to get strategic. Set times will inevitably clash. The key is to prioritize ruthlessly.
Tier 1: The Non-Negotiables: Identify the 3-4 artists each day that you absolutely, positively cannot miss. These are your anchors, the pillars around which the rest of your day will be built.
Tier 2: The High-Interest Acts: These are the performers you’d be thrilled to see. If their set times and locations work conveniently around your Tier 1 picks, you’ll make every effort to be there.
Tier 3: The Serendipity List: This is your list for discovery. It’s filled with intriguing local brass bands, up-and-coming songwriters, or genres you’re curious about. These are the acts you’ll check out when you have a gap in your schedule. The true magic of Jazz Fest often lies in stumbling upon an incredible performance you never planned to see.

Essential Gear for a Full Day at the Fair Grounds
The festival is a marathon, not a sprint. It runs from 11 AM to 7 PM daily and proceeds "rain or shine," so you need to be prepared for anything a Louisiana spring day can throw at you.
Sun Protection: A wide-brimmed hat, sweatproof sunscreen, and sunglasses are non-negotiable. Shade is a precious and rare commodity.
Footwear: You will walk miles on uneven terrain that can turn to mud in an instant. Comfortable, broken-in, waterproof boots are your best bet.
Rain Gear: A lightweight poncho is a must. A classic New Orleans downpour can appear out of nowhere, and a simple poncho can save your day.
Hydration: Bring an empty reusable water bottle. Free water stations are located throughout the grounds, and staying hydrated is critical.
A Small Blanket or Chair: A small, foldable festival chair or a compact blanket gives you a home base at a stage and a chance to get off your feet. Always check the official festival website for the latest rules on chair sizes.
Navigating the Stages: A Pro's Guide to the Jazz Fest New Orleans Landscape
Once you’re on the grounds, a new challenge emerges: moving efficiently through a temporary city of music lovers. The space is vast, the crowds are thick, and every minute spent fighting a human traffic jam is a minute of music lost. Mastering the art of movement is what separates the pros from the rookies.

The Art of Stage Hopping: The Perimeter Strategy
The single most effective technique for navigating between stages is to avoid the center. The natural instinct is to cut directly through the middle of the crowd, but this is almost always the slowest and most frustrating path.
Instead, adopt the perimeter strategy. When you need to move, walk to the outer edge of the crowd and use the less-congested pathways along the racetrack, food vendor areas, and craft marketplaces. It may look like a longer route on the map, but you will move significantly faster. This method is your secret weapon for making it from the Gospel Tent to the Gentilly Stage in record time.
Understanding the Vibe of Each Major Stage Area
While the lineup is diverse everywhere, different stages at Jazz Fest New Orleans cultivate their own unique atmospheres. Knowing these vibes helps you plan not just your schedule, but your energy.
The Main Stages (Festival Stage & Gentilly Stage): These are the epicenters for the big-name headliners. Expect massive crowds, high energy, and a classic large-scale concert feel. If you want to be close, you need to camp out hours in advance.
The Tents (Gospel, Blues, Jazz): The tents offer a more intimate and often more intense musical experience. The Gospel Tent is legendary for its powerful, soul-stirring performances. The Blues and Jazz tents are where you’ll find virtuoso musicians in a focused, respectful listening environment. They also provide crucial shade.
The Cultural Stages (Fais Do-Do, Jazz & Heritage): These stages are the heart of the festival's "heritage" mission, showcasing the rich sounds of Louisiana, from Cajun and Zydeco to Mardi Gras Indians. The vibe here is pure, joyful, and deeply authentic.
Pro-Tip: Use the official festival app to set alerts for your must-see artists 15 minutes before their set time. This gives you a travel-time buffer to move from one stage to another using the perimeter strategy without feeling rushed.
More Than Music: Planning Your Culinary and Cultural Itinerary
To treat Jazz Fest as only a music festival is to miss half the point. It is, without exaggeration, one of the greatest food festivals on the planet. Furthermore, the craft areas showcase the incredible artistry of the region. A truly ultimate lineup plan integrates these cultural pillars into your day.

The "Food Fest" Within the Jazz Fest: Don't Miss These Bites
The food booths at Jazz Fest are a headline attraction. Planning your meals is just as important as planning your music.
Eat at Off-Peak Times: The food lines are longest between noon and 2 PM. Plan to eat an early lunch right when the gates open or a later one after 3 PM to minimize your wait.
Divide and Conquer: If you’re with a group, send one person for drinks while others wait in different food lines for Crawfish Monica, Mango Freeze, or Alligator Sausage. Reconvene and share your haul to sample more of the legends.
The vibrant colors of the food, the elaborate costumes, and the soulful expressions of the musicians are all begging to be photographed. To make your festival shots pop, download our Free Travel Lightroom Presets. They are expertly designed to enhance the unique light and color palette of a New Orleans celebration.
Exploring the Heritage Crafts: A Mid-Day Music Break
Jazz Fest features three distinct craft marketplaces: Congo Square African Marketplace, Contemporary Crafts, and the Louisiana Marketplace. When the sun is at its peak or you have a gap between sets, take a leisurely stroll through these areas. It’s a perfect way to rest your ears, cool down, and find a unique, handmade souvenir that truly represents the soul of the festival.
Advanced Strategies for the Ultimate Jazz Fest New Orleans Experience
You’ve prepped, you’ve planned, and you know how to navigate. Now it’s time for the pro-level strategies that will elevate your experience from great to unforgettable.
The "Rain or Shine" Reality: How to Prepare for Louisiana Weather
The festival’s "rain or shine" policy is serious. While stages may temporarily close for lightning, the event continues.
Protect Your Gear: Bring a waterproof bag or Ziploc bags for your phone and wallet. A wet phone can quickly ruin a day.
Embrace the Mud: If it rains, the Fair Grounds will become muddy. This is where your choice of waterproof footwear pays off. Lean into it.
Post-Rain Strategy: After a storm, the covered tents will be packed. This is a great time to head to an outdoor stage, as many people will be slow to leave the shelter, giving you a chance to get a better spot.

The Zero-Waste Warrior: Participating in Festival Sustainability
Jazz Fest is a massive event, and you can play a role in reducing its environmental impact. Look for the festival’s oyster shell recycling program, a fantastic initiative that helps rebuild coastal reefs. Use the designated recycling and compost bins, and always opt for refilling your water bottle over buying single-use plastic.
Pro-Tip: The last set of the day creates a massive exit rush. Consider leaving 15-20 minutes before the final song of the headliner you're watching to beat the crowds heading for the shuttles. That small head start can save you an hour of waiting in line.
Planning a trip to Jazz Fest is often the centerpiece of a larger New Orleans adventure. To make the most of your entire visit, from the French Quarter to the Garden District, our comprehensive Travel Guide provides expert-led itineraries and local secrets to help you build the perfect trip.

Your Blueprint for Jazz Fest Success
You are now armed with a complete strategic blueprint to not just attend the New Orleans Jazz & Heritage Festival, but to truly conquer it. By decoding the cubes, prioritizing your artist list, and mastering the perimeter strategy, you’ve eliminated the guesswork. By integrating the world-class food and crafts into your plan, you’ve ensured a rich experience that captures the true spirit of this cultural institution. You are ready to move with purpose, eat with gusto, and immerse yourself in the unparalleled soundscape of the incredible Jazz Fest New Orleans.
Meta Data Suggestions:
SEO Meta Title: Jazz Fest New Orleans: The Ultimate Lineup & Stage Planner
URL Slug: /jazz-fest-new-orleans-lineup-planner
SEO Meta Description: Conquer Jazz Fest 2026 with our ultimate planner. Get pro tips on navigating stages, scheduling artists like Pearl Jam, and finding the best food.
Don't Miss Out! Subscribe for Exclusive Content
SubscribeComments 0
No comments yet
Be the first to share your experience!
Dont Miss Out! Subscribe for Exclusive Content

San Francisco Cherry Blossoms: A Local's Guide to the Blooms

Halloween SF: Haunts Without Horrors

SF Festivals: 7 Must-See Lineups

Christmas SF: Lights & Wharf Wonders

SF Pride: 6 Route & Party Hacks
