Essential Affiliate Tools: From Tracking to Full Optimization
TrekGuider @trekguider
You’re a creator, not an administrator. Yet, you find yourself drowning in a sea of administrative tasks. You’re manually copying and pasting ugly, mile-long affiliate links, toggling between a dozen different program dashboards to check your stats, and spending more time wrestling with spreadsheets than you do creating the travel content you love. Your affiliate "business" feels less like a streamlined operation and more like a chaotic, time-sucking hobby that isn't paying the bills.
This inefficiency is more than just frustrating—it's a silent killer of your income. Every hour you spend on manual, repetitive tasks is an hour you’re not creating the next piece of content that could generate revenue for years to come. You're flying blind, guessing which strategies are working, unable to see which links are converting, and which pages are actually profitable. The reported average income of $13,847 a month for travel affiliates feels like a distant fantasy when you’re stuck in this administrative quicksand.

This guide is your way out. It is your curated, creator-friendly tech stack—a definitive list of the essential affiliate marketing tools that will automate the tedious, provide crystal-clear data, and free you up to focus on growth. We’ll cover the entire workflow, from foundational link management and tracking to the advanced tools needed for full-scale optimization. This is how you transform your passion project into a professional, efficient, and profitable business. For a complete command of the entire affiliate landscape, our definitive pillar page, Travel Affiliate Programs: The 2026 Ultimate Guide, is your essential command center for mastering the entire ecosystem.
The Foundational Layer: Your Operational Command Center
Before you can optimize, you must organize. This first set of tools forms the non-negotiable foundation of any serious affiliate marketing business. They are your central nervous system for managing links, ensuring compliance, and tracking performance from a single source of truth.
Link Management Plugins (The Digital Quartermaster)
If you run your travel blog on WordPress, a link management plugin is the single most important tool you will install. These plugins take the long, ugly, and intimidating affiliate links provided by programs and "cloak" them into short, clean, branded URLs that are far more trustworthy to your audience.
Think of it as your command center. Instead of embarking on a digital scavenger hunt through year-old posts to update a single expired link, you change it once in a central dashboard, and the plugin deploys that change site-wide instantly. This functionality alone will save you hundreds of hours over the life of your business. Furthermore, a link like yourblog.com/recommends/osprey-backpack is infinitely more professional and trustworthy to a reader than a long URL filled with random tracking parameters, directly impacting your click-through rates.

Top Tools in This Category:
Recommended: Travel Creator Toolkit: 34 Essential Apps and Resources
Recommended: Digital Product Ideas: How to Make Money From Your Next Trip
ThirstyAffiliates: A powerhouse plugin built specifically for affiliate marketers. It offers advanced features like autolinking (automatically turning specific keywords into affiliate links), proactive link checking to find broken links, and detailed click analytics.
Pretty Links: A slightly simpler but highly effective alternative. It excels at link cloaking, redirection, and providing basic click-tracking reports right from your WordPress dashboard.
Pro-Tip: The best link management plugins, like ThirstyAffiliates, can automatically add the required rel="sponsored" tag to all of your affiliate links. This is a critical feature that ensures you stay compliant with Google's guidelines for paid links, protecting your site from potential SEO penalties without you having to think about it.
Affiliate Tracking Tools (Your Source of Truth)
"What gets measured gets managed." To grow your affiliate income, you need a crystal-clear understanding of what’s working. While many creators start by manually checking each affiliate network’s dashboard, a dedicated approach to tracking provides a more holistic, actionable view.
For most creators, your affiliate tracking tools will be a combination of your link management plugin’s analytics and the dashboards provided by your affiliate networks (like CJ Affiliate or Travelpayouts). These platforms show you crucial metrics like clicks, conversions, and commission earnings.
However, as your business matures, you'll want to track performance across different income models. For example, the TrekGuider Seller Platform includes a dedicated referral dashboard. This is a specialized tracking tool that shows you not just one-time sales, but the ongoing, passive income you’re earning from the new sellers you’ve brought to the platform. It’s a perfect example of how a modern platform provides the built-in affiliate tracking tools you need to monitor more sophisticated, high-margin income streams like revenue sharing.
The Growth Engine: Traffic & SEO Tools
With your operational house in order, the focus must pivot from organization to acquisition. A perfectly managed link is useless without a steady stream of the right people clicking on it. This is where your growth engine comes in—the tools designed to attract your ideal audience with precision.
SEO & Keyword Research Platforms
The most profitable affiliate content is created with intention. It targets keywords that signal a user is actively researching a purchase (e.g., "best carry-on luggage review"). SEO platforms are your treasure map for finding these "money" keywords and building a content strategy that attracts buyers, not just browsers.

These platforms are indispensable for:
Finding Profitable Keywords: Uncover what your audience is searching for, how many people are searching for it, and how difficult it will be to rank on Google.
Analyze the Competition: See exactly which keywords your competitors are ranking for and which pages are bringing them the most traffic.
Track Your Performance: Monitor your rankings for your target keywords over time to see what’s working and where you need to improve.
Top Tools in This Category:
Ahrefs: A comprehensive, professional-grade SEO toolkit. Its "Keywords Explorer" is second to none for finding high-value commercial investigation keywords, and its "Site Explorer" provides deep insights into any competitor's strategy.
SEMrush: Another all-in-one industry leader that offers a powerful suite of tools for keyword research, rank tracking, and competitive analysis.
Pro-Tip: Don't confine your keyword strategy to your blog. With video projected to account for a staggering 55% of all affiliate traffic by 2026, the same commercial-intent keywords you find for your articles are the exact titles you should be using for your YouTube videos and TikToks.
Analytics Platforms
While SEO tools help you get traffic, a web analytics platform tells you what that traffic does once it arrives. It’s essential for understanding your audience, diagnosing problems, and optimizing their journey from reader to buyer.
The Must-Have Tool:
Google Analytics: The free, industry-standard tool for website analytics. It's an incredibly powerful platform that provides all the data you need to understand user behavior, track conversions, and identify your top traffic sources, allowing you to double down on what works.
The Conversion Toolkit: Optimization & Social Media Tools
Attracting traffic is only half the battle. The final, crucial step is converting that traffic into clicks and commissions. This set of tools is designed to streamline your workflow and optimize your content for maximum impact.
"Link in Bio" Tools (For Social Dominance)
Platforms like Instagram and TikTok are powerful for audience building, but they famously limit your ability to use clickable links. A "link in bio" tool solves this by creating a simple, mobile-friendly landing page that can house all of your most important affiliate links, blog posts, and offers.

Top Tools in This Category:
Linktree: The most well-known tool in this space, offering a simple and effective way to create a micro-landing page for your social media bio.
Later: While primarily a social media scheduling tool, Later’s "Link in Bio" feature is excellent, allowing you to create a clickable grid of your Instagram posts, driving traffic directly to relevant blog posts and affiliate offers.
The Amazon Workflow Accelerator
For nearly every travel creator, Amazon Associates is a core part of their affiliate strategy. However, creating links for individual products can be a slow, manual process.
The Must-Have Tool:
Amazon SiteStripe: This is a free, official toolbar from Amazon that appears at the top of your browser whenever you’re on Amazon.com. It allows you to generate a custom affiliate link (text, image, or both) for any product page with a single click, dramatically speeding up your content creation workflow.
Your Strategy Blueprint: The Travel Creator's Toolkit
Feeling overwhelmed by the options? A powerful tech stack is only as good as the strategy behind it. To help you organize your entire affiliate marketing plan—from keyword research to content creation and promotion—we've created the ultimate resource bundle. It’s packed with the checklists, templates, and guides you need to build a professional and profitable system.
Download Your Free Bundle: The Travel Creator's Toolkit Today!
Frequently Asked Questions (FAQ)
1. Do I really need all these tools when I'm just starting out? When you're starting, focus on the foundation. A WordPress site with a link management plugin (like Pretty Links) and Google Analytics is your essential starting stack. This is a low-cost setup that allows you to organize your links and track your traffic from day one. You can invest in a premium SEO tool like Ahrefs once your site is generating enough revenue to justify the cost.
2. Are there any good free affiliate marketing tools? Absolutely. Google Analytics is free and non-negotiable. Amazon SiteStripe is also free. For keyword research, you can start with free tools like Google Keyword Planner or the free versions of various SEO tools, though they are more limited. The free versions of "link in bio" tools like Linktree are also perfectly sufficient for most creators.
3. How do these tools help with tracking beyond just clicks? Advanced tracking involves connecting data points. For instance, by using UTM parameters (which you can add manually or with some plugins), you can see in Google Analytics not just that someone came from your blog, but that they came from the specific button in your review of the Osprey backpack. This level of detail is what allows you to A/B test different calls-to-action and truly optimize your pages for conversion.
Conclusion: From Hobbyist to CEO
The difference between a creator earning a few dollars a month and one earning a full-time income often comes down to their systems. Top earners don't waste time on manual, low-value tasks. They leverage technology to work smarter, not harder. They treat their content not as a hobby, but as a business.

You now have a curated list of the best affiliate marketing tools to build your own professional tech stack. Start with the foundation: a link management plugin to organize and track your links. Then, layer in SEO and analytics tools to build a predictable stream of traffic. Finally, use optimization and workflow tools to convert that traffic with maximum efficiency.
These affiliate tracking tools and optimization platforms are not an expense; they are an investment in your own efficiency, professionalism, and profitability. By implementing this toolkit, you take a definitive step away from being a hobbyist and become the CEO of your own thriving travel content business.
Meta Data Suggestions:
SEO Meta Title (58 characters): 9 Essential Affiliate Marketing Tools for Travel Creators
URL Slug: essential-affiliate-marketing-tools
SEO Meta Description (154 characters): Discover the top affiliate marketing tools for travel creators. From link tracking to SEO, this guide covers the essential tech stack to automate and grow your income.
Read the full guide: The Travel Blogger's Playbook to Affiliate Marketing Mastery
Don't Miss Out! Subscribe for Exclusive Content
Subscribe


Comments 0
No comments yet
Be the first to share your experience!
Dont Miss Out! Subscribe for Exclusive Content

Ultimate USA Holidays Guide: Top Picks

FTC Affiliate Disclosure: Stay Compliant as a Travel Creator

Avoid These 5 Affiliate Landing Page Mistakes for Better Conversions

Affiliate Keyword Research Mastery for Travel Blogs

Booking.com Affiliate Review: Pros, Cons & Earnings

Decoding Affiliate Commission Rates: Benchmarks for Travel Creators
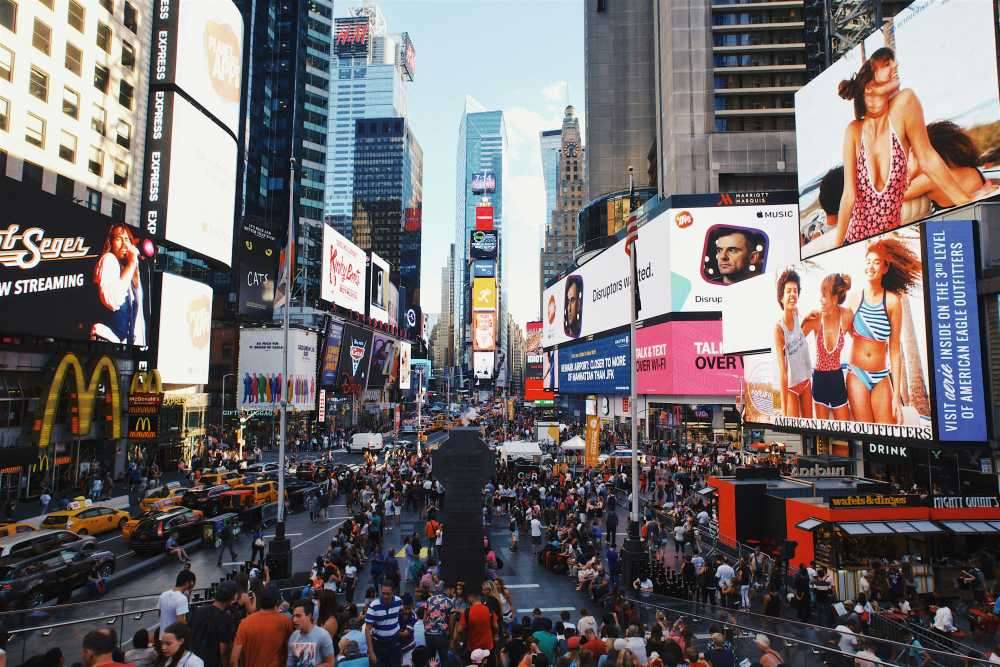
NYE Times Square: How to Survive Crowds
TrekGuider @trekguider
The image is seared into our collective consciousness: a million smiling faces turned upward, a cascade of confetti, and the glittering descent of the Waterford Crystal ball marking the start of a new year. Experiencing New York's Eve Times Square is a bucket-list dream for travelers worldwide. But behind that minute of pure magic lies a grueling, 12-hour urban endurance test. The reality is a battle against massive crowds, freezing temperatures, and a complete lack of basic amenities. Without a solid strategy, your once-in-a-lifetime dream can quickly devolve into a miserable, claustrophobic nightmare, leaving you with nothing but cold feet and regret.
You’ve seen the celebration on TV, but you haven’t seen the real story: the hours spent standing in a single spot, the desperate need for a bathroom that doesn’t exist, and the crushing disappointment of arriving too late only to have your view blocked by a skyscraper. This isn’t just a party; it’s a logistical gauntlet. But what if you could walk into that chaos armed with the knowledge of a seasoned local? What if you knew exactly when to arrive, what to bring, and how to navigate the human labyrinth to secure a prime spot?
Consider this your definitive survival guide. We’re cutting through the noise to give you the actionable, step-by-step playbook required to not just survive the chaos, but to conquer it and forge an unforgettable memory. This single event is the crown jewel of the city's festive calendar, a spectacle we put into context in our complete guide to New York Holidays: 10 Must-Do Events. Now, let's master the art of the ball drop.

The Gauntlet Defined: What to Really Expect on New Year's Eve Times Square
Before you even think about your outfit, you need a crystal-clear understanding of the environment you’re about to enter. The Times Square ball drop is one of the most heavily secured and controlled public events on the planet. Forget a casual, free-flowing party; this is a highly structured affair managed by the New York City Police Department (NYPD).
The entire area, from 42nd Street to 47th Street between Broadway and 7th Avenue, is sectioned off into a series of viewing pens. Think of them as metal-barricaded corrals. Once the NYPD deems a pen full, they close it for good. You cannot move between pens, and crucially, if you leave your pen for any reason—food, bathroom, a moment of fresh air—you will not be allowed back in. There is no re-entry.
Here’s a breakdown of the harsh realities:
The Timeline is Brutal: Streets in and around Times Square begin closing in the early afternoon. To get a decent viewing spot, the official recommendation is to arrive by 3:00 PM. That means you’ll be standing in your designated spot for at least nine hours until the ball drops at midnight.
Zero Public Bathrooms: This is the single most challenging aspect for most attendees. There are absolutely no public restrooms or portable toilets available within the viewing areas. Once you are in a pen, you have no options. This requires careful planning regarding your food and drink intake.
Security is Absolute: You will pass through a security screening to enter the viewing areas. Security is absolute, a high-tech fortress of surveillance that includes everything from drones overhead to NYPD scuba divers in the nearby waters. All bags will be checked, and there is a long list of prohibited items.
The Weather is Unforgiving: Late December in New York City is predictably cold. Temperatures often dip below freezing, and wind chill can make it feel even colder as it funnels between the skyscrapers. You will be exposed to the elements for the entire duration.
Knowing these truths isn't meant to discourage you, but to prepare you. Success on New Year's Eve Times Square is 90% preparation and 10% endurance.
The Strategic Arrival: Your Step-by-Step Game Plan
Your experience will be made or broken in the first few hours. A well-executed arrival strategy is the difference between a prime view of the ball drop and being stuck blocks away staring at the back of a building.
When to Arrive: The 3 PM Deadline is Non-Negotiable
The official guidance confirms what veterans know: arriving by 3:00 PM is essential. For the upcoming celebration on Wednesday, December 31, 2026, you should treat this as your final deadline. The pens closest to One Times Square (where the ball descends) fill up the fastest. The NYPD systematically fills the area, starting from the south at 42nd Street and moving north. If you arrive at 5:00 PM or 6:00 PM, you will likely end up miles away, with your only view of the event coming from a distant Jumbotron. Arriving early doesn't just get you a better view; it guarantees you get a view at all.
Where to Enter: Navigating the Frozen Zones
As streets close, navigating Midtown Manhattan becomes a confusing maze. Driving is impossible. Your only viable option is public transportation.
Take the Subway: The New York City subway system is your best friend. However, the Times Sq-42nd St station will be chaos, with many exits likely closed or designated for egress only.
Aim for Peripheral Stations: Instead of heading directly to Times Square, get off at a station a few blocks away and walk. Good options include:
Rockefeller Center (B, D, F, M lines): Walk south and west.
49th Street (N, Q, R, W lines): This is close, so be prepared for crowds.
50th Street (C, E lines): Walk east.
Follow NYPD Instructions: As you approach the secured zone, you will see barricades and police officers. They will direct you to official entry points, which are typically located on 6th Avenue and 8th Avenue. Be polite, listen to their instructions, and be prepared for a slow, shuffling walk to the screening areas.
The Art of the "Pen": Securing Your Viewing Spot
Once you’re through security, you’ll be herded into one of the viewing pens. You won't have much choice in the matter, as officers fill them sequentially. However, the goal is to get into a pen with a direct line of sight to the One Times Square building. This is where the ball is. A spot further north on Broadway or 7th Avenue is generally better than being shunted off to a side street. Once you’re in, stake out a small piece of territory with your group and prepare to settle in for the long haul.

The Ultimate Survival Kit: What to Pack (and What to Leave Behind)
Packing for this event is like preparing for a winter camping trip in the middle of a city. You need to be strategic, minimalist, and focused on warmth and sustenance.
Essential Gear for the Urban Tundra
Everything you bring must be carried on your person. Think pockets, not bags.
Extreme Winter Wear: This is not the time for fashion. Dress in warm, waterproof layers.
Base Layer: Thermal, moisture-wicking underwear (top and bottom).
Mid Layer: Fleece or a down vest.
Outer Layer: A heavy, insulated, and waterproof winter coat.
Accessories: A warm hat that covers your ears, a scarf or neck gaiter, insulated gloves, and thick wool socks are all non-negotiable.
Hand and Foot Warmers: These small, air-activated heat packs are a game-changer. Bring several pairs and activate a new set every few hours to keep your extremities from freezing.
Food and Water: Pack high-energy, easy-to-eat snacks like protein bars, nuts, and chocolate. Bring your own water in a plastic bottle. Avoid caffeine and other diuretics for obvious reasons.
Portable Phone Charger: Your phone battery will drain quickly in the cold. A fully charged power bank is essential for communication and capturing the midnight moment.
Simple Entertainment: A book, a deck of cards, or downloaded podcasts can help pass the time.
Pro-Tip: Pack a few large, empty plastic water bottles with secure caps. While it’s not glamorous, they can serve as a last-resort emergency "bathroom" for men and a more challenging but still possible option for women, a well-known but unspoken hack for veterans of the event.
The Forbidden List: Items That Will Get You Turned Away
The NYPD is extremely strict about what is allowed into the viewing areas. Bringing any of these items will result in them being confiscated, or you being denied entry.
Backpacks, Large Purses, or Any Large Bags: This is the most common mistake. You will be turned away. Use your pockets.
Alcohol: Absolutely forbidden.
Umbrellas: They block the view for others and are considered a security risk. Wear a waterproof coat with a hood instead.
Strollers: While not always explicitly banned, navigating the dense crowds with a stroller is practically impossible and unsafe.
Coolers, Chairs, or Blankets: There is simply no room for these items.
Mastering the Marathon: How to Endure the 9-Hour Wait
The wait is a mental and physical challenge. Success lies in conserving energy, staying warm, and keeping your spirits up.
Fueling Your Body: The Right Way to Eat and Drink
Your strategy for consumption should be carefully managed. Eat a large, hearty meal before you leave for Times Square. A meal rich in protein and complex carbs will provide sustained energy. Once you are in your pen, ration your snacks. The goal is to keep your energy levels stable without over-consuming liquids. Sip your water slowly and methodically throughout the evening. This isn't the time to chug a whole bottle.
Staying Sane: Entertainment and Mental Fortitude
The nine-hour wait can be tedious. Keeping morale high, especially in a group, is a skill unto itself. It requires patience and planning—the same principles that make any challenging journey a success. For a deeper dive into managing group dynamics and keeping everyone happy during long waits, our Stress-Free Flying with Kids Guide offers timeless strategies that work just as well on the ground in Times Square as they do at 30,000 feet.
Here’s how to manage the wait:
Befriend Your Neighbors: You’ll be standing shoulder-to-shoulder with the same people for hours. Strike up a conversation! Sharing stories with people from around the world is one of the most unique parts of the experience.
Enjoy the Show: The Times Square Alliance puts on a live show starting around 6:00 PM. There are musical performances, celebrity appearances, and hourly countdowns that help break up the monotony.
Stay Active (in Place): Do small exercises to keep your blood flowing. Wiggle your toes, shift your weight from foot to foot, and do small leg stretches. This will help prevent stiffness and keep you warmer.

The Grand Finale and The Great Escape
After hours of waiting, the final moments are a whirlwind of excitement. But your strategic planning doesn’t end when the ball drops.
The Ball Drop: Savoring the Moment
At 11:59 PM, the 12,000-pound geodesic sphere begins its 60-second descent. The energy of the crowd is electric. This is the moment you’ve been waiting for. Put your phone away for a few seconds and be fully present. Absorb the sounds, the sights, and the feeling of shared celebration with a million other people. The confetti drop, the cheering, the fireworks—it’s a truly magical experience that justifies the entire ordeal.

Post-Midnight Exodus: Navigating the Human River
Once the celebration peaks, the next challenge begins: the exit. A million people will be trying to leave a very small area at the exact same time.
Do Not Rush: The biggest mistake is trying to push your way out immediately. The initial surge is dangerous and stressful. Be patient. Wait 15-20 minutes in your spot for the thickest crowds to begin to disperse.
Have a Predetermined Exit Route: Before you even arrive, decide which direction you will walk. Do not just follow the herd. Plan to walk at least 10-15 blocks away from Times Square before even attempting to find a subway or hail a rideshare.
Avoid the Main Subway Hubs: The Times Sq-42nd St station will be dangerously overcrowded. Walk further to a less central station to begin your journey home.
Pro-Tip: Pre-book a table at a restaurant or bar a 15-20 minute walk away from Times Square for 12:45 AM. This gives you a warm place to decompress, use a real bathroom, and have a proper celebratory drink while the worst of the crowds clear out.
Your Unforgettable New Year's Eve Awaits
Attending the New Year's Eve Times Square ball drop is not for the faint of heart. It is an intense, demanding, and often uncomfortable experience. But by following this guide, you are no longer just a hopeful tourist; you are a prepared strategist. You have the expert-level knowledge to navigate the chaos, endure the wait, and place yourself in the perfect position to witness one of the world's most iconic celebrations. The cold, the crowds, and the long hours will fade into the background, replaced by the unforgettable memory of counting down to a new year in the heart of the world.
You've conquered the ultimate urban challenge. To discover what other incredible adventures await you in the city and beyond, our comprehensive Travel Guide is the only resource you'll need. It’s your all-access pass to mastering travel like a pro.
Meta Data Suggestions:
SEO Meta Title: NYE Times Square Survival Guide: Beat The Crowds & See The Ball
URL Slug: /nye-times-square-crowds-survival-guide
SEO Meta Description: A complete guide to surviving New Year's Eve in Times Square. Learn when to arrive, what to pack, and how to get the best view of the ball drop.
Don't Miss Out! Subscribe for Exclusive Content
SubscribeComments 0
No comments yet
Be the first to share your experience!
Dont Miss Out! Subscribe for Exclusive Content

San Francisco Cherry Blossoms: A Local's Guide to the Blooms

Halloween SF: Haunts Without Horrors

SF Festivals: 7 Must-See Lineups

Christmas SF: Lights & Wharf Wonders

SF Pride: 6 Route & Party Hacks

Chinese New Year SF: Parade Essentials
Best Solo Destinations in the USA (For Your Travel Style)
TrekGuider @trekguider
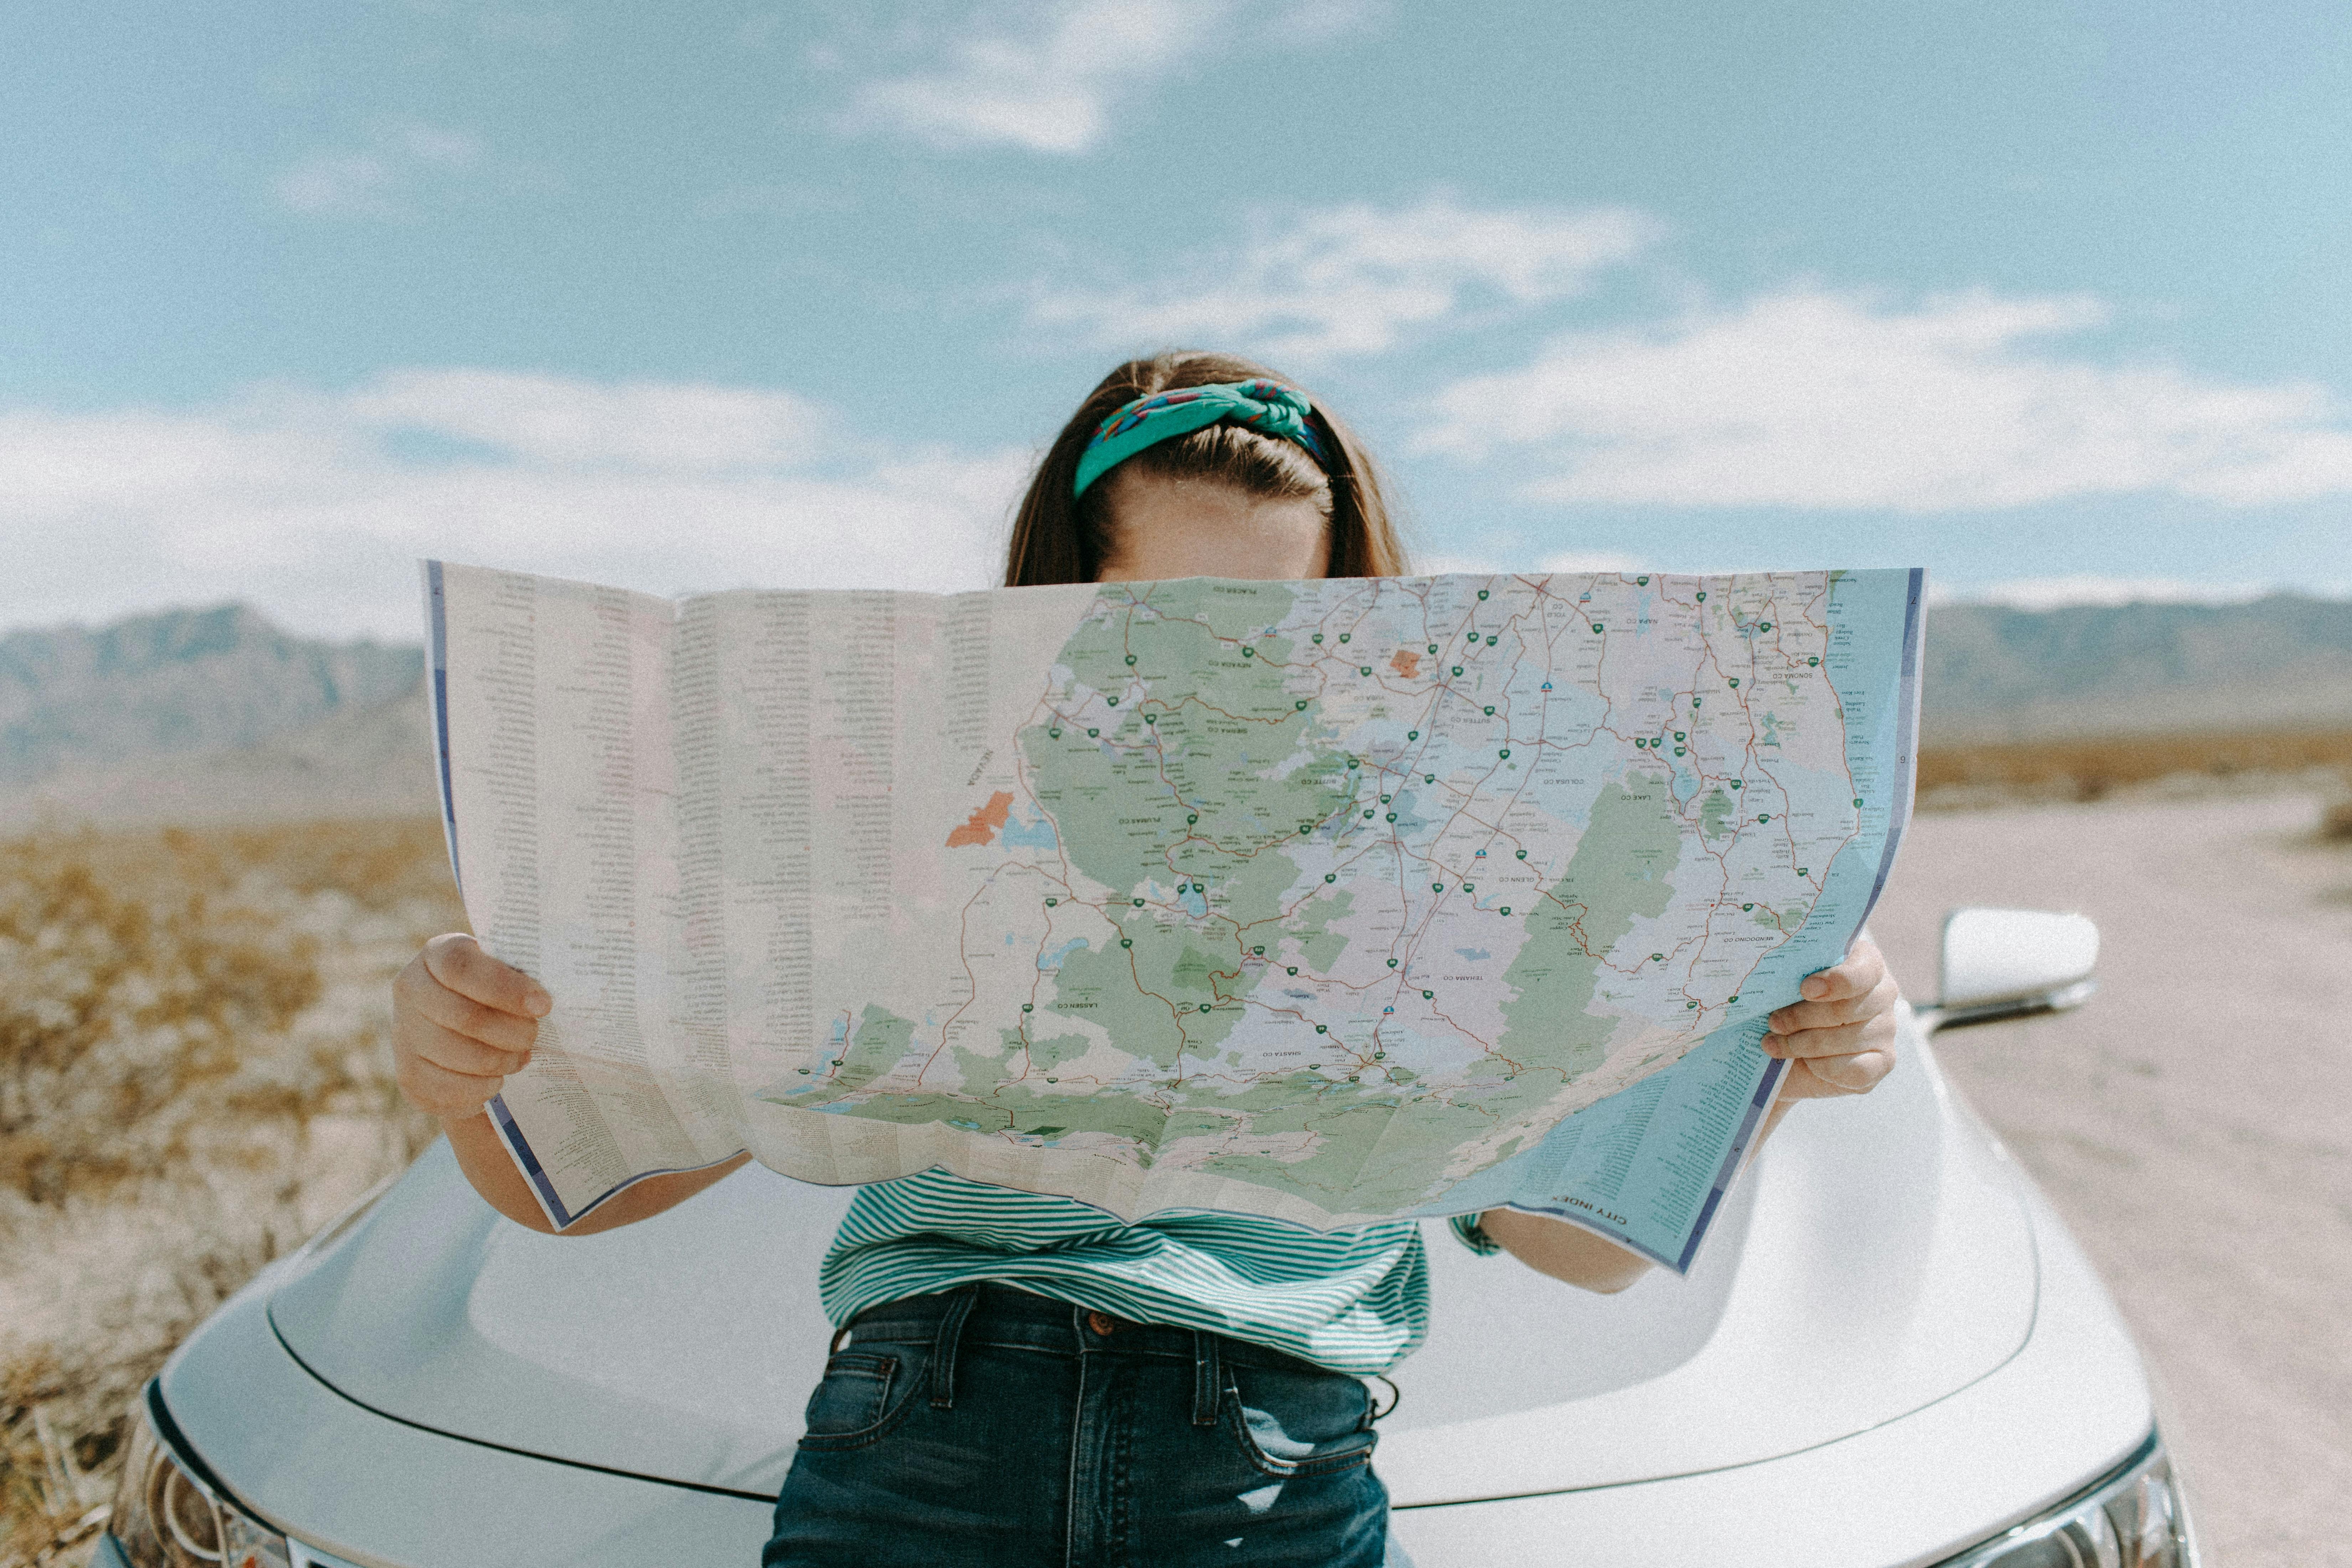
Planning a solo travel USA adventure can feel both exhilarating and incredibly daunting. Staring at a map with a thousand pins, you're drowning in options, caught between endless, subjective lists that lump sprawling cities with remote national parks. The result? Total analysis paralysis. You're not just looking for a place to go; you're searching for the right place for you—a destination that feels safe, is easy to navigate, and truly matches your unique travel style.
This is where we do things differently. Forget one-size-fits-all lists. This guide is your compass, built around a single, powerful idea: your unique travel personality. We’ve organized the country’s best solo destinations into five distinct "Traveler Archetypes." By identifying which one resonates with you, you'll unlock a curated list of places where you're not just guaranteed a great trip, but an adventure that feels like it was designed just for you.
Before you dive in, remember that being prepared is what makes a trip successful. For a complete breakdown of budgeting, packing, and safety protocols, review our ultimate guide to essential solo travel tips.
For the bigger picture on planning your first independent journey, explore

What's Your Solo Traveler Archetype?
Every solo traveler is motivated by a different calling. Some crave the electric pulse of a city, while others seek the quiet wisdom of the wild. By matching a place to your personality, you can stop guessing and start planning an incredible journey. Which of these sounds most like you? 🗺️
The Urban Explorer: You come alive amidst the energy of a great city. Museums, history, architecture, and the endless possibility of discovery are your fuel.
The Outdoor Adventurer: You feel most at home in the great outdoors. Fresh air, epic hikes, and breathtaking natural vistas are what you seek.
The Foodie: You travel with your taste buds. Your itinerary is built around iconic dishes, bustling food markets, and the quest for the perfect meal.
The History Buff: You walk through the present while exploring the past. You're drawn to places that tell the rich, complex story of America.
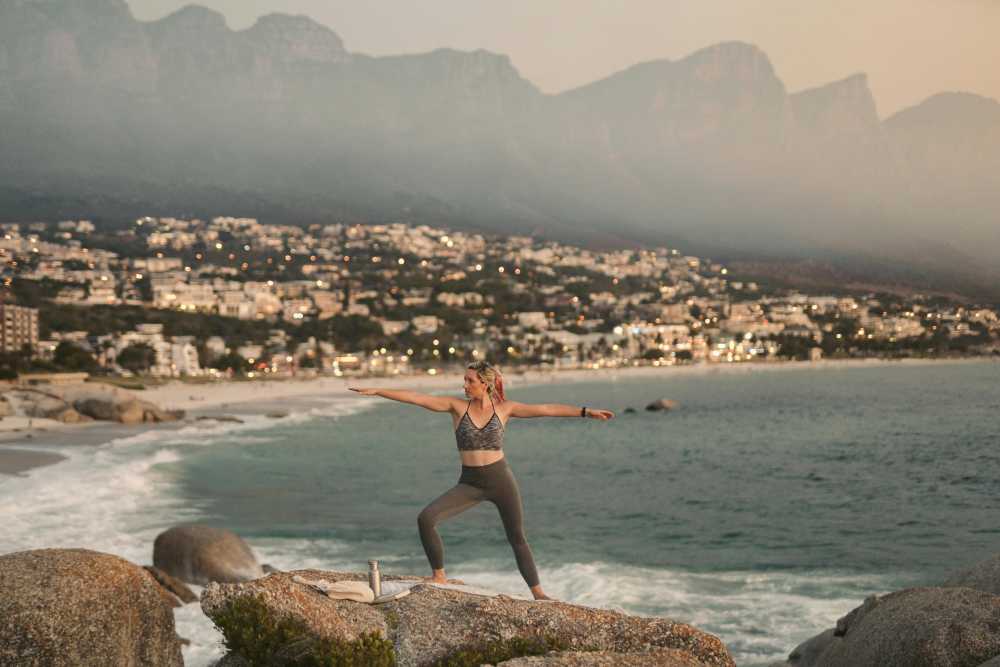
The Wellness Seeker: You travel to recharge and reconnect. Tranquility, mindfulness, and serene environments are your ultimate destination.
For the Urban Explorer: Cities That Never Sleep
For those who thrive on culture, art, and the vibrant energy of a metropolis, these cities offer endless solo exploration with world-class public transport and walkability. They are logistical dreamscapes where you can effortlessly blend into the rhythm of the city.

New York City, New York: The Iconic Metropolis
Recommended: The Solo Female Travel Safety Guide
Recommended: How to Pack Light: The Carry-On Guide
Let's be clear: New York City isn't just arguably the ultimate solo travel destination; it is. This is a city built for individuals on a mission, where being alone is a way of life and dining solo is an art form. The sheer energy of millions of people forging their own paths means you'll never feel out of place, and with an unparalleled public transit system, you have five boroughs of distinct culture, food, and history at your fingertips.
Top Things to Do Alone:
Conquer Museum Mile: Get lost for hours in The Metropolitan Museum of Art, marvel at modern masterpieces at MoMA, or explore the Guggenheim's iconic spiral.
Find Your Spot in Central Park: Rent a bike, wander through the Ramble, find a quiet bench by the Lake, or simply people-watch on the Great Lawn.
Walk Across the Brooklyn Bridge: Go at sunrise for unforgettable, crowd-free skyline views that will stay with you forever.
Catch a Broadway Show: The TKTS booth in Times Square offers same-day discount tickets, making it easy to snag a single seat for a world-class performance.
Solo Pro-Tip: Nearly every great restaurant has bar seating. Sit at the counter at a legendary spot like Joe's Pizza in Greenwich Village for a classic slice without the fuss. Don't be afraid to embrace the cliché of just sitting on a bench in Central Park; watching the city's incredible cross-section of humanity walk by is a grounding and memorable experience.
Chicago, Illinois: The Architectural Hub
Chicago offers the big-city buzz of NYC but with a friendlier, more approachable Midwestern vibe. It's a clean, stunningly beautiful city with a world-class arts scene, incredible food, and an efficient 'L' train system that connects all major neighborhoods. For the solo explorer, its walkable downtown and magnificent architecture are a dream come true.
Top Things to Do Alone:
Take an Architecture River Cruise: The Chicago Architecture Foundation Center's tour is legendary and unquestionably the best way to see the city.
Explore Millennium Park: See your reflection in the iconic "Bean" (Cloud Gate) sculpture and enjoy the free public art.
Visit the Art Institute of Chicago: Spend an afternoon with masters like Grant Wood, Monet, and Seurat.
Solo Pro-Tip: Everyone tells you to get deep-dish pizza, but the real solo dining hack is finding a classic Chicago hot dog stand. It's quick, delicious, and a truly local experience. Grab a "dog dragged through the garden" at Portillo's and eat it by the river.
San Francisco, California: The Quirky Coastal Gem
With its iconic hills, historic cable cars, and fiercely independent spirit, San Francisco is a fantastic city to explore alone. Every neighborhood, from the Mission District to Haight-Ashbury, has its own distinct personality waiting to be discovered.
At a Glance:
Solo Safety Index: Moderate. Stick to well-trafficked areas, especially at night, and be aware of petty theft.
Budget Snapshot (Per Day): Budget: $90 | Mid-Range: $220 | Luxury: $450+
Navigability Score: 4/5. A combination of BART, Muni buses, and cable cars make it easy to get around. Be prepared for steep hills!
Best Time to Visit: Fall (September-October) for the city's sunniest weather.
Top Things to Do Alone:
Tour Alcatraz: Book your tickets well in advance—it's a fascinating and chilling experience.
Walk or Bike the Golden Gate Bridge: A true bucket-list moment with unparalleled views.
Explore the Ferry Building Marketplace: A vibrant food hall perfect for sampling local cheeses, coffee, and oysters.
Solo Pro-Tip: Riding the cable car isn't just for tourists. Hang on to the outside rail for the full, wind-in-your-hair experience. It's a genuinely fun way to get a feel for the city's unique topography and is worth the wait.
Portland, Oregon: The Hub of Indie Culture
Famous for its motto "Keep Portland Weird," this city is a haven for independent spirits. It's perfect for the solo traveler who loves unique shops, incredible coffee, a thriving food truck scene, and easy access to nature.
At a Glance:
Solo Safety Index: Good. Downtown and popular neighborhoods are safe, but be aware of your surroundings.
Budget Snapshot (Per Day): Budget: $60 | Mid-Range: $150 | Luxury: $300+
Navigability Score: 4/5. Portland has an excellent public transit system (MAX Light Rail and buses) and is famously bike-friendly.
Best Time to Visit: Summer (July-August) for warm, dry weather.
Top Things to Do Alone:
Get Lost in Powell's City of Books: The world's largest independent bookstore is a universe unto itself.
Explore the International Rose Test Garden: Enjoy stunning city views and thousands of fragrant blooms.
Eat Your Way Through a Food Cart Pod: A culinary adventure awaits with dozens of options in one place.
Solo Pro-Tip: The food cart pods are a solo traveler's dream. You can sample multiple cuisines without the formality of a sit-down restaurant. Grab a Thai dish and a craft soda and just people-watch; it’s the heart of the city's social scene.
For the Outdoor Adventurer: Epic Natural Escapes
If your idea of a perfect trip involves hiking boots and national parks, these destinations offer some of the best adventure-focused solo travel USA experiences imaginable. 🏞️
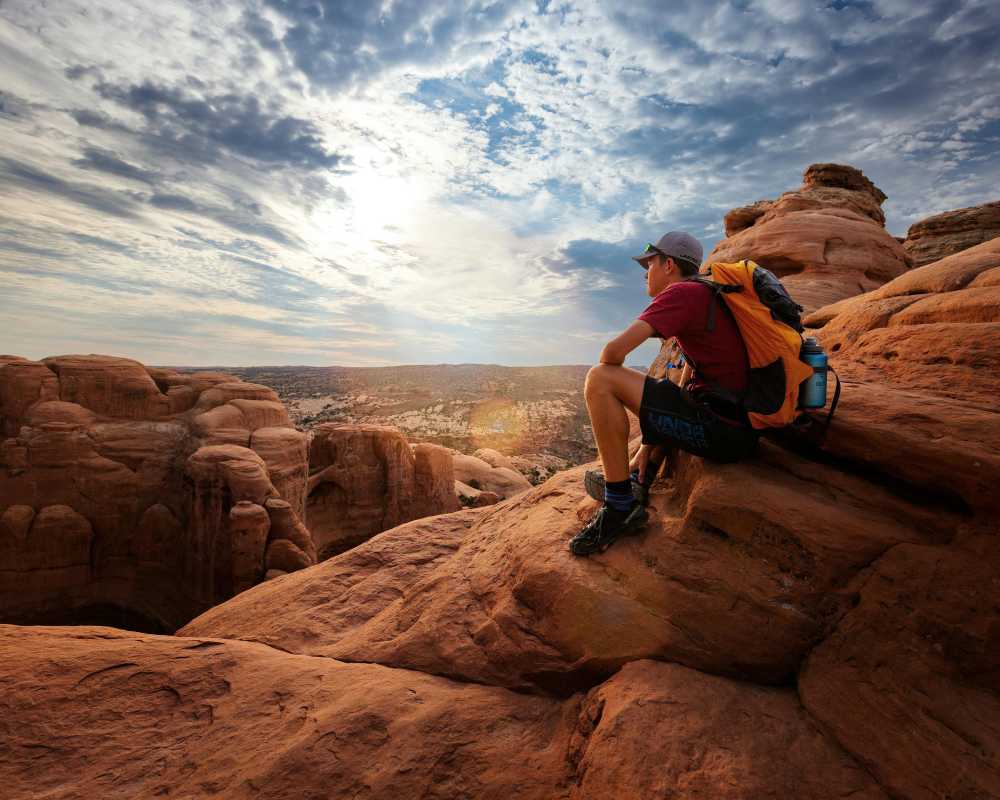
Moab, Utah: Gateway to Arches & Canyonlands
Moab is the undisputed adventure capital of the Southwest. It provides direct access to two national parks—Arches and Canyonlands—offering a lifetime's worth of hiking, photography, and stargazing for the solo nature lover.
At a Glance:
Solo Safety Index: High. The main safety concerns are standard wilderness precautions (carry plenty of water, inform someone of your hiking plans).
Budget Snapshot (Per Day): Budget: $60 | Mid-Range: $160 | Luxury: $320+
Navigability Score: 2/5. A car is essential to access the parks and trailheads.
Best Time to Visit: Spring (April-May) and Fall (September-October) for ideal hiking temperatures.
Top Things to Do Alone:
Hike to Delicate Arch at Sunrise: Seeing the morning light hit the iconic arch in Arches National Park is a spiritual experience.
Visit Canyonlands National Park: Drive the scenic Island in the Sky district for jaw-dropping, expansive views.
Join a Group Rafting Tour: See the towering red cliffs from a new perspective on the Colorado River.
Solo Pro-Tip: The sheer silence at Dead Horse Point State Park at sunset is unforgettable. Find a spot away from the main overlook, sit down, and just listen. It’s a profoundly peaceful experience.
Sedona, Arizona: Red Rocks and Spiritual Retreats
Sedona's stunning red rock landscapes are believed by many to be centers of spiritual energy, or vortexes. This makes it a popular and welcoming destination for solo travelers on a journey of reflection, hiking, and natural immersion.
At a Glance:
Solo Safety Index: High. Sedona is an extremely safe and tranquil community.
Budget Snapshot (Per Day): Budget: $70 | Mid-Range: $180 | Luxury: $400+
Navigability Score: 2/5. You'll need a car to get the most out of the area and access various trailheads.
Best Time to Visit: Spring (March-May) and Fall (September-November).
Top Things to Do Alone:
Hike a Vortex Site: Cathedral Rock and Bell Rock are the most famous, offering powerful energy and incredible views.
Drive the Red Rock Scenic Byway (SR 179): This short drive offers breathtaking views at every turn.
Explore Tlaquepaque Arts & Shopping Village: A beautiful, mission-style village filled with art galleries and craft shops.
Solo Pro-Tip: Even if you're not into the spiritual side of things, the hike up to the Airport Mesa overlook is incredible for 360-degree sunset views. The way the light hits the red rocks is pure magic.
Other Great Outdoor Destinations:
The Oregon Coast: A 363-mile solo road trip dream of dramatic cliffs, charming towns, and public beaches. A car is mandatory.
Jackson Hole, Wyoming: A welcoming basecamp for exploring the awe-inspiring jagged peaks of Grand Teton National Park.
Boulder, Colorado: An outdoor lover's paradise nestled at the base of the Rockies, with hundreds of miles of trails accessible right from town.
For the Foodie: 4 Cities to Feast In
If your travel memories are measured in meals, these cities offer culinary adventures that are perfect for the solo diner, with abundant counter seating and vibrant food markets. 🌮

New Orleans, Louisiana: Creole & Cajun Capital
NOLA is a city that stimulates all the senses, especially taste. Its unique food culture is a massive draw, and the abundance of bar seating at classic establishments makes solo dining a joy.
At a Glance:
Solo Safety Index: Moderate. The French Quarter is busy, but be very cautious at night, especially off Bourbon Street.
Budget Snapshot (Per Day): Budget: $60 | Mid-Range: $160 | Luxury: $320+
Navigability Score: 4/5. The French Quarter is extremely walkable, and the St. Charles Streetcar is a charming way to see other parts of the city.
Best Time to Visit: Spring (February-May) for pleasant weather and festivals.
Top Things to Do Alone:
Join a Food Tour of the French Quarter: Sample everything from gumbo to po'boys to pralines.
Enjoy Beignets and Café au Lait: A stop at the iconic Café Du Monde is non-negotiable.
Listen to Live Jazz on Frenchmen Street: Far more authentic than Bourbon Street, it's the soul of the city's music scene.
Solo Pro-Tip: Find a club on Frenchmen Street, grab a seat at the bar with a Sazerac cocktail, and let the incredible live jazz wash over you. It's an essential New Orleans experience.
Austin, Texas: BBQ, Tacos, and Food Trucks
Austin's laid-back, creative atmosphere is reflected in its casual and incredibly delicious food scene. It's a city where a solo traveler can happily subsist on world-class brisket, breakfast tacos, and inventive food truck fare.
At a Glance:
Solo Safety Index: Good. Austin is a safe city, particularly in the downtown and South Congress areas.
Budget Snapshot (Per Day): Budget: $55 | Mid-Range: $150 | Luxury: $300+
Navigability Score: 3/5. The downtown core is walkable, but the city is spread out. Ride-sharing services are your best bet.
Best Time to Visit: Spring (March-May) and Fall (September-November) to avoid the brutal summer heat.
Top Things to Do Alone:
Eat Texas Barbecue: Brave the line at Franklin Barbecue for a transcendent experience, or head to a spot like Terry Black's for phenomenal brisket without the wait.
Swim in Barton Springs Pool: A three-acre, natural spring-fed oasis perfect for cooling off.
Experience the Live Music Scene: Check out the bars along 6th Street or in the Red River Cultural District.
Solo Pro-Tip: The line at Franklin Barbecue is part of the experience, and you'll meet people from all over the world. To feel more comfortable and social at any restaurant, always opt for a seat at the bar or a chef's counter.
Other Great Foodie Destinations:
Portland, Maine: A charming, walkable coastal city with a sophisticated food scene and arguably the best lobster rolls in the country.
Los Angeles, California: A treasure hunt through an endless landscape of authentic taco trucks, world-class sushi bars, and historic food markets like Grand Central Market.
For the History Buff: Destinations That Tell America's Story
Step back in time in these cities, where the past is always present and every street corner has a story to tell. These walkable historic cores are perfect for the intellectually curious solo traveler. 🏛️
Washington, D.C.: The Nation's Capital
Our nation's capital is one of the best solo destinations in the USA for budget-conscious and intellectually curious travelers. The core of the city—the National Mall and its surrounding monuments and museums—is incredibly walkable. Best of all, every single one of the Smithsonian museums is completely free to enter, allowing you to craft a deeply personal journey through American history.
At a Glance:
Solo Safety Index: Good. The tourist areas around the National Mall are very safe.
Budget Snapshot (Per Day): Budget: $60 | Mid-Range: $170 | Luxury: $350+
Navigability Score: 5/5. The Metro system is clean and efficient, and the core is very walkable.
Best Time to Visit: Spring (March-April) for the iconic Cherry Blossom Festival.
Top Things to Do Alone:
Explore the Smithsonian Museums: You could spend weeks here. Pick a few that match your interests, from the National Air and Space Museum to the National Portrait Gallery.
Walk the National Mall at Night: The monuments—from the Lincoln Memorial to the Washington Monument—are beautifully illuminated and far less crowded, creating a powerful and reflective experience.
Wander Through Georgetown: Explore the historic cobblestone streets, browse the chic boutiques, and walk along the scenic C&O Canal.
Solo Pro-Tip: The sheer scale of the Lincoln Memorial is so much more powerful in person than in photos. Go at night when the crowds are thinner. It's a very moving and contemplative experience to stand there alone with your thoughts.
Boston, Massachusetts: The Historic Walker's Paradise
Boston is a city that wears its history on its sleeve. Its compact, European-style downtown is a walker's paradise, made for tracing the footsteps of the American Revolution at your own pace. The 2.5-mile Freedom Trail is a red-bricked line that guides you past 16 of the nation's most important historic sites.
Top Things to Do Alone:
Walk the Freedom Trail: It's the perfect self-guided tour. Take your time, read the plaques, and immerse yourself in the story of the nation's birth.
Explore the North End: Get lost in the narrow streets of Boston's oldest residential neighborhood. The lively atmosphere and incredible Italian food are a must.
Visit the Isabella Stewart Gardner Museum: A truly unique museum housed in a Venetian-style palace. The stunning courtyard garden is an oasis of calm.
Solo Pro-Tip: In the North End, skip the restaurants with long lines and duck into one of the smaller, more authentic bakeries like Bova's or Modern Pastry for a cannoli. Enjoy it while wandering the beautiful, narrow streets.
Other Great History Destinations:
Philadelphia, Pennsylvania: The birthplace of a nation, where you can stand in the very rooms where the Declaration of Independence and Constitution were signed.
Savannah, Georgia: Walk through 22 park-like squares draped in Spanish moss to soak in the Antebellum South's beauty and complex history.
St. Augustine, Florida: Explore the nation's oldest continuously inhabited European-established settlement, with its 17th-century stone fort and narrow colonial lanes.
For the Wellness Seeker: 3 Retreats for Mind & Body
If your goal is to disconnect, recharge, and find tranquility, these destinations offer serene landscapes, a peaceful atmosphere, and a focus on well-being. 🧘

Santa Fe, New Mexico: Arts, Culture, and Serenity
With its unique Pueblo-style architecture, high-desert landscape, and thriving arts scene, Santa Fe has long been a magnet for those seeking spiritual and artistic renewal. It has a calming energy that's perfect for a solo retreat.
At a Glance:
Solo Safety Index: High. Santa Fe is a very safe and relaxed city.
Budget Snapshot (Per Day): Budget: $70 | Mid-Range: $190 | Luxury: $400+
Navigability Score: 3/5. The historic Plaza is walkable, but a car is needed to explore further afield.
Best Time to Visit: Fall (September-October) for the smell of roasting green chiles and golden aspen leaves.
Top Things to Do Alone:
Explore the Art Galleries on Canyon Road: A half-mile stretch of over 100 galleries, boutiques, and restaurants.
Visit the Georgia O'Keeffe Museum: Immerse yourself in the work of the master of American modernism.
Experience Meow Wolf's House of Eternal Return: A unique, immersive art adventure that defies description.
Solo Pro-Tip: The drive up to Ten Thousand Waves, a Japanese-style spa nestled in the mountains, is part of the experience. Book a private tub for an hour. Soaking in the hot water surrounded by piñon pines as the sun sets is pure bliss.
Big Sur, California: Coastal Contemplation
There are few places on Earth more soul-stirring than Big Sur. This rugged stretch of California coast is a place of profound, wild beauty that forces you to slow down, breathe, and simply be present. Cell service is very limited, making it the perfect place to truly disconnect.
At a Glance:
Solo Safety Index: High. The primary safety concerns are related to driving the winding Highway 1.
Budget Snapshot (Per Day): Budget: $80 | Mid-Range: $250 | Luxury: $600+
Navigability Score: 1/5. A car is absolutely essential.
Best Time to Visit: Spring (April-May) for wildflowers or Fall (September-October) for the clearest weather.
Top Things to Do Alone:
Photograph the Bixby Bridge: Pull over at one of the many turnouts to capture this iconic feat of engineering.
Hike in Pfeiffer Big Sur State Park: Wander among towering coastal redwoods.
Watch the Sunset from Nepenthe: This cliffside restaurant offers legendary views over the Pacific.
Solo Pro-Tip: Pack a lunch and go to Pfeiffer Beach to see the keyhole arch. The road down is easy to miss, so look carefully. It feels like a secret spot and is the perfect place to sit and just watch the powerful waves crash.
Asheville, North Carolina: Blue Ridge Mountain Calm
Tucked into the beautiful Blue Ridge Mountains, Asheville offers a perfect blend of vibrant city life and tranquil nature. It's a progressive, friendly city known for its arts scene, craft breweries, and focus on wellness.
At a Glance:
Solo Safety Index: High. Asheville is a very safe and welcoming community.
Budget Snapshot (Per Day): Budget: $65 | Mid-Range: $170 | Luxury: $350+
Navigability Score: 3/5. Downtown is walkable, but you'll need a car to access the Blue Ridge Parkway.
Best Time to Visit: Fall (October) when the mountain foliage is at its peak.
Top Things to Do Alone:
Drive a Portion of the Blue Ridge Parkway: One of America's most scenic drives, with countless overlooks and hiking trails.
Tour the Biltmore Estate: Explore America's largest home, a magnificent Gilded Age mansion.
Explore Downtown Asheville: Check out the funky shops, art galleries, and excellent restaurants.
Solo Pro-Tip: The drum circle in Pritchard Park on Friday nights is a must-see. It's an amazing, free-spirited display of Asheville's bohemian soul. Grab a local craft beer and watch the community come alive.
Your Solo Travel USA Questions, Answered
Is it safe to travel alone in the USA?
Yes, absolutely—with the right preparation. Safety varies greatly by location, so research is key. In cities, situational awareness matters most: stick to well-lit, populated areas at night and be mindful of your belongings. In national parks, the risks are different: always inform someone of your hiking plans, carry extra water, and be "bear aware."
What is the safest state for a solo female traveler?
While states in New England like Vermont, New Hampshire, and Maine consistently rank as having the lowest crime rates, a safe trip is less about a "safe state" and more about practicing awareness in a specific city or town.
How can I save money traveling solo?
Travel during the "shoulder seasons" (spring and fall) to dramatically reduce flight and accommodation costs. Prioritize destinations with great public transit to save on rental cars, take advantage of free museum days, and balance restaurant meals with grabbing food from local grocery stores or food markets.
Is it strange to eat out alone in America?
Not at all! It's increasingly common, and you shouldn't let it stop you from trying great places. To feel more comfortable, opt for a seat at the bar or a chef's counter. It's more casual, and you might strike up a conversation. Bringing a book also makes the experience more enjoyable.
How can I meet people while traveling solo?
Staying in hostels is a guaranteed way to meet people. Joining a group city tour, a cooking class, or a local Meetup event are also fantastic options. Don't underestimate the power of simply sitting at the bar in a friendly brewery; it’s an open invitation for conversation.
What are the best solo road trips in the USA?
For stunning scenery and plenty of safe stops, the Pacific Coast Highway in California is iconic for a reason. Other fantastic options include the Blue Ridge Parkway through Virginia and North Carolina, and the scenic loop through Utah's "Mighty 5" National Parks.
The United States offers an incredible spectrum of experiences for those bold enough to explore it on their own. By matching your travel style to the right destination, you move beyond a generic vacation and create a journey that truly resonates. The confidence you're looking for isn't found in an article; it's waiting for you on a bustling city street, a quiet mountain trail, or at a lively food truck. The only thing left to do is pick one and go.
Read the full guide: Anxious to Adventurous: The Ultimate Guide to Solo Travel Confidence
Don't Miss Out! Subscribe for Exclusive Content
SubscribeComments 0
No comments yet
Be the first to share your experience!
Dont Miss Out! Subscribe for Exclusive Content
San Francisco Cherry Blossoms: A Local's Guide to the Blooms
Halloween SF: Haunts Without Horrors
SF Festivals: 7 Must-See Lineups
Christmas SF: Lights & Wharf Wonders
SF Pride: 6 Route & Party Hacks
Chinese New Year SF: Parade Essentials
How to Create a Digital Travel Guide People Will Buy
TrekGuider @trekguider
You’re a travel expert. Your notes are filled with hidden gems, your camera roll is a treasure trove of untold stories, and your advice could save fellow travelers hundreds of dollars and hours of stress. You know your expertise has value, but packaging it into a real, scalable income stream feels like a monumental task. Relying on the slow trickle of ad revenue or the unpredictability of affiliate sales is a frustrating grind, keeping your dream of a truly independent business just out of reach.
This uncertainty keeps you on the content treadmill, trading your valuable time for pennies. You see other creators launching their own products and achieving a level of financial freedom that feels like a distant fantasy. The path forward is a confusing fog of questions about design, content, pricing, and technology, leaving you stuck in analysis paralysis while the immense opportunity of the creator economy—a market projected to nearly double from $250 billion to almost $500 billion by 2027—passes you by.
It’s time to stop trading hours for dollars and start building assets. This is your chronological, step-by-step playbook. We will demystify the entire process and show you exactly how to create a digital travel guide that people will not only buy but will also love and recommend. This is your complete workflow for transforming your hard-won expertise into a polished, professional product that generates passive income for years to come. Think of this as a critical chapter in your business plan; for the complete blueprint on building a modern creator enterprise, be sure to read our ultimate guide to How to Make Money Online: A Creator's Guide for 2026.

Why a Digital Guide is Your Ultimate Scalable Asset
Before diving into the "how," it's critical to understand the "why." Transitioning from promoting others' products to creating and selling your own is the single most powerful step you can take toward building a profitable, independent business. While ads and affiliate links have their place, digital products offer a level of control and scalability that other models simply can't match.
The advantages are transformative:
Infinite Scalability: Digital products operate on a "create once, sell forever" model. Whether you sell 10 copies or 10,000, your workload remains the same. There is no inventory to manage and no shipping to worry about.
Exceptionally High Profit Margins: With no manufacturing or distribution costs, the profit margins are extraordinary. Once you recoup your initial time investment, nearly every sale is pure profit.
Full Ownership and Control: When you sell your own guide, you own the entire process. You control the product, the pricing, the marketing, and the customer relationship. You are no longer dependent on an affiliate partner’s commission rates or an ad network's traffic requirements.
Solidifies Your Authority: Creating and selling a high-quality product instantly positions you as an expert. It builds deep trust with your audience, as you are no longer just recommending other people's stuff—you are standing behind your own valuable creation.
The market reflects this opportunity. The e-learning sector alone, a huge component of the digital product world, is projected to surge to an incredible $848 billion by 2030. This isn't a fleeting trend; it's a fundamental shift in how creators build resilient businesses.
The Blueprint – Research and Validation
The costliest mistake a creator can make is to spend months building a product nobody asked for. Thorough research and validation aren't optional; they are the foundation upon which a profitable product is built.
Identify Audience Needs and Define a Specific Niche
Your first job isn't to be a brilliant inventor; it's to be a sharp detective, uncovering the real, recurring problems your audience is desperate to solve.
Listen to Your Audience: The best ideas are hidden in plain sight. Dive into your blog comments, email replies, and social media DMs. What destinations are people constantly asking about? What part of the travel planning process do they find most challenging or stressful? Their recurring questions are your product ideas.
Define a Hyper-Specific Niche: Avoid creating a generic guide. A broad guide to "Mexico" will get lost in a sea of competition. A highly specific product like "A First-Timer's Foodie Guide to Mexico City's Roma Norte Neighborhood" is more valuable, easier to market, and instantly positions you as a niche expert.
Conduct Keyword and Market Research to Validate Demand
Once you have an idea, you must validate it with data.
Analyze Search Volume: Use an SEO tool to check the search volume for terms related to your guide idea. High search volume for long-tail keywords like "7-day Japan itinerary for foodies" or "what to do in Lisbon with kids" is a strong data signal that a ready market exists for a guide on that topic.
Conduct Competitor Analysis: Find 3-5 comparable digital travel guides in your niche. Your goal isn’t to copy them, but to identify a gap in the market. Analyze their price points, what they include, and, most importantly, read their reviews. What are customers praising? What are they complaining about? This will show you exactly how to create a superior product.
Pro-Tip: True validation comes from the intersection of qualitative and quantitative data. A great product idea is one that your audience is asking for (qualitative) and that a significant number of people are searching for online (quantitative).

The Core – Outlining and Content Creation
With a validated idea, it’s time to build the heart of your product: the content. This is where your unique expertise, voice, and experience shine.
Develop a Logical Structure
A good guide flows intuitively and is easy to navigate. Before you write a single word, create a detailed table of contents. This will be your roadmap and ensure you don't miss any crucial information. A typical structure includes:
Introduction: A brief overview of the destination, essential facts (currency, language), and why your guide is the ultimate resource.
Logistics: The practical nuts and bolts—getting there, getting around, visa requirements, and curated recommendations on where to stay for different budgets.
Experiences: The core of your guide. This includes top attractions, detailed daily itineraries, and deep dives into your niche (e.g., food and drink recommendations, hiking trails, photo spots).
Practicalities: The crucial final details like safety tips, packing lists, a budget breakdown, and useful local phrases.
Write Compelling and Useful Content
This is where you go beyond the generic advice found on a thousand other blogs.
Gather Your Assets: Compile all of your personal notes, journal entries, and high-quality photographs from your travels to the destination. Your first-hand experience and unique visuals are your primary competitive advantage.
Be Both Inspirational and Intensely Practical: Write in an engaging, personal tone. Share anecdotes and insider tips that bring the destination to life. Go beyond simply listing facts; tell your readers why a place is special. Share the hard-won wisdom that can't be found elsewhere, like "skip the line at the Colosseum by booking this specific tour" or "the best gelato is actually found two blocks away from the main square at this tiny shop."
With your raw content compiled, the next step is to give it a professional polish that signals its immense value.

The Polish – Professional Design for Non-Designers
Your guide's content may be brilliant, but in the digital world, packaging matters. A professional, user-friendly design signals quality and dramatically improves the customer experience.
Select a User-Friendly Design Tool
You don't need to be a graphic designer to create a stunning product. For a travel blogger whose primary goal is to efficiently create a static PDF travel guide, a template-based tool like Canva is the strategically superior choice. While powerful professional software like Figma or Adobe Illustrator has a steep learning curve that can delay your launch by weeks, Canva is built specifically for this type of project. Its intuitive, drag-and-drop interface is designed to help non-designers produce high-quality visuals quickly.
Feeling inspired to build your own assets but not sure where to begin? Creating high-value products is the core of a modern creator business. To accelerate your journey, we've bundled together some of our most powerful resources. The Travel Creator's Toolkit is a free collection of checklists, templates, and guides designed to help you streamline your workflow and build your business faster.
5 Essential Mobile-First Design Principles for a User-Friendly Guide
Your guide will almost certainly be used on a mobile phone while your customer is in-destination. Designing with a mobile-first user experience (UX) is not an option; it is essential for your product to be functional and valuable.
Prioritize Legibility and High Contrast: The content must be effortlessly readable on a small screen, often in bright sunlight. Use a clean, simple font of at least 11 points so users don't need to pinch-and-zoom. Crucially, ensure a high contrast ratio between the text and background—at least 4.5:1 as recommended by Web Content Accessibility Guidelines (WCAG)—to maintain readability.
Implement Simplified Navigation: The single most important navigation element is a hyperlinked Table of Contents at the beginning of the document. This allows users to jump directly to the section they need with a single tap, which is crucial when they're trying to find information quickly on a busy street.
Design for Touch with Finger-Friendly Targets: Any included hyperlinks (e.g., a link to a restaurant's website or a Google Maps location) must have a clickable area large enough to be easily tapped with a finger—the industry standard is a minimum touch target size of 44x44 points (approximately 7-10mm).
Minimize Cognitive Load by Eliminating Clutter: Mobile users are often distracted. Their interaction with a guide is typically in short bursts or "micro-tasks". To accommodate this, use short paragraphs, bulleted lists, bolded text for key information, and generous white space. A clean, uncluttered interface helps users find what they need with minimum effort.
Optimize for Performance and Portrait Orientation: The vast majority (94%) of mobile users hold their phones vertically. Your guide must be designed with a portrait layout (e.g., A4 or US Letter size). Crucially, keep the final PDF file size as small as possible by compressing all images before inserting them into your document. A large file will download slowly on a weak cellular connection, creating a poor user experience.

The Launchpad – How to Create a Digital Travel Guide for Sale
You've created a valuable, beautifully designed resource. The final phase is to package it, price it for profit, and get it into the hands of your customers.
How to Price Your First Digital Product
Pricing is one of the most challenging decisions. The most effective strategy for a knowledge-based product is value-based pricing. Instead of focusing on your production costs, price your product based on the transformation it provides to the customer. If your guide saves a user 20 hours of stressful research and helps them discover priceless experiences they would have otherwise missed, its value is immense.
A practical process for setting your price:
Step 1: Research the Market: Identify 3-5 comparable digital travel guides in your niche to establish a realistic market range.
Step 2: Articulate the Value: Make a specific list of the tangible outcomes your guide provides (e.g., "Saves over 15 hours of planning," "Includes a pre-planned 7-day itinerary worth over $100 in planning fees").
Step 3: Set an Initial Price and Test: For a high-quality, first-time travel guide, a price point between $19 and $49 is a strong starting position. It communicates significant value without creating sticker shock for the buyer.
Choose a Sales Platform That Works for You
You need a platform to handle the sale and secure digital delivery of your product. While you can use e-commerce plugins on your own blog, the smartest strategy is to leverage a platform that puts you in front of a built-in audience of motivated buyers.
Pro-Tip: Don't just build a product; build your business inside an ecosystem. A specialized marketplace like TrekGuider is the ideal place to sell your high-quality Travel Guide. It provides a professional, ready-made storefront and connects you with a global audience of passionate travelers who are actively searching for expert resources. You can publish articles to attract new customers directly on the platform, creating a powerful marketing funnel that leads right back to your product page.
Frequently Asked Questions (FAQ)
1. How long should my digital travel guide be?
Value is not measured in page count. A concise, 50-page guide packed with unique, actionable advice is far more valuable than a rambling 200-page guide filled with generic information. Focus on comprehensively solving the specific problem your niche audience has.
2. Do I need to have visited the destination very recently?
While recent, first-hand experience is ideal, an "evergreen" guide focused on core attractions, culture, and logistics can have a long shelf life. The key is transparency. Be clear about when you last visited and focus on information that doesn't change rapidly. You can always update your guide with new editions.
3. What if I'm not a professional writer or photographer?
You don't need to be. Your audience values authenticity and expertise over perfect prose. Write in your natural, conversational voice, as if you were giving advice to a friend. For photos, a modern smartphone can capture high-quality images. The goal is to be clear, helpful, and genuine.
Your Journey from Expert to Entrepreneur Starts Now
You now have the complete, A-to-Z workflow. You've moved from the vague idea of a product to a concrete, actionable blueprint that covers research, content creation, professional design, and a smart launch strategy. The path from being a passionate travel expert to a successful digital entrepreneur is no longer a fog of confusion.
You have the definitive answer to the question of how to create a digital travel guide that provides immense value and generates a sustainable income. The only thing left to do is take the first step. Start the research, outline your expertise, and begin building the asset that will power your business and fund your adventures for years to come.
SEO Meta Data Suggestions:
SEO Meta Title (58 characters): How to Create a Digital Travel Guide People Will Actually Buy
URL Slug: how-to-create-digital-travel-guide
SEO Meta Description (154 characters): A step-by-step playbook for travel creators on how to create a digital travel guide, from research and writing to design, pricing, and selling your product.
Read the full guide: The Travel Blog Business Plan: How to Make Real Money in 2026
Don't Miss Out! Subscribe for Exclusive Content
SubscribeComments 0
No comments yet
Be the first to share your experience!
Dont Miss Out! Subscribe for Exclusive Content
FTC Affiliate Disclosure: Stay Compliant as a Travel Creator

Essential Affiliate Tools: From Tracking to Full Optimization
Avoid These 5 Affiliate Landing Page Mistakes for Better Conversions
Affiliate Keyword Research Mastery for Travel Blogs
Booking.com Affiliate Review: Pros, Cons & Earnings