Essential Affiliate Tools: From Tracking to Full Optimization
TrekGuider @trekguider
You’re a creator, not an administrator. Yet, you find yourself drowning in a sea of administrative tasks. You’re manually copying and pasting ugly, mile-long affiliate links, toggling between a dozen different program dashboards to check your stats, and spending more time wrestling with spreadsheets than you do creating the travel content you love. Your affiliate "business" feels less like a streamlined operation and more like a chaotic, time-sucking hobby that isn't paying the bills.
This inefficiency is more than just frustrating—it's a silent killer of your income. Every hour you spend on manual, repetitive tasks is an hour you’re not creating the next piece of content that could generate revenue for years to come. You're flying blind, guessing which strategies are working, unable to see which links are converting, and which pages are actually profitable. The reported average income of $13,847 a month for travel affiliates feels like a distant fantasy when you’re stuck in this administrative quicksand.

This guide is your way out. It is your curated, creator-friendly tech stack—a definitive list of the essential affiliate marketing tools that will automate the tedious, provide crystal-clear data, and free you up to focus on growth. We’ll cover the entire workflow, from foundational link management and tracking to the advanced tools needed for full-scale optimization. This is how you transform your passion project into a professional, efficient, and profitable business. For a complete command of the entire affiliate landscape, our definitive pillar page, Travel Affiliate Programs: The 2026 Ultimate Guide, is your essential command center for mastering the entire ecosystem.
The Foundational Layer: Your Operational Command Center
Before you can optimize, you must organize. This first set of tools forms the non-negotiable foundation of any serious affiliate marketing business. They are your central nervous system for managing links, ensuring compliance, and tracking performance from a single source of truth.
Link Management Plugins (The Digital Quartermaster)
If you run your travel blog on WordPress, a link management plugin is the single most important tool you will install. These plugins take the long, ugly, and intimidating affiliate links provided by programs and "cloak" them into short, clean, branded URLs that are far more trustworthy to your audience.
Think of it as your command center. Instead of embarking on a digital scavenger hunt through year-old posts to update a single expired link, you change it once in a central dashboard, and the plugin deploys that change site-wide instantly. This functionality alone will save you hundreds of hours over the life of your business. Furthermore, a link like yourblog.com/recommends/osprey-backpack is infinitely more professional and trustworthy to a reader than a long URL filled with random tracking parameters, directly impacting your click-through rates.

Top Tools in This Category:
Recommended: Travel Creator Toolkit: 34 Essential Apps and Resources
Recommended: Digital Product Ideas: How to Make Money From Your Next Trip
ThirstyAffiliates: A powerhouse plugin built specifically for affiliate marketers. It offers advanced features like autolinking (automatically turning specific keywords into affiliate links), proactive link checking to find broken links, and detailed click analytics.
Pretty Links: A slightly simpler but highly effective alternative. It excels at link cloaking, redirection, and providing basic click-tracking reports right from your WordPress dashboard.
Pro-Tip: The best link management plugins, like ThirstyAffiliates, can automatically add the required rel="sponsored" tag to all of your affiliate links. This is a critical feature that ensures you stay compliant with Google's guidelines for paid links, protecting your site from potential SEO penalties without you having to think about it.
Affiliate Tracking Tools (Your Source of Truth)
"What gets measured gets managed." To grow your affiliate income, you need a crystal-clear understanding of what’s working. While many creators start by manually checking each affiliate network’s dashboard, a dedicated approach to tracking provides a more holistic, actionable view.
For most creators, your affiliate tracking tools will be a combination of your link management plugin’s analytics and the dashboards provided by your affiliate networks (like CJ Affiliate or Travelpayouts). These platforms show you crucial metrics like clicks, conversions, and commission earnings.
However, as your business matures, you'll want to track performance across different income models. For example, the TrekGuider Seller Platform includes a dedicated referral dashboard. This is a specialized tracking tool that shows you not just one-time sales, but the ongoing, passive income you’re earning from the new sellers you’ve brought to the platform. It’s a perfect example of how a modern platform provides the built-in affiliate tracking tools you need to monitor more sophisticated, high-margin income streams like revenue sharing.
The Growth Engine: Traffic & SEO Tools
With your operational house in order, the focus must pivot from organization to acquisition. A perfectly managed link is useless without a steady stream of the right people clicking on it. This is where your growth engine comes in—the tools designed to attract your ideal audience with precision.
SEO & Keyword Research Platforms
The most profitable affiliate content is created with intention. It targets keywords that signal a user is actively researching a purchase (e.g., "best carry-on luggage review"). SEO platforms are your treasure map for finding these "money" keywords and building a content strategy that attracts buyers, not just browsers.

These platforms are indispensable for:
Finding Profitable Keywords: Uncover what your audience is searching for, how many people are searching for it, and how difficult it will be to rank on Google.
Analyze the Competition: See exactly which keywords your competitors are ranking for and which pages are bringing them the most traffic.
Track Your Performance: Monitor your rankings for your target keywords over time to see what’s working and where you need to improve.
Top Tools in This Category:
Ahrefs: A comprehensive, professional-grade SEO toolkit. Its "Keywords Explorer" is second to none for finding high-value commercial investigation keywords, and its "Site Explorer" provides deep insights into any competitor's strategy.
SEMrush: Another all-in-one industry leader that offers a powerful suite of tools for keyword research, rank tracking, and competitive analysis.
Pro-Tip: Don't confine your keyword strategy to your blog. With video projected to account for a staggering 55% of all affiliate traffic by 2026, the same commercial-intent keywords you find for your articles are the exact titles you should be using for your YouTube videos and TikToks.
Analytics Platforms
While SEO tools help you get traffic, a web analytics platform tells you what that traffic does once it arrives. It’s essential for understanding your audience, diagnosing problems, and optimizing their journey from reader to buyer.
The Must-Have Tool:
Google Analytics: The free, industry-standard tool for website analytics. It's an incredibly powerful platform that provides all the data you need to understand user behavior, track conversions, and identify your top traffic sources, allowing you to double down on what works.
The Conversion Toolkit: Optimization & Social Media Tools
Attracting traffic is only half the battle. The final, crucial step is converting that traffic into clicks and commissions. This set of tools is designed to streamline your workflow and optimize your content for maximum impact.
"Link in Bio" Tools (For Social Dominance)
Platforms like Instagram and TikTok are powerful for audience building, but they famously limit your ability to use clickable links. A "link in bio" tool solves this by creating a simple, mobile-friendly landing page that can house all of your most important affiliate links, blog posts, and offers.

Top Tools in This Category:
Linktree: The most well-known tool in this space, offering a simple and effective way to create a micro-landing page for your social media bio.
Later: While primarily a social media scheduling tool, Later’s "Link in Bio" feature is excellent, allowing you to create a clickable grid of your Instagram posts, driving traffic directly to relevant blog posts and affiliate offers.
The Amazon Workflow Accelerator
For nearly every travel creator, Amazon Associates is a core part of their affiliate strategy. However, creating links for individual products can be a slow, manual process.
The Must-Have Tool:
Amazon SiteStripe: This is a free, official toolbar from Amazon that appears at the top of your browser whenever you’re on Amazon.com. It allows you to generate a custom affiliate link (text, image, or both) for any product page with a single click, dramatically speeding up your content creation workflow.
Your Strategy Blueprint: The Travel Creator's Toolkit
Feeling overwhelmed by the options? A powerful tech stack is only as good as the strategy behind it. To help you organize your entire affiliate marketing plan—from keyword research to content creation and promotion—we've created the ultimate resource bundle. It’s packed with the checklists, templates, and guides you need to build a professional and profitable system.
Download Your Free Bundle: The Travel Creator's Toolkit Today!
Frequently Asked Questions (FAQ)
1. Do I really need all these tools when I'm just starting out? When you're starting, focus on the foundation. A WordPress site with a link management plugin (like Pretty Links) and Google Analytics is your essential starting stack. This is a low-cost setup that allows you to organize your links and track your traffic from day one. You can invest in a premium SEO tool like Ahrefs once your site is generating enough revenue to justify the cost.
2. Are there any good free affiliate marketing tools? Absolutely. Google Analytics is free and non-negotiable. Amazon SiteStripe is also free. For keyword research, you can start with free tools like Google Keyword Planner or the free versions of various SEO tools, though they are more limited. The free versions of "link in bio" tools like Linktree are also perfectly sufficient for most creators.
3. How do these tools help with tracking beyond just clicks? Advanced tracking involves connecting data points. For instance, by using UTM parameters (which you can add manually or with some plugins), you can see in Google Analytics not just that someone came from your blog, but that they came from the specific button in your review of the Osprey backpack. This level of detail is what allows you to A/B test different calls-to-action and truly optimize your pages for conversion.
Conclusion: From Hobbyist to CEO
The difference between a creator earning a few dollars a month and one earning a full-time income often comes down to their systems. Top earners don't waste time on manual, low-value tasks. They leverage technology to work smarter, not harder. They treat their content not as a hobby, but as a business.

You now have a curated list of the best affiliate marketing tools to build your own professional tech stack. Start with the foundation: a link management plugin to organize and track your links. Then, layer in SEO and analytics tools to build a predictable stream of traffic. Finally, use optimization and workflow tools to convert that traffic with maximum efficiency.
These affiliate tracking tools and optimization platforms are not an expense; they are an investment in your own efficiency, professionalism, and profitability. By implementing this toolkit, you take a definitive step away from being a hobbyist and become the CEO of your own thriving travel content business.
Meta Data Suggestions:
SEO Meta Title (58 characters): 9 Essential Affiliate Marketing Tools for Travel Creators
URL Slug: essential-affiliate-marketing-tools
SEO Meta Description (154 characters): Discover the top affiliate marketing tools for travel creators. From link tracking to SEO, this guide covers the essential tech stack to automate and grow your income.
Read the full guide: The Travel Blogger's Playbook to Affiliate Marketing Mastery
Don't Miss Out! Subscribe for Exclusive Content
Subscribe


Comments 0
No comments yet
Be the first to share your experience!
Dont Miss Out! Subscribe for Exclusive Content

Ultimate USA Holidays Guide: Top Picks

FTC Affiliate Disclosure: Stay Compliant as a Travel Creator

Avoid These 5 Affiliate Landing Page Mistakes for Better Conversions

Affiliate Keyword Research Mastery for Travel Blogs

Booking.com Affiliate Review: Pros, Cons & Earnings

Decoding Affiliate Commission Rates: Benchmarks for Travel Creators
Art Basel Miami: 7 Insider Hacks
TrekGuider @trekguider
The email lands, the tickets are booked, and a jolt of excitement hits you. You’re finally going to Art Basel Miami, the undisputed heavyweight champion of art fairs in the Americas. But as you start scrolling through the endless lists of exhibitors, satellite fairs, and after-parties, a subtle wave of panic begins to set in. The sheer scale is dizzying—a sprawling, week-long labyrinth of priceless art, exclusive events, and shoulder-to-shoulder crowds. You start to worry you’ll spend more time stuck in traffic on the MacArthur Causeway than actually seeing art, that you'll miss the truly groundbreaking exhibits, and that you'll leave feeling like you barely scratched the surface.
This anxiety is the invisible wall that separates the tourists from the insiders. Every December, thousands of attendees arrive unprepared, succumbing to sensory overload and logistical nightmares. They wander aimlessly through the cavernous Miami Beach Convention Center, get hit with sticker shock from last-minute parking fees, and completely miss the vibrant, renegade energy of the satellite fairs where the art world’s future is being forged. They leave exhausted and defeated, with a camera roll of blurry photos and a profound sense of having missed out.
That won’t be you. This guide is your secret weapon, your backstage pass. We’ve distilled the chaos into seven actionable, pro-level hacks that will fundamentally transform your experience. You will learn to navigate the city’s complex geography, decode the schedule like a seasoned collector, and discover the hidden gems that most visitors fly right over. This isn't just an art fair; it's a city-wide cultural takeover, and it’s just one of the many incredible events that cement the city’s reputation as a year-round festival hub, a theme we explore in our complete guide to Miami Holidays: 8 Beach Fest Vibes. Prepare to conquer Art Basel Miami with the confidence of an insider.

Hack 1: Master the Map of Art Basel Miami—Go Beyond the Convention Center
The first mistake nearly every newcomer makes is thinking Art Basel Miami is a single event confined to the Miami Beach Convention Center (MBCC). While the MBCC is the mothership—an awe-inspiring spectacle of blue-chip art that you absolutely must see—the true soul of Miami Art Week pulses in the dozens of satellite fairs scattered across the city. Treating the MBCC as your only destination is like visiting Paris and only seeing the Eiffel Tower from the ground.
Think of the MBCC as your anchor, not your cage. By all means, start your journey there to get a feel for the sheer scale of the event.
Navigate the Core Strategically: The main fair is organized into distinct sectors designed to guide your experience. To avoid getting overwhelmed, prioritize starting with Meridians, which features massive, museum-quality installations that are often the most talked-about pieces of the show. Alternatively, head to the Nova sector, which showcases brand-new work from the world's most exciting emerging galleries.
Embrace the Satellites: The real discoveries—the moments that make your heart race—often happen outside the main hall. These smaller, more focused fairs are where you’ll find groundbreaking work from up-and-coming artists, often at more accessible price points. Plan to visit at least two or three.
Your Satellite Fair Hit List:
Untitled Art: Located directly on the sands of Ocean Drive, this fair’s stunning backdrop is part of the experience. It’s often free to access and is a fantastic place to see cutting-edge contemporary art in a uniquely Miami setting.
Wynwood Walls: While not a formal fair, this world-famous outdoor street art museum is an essential pilgrimage during Art Week. It’s completely free to view the incredible murals that cover the district, offering a raw and vibrant contrast to the polished booths of the main fair.
Design Miami/: Occurring concurrently just a stone's throw from the MBCC, this prestigious sister fair is dedicated to collectible design from the 20th and 21st centuries. It’s a must-see for anyone interested in the intersection of art, furniture, lighting, and objects d'art.
Pro-Tip: Don't try to be a hero and see everything in one day. Group your visits geographically. Dedicate one day to Miami Beach (MBCC, Untitled Art, Design Miami/) and another to the mainland neighborhoods like Wynwood and the Design District. This minimizes travel time and maximizes art time.

Hack 2: Conquer Transportation Like a Local
During Art Week, Miami’s already notorious traffic transforms into a city-wide parking lot. This isn't an exaggeration—with an economic impact of over $500 million, the event draws crowds on par with a Super Bowl, and it feels like every single attendee is in a car on the causeway next to you. Driving your own car is the single most stressful, time-consuming, and expensive mistake you can make.
Parking is not just difficult; it’s extremely limited and eye-wateringly expensive. To navigate the city like a pro, you must ditch the idea of driving.
Rideshares Are Non-Negotiable: Services like Uber and Lyft are your lifeline. While surge pricing will be in effect during peak hours, the cost is often still less than a parking garage, and it saves you the soul-crushing headache of navigating closed streets and full lots. Use the "schedule a ride" feature for early morning trips to beat the initial rush.
Leverage Public Transit: Miami-Dade's public transit system is a surprisingly effective and cost-efficient option. The elevated Metromover is free and circles the downtown area, connecting you to the Metrorail and bus routes that cross over to Miami Beach. It’s a great way to bypass the worst of the gridlock while getting a scenic view.
Book Parking in Advance (If You Must): If driving is your only option, do not leave it to chance. Use an app like SpotHero to reserve a parking spot weeks in advance. Be prepared to park a significant distance from the venue and use a rideshare or a long walk for the final leg of your journey.
Hack 3: Decode the Art Basel Miami Schedule—Public vs. Private Days
Understanding the rhythm of the Art Basel schedule is crucial. The fair is not open to the public for its entire duration, and showing up on the wrong day is a common and deflating rookie error. The opening days are reserved for the art world’s heaviest hitters.
Here is the official breakdown for the 2026 show:
Private Days (Invitation-Only): December 3rd – 4th, 2026. These first two days are the exclusive preview for serious collectors, museum curators, celebrities, and accredited media. Access is strictly by a VIP invitation from a participating gallery or Art Basel itself. This is when the majority of high-value sales are negotiated and finalized.
Public Days: December 5th – 7th, 2026. The fair opens its doors to the general public. The official hours are 11:00 AM to 6:00 PM.
While getting into the private viewings is tough without connections, it’s not impossible for aspiring collectors. The key is to build relationships with galleries you admire throughout the year. If you’re serious, inquire about access when you purchase work. For most visitors, the best strategy is to maximize the public days. Arrive shortly before the 11:00 AM opening time to get ahead of the intense afternoon crowds.

Hack 4: Network Smarter, Not Harder
Art Basel Miami is as much a networking event as it is an art exhibition. It’s where artists find gallery representation, collectors discover new talent, and creative professionals forge career-defining collaborations. However, simply handing out business cards in a crowded hall is about as effective as throwing them into the ocean. You need a targeted approach.
Do Your Homework: Before you arrive, study the exhibitor list. Identify the galleries that represent artists or styles that resonate with you. When you approach a gallerist, you can have a much more meaningful conversation if you can say, "I was so excited to see you were showing Artist's Name; I've been following their work since..."
Attend the Talks and Panels: The official Art Basel program is packed with fascinating talks and panel discussions. These are fantastic opportunities to learn directly from leading artists, curators, and critics. The Q&A sessions are a perfect, low-pressure environment to ask an intelligent question and make a memorable impression.
Use the Satellite Fairs: The atmosphere at satellite fairs is often more relaxed and accessible than at the MBCC. Gallerists and artists have more time and energy to engage in genuine conversation. This is where you can build real relationships that last beyond the week.
For many creative professionals, the sheer density of inspiration at Art Basel sparks a torrent of new business ideas. The challenge is turning that spark into a viable product. If you leave Miami buzzing with new concepts, the next step is to structure them for success. Our Digital Product Ideas Guide provides a complete framework for developing, launching, and monetizing your creative passion, helping you transform that art-world fire into a sustainable income stream.
Hack 5: Fuel Your Art Binge Strategically
Walking miles of concrete floors in convention centers and galleries is a marathon, not a sprint. If you don’t plan your food and hydration, you will burn out by day two, guaranteed. The food inside the convention center is notoriously overpriced and underwhelming. You need a better plan.
Book Dinner Reservations Yesterday: If you plan on dining at any of Miami’s top restaurants—especially in South Beach, Wynwood, or the Design District—you need to make reservations weeks, if not months, in advance.
Embrace High-Quality Casual Eats: For lunch, skip the long lines and high prices at sit-down restaurants. Miami has a phenomenal food truck scene, and many pop up near the major art hubs. This is a great way to grab a quick, delicious, and more affordable meal without losing an hour of your day.
Pack Your Own Survival Kit: Be your own hero. Pack a refillable water bottle (most venues have filling stations), a couple of protein bars, and a bag of almonds in your tote. Having snacks on hand will save you from paying $8 for a bottle of water and will keep your energy levels stable, preventing the dreaded "art fatigue" from setting in too early.
Pro-Tip: Many of the top-tier galleries host private cocktail receptions or breakfasts at their booths for their best clients. If you have an established relationship with a gallery, don't be shy about asking if they have any events planned. It’s a fantastic way to see the art and network in a much more civilized setting.
Hack 6: Prioritize Satellite Fairs for True Discovery
We mentioned this in Hack #1, but it’s so critical it deserves its own section. The satellite fairs are the lifeblood of Miami Art Week. While the main fair showcases the blue-chip, established titans of the art world, the satellite fairs are where you’ll find the raw, experimental, and often more exciting work from the next generation of art stars.
Making these fairs a priority will give you a more comprehensive and authentic view of the contemporary art landscape. You’ll see work you won’t find anywhere else and have the chance to buy original art from emerging artists before their prices skyrocket. Fairs like NADA (New Art Dealers Alliance) are renowned for their sharp focus on new talent and are a favorite among seasoned collectors looking for the next big thing. Don't just visit them if you have extra time; build your entire itinerary around them.

Hack 7: Plan Your Post-Basel Decompression
After several days of non-stop art, crowds, and social stimulation, you will experience a unique phenomenon known as "art fatigue." Your eyes will glaze over, and even a Picasso won't be able to hold your attention. It’s an inevitable part of the experience, but the pros know how to plan for it.
Schedule Deliberate Downtime: Do not book every single minute of your trip. Leave your final morning or afternoon completely open to do something unrelated to art. Go to the beach, sit by the hotel pool, or explore a quiet neighborhood like Coconut Grove. Let your brain breathe.
Book a Recovery Day: The ultimate pro-move is to add an extra day to your trip after the fairs close on December 7th. Let the art crowd fly home while you enjoy a quieter, more relaxed Miami. This day of decompression is crucial for processing the immense amount of visual information you’ve absorbed.
Stay Strategically: Consider booking your final night at a hotel slightly removed from the South Beach chaos. A calmer environment in a neighborhood like Coral Gables or Key Biscayne will help you recharge before heading home.
A successful trip isn't just about what you do during the event; it's about how you plan the entire journey. Creating a seamless travel experience, whether for a high-intensity week like Art Basel or a cross-country road trip, requires expert planning. For a comprehensive resource that covers every aspect of trip planning in the U.S., our Travel Guide is the ultimate tool for crafting perfect, stress-free itineraries.
Your Insider’s Guide to Conquering Art Basel
You are now armed with the strategies to transform your Art Basel Miami trip from an overwhelming ordeal into an unforgettable adventure. By looking beyond the convention center, mastering transportation, decoding the schedule, and networking with purpose, you can navigate the world’s most important art week with the ease and confidence of a veteran. Remember to fuel yourself properly, prioritize the satellite fairs for groundbreaking discoveries, and plan for some much-needed decompression.
With these seven insider hacks, your next Art Basel Miami experience will be defined by inspiration, connection, and discovery—not by stress and exhaustion. You are no longer just an attendee; you are an insider, ready to experience the very best the art world has to offer.
Meta Data Suggestions:
SEO Meta Title: Art Basel Miami: 7 Insider Hacks to Navigate Like a Pro
URL Slug: art-basel-miami-insider-hacks
SEO Meta Description: Conquer Art Basel Miami with 7 expert hacks. Learn to navigate satellite fairs, beat the traffic, and network smarter at the world's premier art event.
Don't Miss Out! Subscribe for Exclusive Content
SubscribeComments 0
No comments yet
Be the first to share your experience!
Dont Miss Out! Subscribe for Exclusive Content

San Francisco Cherry Blossoms: A Local's Guide to the Blooms

Halloween SF: Haunts Without Horrors

SF Festivals: 7 Must-See Lineups

Christmas SF: Lights & Wharf Wonders

SF Pride: 6 Route & Party Hacks

Chinese New Year SF: Parade Essentials
The Travel Blog Business Plan: How to Make Real Money in 2026
TrekGuider @trekguider
Stop collecting tactics. Start building a business. The internet is flooded with articles listing a dozen ways of how to make money travel blogging—affiliate links, display ads, sponsored posts—but they all miss the most critical question: in what order? Without a strategic plan, those tactics are just lottery tickets, a recipe for confusion and burnout.

This isn't another list. This is your comprehensive, step-by-step business plan, designed to take you from zero traffic and zero income to a profitable, scalable travel content business. We’re going to show you exactly what to focus on in your first 12 months (hint: it has nothing to do with making money) and provide the exact framework the top 1% of bloggers use to build seven-figure brands.
Forget the random tips and the vague "follow your passion" advice. It’s time to get serious. It's time to build a real asset.
Phase 1: Building Your Unfair Advantage (Months 1-12)
Welcome to the trenches. This is the most important—and by far the least glamorous—phase of your travel blogging career. The first 6 to 12 months are not about earning an income, chasing sponsored trips, or designing a beautiful logo. Let me be crystal clear: your goal in year one is not to make money.
Your goal is to build an asset.
Think of yourself as a real estate developer in a prime location. You wouldn't try to rent out a skyscraper while you're still pouring the concrete foundation. In the world of digital content, your asset is a high-quality website that attracts a dedicated audience through search engines. Your currency isn't dollars; it's traffic. Your foundation isn't concrete; it's trust.

During this foundational phase, every ounce of your energy—every late night and every weekend—will be dedicated to constructing a blog that is so genuinely helpful and authoritative that monetization becomes the natural, inevitable next step, not a desperate scramble. This is where you do the unsexy work that separates you from the 99% of travel blogs that are abandoned by month six. This is where you build your unfair advantage.
Step 1: Choose a Profitable Niche (Go Deep, Not Wide)
The single most fatal mistake a new travel blogger can make is trying to be everything to everyone. A blog about "my travels around the world" is a personal journal destined for an audience of three: you, your mom, and your most supportive friend.
A blog about "solo female travel in Southeast Asia on a budget" is a business. For those interested in this path, starting with can provide immense value to your future audience.
The fear of market saturation is valid, but the solution isn't to give up. The solution is to get laser-focused. Choosing a profitable niche is the most critical strategic decision you will make. It's not about limiting yourself; it's about making yourself the only logical choice for a specific person. A narrow focus is your primary weapon against a crowded market.

Here’s why this works:
It Builds Crushing Topical Authority for SEO: Google's algorithm is a machine built to find experts. When you write 30 in-depth articles exclusively about hiking in the Pacific Northwest, you are screaming to Google that you are the authority on that topic. This makes it exponentially easier to rank for valuable keywords than it is for a generalist who writes about Oregon one week and Paris the next. You're not just a voice in the crowd; you're the leading expert in a specific field.
It Attracts a High-Value Audience: A focused niche attracts a specific, passionate audience with a predictable set of problems, desires, and budgets. This clarity makes it far easier to create content that feels like it’s reading their mind, which in turn makes it easier to eventually sell products they are desperate to buy.
It Skyrockets Conversion Rates: Whether it's an affiliate link for a specific child-friendly hiking carrier or a brand deal with an Oregon-based tour company, a targeted audience converts at an astronomically higher rate. A general audience is just window shopping; a niche audience has their wallet out, ready to act on your expert recommendations.
Don't be afraid to get granular. Use this simple formula: [Who] does [What] in [Where].
From: "European travel" -> To: "Train travel for seniors in Western Europe."
From: "Family travel" -> To: "Accessible travel in Tuscany for multi-generational families."
From: "Adventure travel" -> To: "Scuba diving certification trips in the Caribbean for beginners."
A niche isn't a prison; it's your real advantage. It allows you to become a big fish in a small, profitable pond. For more ideas, explore our in-depth guide to 15 Profitable Travel Blog Niche Ideas for 2026.
Step 2: The Minimum Viable Setup (Spend Less Than $100)
Recommended: Stress-Free Flying with Kids: Airport, TSA, and In-Flight Guide
Recommended: Travel Guide: Trip Planning, Flights, and Avoiding Tourist Traps
Your perfectionism is your enemy here. The "Aspiring Travelpreneur" often falls into the trap of "pre-crastination"—spending months and thousands of dollars on custom design, expensive plugins, and countless online courses before they've even published a single, helpful article.
Resist this urge with every fiber of your being. In the beginning, your money is infinitely better spent on the experiences you can write about than on a fancy website.
Forget the custom logo and bespoke WordPress theme for now. In the beginning, your website needs to be a Toyota Corolla, not a Ferrari: utterly reliable, brutally efficient, and cheap to run. The goal isn't to win design awards; it's to build a platform that won't buckle when the traffic finally arrives.

Here are the absolute essentials:
A Domain Name: Choose a .com that is brandable, memorable, and hints at your niche. Don't overthink it. (Approx. $15/year)
Reliable Hosting: This is your one non-negotiable technical investment. Do not use free platforms like Wix or Blogger—you don't own your content, and your monetization options will be crippled. Shared hosting from a reputable provider like SiteGround, Bluehost, or Lyrical Host is the industry standard for your first year. (Approx. $5-$10/month)
A Clean WordPress Theme: Install the free, self-hosted version from WordPress.org (never .com). Then, choose a lightweight, fast-loading theme. A premium theme like Kadence or GeneratePress offers a free version that is more than powerful enough to get you started. In 2026, website speed is a critical ranking factor for SEO and essential for user experience. A slow site is a dead site.
Alternatively, for creators who want to bypass the technical setup of hosting and WordPress entirely, a marketplace platform like TrekGuider offers a powerful head start. By registering as a creator on TrekGuider, you can not only sell digital products but also publish your own blog directly on the platform. This approach allows you to focus 100% on creating great content while leveraging built-in tools to view statistics on your posts, directly track your audience engagement, and grow your business within an established travel ecosystem.
That's it. Your total initial investment can and should be under $100. Every dollar you save here is a dollar you can put toward the travel that will fuel your content—and your business—for the next year.
Step 3: Master "Helpful Content" SEO to Reach 50,000 Sessions
Traffic is the lifeblood of a profitable blog. It is the raw material from which all revenue is refined. Without a steady, predictable stream of readers, you have no one to show ads to, no one to click your affiliate links, and zero influence to leverage with brands. In this foundational phase, your single most important Key Performance Indicator (KPI) is monthly sessions.
And your singular, obsessive goal is to reach 50,000 monthly sessions.

Why that exact number? Because it's the golden ticket. It is the minimum traffic requirement to get accepted into premium advertising networks like Mediavine and Raptive (formerly AdThrive). The income difference isn't just big; it's staggering.
Google AdSense might earn you a paltry $1-$3 per 1,000 visitors (a metric called "RPM," or Revenue Per Mille).
A premium network like Mediavine can earn you $20, $30, or even $40+ RPM for the exact same traffic.
Hitting this threshold is the inflection point where your blog transforms from an expensive hobby into a legitimate source of income. It's the first taste of real profit.
The only sustainable, long-term way to get there is through Search Engine Optimization (SEO). This means creating content that methodically answers the specific questions your niche audience is typing into Google. Forget writing diary entries about your feelings. Your job now is to become a problem-solver. Your mantra is "helpful content."
This "nuts and bolts" content is the bedrock of every successful travel blog. Think about the practical, unglamorous questions a traveler actually needs answered:
"How much does a 3-day trip to Lisbon cost for a couple?" (Our is built on answering questions just like this.)
"Is it safe to drink tap water in Costa Rica in 2026?"
"What is the best travel insurance that covers trekking in Nepal?"
"A detailed, day-by-day itinerary for one week in Japan without a car." (This is the exact kind of detail you'll find in our .)
By focusing relentlessly on answering these practical questions with first-hand experience and exhaustive detail, you build immense trust with your audience and demonstrate your expertise to Google. This is a slow, methodical process of laying brick after brick. To learn the fundamentals, your first read should be our A Beginner's Guide to SEO for Travel Blogs.
Phase 2: The Monetization Ladder (Months 12-24)
You survived the gauntlet of year one. You've published 50+ articles of deeply helpful, SEO-optimized content. Your traffic is climbing steadily, and you're approaching or have just surpassed the magical 50,000 session mark. Now, and only now, is it time to flip the monetization switch. It's time to talk about how to make money travel blogging.

We call this phase the "Monetization Ladder" because it’s a sequential process. Trying to do everything at once—ads, affiliates, brand deals, products—is the fastest way to get overwhelmed and do everything poorly. Instead, you'll climb the ladder one rung at a time, introducing income streams in a logical order that aligns with your blog's growth and authority.
Rung 1: Affiliate Marketing
Affiliate marketing is the perfect first rung on the ladder for two simple, powerful reasons: it has zero traffic requirements, and it integrates perfectly with the helpful content you are already creating. Our guide on .
The concept is beautifully simple: you recommend products or services you genuinely use and love (hotels, tours, gear, travel insurance), and when a reader makes a purchase through your unique tracking link, you earn a commission at no extra cost to them.
This is the most reader-centric form of monetization possible. You're not just slapping a jarring banner ad on your site; you're providing a curated, value-added recommendation that solves a specific problem for your reader. For example, in an article about "The Best Carry-On Backpacks for a Two-Week Trip to Europe," you link to the specific Osprey backpack you've personally torture-tested for the past three years. It's a natural, helpful, and profitable service.

Your Action Plan:
Begin with Aggregators: In your early days, it's most efficient to join large affiliate networks that give you access to thousands of brands under one roof. For travel, your first stops should be platforms like TravelPayouts (for flights, hotels, tours), Stay22 (for embedding beautiful, interactive accommodation maps), and of course, Amazon Associates for all travel gear.
Perform a Content Audit: Go back through your top 10-15 highest-traffic articles. Where have you mentioned a hotel, a piece of gear, a tour, or a booking site? Add your affiliate links to these existing, proven posts first. This is the lowest-hanging fruit.
Prioritize Unshakeable Trust: This is the cardinal rule. Only recommend things you have used personally or would confidently recommend to your best friend. Your long-term credibility is worth infinitely more than a few quick commissions. The moment your readers suspect you're recommending something just for the money, you've lost.
Rung 2: Premium Display Advertising
This is your reward for a year of relentless, thankless work. The moment your Google Analytics shows you've crossed the 50,000-session threshold in the last 30 days, you should stop everything you're doing and apply to Mediavine.
Getting accepted is a rite of passage. It's the moment your traffic asset begins producing significant, life-changing passive income.
As we covered, the income potential is transformative. A blog earning a disappointing $50/month from AdSense could suddenly be earning $1,000-$2,000/month from Mediavine with the exact same audience. This provides a stable, predictable income floor. It's the money that pays your rent, allows you to reinvest in your business, and finally eases the financial pressure of this entrepreneurial journey.
The beauty of premium ads is their passive nature. Once you're approved, Mediavine's expert team works with you to install the ad code. They handle all the optimization, management, and advertiser relationships. Your only job is to keep doing what got you here: creating excellent content that attracts readers. This predictable income stream frees up your mental energy to focus on the more lucrative, and more complex, rungs of the ladder.
Rung 3: Sponsored Content & Brand Partnerships
Once you have established traffic, a clear niche, and a professional-looking website, brands will start to notice. You'll begin to get emails in your inbox with subject lines like "Collaboration Opportunity." This can be a very lucrative income stream, but it is a minefield if not approached with extreme strategic caution, as we outline in our guide to .

Many bloggers, desperate for validation and cash, fall into the trap of accepting any and every offer that comes their way. They turn their carefully crafted blog into a chaotic billboard of random, low-value sponsored posts for mattress companies and mobile games. This erodes reader trust and can be, in the words of veteran blogger Nomadic Matt, utterly "soul-sucking."
Position sponsored content as an opportunistic, supplementary income stream, not your primary goal.
You Are the Prize: Remember this always. You have done the hard work of building the asset—the targeted audience. Brands need access to your audience far more than you need their one-off payment. Do not accept free products in exchange for "exposure." Your rates should be based on the value you provide, and you should be comfortable starting at $500-$1,000 for a single sponsored post and rising quickly from there.
Create a Professional Media Kit: When you're ready to proactively pitch brands or respond to inquiries, you need a professional media kit. This is a 2-3 page PDF that acts as your blog's resume. Our free resource, , includes essential apps and resources that can help you showcase your traffic statistics, audience demographics, and past work, making the difference between being ignored and landing a four-figure deal.
Chase Partnerships, Not Posts: The most successful bloggers don't do one-off posts. They build long-term, multi-faceted partnerships. Instead of just pitching a single article, pitch a package that includes a dedicated blog post, a series of Instagram stories, a YouTube video, and inclusion in your email newsletter. This provides immense value to the brand and commands a price tag 5-10x higher than a single post.
Phase 3: Scaling to a Six-Figure Business (Year 2+)
If you've diligently climbed the monetization ladder, you'll have a profitable travel blog. You'll be earning a consistent, respectable income from ads, affiliates, and a few select brand deals. Congratulations—you've built yourself a great job.
But Phase 3 is about transcending that. It's about making the leap from content creator to business owner.

The objective here is to decouple your income from your time. It's about building systems and assets that generate revenue while you sleep, travel, or work on your next big project. This is where becomes a reality. You achieve this by creating and owning your own proprietary products.
The Ultimate Goal: Creating and Selling Your Own Digital Products
This is the endgame. This is the key to true financial independence and uncapped scaling. When you sell your own products, you control everything: the price, the profit margin (which is often 95% or higher), and the customer relationship. This is how the most successful bloggers build seven-figure brands, and we've compiled some top .
The best digital products are not born from a flash of genius. They are born directly from the problems you have been methodically solving for your audience all along. What questions do they ask you over and over again in your comments and DMs? What is their single biggest pain point?
Package the solution.

Examples of highly profitable digital products for travel bloggers include:
Hyper-Detailed Itineraries or Guides: Not a blog post, but a beautifully designed, downloadable PDF itinerary for a specific trip, complete with daily schedules, Google Map integrations, booking links, and insider tips they can't find anywhere else.
Niche E-books: A comprehensive guide to a topic you are an undisputed expert in, like "The Digital Nomad's Handbook to Visas and Taxes" or "The Complete Guide to Planning a Honeymoon in Greece," which you could model after our professional .
High-Value Templates: Notion or Google Sheets templates that help your readers organize their trip research, manage their budget, or track their credit card points. People will gladly pay a premium to save time and get organized.
Specialized Online Courses: High-ticket items ($200-$2,000+) that teach a specific, valuable skill, such as "Travel Photography for Beginners," "How to Land Your First Tourism Board Partnership," or "SEO for Travel Bloggers."
Once you've created your product, the next question is where to sell it. While you can set up your own storefront on your blog, a dedicated marketplace is often the fastest path to your first sale. By listing your products on the TrekGuider marketplace, you tap into a pre-existing audience of passionate travelers actively looking for resources. Our platform provides you with the tools to not only sell your digital guides and itineraries but also to publish your own blog content, view detailed statistics on views and engagement, and directly influence your sales through an integrated ecosystem designed for travelpreneurs.
Creating high-value products like detailed travel itineraries is a proven, winning model. To streamline this process, you can start with , which allows you to create professional, shareable plans your audience will love.
The potential here is limitless, and it is where you will build real, lasting, life-changing wealth.
Building an Email List: Your Most Valuable Asset
If your blog is your public storefront, your email list is your private VIP lounge. It is the single most valuable, durable, and critical asset in your entire business, for one simple reason: you own it. For a deep dive, explore our guide on .
Your Google rankings can fluctuate overnight. Instagram could shut down tomorrow. Facebook's algorithm is a black box. But your email list is a direct, unfiltered line of communication to your most loyal fans, and it is immune to the whims of algorithms.
It is the primary sales channel for launching your digital products and the ultimate tool for building a durable, long-term business.

Start building your list from day one—long before you have something to sell. Don't just put a "subscribe here" box in your footer. Offer a simple, valuable, and irresistible "lead magnet"—a freebie in exchange for an email address. This could be a one-page packing checklist like our , a 5-page PDF guide to the "Top 10 Mistakes to Avoid," or a simple spreadsheet template.
Nurture that list by sending regular, value-packed newsletters. Then, when it comes time to launch your e-book or course, you will have a warm, engaged audience of true fans who are ready and eager to buy from you. If you need help getting started, read our guide on How to Choose the Best Email Marketing Platform.
This three-phase plan is the exact blueprint for building a real business. But what does that business actually look like on a bank statement? Let’s pull back the curtain and talk about the numbers.
Financial Realities: A Data-Backed Look at Income & Timelines
It is absolutely crucial to have realistic expectations. Travel blogging is a marathon, not a sprint. The internet is littered with the ghosts of blogs started by people who expected to be earning thousands within a few months and quit when reality hit.
Profitability is a slow, steady climb built on relentless consistency. The numbers below are aggregated from dozens of public travel blog income reports to give you a realistic, no-fluff picture of what the journey often looks like when you follow this business plan.

These figures are not guarantees. They are a reflection of what is possible with a strategic, patient, and business-minded approach. Many bloggers never reach these numbers because they quit too soon, focus on the wrong things (like Instagram likes), or treat their blog like a diary instead of an asset. By following this plan, you put yourself on the path to joining the successful minority.
Frequently Asked Questions (FAQ Section)

How much do top travel bloggers make?
The most successful travel bloggers operate as full-blown media companies and can earn anywhere from $20,000 to over $100,000 per month. These figures are the result of 5-10+ years of work. Their income is highly diversified, coming from premium ads, a complex web of affiliate partnerships, a suite of their own digital products and courses, high-level brand ambassador deals, and sometimes even their own curated group tours. They have successfully transitioned from being "bloggers" to being brand CEOs.
Can you start a travel blog with no money?
While you can technically start on a free platform, it is a strategic dead end if your goal is to make serious money. As outlined in Phase 1, the minimum viable setup (domain and hosting) costs less than $100 for the entire first year. The question of how to become a travel blogger with no money is better framed as a lean startup. The most significant investment by far is your "sweat equity"—the hundreds of hours you will pour into creating exceptional content. If the initial $100 is a barrier, your first business goal should be to save that amount.
Is travel blogging dead or too saturated in 2026?
No, but the bar for entry is much higher. The era of the generalist "look at my cool life" travel diary is definitively over. The market is saturated with mediocrity, but there is more opportunity than ever for true experts who serve a specific niche. Readers and Google alike are rewarding authentic, deep, experience-based content over generic, AI-generated listicles. So, is travel blogging profitable in 2026? The answer is a resounding yes—for those who treat it like a business and commit to becoming the most helpful resource for a specific audience.
You have the business plan. Now it's time to get the tools to execute it.
The TrekGuider marketplace is built for this journey. Here, you can not only sell your digital products but also publish your own blog, track your stats, and grow your audience. To get started, download , a curated collection of 34 essential apps and resources designed to help you build your travel blog faster and smarter. For a complete A-to-Z resource on smarter travel, which will fuel your content for years, check out our .
Related Guides
- How to Make Money Blogging (From $0 to $10k/mo)
- How to Create a Digital Travel Guide People Will Buy
- 7 Digital Products That Sell Themselves for Travelers
- How to Make Money Online: A Creator's Guide for 2026
- Top 10 Travel Affiliate Programs for 2026
- 6 Proven Models to Make Money Online Blogging
- 5 Passive Income Ideas for Your Travel Blog
- Email Marketing for Bloggers: A Step-by-Step Playbook
- How to Start a Travel Blog (And Get Noticed)
- 15 Travel Blog Niche Ideas with Low Competition
Don't Miss Out! Subscribe for Exclusive Content
SubscribeComments 0
No comments yet
Be the first to share your experience!
Dont Miss Out! Subscribe for Exclusive Content
FTC Affiliate Disclosure: Stay Compliant as a Travel Creator

Essential Affiliate Tools: From Tracking to Full Optimization
Avoid These 5 Affiliate Landing Page Mistakes for Better Conversions
Affiliate Keyword Research Mastery for Travel Blogs
Booking.com Affiliate Review: Pros, Cons & Earnings
Decoding Affiliate Commission Rates: Benchmarks for Travel Creators
San Francisco Cherry Blossoms: A Local's Guide to the Blooms
TrekGuider @trekguider
The cherry blossom experience in San Francisco is not a grand, sweeping spectacle. It’s something more intimate, more soulful. It’s about turning a corner in a vibrant, historic neighborhood and finding yourself under a delicate canopy of blossoms, the scent of ramen broth mixing with the faint fragrance of spring. It’s a celebration rooted not in diplomacy, but in the fierce resilience of a community.
This is a concentrated jewel box of culture. But that intimacy comes with its own challenges. The Northern California Cherry Blossom Festival, the largest on the West Coast, packs over 220,000 people into the tight-knit blocks of Japantown. A poorly planned visit can quickly devolve into a frustrating battle with crowds, leaving you with more stress than serenity.
This isn’t just another guide. This is your strategic playbook for experiencing San Francisco’s cherry blossoms like a local. We’ll deconstruct the bloom’s tricky timing, reveal the best viewing spots both in and out of the festival’s epicenter, and provide the transportation hacks you need to navigate the city like a pro. By the end of this, you’ll have a plan to witness one of America’s most meaningful cultural celebrations in all its glory.

A Story of Resilience: The Soul of the Festival
To truly appreciate the blossoms here, you have to understand their story. San Francisco’s are proof of a community’s will to survive. Japantown, or Nihonmachi, is one of only three remaining in the United States, a neighborhood that has weathered unimaginable challenges.
After the forced internment of Japanese Americans during WWII, the community returned to find their homes and businesses lost. In the 1960s, city redevelopment projects displaced thousands more. The Northern California Cherry Blossom Festival was born from this turmoil. First held in 1968, it was a defiant celebration of culture and a powerful statement that the community was here to stay.
So when you stand in the Peace Plaza, you’re standing on historic ground. That iconic, five-tiered structure is the Peace Pagoda, a gift from San Francisco’s sister city of Osaka, designed by the renowned Japanese architect Yoshiro Taniguchi. It’s not just a landmark; it’s the spiritual anchor of the entire festival. Every blossom that blooms here feels more meaningful because of the history it represents.
Decoding the Bloom: Festival Dates vs. Nature’s Whim
The first mistake visitors make is confusing the festival schedule with the flowers’ schedule. They are two separate things.
For your planning purposes, here are the official festival dates, which traditionally span two weekends in April:
2026 Northern California Cherry Blossom Festival: April 12-13 & April 19-20, 2026
But here’s the critical distinction every visitor must understand: the festival dates are not the bloom dates. The festival is a fixed celebration of culture, while the blossoms themselves are a fleeting, unpredictable miracle of nature. Your goal is to find the magic window where the two overlap.

The Nuance of "Peak Bloom" in the Bay Area
In San Francisco, "peak bloom" is a rolling event, not a single moment. It depends on the tree variety and the city’s famously fickle microclimates.
The First Wave (Yoshino): The delicate, pale pink Yoshino cherry trees are typically the first to bloom, usually from late March into early April. These are the classic, ethereal blossoms you see in the Japanese Tea Garden.
The Second Wave (Kwanzan): Following the Yoshino are the Kwanzan cherry trees, which produce much fuller, fluffier, and deeper pink blossoms. These are hardier and their bloom often coincides perfectly with the festival’s second weekend and the Grand Parade, making for a spectacular show in Japantown.
Predicting the bloom is an art, not a science. A warm, dry winter can sometimes delay the bloom, as the trees need a certain number of "chill hours" to properly set their buds. Your best bet is to monitor social media. The official festival website and the Instagram accounts for the Japanese Tea Garden and SF Botanical Garden are invaluable resources for real-time updates.
Your Strategic Viewing Guide
You can experience the blossoms in three distinct ways: embracing the festival’s vibrant chaos, seeking tranquil beauty in a world-class garden, or discovering a hidden gem beloved by locals.
1. The Epicenter: Japantown & The Peace Plaza
During the festival weekends, the blocks around the Peace Plaza transform into a bustling hub of Japanese culture. You’ll find everything from traditional music and martial arts demonstrations to mouth-watering street food.
In Japantown, timing isn’t just important—it’s everything. It’s the difference between a serene morning stroll among the blossoms and being swept up in a shoulder-to-shoulder river of festival-goers.
Pro-Tip for Foodies: The food booths, known as yatai, are a massive draw. Don't miss the Takoyaki (octopus balls) from Kagura or the sweet, red-bean-filled Imagawayaki. To beat the lines, arrive right at 11 AM when the festival opens and eat first. The lines can be an hour long by 1 PM.
Pro-Tip for Photographers: The best shot of the Peace Pagoda framed by blossoms is from the Webster Street Bridge overlooking the plaza. For street scenes, a weekday morning before the festival begins offers beautiful, soft light and empty streets.
Go Deeper: For those who want to go even deeper, this is the perfect opportunity to connect with a local expert. The history of Japantown is complex and deeply moving, and a guided walk can reveal stories you’d never find on your own.
2. The Oasis: Golden Gate Park
If you need a break from the festival energy, a short bus ride will take you to the serene landscapes of Golden Gate Park, home to two premier blossom-viewing locations.
The Japanese Tea Garden: This is the oldest public Japanese garden in the United States, and it is an absolute masterpiece. The cherry trees here are artfully placed around the Drum Bridge, pagodas, and koi ponds. It’s a photographer’s dream. There is an entrance fee, but it’s worth every penny. To avoid crowds, purchase your ticket online in advance and go on a weekday morning.
The San Francisco Botanical Garden: Just a short walk from the Tea Garden, the SFBG offers a more sprawling, less crowded experience. Head to the Temperate Asia collection to find their grove of cherry trees. It’s a perfect spot for a quiet picnic under the petals.
3. The Secret Spot: The Palace of Fine Arts
For a truly local experience, head to the Marina district. Tucked away behind the iconic rotunda of the Palace of Fine Arts is a small, enchanting grove of cherry trees. The blossoms here often peak a bit later, sometimes into early May. The sight of the delicate pink flowers against the Greco-Roman architecture is breathtaking and feels like a hidden secret. It’s the perfect place to escape the crowds and enjoy a quiet moment.
Logistics Masterclass: Getting Around
Rule number one: Do not drive to Japantown during the festival. You will spend your entire day circling for non-existent parking. Here’s how to do it right:
Public Transit (Muni): This is your best friend. The 38-Geary and 38R-Geary Rapid buses run constantly along a major corridor and stop one block from the festival. The 2-Clement and 22-Fillmore are also excellent options. Use a Clipper card or the MuniMobile app to make things seamless.
Parking (If You Absolutely Must): The only sane option is the Japan Center Main Garage. The entrance is on Geary Blvd. On festival weekends, you must arrive before 10 AM, or you will find it full.
Ride-Sharing: A good option, but set your drop-off and pick-up points at least three blocks away from the festival’s core (e.g., at Geary & Laguna or Post & Franklin) to avoid getting stuck in gridlock.
Don't-Miss Festival Highlights
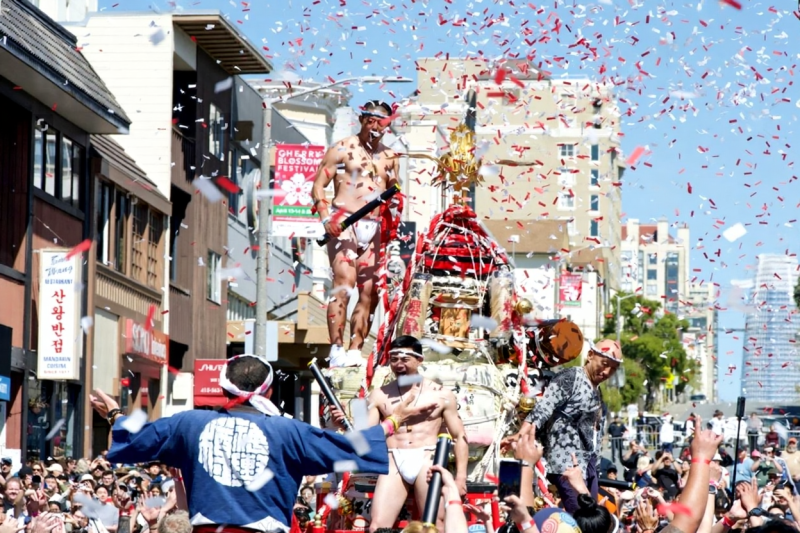
The festival’s crown jewel is the Grand Parade, which closes out the final Sunday of the event. This is a spectacular procession that starts near City Hall and travels up Post Street into the heart of Japantown. You’ll see everything from taiko drummers and dancers to the newly crowned Cherry Blossom Queen and her court—a leadership program for young Japanese American women.
The parade’s incredible finale is the TaruMikoshi. This is a massive, ornate portable shrine weighing over 1,000 pounds, carried on the shoulders of over 100 chanting participants. It’s a powerful, energetic display of community spirit and a must-see spectacle.
Your Pre-Trip Checklist
A little preparation goes a long way in San Francisco.
Dress in Layers: This is the golden rule of SF. A chilly, foggy morning can become a sunny, breezy afternoon in an instant. A fleece or mid-layer under a windbreaker is the standard local uniform for a reason.
Comfortable Shoes: You will be walking. A lot. The hills are no joke. This is not the time to break in new shoes.
Portable Power Bank: Between navigating, taking photos, and using transit apps, your phone battery won’t stand a chance. A power bank is essential.
Cash: While most vendors take cards, the lines for ATMs are long and the smaller food stalls are often cash-only.
The Cherry Blossom Festival is one of the city's signature spring events. For a complete look at what's happening year-round, our complete guide to San Francisco Holidays: Bay Area Buzz is the essential next read for planning a trip around the city's top seasonal events.
An Unforgettable Bloom
San Francisco’s cherry blossom celebration offers something truly special: a world-class cultural event with the heart of a neighborhood block party. It’s a chance to not only witness the stunning beauty of spring but to feel the powerful spirit of a community that has refused to be erased.
By timing your visit strategically, knowing where to find your own quiet corner, and embracing the city’s public transit, you can bypass the stress and create a truly unforgettable memory. You’re no longer just a tourist; you’re an insider, ready to experience this beautiful and meaningful spectacle to its fullest.
Capture the Perfect Bloom
You’re going to take hundreds of photos of the cherry blossoms—don’t let them get lost on your camera roll. Our free collection of Travel Lightroom Presets is designed to make your photos pop with just one click. Transform your shots of the delicate pink petals and vibrant festival scenes into professional-quality images you’ll be proud to share.
Frequently Asked Questions (FAQ)
When is the absolute best time to see the cherry blossoms in San Francisco? While the festival is in mid-to-late April, the "best" time depends on what you want to see. For the most ethereal, classic blossoms in a garden setting, aim for the first week of April at the Japanese Tea Garden. For the full, vibrant festival experience with the fluffy Kwanzan blossoms, the second weekend of the festival is your best bet.
Is the Northern California Cherry Blossom Festival free? Yes, attending the festival in Japantown, including all the stage performances and watching the parade, is completely free. You will need to pay for food, drinks, and any items from craft vendors. Note that visiting the Japanese Tea Garden in Golden Gate Park requires a separate admission fee.
How much time should I budget for the festival? If you plan to eat, watch a few performances, and browse the stalls, give yourself at least 3-4 hours in Japantown. If you want to see the parade, plan for that to take an additional 2 hours of your day.
Is the festival kid-friendly? Absolutely. Kids love the energy, the food, and the parade. There are also often hands-on cultural activities like origami folding. However, the crowds can be overwhelming for small children, so a weekday visit or arriving right at the opening on a weekend is recommended.
Can I see cherry blossoms in San Francisco outside of Japantown and Golden Gate Park? Yes! Besides our "secret spot" at the Palace of Fine Arts, you can often find beautiful blooming trees scattered in residential neighborhoods like the Richmond and Sunset districts. Keep your eyes peeled in late March and April—you’ll be surprised where they pop up.
Recommended: Free Travel Lightroom Presets: The TrekGuider Wanderlust Collection
Recommended: NYC Photo Map: 25 Iconic and Hidden Spots
Don't Miss Out! Subscribe for Exclusive Content
SubscribeComments 0
No comments yet
Be the first to share your experience!
Dont Miss Out! Subscribe for Exclusive Content
Halloween SF: Haunts Without Horrors
SF Festivals: 7 Must-See Lineups
Christmas SF: Lights & Wharf Wonders
SF Pride: 6 Route & Party Hacks
Chinese New Year SF: Parade Essentials
