Essential Affiliate Tools: From Tracking to Full Optimization
TrekGuider @trekguider
You’re a creator, not an administrator. Yet, you find yourself drowning in a sea of administrative tasks. You’re manually copying and pasting ugly, mile-long affiliate links, toggling between a dozen different program dashboards to check your stats, and spending more time wrestling with spreadsheets than you do creating the travel content you love. Your affiliate "business" feels less like a streamlined operation and more like a chaotic, time-sucking hobby that isn't paying the bills.
This inefficiency is more than just frustrating—it's a silent killer of your income. Every hour you spend on manual, repetitive tasks is an hour you’re not creating the next piece of content that could generate revenue for years to come. You're flying blind, guessing which strategies are working, unable to see which links are converting, and which pages are actually profitable. The reported average income of $13,847 a month for travel affiliates feels like a distant fantasy when you’re stuck in this administrative quicksand.

This guide is your way out. It is your curated, creator-friendly tech stack—a definitive list of the essential affiliate marketing tools that will automate the tedious, provide crystal-clear data, and free you up to focus on growth. We’ll cover the entire workflow, from foundational link management and tracking to the advanced tools needed for full-scale optimization. This is how you transform your passion project into a professional, efficient, and profitable business. For a complete command of the entire affiliate landscape, our definitive pillar page, Travel Affiliate Programs: The 2026 Ultimate Guide, is your essential command center for mastering the entire ecosystem.
The Foundational Layer: Your Operational Command Center
Before you can optimize, you must organize. This first set of tools forms the non-negotiable foundation of any serious affiliate marketing business. They are your central nervous system for managing links, ensuring compliance, and tracking performance from a single source of truth.
Link Management Plugins (The Digital Quartermaster)
If you run your travel blog on WordPress, a link management plugin is the single most important tool you will install. These plugins take the long, ugly, and intimidating affiliate links provided by programs and "cloak" them into short, clean, branded URLs that are far more trustworthy to your audience.
Think of it as your command center. Instead of embarking on a digital scavenger hunt through year-old posts to update a single expired link, you change it once in a central dashboard, and the plugin deploys that change site-wide instantly. This functionality alone will save you hundreds of hours over the life of your business. Furthermore, a link like yourblog.com/recommends/osprey-backpack is infinitely more professional and trustworthy to a reader than a long URL filled with random tracking parameters, directly impacting your click-through rates.

Top Tools in This Category:
Recommended: Travel Creator Toolkit: 34 Essential Apps and Resources
Recommended: Digital Product Ideas: How to Make Money From Your Next Trip
ThirstyAffiliates: A powerhouse plugin built specifically for affiliate marketers. It offers advanced features like autolinking (automatically turning specific keywords into affiliate links), proactive link checking to find broken links, and detailed click analytics.
Pretty Links: A slightly simpler but highly effective alternative. It excels at link cloaking, redirection, and providing basic click-tracking reports right from your WordPress dashboard.
Pro-Tip: The best link management plugins, like ThirstyAffiliates, can automatically add the required rel="sponsored" tag to all of your affiliate links. This is a critical feature that ensures you stay compliant with Google's guidelines for paid links, protecting your site from potential SEO penalties without you having to think about it.
Affiliate Tracking Tools (Your Source of Truth)
"What gets measured gets managed." To grow your affiliate income, you need a crystal-clear understanding of what’s working. While many creators start by manually checking each affiliate network’s dashboard, a dedicated approach to tracking provides a more holistic, actionable view.
For most creators, your affiliate tracking tools will be a combination of your link management plugin’s analytics and the dashboards provided by your affiliate networks (like CJ Affiliate or Travelpayouts). These platforms show you crucial metrics like clicks, conversions, and commission earnings.
However, as your business matures, you'll want to track performance across different income models. For example, the TrekGuider Seller Platform includes a dedicated referral dashboard. This is a specialized tracking tool that shows you not just one-time sales, but the ongoing, passive income you’re earning from the new sellers you’ve brought to the platform. It’s a perfect example of how a modern platform provides the built-in affiliate tracking tools you need to monitor more sophisticated, high-margin income streams like revenue sharing.
The Growth Engine: Traffic & SEO Tools
With your operational house in order, the focus must pivot from organization to acquisition. A perfectly managed link is useless without a steady stream of the right people clicking on it. This is where your growth engine comes in—the tools designed to attract your ideal audience with precision.
SEO & Keyword Research Platforms
The most profitable affiliate content is created with intention. It targets keywords that signal a user is actively researching a purchase (e.g., "best carry-on luggage review"). SEO platforms are your treasure map for finding these "money" keywords and building a content strategy that attracts buyers, not just browsers.

These platforms are indispensable for:
Finding Profitable Keywords: Uncover what your audience is searching for, how many people are searching for it, and how difficult it will be to rank on Google.
Analyze the Competition: See exactly which keywords your competitors are ranking for and which pages are bringing them the most traffic.
Track Your Performance: Monitor your rankings for your target keywords over time to see what’s working and where you need to improve.
Top Tools in This Category:
Ahrefs: A comprehensive, professional-grade SEO toolkit. Its "Keywords Explorer" is second to none for finding high-value commercial investigation keywords, and its "Site Explorer" provides deep insights into any competitor's strategy.
SEMrush: Another all-in-one industry leader that offers a powerful suite of tools for keyword research, rank tracking, and competitive analysis.
Pro-Tip: Don't confine your keyword strategy to your blog. With video projected to account for a staggering 55% of all affiliate traffic by 2026, the same commercial-intent keywords you find for your articles are the exact titles you should be using for your YouTube videos and TikToks.
Analytics Platforms
While SEO tools help you get traffic, a web analytics platform tells you what that traffic does once it arrives. It’s essential for understanding your audience, diagnosing problems, and optimizing their journey from reader to buyer.
The Must-Have Tool:
Google Analytics: The free, industry-standard tool for website analytics. It's an incredibly powerful platform that provides all the data you need to understand user behavior, track conversions, and identify your top traffic sources, allowing you to double down on what works.
The Conversion Toolkit: Optimization & Social Media Tools
Attracting traffic is only half the battle. The final, crucial step is converting that traffic into clicks and commissions. This set of tools is designed to streamline your workflow and optimize your content for maximum impact.
"Link in Bio" Tools (For Social Dominance)
Platforms like Instagram and TikTok are powerful for audience building, but they famously limit your ability to use clickable links. A "link in bio" tool solves this by creating a simple, mobile-friendly landing page that can house all of your most important affiliate links, blog posts, and offers.

Top Tools in This Category:
Linktree: The most well-known tool in this space, offering a simple and effective way to create a micro-landing page for your social media bio.
Later: While primarily a social media scheduling tool, Later’s "Link in Bio" feature is excellent, allowing you to create a clickable grid of your Instagram posts, driving traffic directly to relevant blog posts and affiliate offers.
The Amazon Workflow Accelerator
For nearly every travel creator, Amazon Associates is a core part of their affiliate strategy. However, creating links for individual products can be a slow, manual process.
The Must-Have Tool:
Amazon SiteStripe: This is a free, official toolbar from Amazon that appears at the top of your browser whenever you’re on Amazon.com. It allows you to generate a custom affiliate link (text, image, or both) for any product page with a single click, dramatically speeding up your content creation workflow.
Your Strategy Blueprint: The Travel Creator's Toolkit
Feeling overwhelmed by the options? A powerful tech stack is only as good as the strategy behind it. To help you organize your entire affiliate marketing plan—from keyword research to content creation and promotion—we've created the ultimate resource bundle. It’s packed with the checklists, templates, and guides you need to build a professional and profitable system.
Download Your Free Bundle: The Travel Creator's Toolkit Today!
Frequently Asked Questions (FAQ)
1. Do I really need all these tools when I'm just starting out? When you're starting, focus on the foundation. A WordPress site with a link management plugin (like Pretty Links) and Google Analytics is your essential starting stack. This is a low-cost setup that allows you to organize your links and track your traffic from day one. You can invest in a premium SEO tool like Ahrefs once your site is generating enough revenue to justify the cost.
2. Are there any good free affiliate marketing tools? Absolutely. Google Analytics is free and non-negotiable. Amazon SiteStripe is also free. For keyword research, you can start with free tools like Google Keyword Planner or the free versions of various SEO tools, though they are more limited. The free versions of "link in bio" tools like Linktree are also perfectly sufficient for most creators.
3. How do these tools help with tracking beyond just clicks? Advanced tracking involves connecting data points. For instance, by using UTM parameters (which you can add manually or with some plugins), you can see in Google Analytics not just that someone came from your blog, but that they came from the specific button in your review of the Osprey backpack. This level of detail is what allows you to A/B test different calls-to-action and truly optimize your pages for conversion.
Conclusion: From Hobbyist to CEO
The difference between a creator earning a few dollars a month and one earning a full-time income often comes down to their systems. Top earners don't waste time on manual, low-value tasks. They leverage technology to work smarter, not harder. They treat their content not as a hobby, but as a business.

You now have a curated list of the best affiliate marketing tools to build your own professional tech stack. Start with the foundation: a link management plugin to organize and track your links. Then, layer in SEO and analytics tools to build a predictable stream of traffic. Finally, use optimization and workflow tools to convert that traffic with maximum efficiency.
These affiliate tracking tools and optimization platforms are not an expense; they are an investment in your own efficiency, professionalism, and profitability. By implementing this toolkit, you take a definitive step away from being a hobbyist and become the CEO of your own thriving travel content business.
Meta Data Suggestions:
SEO Meta Title (58 characters): 9 Essential Affiliate Marketing Tools for Travel Creators
URL Slug: essential-affiliate-marketing-tools
SEO Meta Description (154 characters): Discover the top affiliate marketing tools for travel creators. From link tracking to SEO, this guide covers the essential tech stack to automate and grow your income.
Read the full guide: The Travel Blogger's Playbook to Affiliate Marketing Mastery
Don't Miss Out! Subscribe for Exclusive Content
Subscribe


Comments 0
No comments yet
Be the first to share your experience!
Dont Miss Out! Subscribe for Exclusive Content

Ultimate USA Holidays Guide: Top Picks

FTC Affiliate Disclosure: Stay Compliant as a Travel Creator

Avoid These 5 Affiliate Landing Page Mistakes for Better Conversions

Affiliate Keyword Research Mastery for Travel Blogs

Booking.com Affiliate Review: Pros, Cons & Earnings

Decoding Affiliate Commission Rates: Benchmarks for Travel Creators
How to Stay Safe While Hiking: A Hiker's Safety Guide
TrekGuider @trekguider
The call of the trail is a powerful one. It promises sweeping vistas, the quiet solitude of the forest, and the profound satisfaction of reaching a summit under your own power. But for all its beauty, the wilderness is impartial and unforgiving. The same trail that offers bliss on a sunny morning can present serious danger when the weather turns, a wrong turn is made, or an ankle is twisted. This is the problem every hiker faces: the gap between the adventure we dream of and the preparation it demands.
That gap is often filled with anxiety. A flicker of doubt about reading the map, a worry about the approaching clouds, or a sudden fear of what that noise was in the undergrowth can rob an incredible experience of its joy. Too often, hikers—both novice and experienced—find themselves in serious trouble simply by underestimating the trail and overestimating their preparedness. According to Search and Rescue (SAR) teams, most emergencies are the result of small, preventable mistakes. This guide is your definitive playbook for closing that gap for good. We’re providing the essential, expert-backed hiking safety tips you need to move through the backcountry with unwavering confidence. This isn't about fear; it's about empowerment. By mastering these skills, you’re ensuring every hike is a safe one, a core pillar of the responsible adventurer’s mindset we explore in our definitive The Ultimate Guide to Travel Safety: A 2026 Playbook. Let’s gear up, get smart, and get you ready to hit the trail.

This journey from novice to self-sufficient hiker begins not on the trail itself, but with a simple, powerful philosophy of preparedness that has been tested and refined by generations of mountaineers and wilderness experts. It all starts with your pack.
The Foundation of Safety: The 10 Essentials System
Long before your boots touch the dirt, your safety on the trail has already been decided by one thing: what’s inside your pack. Endorsed by the National Park Service and outdoor organizations like REI, the "10 Essentials" is not just a packing list; it's a systematic approach to preparedness. It ensures you have the tools to handle common problems and survive an unexpected night outdoors. Think of these not as ten individual items, but as ten crucial systems.
Navigation: Your primary system for knowing where you are and where you’re going. This must include a physical topographic map of the area and a compass. A GPS device or a smartphone with downloaded offline maps is a great tool, but electronics can fail. A map and compass are your foolproof backup.
Illumination: You need to be able to see in the dark, period. Carry a headlamp or flashlight with a full charge, and always pack extra batteries. A headlamp is superior as it keeps your hands free for other tasks.
Sun Protection: Sunburn and sunstroke can be serious dangers on the trail. This system includes sunglasses, broad-spectrum sunscreen (SPF 30+), and a wide-brimmed hat. Sun-protective clothing can also be a game-changer.
First-Aid Supplies: You must have the ability to treat common trail injuries. Your kit should be equipped to handle blisters, cuts, scrapes, and sprains. A basic kit is good; a custom-built one is better.
Repair Kit and Tools: Gear can break. A multi-tool or knife is invaluable, and a small roll of duct tape can repair everything from a torn jacket to a broken tent pole.
Fire: In an emergency, fire provides warmth, a way to purify water, and a powerful psychological boost. Carry waterproof matches, a reliable lighter, and a dedicated fire starter like dryer lint or a commercial fire-starting block.
Insulation: Weather can change in an instant, especially at elevation. You must carry an extra layer of clothing beyond what you start the hike in, regardless of the forecast. This should be a moisture-wicking layer, like a fleece jacket or thermal top—never cotton, which loses all insulating properties when wet.
Nutrition: Always pack more food than you think you’ll need. An extra day’s worth of non-perishable, high-energy food is the standard. Items like protein bars, nuts, and dried fruit are perfect.
Hydration: Carry more water than you expect to need and have a way to purify more. This means carrying a water filter or purification tablets to safely treat water from streams or lakes in an emergency.
Emergency Shelter: If you’re forced to spend an unplanned night out, protection from the elements is critical to preventing hypothermia. This doesn't mean a tent. A lightweight, packable emergency space blanket or bivy sack is all you need.

For expert-vetted gear lists and detailed trail guides from seasoned creators, the TrekGuider Marketplace is an invaluable resource for taking your preparation to the next level.
"Never Get Lost Again": Mastering Trail Navigation
Of all the potential hiking dangers, getting lost is one of the most common and terrifying. A recent study of SAR missions revealed that "error in judgment" was a leading cause of hikers needing rescue, and a huge part of that is poor navigation. Relying solely on your phone’s GPS is one of the biggest hiking safety tips to ignore—service is unreliable in the backcountry, and batteries die. True navigational confidence comes from time-tested skills.
How to Use a Map and Compass
This fundamental skill is easier than you think and is your most reliable tool.
Place the Compass on the Map: Lay your map flat. Identify your current location and your destination. Place your compass so the long edge of its baseplate creates a line connecting the two points, with the "Direction of Travel" arrow on the compass pointing toward your destination.
Set the Compass Bezel: Keeping the baseplate still, rotate the round bezel (the dial) until the orienting lines inside it are parallel with the map's north-south grid lines. Make sure the "N" on the bezel is pointing to North on the map. The number on the bezel aligned with the Direction of Travel arrow is now your bearing.
Follow the Bearing: Lift the compass off the map and hold it level in front of you. Turn your body until the red magnetic needle is "in the shed"—that is, perfectly inside the red orienting arrow on the bezel. The Direction of Travel arrow now points precisely to your destination. Pick a landmark in that direction, walk to it, and repeat the process.
Pro-Tip: The difference between "true north" (on your map) and "magnetic north" (where your compass points) is called declination. For precise navigation, you must adjust your compass for the local declination, which will be printed on your map.

Wildlife on the Trail: A Guide to Safe Encounters
Seeing wildlife is a thrilling part of hiking, but it’s crucial to remember that you are a visitor in their home. The core principles of every encounter are to maintain a safe distance, never feed wildlife, and know how to react to avoid escalating a situation.
Bear Encounters (Black vs. Grizzly)
Making noise while you hike (talking, clapping) is the best way to avoid surprising a bear. If you do encounter one, your reaction depends on the species.
If a Black Bear Approaches: Never run. Make yourself look as large as possible by raising your arms and opening your jacket. Yell, clap, and make loud noises. If it attacks, fight back aggressively. Target the bear's face and nose with anything you have—rocks, trekking poles, your fists. Do not play dead.
If a Grizzly Bear Approaches/Charges: Do not run and do not make direct eye contact. Speak in a calm, low voice to show you are not a threat. If it charges, stand your ground and use bear spray when it is within 30 feet. If it makes contact, play dead. Lie flat on your stomach, protect the back of your neck with your hands, and use your pack as a shield.
Mountain Lion (Cougar) Encounters
These predators are ambush hunters, so an encounter is rare. If you see one, it has likely been watching you.
Protocol: Do not run, as this triggers their chase instinct. Make direct eye contact. Make yourself appear larger by raising your arms and opening your jacket. Speak in a loud, firm voice. Slowly back away, giving the cat an escape route.
If Attacked: Fight back with everything you've got. Use rocks, sticks, or your hands to target the animal's eyes and face.
Venomous Snake Encounters
Snakes have no interest in humans and will only strike if they feel threatened.
Protocol: If you see a snake, freeze. Do not make any sudden movements. Once you've located the snake, slowly back away and give it a wide berth to move on. Be careful where you step and place your hands, especially when scrambling over rocks or logs.
If Bitten: The priority is to stay calm to slow the spread of venom. Limit physical activity and get to a hospital as quickly and safely as possible for evaluation and potential antivenom treatment.
Handling Trail Emergencies: What to Do When Things Go Wrong
Even with perfect preparation, accidents can happen. A twisted ankle, a sudden illness, or getting turned around can escalate quickly. Your ability to stay calm and make rational decisions is your most valuable asset. If you find yourself in trouble, remember the acronym S.T.O.P.
Stop: The moment you realize you are in trouble, stop moving. Sit down.
Think: Assess your situation calmly. What went wrong? What resources do you have?
Observe: Look around you. Where is the sun? Can you see any landmarks? Is there a source of water or shelter nearby?
Plan: Formulate a simple, logical plan. Don't make panicked decisions.
First Aid on the Trail
Your first-aid kit from the 10 Essentials is your go-to tool for injuries. Here's how to handle the most common trail ailments:
Blisters: The moment you feel a "hot spot" on your foot, stop and address it. Clean the area and apply moleskin or a blister-specific pad. Don't wait for it to become a full-blown blister.
Sprains: For a twisted ankle or knee, use an elastic wrap bandage from your kit to provide compression and support. Loosen it if you feel any numbness or tingling. Elevate the joint when you rest, and use a trekking pole or sturdy branch as a crutch if needed.
Cuts and Scrapes: Control any bleeding with direct pressure using a sterile gauze pad. Once it stops, clean the wound thoroughly with an antiseptic wipe and apply antibiotic ointment before covering it with a bandage.
A well-stocked daypack is crucial, but so is a plan for the whole trip. Before you head out to explore our incredible national parks, make sure your vehicle and supplies are just as prepared as your hiking gear.
Your Ultimate Adventure Blueprint
Ready to hit the road? Don't leave home without our expert-vetted National Park Road Trip Checklist. This free guide covers everything from vehicle prep and essential gear to can't-miss stops, ensuring your adventure is seamless from start to finish. Download it for free now!
Hiking Safety FAQs
A prepared mind anticipates questions. Here are expert answers to common concerns.
1. What's the right way to signal for help?
If you determine you cannot get yourself out of a situation safely, you need to signal for help. The universal distress signal is three of anything: three whistle blasts, three flashes of a headlamp, or three piles of rocks. A whistle is a must-have item that uses far less energy and carries further than shouting. For serious backcountry travel, consider investing in a personal locator beacon (PLB) or satellite messenger, which can send an SOS signal with your exact location to emergency services.
2. Is it safe to hike alone?
Solo hiking can be an incredibly rewarding experience, but it requires a higher level of preparation and self-sufficiency. All the rules in this guide become even more critical. It is absolutely essential that you leave a detailed itinerary with a trusted friend or family member. Include your planned route, your start and end times, and a "panic time"—the specific time they should call for help if they haven't heard from you.
3. What do I do if the weather turns bad unexpectedly?
Your first priority is to get below the treeline if you're in an exposed area to reduce the risk of lightning strikes. Put on your extra insulating layer and your rain gear before you get wet and cold. Assess your map and your situation. It is often safer to turn back, even if you're close to your destination, than to push on into deteriorating conditions.
Pro-Tip: Always tell someone your plan. Before every hike, leave a detailed itinerary with a trusted friend or family member. This is the single most important safety net you have.

Your Adventure, Empowered by Preparation
The goal of these hiking safety tips is not to fill you with fear, but to arm you with confidence. Every piece of gear you pack and every skill you learn is a key that unlocks a new level of freedom on the trail. Preparation allows you to push your boundaries, explore wilder places, and immerse yourself in the beauty of nature without the nagging whisper of anxiety. By respecting the wilderness and committing to self-sufficiency, you transform from a simple visitor into a capable, confident adventurer.
Now that you have the skills for a safe hike, you can integrate that adventure into a larger, perfectly planned journey. For a complete master plan covering everything from budgeting and logistics to finding the best trails and tours, our all-encompassing Travel Guide is the only resource you'll ever need.
Don't Miss Out! Subscribe for Exclusive Content
SubscribeComments 0
No comments yet
Be the first to share your experience!
Dont Miss Out! Subscribe for Exclusive Content

How to Avoid Travel Scams: A Global Guide

Is Public WiFi Safe? How to Protect Your Data Abroad

A Woman's Guide to Safe Travel: 10 Critical Tips

7 Hotel Safety & Security Tips for Peace of Mind

9 Beach Safety Tips That Could Save Your Life

7 Travel Insurance Red Flags to Spot Before You Buy
7 Travel Insurance Red Flags to Spot Before You Buy
TrekGuider @trekguider
You’ve done it. You’ve booked the flights, reserved the hotel with the incredible view, and started daydreaming about the adventures that await. But amidst the excitement, a nagging thought creeps in: What if something goes wrong? A sudden illness, a cancelled flight, a lost bag—these are the travel gremlins that can turn a dream trip into a logistical and financial nightmare. You know you need travel insurance, but as you stare at policies, your eyes glaze over. It’s a dense jungle of jargon, fine print, and confusing clauses, and you’re terrified of making a costly mistake.
The truth is, not all travel insurance is created equal. A cheap policy can be worse than no policy at all, luring you in with a low price only to deny your claim with a hidden exclusion you never saw coming. This is more than just an inconvenience; a denied medical claim abroad can lead to financially crippling bills. But it doesn’t have to be this way. Consider this guide your consumer advocate, your secret decoder ring for the complex world of travel insurance. We’re here to provide the critical travel insurance tips you need to buy with confidence, ensuring your policy is a true safety net, not a tangled mess of loopholes. This is a vital piece of the puzzle we cover in our comprehensive guide to The Ultimate Guide to Travel Safety: A 2026 Playbook. Let’s pull back the curtain and expose the seven most critical red flags you must spot before you buy.

Red Flag #1: The Vague "Pre-Existing Medical Conditions" Clause
This is, without a doubt, the single most common landmine in any policy and the reason countless claims are denied. A "pre-existing condition" is generally any injury or illness for which you've had symptoms or received treatment before your policy's start date. The problem is that the definition and the "look-back" period can vary wildly.
A major red flag is an overly broad or unclear definition. Many basic policies will flat-out refuse to cover any claim that arises, directly or indirectly, from a pre-existing condition. This could be something as common as asthma, a managed heart condition, or even a recent knee injury. Furthermore, many travelers are shocked to discover that mental health conditions like anxiety or depression are frequently excluded under this clause.
What to look for:
A Clear "Look-Back Period": A good policy will specify the exact time frame it examines for pre-existing conditions (e.g., 60, 90, or 180 days before you bought the policy).
Waiver of Exclusion: Many comprehensive policies offer a "waiver for pre-existing medical conditions" if you purchase the plan within a short window (typically 14-21 days) of your initial trip deposit. This is an incredibly valuable benefit.
Coverage for "Stable" Conditions: Some policies will cover conditions that have been stable (no change in medication, no new symptoms) for the duration of the look-back period.
Pro-Tip: Honesty is the only policy. When getting a quote, you must declare all medical conditions. Failure to disclose a condition can give the insurer grounds to void your entire policy and deny any claim, even one completely unrelated to your non-disclosure.
Red Flag #2: The "Adventure & High-Risk Activities" Exclusion
That thrilling scuba dive in the Red Sea, the exhilarating ski trip down a black diamond run, or even a "tame" activity like hot-air ballooning might not be covered by a standard policy. Insurers create a list of activities they deem "high-risk," and if you get injured while participating, you're on your own. For any traveler whose itinerary is more ambitious than a stroll from the hotel to the pool, this is a five-alarm fire.
The list of excluded activities can be surprisingly long and sometimes illogical. It can include everything from bungee jumping and skydiving to motorcycle riding and even certain types of high-altitude trekking. If you're booking an excursion, the first thing you should do is check if that specific activity is covered. Never assume it is.
What to look for:
A Clearly Defined List: Scrutinize the policy document for a specific section on "Excluded Activities." If you can't find a clear list, that's a red flag in itself.
Optional "Adventure Sports" Rider: Reputable insurance providers will offer an optional add-on or a specific, higher-tiered plan that provides coverage for a wide range of adventure sports. It will cost more, but it’s non-negotiable if you plan to partake.
Check Specifics: Don't just see "scuba diving" is covered. Check the details. Does it cover you to a certain depth? Does it require a specific certification? The details are everything.
Red Flag #3: The "Government Travel Advisory" Loophole
In an unstable world, government travel advisories are a key tool for assessing risk. They can also become a loophole for insurers to deny claims. Most policies contain a clause that voids your coverage if you travel to a country or region for which your home government has issued a "Do Not Travel" or equivalent high-level warning before your departure.
Where this gets tricky is when an advisory is issued after you've booked your trip. While some policies will cover trip cancellation in this scenario, many will not provide any medical or evacuation coverage if you choose to go against the official advice. This red flag effectively shifts the entire financial risk of traveling to a potentially volatile destination onto your shoulders.
What to look for:
Specific Wording on Advisories: Look for the exact language the policy uses. Does it only exclude travel to destinations with a warning in place at the time of purchase, or does it also apply if a warning is issued later?
"Cancel for Any Reason" Upgrade: This is one of the best ways to protect yourself against last-minute travel advisory changes. More on this below.

Red Flag #4: The Blanket "Pandemic & Epidemic" Exclusion
In the wake of the COVID-19 pandemic, nearly every provider updated its policies to address communicable diseases. A major red flag is a policy with a broad, all-encompassing exclusion for any losses "due to, arising from, or in connection with any pandemic or epidemic."
This sweeping language could mean you have no coverage for a wide range of scenarios. It could mean you can't cancel if a new lockdown is imposed, if you're afraid to travel due to an outbreak, or even if you contract the illness yourself just before or during your trip.
What to look for:
Named Perils Coverage: Look for policies that, at a minimum, treat a specific disease (e.g., COVID-19) like any other illness. This means if you are medically diagnosed and can't travel, your trip cancellation should be covered. Likewise, your emergency medical expenses should be covered if you get sick on your trip.
Clarity on Quarantine Costs: The best policies today will explicitly state whether they cover the costs of a mandatory quarantine (e.g., extra hotel nights, food) if you test positive while abroad.
Red Flag #5: The "Named Perils Only" Cancellation Clause
Many travelers believe "trip cancellation coverage" means they can cancel for any reason and get their money back. This is a dangerous and costly misconception. Standard policies operate on a "named perils" basis, meaning they will only reimburse you for non-refundable costs if you cancel for one of the very specific, listed reasons in the policy document.
A red flag is a policy with a short and restrictive list. Common covered reasons include the unforeseen illness or death of the traveler or a close family member, a house fire, or being called for jury duty. Common reasons that are often not covered include changing your mind, a relationship breakup, or work conflicts. This means if you have to cancel because your pet-sitter backs out or your boss denies your vacation time at the last minute, you get nothing.
Red Flag #6: The Restrictive "Pregnancy & Childbirth" Limitation
Traveling while pregnant requires an extra layer of precaution, and your insurance policy needs to reflect that. A significant red flag is a policy that either completely excludes pregnancy or has highly restrictive limitations.
Many standard policies will not cover costs related to a normal, routine pregnancy. This means if you go into labor while on your trip, the costs of a routine childbirth and care for a healthy newborn will likely not be covered. Coverage for unforeseen complications is often only provided up to a certain stage of the pregnancy (e.g., 23 to 32 weeks), and many policies will not cover pregnancies that resulted from IVF.
What to look for:
A Clear Definition of "Complication": The policy should specify what it considers an unforeseen complication of pregnancy.
Stated Gestational Week Limit: Look for the exact week up to which coverage for complications is provided.
Coverage for Newborn Care: Check if the policy provides any coverage for the care of a newborn if they are born prematurely on the trip.

Your Pre-Trip Master Plan
Navigating insurance is just one piece of the pre-travel puzzle. To ensure you've covered every base—from passports and visas to packing and finances—a master checklist is your most powerful tool. Download our free, comprehensive checklist to make your preparation seamless.
Download Your Free International Travel Checklist Now!
Red Flag #7: The "Mental Health Conditions" Blind Spot
This is a frequently overlooked but critically important exclusion. Many travel insurance policies contain a specific clause that excludes any claims arising from "mental or nervous health disorders." This can include conditions like anxiety disorders, depression, dementia, and other psychiatric conditions.
This means if you have a panic attack and need to be hospitalized, or if you need to cancel your trip due to a severe depressive episode, your policy may offer no coverage. For the millions of people who manage mental health conditions, this is a glaring and dangerous gap in coverage.
What to look for:
Review the Exclusions List: Carefully read the general exclusions section for any mention of "mental," "nervous," or "psychological" disorders.
Specialized Policies: Some providers are beginning to offer more inclusive plans. You may need to seek out a specialty provider or a higher-end comprehensive plan that explicitly states it provides coverage for acute episodes of a pre-existing mental health condition.
Pro-Tip: Cancel For Any Reason (CFAR) is an optional upgrade that acts as your ultimate safety net against uncovered cancellation reasons. It typically reimburses 50-80% of your non-refundable costs. But be aware: you must purchase a CFAR add-on within a short window, usually 14-21 days, of your initial trip payment. Don't wait!
Travel Insurance FAQs
Spotting red flags is easier when you speak the language. Here are answers to common questions, providing some essential travel insurance tips for understanding policy jargon.
1. What's the real difference between primary and secondary medical coverage?
This determines the order of payment and how much work you have to do. A primary policy pays first. You file your claim directly with the travel insurer, which means less paperwork and faster reimbursement. Secondary coverage only pays after your other insurance (like your regular health plan) has paid its share. It requires you to file twice and is generally less convenient. For international travel, primary coverage is strongly recommended.
2. Is travel insurance worth it for a domestic trip?
Often, yes. While your regular health insurance will likely work in another state, it won't cover trip cancellation, interruption, or lost baggage. If you've prepaid for expensive flights and non-refundable hotels for a trip to a national park, for instance, trip insurance can protect that investment if you have to cancel for a covered reason.
3. When is the best time to buy travel insurance?
You should buy your policy as soon as you make your first non-refundable trip payment (like booking flights or a tour). This ensures you are covered for the longest possible period. More importantly, it's the only way to be eligible for time-sensitive benefits like the "pre-existing condition waiver" and the "Cancel for Any Reason" upgrade, which often must be purchased within 14-21 days of your initial deposit.

Travel with True Peace of Mind
Buying travel insurance isn’t just about ticking a box on your pre-trip to-do list. It’s about making an informed decision to purchase a strong financial safety net. By using these travel insurance tips to read a policy like a pro, you can confidently spot the red flags, avoid the worthless plans, and choose a policy that delivers on its promise. An investment in the right coverage—and in a comprehensive resource like our all-encompassing Travel Guide—is an investment in your own peace of mind. Now you can focus on the adventure ahead, knowing you’re protected no matter what the journey throws your way.
Meta Data Suggestions:
SEO Meta Title (59 characters): 7 Travel Insurance Red Flags to Spot Before You Buy
URL Slug: travel-insurance-red-flags
SEO Meta Description (154 characters): Don't get burned by bad travel insurance. Learn the 7 critical red flags to spot in any policy with these essential travel insurance tips before you buy.
Don't Miss Out! Subscribe for Exclusive Content
SubscribeComments 0
No comments yet
Be the first to share your experience!
Dont Miss Out! Subscribe for Exclusive Content
Ultimate USA Holidays Guide: Top Picks
FTC Affiliate Disclosure: Stay Compliant as a Travel Creator

Essential Affiliate Tools: From Tracking to Full Optimization
Booking.com Affiliate Review: Pros, Cons & Earnings
Decoding Affiliate Commission Rates: Benchmarks for Travel Creators

Top 11 High-Paying Affiliate Programs for Travel Bloggers
Skip the Crowds: 8 Amazing Family Vacation Destinations
TrekGuider @trekguider
Tired of scrolling through the same lists of crowded, overpriced family vacation spots? You're not just looking for a random vacation; you're hunting for a genuine experience. You want a trip that sparks real curiosity in your kids and forges memories that last longer than the flight home, but the standard destinations can feel like a treadmill of long lines and manufactured fun.
The real frustration is the fear of choosing wrong. You know there are incredible, unique places across the USA that could offer your family a real adventure, but finding them feels like searching for a needle in a digital haystack. You worry about picking a spot that results in bored teenagers, overwhelmed toddlers, or a trip that feels more stressful than your daily routine.
This guide is your solution. It’s a curated map to America's hidden gems—the destinations that deliver authentic charm, thrilling adventures, and precious family connection, without the overwhelming crowds. For a broader look at how to choose the perfect trip style for your crew, be sure to check out our comprehensive Family Travel Ideas: The 2026 Guide to Unforgettable Trips before diving into these specific locales.
Why Skip the Crowds? Uncovering America's Best-Kept Secrets
Let's be clear: choosing a hidden gem isn't just about avoiding crowds. It's a strategic decision to trade manufactured fun for authentic discovery. It's the difference between waiting in line for a ride and watching wild ponies roam on a pristine beach.
Instead of an overpriced city tour, you're exploring ancient cliff dwellings with your kids. These are the family vacation destinations that offer more than just a getaway; they offer a story. We’ve handpicked locations that excel in three key areas: authenticity, value, and manageable logistics for families.

Ready to Get Organized?
Planning the perfect trip requires the right tools. Before you dive into these amazing destinations, grab our free Travel Itinerary Template. It's the easiest way to organize your days, keep track of bookings, and make your family travel planning actually easy.
Secret Shores & Lakeside Sanctuaries
For families who feel the call of the water, these destinations offer a refreshing alternative to the usual packed coasts.
1. Chincoteague Island, Virginia: Wild Ponies and Salty Air
Forget the high-rises and boardwalks. Chincoteague Island is a laid-back sanctuary on Virginia's Eastern Shore, famous for the wild ponies that roam the adjacent Assateague Island National Seashore. This is a place that runs on a slower, more natural clock.

The Vibe: A classic, unpretentious beach town where the main attractions are provided by nature. It's all about bike rides, bird watching, and beachcombing.
Best For: Families with elementary-aged children who love animals and nature.
Best Time to Visit: Late spring and early fall offer beautiful weather and fewer crowds. The annual Pony Swim in late July is a bucket-list event, but book accommodations a year in advance.
Can't-Miss Activities:
Take a wildlife boat tour: This is non-negotiable. It's the best way to see the wild ponies, dolphins, and stunning shorebirds up close.
Bike the refuge trails: The flat, paved paths of the Chincoteague National Wildlife Refuge are perfect for a leisurely family bike ride to the beach.
Go crabbing off a public dock: Rent a simple crab pot and line for an afternoon of old-fashioned fun. It's a rite of passage here.
Climb the Assateague Lighthouse: The view from the top gives you a fantastic perspective of the islands.
2. Traverse City, Michigan: The "Caribbean of the North"
Nestled on the shores of Lake Michigan's Grand Traverse Bay, Traverse City boasts stunning freshwater beaches with turquoise water and towering sand dunes. Its family-friendly atmosphere rivals any ocean destination.
The Vibe: Wholesome, active, and quintessentially Midwestern summer. It blends stunning natural beauty with charming small towns and a thriving food scene.
Best For: Multigenerational families looking for a mix of relaxation and accessible activities.
Best Time to Visit: July and August for the warmest swimming weather. The National Cherry Festival in early July is popular but extremely crowded; consider late August for a more relaxed trip.
Can't-Miss Activities:
Conquer Sleeping Bear Dunes: Climb the massive Dune Climb for an incredible view and then run, roll, or slide down to the shore of Glen Lake.
Hunt for Petoskey Stones: Spend an afternoon walking the shores of Lake Michigan, searching for these unique fossilized stones.
Kayak the Crystal River: This gentle, crystal-clear river is perfect for a family float, winding through lush forests.
Explore Fishtown in Leland: Walk through the historic, weathered fishing shanties, now home to quirky shops and galleries.
3. The San Juan Islands, Washington: An Archipelago Adventure
Just a scenic ferry ride from Seattle, this collection of islands feels like a world away. Life here revolves around the water, from whale watching to kayaking in serene coves. Each island has its own personality, from the bustling Friday Harbor on San Juan Island to the pastoral quiet of Lopez Island.

The Vibe: Pacific Northwest bliss. It’s relaxed, eco-conscious, and breathtakingly beautiful, with a focus on wildlife and quiet exploration.
Best For: Families with kids of all ages who appreciate nature and a slower pace.
Best Time to Visit: July and August offer the sunniest, warmest weather, which is also the peak season for whale watching.
Budget-Saving Tip: Pack a cooler with picnic supplies and snacks. Groceries and restaurants on the islands can be pricey, and a beach picnic is part of the classic San Juan experience.
Can't-Miss Activities:
Go on a Whale Watching Tour: The San Juans are one of the best places in the world to see orcas in the wild. It’s an unforgettable experience.
Visit Lime Kiln Point State Park: Known as "Whale Watch Park," you can often spot whales right from the shoreline.
Explore the sculpture park: The 20-acre San Juan Islands Sculpture Park near Roche Harbor is a fantastic place for kids to run around and interact with art.
Bike around Lopez Island: Known as the "Friendly Isle" for its gentle terrain and waving locals, Lopez is perfect for a family bike ride.
Pro-Tip: Ferry reservations are absolutely essential, especially during the summer. Book your vehicle spot on the Washington State Ferries website as soon as your travel dates are confirmed.
Mountain Escapes & Park Alternatives
For families craving fresh air and epic landscapes, these destinations provide all the majesty of the more famous national parks with a fraction of the traffic. For more ideas like these, don't miss our guide to 4 Unforgettable National Park Family Travel Ideas.
4. Custer State Park, South Dakota: The Crown Jewel of the Black Hills
Often treated as a side trip from Mount Rushmore, Custer State Park is a world-class destination in its own right. With 71,000 acres of breathtaking landscapes and wildlife that rivals the big-name parks, it's arguably one of the best state parks in the nation.

The Vibe: Wild West writ large. It's a world of granite spires, rolling prairies, and massive bison herds that feels both accessible and untamed.
Best For: Active families with kids aged 7+ who love hiking and wildlife spotting.
Best Time to Visit: Early June or September to avoid the massive crowds from the Sturgis Motorcycle Rally (early August).
Can't-Miss Activities:
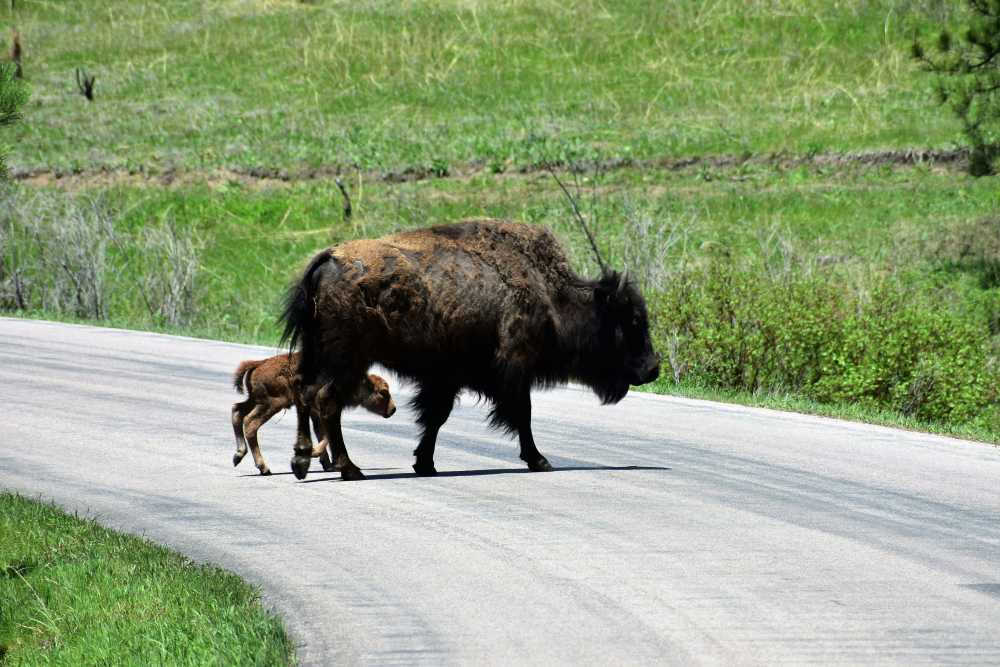
Drive the Wildlife Loop Road at dusk: This is when the animals are most active. You're almost guaranteed to get stuck in a "bison jam."
Navigate the Needles Highway: This incredible 14-mile road twists and turns through towering granite spires and narrow tunnels carved from rock.
Swim or kayak on Sylvan Lake: This impossibly scenic lake, surrounded by rock formations, is the perfect spot for an afternoon on the water.
Hike to Black Elk Peak: For ambitious families, the hike to the highest point east of the Rockies offers unforgettable 360-degree views.
5. The Finger Lakes, New York: Gorges, Falls, and Lakeside Fun
This stunning region in upstate New York is known for its 11 long, narrow lakes and wineries. But its true hidden gem status for families comes from its spectacular state parks, filled with dramatic gorges and countless waterfalls.

The Vibe: A natural waterpark carved by glaciers. It's a place for active exploration followed by relaxing evenings by the lake.
Best For: Families with energetic kids and teens who love to hike, swim, and explore.
Local Flavor: Don't leave without trying a "grape pie," a regional specialty that's a delicious nod to the area's Concord grape heritage.
Can't-Miss Activities:
Walk the Gorge Trail at Watkins Glen: The trail takes you over, under, and behind 19 incredible waterfalls in just two miles.
Swim at the base of a waterfall: Robert H. Treman State Park has a classic swimming hole right below a massive waterfall, complete with a diving board.
Get hands-on at the Corning Museum of Glass: The live glass-blowing demonstrations are mesmerizing, and you can even make your own glass creation.
Rent a pontoon boat: Spend a day on Cayuga or Seneca Lake, jumping in for a swim and enjoying the scenery from the water.
6. The Berkshires, Massachusetts: Culture in the Countryside
Nestled in the rolling hills of western Massachusetts, The Berkshires offer a unique blend of outdoor adventure and world-class culture. You can hike a mountain in the morning and listen to a symphony concert on the lawn at Tanglewood in the evening.

The Vibe: Rustic sophistication. It’s a haven for artists and nature lovers, with charming small towns and a palpable creative energy.
Best For: Families with a mix of interests, from art and music to hiking and swimming.
Best Time to Visit: Summer for the full slate of cultural festivals. Fall is breathtaking with its famous foliage.
Can't-Miss Activities:
Hike to the summit of Monument Mountain: A moderate hike rewards you with panoramic views that once inspired famous authors.
Explore the Norman Rockwell Museum: Even kids who aren't "museum people" will connect with Rockwell's relatable and iconic images of American life.
Go for a swim at Lake Pontoosuc: This public lake has a sandy beach and is a popular spot for families to cool off.
Wander through the town of Stockbridge: This is the quintessential New England town, so picturesque it was immortalized in a Rockwell painting.
Places That Tell a Story: History & Culture Off the Beaten Path
These unique destinations offer a chance to engage with American history and culture in a way that’s truly captivating for the whole family.
7. Mesa Verde National Park, Colorado: A City in the Cliffs
This UNESCO World Heritage Site protects nearly 5,000 archeological sites, including 600 incredibly preserved cliff dwellings of the Ancestral Pueblo people. This isn't just history behind glass; it's history you can touch and climb into.

The Vibe: Awe-inspiring and humbling. It connects you to a deep and ancient American story in a profoundly tangible way.
Best For: Families with school-aged children (age 7+) interested in history and adventure. Note that some tours involve climbing steep ladders.
Pro-Tip: Tour tickets for Cliff Palace and Balcony House are released 14 days in advance on recreation.gov and sell out almost instantly. Be online the moment they become available.
Can't-Miss Activities:
Tour a cliff dwelling: A ranger-led tour of Cliff Palace or Balcony House is the absolute highlight.
Drive the Mesa Top Loop Road: This 6-mile drive has easily accessible overlooks that tell the chronological story of the Ancestral Pueblo people.
See Spruce Tree House: The view of this massive dwelling from the overlook near the museum is spectacular.
Become a Junior Ranger: The park's program is excellent and is a fantastic way to engage kids in learning about the park's history.
8. St. Augustine, Florida: Where America's Story Begins
Founded in 1565, St. Augustine offers a slice of colonial Spanish history on the Florida coast. With its cobblestone streets, imposing fortress, and tales of pirates, it's a city that sparks the imagination.
The Vibe: A European city that washed up on a Florida beach. It's historic, walkable, and packed with unique attractions.
Best For: Families with a wide range of ages—from young kids who love pirates to teens who can appreciate the deep history.
Best Time to Visit: Spring and fall have the most pleasant weather for walking. The "Nights of Lights" festival from November to January is magical.
Can't-Miss Activities:
Explore the Castillo de San Marcos: Kids love running around the ramparts of the oldest masonry fort in the continental U.S. Don't miss the cannon firing demonstrations.
Hunt for treasure at the Pirate & Treasure Museum: This is a surprisingly well-done museum with authentic pirate artifacts.
Climb the St. Augustine Lighthouse: Brave the 219 steps for a stunning panoramic view of the city and the Atlantic Ocean.
Hit the beach: Just a short drive away, St. Augustine Beach offers miles of wide, white sand perfect for sandcastles and splashing.
Frequently Asked Questions
What are the main benefits of choosing a less-crowded family vacation destination?
The biggest benefits are a more relaxed pace, lower costs, and more authentic experiences. You'll spend less time waiting in lines and more time connecting with your family and the destination itself, often creating much richer memories.
Are "hidden gem" destinations good for families with toddlers or teens?
Absolutely. The key is matching the destination's activities to your kids' ages and interests. A place like Chincoteague is perfect for young, animal-loving kids, while the hiking and history of Mesa Verde or the gorges of the Finger Lakes are fantastic for engaging older kids and teens.
What's the best way to find unique vacation spots beyond this list?
Recommended: Stress-Free Flying with Kids: Airport, TSA, and In-Flight Guide
Recommended: Travel Guide: Trip Planning, Flights, and Avoiding Tourist Traps
Start by looking at state parks instead of only national parks, which are often just as beautiful but with fewer crowds. You can also explore regions just outside major tourist hubs or ask for recommendations in online travel communities focused on specific interests like hiking or history.
Create Your Own Adventure
Choosing one of these hidden gems is about more than just avoiding crowds; it’s an intentional decision to seek out a different kind of trip. It’s about finding the places that allow your family to connect—with nature, with history, and most importantly, with each other.
These unique family vacation destinations prove that the most memorable adventures are often found on the roads less traveled. So, break free from the conventional lists, pack your bags with a sense of curiosity, and get ready to create a family story that is uniquely yours.
Read the full guide: Family Travel Ideas: The 2026 Guide to Unforgettable Trips
Don't Miss Out! Subscribe for Exclusive Content
SubscribeComments 0
No comments yet
Be the first to share your experience!
Dont Miss Out! Subscribe for Exclusive Content
Ultimate USA Holidays Guide: Top Picks
FTC Affiliate Disclosure: Stay Compliant as a Travel Creator
Essential Affiliate Tools: From Tracking to Full Optimization
Booking.com Affiliate Review: Pros, Cons & Earnings
Decoding Affiliate Commission Rates: Benchmarks for Travel Creators
