Essential Affiliate Tools: From Tracking to Full Optimization
TrekGuider @trekguider
You’re a creator, not an administrator. Yet, you find yourself drowning in a sea of administrative tasks. You’re manually copying and pasting ugly, mile-long affiliate links, toggling between a dozen different program dashboards to check your stats, and spending more time wrestling with spreadsheets than you do creating the travel content you love. Your affiliate "business" feels less like a streamlined operation and more like a chaotic, time-sucking hobby that isn't paying the bills.
This inefficiency is more than just frustrating—it's a silent killer of your income. Every hour you spend on manual, repetitive tasks is an hour you’re not creating the next piece of content that could generate revenue for years to come. You're flying blind, guessing which strategies are working, unable to see which links are converting, and which pages are actually profitable. The reported average income of $13,847 a month for travel affiliates feels like a distant fantasy when you’re stuck in this administrative quicksand.

This guide is your way out. It is your curated, creator-friendly tech stack—a definitive list of the essential affiliate marketing tools that will automate the tedious, provide crystal-clear data, and free you up to focus on growth. We’ll cover the entire workflow, from foundational link management and tracking to the advanced tools needed for full-scale optimization. This is how you transform your passion project into a professional, efficient, and profitable business. For a complete command of the entire affiliate landscape, our definitive pillar page, Travel Affiliate Programs: The 2026 Ultimate Guide, is your essential command center for mastering the entire ecosystem.
The Foundational Layer: Your Operational Command Center
Before you can optimize, you must organize. This first set of tools forms the non-negotiable foundation of any serious affiliate marketing business. They are your central nervous system for managing links, ensuring compliance, and tracking performance from a single source of truth.
Link Management Plugins (The Digital Quartermaster)
If you run your travel blog on WordPress, a link management plugin is the single most important tool you will install. These plugins take the long, ugly, and intimidating affiliate links provided by programs and "cloak" them into short, clean, branded URLs that are far more trustworthy to your audience.
Think of it as your command center. Instead of embarking on a digital scavenger hunt through year-old posts to update a single expired link, you change it once in a central dashboard, and the plugin deploys that change site-wide instantly. This functionality alone will save you hundreds of hours over the life of your business. Furthermore, a link like yourblog.com/recommends/osprey-backpack is infinitely more professional and trustworthy to a reader than a long URL filled with random tracking parameters, directly impacting your click-through rates.

Top Tools in This Category:
Recommended: Travel Creator Toolkit: 34 Essential Apps and Resources
Recommended: Digital Product Ideas: How to Make Money From Your Next Trip
ThirstyAffiliates: A powerhouse plugin built specifically for affiliate marketers. It offers advanced features like autolinking (automatically turning specific keywords into affiliate links), proactive link checking to find broken links, and detailed click analytics.
Pretty Links: A slightly simpler but highly effective alternative. It excels at link cloaking, redirection, and providing basic click-tracking reports right from your WordPress dashboard.
Pro-Tip: The best link management plugins, like ThirstyAffiliates, can automatically add the required rel="sponsored" tag to all of your affiliate links. This is a critical feature that ensures you stay compliant with Google's guidelines for paid links, protecting your site from potential SEO penalties without you having to think about it.
Affiliate Tracking Tools (Your Source of Truth)
"What gets measured gets managed." To grow your affiliate income, you need a crystal-clear understanding of what’s working. While many creators start by manually checking each affiliate network’s dashboard, a dedicated approach to tracking provides a more holistic, actionable view.
For most creators, your affiliate tracking tools will be a combination of your link management plugin’s analytics and the dashboards provided by your affiliate networks (like CJ Affiliate or Travelpayouts). These platforms show you crucial metrics like clicks, conversions, and commission earnings.
However, as your business matures, you'll want to track performance across different income models. For example, the TrekGuider Seller Platform includes a dedicated referral dashboard. This is a specialized tracking tool that shows you not just one-time sales, but the ongoing, passive income you’re earning from the new sellers you’ve brought to the platform. It’s a perfect example of how a modern platform provides the built-in affiliate tracking tools you need to monitor more sophisticated, high-margin income streams like revenue sharing.
The Growth Engine: Traffic & SEO Tools
With your operational house in order, the focus must pivot from organization to acquisition. A perfectly managed link is useless without a steady stream of the right people clicking on it. This is where your growth engine comes in—the tools designed to attract your ideal audience with precision.
SEO & Keyword Research Platforms
The most profitable affiliate content is created with intention. It targets keywords that signal a user is actively researching a purchase (e.g., "best carry-on luggage review"). SEO platforms are your treasure map for finding these "money" keywords and building a content strategy that attracts buyers, not just browsers.

These platforms are indispensable for:
Finding Profitable Keywords: Uncover what your audience is searching for, how many people are searching for it, and how difficult it will be to rank on Google.
Analyze the Competition: See exactly which keywords your competitors are ranking for and which pages are bringing them the most traffic.
Track Your Performance: Monitor your rankings for your target keywords over time to see what’s working and where you need to improve.
Top Tools in This Category:
Ahrefs: A comprehensive, professional-grade SEO toolkit. Its "Keywords Explorer" is second to none for finding high-value commercial investigation keywords, and its "Site Explorer" provides deep insights into any competitor's strategy.
SEMrush: Another all-in-one industry leader that offers a powerful suite of tools for keyword research, rank tracking, and competitive analysis.
Pro-Tip: Don't confine your keyword strategy to your blog. With video projected to account for a staggering 55% of all affiliate traffic by 2026, the same commercial-intent keywords you find for your articles are the exact titles you should be using for your YouTube videos and TikToks.
Analytics Platforms
While SEO tools help you get traffic, a web analytics platform tells you what that traffic does once it arrives. It’s essential for understanding your audience, diagnosing problems, and optimizing their journey from reader to buyer.
The Must-Have Tool:
Google Analytics: The free, industry-standard tool for website analytics. It's an incredibly powerful platform that provides all the data you need to understand user behavior, track conversions, and identify your top traffic sources, allowing you to double down on what works.
The Conversion Toolkit: Optimization & Social Media Tools
Attracting traffic is only half the battle. The final, crucial step is converting that traffic into clicks and commissions. This set of tools is designed to streamline your workflow and optimize your content for maximum impact.
"Link in Bio" Tools (For Social Dominance)
Platforms like Instagram and TikTok are powerful for audience building, but they famously limit your ability to use clickable links. A "link in bio" tool solves this by creating a simple, mobile-friendly landing page that can house all of your most important affiliate links, blog posts, and offers.

Top Tools in This Category:
Linktree: The most well-known tool in this space, offering a simple and effective way to create a micro-landing page for your social media bio.
Later: While primarily a social media scheduling tool, Later’s "Link in Bio" feature is excellent, allowing you to create a clickable grid of your Instagram posts, driving traffic directly to relevant blog posts and affiliate offers.
The Amazon Workflow Accelerator
For nearly every travel creator, Amazon Associates is a core part of their affiliate strategy. However, creating links for individual products can be a slow, manual process.
The Must-Have Tool:
Amazon SiteStripe: This is a free, official toolbar from Amazon that appears at the top of your browser whenever you’re on Amazon.com. It allows you to generate a custom affiliate link (text, image, or both) for any product page with a single click, dramatically speeding up your content creation workflow.
Your Strategy Blueprint: The Travel Creator's Toolkit
Feeling overwhelmed by the options? A powerful tech stack is only as good as the strategy behind it. To help you organize your entire affiliate marketing plan—from keyword research to content creation and promotion—we've created the ultimate resource bundle. It’s packed with the checklists, templates, and guides you need to build a professional and profitable system.
Download Your Free Bundle: The Travel Creator's Toolkit Today!
Frequently Asked Questions (FAQ)
1. Do I really need all these tools when I'm just starting out? When you're starting, focus on the foundation. A WordPress site with a link management plugin (like Pretty Links) and Google Analytics is your essential starting stack. This is a low-cost setup that allows you to organize your links and track your traffic from day one. You can invest in a premium SEO tool like Ahrefs once your site is generating enough revenue to justify the cost.
2. Are there any good free affiliate marketing tools? Absolutely. Google Analytics is free and non-negotiable. Amazon SiteStripe is also free. For keyword research, you can start with free tools like Google Keyword Planner or the free versions of various SEO tools, though they are more limited. The free versions of "link in bio" tools like Linktree are also perfectly sufficient for most creators.
3. How do these tools help with tracking beyond just clicks? Advanced tracking involves connecting data points. For instance, by using UTM parameters (which you can add manually or with some plugins), you can see in Google Analytics not just that someone came from your blog, but that they came from the specific button in your review of the Osprey backpack. This level of detail is what allows you to A/B test different calls-to-action and truly optimize your pages for conversion.
Conclusion: From Hobbyist to CEO
The difference between a creator earning a few dollars a month and one earning a full-time income often comes down to their systems. Top earners don't waste time on manual, low-value tasks. They leverage technology to work smarter, not harder. They treat their content not as a hobby, but as a business.

You now have a curated list of the best affiliate marketing tools to build your own professional tech stack. Start with the foundation: a link management plugin to organize and track your links. Then, layer in SEO and analytics tools to build a predictable stream of traffic. Finally, use optimization and workflow tools to convert that traffic with maximum efficiency.
These affiliate tracking tools and optimization platforms are not an expense; they are an investment in your own efficiency, professionalism, and profitability. By implementing this toolkit, you take a definitive step away from being a hobbyist and become the CEO of your own thriving travel content business.
Meta Data Suggestions:
SEO Meta Title (58 characters): 9 Essential Affiliate Marketing Tools for Travel Creators
URL Slug: essential-affiliate-marketing-tools
SEO Meta Description (154 characters): Discover the top affiliate marketing tools for travel creators. From link tracking to SEO, this guide covers the essential tech stack to automate and grow your income.
Read the full guide: The Travel Blogger's Playbook to Affiliate Marketing Mastery
Don't Miss Out! Subscribe for Exclusive Content
Subscribe


Comments 0
No comments yet
Be the first to share your experience!
Dont Miss Out! Subscribe for Exclusive Content

Ultimate USA Holidays Guide: Top Picks

FTC Affiliate Disclosure: Stay Compliant as a Travel Creator

Avoid These 5 Affiliate Landing Page Mistakes for Better Conversions

Affiliate Keyword Research Mastery for Travel Blogs

Booking.com Affiliate Review: Pros, Cons & Earnings

Decoding Affiliate Commission Rates: Benchmarks for Travel Creators
Budget Solo Travel: A Proven System for Trips Under $1000
TrekGuider @trekguider
Planning a solo trip should be thrilling. But for many, one question hangs in the air, casting a shadow of stress and analysis paralysis over the entire process: "How much will this actually cost?" You’ve scrolled through the endless, generic "tips," but you’re still left without a real plan, haunted by the specter of hidden fees, unexpected expenses, and the daunting idea that a trip under $1000 is pure fantasy.
This is not another list. This is your financial playbook. It’s a proven, three-phase system designed to dismantle uncertainty and empower you to plan an incredible adventure with total confidence. This guide to budget solo travel will give you the framework and the tools to build a realistic budget you can actually trust. A successful trip, however, involves more than just money. For a complete masterclass covering everything from safety to packing and meeting people, be sure to read our ultimate guide to .
The Strategic Foundation—The Decisions That Save the Most
The secret to a truly affordable solo trip isn't about pinching every penny until it screams. It’s about making a few smart, high-impact decisions long before you even think about packing. These foundational choices have the biggest impact on your bottom line and set the stage for a stress-free adventure.
Choose Your Playground Wisely
This is the single most important decision you will make. Your destination dictates the cost of everything else. A week in Zurich will cost exponentially more than a month in Hanoi, no matter how frugal you are. To keep your trip under $1000, you must focus on regions where your home currency has heavyweight buying power.
Southeast Asia (The Budget Gold Standard): Countries like Vietnam, Thailand, Cambodia, and Indonesia are legendary for a reason. You can feast on world-class street food for a couple of dollars, secure a clean, private guesthouse room for $20-$30, and witness breathtaking landscapes that cost absolutely nothing to enjoy.
Eastern Europe (Culture Without the Cost): Forget the well-trodden paths of Paris and Rome. Cities like Budapest (Hungary), Prague (Czech Republic), Krakow (Poland), and Lisbon (Portugal) offer centuries of history, stunning architecture, and vibrant culture at a price that feels like a pleasant time warp.
Latin America (Adventure Capital): For raw adventure and rich culture, destinations like Mexico, Colombia, Bolivia, and Guatemala provide unparalleled value. You can explore ancient Mayan ruins, hike active volcanoes, and immerse yourself in dynamic local life, all on a remarkably modest budget.

Master the Calendar
Recommended: Stress-Free Flying with Kids: Airport, TSA, and In-Flight Guide
Recommended: Travel Guide: Trip Planning, Flights, and Avoiding Tourist Traps
Timing isn't just important; it's everything. Every destination has three travel seasons, and knowing the difference is like having a cheat code.
High Season: Peak tourist time with postcard-perfect weather, but also the biggest crowds and eye-watering prices.
Low Season: The off-season, often with challenging weather, fewer open attractions, and rock-bottom prices.
Shoulder Season: The magic window. Nestled between the high and low seasons (typically April-May and September-October in the northern hemisphere), this is the budget traveler's sweet spot.
Traveling during the shoulder season means you get the best of both worlds: pleasant weather, far fewer tourists cluttering your photos, and dramatic drops in the cost of flights and accommodations. Visiting the Greek Islands in May instead of July, for instance, can easily cut your two biggest expenses by 30-50%.
Build Your Budget Blueprint
Let’s reframe the word "budget." It isn't a restriction; it's a permission slip. A well-crafted budget doesn't tell you what you can't do; it gives you the freedom to do what you want to do, without the guilt or anxiety. Here’s how to build one you can rely on.
Set Your Ceiling: Before anything else, define your absolute maximum trip cost. For this playbook, we're targeting a complete trip under $1000.
Become a Researcher: Open a spreadsheet and start plugging in real numbers. Use sites like Kayak, Booking.com, and detailed travel blogs to estimate average costs for your chosen destination. Be thorough.
Flights/Major Transport: Your biggest single purchase.
Accommodation: Your largest daily expense.
Food & Drink: A realistic mix of meals out, street food, and groceries.
Activities & Tours: Museum entries, day trips, cooking classes.
Local Transport: Subways, buses, and the occasional ride-share.
Travel Insurance: Non-negotiable. Don't even consider leaving home without it.
Build a Financial Safety Net: This is the pro move. Once you have your total estimated cost, add a 15-20% "contingency fund." This isn't for overspending; it’s for the unexpected. It’s the money that lets you say "yes" to a spontaneous adventure or handle a missed train without a panic attack. It’s the key to true peace of mind.

With that blueprint in hand, it’s time to move from strategy to action.
The Booking Engine—Locking in Value on Your Biggest Expenses
This is where the rubber meets the road. With your strategic plan in place, you can now book the core components of your trip with surgical precision, ensuring you get the absolute best value for every dollar spent.
Accommodation Strategy
For a solo traveler, a standard hotel room is almost always the least imaginative and most expensive option. The world of alternative accommodations is where you’ll find incredible value and far more interesting experiences.
Hostels (The Social Hub): The undisputed champion of budget solo travel. They offer dorm beds for incredibly low prices and have a built-in social atmosphere that’s perfect for meeting other travelers. If dorms aren’t your scene, a private room in a quality hostel gives you the perfect blend of privacy and community at a price well below a hotel.
Guesthouses & Local Inns: These smaller, often family-run establishments offer a direct line to the local culture. They're typically much cheaper than large hotel chains and infinitely more charming.
Apartment Rentals (with a Kitchen): For stays of three days or more, sites like Airbnb can be fantastic value. The real secret weapon here is the kitchen. Being able to prepare your own breakfast and the occasional dinner will slash your daily food costs.

How to Slay the Single Supplement Dragon
The "single supplement" is an infuriating fee that tour companies and cruise lines charge solo travelers to cover the perceived loss of a second person in a double-occupancy room. It’s a penalty for your independence, and you should refuse to pay it. Here’s how:
Seek Out Solo-Friendly Companies: Tour operators like Intrepid Travel, G Adventures, and Overseas Adventure Travel are built for travelers like you. They’ll match you with a same-sex roommate to eliminate the fee entirely.
Use the Calendar to Your Advantage: Companies are far more likely to waive the fee during the shoulder season when they have more empty spots to fill.
Become a Last-Minute opportunist: If your schedule is flexible, call companies a week or two before a tour's departure. They may be desperate to fill a final spot and will gladly waive the fee to make a sale.
Don't Be Afraid to Ask: If a solo option isn't listed online, pick up the phone. A friendly, direct request can often work wonders.
Transportation Hacks
Getting from Point A to Point B is a major budget item. A few smart moves here can free up hundreds of dollars for more exciting things.
Pack Light, Win Big: Master the art of carry-on-only travel. Checked baggage fees are a massive profit center for airlines, especially budget carriers. A well-packed carry-on is free, keeps you nimble, and prevents the nightmare of lost luggage.
Make Your Travel Day Your Hotel Night: For longer overland journeys, an overnight train or bus is a brilliant two-for-one hack. It combines your transportation and accommodation costs into a single ticket, saving you a night's expense and a full day of travel time.
Be a Flexible Flier: Use flight aggregators like Google Flights and Skyscanner like a pro. Their "price graph" and "entire month" views are your best friends, instantly showing you the cheapest days to fly. Always search in an incognito browser to prevent price hikes based on your search history.
Pro-Tip: When comparing flight prices, always factor in the "hidden" cost of airport transfers. A flight that looks $50 cheaper might land at a remote airport where a $70 taxi ride is your only option, completely negating your savings.
The Execution Playbook—Living Smart on the Ground
You’ve arrived. Your careful planning has paid off. Now, it's all about execution. Your daily habits and micro-decisions will determine your budget's success. This is where you shift your mindset from "tourist" to "savvy local."
The Food Budget
You don’t have to survive on protein bars to eat affordably. The key is a "High-Low" hybrid approach that lets you experience the best of the local food scene without blowing your budget.
Make Lunch the Main Event: In many cultures, lunch is the biggest meal of the day. Look for a "menu of the day" (or menu del día) where you can get a multi-course, high-quality meal for a fantastic price. Have a lighter, cheaper dinner.
Go on a Supermarket Safari: Your local grocery store is more than just a place for supplies; it’s a cultural institution. It’s perfect for grabbing breakfast items, picnic lunches, and local snacks.
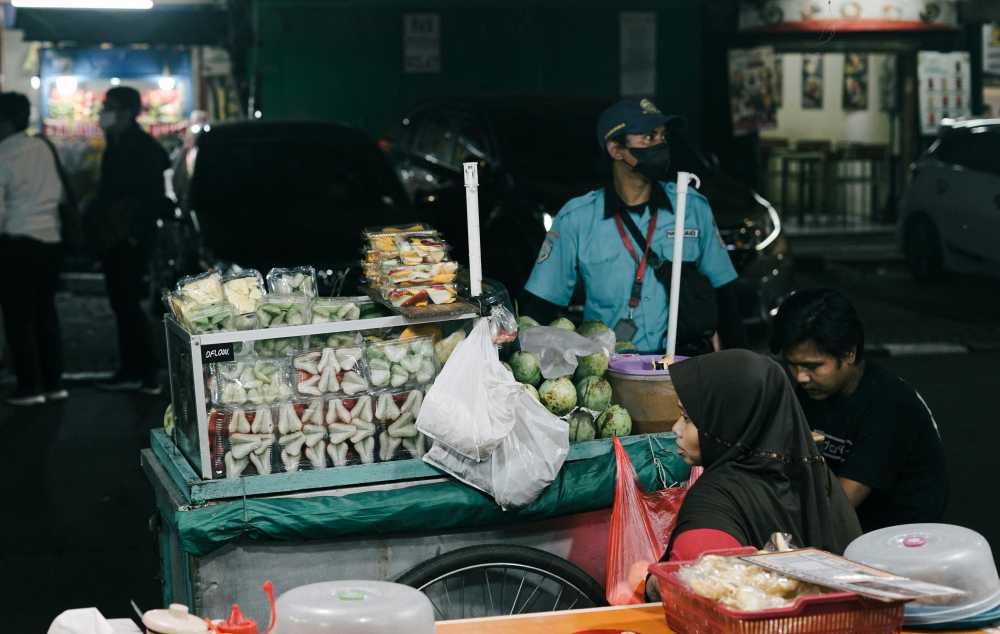
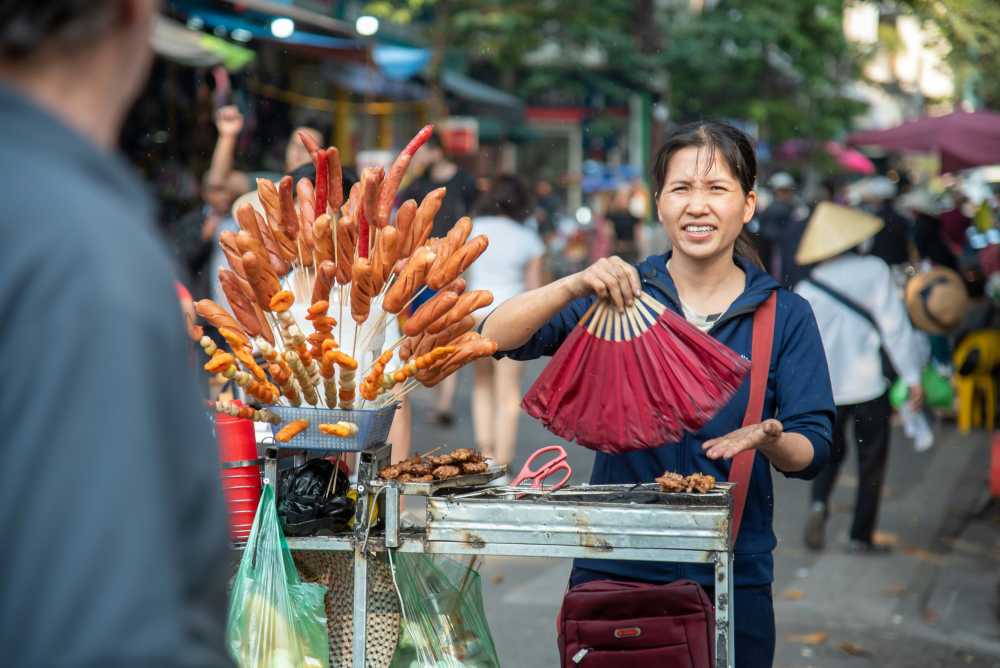
Trust the Streets: In many destinations, especially in Asia and Latin America, the best, most authentic food is found at bustling street food stalls for a dollar or two. It’s a delicious, ultra-affordable way to dive deep into the local cuisine.

Maximize Your Experience, Not Your Spending
The most memorable travel moments are rarely the most expensive. Every city is overflowing with incredible, zero-cost experiences for those who know where to look.
Take a Free Walking Tour (On Day One): This should be your first activity in any new city. It’s a crash course in history, layout, and local culture. You’ll get your bearings and receive priceless insider tips from your guide. Just be sure to tip them what you feel the tour was worth.
Explore Public Parks and Spaces: From the lush gardens of Paris to the sprawling beaches of Rio, a city's public spaces are its soul. They cost nothing to enjoy and are perfect for people-watching.
Hunt for Free Museum Days: Nearly every major museum offers free admission on certain days of the month or evenings of the week. A quick Google search can save you a significant amount on entry fees.
Embrace the Art of Wandering: The single best way to discover a city's hidden courtyards, charming side streets, and authentic local life is to put away the map and simply wander.

Your Blueprint for Affordable Adventure
This isn't just a collection of tips; it's a mindset. You now understand that successful budget solo travel is not a competition to spend the least amount of money possible. It's about the strategic allocation of your resources to maximize experience, discovery, and joy. It's the difference between being cheap and being smart.
Avoid the trap of "false economies"—like booking a hotel far outside the city to save $10, only to spend $15 and two hours on transport each day. But also, know when to embrace the "strategic splurge"—that one incredible meal, cooking class, or guided tour that will become the key element memory of your entire trip. You have the playbook. You have the system. You have the confidence to reject the anxiety of the unknown and step into the incredible freedom of solo travel. The world is not as expensive as you think.
Frequently Asked Questions (FAQ)
How much money do I really need for a trip under $1000?
Excluding your main international flight, a budget of $1000 can comfortably last for 2-4 weeks in high-value regions like Southeast Asia or parts of Eastern Europe. For a one-week trip including flights from the US, you’ll need to target shoulder-season deals to nearby destinations like Mexico and Central America, or watch for flash sales to Europe.
Is it cheaper to stay in a hostel or an Airbnb when solo?
A hostel dorm bed will almost always be your cheapest nightly option. A private room in a hostel is often comparable in price to a basic room in an Airbnb. An entire Airbnb apartment only becomes cost-effective if you stay long enough and use the kitchen religiously to offset the higher upfront cost.
What are the best apps for budget solo travel?
Skyscanner/Google Flights: For finding the cheapest flight dates.
Hostelworld/Booking.com: For finding and booking affordable accommodation.
Rome2rio: For figuring out the cheapest way to get between cities.
Trail Wallet/TravelSpend: For tracking every penny of your expenses in real-time.
How do I handle currency conversion and ATM fees abroad?
First, get a debit card from a bank that charges zero foreign transaction fees and reimburses ATM fees (Charles Schwab Bank is excellent for this). Always decline the "dynamic currency conversion" offered by ATMs and card machines—it's a scam with a terrible exchange rate. Always choose to be charged in the local currency.
Read the full guide: Anxious to Adventurous: The Ultimate Guide to Solo Travel Confidence
Don't Miss Out! Subscribe for Exclusive Content
SubscribeComments 0
No comments yet
Be the first to share your experience!
Dont Miss Out! Subscribe for Exclusive Content
Ultimate USA Holidays Guide: Top Picks
FTC Affiliate Disclosure: Stay Compliant as a Travel Creator

Essential Affiliate Tools: From Tracking to Full Optimization
Booking.com Affiliate Review: Pros, Cons & Earnings
Decoding Affiliate Commission Rates: Benchmarks for Travel Creators

Top 11 High-Paying Affiliate Programs for Travel Bloggers
Food & Water Safety Abroad: How to Avoid Getting Sick
TrekGuider @trekguider
There’s a moment on every trip where the true magic happens: the first bite of a dish you can’t pronounce from a street cart buzzing with locals, the refreshing sip of a regional drink, the discovery of a flavor that will forever define a place in your memory. Food is culture, connection, and the fastest way to the heart of a destination. And that’s the traveler’s paradox, isn’t it? The very experiences that promise the most profound connection also carry a potent, gut-wrenching risk.
One bad meal or a single sip of contaminated water can derail your entire adventure, swapping days of discovery for days spent locked in a hotel room. This fear is agitated by horror stories from fellow travelers and the sheer unpredictability of an unfamiliar environment. It's a valid concern—traveler's diarrhea is unequivocally the most common travel-related illness, affecting up to 80% of international travelers depending on the destination. The fear of getting sick can make you timid, causing you to stick to bland, "safe" foods and miss out on the rich mix of flavors your destination has to offer. It can rob you of the very experiences you traveled so far to find.

But it doesn't have to be this way. This guide is your solution, a definitive and practical playbook for mastering food and water safety abroad. We’ve synthesized actionable advice from the world’s leading health organizations, including the Centers for Disease Control and Prevention (CDC) and the World Health Organization (WHO), to empower you to eat boldly and drink safely. This isn’t a list of things to fear; it’s a set of simple, memorable rules for prevention, identification, and, if necessary, management. This is a critical deep-dive into a core pillar of preparedness we cover in The Ultimate Guide to Travel Safety: A 2026 Playbook, designed to give you the confidence to dive fork-first into the heart of a culture.
The Golden Rule of Food and Water Safety: "Boil It, Cook It, Peel It, or Forget It"
If you remember only one thing from this guide, make it this simple, five-word mantra. Promoted by the CDC and other global health bodies, this single rule is a powerful and easy-to-use filter for nearly every culinary decision you'll make on the road. It’s the foundation of your entire food and water safety strategy.
Boil It: Your Safest Bet for Liquids
Pathogens like bacteria, viruses, and parasites are killed by heat. This makes boiling the most effective method for purifying liquids.
Examples: Drinking water that has been brought to a vigorous, rolling boil for at least one full minute. Hot beverages like tea or coffee that are served steaming hot are also generally safe. Any milk products you consume should be confirmed to be pasteurized or have been boiled.
Cook It: The Power of Heat
Thoroughly cooking food kills the harmful microorganisms that cause illness. The key is to ensure it is cooked all the way through and served hot.
Examples: Meat, poultry, or seafood that is well-cooked (not rare or raw) and served steaming hot to the touch. This is especially crucial for street food; dishes that are cooked fresh to order in front of you are a much safer bet than those that have been sitting out.
Peel It: Nature’s Own Packaging
For raw fruits and vegetables, the contamination is almost always on the outside surface. By peeling it yourself with clean hands, you remove the risk.
Examples: Fruits with a thick, peelable skin like bananas, oranges, mangoes, and avocados are your safest and best friends for a healthy snack. Similarly, vegetables you can peel, such as cucumbers, are also a great option.
Forget It: When in Doubt, Go Without
This is the most critical and sometimes most difficult part of the rule to follow. It requires discipline, but it’s your ultimate defense. If an item of food or drink doesn't meet one of the three criteria above, you must skip it.
Examples: Tap water and ice cubes made from tap water are the biggest culprits. Salads and raw leafy greens like lettuce are high-risk because they are difficult to clean thoroughly and may have been washed in contaminated water. You should also avoid fruits that cannot be peeled, such as grapes and berries, and any unpasteurized dairy products like milk or cheese. Finally, be very wary of any food served at room temperature, such as from a buffet.
Navigating the Streets: A Visual Guide to Spotting Unsafe Food
Street food is often the soul of a city's cuisine, but not all vendors are created equal. Your eyes are your best tool for vetting a stall. Before you order, take thirty seconds to perform a quick visual inspection. Look for these five clear signs of a safe or unsafe operation.
Poor General Cleanliness: This is the most obvious indicator. Red flags include dirty workstations with unwiped spills, visible food waste, rubbish on the ground, and the presence of pests like flies or wasps. The vendor themselves should also appear clean, with tidy clothes and hands.
Improper Food Temperatures: Food left in the "danger zone" (room temperature) is a breeding ground for bacteria. Avoid stalls where cooked food, especially meat, is sitting out in large trays. The safest option is always food that is cooked fresh to order, right in front of you. Hot food should be visibly steaming.
Obvious Cross-Contamination: Watch how the vendor handles ingredients. A major red flag is using the same cutting board, knife, or unwashed hands to handle raw meat and then touch ready-to-eat items like bread, salad, or cooked food.
Use of Contaminated Water: Look at the vendor’s water source. Rinsing dishes, utensils, or vegetables in a single bucket of murky, stagnant water is a sign of a high-risk operation. Likewise, avoid ice in your drinks unless you can confirm it was made from purified water (commercially bagged ice is usually a safe sign).
Lack of a Crowd (Especially Locals): A busy stall with a long line, particularly of local residents, is one of the best indicators of a trusted and safe food source. High customer turnover means the food is fresh and hasn't been sitting out for long. An empty stall is often empty for a reason.
Pro-Tip: Make "follow the locals" your street food mantra. A long line of residents is a walking, talking five-star review of a vendor's quality and safety. It's the most reliable seal of approval you can find.
Securing Your Water Supply: A Deep Dive into Hydration and Purification
Staying hydrated is non-negotiable for your health and energy while traveling, but assuming tap water is safe is one of the most common and dangerous mistakes a traveler can make. Here’s how to ensure every sip you take is safe.
Identifying Safe and Unsafe Drinking Water Sources
The CDC and WHO have clear guidelines. Unless you are in a country with a known, highly-developed sanitation system, you should assume all tap water is unsafe.
Safest Sources: Commercially bottled water in a factory-sealed, tamper-proof container is your most reliable option. Carbonated water is even safer, as a broken seal is immediately obvious. The second safest source is water that you have personally brought to a rolling boil for at least one minute.
Unsafe Sources to Avoid: Tap water, well water, ice made from tap water, fountain drinks mixed with tap water, and even water from clear mountain streams (which can contain germs) should all be avoided unless they have been purified.
Your Purification Playbook: The Top 3 Methods
When bottled or boiled water isn't available, you need a backup plan. Here are the top three recommended purification methods.
Boiling (The Gold Standard): This is consistently ranked by the CDC and WHO as the single most effective method. It kills all known disease-causing microorganisms, including viruses, bacteria, and parasites. Simply bring clear water to a rolling boil for 1 minute (or 3 minutes at elevations above 6,500 feet / 2,000 meters).
Filtration: A high-quality portable water filter is highly effective at removing bacteria and protozoan parasites like Giardia and Cryptosporidium. Look for a filter with an absolute pore size of 1 micron or smaller. The main limitation is that most portable filters do not remove viruses, so in high-risk areas, the CDC recommends following filtration with chemical disinfection.
Chemical Disinfection: Chlorine, iodine, or chlorine dioxide tablets/drops are a lightweight and easy way to kill viruses and bacteria. However, they are not consistently effective against the parasite Cryptosporidium and require a contact time of at least 30 minutes.
For in-depth planning on what gear to pack for every type of trip, from water filters to first-aid supplies, our all-encompassing Travel Guide is the only resource you'll ever need.
Damage Control: How to Manage Traveler's Diarrhea
But let’s be realistic: even the most diligent traveler can have a bad day. When that happens, knowing exactly what to do—and what not to do—can be the difference between a 24-hour nuisance and a trip-ruining ordeal. This is the damage control phase of your food and water safety plan.
The First and Most Critical Step: Oral Rehydration
According to travel medicine doctors, dehydration is the single most likely and dangerous complication of traveler's diarrhea. Replacing lost fluids and electrolytes is your absolute first priority.
Method: The best way to rehydrate is with a dedicated Oral Rehydration Solution (ORS), which comes in packets of salts and sugars that you mix with boiled or bottled water. In a pinch, sports drinks or clear soups can also be used.
Symptomatic Treatment for Mild to Moderate Cases
If the diarrhea is tolerable and not accompanied by a high fever or blood, over-the-counter medications can provide relief and help you get through a travel day.
Medications: An antimotility agent like Loperamide (the active ingredient in Imodium, a top pharmacist-recommended brand) can reduce the frequency of bowel movements. Bismuth Subsalicylate (found in Pepto-Bismol, another pharmacist favorite) can also help decrease the frequency and shorten the duration of the illness.
When to Use Standby Antibiotics (For Severe Cases)
If diarrhea is distressing, incapacitating, or contains blood or mucus, a prescribed antibiotic may be necessary.
Method: Before you travel, speak with your doctor or a travel medicine clinic. For travelers heading to high-risk destinations, they may provide a prescription for a standby antibiotic, such as Azithromycin, to carry with you. A single dose is often highly effective at treating severe cases.
Pro-Tip: Within your main travel first-aid kit, create a dedicated "Digestive Distress" module. Keep it in a separate, clearly-labeled zip-top bag containing a few packets of Oral Rehydration Salts, a strip of Loperamide, and a few antacids. This way, when you need it, you won't have to rummage through your entire kit.

Ready to Pack Like a Pro?
A smart food and water safety strategy is just one piece of your pre-trip preparation. To ensure you don't overlook a single essential item—from documents and finances to clothing and medical supplies—a master checklist is your most powerful tool. Our comprehensive, free checklist has you covered for every stage of your journey.
Download Your Free International Travel Checklist Now!
Food and Water Safety FAQs
A prepared mind is a safe mind. Here are expert answers to common questions that take your preparedness to the next level.
1. Besides traveler's diarrhea, what are the most common travel illnesses?
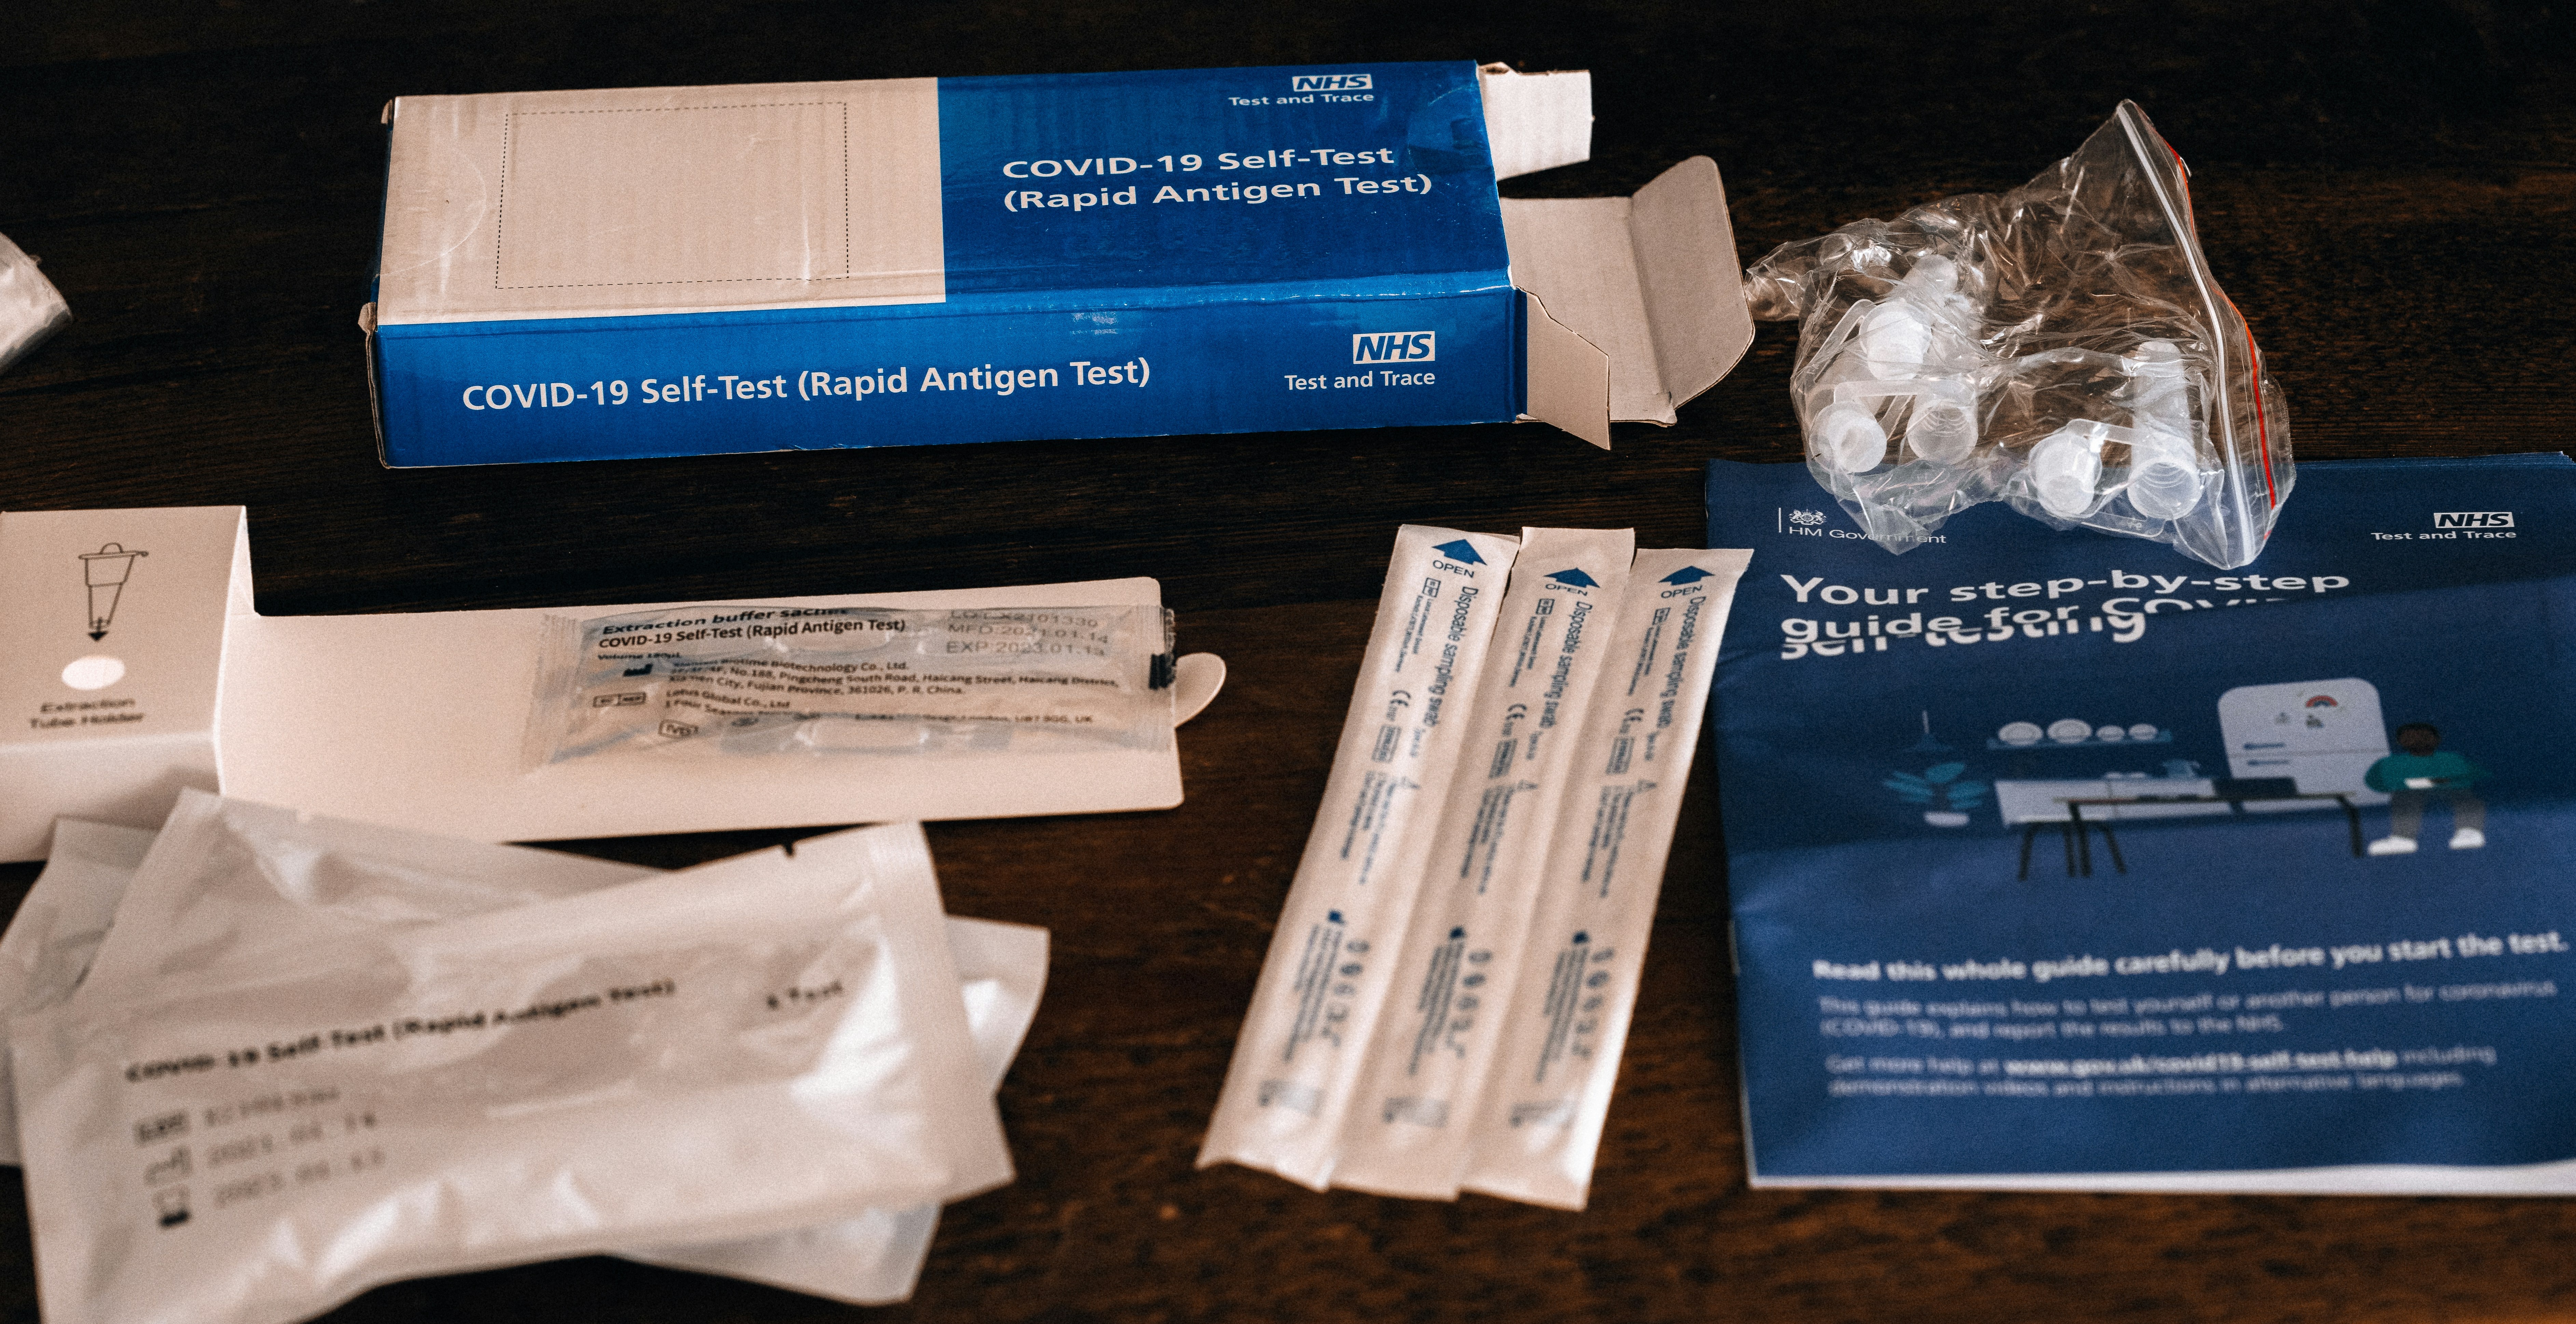
While traveler's diarrhea is number one, the CDC reports that other common issues include acute respiratory infections (like influenza or COVID-19, often acquired in transit), vector-borne fevers like Dengue and Malaria in tropical regions, and other food-borne illnesses like Hepatitis A and Typhoid Fever. Skin conditions from insect bites are also extremely common.
2. Is it safe to eat at a restaurant if I'm worried about street food?
Generally, restaurants can be safer, but the same principles apply. A busy restaurant full of locals is a great sign. Be cautious with the same high-risk items: salads, unpeeled fruits, and tap water or ice. If you want to find trusted, local-approved gems, explore the TrekGuider platform, where travel creators often share their own curated guides to safe and authentic eats.
3. Should I carry a standby antibiotic in my first-aid kit?
This is a question for your doctor or a travel medicine clinic. For travelers heading to high-risk destinations where severe traveler's diarrhea is common, many doctors will provide a prescription for a standby antibiotic like Azithromycin. It’s not for mild cases but can significantly shorten the duration of a severe bout of illness. Discuss your itinerary with your doctor to see if this is right for you.
Eat Boldly, Travel Well
The world of food is a world of incredible diversity and connection, and it deserves to be explored with an open mind and a curious palate. The goal of mastering food and water safety is not to build a wall of fear that separates you from authentic experiences. It is about building a foundation of knowledge that gives you the freedom to be adventurous. By internalizing the golden rule of "Boil it, cook it, peel it, or forget it," learning to trust your own visual assessment of a food stall, and knowing exactly what to do if you get sick, you replace anxiety with empowerment. You are now equipped with the skills to navigate the world's most exciting cuisines with confidence, ensuring your focus remains on the flavor, connection, and joy that every journey promises. Go explore, eat boldly, and travel well.

Meta Data Suggestions:
SEO Meta Title (Under 60 characters): Food & Water Safety Abroad: How to Avoid Getting Sick
URL Slug: food-water-safety-abroad
SEO Meta Description (Under 155 characters): Avoid traveler's diarrhea with our expert guide to food and water safety abroad. Learn the golden rules for eating street food, purifying water, and staying healthy.
Don't Miss Out! Subscribe for Exclusive Content
SubscribeComments 0
No comments yet
Be the first to share your experience!
Dont Miss Out! Subscribe for Exclusive Content

Chicago Beer Fests: Top 6 Tastings
Ultimate USA Holidays Guide: Top Picks
FTC Affiliate Disclosure: Stay Compliant as a Travel Creator
Essential Affiliate Tools: From Tracking to Full Optimization
Booking.com Affiliate Review: Pros, Cons & Earnings
Decoding Affiliate Commission Rates: Benchmarks for Travel Creators
The 7 Solo Female Travel Safety Rules You Can't Ignore
TrekGuider @trekguider
You feel the magnetic pull of the world, a deep-seated desire to explore ancient cities, wander through breathtaking landscapes, and discover it all on your own terms. The dream of solo travel is vibrant and powerful. But for so many women, that dream is shadowed by a persistent and paralyzing question: "But will I be safe?"
This isn't just a fleeting thought; it's a formidable barrier. It’s a shared, valid concern that echoes across the travel community. A staggering 66% of women who travel solo report worrying about their personal safety, and for the 59% of women who have yet to start their first independent journey, these concerns are the second-largest obstacle holding them back. The fear is real, and it is robbing you of what could be the most transformative experience of your life. But what if you could systematically dismantle that fear, replacing it with an unshakable foundation of competence?
This guide is your tactical blueprint to do exactly that. We are moving beyond vague reassurances and diving into the essential, non-negotiable rules of solo female travel safety. This isn't about seeing the world through a lens of paranoia; it's about equipping yourself with the knowledge to navigate it intelligently. For a complete overview of the journey, start with our comprehensive pillar guide, The Ultimate Guide to Solo Female Travel (15 Essential Tips). These seven rules, however, are the bedrock—the field-tested strategies that will transform you from a worrier into a prepared and confident global explorer.
Rule 1: Build a "Lifeline Home" Before You Leave
The single most important phase of your safety strategy happens before you ever pack a bag. Creating a strong communication and information bridge between you and a trusted emergency contact back home is non-negotiable. This "mission control" is your ultimate safety net, ensuring that if you are ever unreachable, someone you trust has every critical detail needed to help.
Your "lifeline" packet should be a comprehensive dossier containing both physical and digital copies of the following, based on recommendations from the U.S. Department of State:
A Complete Itinerary: Detail your trip on a day-by-day basis, including flight numbers, train schedules, and the names, addresses, and phone numbers of all booked accommodations.
Copies of All Important Documents: Include the photo page of your passport, any necessary visas, your driver's license, and a full copy of your travel insurance policy, complete with the policy number and the 24/7 emergency assistance phone number.
Financial Information: Provide photocopies of the front and back of every credit and debit card you are carrying. The international toll-free numbers on the back are essential for canceling them if they are lost or stolen.
A Pre-Arranged Communication Plan: Establish a clear plan for when you will check in (e.g., a quick text upon arrival in a new city). Crucially, agree on a protocol for what your contact should do if you miss a check-in (e.g., wait 12 hours, then contact your hotel, then contact the nearest embassy).

Pro-Tip: The single most effective safety action you can take in under five minutes is to enroll your trip with the U.S. Department of State’s free Smart Traveler Enrollment Program (STEP). This provides the nearest U.S. Embassy or Consulate with your itinerary, creating a three-way digital bridge connecting you, your emergency contact, and the State Department for a coordinated response in a worst-case scenario.
Rule 2: Master Your Sanctuary with an Unbreakable Arrival Protocol
Think of your accommodation as more than just a place to sleep. It’s your secure base of operations, your private sanctuary to rest and recharge. Ensuring its integrity from the moment you arrive is a critical habit that provides profound peace of mind. Adopt this methodical security check and perform it automatically every single time you enter a new room.
Prop the Door Open. Before you fully enter, use your main piece of luggage to prop the door open. This simple action prevents the door from closing and locking behind you, guaranteeing an immediate escape route should the room not be empty.
Conduct a Full Room Sweep. With the door still open, perform a quick but thorough physical search. Check under the bed, behind all curtains, inside closets, and in the bathroom, including behind the shower curtain.
Verify All Locks. Once the room is confirmed to be empty, close the door and immediately test all locking mechanisms. Engage the deadbolt, chain lock, or security latch. Go to every window and any balcony doors to ensure they lock securely.
Deploy Your Personal Security. Your own devices provide a layer of protection entirely within your control. Immediately place a rubber wedge doorstop alarm under the main door or install a portable door lock like an Addalock. These inexpensive, lightweight devices are highly effective at preventing unauthorized entry, even from someone with a key card.
Locate and Map Emergency Exits. Find the fire exit map on the back of the door. Identify the two nearest exits, then physically walk the route to each one, counting the doors you pass. This mental map is invaluable for navigating in darkness or smoke.
Perform a Hidden Camera Scan. In an age of miniaturized electronics, a quick scan for hidden cameras is a prudent measure. Use your phone's flashlight to look for the tell-tale glint of a tiny lens in unexpected places like smoke detectors, alarm clocks, and USB wall chargers. In the dark, use your phone's front-facing camera (which is more sensitive to infrared light) to scan the space. Look for the small, often blinking, IR lights used by night-vision cameras that are invisible to the naked eye.
Adopt a "Verify, Then Open" Door Policy. Make it your strict policy to never open your door to an unsolicited knock. If someone claims to be from housekeeping, call the front desk using the room phone to verify they sent a staff member to your room.

YOUR ULTIMATE SAFETY TOOLKIT
Mastering your environment is the first step to confident travel. True preparedness means having the right tools for every situation. Our free, downloadable Solo Female Travel Safety Guide is the perfect companion to these rules. It's a comprehensive checklist and resource guide covering everything from what to pack to what to do in an emergency.
Rule 3: Take Absolute Control of Your Ground Transportation
Moving through an unfamiliar city can be a point of high vulnerability. Whether you’re using a ride-sharing app or a local taxi, you must shift from being a passive passenger to an active participant in your own safety. Adhere to this strict set of protocols for every single ride.
The "Match, Name, Share" Protocol for Ride-Shares
Match: Before you get in, carefully match the vehicle's make, model, and license plate number with the information in the app. Check that the driver's appearance matches their profile photo. If anything is off, do not get in the car.
Name: This is a critical verification step. Do not approach a vehicle and ask, "Are you here for Jane?" This gives a potential imposter the information they need. Instead, from a safe position on the curb, ask the driver, "Who are you here for?" A legitimate driver will be able to state your name correctly.
Share: Before your ride begins, use the app's built-in "Share Trip Status" feature. This sends a live map of your journey to a trusted contact, allowing them to track your progress in real-time.
Universal Rules for Every Ride
The Backseat Protocol: As a solo traveler, always sit in the back seat on the side opposite the driver. This creates crucial physical distance and gives you access to two separate exits.
The Route Protocol: Keep your own mapping application, like Google Maps, open on your phone throughout the journey. If the driver takes a significant, unexplained detour, you are empowered to question it. If the response makes you uncomfortable, end the ride in a safe, well-lit public area.

Rule 4: Create Layers of Personal and Digital Security
Your solo female travel safety strategy should be built on layers and redundancy. This means pairing smart practices with an effective toolkit of personal security devices and ensuring your digital lifelines are always active.
Your Personal Security Toolkit
Personal Safety Alarm: This is arguably the most valuable device for a solo traveler. An alarm like the She's Birdie emits an extremely loud siren (130+ decibels) and a flashing strobe light to startle an attacker and attract immediate attention. They are small, legal everywhere, and attach to a keychain for instant access.
Anti-Theft Bag: Invest in a bag with features like RFID-blocking pockets (to protect from electronic skimming), slash-proof fabric, and lockable zippers. A crossbody style worn in front of your body offers the most security.
Portable Door Lock / Alarm: As mentioned in Rule 2, carrying your own lock gives you absolute control over the security of your room, ensuring your sanctuary remains impenetrable.

Your Digital Security Layer
Your phone is your map, translator, and lifeline. A solar-powered power bank adds a critical layer of resilience to a standard one, ensuring you can maintain a charge even during power outages or on multi-day treks.
Rule 5: Project Confidence and Practice Proactive Situational Awareness
How you carry yourself has a profound impact on how you are perceived. Projecting confidence—even when you're feeling uncertain—is a powerful deterrent. Walk with purpose, keep your head up, and make brief eye contact. This signals that you are aware of your surroundings, not an easy target.
This confidence is fueled by situational awareness. It's not about being paranoid; it's about being present.
Understand the Local Landscape: Before arriving, research common tourist scams. A 2024 report noted that 29% of solo female travelers had experienced a theft or attempted scam. Knowing the playbook for ploys like the "friendship bracelet" or "spilled drink" allows you to disengage before you become a victim.
Trust Your Intuition: Your intuition is your most finely tuned security equipment. If a person, place, or situation feels "off," it probably is. You do not need a logical reason. Honor it. Cross the street, leave the bar, get in a different train car. Acting on your intuition is not rude; it is intelligent.
Manage Your Inputs: Be mindful of your alcohol consumption. Your awareness is your primary defense, and anything that dulls it increases your vulnerability.

Rule 6: Embrace That Safety Anxiety Decreases with Experience
It's crucial to understand the psychology of solo travel fear. The data reveals a powerful truth: the act of traveling solo is the most effective antidote to the fear of it.
Among women who have taken fewer than six solo trips, 77% report worrying about safety. That number drops dramatically to just 55% for those who have traveled solo more than ten times. This establishes a direct, negative correlation between experience and anxiety.

Every time you successfully navigate a new city and overcome a challenge, you are collecting real-world evidence of your own competence. This direct experience systematically replaces abstract, media-fueled fear with managed, situational awareness. You learn that while vigilance is essential, you are far more capable than you imagined. The goal of your first trip is to break this cycle of fear and begin the empowering loop of experience.
Rule 7: Never Outsource Your Safety to Chance—The Travel Insurance Mandate
For a solo traveler, travel insurance isn't an optional add-on; it is a foundational pillar of your financial security. A cheap policy is not a good deal if it doesn't have the right coverage. When evaluating policies, ensure the plan includes strong coverage in these key areas:
Emergency Medical Coverage: A policy should offer a minimum of $250,000 in benefits.
Emergency Medical Evacuation: This covers the potentially astronomical cost of transporting you to a hospital with adequate facilities or back home.
Emergency Medical Reunion (Companion Coverage): This is vital for solo travelers. If you are hospitalized, this coverage pays for a family member's transportation and accommodation to be at your bedside, providing invaluable logistical and emotional support.
Trip Interruption and Cancellation: This reimburses your non-refundable trip costs if you have to cancel or cut your trip short for a covered reason.
Frequently Asked Questions About Solo Female Travel Safety
What's the single most important safety device I should buy?
A personal safety alarm. While a doorstop and anti-theft bag are excellent, a loud, attention-grabbing alarm is the most versatile tool for deterring a potential threat in any public situation, day or night.
I'm nervous about nightlife. Should I just avoid going out after dark?
Not at all! The key is to be strategic. Have your transportation planned in advance—know exactly how you're getting home. Nurse your drink and never leave it unattended. Stick to well-lit, reputable areas and consider starting with a structured activity, like a group tour or a show, rather than just wandering.
How do I handle street harassment without escalating the situation?
The most effective strategy is confident disengagement. Do not respond or make prolonged eye contact. Project purpose and keep walking. In many cases, a reaction is what the harasser is seeking. If you feel you are being followed, walk into a busy, open shop or restaurant immediately.
Are group tours a good option for a safety-conscious first-timer?
Absolutely. An estimated 75% of women who have never traveled alone would be more likely to do so on a group tour. They provide a "scaffolded" entry into the world of solo travel. You can find tours vetted and reviewed by other solo female travelers on platforms like TrekGuider, which is a great way to build foundational confidence.
Your Journey to Confident Exploration Starts Now
The narrative around solo female travel safety is too often dominated by fear. But the data tells a different, more empowering story of capability and resilience. These seven rules are your framework—a practical system for managing risk and moving through the world with intelligent confidence. By internalizing these strategies, you build a foundation of competence from which you can freely and bravely explore.
Now that you have the safety blueprint, the truly exciting part can begin. Explore our collection of expert-written Travel Guide resources to find your perfect destination, and remember to download the essential Solo Female Travel Safety Guide. The world is waiting for you to discover it—and yourself.
Meta Data Suggestions:
SEO Meta Title (59 characters): The 7 Essential Solo Female Travel Safety Rules for 2026
URL Slug: solo-female-travel-safety-rules
SEO Meta Description (154 characters): From accommodation security to transport protocols, these 7 non-negotiable solo female travel safety rules will empower you to explore the world with confidence.
Don't Miss Out! Subscribe for Exclusive Content
SubscribeComments 0
No comments yet
Be the first to share your experience!
Dont Miss Out! Subscribe for Exclusive Content

How to Avoid Travel Scams: A Global Guide

Is Public WiFi Safe? How to Protect Your Data Abroad

A Woman's Guide to Safe Travel: 10 Critical Tips

7 Hotel Safety & Security Tips for Peace of Mind

9 Beach Safety Tips That Could Save Your Life
