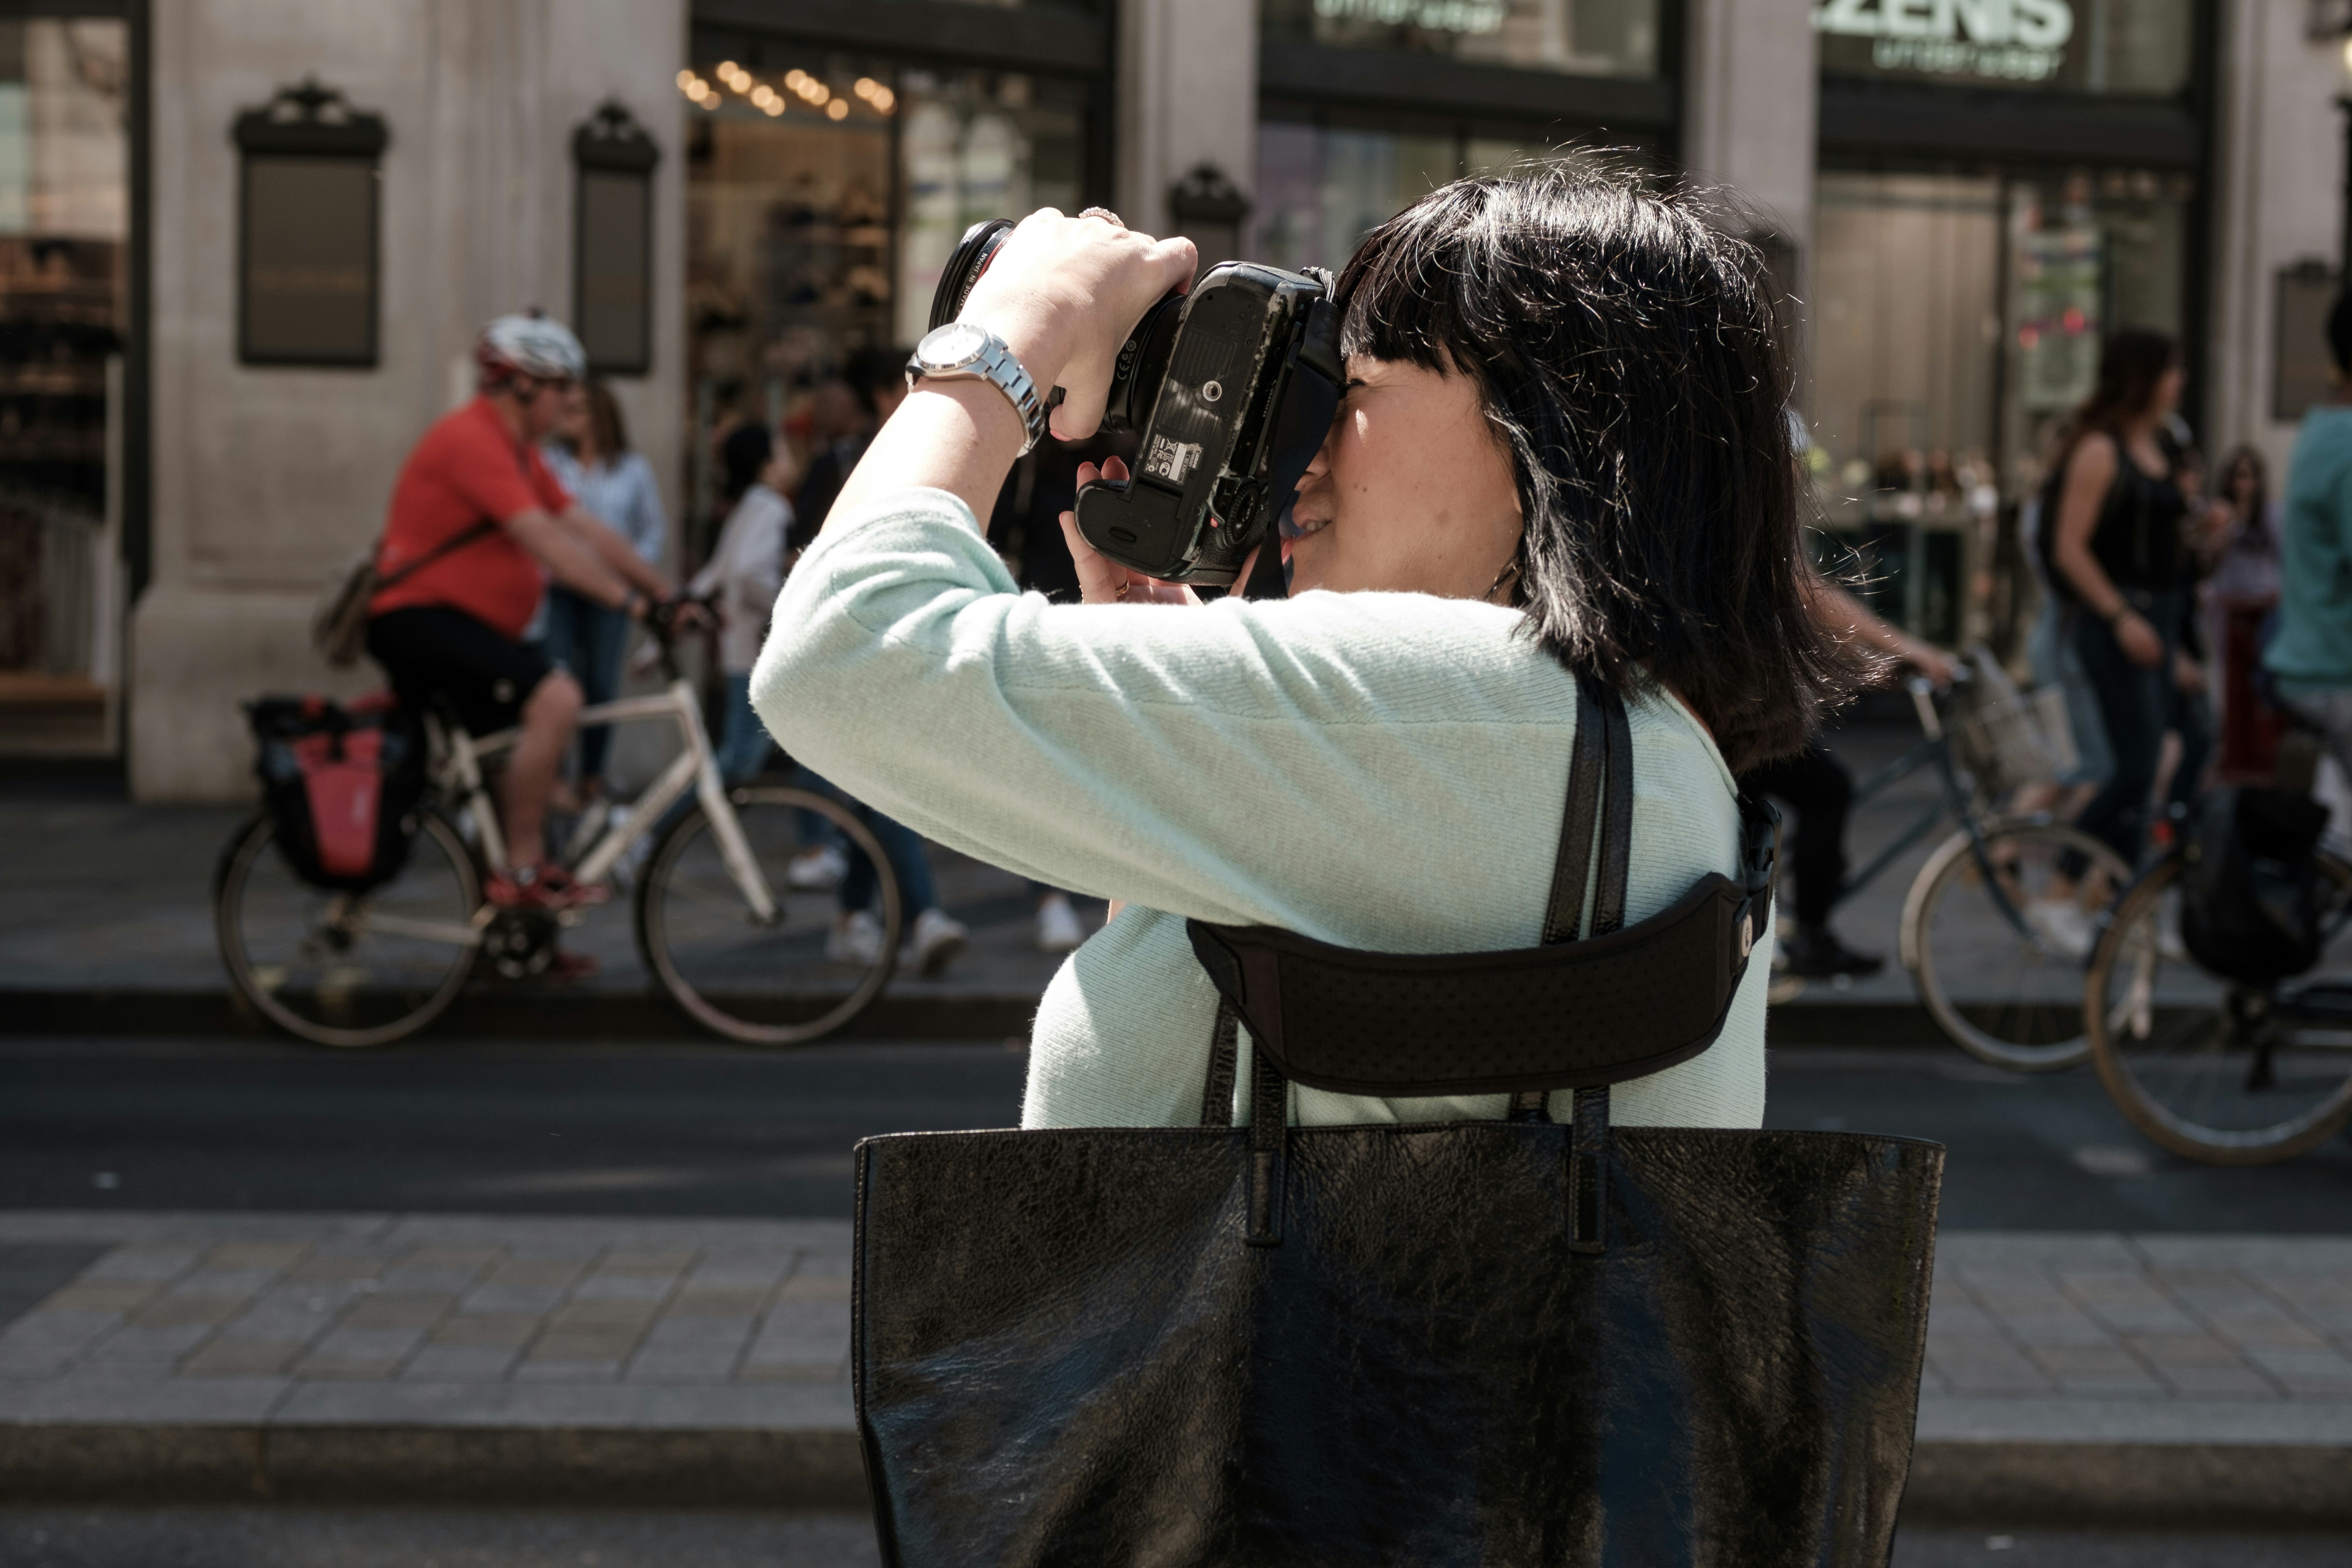
Essential Affiliate Tools: From Tracking to Full Optimization
TrekGuider @trekguider
You’re a creator, not an administrator. Yet, you find yourself drowning in a sea of administrative tasks. You’re manually copying and pasting ugly, mile-long affiliate links, toggling between a dozen different program dashboards to check your stats, and spending more time wrestling with spreadsheets than you do creating the travel content you love. Your affiliate "business" feels less like a streamlined operation and more like a chaotic, time-sucking hobby that isn't paying the bills.
This inefficiency is more than just frustrating—it's a silent killer of your income. Every hour you spend on manual, repetitive tasks is an hour you’re not creating the next piece of content that could generate revenue for years to come. You're flying blind, guessing which strategies are working, unable to see which links are converting, and which pages are actually profitable. The reported average income of $13,847 a month for travel affiliates feels like a distant fantasy when you’re stuck in this administrative quicksand.

This guide is your way out. It is your curated, creator-friendly tech stack—a definitive list of the essential affiliate marketing tools that will automate the tedious, provide crystal-clear data, and free you up to focus on growth. We’ll cover the entire workflow, from foundational link management and tracking to the advanced tools needed for full-scale optimization. This is how you transform your passion project into a professional, efficient, and profitable business. For a complete command of the entire affiliate landscape, our definitive pillar page, Travel Affiliate Programs: The 2026 Ultimate Guide, is your essential command center for mastering the entire ecosystem.
The Foundational Layer: Your Operational Command Center
Before you can optimize, you must organize. This first set of tools forms the non-negotiable foundation of any serious affiliate marketing business. They are your central nervous system for managing links, ensuring compliance, and tracking performance from a single source of truth.
Link Management Plugins (The Digital Quartermaster)
If you run your travel blog on WordPress, a link management plugin is the single most important tool you will install. These plugins take the long, ugly, and intimidating affiliate links provided by programs and "cloak" them into short, clean, branded URLs that are far more trustworthy to your audience.
Think of it as your command center. Instead of embarking on a digital scavenger hunt through year-old posts to update a single expired link, you change it once in a central dashboard, and the plugin deploys that change site-wide instantly. This functionality alone will save you hundreds of hours over the life of your business. Furthermore, a link like yourblog.com/recommends/osprey-backpack is infinitely more professional and trustworthy to a reader than a long URL filled with random tracking parameters, directly impacting your click-through rates.

Top Tools in This Category:
Recommended: Travel Creator Toolkit: 34 Essential Apps and Resources
Recommended: Digital Product Ideas: How to Make Money From Your Next Trip
ThirstyAffiliates: A powerhouse plugin built specifically for affiliate marketers. It offers advanced features like autolinking (automatically turning specific keywords into affiliate links), proactive link checking to find broken links, and detailed click analytics.
Pretty Links: A slightly simpler but highly effective alternative. It excels at link cloaking, redirection, and providing basic click-tracking reports right from your WordPress dashboard.
Pro-Tip: The best link management plugins, like ThirstyAffiliates, can automatically add the required rel="sponsored" tag to all of your affiliate links. This is a critical feature that ensures you stay compliant with Google's guidelines for paid links, protecting your site from potential SEO penalties without you having to think about it.
Affiliate Tracking Tools (Your Source of Truth)
"What gets measured gets managed." To grow your affiliate income, you need a crystal-clear understanding of what’s working. While many creators start by manually checking each affiliate network’s dashboard, a dedicated approach to tracking provides a more holistic, actionable view.
For most creators, your affiliate tracking tools will be a combination of your link management plugin’s analytics and the dashboards provided by your affiliate networks (like CJ Affiliate or Travelpayouts). These platforms show you crucial metrics like clicks, conversions, and commission earnings.
However, as your business matures, you'll want to track performance across different income models. For example, the TrekGuider Seller Platform includes a dedicated referral dashboard. This is a specialized tracking tool that shows you not just one-time sales, but the ongoing, passive income you’re earning from the new sellers you’ve brought to the platform. It’s a perfect example of how a modern platform provides the built-in affiliate tracking tools you need to monitor more sophisticated, high-margin income streams like revenue sharing.
The Growth Engine: Traffic & SEO Tools
With your operational house in order, the focus must pivot from organization to acquisition. A perfectly managed link is useless without a steady stream of the right people clicking on it. This is where your growth engine comes in—the tools designed to attract your ideal audience with precision.
SEO & Keyword Research Platforms
The most profitable affiliate content is created with intention. It targets keywords that signal a user is actively researching a purchase (e.g., "best carry-on luggage review"). SEO platforms are your treasure map for finding these "money" keywords and building a content strategy that attracts buyers, not just browsers.

These platforms are indispensable for:
Finding Profitable Keywords: Uncover what your audience is searching for, how many people are searching for it, and how difficult it will be to rank on Google.
Analyze the Competition: See exactly which keywords your competitors are ranking for and which pages are bringing them the most traffic.
Track Your Performance: Monitor your rankings for your target keywords over time to see what’s working and where you need to improve.
Top Tools in This Category:
Ahrefs: A comprehensive, professional-grade SEO toolkit. Its "Keywords Explorer" is second to none for finding high-value commercial investigation keywords, and its "Site Explorer" provides deep insights into any competitor's strategy.
SEMrush: Another all-in-one industry leader that offers a powerful suite of tools for keyword research, rank tracking, and competitive analysis.
Pro-Tip: Don't confine your keyword strategy to your blog. With video projected to account for a staggering 55% of all affiliate traffic by 2026, the same commercial-intent keywords you find for your articles are the exact titles you should be using for your YouTube videos and TikToks.
Analytics Platforms
While SEO tools help you get traffic, a web analytics platform tells you what that traffic does once it arrives. It’s essential for understanding your audience, diagnosing problems, and optimizing their journey from reader to buyer.
The Must-Have Tool:
Google Analytics: The free, industry-standard tool for website analytics. It's an incredibly powerful platform that provides all the data you need to understand user behavior, track conversions, and identify your top traffic sources, allowing you to double down on what works.
The Conversion Toolkit: Optimization & Social Media Tools
Attracting traffic is only half the battle. The final, crucial step is converting that traffic into clicks and commissions. This set of tools is designed to streamline your workflow and optimize your content for maximum impact.
"Link in Bio" Tools (For Social Dominance)
Platforms like Instagram and TikTok are powerful for audience building, but they famously limit your ability to use clickable links. A "link in bio" tool solves this by creating a simple, mobile-friendly landing page that can house all of your most important affiliate links, blog posts, and offers.

Top Tools in This Category:
Linktree: The most well-known tool in this space, offering a simple and effective way to create a micro-landing page for your social media bio.
Later: While primarily a social media scheduling tool, Later’s "Link in Bio" feature is excellent, allowing you to create a clickable grid of your Instagram posts, driving traffic directly to relevant blog posts and affiliate offers.
The Amazon Workflow Accelerator
For nearly every travel creator, Amazon Associates is a core part of their affiliate strategy. However, creating links for individual products can be a slow, manual process.
The Must-Have Tool:
Amazon SiteStripe: This is a free, official toolbar from Amazon that appears at the top of your browser whenever you’re on Amazon.com. It allows you to generate a custom affiliate link (text, image, or both) for any product page with a single click, dramatically speeding up your content creation workflow.
Your Strategy Blueprint: The Travel Creator's Toolkit
Feeling overwhelmed by the options? A powerful tech stack is only as good as the strategy behind it. To help you organize your entire affiliate marketing plan—from keyword research to content creation and promotion—we've created the ultimate resource bundle. It’s packed with the checklists, templates, and guides you need to build a professional and profitable system.
Download Your Free Bundle: The Travel Creator's Toolkit Today!
Frequently Asked Questions (FAQ)
1. Do I really need all these tools when I'm just starting out? When you're starting, focus on the foundation. A WordPress site with a link management plugin (like Pretty Links) and Google Analytics is your essential starting stack. This is a low-cost setup that allows you to organize your links and track your traffic from day one. You can invest in a premium SEO tool like Ahrefs once your site is generating enough revenue to justify the cost.
2. Are there any good free affiliate marketing tools? Absolutely. Google Analytics is free and non-negotiable. Amazon SiteStripe is also free. For keyword research, you can start with free tools like Google Keyword Planner or the free versions of various SEO tools, though they are more limited. The free versions of "link in bio" tools like Linktree are also perfectly sufficient for most creators.
3. How do these tools help with tracking beyond just clicks? Advanced tracking involves connecting data points. For instance, by using UTM parameters (which you can add manually or with some plugins), you can see in Google Analytics not just that someone came from your blog, but that they came from the specific button in your review of the Osprey backpack. This level of detail is what allows you to A/B test different calls-to-action and truly optimize your pages for conversion.
Conclusion: From Hobbyist to CEO
The difference between a creator earning a few dollars a month and one earning a full-time income often comes down to their systems. Top earners don't waste time on manual, low-value tasks. They leverage technology to work smarter, not harder. They treat their content not as a hobby, but as a business.

You now have a curated list of the best affiliate marketing tools to build your own professional tech stack. Start with the foundation: a link management plugin to organize and track your links. Then, layer in SEO and analytics tools to build a predictable stream of traffic. Finally, use optimization and workflow tools to convert that traffic with maximum efficiency.
These affiliate tracking tools and optimization platforms are not an expense; they are an investment in your own efficiency, professionalism, and profitability. By implementing this toolkit, you take a definitive step away from being a hobbyist and become the CEO of your own thriving travel content business.
Meta Data Suggestions:
SEO Meta Title (58 characters): 9 Essential Affiliate Marketing Tools for Travel Creators
URL Slug: essential-affiliate-marketing-tools
SEO Meta Description (154 characters): Discover the top affiliate marketing tools for travel creators. From link tracking to SEO, this guide covers the essential tech stack to automate and grow your income.
Read the full guide: The Travel Blogger's Playbook to Affiliate Marketing Mastery
Don't Miss Out! Subscribe for Exclusive Content
Subscribe


Comments 0
No comments yet
Be the first to share your experience!
Dont Miss Out! Subscribe for Exclusive Content

Ultimate USA Holidays Guide: Top Picks

FTC Affiliate Disclosure: Stay Compliant as a Travel Creator

Avoid These 5 Affiliate Landing Page Mistakes for Better Conversions

Affiliate Keyword Research Mastery for Travel Blogs

Booking.com Affiliate Review: Pros, Cons & Earnings

Decoding Affiliate Commission Rates: Benchmarks for Travel Creators
5 Things to Never Do When Traveling Alone
TrekGuider @trekguider
Let’s be honest: society tells women two conflicting stories about traveling alone. On one hand, you have the romanticized, 'Eat, Pray, Love' fantasy of a life-changing journey of self-discovery. On the other, you have a much darker, fear-based narrative—a constant, insidious whisper of warnings about dark alleys and stranger danger. This conflict creates a paralyzing anxiety, trapping would-be adventurers between a deep desire for freedom and a legitimate concern for their well-being. The constant worry about solo travel women safety can feel so overwhelming that the dream of an independent trip starts to feel reckless or irresponsible.

But what if that choice—between being adventurous and being safe—is a false one? What if safety isn't the opposite of adventure, but the very foundation that makes true adventure possible? Confident and secure solo travel is not about eliminating risk; it’s about mastering it. It requires transforming abstract fear into a series of manageable, concrete challenges that you can systematically overcome with the right knowledge and preparation. This guide is your strategic playbook. Bridging the gap between fear and freedom, it combines official expert advice with the hard-won wisdom of experienced travelers. For the bigger picture on planning your first independent journey, explore . This article, however, is your deep dive into the specific art of navigating the world as a strong, savvy, and secure solo female traveler.
Your Pre-Flight Mission: Master Your Destination Before You Go
Incredible journeys are born from careful preparation. The most impactful steps you take to ensure your safety happen long before you ever pack your bag. This proactive phase is the single greatest antidote to travel anxiety, systematically dismantling worries by replacing them with a robust, well-researched plan.
Step 1: Research is Your First and Best Line of Defense
Knowledge is power, and in the context of solo travel, it is your primary shield. A multi-pronged research strategy empowers you to make informed decisions, transforming the unknown into the familiar.
Official Advisories: Your first, non-negotiable stop is the U.S. Department of State's travel advisories. Understand their four-level system (Level 1: Exercise Normal Precautions, Level 2: Exercise Increased Caution, Level 3: Reconsider Travel, Level 4: Do Not Travel). This provides the official, high-level safety assessment for any country you plan to visit.
Cultural Norms: Go beyond government warnings and dig into local customs. Researching appropriate dress codes and social etiquette is not just a sign of respect; it's a key safety strategy. Blending in helps you avoid unwanted attention and navigate social interactions more smoothly.
Location-Specific Vetting: Don't stop at the country level. True safety planning is granular. You must research specific cities and, even more importantly, individual neighborhoods. A city can be generally safe, but have pockets of high crime.
Pro-Tip: Adopt this three-tier research process for total clarity.
Macro-Level (The Official View): Start with the U.S. State Department for the non-negotiable baseline.
Meso-Level (The Community View): Move to community sources like the Solo Female Travelers Club forums or trusted travel blogs for recent, on-the-ground experiences.
Micro-Level (The Street View): Finally, get hyper-local. Use Google Maps Street View to virtually "walk" around a potential hotel. Check local news sites for recent incidents and browse local subreddits for candid discussions about neighborhood safety.

Step 2: Choosing Your Safe Haven: A Masterclass in Vetting Accommodations
Recommended: Stress-Free Flying with Kids: Airport, TSA, and In-Flight Guide
Recommended: Travel Guide: Trip Planning, Flights, and Avoiding Tourist Traps
Your accommodation is more than just a place to sleep; it’s your secure base of operations. Treat its selection with the seriousness it deserves. While it can be tempting to book the cheapest option, a slight increase in your budget can yield a massive return in safety and peace of mind. Prioritize properties with 24-hour reception, a critical feature for late-night arrivals or if you find yourself in an emergency and need immediate assistance.
When analyzing reviews, learn to read between the lines. Use the search function to look for keywords like "solo female," "safe at night," "helpful staff," and "secure lockers." These comments provide invaluable insights from travelers who share your priorities.
Finally, protect your privacy during the check-in process. When registering, use only your first initial and last name. Avoid titles like "Ms." or "Mrs." that advertise your gender and marital status. It's a small, simple step that prevents staff or other guests from making assumptions about you being alone.
Step 3: Your At-Home Support Network: The Lifeline You Set Up in Advance
Traveling solo never means being completely isolated. A pre-planned, strong communication strategy is a crucial safety net that provides peace of mind for both you and your loved ones back home.
The Itinerary Share: Before you leave, share a comprehensive copy of your itinerary with a trusted friend or family member. This should include flight numbers, hotel names, addresses, and phone numbers, and a general outline of your plans.
The Power of Live Location: Leverage modern technology for an added layer of security. Apps like Apple's "Find My" or the location-sharing feature in WhatsApp allow you to share your real-time GPS location with a trusted contact for the duration of your trip.
Official Registration: Enroll in the U.S. Department of State's free Smart Traveler Enrollment Program (STEP). This service allows the local U.S. embassy to send you security alerts and helps them locate you in an emergency. It's the official, government-backed component of your support network.
Street Smarts on the Ground
Once your trip begins, safety becomes an active practice. It's about conscious behavior, unwavering situational awareness, and projecting a quiet confidence that makes you a less appealing target for opportunistic individuals.
The Golden Rules of Solo Travel Women Safety: 5 Things to Never Do
This is your non-negotiable list of on-the-ground rules, learned from the collective wisdom of thousands of experienced solo female travelers.
NEVER Advertise You're Alone: Master the art of the "white lie." If a stranger's questions make you uncomfortable, mentioning a husband who is "meeting you shortly" or a friend who is "waiting at the hotel" is a highly effective way to shut down unwanted advances. It’s not about shame; it’s about smart information management.
NEVER Bury Your Head in Your Phone: Project confidence, even if you don't feel it. Walk with your head up, shoulders back, and make brief, deliberate eye contact. If you need to check a map, step into a shop or cafe rather than stopping in the middle of a busy sidewalk, which marks you as a lost and distracted tourist.
NEVER Let Politeness Override Your Instincts: This is the most critical rule. Women are often socialized to be polite, but your safety is far more important than a stranger's feelings. If someone or something feels wrong, it is wrong. Trust that gut feeling. Use a firm voice, direct language ("Leave me alone"), and remove yourself from the situation immediately. Being safe is more important than being polite.
NEVER Be Out of Touch: Your communication plan isn't a one-time setup; it's a daily practice. A quick "Goodnight" text or email to your at-home contact maintains that vital link and ensures someone knows you're safe at the end of each day.
NEVER Do Abroad What You Wouldn't Do at Home: This is a simple but powerful gut-check. If you wouldn't walk down a dark, unfamiliar alley alone at 3 AM in your own city, don't do it in Rome or Bangkok. Your common sense is one of your most valuable travel companions.
Mastering Movement: Transportation Safety for the Solo Traveler
How you get from point A to point B is a frequent point of vulnerability. Understanding the hierarchy of safe options is key.
The Gold Standard (App-Based Ride-Shares): Services like Uber and Lyft offer unparalleled safety features. The digital record of the ride, driver identification, PIN verification, and real-time trip sharing create a powerful digital paper trail that deters bad behavior.
Official Taxis: If using a taxi, ensure it is a licensed, reputable one. Look for official markings and a visible meter. Be especially wary of unlicensed "fake taxis," a common scam at airports.
Public Transit: While often practical, public transport requires heightened awareness. Avoid completely empty train cars, which increase isolation, as well as overly crowded ones, which are ideal for pickpockets.
The Hard No: There is no ambiguity here. Do not hitchhike. Ever.
Socializing and Nightlife: How to Stay Safe While Having Fun
Experiencing local culture often includes nightlife, but it demands extra vigilance. One of the biggest concerns is drink spiking. Follow these steps without fail: never accept a drink from a stranger, always watch your drink being made, and physically cover the top of your glass with your hand when you're not sipping it.
Above all, continue to trust your gut. If you get a strange vibe from a new acquaintance, that's all the reason you need to politely excuse yourself and leave. If you ever start to feel strange or unwell in a way that seems inconsistent with your alcohol consumption, immediately inform a trusted person (like a bartender), call for local emergency help, and, if abroad, contact the nearest U.S. embassy.
A Nuanced Guide to Solo Travel Women Safety in the USA
One of the biggest mistakes in travel planning is treating the United States as a single, homogenous entity. Safety in the USA varies dramatically by region, state, city, and even by neighborhood. As one traveler wisely noted, "Do research on specific neighborhoods/towns you want to visit rather than the country as a whole."

The USA is Not a Monolith: A Framework for Regional Risk Assessment
Understanding the context of your environment is critical. The risks in a major city are different from those in a remote national park.
Urban vs. Rural vs. Wilderness: Major cities like New York or Chicago present higher risks of theft and scams, but offer the "safety in numbers" of bustling streets. Rural or wilderness areas, like national parks, involve risks of isolation, wildlife encounters, and the need for self-sufficiency.
State-by-State Variation: Safety metrics can vary wildly. States like Vermont and Maine consistently rank as among the safest, while certain neighborhoods within large cities require a much higher degree of caution, especially after dark.
Pro-Tip: Use this four-step USA Location Vetting Checklist for any domestic trip. 1) Check City-Level Crime Statistics: Look up official data on city police department websites or the FBI's crime data explorer. 2) Use Neighborhood-Specific Tools: Websites like NeighborhoodScout offer detailed local data. Also, use the local knowledge on forums like Reddit (e.g., asking about a specific block on r/AskNYC). 3) Read Local News: A quick Google News search for the neighborhood can reveal any recent patterns of crime. 4) Analyze Accommodation Reviews: Look for reviews that specifically mention feeling safe walking in the immediate area at night.
Practical Scenarios: City Streets, National Parks, and Road Trips
Major Cities (e.g., New York, San Francisco): Understand the rhythm of the city. Subways are generally safe during the day but require more caution late at night. Be aware of common urban scams, like someone trying to "help" you with a broken ATM.
National Parks: The primary risks here are environmental. Always check the weather forecast, carry more water than you think you'll need, be aware of local wildlife, and inform a park ranger or friend of your hiking plans and expected return time.
The Great American Road Trip: Secure your vehicle. Never leave valuables in plain sight, especially at trailheads or in busy city centers. Be cautious at remote, unlit rest stops at night; well-lit, busy truck stops are often a safer choice.

Your Emergency Action Plan & Toolkit
Planning for the worst isn't about fear; it's about building resilience. Knowing exactly what to do in a crisis reduces panic and leads to better outcomes.
Your Step-by-Step Emergency Response Plan
If you are in immediate physical danger, follow these steps in order:
Attract Attention: Get loud. Yell, scream, blow a whistle, or use a personal safety alarm. Creating a disturbance is your best defense.
Contact Local Authorities: In the United States, the emergency number is 911. In Europe, it's 112, and in the UK, it's 999. Save the correct number in your phone.
Contact the U.S. Embassy: If you are abroad, the nearest U.S. embassy or consulate is a critical resource for American citizens who are victims of crime.
Seek Medical Attention: In the event of an assault, seeking immediate medical care is crucial. This is vital for your health and for the collection of potential evidence.
Contact Support Networks: Organizations like the Rape, Abuse, and Incest National Network (RAINN) have 24/7 hotlines and offer confidential support, no matter where you are.

At-a-Glance Emergency Resource Directory
The World is Ready For You. Are You?
Safe solo travel women safety is not about living in a bubble of fear. It is the exact opposite. It's about having the confidence and competence to step out of your comfort zone, armed with the knowledge that you are prepared, aware, and fully capable of handling whatever comes your way. Through diligent research, unwavering trust in your instincts, and a commitment to smart, conscious decision-making, you transform yourself from a potential target into a savvy, empowered world traveler. The world is vast and beautiful, and it is waiting for you to explore it—safely, and on your own terms.
We encourage you to build this community of empowered travelers. Share your own hard-won safety tips in the comments below, and please, share this article with any woman in your life who dreams of a solo adventure.
Read the full guide: Anxious to Adventurous: The Ultimate Guide to Solo Travel Confidence
Don't Miss Out! Subscribe for Exclusive Content
SubscribeComments 0
No comments yet
Be the first to share your experience!
Dont Miss Out! Subscribe for Exclusive Content

How to Avoid Travel Scams: A Global Guide

Is Public WiFi Safe? How to Protect Your Data Abroad

A Woman's Guide to Safe Travel: 10 Critical Tips

7 Hotel Safety & Security Tips for Peace of Mind

9 Beach Safety Tips That Could Save Your Life

How to Stay Safe While Hiking: A Hiker's Safety Guide
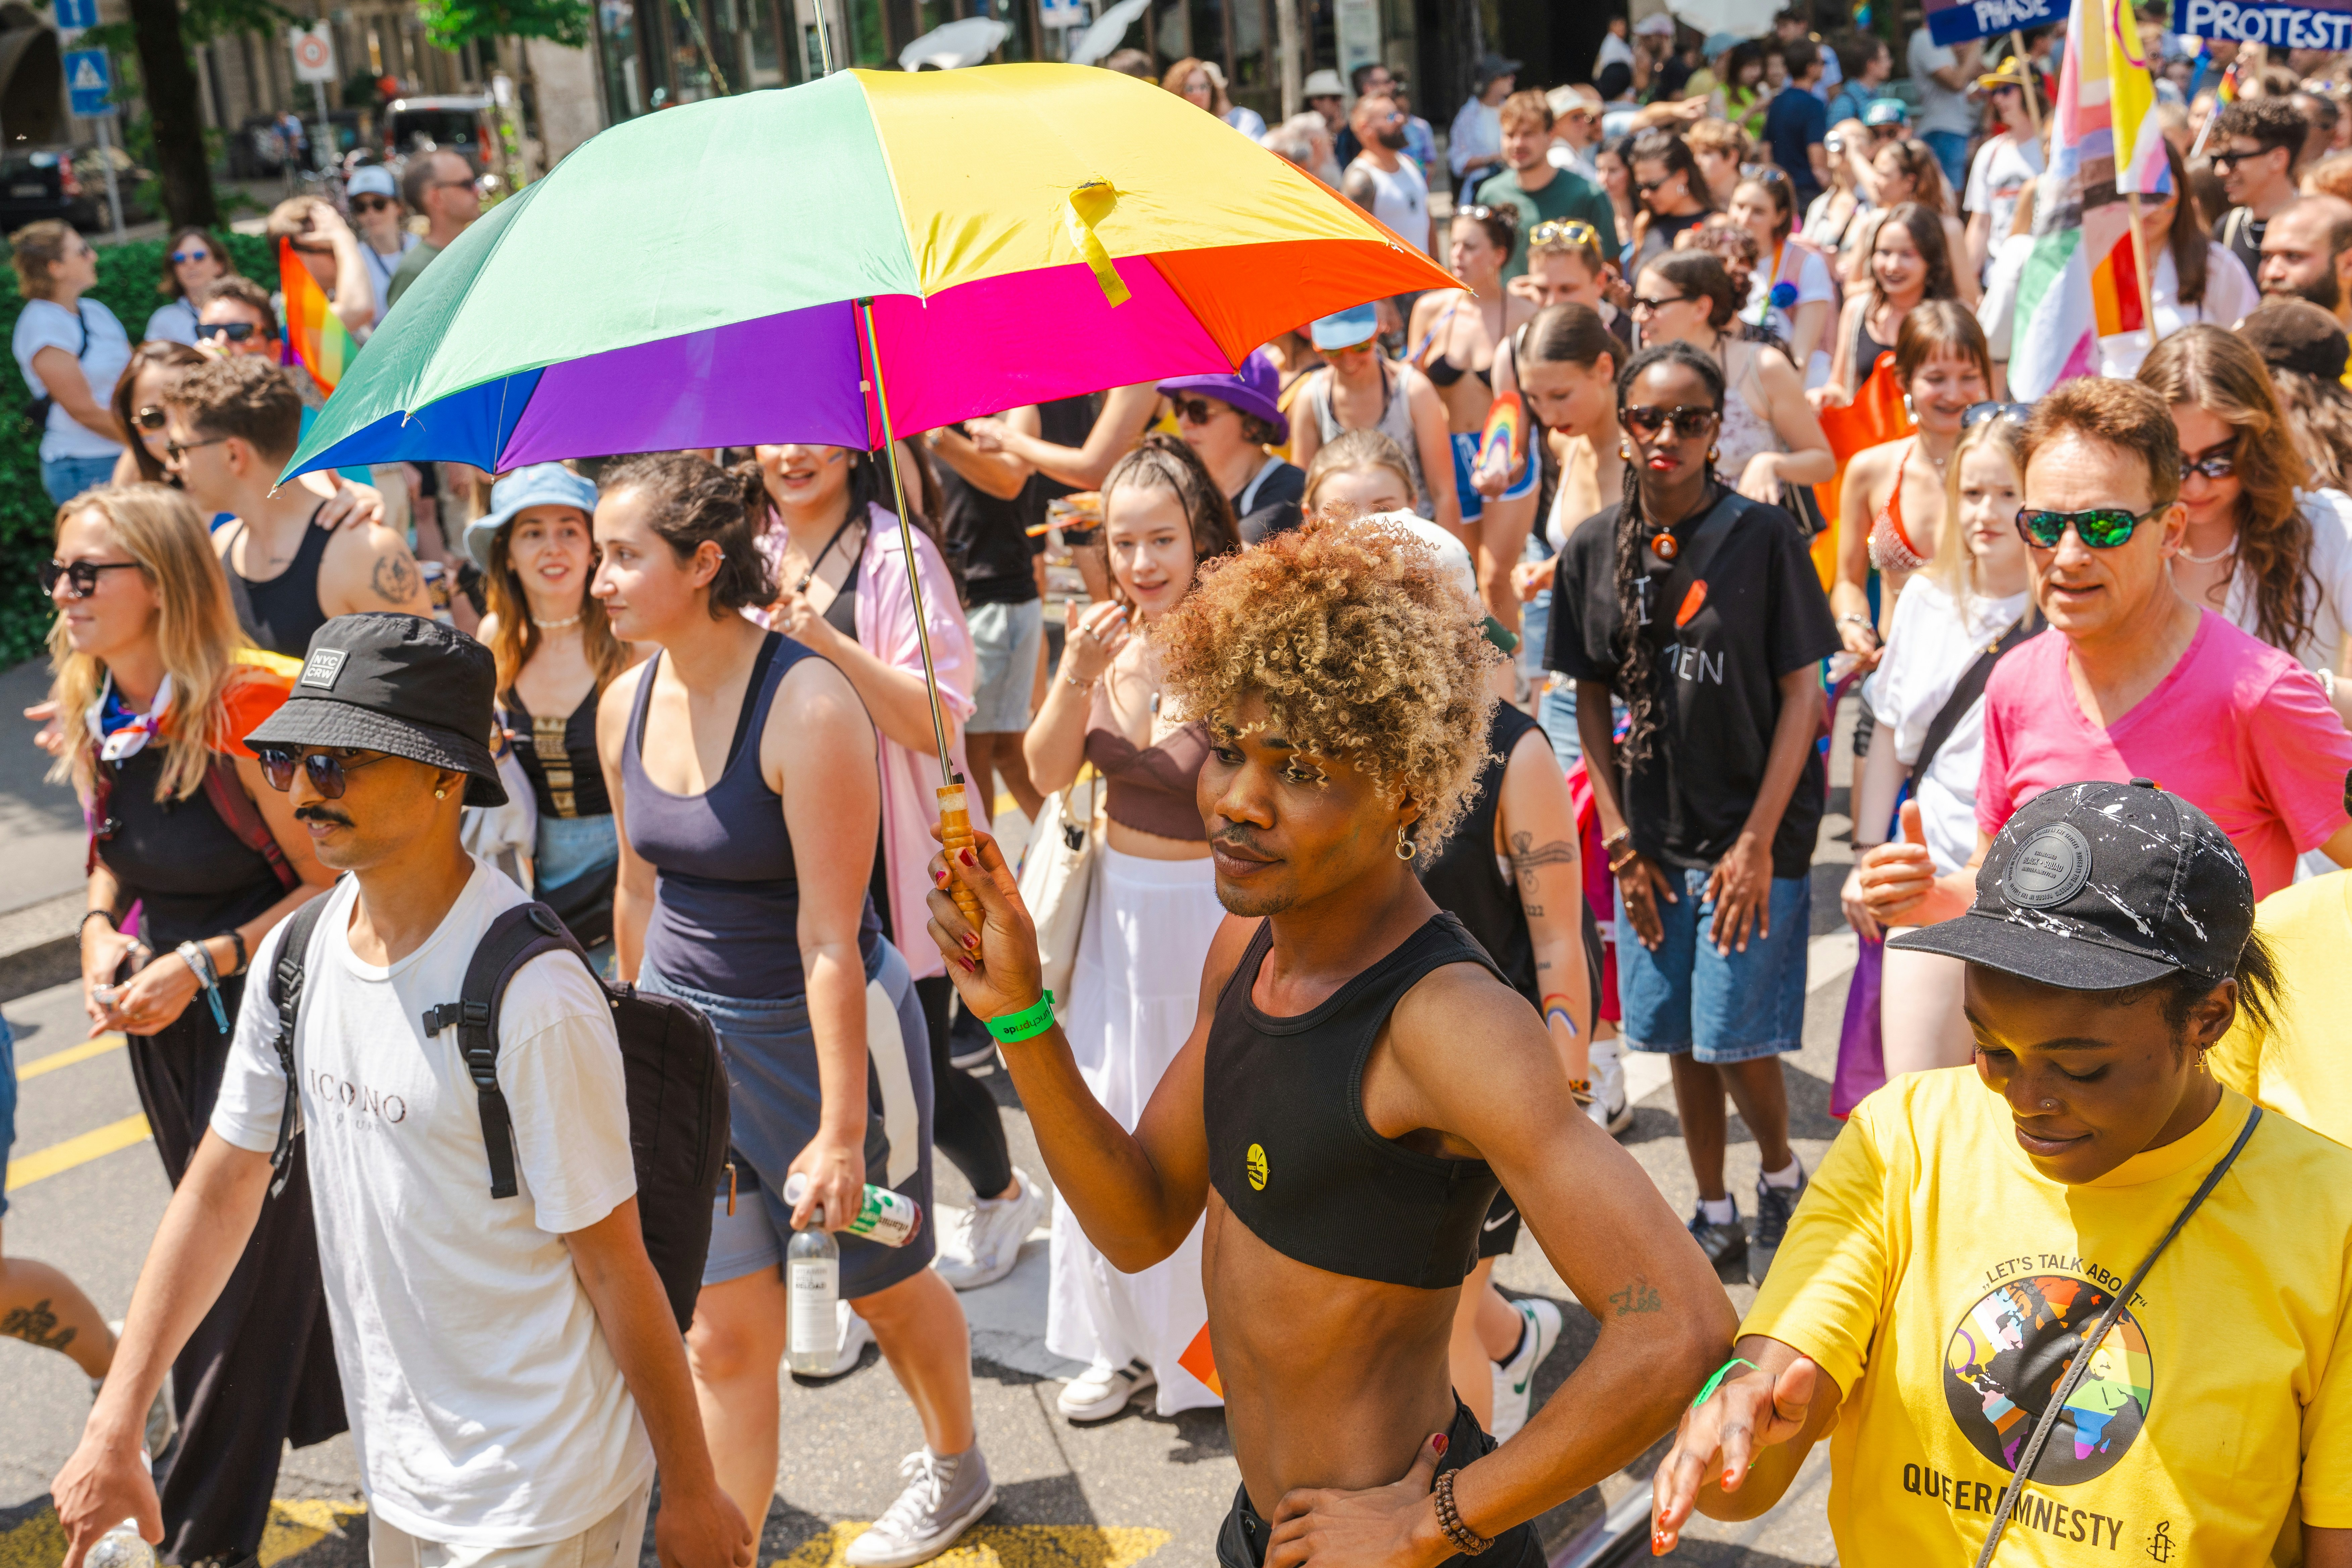
NYC Pride: Parade Route Essentials
TrekGuider @trekguider
The air crackles with anticipation. You feel the bass from a distant float thumping in your chest, a rhythmic heartbeat for a city ready to explode in a celebration of love, identity, and history. The NYC Pride Parade is one of the most iconic, life-affirming events on the planet. But as you picture the cascade of rainbow flags, a knot of logistical questions tightens in your stomach. With millions of people flooding Manhattan, where do you even begin? How early is early enough? How do you navigate a multi-mile route to actually see the parade without getting swallowed by the crowd?
Without a smart plan, the dream experience can dissolve into a logistical nightmare. You risk being stuck ten-deep behind a wall of people, catching only glimpses of the spectacle. You could spend hours feeling overwhelmed, battling for a sliver of sidewalk instead of immersing yourself in the powerful current of community and celebration. The line between an unforgettable day of joy and a frustrating ordeal is drawn by preparation.
This is your definitive playbook for conquering the chaos. Forget the guesswork. We are breaking down the entire pride parade New York route, section by section, arming you with insider strategies and actionable essentials. From the electric energy of the formation zone to the historic heart of the Village, this guide will help you navigate the day like a seasoned pro. Get ready to transform potential stress into pure, unadulterated Pride.

The Heartbeat of Pride: A Journey from Protest to Celebration
But to truly appreciate the river of rainbow flags and joyous noise, you have to understand its source. This isn’t just a party; it’s a pilgrimage. The modern NYC Pride Parade is the direct descendant of the Christopher Street Liberation Day March, first held in 1970, exactly one year after the Stonewall Uprising of 1969. That rebellion, a series of spontaneous and defiant demonstrations against a police raid on the Stonewall Inn, was the flashpoint that ignited the modern gay rights movement.
What began as a protest march has evolved over decades into a powerful dual-purpose event: a joyous celebration of identity and a formidable platform for activism. In the 1980s, as the AIDS crisis devastated the community, the parade became a vital and visible front line for raising awareness and demanding action, cementing its role as the community's conscience and its loudest voice. Its deep historical roots and unwavering commitment to progress make it a key element event—and for good reason, a non-negotiable highlight in our definitive guide to New York Holidays: 10 Must-Do Events. Understanding this legacy enriches the entire experience, transforming you from a spectator into a participant in living history.
Mark Your Calendar: 2026 NYC Pride Parade Date and Time
Precision is your best friend when planning for an event of this magnitude. Get these details locked into your calendar now.
Date: Sunday, the last Sunday of June
Start Time: The parade officially kicks off between 11:00 AM and 12:00 PM.
A word of caution: Do not mistake the start time for your arrival time. The parade route is miles long, and the best viewing spots are claimed hours in advance. For a prime location, especially in the more popular sections, you should be in position no later than 9:00 AM. For the truly iconic spots, even earlier is better.

Deconstructing the Route: A Mile-by-Mile Guide to the Pride Parade New York
The official route for the pride parade New York is a journey through the city's cultural and historical soul. Each segment offers a distinct atmosphere and viewing experience. Your perfect spot depends entirely on the vibe you’re seeking.
The Kick-Off: 26th Street and 5th Avenue (The Formation Zone)
The Vibe: This is the epicenter of pure, unharnessed anticipation. The energy here is electric, a fascinating mix of organized chaos and raw excitement. You’ll see floats getting their final sound checks, dance troupes running through their choreography one last time, and thousands of marchers buzzing with adrenaline before they take their first official step. It’s less of a polished performance and more of an authentic, behind-the-scenes look at the massive human effort powering the event.
Viewing Advice: Standing near the start means you see every contingent at its absolute freshest. The costumes are pristine, the energy is at its peak, and the performances are sharp. It’s a fantastic spot for photographers wanting to capture candid moments and fine details. The crowds here are intense as everyone jockeys for that first glimpse.
Logistics: Arrive extra early—think 8:00 AM—to secure a spot with a clear line of sight. Amenities are scarcer here compared to further down the route. Pack what you need for the morning, as ducking into a local shop will be a major, time-consuming undertaking.
The Main Artery: South on 5th Avenue (The Spectator Hub)
The Vibe: As the parade marches down the world-famous 5th Avenue, it hits its full, spectacular stride. This is the quintessential big-city parade experience. The avenue is wide, the crowds are massive, and the backdrop is pure New York City grandeur. The sound of music and cheering reverberates off the tall buildings, creating an immersive wall of sound. You’ll be surrounded by a diverse mix of families, tourists, and locals, all united in a shared celebration.
Viewing Advice: This is the longest stretch of the parade and where most spectators naturally congregate. For a slightly less condensed crowd, try to find a spot further north, perhaps in the high 30s or 40s. The closer you get to the Village, the exponentially denser the crowds become.
Logistics: This section offers the best access to delis, coffee shops, and stores for restrooms and refreshments. However, be prepared for long lines for absolutely everything. Public transportation is your best friend here; the numerous subway stops along 6th Avenue run parallel to the route, making access relatively straightforward.
The Historic Turn: 8th Street to Christopher Street (The Soul of Pride)
The Vibe: This is the emotional and historical heart of the entire parade. As the route makes its key turn off 5th Avenue and winds through the narrower streets of Greenwich Village towards the Stonewall National Monument, the atmosphere shifts. It becomes more intimate, more intense, and deeply resonant. The sense of history is palpable. This is where the cheers often feel the loudest and the connection between the marchers and the crowd feels most profound.
Viewing Advice: This is, without question, the most meaningful and popular place to watch the parade. Consequently, it is the most crowded. To get a spot here, you must be committed. Arrive by 8:00 AM at the absolute latest, and be prepared to hold your ground for hours. The experience, however, is powerful and unparalleled.
Logistics: Once you’re in a spot here, you’re in for the duration. The narrow streets and dense crowds make movement nearly impossible. Pack everything you need for several hours. There are fewer commercial establishments directly on these streets, so plan accordingly.

Pro-Tip: For a less obstructed view, look for spots near intersections on the opposite side of the street from the parade's direction of travel. Crowd density is often slightly lower there as people tend to cluster on the inside of the turns.
The Grand Finale: Finishing Near 15th Street and 7th Avenue (The Dispersal Zone)
The Vibe: The energy at the end of the route is one of joyous exhaustion and collective accomplishment. Marchers, who have been on their feet for hours, are often interacting more freely with the crowd as they complete their long journey. It’s less of a formal procession and more of a massive, mobile street party winding down into its final, celebratory moments.
Viewing Advice: This is by far the least crowded section of the route, making it an excellent choice for families, those with accessibility concerns, or anyone who couldn't arrive at the crack of dawn. You’ll still see every float and group, but with significantly more room to breathe and move.
Logistics: This area offers the easiest exit strategy. With the parade dispersing, streets begin to reopen sooner, and access to multiple subway lines on 7th Avenue (like the 1, 2, and 3 trains) makes for a quicker trip home or to your next destination.
Your Strategic Viewing Plan: 7 Essential Tips for the Best Experience
A little strategy goes a long way in a crowd of millions. Follow these essential tips to ensure your day is smooth, safe, and spectacular.
Arrive Early, Then Arrive Earlier: This cannot be overstated. For a front-row spot anywhere south of 23rd Street, 9:00 AM is a good baseline. For a coveted spot in the West Village or near Christopher Street, you need to be thinking 7:30 AM or 8:00 AM. The most dedicated spectators arrive with breakfast and a blanket.
Pack Your Urban Survival Kit: You are essentially setting up a base camp for the day. Your kit should include: a large, reusable water bottle (staying hydrated is non-negotiable), high-SPF sunscreen, a portable phone charger, and plenty of snacks. Relying on local bodegas is a rookie mistake; they will be overwhelmed and may run out of supplies.
Master Public Transit: Driving is not an option. Street closures are extensive and begin in the early morning. The subway is your only logical choice. Use lines that run along 6th Avenue (B, D, F, M) or Lexington Avenue (4, 5, 6) and walk west. Avoid stations directly on the route, as they will be dangerously crowded.
Choose Your Vibe, Not Just a Spot: Before you pick a location, decide what kind of experience you want. Do you crave the high-energy launch? The massive midtown spectacle? The deeply emotional historic heart? Or the relaxed, celebratory finish? Matching the location to your desired vibe is the secret to a perfect day.
Stay Connected (But Have a Backup): With millions of people in one area, cell service can be notoriously unreliable. While you should keep your phone charged, don’t depend on it for communication. Use a buddy system, and if you’re with a group, establish a clear, physical meeting point and time in case you get separated.
Prioritize Accessibility: Organizers are continually working to make the event more accessible. Check the official NYC Pride website in the weeks leading up to the parade for detailed information on designated viewing areas for people with disabilities. These locations offer better sightlines and a less congested environment.
Embrace the Virtual Experience: If you can't make it in person or prefer to avoid massive crowds, don't worry. The NYC Pride Parade is live-streamed across multiple platforms. You can catch all the action from the comfort of your home, a powerful option for those who want to participate from afar.
Pro-Tip: The blocks just after the parade turns off 5th Avenue onto 8th Street can be a strategic viewing sweet spot. The crowd thins slightly as it navigates the corner, offering a brief window for better photos and a bit more breathing room before it swells again towards Christopher Street.
Beyond the Sidelines: Documenting Your Day
The spirit of Pride is participation. Even as a spectator, you are a vital part of the event. Wear your brightest colors, create a supportive sign, and cheer loudly for the groups that resonate with you. Your energy is what fuels the marchers on their long walk.
For many, capturing the day is part of the experience. The vibrant colors, powerful emotions, and incredible stories of the pride parade New York make it a content creator's dream. If you're looking to capture and share the experience like a pro, preparation is everything. To elevate your storytelling, our The Travel Creator's Toolkit provides the essential checklists and guides to turn your passion into compelling content that does justice to this incredible event.

Planning the Perfect Pride Weekend in NYC
The parade is the magnificent centerpiece of a city-wide, month-long celebration. Pride Month in New York is packed with parties, cultural events, and community gatherings. Don’t limit your experience to just a few hours on a Sunday afternoon. Make it the anchor of an unforgettable weekend or a longer trip to the city.
Navigating the parade is just one piece of an unforgettable trip. To build a complete itinerary—from finding the best LGBTQ+-friendly hotels in Chelsea or Hell's Kitchen to exploring other iconic city sights that have shaped queer history—our comprehensive Travel Guide is the ultimate resource for planning your entire New York adventure. It helps you weave the parade into a broader, richer travel experience.
Your Mission: Experience Pride to the Fullest
You are now armed with the essential knowledge to navigate the pride parade New York not just as a spectator, but as an informed participant in a powerful celebration. You know the history that fuels the march, the unique vibe of each section of the route, and the practical strategies to make your day a resounding success. The parade is more than a route on a map; it's a journey through history, proof of resilience, and an explosion of pure joy.
So pick your spot, pack your survival kit, and get ready to experience the love, history, and unbreakable community of NYC Pride. Go with an open heart, a loud voice, and a solid plan.
Meta Data Suggestions:
SEO Meta Title: NYC Pride Parade Route Guide: Best Viewing Spots & Tips 2026
URL Slug: /nyc-pride-parade-route-essentials
SEO Meta Description: Your ultimate guide to the 2026 NYC Pride Parade. Discover the best viewing spots, route map, start times, and essential tips to navigate the crowds.
Don't Miss Out! Subscribe for Exclusive Content
SubscribeComments 0
No comments yet
Be the first to share your experience!
Dont Miss Out! Subscribe for Exclusive Content

San Francisco Cherry Blossoms: A Local's Guide to the Blooms

Halloween SF: Haunts Without Horrors

SF Festivals: 7 Must-See Lineups

Christmas SF: Lights & Wharf Wonders

SF Pride: 6 Route & Party Hacks

Chinese New Year SF: Parade Essentials
50+ Travel Blog Name Ideas (And How to Choose)
TrekGuider @trekguider
You feel it in your bones—the burning desire to turn your travel adventures into something more. You're ready to build a brand, share your stories, and launch the travel blog you've been dreaming of. But you’re stuck. You’re staring at a blank screen, trapped by the single most paralyzing question every creator faces: What do I call it?
The pressure to find the perfect name is immense. Every brilliant idea you have feels either too generic, too cheesy, or, most frustratingly, already taken. You worry about choosing a name you’ll outgrow or one that fails to capture the essence of your vision, and this single decision is holding you back from ever hitting "publish."
Forget the endless, frustrating brainstorming sessions. This guide is your definitive branding workshop. We’re not just going to give you a list of generic travel blog name ideas; we’re going to equip you with a proven, step-by-step framework for brainstorming, vetting, and choosing a powerful, memorable, and—most importantly—available brand name. Consider this the final resource you’ll need to overcome the naming hurdle and finally launch your travel media business.

Why Your Blog’s Name is a Critical Business Decision
In the competitive world of travel content, your blog's name is far more than just a URL; it’s the foundation of your entire brand. It’s the first impression you make on a potential reader, a signal of your niche, and a promise of the value you provide. The right name can convey authority, personality, and trustworthiness in a split second.
As the digital world becomes more crowded, a unique and memorable name is a key differentiator that helps you stand out and build a loyal community. Choosing the right name is the very first step in joining the ranks of The Best Travel Blogs to Follow in 2026, transforming your passion from a simple hobby into a legitimate media brand. It sets the tone for your content, guides your visual identity, and becomes the anchor for the entire business you are about to build.
The 5-Step Framework for Choosing the Perfect Travel Blog Name
Treat this framework as your strategic playbook. By following these five steps systematically, you’ll move from a state of overwhelming uncertainty to one of confident clarity, ensuring you select a name that is not only creative but also commercially viable.

Step 1: The Foundation — Brainstorm Core Keywords
Before you can think of a single name, you must first define what your brand is about. This initial step is all about creating a "word bank" of concepts that are central to your blog. Don’t self-censor here; just write.
Create lists of words associated with these four categories:
Your Niche: Are you focused on luxury, budget, adventure, family, food, or solo travel? List every related term. For example, a family adventure blog might list: family, kids, teens, journey, trek, quest, wild, explore, outdoors.
Your Target Audience: Who are you writing for? Digital nomads, parents, retirees, college students? List words that describe them or resonate with them. For example: nomad, creator, parent, wanderer, seeker, adventurer.
Your Tone & Voice: What feeling do you want to evoke? Is your brand inspiring, funny, practical, sophisticated, or rugged? List adjectives. For example: witty, curious, bold, serene, classic, heirloom, luxe.
Travel & Exploration Verbs/Nouns: List general travel-related words that you like the sound of. For example: atlas, compass, globe, passport, voyage, roam, wander, seek, journey, passage, trail.
At the end of this exercise, you’ll have a rich palette of keywords to work with in the next steps.
Step 2: The Spark — Apply Proven Naming Formulas
Now, take the keywords from your word bank and start combining them using these common, effective naming formulas. This is where the magic happens.
The Alliteration Formula (Same Letter): This technique makes names catchy and memorable.
Examples: Roaming Roads, Compass Chronicles, Summit Stories.
The Portmanteau Formula (Blend Words): Combine two words to create a new, unique one.
Examples: Foodventure (Food + Adventure), Staycationist (Stay + Vacation), Technomad (Tech + Nomad).
The "Your Name" Formula (Personal Brand): Using your own name builds a personal connection and positions you as the expert.
Examples: Adventurous Kate, Nomadic Matt, Travels with Taylor.
The "Adjective + Noun" Formula (Descriptive): This is a classic, straightforward approach.
Examples: The Wandering Wagars, The Broke Backpacker, The Travel Bite.
Experiment by mixing and matching words from your Step 1 list into these formulas. Generate a long list of 20-30 potential names without judgment.
Step 3: The Inspiration — Use Blog Name Generators (Wisely)
Online blog name generators can be helpful, but they should be used for inspiration, not as a final answer. Input your top keywords from Step 1 into a few of these tools. Most of the suggestions will be generic or unusable, but occasionally, a generator can spark a new idea or a creative word combination you hadn't considered. Add any interesting options to your long list.
Pro-Tip: Think five or ten years into the future. Will the name you choose still fit if your travel style evolves? A name like "Backpacking a Twenty-Something" might feel perfect now, but it has a built-in expiration date. Aim for a name that allows your brand to grow with you.

Step 4: The Reality Check — Verify Availability
This is the most critical and often most disheartening step, but it’s non-negotiable. You must thoroughly check if your favorite names are available.
Check the Domain: Your primary goal is to secure a .com domain. Our market analysis consistently shows that a professional, easy-to-navigate website is a direct signal of brand investment. A .com domain is at the heart of that perception, inspiring a level of trust that other extensions simply don't. Use a domain registrar like Namecheap or GoDaddy to see if YourBlogName.com is available. If it’s taken, you should strongly consider moving on to the next name on your list.
Check Social Media Handles: Once you find an available .com, immediately check if the name is available as a consistent handle across your target social media platforms (e.g., Instagram, TikTok, Pinterest, YouTube). Having @YourBlogName everywhere is crucial for brand consistency.
If your top name passes both checks, put it on your shortlist. If not, cross it off and move on. Do not get emotionally attached to a name you can't own outright.
Step 5: The Final Hurdle — Conduct a Conflict Check
Before you purchase the domain, perform one last check to avoid future headaches.
Google It: Do a simple Google search for your chosen name. Is another brand, especially in a related industry, already using it? Even if the .com is available, you don’t want to compete with an established brand for name recognition.
Check Trademarks: For extra diligence, perform a basic search on the U.S. Patent and Trademark Office (USPTO) database. This can help you avoid obvious trademark conflicts down the road.
The name that makes it through all five steps is your winner.
Ready to Build Your Brand?
Choosing a name is the first step. Building a successful travel blog requires a full suite of tools for content creation, SEO, and monetization. Get a head start with our comprehensive, expert-curated toolkit.
The Travel Creator's Toolkit
75+ Travel Blog Name Ideas to Spark Your Creativity
To help you with Step 1 and 2, here is a categorized list of over 75 travel blog name ideas. Use these as a starting point to fuel your own unique combinations.

Puns & Wordplay
In Tents Exploration
The Globe Trotters
Suitcase Stories
Miles and Smiles
Pretty Plane Sailing
Frequent Flier Finds
Life is a Trip
Home is Where the Bag is
Have Luggage, Will Travel
Check-In & Check-Out
Alliteration & Rhyme
Roaming Roads
Compass Chronicles
Voyage Vision
Summit Stories
Passage Planner
Wayward Wanderings
The Travel Tribe
Seeker’s Saga
Trekking Threads
The Global Guide
Niche-Specific Names
Family: The Family Fold, Park Pack, Teen Travel Tribe, Little Luggage Life, The Wandering Weans
Solo: Solo Sphere, One Woman’s World, The Independent Itinerary, Just Me Journeys, The Singular Seeker
Luxury: The Gilded Getaway, First Class Compass, The Curated Journey, Velvet Atlas, Heritage & Hideaways
Budget: The Frugal Flier, Penny-Wise Passage, The Backpacker's Billfold, Thrifty Trails, The Value Voyager
Adventure: Adventure Atlas, Summit & Scale, The Adrenaline Almanac, Off-Grid Odyssey, The Wild Wayfarer
Action-Oriented & Evocative
Chase the Horizon
Seek the Summit
Beyond the Map
Find Your Path
Cross the Meridian
The Saffron Trail
Saltwater Soul
Alpenglow Atlas
Terra Incognita
The Far-Flung
Modern & Simple
The Travel Edit
Wayward Co.
Compass Collective
The Getaway Guide
Trip Theory
Atlas & Anchor
Itinerary & Ink
The Local Lens
Foreign & Familiar
The Departure Desk
Food Travel
Feast Finder
Culinary Compass
The Hungry Horizon
Fork & Globe
Spice Routes
The Traveling Table
Street Food Stories
Plates & Passports
The Foodie Flight
Cravings & Capitals
Photography Travel
The Shutter Sphere
Aperture Abroad
Focus Finder
The Framing Fellow
Light & Landmark
Pixel Passport
The Wandering Lens
ISO Elsewhere
The Photo Trekker
Viewfinder Voyages

Frequently Asked Questions About Naming Your Blog
Should my blog name include my destination niche (e.g., "Awesome Italy")?
It can be a powerful strategy for building authority quickly. It tells readers and search engines exactly what you're about. However, it can be limiting if you decide to travel elsewhere. If you're certain you'll focus on one area for years, go for it. If you think you might expand, a broader name offers more long-term flexibility.
What if the .com for my name is taken, but .net or .co is free?
We strongly advise against it. As mentioned, the .com extension is the gold standard; it conveys professionalism and trust. Other extensions can appear less credible and are harder for people to remember. Your audience will instinctively type .com, and you don’t want to send your hard-earned traffic to another website. It’s better to find a new name with an available .com.
Is it a bad idea to use my own name for my travel blog?
Not at all! Using your own name is an excellent way to build a personal brand, positioning yourself as the face of your business. Industry leaders like Nomadic Matt and Adventurous Kate have done this with massive success. The only downside is a potential lack of privacy, so be sure you're comfortable with putting your name out there publicly.
How important is having a keyword in my blog name for SEO?
It's less important than it used to be. Today, search engines prioritize the quality of your content over having an exact-match keyword in your domain. Focus on choosing a name that is memorable, unique, and brandable. A strong brand name is far more valuable for long-term SEO than a clunky, keyword-stuffed domain.
The Final Step: From Name to Brand
Once you’ve successfully navigated the framework and chosen your perfect name, act immediately. The internet moves fast, and you don’t want someone else to grab your idea.

Pro-Tip: As soon as you decide on a name that is available, purchase the .com domain and claim the social media handles on all relevant platforms. Do this immediately, even before you have a website built. Owning these assets is the first real step in making your brand a reality.
With your name secured, you’re no longer just dreaming; you’re building. The next step is to create a platform where you can share your expertise and begin monetizing your content. While traditional methods like advertising exist, the most profitable and sustainable path is to sell your own unique digital products—like itineraries, guides, or workshops. This is where you transition from being a content creator to a media entrepreneur. The TrekGuider Platform is the ultimate ecosystem designed for creators like you, providing the tools and marketplace to sell your digital products and build a thriving business from day one.
Your Journey Starts Now
Choosing a name for your travel blog can feel like an insurmountable obstacle, but it doesn’t have to be. By shifting your mindset from searching for a "cool name" to executing a strategic branding process, you can move forward with confidence and clarity. You now have a repeatable framework and a wealth of travel blog name ideas to break through the creative block that has been holding you back.
The perfect name is a strategic blend of personal expression and practical verification. You are equipped with the knowledge to find it. You're no longer just a traveler with an idea; you're a founder. Go claim your name, and start building your empire.
Meta Data Suggestions:
SEO Meta Title (58 characters): 75+ Travel Blog Name Ideas & How to Choose the Perfect One
URL Slug: travel-blog-name-ideas
SEO Meta Description (154 characters): Stuck on naming your travel blog? Get unstuck with our 5-step framework and 75+ creative travel blog name ideas to find the perfect brand name for you today.
Don't Miss Out! Subscribe for Exclusive Content
SubscribeComments 0
No comments yet
Be the first to share your experience!
Dont Miss Out! Subscribe for Exclusive Content
Ultimate USA Holidays Guide: Top Picks
FTC Affiliate Disclosure: Stay Compliant as a Travel Creator

Essential Affiliate Tools: From Tracking to Full Optimization
Avoid These 5 Affiliate Landing Page Mistakes for Better Conversions
Affiliate Keyword Research Mastery for Travel Blogs