Essential Affiliate Tools: From Tracking to Full Optimization
TrekGuider @trekguider
You’re a creator, not an administrator. Yet, you find yourself drowning in a sea of administrative tasks. You’re manually copying and pasting ugly, mile-long affiliate links, toggling between a dozen different program dashboards to check your stats, and spending more time wrestling with spreadsheets than you do creating the travel content you love. Your affiliate "business" feels less like a streamlined operation and more like a chaotic, time-sucking hobby that isn't paying the bills.
This inefficiency is more than just frustrating—it's a silent killer of your income. Every hour you spend on manual, repetitive tasks is an hour you’re not creating the next piece of content that could generate revenue for years to come. You're flying blind, guessing which strategies are working, unable to see which links are converting, and which pages are actually profitable. The reported average income of $13,847 a month for travel affiliates feels like a distant fantasy when you’re stuck in this administrative quicksand.

This guide is your way out. It is your curated, creator-friendly tech stack—a definitive list of the essential affiliate marketing tools that will automate the tedious, provide crystal-clear data, and free you up to focus on growth. We’ll cover the entire workflow, from foundational link management and tracking to the advanced tools needed for full-scale optimization. This is how you transform your passion project into a professional, efficient, and profitable business. For a complete command of the entire affiliate landscape, our definitive pillar page, Travel Affiliate Programs: The 2026 Ultimate Guide, is your essential command center for mastering the entire ecosystem.
The Foundational Layer: Your Operational Command Center
Before you can optimize, you must organize. This first set of tools forms the non-negotiable foundation of any serious affiliate marketing business. They are your central nervous system for managing links, ensuring compliance, and tracking performance from a single source of truth.
Link Management Plugins (The Digital Quartermaster)
If you run your travel blog on WordPress, a link management plugin is the single most important tool you will install. These plugins take the long, ugly, and intimidating affiliate links provided by programs and "cloak" them into short, clean, branded URLs that are far more trustworthy to your audience.
Think of it as your command center. Instead of embarking on a digital scavenger hunt through year-old posts to update a single expired link, you change it once in a central dashboard, and the plugin deploys that change site-wide instantly. This functionality alone will save you hundreds of hours over the life of your business. Furthermore, a link like yourblog.com/recommends/osprey-backpack is infinitely more professional and trustworthy to a reader than a long URL filled with random tracking parameters, directly impacting your click-through rates.

Top Tools in This Category:
Recommended: Travel Creator Toolkit: 34 Essential Apps and Resources
Recommended: Digital Product Ideas: How to Make Money From Your Next Trip
ThirstyAffiliates: A powerhouse plugin built specifically for affiliate marketers. It offers advanced features like autolinking (automatically turning specific keywords into affiliate links), proactive link checking to find broken links, and detailed click analytics.
Pretty Links: A slightly simpler but highly effective alternative. It excels at link cloaking, redirection, and providing basic click-tracking reports right from your WordPress dashboard.
Pro-Tip: The best link management plugins, like ThirstyAffiliates, can automatically add the required rel="sponsored" tag to all of your affiliate links. This is a critical feature that ensures you stay compliant with Google's guidelines for paid links, protecting your site from potential SEO penalties without you having to think about it.
Affiliate Tracking Tools (Your Source of Truth)
"What gets measured gets managed." To grow your affiliate income, you need a crystal-clear understanding of what’s working. While many creators start by manually checking each affiliate network’s dashboard, a dedicated approach to tracking provides a more holistic, actionable view.
For most creators, your affiliate tracking tools will be a combination of your link management plugin’s analytics and the dashboards provided by your affiliate networks (like CJ Affiliate or Travelpayouts). These platforms show you crucial metrics like clicks, conversions, and commission earnings.
However, as your business matures, you'll want to track performance across different income models. For example, the TrekGuider Seller Platform includes a dedicated referral dashboard. This is a specialized tracking tool that shows you not just one-time sales, but the ongoing, passive income you’re earning from the new sellers you’ve brought to the platform. It’s a perfect example of how a modern platform provides the built-in affiliate tracking tools you need to monitor more sophisticated, high-margin income streams like revenue sharing.
The Growth Engine: Traffic & SEO Tools
With your operational house in order, the focus must pivot from organization to acquisition. A perfectly managed link is useless without a steady stream of the right people clicking on it. This is where your growth engine comes in—the tools designed to attract your ideal audience with precision.
SEO & Keyword Research Platforms
The most profitable affiliate content is created with intention. It targets keywords that signal a user is actively researching a purchase (e.g., "best carry-on luggage review"). SEO platforms are your treasure map for finding these "money" keywords and building a content strategy that attracts buyers, not just browsers.

These platforms are indispensable for:
Finding Profitable Keywords: Uncover what your audience is searching for, how many people are searching for it, and how difficult it will be to rank on Google.
Analyze the Competition: See exactly which keywords your competitors are ranking for and which pages are bringing them the most traffic.
Track Your Performance: Monitor your rankings for your target keywords over time to see what’s working and where you need to improve.
Top Tools in This Category:
Ahrefs: A comprehensive, professional-grade SEO toolkit. Its "Keywords Explorer" is second to none for finding high-value commercial investigation keywords, and its "Site Explorer" provides deep insights into any competitor's strategy.
SEMrush: Another all-in-one industry leader that offers a powerful suite of tools for keyword research, rank tracking, and competitive analysis.
Pro-Tip: Don't confine your keyword strategy to your blog. With video projected to account for a staggering 55% of all affiliate traffic by 2026, the same commercial-intent keywords you find for your articles are the exact titles you should be using for your YouTube videos and TikToks.
Analytics Platforms
While SEO tools help you get traffic, a web analytics platform tells you what that traffic does once it arrives. It’s essential for understanding your audience, diagnosing problems, and optimizing their journey from reader to buyer.
The Must-Have Tool:
Google Analytics: The free, industry-standard tool for website analytics. It's an incredibly powerful platform that provides all the data you need to understand user behavior, track conversions, and identify your top traffic sources, allowing you to double down on what works.
The Conversion Toolkit: Optimization & Social Media Tools
Attracting traffic is only half the battle. The final, crucial step is converting that traffic into clicks and commissions. This set of tools is designed to streamline your workflow and optimize your content for maximum impact.
"Link in Bio" Tools (For Social Dominance)
Platforms like Instagram and TikTok are powerful for audience building, but they famously limit your ability to use clickable links. A "link in bio" tool solves this by creating a simple, mobile-friendly landing page that can house all of your most important affiliate links, blog posts, and offers.

Top Tools in This Category:
Linktree: The most well-known tool in this space, offering a simple and effective way to create a micro-landing page for your social media bio.
Later: While primarily a social media scheduling tool, Later’s "Link in Bio" feature is excellent, allowing you to create a clickable grid of your Instagram posts, driving traffic directly to relevant blog posts and affiliate offers.
The Amazon Workflow Accelerator
For nearly every travel creator, Amazon Associates is a core part of their affiliate strategy. However, creating links for individual products can be a slow, manual process.
The Must-Have Tool:
Amazon SiteStripe: This is a free, official toolbar from Amazon that appears at the top of your browser whenever you’re on Amazon.com. It allows you to generate a custom affiliate link (text, image, or both) for any product page with a single click, dramatically speeding up your content creation workflow.
Your Strategy Blueprint: The Travel Creator's Toolkit
Feeling overwhelmed by the options? A powerful tech stack is only as good as the strategy behind it. To help you organize your entire affiliate marketing plan—from keyword research to content creation and promotion—we've created the ultimate resource bundle. It’s packed with the checklists, templates, and guides you need to build a professional and profitable system.
Download Your Free Bundle: The Travel Creator's Toolkit Today!
Frequently Asked Questions (FAQ)
1. Do I really need all these tools when I'm just starting out? When you're starting, focus on the foundation. A WordPress site with a link management plugin (like Pretty Links) and Google Analytics is your essential starting stack. This is a low-cost setup that allows you to organize your links and track your traffic from day one. You can invest in a premium SEO tool like Ahrefs once your site is generating enough revenue to justify the cost.
2. Are there any good free affiliate marketing tools? Absolutely. Google Analytics is free and non-negotiable. Amazon SiteStripe is also free. For keyword research, you can start with free tools like Google Keyword Planner or the free versions of various SEO tools, though they are more limited. The free versions of "link in bio" tools like Linktree are also perfectly sufficient for most creators.
3. How do these tools help with tracking beyond just clicks? Advanced tracking involves connecting data points. For instance, by using UTM parameters (which you can add manually or with some plugins), you can see in Google Analytics not just that someone came from your blog, but that they came from the specific button in your review of the Osprey backpack. This level of detail is what allows you to A/B test different calls-to-action and truly optimize your pages for conversion.
Conclusion: From Hobbyist to CEO
The difference between a creator earning a few dollars a month and one earning a full-time income often comes down to their systems. Top earners don't waste time on manual, low-value tasks. They leverage technology to work smarter, not harder. They treat their content not as a hobby, but as a business.

You now have a curated list of the best affiliate marketing tools to build your own professional tech stack. Start with the foundation: a link management plugin to organize and track your links. Then, layer in SEO and analytics tools to build a predictable stream of traffic. Finally, use optimization and workflow tools to convert that traffic with maximum efficiency.
These affiliate tracking tools and optimization platforms are not an expense; they are an investment in your own efficiency, professionalism, and profitability. By implementing this toolkit, you take a definitive step away from being a hobbyist and become the CEO of your own thriving travel content business.
Meta Data Suggestions:
SEO Meta Title (58 characters): 9 Essential Affiliate Marketing Tools for Travel Creators
URL Slug: essential-affiliate-marketing-tools
SEO Meta Description (154 characters): Discover the top affiliate marketing tools for travel creators. From link tracking to SEO, this guide covers the essential tech stack to automate and grow your income.
Read the full guide: The Travel Blogger's Playbook to Affiliate Marketing Mastery
Don't Miss Out! Subscribe for Exclusive Content
Subscribe


Comments 0
No comments yet
Be the first to share your experience!
Dont Miss Out! Subscribe for Exclusive Content

Ultimate USA Holidays Guide: Top Picks

FTC Affiliate Disclosure: Stay Compliant as a Travel Creator

Avoid These 5 Affiliate Landing Page Mistakes for Better Conversions

Affiliate Keyword Research Mastery for Travel Blogs

Booking.com Affiliate Review: Pros, Cons & Earnings

Decoding Affiliate Commission Rates: Benchmarks for Travel Creators
Christmas in NYC: 7 Magical Markets
TrekGuider @trekguider
Planning a trip for Christmas in New York can feel like trying to direct a Broadway show—exciting, but utterly overwhelming. You’ve seen the twinkling lights and festive cheer in countless movies, and you want that magical, snow-globe experience for yourself. You dream of sipping hot cocoa while browsing charming wooden stalls, finding unique gifts, and soaking in an atmosphere so festive it feels like a warm hug.
But the reality can be a chaotic whirlwind of massive crowds, tourist traps, and paralyzing indecision. You risk spending your precious holiday time stuck in the wrong places, missing out on the authentic, cozy markets that truly define the city's holiday spirit. Instead of feeling the magic, you end up feeling stressed, cold, and disappointed, wondering if you’ve missed the real heart of a New York Christmas.
This guide is your definitive map to festive perfection. We’re cutting through the noise to take you on an insider’s tour of the 7 most magical Christmas markets in NYC. We’ll share pro-tips on what to buy, the best times to visit to avoid the crowds, and how to pair each market with the city’s most stunning light displays for the ultimate holiday adventure. These markets are a key part of the city's festive transformation, a spectacle we explore in full in our complete guide to New York Holidays: 10 Must-Do Events. Get ready to experience the holiday season in NYC the way it was meant to be.

Essential Know-Before-You-Go Tips for a Perfect Market Day
A little strategy goes a long way in a city that never sleeps, especially during the holidays. To make your market-hopping experience more magical and less maddening, keep these core principles in mind. They are the key to unlocking a smoother, more enjoyable Christmas in New York.
Embrace the Weekday Morning: The single best piece of advice for any major NYC attraction is to go early on a weekday. The holiday markets are most pleasant right when they open, typically around 11 AM. You’ll have more space to browse, chat with vendors, and truly appreciate the craftsmanship without being jostled by the shoulder-to-shoulder afternoon crowds.
Master Public Transportation: Driving and parking in Manhattan during the holidays is a recipe for extreme frustration and expense. The subway and buses are your best friends. Plan your market route using a transit app, buy a MetroCard for the duration of your stay, and enjoy the freedom of zipping beneath the traffic-clogged streets.
Dress in Smart Layers: New York’s winter weather is notoriously fickle. You might be freezing while walking between markets but quickly overheat once inside a packed indoor venue like Grand Central. Dress in layers—a thermal base, a sweater or fleece, and a warm, waterproof coat—that you can easily add or remove. A comfortable pair of waterproof boots is non-negotiable.
Carry a Mix of Cash and Cards: While the vast majority of vendors now accept credit cards, some smaller artisans or food stalls may be cash-only or have credit card minimums. Having a mix of both ensures you’ll never miss out on that perfect, one-of-a-kind find or a warm pretzel when you need it most.
1. Bank of America Winter Village at Bryant Park: The Iconic Centerpiece
If you could only visit one holiday market in NYC, this would be it. The Winter Village at Bryant Park is the quintessential New York Christmas experience, a dazzling wonderland set against the iconic backdrop of the New York Public Library and soaring midtown skyscrapers. This isn't just a market; it's a full-blown festive destination.
The entire experience is built around the 17,000-square-foot ice rink, which famously offers free admission (you just pay for skate rentals). Surrounding it are over 180 European-inspired, custom-designed "jewel box" kiosks that glow from within, creating a warm and inviting atmosphere as you wander the park's allées.
Here, you’ll find a truly global selection of goods, from complex ornaments and handmade leather goods to unique jewelry and cozy winter apparel from independent designers. The food options are a major draw. You can find everything from savory Belgian waffles and pierogies to rich hot chocolate and artisanal cheese. The Lodge provides an aprés-skate-themed food hall, offering a cozy spot to refuel and watch the skaters.
Pro-Tip: To truly enjoy the ambiance, visit on a weekday morning right when it opens. You can have a leisurely skate on the near-empty rink and browse the shops in peace. By lunchtime, the crowds swell, and the experience becomes far more hectic.

2. Union Square Holiday Market: The Eclectic European-Style Village
If your gift list demands something with more soul than a department store can offer, make a beeline for the Union Square Holiday Market. It’s less a market and more a sprawling, festive village that erupts in the heart of downtown, its iconic red-and-white striped stalls forming a labyrinth of pure creative energy.
The sheer variety and quality of the vendors are what set this market apart. It’s a juried market, meaning every vendor is carefully selected, ensuring a high standard of craftsmanship and originality. The winding aisles encourage exploration, making you feel like you’re discovering a hidden gem around every corner. This is the place to find gifts you simply won't see anywhere else: hand-blown glass ornaments, screen-printed posters from local artists, gourmet pantry items, and organic bath products. Several booths even offer on-the-spot personalization, whether it’s stamping a leather keychain or engraving a piece of jewelry.
The market can feel overwhelming. Our advice? Grab a map at the entrance and do a quick loop of the perimeter first to get your bearings. Then, dive into the inner aisles to hunt for treasures.
3. Columbus Circle Holiday Market: An Upscale Festive Escape
Perfectly situated at the southwest entrance to Central Park, the Columbus Circle Holiday Market offers a slightly more relaxed and upscale shopping experience. It’s the ideal place to find sophisticated gifts for the most discerning people on your list, with the added bonus of a magical Central Park stroll right next door.
The location is simply unbeatable. The glittering lights of the market stalls, with the stone arches of the park entrance and the Time Warner Center as a backdrop, create a picture-perfect holiday scene. It’s smaller and more manageable than Union Square, allowing for a more leisurely browsing experience focused on quality craftsmanship and gourmet treats. Expect to find elegant jewelry, designer winter wear, complex wooden puzzles, and fine art photography. The food vendors are a delight, selling artisanal chocolates, infused olive oils, and spiced gingerbread.
After shopping, complete your classic NYC holiday afternoon by taking a horse-drawn carriage ride through Central Park or going for a skate at the famous Wollman Rink.

4. Grand Central Holiday Fair: The Warmest Indoor Market
When the winter wind is biting, the Grand Central Holiday Fair offers a warm and dazzling respite. Housed in the magnificent, beaux-arts Vanderbilt Hall, this indoor market is a haven of calm and quality, away from the outdoor chill. Shopping under the grand chandeliers is an experience in itself.
The market is hand-picked, focusing exclusively on American-made and handcrafted products from artisans and small businesses across the USA. You’ll find everything from handmade stationery and children’s clothing to beautiful pottery and eco-friendly accessories. The atmosphere is refined and peaceful, a stark contrast to the joyful chaos of the outdoor markets. Its location within Grand Central Terminal makes it an incredibly convenient stop for commuters and travelers. Because it’s indoors, this is the perfect market to save for a particularly cold or snowy day.
5. The Holiday Market at the Oculus: A Modern Marvel
For a Christmas in New York experience that is sleek, modern, and architecturally stunning, head downtown to the Holiday Market at the Oculus. Set inside Santiago Calatrava’s breathtaking transit hub, this market blends high-end shopping with festive pop-ups in a truly unforgettable setting.
The venue is the star. The soaring white ribs of the Oculus create a cathedral-like space that feels both grand and futuristic. During the holidays, the space is filled with elaborate decorations and a cheerful, bustling energy, offering a completely different vibe from the traditional wooden-stall markets. The market is a mix of familiar luxury brands and curated pop-up shops offering everything from gourmet sweets to tech gadgets. It often features live musical performances, adding to the lively atmosphere.
Pair It With: The Oculus is part of the World Trade Center complex, making it easy to combine your shopping with a poignant visit to the 9/11 Memorial & Museum or a trip to the top of One World Observatory for staggering city views.

6. Brooklyn Flea + Smorgasburg Winter Market: The Hipster's Holiday Haul
Escape the Manhattan crowds and discover a treasure trove of unique finds at the Brooklyn Flea + Smorgasburg Winter Market. This is where you’ll find the city’s coolest vintage goods, handmade crafts, and artisanal foods all under one roof, making it the ultimate destination for a one-of-a-kind gift.
The vibe is pure Brooklyn: creative, eclectic, and effortlessly cool. It’s a massive market that combines the best of the Brooklyn Flea (vintage clothing, antique furniture, retro vinyl) with the best of Smorgasburg (dozens of gourmet food vendors). You are guaranteed to find something here that you won’t see anywhere else, shopping directly from Brooklyn-based artists and designers. The Smorgasburg section is a culinary adventure in itself, serving up inventive dishes from around the world.
Pro-Tip: This is the perfect market for finding a truly unique gift that tells a story. To make your trip even smoother, especially if you're visiting from abroad and planning to bring treasures home, download our International Travel Checklist to ensure you have everything you need for a seamless journey.
7. Grand Holiday Bazaar: The Year-Round Market with a Festive Flair
For a shopping experience that feels good and does good, visit the Grand Holiday Bazaar on the Upper West Side. This is the city’s largest curated weekly market, but it pulls out all the stops for the holiday season with special festive themes and vendors.
What makes this market truly magical is its powerful social mission: all profits are donated to four local public schools, benefiting over 2,000 children. Shopping here means you’re directly supporting the local community, making every purchase feel meaningful. The atmosphere is friendly and neighborhood-focused, with a rotating lineup of over 150 independent local artisans, designers, and vintage dealers each week. Be sure to check their website before you go to see the theme for the week.

Beyond the Markets: A Tour of NYC's Legendary Holiday Lights
No trip for Christmas in New York is complete without indulging in the city’s legendary light displays. Many of these are conveniently located near the markets, allowing you to create a perfect festive itinerary.
The Rockefeller Center Christmas Tree: This is the undisputed king of all holiday displays. The single best piece of advice, straight from seasoned locals, is to visit at dawn. The early hour rewards you with a serene, crowd-free view that feels like a private showing.
Saks Fifth Avenue Light Show: Directly across from Rockefeller Center, the entire facade of the Saks Fifth Avenue flagship store is transformed into a dazzling musical light show that runs every ten minutes after dusk. It’s a spectacular and unmissable piece of holiday theater.
Dyker Heights, Brooklyn: For a truly over-the-top display, you must take a trip to this Brooklyn neighborhood. The residents engage in a friendly competition to create the most spectacular, professionally-done Christmas light displays imaginable. It’s an unforgettable experience that feels like stepping onto a movie set.
Your Magical New York Christmas Awaits
You now have the insider’s playbook to the very best of festive New York. Armed with this guide, you can navigate the city not as a stressed tourist, but as a savvy traveler ready to soak in the genuine magic of the season. From the iconic grandeur of Bryant Park to the creative buzz of Brooklyn, you have the keys to unlock a holiday trip filled with unique gifts, delicious food, and unforgettable memories. Your perfect Christmas in New York is no longer just a dream—it’s a plan.
Ready to plan your entire U.S. holiday adventure? Our comprehensive Travel Guide is packed with expert advice, detailed itineraries, and local secrets to unlock unforgettable experiences across the country.
Don't Miss Out! Subscribe for Exclusive Content
SubscribeComments 0
No comments yet
Be the first to share your experience!
Dont Miss Out! Subscribe for Exclusive Content

San Francisco Cherry Blossoms: A Local's Guide to the Blooms

Halloween SF: Haunts Without Horrors

SF Festivals: 7 Must-See Lineups

Christmas SF: Lights & Wharf Wonders

SF Pride: 6 Route & Party Hacks

Chinese New Year SF: Parade Essentials
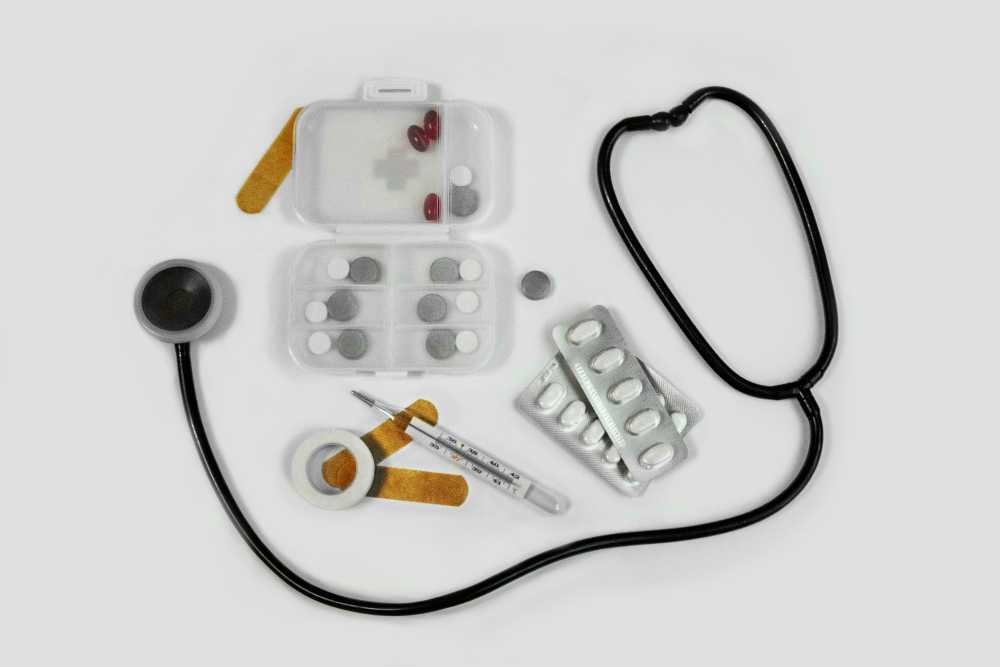
The Ultimate Travel First Aid Kit Checklist (2026)
TrekGuider @trekguider
But it doesn’t have to be that way. The single most powerful tool for ensuring a healthy, stress-free journey is one you create before you even leave home: a comprehensive travel first aid kit. This isn’t just a box of bandages; it’s a personalized arsenal of preparedness that empowers you to handle common health issues with confidence and ease. Building your own kit is at the heart of the proactive mindset we cover in our comprehensive The Ultimate Guide to Travel Safety: A 2026 Playbook. Think of this guide less as a simple shopping list and more as a masterclass in preparedness, backed by pharmacist-approved advice to help you build the ultimate defense against travel’s minor medical curveballs.
DIY vs. Pre-Made: Which Travel First Aid Kit is Right for You?
Before we dive into the specific items, it’s worth considering whether to build your kit from scratch or buy a pre-made one.
Pre-Made Kits: These offer undeniable convenience. They come in a compact case and provide a decent baseline of supplies. However, they are often filled with low-quantity, generic items and may lack the specific medications you need for your trip.
DIY Kits: Building your own kit requires a bit more effort upfront but is superior in every other way. It allows you to choose high-quality brands, pack sufficient quantities, and tailor the contents specifically to your destination, your planned activities, and your personal health needs.
Our recommendation? Start with a high-quality pre-made kit as your base and then use this checklist to supercharge it, swapping out generic items and adding the crucial medications and tools it’s missing. This hybrid approach gives you the best of both worlds.
The Core Components of Your Ultimate Travel First Aid Kit
A truly effective travel first aid kit is organized like a mobile clinic, with specific supplies to treat the most common categories of travel-related ailments. Here is the definitive breakdown of what you need.
Wound & Burn Care: For Life's Little Scrapes
From a papercut to a scraped knee on a cobblestone street, any break in the skin is an open invitation for infection, especially in new environments. Here’s how you shut that door, fast.
Antiseptic Wipes (BZK or alcohol-based): For cleaning wounds, scrapes, and your hands before providing treatment. Individual packets are perfect for travel.
Antibiotic Ointment (e.g., bacitracin): A crucial step to prevent infection in minor cuts, scrapes, and burns after cleaning.
Assorted Adhesive Bandages: Pack a variety of sizes. Fabric bandages are generally more durable and flexible than plastic ones.
Butterfly Bandages / Wound-Closure Strips: Essential for taping the edges of a minor cut together to help it heal cleanly.
Sterile Gauze Pads and a Roll of Gauze: For dressing larger wounds or as a compress to control bleeding. Pack a few different sizes.
Medical Adhesive Tape: To secure gauze and bandages in place.
Moleskin or Blister Treatment Pads: An absolute lifesaver for any trip involving significant walking or hiking. Apply it as soon as you feel a "hot spot" to prevent a blister from forming.
Aloe Vera Gel: Provides soothing relief for minor sunburns.
Pain, Fever & Sprains: Managing Aches and Injuries
Long days of sightseeing, sleeping in unfamiliar beds, and carrying luggage can lead to aches and pains. Be prepared to manage them effectively so they don't slow you down.
Pain Relievers/Fever Reducers: Pack both an ibuprofen-based and an acetaminophen-based option. Pharmacists consistently recommend trusted brands like Advil/Motrin (Ibuprofen) for inflammation and pain, and Tylenol (Acetaminophen) for general pain and fever.
Aspirin: While not for general pain relief for everyone, a dose of aspirin can be life-saving for an adult experiencing symptoms of a heart attack.
Elastic Wrap Bandage: Invaluable for providing support and compression to a sprained ankle, wrist, or knee.
Instant Cold Packs: These single-use packs are activated by squeezing them and are excellent for reducing swelling from sprains, strains, and other minor injuries in the first 24-48 hours.
Pro-Tip: Decant pills into small, clearly labeled travel containers to save space, but take a photo of the original packaging first. This helps you remember dosages and provides information for pharmacists or doctors abroad if needed.

Digestive Issues: Your Defense Against Traveler's Diarrhea
Let’s be direct: traveler’s diarrhea is the single most common illness to strike travelers, affecting up to 80% of visitors in some destinations. Having a dedicated section in your kit to manage digestive distress is absolutely critical.
Anti-diarrhea Medication: To manage symptoms when you need to travel or get through a planned activity. The top pharmacist-recommended brand is Imodium (Loperamide).
Antacids: For relief from indigestion, heartburn, and general upset stomach. Pepto-Bismol is another pharmacist-favorite that can also help with mild diarrhea.
Oral Rehydration Salts: This is arguably the most important item in this section. Dehydration is the primary risk of diarrhea and vomiting. These pre-measured packets mix with safe, bottled water to replenish the essential fluids and electrolytes your body has lost.
Anti-nausea or Motion Sickness Medication: Essential if you’re prone to motion sickness on planes, boats, or winding bus rides.
Allergies, Bites & Skin: Soothing Irritations
New environments mean new pollens, unfamiliar insects, and different plants. Be ready to tackle itches, rashes, and allergic reactions before they become a major annoyance.
Antihistamine (e.g., diphenhydramine): For treating allergic reactions, hives, and severe itching. Note that some antihistamines can cause drowsiness.
Hydrocortisone Cream (1%): A topical steroid cream that provides fast relief from the irritation and itching of rashes and insect bites.
Insect Repellent: In any region with mosquito-borne illnesses like Dengue or Malaria, this is as important as your passport. Choose a repellent with an effective active ingredient like DEET or Picaridin.
Epinephrine Auto-Injector (e.g., EpiPen): This requires a prescription and is absolutely essential for travelers with a history of severe allergic reactions (anaphylaxis).
Ready to Pack Like a Pro?
Your travel first aid kit is a critical piece of your travel puzzle, but it's not the only one. To ensure you don't overlook a single essential item—from documents and finances to clothing and gear—you need a master list. Our comprehensive, free checklist has you covered.
Download Your Free International Travel Checklist Now!
Essential Tools & Personal Medications
The final layer of your kit includes the tools to use your supplies effectively and your own personal health necessities.
Fine-Point Tweezers: For removing splinters, ticks, or other foreign objects from the skin.
Small, Rounded-Tip Scissors: For cutting medical tape, gauze, or moleskin. (Ensure they meet TSA guidelines if packing in a carry-on).
Disposable Non-Latex Gloves: To protect your hands and prevent infection when treating a wound on yourself or someone else.
Digital Thermometer: For accurately checking for fever.
Personal Medications: This is the most critical category. Pack a sufficient supply for your entire trip, plus at least a few extra days' worth in case of delays. Always keep your personal medications in your carry-on luggage in their original, labeled containers.
Pro-Tip: Before you leave, ask your doctor for a letter describing your condition and the medications you take, including their generic names. Keep a digital copy of this and your prescriptions on your phone. This can be invaluable if your medication is lost or you need to see a doctor abroad.

Beyond the Basics: Customizing Your Kit
The ultimate travel first aid kit is not one-size-fits-all. Once you have the core components, elevate your preparedness by customizing it for your specific journey.
By Destination:
Tropical/Developing Countries: Add anti-fungal cream, more insect repellent, and potentially a prescription for a standby antibiotic for severe traveler's diarrhea (consult your doctor).
High-Altitude Destinations: Speak with your doctor about medication to prevent altitude sickness.
By Activity:
Hiking/Trekking: Double down on blister care (moleskin, gel pads), pack an elastic wrap for sprains, and add pain-relieving gel.
Beach Vacation: Add extra aloe vera gel, sting-relief spray, and waterproof bandages.
By Traveler:
With Children: Include children’s formulations and dosages of pain/fever reducers, kid-friendly bandages, and any specific allergy medications they need.
Travel First Aid Kit FAQs
A great kit anticipates problems. Here are answers to common questions that take your preparedness to the next level.
1. What’s the first thing I should do if I get traveler’s diarrhea?
According to the CDC and travel medicine doctors, the first and most important step is oral rehydration. Dehydration is the biggest risk. Start sipping an Oral Rehydration Solution (ORS), sports drinks, or clear broths immediately. For mild to moderate cases that don't have a high fever or blood, an antimotility drug like Loperamide (Imodium) can help manage the symptoms. If symptoms are severe, incapacitating, or include a high fever or blood, it's time to consider a prescribed standby antibiotic and seek medical advice.
2. Should I pack a standby antibiotic in my kit?
This is a question for your doctor or a travel medicine clinic. For travelers heading to high-risk destinations where severe traveler's diarrhea is common, many doctors will provide a prescription for a standby antibiotic like Azithromycin. It’s not for mild cases but can significantly shorten the duration of a severe bout of illness. Discuss your itinerary with your doctor to see if this is right for you.
3. Is it okay to pack medications outside their original bottles to save space?
While it's tempting, it's safest to keep prescription medications in their original, clearly labeled containers. This avoids any confusion or legal issues with customs officials. For over-the-counter pills, you have more flexibility. If you use a travel pill organizer, consider taking a photo of the original packaging so you have the dosage information and ingredients handy.

Pack Confidence for Every Journey
A carefully assembled travel first aid kit does more than just prepare you for minor medical issues; it provides profound peace of mind. It transforms you from a worried passenger into a self-sufficient, empowered traveler, ready to handle the small bumps in the road so you can stay focused on the incredible experiences ahead. By following this checklist, you’re not just packing supplies—you’re packing the confidence to explore the world freely and fully.
Now that your health and safety are covered, you can focus on the other details that make a trip unforgettable. For a complete, deep-dive into every facet of trip planning, from health and safety to budgeting and logistics, our comprehensive Travel Guide is the only resource you'll ever need.
Meta Data Suggestions:
SEO Meta Title (55 characters): The Ultimate Travel First Aid Kit Checklist (2026)
URL Slug: travel-first-aid-kit-checklist
SEO Meta Description (154 characters): Build the perfect travel first aid kit. Our 2026 checklist, with pharmacist-approved tips, covers everything from wound care to stomach issues. Be prepared.
Don't Miss Out! Subscribe for Exclusive Content
SubscribeComments 0
No comments yet
Be the first to share your experience!
Dont Miss Out! Subscribe for Exclusive Content
Ultimate USA Holidays Guide: Top Picks
FTC Affiliate Disclosure: Stay Compliant as a Travel Creator

Essential Affiliate Tools: From Tracking to Full Optimization
Booking.com Affiliate Review: Pros, Cons & Earnings
Decoding Affiliate Commission Rates: Benchmarks for Travel Creators

Amazon Associates for Travel: Strategies to Maximize Commissions
5 Passive Income Ideas for Your Travel Blog
TrekGuider @trekguider
Let’s be honest: you didn’t launch a travel blog to build yourself a different kind of cubicle. The dream was freedom—an income untethered from a desk, a business that could fund your adventures. Yet the reality for most creators is a hamster wheel of content creation. You’re stuck on a content treadmill, constantly creating, posting, and promoting just to stay afloat. Your blog feels less like a passport to freedom and more like a demanding job that has followed you around the world.
The problem is a strategic one. You’re trapped trading time directly for money through freelance articles or one-off sponsorships, which means if you stop working, the money stops flowing. This constant hustle is the fast track to burnout, leaving your dream of a truly independent lifestyle feeling impossibly out of reach.

It’s time to stop trading hours for dollars and start building assets. The solution is to fundamentally shift your strategy toward building a portfolio of passive income streams—systems and products that work for you 24/7, whether you’re on a plane, exploring a new city, or fast asleep. This guide provides five proven, actionable ideas for passive income blogging. This is your blueprint for creating automated revenue engines that will finally decouple your income from the hours you work. Think of this as a crucial chapter in your business education; for the complete curriculum on building a modern creator enterprise, be sure to read our ultimate guide to How to Make Money Online: A Creator's Guide for 2026.
The Fundamental Shift: Trading Hours for Assets
Before we dive into the tactics, it's critical to internalize the foundational mindset shift required for success. Passive income isn't "money for nothing." As defined in lifestyle business design, it is revenue that, after an initial investment of time and effort, continues to be generated with minimal ongoing labor.
It’s the difference between Active and Passive Income:
Active Income is when you get paid for your direct effort. Think of a freelance article, a sponsored Instagram post, or a one-on-one coaching call. The work is finite, and so is the payment.
Passive Income is when you get paid because you own an asset that creates value. Think of an SEO-optimized blog post that earns affiliate commissions for years, or a digital guide that sells automatically every single day.

You are moving from the role of a service provider to an asset builder. Every idea that follows is a different type of digital asset you can build. Your goal is to create a portfolio of them.
1. Craft Evergreen Affiliate Content That Ranks and Earns for Years
Affiliate marketing is often a blogger's first foray into making money, but not all affiliate content is created equal. The key to making it a source of true passive income is to focus exclusively on creating evergreen content that is optimized for search engines (SEO). A post about a fleeting travel trend might get a burst of traffic, but an in-depth guide to "The 5 Best Carry-On Backpacks for Digital Nomads" can attract a steady stream of visitors from Google—and generate commissions—for years after you hit publish.
This is the very definition of a passive income asset. According to performance marketing industry analysis, a single piece of high-ranking content can generate commissions for years with no additional effort, making it an incredibly scalable model.
Your Action Plan for Passive Affiliate Income:
Identify High-Intent Keywords: Use an SEO tool to find long-tail keywords that signal a user is close to making a purchase. Think "best travel insurance for Europe," "what to pack for Southeast Asia," or "REI vs. Patagonia backpack review."
Go Deeper Than the Competition: Your goal is to create the single best resource on the internet for that specific query. This often means writing long-form articles (2,000+ words) that are well-researched and packed with your genuine, first-hand experience.
Build Strategic Comparison Tables: For product-focused articles, a well-structured comparison table is a conversion powerhouse. These tables organize key features, pros, and cons, allowing the reader to make an informed decision easily. Place your affiliate links within a clear "Check Price & Availability" button to capture the user at their highest point of intent.
Prioritize Trust Above All: The currency of affiliate marketing is trust. Only recommend products and services you have personally used and genuinely believe in. Write balanced, honest reviews that include both the good and the bad. This authenticity is what will ultimately drive conversions.
Pro-Tip: Focus your efforts on promoting "high-ticket" items or recurring subscriptions. Earning a 6% commission on a $2,600 G Adventures tour ($156) is a much higher-leverage use of your time than earning 3% on a $20 travel adapter. Similarly, promoting a service like Dollar Flight Club with a 50% recurring commission builds a predictable, compounding income stream.

2. Monetize Traffic with Premium Display Ads for True Passive Income Blogging
Display advertising is perhaps the purest form of passive income for bloggers. Once your blog achieves a consistent level of traffic, you can join a premium ad network that will automatically place high-quality ads on your site. You get paid based on the number of impressions (views), meaning your entire back catalog of content becomes a revenue-generating asset. An old, popular post about "Things to Do in Paris" can earn money from ads every single day without you ever touching it again.
The key is to understand that this is a volume game. Meaningful income from ads is only possible after you've built a substantial audience.
Your Action Plan for Passive Ad Revenue:
Focus 100% on SEO Traffic: Your single objective to unlock this income stream is to grow your organic traffic from Google. The strategy is simple: consistently publish high-quality, helpful content optimized around keywords your target audience is searching for.
Aim for Premium Network Thresholds: Forget about beginner networks like Google AdSense. The payouts are incredibly low. Your goal should be to qualify for a premium ad network, which will dramatically increase your revenue. The industry benchmarks are:
Mediavine: Requires 50,000 monthly sessions.
Raptive (formerly Adthrive): Requires 100,000 monthly pageviews.
Optimize for User Experience: While it may seem counterintuitive, the best way to maximize ad revenue is to create a great user experience. A fast-loading site with well-structured, easy-to-read content will keep readers on your pages longer, which in turn increases ad impressions and revenue. Ensure your site is mobile-friendly, as the majority of traffic comes from mobile devices.
3. Create a "Sell While You Sleep" Digital Travel Guide
Transitioning from promoting others' products to creating and selling your own is the ultimate step in building a scalable business. Digital products, like eBooks or guides, are the perfect "create once, sell forever" asset. After an initial investment of time to create a comprehensive, high-value digital guide, you can sell it an unlimited number of times, generating revenue automatically with each download.
This model offers exceptionally high profit margins and gives you full control over the product and pricing. It’s how you build a truly independent business in a creator economy projected to nearly double from $250 billion to almost $500 billion by 2027.

Your Action Plan for Creating a Digital Guide:
Validate Your Idea First: The biggest mistake is creating a product nobody wants. Dive into your audience's comments and emails. What destination do they ask about most? What part of trip planning do they find most stressful? Their pain points are your product ideas.
Outline and Write with Intense Value: A great guide is both inspirational and intensely practical. Structure your content logically with a hyperlinked table of contents for easy navigation on mobile. Go beyond generic advice and share your unique, hard-won insider tips that can't be found elsewhere.
Design with a User-Friendly Tool: You don't need to be a graphic designer. A tool like Canva offers professional, easy-to-use templates that allow you to create a beautiful, polished guide. Prioritize a clean layout, large fonts, and your own high-quality photos.
Sell on a Specialized Platform: Once your masterpiece is complete, you need a world-class storefront. A dedicated marketplace like TrekGuider is the ideal place to sell your high-quality Travel Guide. It provides a professional, ready-made platform to connect with a global audience of passionate travelers who are actively searching for expert resources just like yours.
4. Sell Lightroom Presets and Digital Templates
A fantastic and highly popular passive income stream for travel creators with a distinct visual style is selling Lightroom presets. These are pre-packaged photo editing settings that allow your followers to achieve your signature aesthetic in their own photos with a single click. Like a digital guide, presets are created once and can be sold infinitely, providing a highly scalable and passive source of income.
Beyond presets, you can apply this same model to any digital template that saves your audience time and stress. This could include:
Customizable Itinerary Templates: Structured planning documents in Notion or Google Sheets.
Printable Travel Planners: A PDF pack including budget trackers, packing lists, and journal prompts.
Video LUTs: Color grading presets for fellow videographers.
Your Action Plan for Selling Presets & Templates:
Define Your Unique Style: Your visual brand is your product. Analyze your most popular photos. What makes them stand out? Is it a moody, cinematic look or a bright and airy feel? Package this style into a cohesive set of 5-10 presets.
Create a High-Converting Sales Page: Your sales page must visually demonstrate the transformation. Use compelling before-and-after photos to show customers exactly what your presets can do for their images.
Leverage a "Pay What You Want" Freebie: The best way to build an audience for your paid presets is to offer one or two for free as a lead magnet. This gives potential customers a risk-free way to try your product and see the quality for themselves.

CTA Block: Get Your Free Travel Lightroom Presets!
Ready to make your travel photos look stunning with a single click? Download our exclusive Free Travel Lightroom Presets! This starter pack is designed to give your images a professional, polished look and is the perfect introduction to the power of preset editing.
5. License Your Stock Photos and Videos
As a travel blogger, your hard drive is a goldmine. The thousands of high-quality images and video clips you've captured on your journeys are valuable assets. By uploading this content to stock photography platforms, you can license it to businesses, marketers, and other creators around the world, creating a small royalty for each download with no further effort required per sale.
While a single sale might be small, hundreds or thousands of downloads over many years can accumulate into a significant and remarkably passive income stream. You are simply monetizing the byproducts of the work you are already doing.
Your Action Plan for Selling Stock Media:
Sign Up for Major Platforms: Focus your efforts on the largest stock media marketplaces to maximize your potential audience. Top platforms include:
Adobe Stock
Shutterstock
Getty Images
Curate and Keyword Carefully: Don't just upload everything. Select your sharpest, best-lit, and highest-quality images. The key to getting your content discovered is careful keywording. Be descriptive and specific. Instead of "beach," use tags like "tropical beach, white sand, turquoise water, palm trees, sunrise, Thailand."
Remove Branding and Logos: To be commercially viable, your photos must be clean of any recognizable branding, logos, or trademarks.
Pro-Tip: Start shooting with stock in mind. When you're traveling, take a few extra minutes to capture generic, "evergreen" shots. These include landscapes without people, close-ups of food, architectural details, and shots that evoke a mood like "adventure" or "relaxation." These types of images have a much broader commercial appeal.
Your Journey to Financial Freedom Starts Now
Building a profitable blog that provides true freedom is a marathon, not a sprint. The path requires a strategic and deliberate shift in focus from being a content creator who gets paid for their time to a business owner who gets paid for the assets they own. The five ideas outlined above are your blueprint for building those assets.

You now have a clear answer to the question of how to achieve passive income blogging. Don't let yourself be overwhelmed by trying to do everything at once. Choose one idea that excites you the most and aligns with your current strengths. If you're a talented photographer, start with presets. If you have deep expertise in a specific destination, start outlining your digital guide. Take the first step today to build an asset that will pay you back for years to come.
Frequently Asked Questions (FAQ)
1. Is it better to focus on one passive income stream or build several at once?
Focus on one, then stack. The most successful creators follow a "Monetization Ladder." They don't try to do everything at once. Master creating evergreen affiliate content first. Once that system is working, use your authority and cash flow to invest time in building your first digital product. Mastering one stream before moving to the next is the key to sustainable growth.
2. How much traffic do I need to start earning passive income?
This depends entirely on the model. For affiliate marketing or selling your own low-cost digital product, you can start earning with as little as a few thousand pageviews per month if your audience is highly targeted and engaged. For display advertising to be truly worthwhile, you should aim for the 50,000+ monthly session threshold required by premium networks.
3. What's the most common mistake bloggers make when trying to earn passive income?
The biggest mistake is impatience. Passive income streams are assets that take time to build and appreciate. Bloggers often give up on SEO after a few months or launch a digital product to a tiny audience and get discouraged by low sales. True passive income is the reward for long-term, strategic effort.
Meta Data Suggestions:
SEO Meta Title (Under 60 characters):
5 Passive Income Ideas for Your Travel Blog (2026)
URL Slug:
passive-income-ideas-travel-blog
SEO Meta Description (Under 155 characters):
Discover 5 proven passive income ideas for your travel blog. Learn to build assets that make money 24/7, from digital guides to affiliate marketing.
Read the full guide: The Travel Blog Business Plan: How to Make Real Money in 2026
Don't Miss Out! Subscribe for Exclusive Content
SubscribeComments 0
No comments yet
Be the first to share your experience!
Dont Miss Out! Subscribe for Exclusive Content
FTC Affiliate Disclosure: Stay Compliant as a Travel Creator
Essential Affiliate Tools: From Tracking to Full Optimization
Avoid These 5 Affiliate Landing Page Mistakes for Better Conversions
Affiliate Keyword Research Mastery for Travel Blogs
Booking.com Affiliate Review: Pros, Cons & Earnings