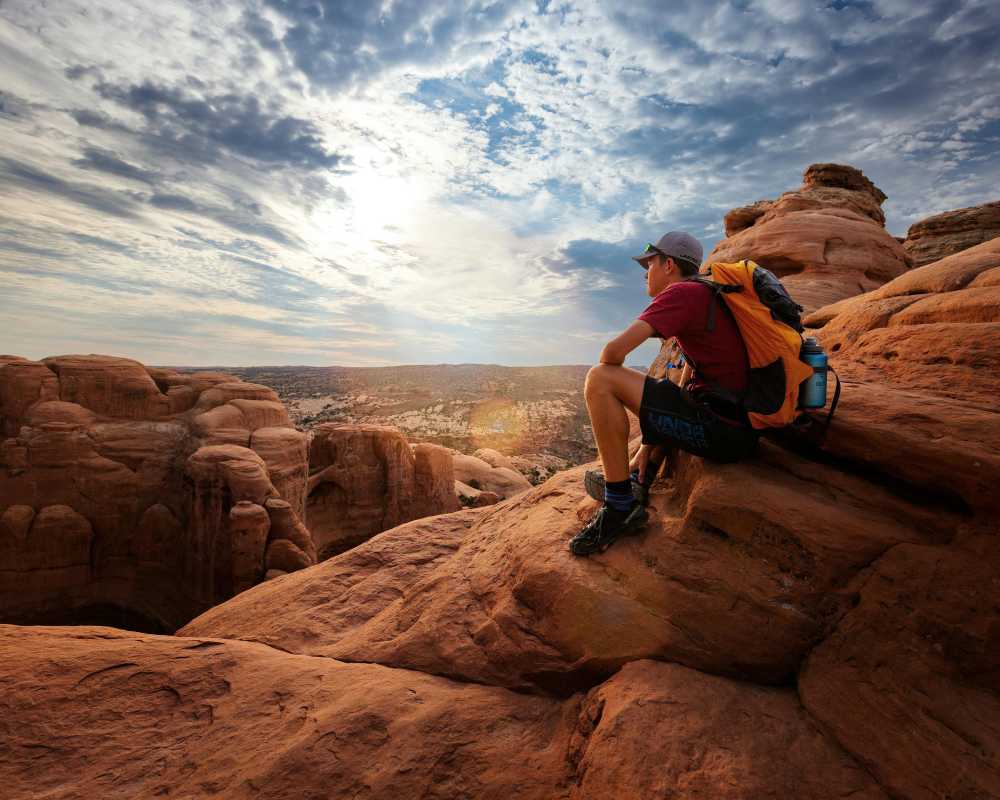
Essential Affiliate Tools: From Tracking to Full Optimization
TrekGuider @trekguider
You’re a creator, not an administrator. Yet, you find yourself drowning in a sea of administrative tasks. You’re manually copying and pasting ugly, mile-long affiliate links, toggling between a dozen different program dashboards to check your stats, and spending more time wrestling with spreadsheets than you do creating the travel content you love. Your affiliate "business" feels less like a streamlined operation and more like a chaotic, time-sucking hobby that isn't paying the bills.
This inefficiency is more than just frustrating—it's a silent killer of your income. Every hour you spend on manual, repetitive tasks is an hour you’re not creating the next piece of content that could generate revenue for years to come. You're flying blind, guessing which strategies are working, unable to see which links are converting, and which pages are actually profitable. The reported average income of $13,847 a month for travel affiliates feels like a distant fantasy when you’re stuck in this administrative quicksand.

This guide is your way out. It is your curated, creator-friendly tech stack—a definitive list of the essential affiliate marketing tools that will automate the tedious, provide crystal-clear data, and free you up to focus on growth. We’ll cover the entire workflow, from foundational link management and tracking to the advanced tools needed for full-scale optimization. This is how you transform your passion project into a professional, efficient, and profitable business. For a complete command of the entire affiliate landscape, our definitive pillar page, Travel Affiliate Programs: The 2026 Ultimate Guide, is your essential command center for mastering the entire ecosystem.
The Foundational Layer: Your Operational Command Center
Before you can optimize, you must organize. This first set of tools forms the non-negotiable foundation of any serious affiliate marketing business. They are your central nervous system for managing links, ensuring compliance, and tracking performance from a single source of truth.
Link Management Plugins (The Digital Quartermaster)
If you run your travel blog on WordPress, a link management plugin is the single most important tool you will install. These plugins take the long, ugly, and intimidating affiliate links provided by programs and "cloak" them into short, clean, branded URLs that are far more trustworthy to your audience.
Think of it as your command center. Instead of embarking on a digital scavenger hunt through year-old posts to update a single expired link, you change it once in a central dashboard, and the plugin deploys that change site-wide instantly. This functionality alone will save you hundreds of hours over the life of your business. Furthermore, a link like yourblog.com/recommends/osprey-backpack is infinitely more professional and trustworthy to a reader than a long URL filled with random tracking parameters, directly impacting your click-through rates.

Top Tools in This Category:
Recommended: Travel Creator Toolkit: 34 Essential Apps and Resources
Recommended: Digital Product Ideas: How to Make Money From Your Next Trip
ThirstyAffiliates: A powerhouse plugin built specifically for affiliate marketers. It offers advanced features like autolinking (automatically turning specific keywords into affiliate links), proactive link checking to find broken links, and detailed click analytics.
Pretty Links: A slightly simpler but highly effective alternative. It excels at link cloaking, redirection, and providing basic click-tracking reports right from your WordPress dashboard.
Pro-Tip: The best link management plugins, like ThirstyAffiliates, can automatically add the required rel="sponsored" tag to all of your affiliate links. This is a critical feature that ensures you stay compliant with Google's guidelines for paid links, protecting your site from potential SEO penalties without you having to think about it.
Affiliate Tracking Tools (Your Source of Truth)
"What gets measured gets managed." To grow your affiliate income, you need a crystal-clear understanding of what’s working. While many creators start by manually checking each affiliate network’s dashboard, a dedicated approach to tracking provides a more holistic, actionable view.
For most creators, your affiliate tracking tools will be a combination of your link management plugin’s analytics and the dashboards provided by your affiliate networks (like CJ Affiliate or Travelpayouts). These platforms show you crucial metrics like clicks, conversions, and commission earnings.
However, as your business matures, you'll want to track performance across different income models. For example, the TrekGuider Seller Platform includes a dedicated referral dashboard. This is a specialized tracking tool that shows you not just one-time sales, but the ongoing, passive income you’re earning from the new sellers you’ve brought to the platform. It’s a perfect example of how a modern platform provides the built-in affiliate tracking tools you need to monitor more sophisticated, high-margin income streams like revenue sharing.
The Growth Engine: Traffic & SEO Tools
With your operational house in order, the focus must pivot from organization to acquisition. A perfectly managed link is useless without a steady stream of the right people clicking on it. This is where your growth engine comes in—the tools designed to attract your ideal audience with precision.
SEO & Keyword Research Platforms
The most profitable affiliate content is created with intention. It targets keywords that signal a user is actively researching a purchase (e.g., "best carry-on luggage review"). SEO platforms are your treasure map for finding these "money" keywords and building a content strategy that attracts buyers, not just browsers.

These platforms are indispensable for:
Finding Profitable Keywords: Uncover what your audience is searching for, how many people are searching for it, and how difficult it will be to rank on Google.
Analyze the Competition: See exactly which keywords your competitors are ranking for and which pages are bringing them the most traffic.
Track Your Performance: Monitor your rankings for your target keywords over time to see what’s working and where you need to improve.
Top Tools in This Category:
Ahrefs: A comprehensive, professional-grade SEO toolkit. Its "Keywords Explorer" is second to none for finding high-value commercial investigation keywords, and its "Site Explorer" provides deep insights into any competitor's strategy.
SEMrush: Another all-in-one industry leader that offers a powerful suite of tools for keyword research, rank tracking, and competitive analysis.
Pro-Tip: Don't confine your keyword strategy to your blog. With video projected to account for a staggering 55% of all affiliate traffic by 2026, the same commercial-intent keywords you find for your articles are the exact titles you should be using for your YouTube videos and TikToks.
Analytics Platforms
While SEO tools help you get traffic, a web analytics platform tells you what that traffic does once it arrives. It’s essential for understanding your audience, diagnosing problems, and optimizing their journey from reader to buyer.
The Must-Have Tool:
Google Analytics: The free, industry-standard tool for website analytics. It's an incredibly powerful platform that provides all the data you need to understand user behavior, track conversions, and identify your top traffic sources, allowing you to double down on what works.
The Conversion Toolkit: Optimization & Social Media Tools
Attracting traffic is only half the battle. The final, crucial step is converting that traffic into clicks and commissions. This set of tools is designed to streamline your workflow and optimize your content for maximum impact.
"Link in Bio" Tools (For Social Dominance)
Platforms like Instagram and TikTok are powerful for audience building, but they famously limit your ability to use clickable links. A "link in bio" tool solves this by creating a simple, mobile-friendly landing page that can house all of your most important affiliate links, blog posts, and offers.

Top Tools in This Category:
Linktree: The most well-known tool in this space, offering a simple and effective way to create a micro-landing page for your social media bio.
Later: While primarily a social media scheduling tool, Later’s "Link in Bio" feature is excellent, allowing you to create a clickable grid of your Instagram posts, driving traffic directly to relevant blog posts and affiliate offers.
The Amazon Workflow Accelerator
For nearly every travel creator, Amazon Associates is a core part of their affiliate strategy. However, creating links for individual products can be a slow, manual process.
The Must-Have Tool:
Amazon SiteStripe: This is a free, official toolbar from Amazon that appears at the top of your browser whenever you’re on Amazon.com. It allows you to generate a custom affiliate link (text, image, or both) for any product page with a single click, dramatically speeding up your content creation workflow.
Your Strategy Blueprint: The Travel Creator's Toolkit
Feeling overwhelmed by the options? A powerful tech stack is only as good as the strategy behind it. To help you organize your entire affiliate marketing plan—from keyword research to content creation and promotion—we've created the ultimate resource bundle. It’s packed with the checklists, templates, and guides you need to build a professional and profitable system.
Download Your Free Bundle: The Travel Creator's Toolkit Today!
Frequently Asked Questions (FAQ)
1. Do I really need all these tools when I'm just starting out? When you're starting, focus on the foundation. A WordPress site with a link management plugin (like Pretty Links) and Google Analytics is your essential starting stack. This is a low-cost setup that allows you to organize your links and track your traffic from day one. You can invest in a premium SEO tool like Ahrefs once your site is generating enough revenue to justify the cost.
2. Are there any good free affiliate marketing tools? Absolutely. Google Analytics is free and non-negotiable. Amazon SiteStripe is also free. For keyword research, you can start with free tools like Google Keyword Planner or the free versions of various SEO tools, though they are more limited. The free versions of "link in bio" tools like Linktree are also perfectly sufficient for most creators.
3. How do these tools help with tracking beyond just clicks? Advanced tracking involves connecting data points. For instance, by using UTM parameters (which you can add manually or with some plugins), you can see in Google Analytics not just that someone came from your blog, but that they came from the specific button in your review of the Osprey backpack. This level of detail is what allows you to A/B test different calls-to-action and truly optimize your pages for conversion.
Conclusion: From Hobbyist to CEO
The difference between a creator earning a few dollars a month and one earning a full-time income often comes down to their systems. Top earners don't waste time on manual, low-value tasks. They leverage technology to work smarter, not harder. They treat their content not as a hobby, but as a business.

You now have a curated list of the best affiliate marketing tools to build your own professional tech stack. Start with the foundation: a link management plugin to organize and track your links. Then, layer in SEO and analytics tools to build a predictable stream of traffic. Finally, use optimization and workflow tools to convert that traffic with maximum efficiency.
These affiliate tracking tools and optimization platforms are not an expense; they are an investment in your own efficiency, professionalism, and profitability. By implementing this toolkit, you take a definitive step away from being a hobbyist and become the CEO of your own thriving travel content business.
Meta Data Suggestions:
SEO Meta Title (58 characters): 9 Essential Affiliate Marketing Tools for Travel Creators
URL Slug: essential-affiliate-marketing-tools
SEO Meta Description (154 characters): Discover the top affiliate marketing tools for travel creators. From link tracking to SEO, this guide covers the essential tech stack to automate and grow your income.
Read the full guide: The Travel Blogger's Playbook to Affiliate Marketing Mastery
Don't Miss Out! Subscribe for Exclusive Content
Subscribe


Comments 0
No comments yet
Be the first to share your experience!
Dont Miss Out! Subscribe for Exclusive Content

Ultimate USA Holidays Guide: Top Picks

FTC Affiliate Disclosure: Stay Compliant as a Travel Creator

Avoid These 5 Affiliate Landing Page Mistakes for Better Conversions

Affiliate Keyword Research Mastery for Travel Blogs

Booking.com Affiliate Review: Pros, Cons & Earnings

Decoding Affiliate Commission Rates: Benchmarks for Travel Creators
Halloween NYC: 5 Spooky Parades
TrekGuider @trekguider
The air in New York City crackles with a different kind of energy in October. The familiar city hum deepens into a mysterious, thrilling whisper as a tangible sense of mischief descends upon the five boroughs. You’re here to experience the legend of a New York Halloween, but the sheer volume of options is a paralyzing paradox of choice. You’ve seen the movies and heard the stories—the epic parties, the haunted houses, the city-wide transformation—but you’re determined to avoid a generic, tourist-trap experience.
The fear of missing out is palpable. A poorly planned evening during Halloween in New York City can quickly devolve from a dream into a logistical nightmare of impenetrable crowds, dead-end queues, and parties that are all hype and no soul. You risk wasting precious time and money on experiences that fail to deliver the spooky, spectacular magic you came for. With Halloween 2026 falling on a Friday, the energy will be at an absolute fever pitch, making a solid plan more critical than ever.
So, let's cut through the noise. Forget the endless blog posts and conflicting advice. This is your tactical guide to the city's electric Halloween spirit, distilled into five core experiences that deliver the spooky, spectacular magic you came for. From the world’s most famous public procession to exclusive rooftop spectacles, this blueprint will ensure your NYC Halloween is not just successful, but legendary. This is your ticket to the very heart of the city's spooky season, a key element celebration among the many incredible festivities we detail in our complete guide to New York Holidays: 10 Must-Do Events.

1. The Main Event: Conquering the Village Halloween Parade
When people talk about Halloween in NYC, they are almost always picturing the Village Halloween Parade. This isn’t just a parade; it’s a cultural institution, a vibrant, chaotic, and utterly breathtaking spectacle of creativity that has been marching through Greenwich Village for nearly half a century. It is, without a doubt, the single most important event on the city’s Halloween calendar.
What Makes It Legendary?
What began in 1974 as a humble neighborhood walk led by a local mask maker has exploded into a televised extravaganza drawing millions of spectators and over 50,000 costumed participants. Its defining feature is its radical inclusivity. This is a parade for the people, by the people. The procession is a mesmerizing river of giant puppets, hundreds of live bands, dancers, and, most importantly, thousands of New Yorkers in some of the most elaborate and imaginative costumes you will ever witness. The energy is infectious, a pure, uninhibited celebration of artistry and the macabre.

How to Participate vs. How to Watch
This is the most critical decision you’ll make. Unlike other parades, the Village Halloween Parade has one simple, golden rule: No Costume, No Marching.
To Participate: If you want to be in the parade, a costume is your non-negotiable ticket. This is your chance to unleash your creativity—the more unique and ambitious, the better. Marchers officially line up on 6th Avenue between Canal Street and Spring Street. The procession kicks off at 7:00 PM sharp on October 31st, but you’ll want to arrive at the lineup area by 6:00 PM to soak in the incredible pre-parade atmosphere and see the costumes up close.
To Watch: If you’d rather be a spectator, your mission is to find a prime viewing spot along the 6th Avenue route, which runs straight north from Spring Street to 16th Street. The sidewalks become incredibly packed, so arriving by 5:30 PM is essential, especially for spots between Bleecker Street and 14th Street, which are the most congested.
Pro-Level Viewing Strategy
For the best experience, avoid the intense crush of the central Village. Head further north on the route, closer to the 14th Street or 16th Street end. The crowds tend to thin out slightly here, giving you a bit more breathing room. Alternatively, find a spot on a cross-street corner, which can offer a slightly better vantage point as the parade turns or passes. Remember that public transportation is your best friend; the subway will be running, but expect crowded stations around the West 4th Street and 14th Street stops.
2. The High-Altitude Parade: Exclusive Rooftop Costume Parties
While the Village Halloween Parade owns the streets, a more exclusive and glamorous kind of procession takes place high above the city: the rooftop party. These events offer a different but equally thrilling version of Halloween in New York City, trading street-level chaos for breathtaking skyline views, curated music, and a parade of high-fashion costumes.
Why a Rooftop Party is a Must-Do
Imagine sipping a smoked old-fashioned while looking out over the glittering lights of the Manhattan skyline, surrounded by people in chic, clever, and sometimes terrifying attire. Rooftop parties provide a controlled, comfortable, and often luxurious environment to celebrate. You get the festive atmosphere without the overwhelming crowds of a public event. It’s the perfect way to see and be seen, offering some of the most photogenic Halloween moments imaginable.

The Unspoken Rules of the Rooftop Parade
This isn't a casual affair. To join this high-altitude parade, you need to plan ahead.
Book Early: Tickets for the best rooftop parties (think venues in the Meatpacking District or with views of the Empire State Building) sell out weeks, sometimes even a month, in advance. Do your research in early October and secure your spot.
Confirm the Dress Code: While it’s Halloween, many high-end venues still maintain a dress code. Your costume should be creative, but it also needs to be classy. Some venues may have specific themes, so read the event details carefully to ensure your costume fits the vibe.
Understand the Cost: These parties are a premium experience. Expect to pay a significant ticket price, which may or may not include drinks. Budget accordingly for a night of upscale revelry.
Pro-Tip: For travelers, especially those exploring the city's nightlife alone, safety matters most. Always let someone know your plans and be mindful of your surroundings. For a complete set of strategies on navigating new places with confidence, our Solo Female Travel Safety Guide offers invaluable, expert-approved advice that applies to any urban adventure.
3. The Parade of Screams: Navigating NYC's Premier Haunted Houses
Not all parades are about celebration; some are about pure, unadulterated fear. The experience of walking through a top-tier haunted house is its own kind of procession—a conga line of terror where every corner reveals a new nightmare. In New York City, this experience is elevated to a high-art horror show.
Inside Blood Manor: What to Expect
Blood Manor is consistently ranked as one of the city’s most intense and terrifying haunted attractions. This isn't a charming ghost tour; it's a full-frontal assault on your senses. You and your group will parade through a labyrinth of themed rooms, corridors, and chambers, each populated by professional actors dedicated to making you scream. The production value is immense, with Hollywood-level sets, gruesome special effects, and a palpable sense of dread that follows you from the moment you enter. You aren't just observing the horror; you are marching directly through its heart.

The Smart Way to Get Scared
The popularity of attractions like Blood Manor means that lines can be monstrous, eating up hours of your night. The single biggest rookie mistake is showing up without a plan. The only way to do this right is to buy timed tickets online in advance. This allows you to select a specific entry window, bypassing the hours-long general admission queue and saving you a massive headache. Arrive about 15-20 minutes before your scheduled time slot to check in.
Pro-Tip: When you’re inside, stick together. The actors are masters of their craft and are trained to identify and isolate the most scared members of a group. Hold onto your friends and move through as a unit. If you get genuinely overwhelmed, look for the designated "exit" signs within the attraction—there's no shame in tapping out if the parade of screams becomes too much.
4. The Family Parade: Charming Neighborhood Trick-or-Treating Processions
For those traveling with family or simply seeking a more wholesome and community-focused Halloween experience, the city’s neighborhood trick-or-treating events are a must. These are informal parades of the cutest kind, where streets are filled with tiny ghosts, goblins, superheroes, and fairies marching from brownstone to brownstone in search of candy.
Where to Find the Best Family-Friendly Atmosphere
While you can find trick-or-treating in many areas, some neighborhoods are famous for going all out. For the quintessential experience, head to the residential blocks of the Upper West Side and the Upper East Side, or cross the bridge to Brooklyn's Park Slope and Cobble Hill. Residents in these areas often decorate their stoops lavishly and are well-prepared for the annual procession of costumed children. Many local community groups and parks also organize specific Halloween "walks" or "rags" that provide a safe and festive environment for families.

Essential Safety for the Little Ghouls
Navigating the city with children on Halloween requires extra vigilance. The general safety rules are more important than ever:
Be Seen: Use reflective tape on costumes and candy bags to ensure children are visible to traffic after dusk. It's a simple step that makes a huge difference.
Stay Together: Adult supervision is non-negotiable. Keep a close eye on your children and establish clear rules about not running ahead.
Plan Your Route: Map out your trick-or-treating path in advance. Stick to well-lit streets and familiar neighborhoods.
Check the Candy: Before anyone eats their treats, inspect the candy at home to ensure everything is sealed and safe.
This charming, family-focused parade is a wonderful way to experience the heartwarming, community-driven side of a New York Halloween, proving that not all of the city’s festivities have to be frightening.
5. The DIY Parade: Crafting Your Own Spooky Pub Crawl
Sometimes the best parade is the one you create yourself. Organizing a themed pub crawl with your friends is a fantastic way to explore different neighborhoods and experience the city’s festive bar scene. This is your chance to be the grand marshal of your own personal procession, charting a course through the city’s most spirited watering holes.
Planning Your Route: From Greenwich Village to the East Village
The key to a successful pub crawl is a well-planned, walkable route. You don’t want to spend your night trekking long distances between stops. Choose a neighborhood with a high density of bars and a vibrant Halloween atmosphere.
Greenwich Village: After watching the main parade, you can easily transition into a crawl here. The area will be buzzing, and nearly every bar will have decorations and drink specials.
The East Village: Known for its edgier, more eclectic vibe, the East Village is packed with unique bars, from historic pubs to modern cocktail lounges. It’s a perfect landscape for a spooky-themed crawl.
Lower East Side: This area offers a fantastic mix of trendy bars and old-school dives, all of which embrace the Halloween spirit with gusto.

Staying Connected and Safe
When your group is on the move, staying safe and connected is crucial. Before you head out, make it a rule that everyone in your group shares their live location with each other using a mobile app. This simple step makes it incredibly easy to find anyone who gets separated from the group in a crowded bar or on a busy street. It’s a modern safety essential for any group outing in a big city.
This DIY approach allows you to fully customize your night, ensuring you experience the exact vibe you’re looking for, making your Halloween in New York City a truly personal and unforgettable adventure.
Your Ultimate Halloween Blueprint
You are now armed with the ultimate insider’s guide. You know how to march in the world’s greatest Halloween parade, how to ascend to an exclusive rooftop party, how to brave a parade of manufactured terror, and how to create your own festive procession through the city’s most iconic neighborhoods. The overwhelming chaos of Halloween in New York City has been distilled into a clear, actionable battle plan. You are no longer just a visitor; you are a participant, ready to dive into the very heart of the magic and madness.
This is just one of the many incredible experiences the city has to offer. To build out your entire trip with the same level of expert insight, from finding the best holiday markets to securing the perfect New Year's Eve spot, explore our comprehensive Travel Guide. It’s the only resource you’ll need to transform your travels from ordinary to extraordinary.
Don't Miss Out! Subscribe for Exclusive Content
SubscribeComments 0
No comments yet
Be the first to share your experience!
Dont Miss Out! Subscribe for Exclusive Content

San Francisco Cherry Blossoms: A Local's Guide to the Blooms

Halloween SF: Haunts Without Horrors

SF Festivals: 7 Must-See Lineups

Christmas SF: Lights & Wharf Wonders

SF Pride: 6 Route & Party Hacks

Chinese New Year SF: Parade Essentials
Best Solo Destinations in the USA (For Your Travel Style)
TrekGuider @trekguider
Planning a solo travel USA adventure can feel both exhilarating and incredibly daunting. Staring at a map with a thousand pins, you're drowning in options, caught between endless, subjective lists that lump sprawling cities with remote national parks. The result? Total analysis paralysis. You're not just looking for a place to go; you're searching for the right place for you—a destination that feels safe, is easy to navigate, and truly matches your unique travel style.
This is where we do things differently. Forget one-size-fits-all lists. This guide is your compass, built around a single, powerful idea: your unique travel personality. We’ve organized the country’s best solo destinations into five distinct "Traveler Archetypes." By identifying which one resonates with you, you'll unlock a curated list of places where you're not just guaranteed a great trip, but an adventure that feels like it was designed just for you.
Before you dive in, remember that being prepared is what makes a trip successful. For a complete breakdown of budgeting, packing, and safety protocols, review our ultimate guide to essential solo travel tips.
For the bigger picture on planning your first independent journey, explore

What's Your Solo Traveler Archetype?
Every solo traveler is motivated by a different calling. Some crave the electric pulse of a city, while others seek the quiet wisdom of the wild. By matching a place to your personality, you can stop guessing and start planning an incredible journey. Which of these sounds most like you? 🗺️
The Urban Explorer: You come alive amidst the energy of a great city. Museums, history, architecture, and the endless possibility of discovery are your fuel.
The Outdoor Adventurer: You feel most at home in the great outdoors. Fresh air, epic hikes, and breathtaking natural vistas are what you seek.
The Foodie: You travel with your taste buds. Your itinerary is built around iconic dishes, bustling food markets, and the quest for the perfect meal.
The History Buff: You walk through the present while exploring the past. You're drawn to places that tell the rich, complex story of America.
The Wellness Seeker: You travel to recharge and reconnect. Tranquility, mindfulness, and serene environments are your ultimate destination.
For the Urban Explorer: Cities That Never Sleep
For those who thrive on culture, art, and the vibrant energy of a metropolis, these cities offer endless solo exploration with world-class public transport and walkability. They are logistical dreamscapes where you can effortlessly blend into the rhythm of the city.

New York City, New York: The Iconic Metropolis
Recommended: The Solo Female Travel Safety Guide
Recommended: How to Pack Light: The Carry-On Guide
Let's be clear: New York City isn't just arguably the ultimate solo travel destination; it is. This is a city built for individuals on a mission, where being alone is a way of life and dining solo is an art form. The sheer energy of millions of people forging their own paths means you'll never feel out of place, and with an unparalleled public transit system, you have five boroughs of distinct culture, food, and history at your fingertips.
Top Things to Do Alone:
Conquer Museum Mile: Get lost for hours in The Metropolitan Museum of Art, marvel at modern masterpieces at MoMA, or explore the Guggenheim's iconic spiral.
Find Your Spot in Central Park: Rent a bike, wander through the Ramble, find a quiet bench by the Lake, or simply people-watch on the Great Lawn.
Walk Across the Brooklyn Bridge: Go at sunrise for unforgettable, crowd-free skyline views that will stay with you forever.
Catch a Broadway Show: The TKTS booth in Times Square offers same-day discount tickets, making it easy to snag a single seat for a world-class performance.
Solo Pro-Tip: Nearly every great restaurant has bar seating. Sit at the counter at a legendary spot like Joe's Pizza in Greenwich Village for a classic slice without the fuss. Don't be afraid to embrace the cliché of just sitting on a bench in Central Park; watching the city's incredible cross-section of humanity walk by is a grounding and memorable experience.
Chicago, Illinois: The Architectural Hub
Chicago offers the big-city buzz of NYC but with a friendlier, more approachable Midwestern vibe. It's a clean, stunningly beautiful city with a world-class arts scene, incredible food, and an efficient 'L' train system that connects all major neighborhoods. For the solo explorer, its walkable downtown and magnificent architecture are a dream come true.
Top Things to Do Alone:
Take an Architecture River Cruise: The Chicago Architecture Foundation Center's tour is legendary and unquestionably the best way to see the city.
Explore Millennium Park: See your reflection in the iconic "Bean" (Cloud Gate) sculpture and enjoy the free public art.
Visit the Art Institute of Chicago: Spend an afternoon with masters like Grant Wood, Monet, and Seurat.
Solo Pro-Tip: Everyone tells you to get deep-dish pizza, but the real solo dining hack is finding a classic Chicago hot dog stand. It's quick, delicious, and a truly local experience. Grab a "dog dragged through the garden" at Portillo's and eat it by the river.
San Francisco, California: The Quirky Coastal Gem
With its iconic hills, historic cable cars, and fiercely independent spirit, San Francisco is a fantastic city to explore alone. Every neighborhood, from the Mission District to Haight-Ashbury, has its own distinct personality waiting to be discovered.
At a Glance:
Solo Safety Index: Moderate. Stick to well-trafficked areas, especially at night, and be aware of petty theft.
Budget Snapshot (Per Day): Budget: $90 | Mid-Range: $220 | Luxury: $450+
Navigability Score: 4/5. A combination of BART, Muni buses, and cable cars make it easy to get around. Be prepared for steep hills!
Best Time to Visit: Fall (September-October) for the city's sunniest weather.
Top Things to Do Alone:
Tour Alcatraz: Book your tickets well in advance—it's a fascinating and chilling experience.
Walk or Bike the Golden Gate Bridge: A true bucket-list moment with unparalleled views.
Explore the Ferry Building Marketplace: A vibrant food hall perfect for sampling local cheeses, coffee, and oysters.
Solo Pro-Tip: Riding the cable car isn't just for tourists. Hang on to the outside rail for the full, wind-in-your-hair experience. It's a genuinely fun way to get a feel for the city's unique topography and is worth the wait.
Portland, Oregon: The Hub of Indie Culture
Famous for its motto "Keep Portland Weird," this city is a haven for independent spirits. It's perfect for the solo traveler who loves unique shops, incredible coffee, a thriving food truck scene, and easy access to nature.
At a Glance:
Solo Safety Index: Good. Downtown and popular neighborhoods are safe, but be aware of your surroundings.
Budget Snapshot (Per Day): Budget: $60 | Mid-Range: $150 | Luxury: $300+
Navigability Score: 4/5. Portland has an excellent public transit system (MAX Light Rail and buses) and is famously bike-friendly.
Best Time to Visit: Summer (July-August) for warm, dry weather.
Top Things to Do Alone:
Get Lost in Powell's City of Books: The world's largest independent bookstore is a universe unto itself.
Explore the International Rose Test Garden: Enjoy stunning city views and thousands of fragrant blooms.
Eat Your Way Through a Food Cart Pod: A culinary adventure awaits with dozens of options in one place.
Solo Pro-Tip: The food cart pods are a solo traveler's dream. You can sample multiple cuisines without the formality of a sit-down restaurant. Grab a Thai dish and a craft soda and just people-watch; it’s the heart of the city's social scene.
For the Outdoor Adventurer: Epic Natural Escapes
If your idea of a perfect trip involves hiking boots and national parks, these destinations offer some of the best adventure-focused solo travel USA experiences imaginable. 🏞️
Moab, Utah: Gateway to Arches & Canyonlands
Moab is the undisputed adventure capital of the Southwest. It provides direct access to two national parks—Arches and Canyonlands—offering a lifetime's worth of hiking, photography, and stargazing for the solo nature lover.
At a Glance:
Solo Safety Index: High. The main safety concerns are standard wilderness precautions (carry plenty of water, inform someone of your hiking plans).
Budget Snapshot (Per Day): Budget: $60 | Mid-Range: $160 | Luxury: $320+
Navigability Score: 2/5. A car is essential to access the parks and trailheads.
Best Time to Visit: Spring (April-May) and Fall (September-October) for ideal hiking temperatures.
Top Things to Do Alone:
Hike to Delicate Arch at Sunrise: Seeing the morning light hit the iconic arch in Arches National Park is a spiritual experience.
Visit Canyonlands National Park: Drive the scenic Island in the Sky district for jaw-dropping, expansive views.
Join a Group Rafting Tour: See the towering red cliffs from a new perspective on the Colorado River.
Solo Pro-Tip: The sheer silence at Dead Horse Point State Park at sunset is unforgettable. Find a spot away from the main overlook, sit down, and just listen. It’s a profoundly peaceful experience.
Sedona, Arizona: Red Rocks and Spiritual Retreats
Sedona's stunning red rock landscapes are believed by many to be centers of spiritual energy, or vortexes. This makes it a popular and welcoming destination for solo travelers on a journey of reflection, hiking, and natural immersion.
At a Glance:
Solo Safety Index: High. Sedona is an extremely safe and tranquil community.
Budget Snapshot (Per Day): Budget: $70 | Mid-Range: $180 | Luxury: $400+
Navigability Score: 2/5. You'll need a car to get the most out of the area and access various trailheads.
Best Time to Visit: Spring (March-May) and Fall (September-November).
Top Things to Do Alone:
Hike a Vortex Site: Cathedral Rock and Bell Rock are the most famous, offering powerful energy and incredible views.
Drive the Red Rock Scenic Byway (SR 179): This short drive offers breathtaking views at every turn.
Explore Tlaquepaque Arts & Shopping Village: A beautiful, mission-style village filled with art galleries and craft shops.
Solo Pro-Tip: Even if you're not into the spiritual side of things, the hike up to the Airport Mesa overlook is incredible for 360-degree sunset views. The way the light hits the red rocks is pure magic.
Other Great Outdoor Destinations:
The Oregon Coast: A 363-mile solo road trip dream of dramatic cliffs, charming towns, and public beaches. A car is mandatory.
Jackson Hole, Wyoming: A welcoming basecamp for exploring the awe-inspiring jagged peaks of Grand Teton National Park.
Boulder, Colorado: An outdoor lover's paradise nestled at the base of the Rockies, with hundreds of miles of trails accessible right from town.
For the Foodie: 4 Cities to Feast In
If your travel memories are measured in meals, these cities offer culinary adventures that are perfect for the solo diner, with abundant counter seating and vibrant food markets. 🌮

New Orleans, Louisiana: Creole & Cajun Capital
NOLA is a city that stimulates all the senses, especially taste. Its unique food culture is a massive draw, and the abundance of bar seating at classic establishments makes solo dining a joy.
At a Glance:
Solo Safety Index: Moderate. The French Quarter is busy, but be very cautious at night, especially off Bourbon Street.
Budget Snapshot (Per Day): Budget: $60 | Mid-Range: $160 | Luxury: $320+
Navigability Score: 4/5. The French Quarter is extremely walkable, and the St. Charles Streetcar is a charming way to see other parts of the city.
Best Time to Visit: Spring (February-May) for pleasant weather and festivals.
Top Things to Do Alone:
Join a Food Tour of the French Quarter: Sample everything from gumbo to po'boys to pralines.
Enjoy Beignets and Café au Lait: A stop at the iconic Café Du Monde is non-negotiable.
Listen to Live Jazz on Frenchmen Street: Far more authentic than Bourbon Street, it's the soul of the city's music scene.
Solo Pro-Tip: Find a club on Frenchmen Street, grab a seat at the bar with a Sazerac cocktail, and let the incredible live jazz wash over you. It's an essential New Orleans experience.
Austin, Texas: BBQ, Tacos, and Food Trucks
Austin's laid-back, creative atmosphere is reflected in its casual and incredibly delicious food scene. It's a city where a solo traveler can happily subsist on world-class brisket, breakfast tacos, and inventive food truck fare.
At a Glance:
Solo Safety Index: Good. Austin is a safe city, particularly in the downtown and South Congress areas.
Budget Snapshot (Per Day): Budget: $55 | Mid-Range: $150 | Luxury: $300+
Navigability Score: 3/5. The downtown core is walkable, but the city is spread out. Ride-sharing services are your best bet.
Best Time to Visit: Spring (March-May) and Fall (September-November) to avoid the brutal summer heat.
Top Things to Do Alone:
Eat Texas Barbecue: Brave the line at Franklin Barbecue for a transcendent experience, or head to a spot like Terry Black's for phenomenal brisket without the wait.
Swim in Barton Springs Pool: A three-acre, natural spring-fed oasis perfect for cooling off.
Experience the Live Music Scene: Check out the bars along 6th Street or in the Red River Cultural District.
Solo Pro-Tip: The line at Franklin Barbecue is part of the experience, and you'll meet people from all over the world. To feel more comfortable and social at any restaurant, always opt for a seat at the bar or a chef's counter.
Other Great Foodie Destinations:
Portland, Maine: A charming, walkable coastal city with a sophisticated food scene and arguably the best lobster rolls in the country.
Los Angeles, California: A treasure hunt through an endless landscape of authentic taco trucks, world-class sushi bars, and historic food markets like Grand Central Market.
For the History Buff: Destinations That Tell America's Story
Step back in time in these cities, where the past is always present and every street corner has a story to tell. These walkable historic cores are perfect for the intellectually curious solo traveler. 🏛️
Washington, D.C.: The Nation's Capital
Our nation's capital is one of the best solo destinations in the USA for budget-conscious and intellectually curious travelers. The core of the city—the National Mall and its surrounding monuments and museums—is incredibly walkable. Best of all, every single one of the Smithsonian museums is completely free to enter, allowing you to craft a deeply personal journey through American history.
At a Glance:
Solo Safety Index: Good. The tourist areas around the National Mall are very safe.
Budget Snapshot (Per Day): Budget: $60 | Mid-Range: $170 | Luxury: $350+
Navigability Score: 5/5. The Metro system is clean and efficient, and the core is very walkable.
Best Time to Visit: Spring (March-April) for the iconic Cherry Blossom Festival.
Top Things to Do Alone:
Explore the Smithsonian Museums: You could spend weeks here. Pick a few that match your interests, from the National Air and Space Museum to the National Portrait Gallery.
Walk the National Mall at Night: The monuments—from the Lincoln Memorial to the Washington Monument—are beautifully illuminated and far less crowded, creating a powerful and reflective experience.
Wander Through Georgetown: Explore the historic cobblestone streets, browse the chic boutiques, and walk along the scenic C&O Canal.
Solo Pro-Tip: The sheer scale of the Lincoln Memorial is so much more powerful in person than in photos. Go at night when the crowds are thinner. It's a very moving and contemplative experience to stand there alone with your thoughts.
Boston, Massachusetts: The Historic Walker's Paradise
Boston is a city that wears its history on its sleeve. Its compact, European-style downtown is a walker's paradise, made for tracing the footsteps of the American Revolution at your own pace. The 2.5-mile Freedom Trail is a red-bricked line that guides you past 16 of the nation's most important historic sites.
Top Things to Do Alone:
Walk the Freedom Trail: It's the perfect self-guided tour. Take your time, read the plaques, and immerse yourself in the story of the nation's birth.
Explore the North End: Get lost in the narrow streets of Boston's oldest residential neighborhood. The lively atmosphere and incredible Italian food are a must.
Visit the Isabella Stewart Gardner Museum: A truly unique museum housed in a Venetian-style palace. The stunning courtyard garden is an oasis of calm.
Solo Pro-Tip: In the North End, skip the restaurants with long lines and duck into one of the smaller, more authentic bakeries like Bova's or Modern Pastry for a cannoli. Enjoy it while wandering the beautiful, narrow streets.
Other Great History Destinations:
Philadelphia, Pennsylvania: The birthplace of a nation, where you can stand in the very rooms where the Declaration of Independence and Constitution were signed.
Savannah, Georgia: Walk through 22 park-like squares draped in Spanish moss to soak in the Antebellum South's beauty and complex history.
St. Augustine, Florida: Explore the nation's oldest continuously inhabited European-established settlement, with its 17th-century stone fort and narrow colonial lanes.
For the Wellness Seeker: 3 Retreats for Mind & Body
If your goal is to disconnect, recharge, and find tranquility, these destinations offer serene landscapes, a peaceful atmosphere, and a focus on well-being. 🧘

Santa Fe, New Mexico: Arts, Culture, and Serenity
With its unique Pueblo-style architecture, high-desert landscape, and thriving arts scene, Santa Fe has long been a magnet for those seeking spiritual and artistic renewal. It has a calming energy that's perfect for a solo retreat.
At a Glance:
Solo Safety Index: High. Santa Fe is a very safe and relaxed city.
Budget Snapshot (Per Day): Budget: $70 | Mid-Range: $190 | Luxury: $400+
Navigability Score: 3/5. The historic Plaza is walkable, but a car is needed to explore further afield.
Best Time to Visit: Fall (September-October) for the smell of roasting green chiles and golden aspen leaves.
Top Things to Do Alone:
Explore the Art Galleries on Canyon Road: A half-mile stretch of over 100 galleries, boutiques, and restaurants.
Visit the Georgia O'Keeffe Museum: Immerse yourself in the work of the master of American modernism.
Experience Meow Wolf's House of Eternal Return: A unique, immersive art adventure that defies description.
Solo Pro-Tip: The drive up to Ten Thousand Waves, a Japanese-style spa nestled in the mountains, is part of the experience. Book a private tub for an hour. Soaking in the hot water surrounded by piñon pines as the sun sets is pure bliss.
Big Sur, California: Coastal Contemplation
There are few places on Earth more soul-stirring than Big Sur. This rugged stretch of California coast is a place of profound, wild beauty that forces you to slow down, breathe, and simply be present. Cell service is very limited, making it the perfect place to truly disconnect.
At a Glance:
Solo Safety Index: High. The primary safety concerns are related to driving the winding Highway 1.
Budget Snapshot (Per Day): Budget: $80 | Mid-Range: $250 | Luxury: $600+
Navigability Score: 1/5. A car is absolutely essential.
Best Time to Visit: Spring (April-May) for wildflowers or Fall (September-October) for the clearest weather.
Top Things to Do Alone:
Photograph the Bixby Bridge: Pull over at one of the many turnouts to capture this iconic feat of engineering.
Hike in Pfeiffer Big Sur State Park: Wander among towering coastal redwoods.
Watch the Sunset from Nepenthe: This cliffside restaurant offers legendary views over the Pacific.
Solo Pro-Tip: Pack a lunch and go to Pfeiffer Beach to see the keyhole arch. The road down is easy to miss, so look carefully. It feels like a secret spot and is the perfect place to sit and just watch the powerful waves crash.
Asheville, North Carolina: Blue Ridge Mountain Calm
Tucked into the beautiful Blue Ridge Mountains, Asheville offers a perfect blend of vibrant city life and tranquil nature. It's a progressive, friendly city known for its arts scene, craft breweries, and focus on wellness.
At a Glance:
Solo Safety Index: High. Asheville is a very safe and welcoming community.
Budget Snapshot (Per Day): Budget: $65 | Mid-Range: $170 | Luxury: $350+
Navigability Score: 3/5. Downtown is walkable, but you'll need a car to access the Blue Ridge Parkway.
Best Time to Visit: Fall (October) when the mountain foliage is at its peak.
Top Things to Do Alone:
Drive a Portion of the Blue Ridge Parkway: One of America's most scenic drives, with countless overlooks and hiking trails.
Tour the Biltmore Estate: Explore America's largest home, a magnificent Gilded Age mansion.
Explore Downtown Asheville: Check out the funky shops, art galleries, and excellent restaurants.
Solo Pro-Tip: The drum circle in Pritchard Park on Friday nights is a must-see. It's an amazing, free-spirited display of Asheville's bohemian soul. Grab a local craft beer and watch the community come alive.
Your Solo Travel USA Questions, Answered
Is it safe to travel alone in the USA?
Yes, absolutely—with the right preparation. Safety varies greatly by location, so research is key. In cities, situational awareness matters most: stick to well-lit, populated areas at night and be mindful of your belongings. In national parks, the risks are different: always inform someone of your hiking plans, carry extra water, and be "bear aware."
What is the safest state for a solo female traveler?
While states in New England like Vermont, New Hampshire, and Maine consistently rank as having the lowest crime rates, a safe trip is less about a "safe state" and more about practicing awareness in a specific city or town.
How can I save money traveling solo?
Travel during the "shoulder seasons" (spring and fall) to dramatically reduce flight and accommodation costs. Prioritize destinations with great public transit to save on rental cars, take advantage of free museum days, and balance restaurant meals with grabbing food from local grocery stores or food markets.
Is it strange to eat out alone in America?
Not at all! It's increasingly common, and you shouldn't let it stop you from trying great places. To feel more comfortable, opt for a seat at the bar or a chef's counter. It's more casual, and you might strike up a conversation. Bringing a book also makes the experience more enjoyable.
How can I meet people while traveling solo?
Staying in hostels is a guaranteed way to meet people. Joining a group city tour, a cooking class, or a local Meetup event are also fantastic options. Don't underestimate the power of simply sitting at the bar in a friendly brewery; it’s an open invitation for conversation.
What are the best solo road trips in the USA?
For stunning scenery and plenty of safe stops, the Pacific Coast Highway in California is iconic for a reason. Other fantastic options include the Blue Ridge Parkway through Virginia and North Carolina, and the scenic loop through Utah's "Mighty 5" National Parks.
The United States offers an incredible spectrum of experiences for those bold enough to explore it on their own. By matching your travel style to the right destination, you move beyond a generic vacation and create a journey that truly resonates. The confidence you're looking for isn't found in an article; it's waiting for you on a bustling city street, a quiet mountain trail, or at a lively food truck. The only thing left to do is pick one and go.
Read the full guide: Anxious to Adventurous: The Ultimate Guide to Solo Travel Confidence
Don't Miss Out! Subscribe for Exclusive Content
SubscribeComments 0
No comments yet
Be the first to share your experience!
Dont Miss Out! Subscribe for Exclusive Content
San Francisco Cherry Blossoms: A Local's Guide to the Blooms
Halloween SF: Haunts Without Horrors
SF Festivals: 7 Must-See Lineups
Christmas SF: Lights & Wharf Wonders
SF Pride: 6 Route & Party Hacks
Chinese New Year SF: Parade Essentials
How to Stay Safe While Hiking: A Hiker's Safety Guide
TrekGuider @trekguider
The call of the trail is a powerful one. It promises sweeping vistas, the quiet solitude of the forest, and the profound satisfaction of reaching a summit under your own power. But for all its beauty, the wilderness is impartial and unforgiving. The same trail that offers bliss on a sunny morning can present serious danger when the weather turns, a wrong turn is made, or an ankle is twisted. This is the problem every hiker faces: the gap between the adventure we dream of and the preparation it demands.
That gap is often filled with anxiety. A flicker of doubt about reading the map, a worry about the approaching clouds, or a sudden fear of what that noise was in the undergrowth can rob an incredible experience of its joy. Too often, hikers—both novice and experienced—find themselves in serious trouble simply by underestimating the trail and overestimating their preparedness. According to Search and Rescue (SAR) teams, most emergencies are the result of small, preventable mistakes. This guide is your definitive playbook for closing that gap for good. We’re providing the essential, expert-backed hiking safety tips you need to move through the backcountry with unwavering confidence. This isn't about fear; it's about empowerment. By mastering these skills, you’re ensuring every hike is a safe one, a core pillar of the responsible adventurer’s mindset we explore in our definitive The Ultimate Guide to Travel Safety: A 2026 Playbook. Let’s gear up, get smart, and get you ready to hit the trail.

This journey from novice to self-sufficient hiker begins not on the trail itself, but with a simple, powerful philosophy of preparedness that has been tested and refined by generations of mountaineers and wilderness experts. It all starts with your pack.
The Foundation of Safety: The 10 Essentials System
Long before your boots touch the dirt, your safety on the trail has already been decided by one thing: what’s inside your pack. Endorsed by the National Park Service and outdoor organizations like REI, the "10 Essentials" is not just a packing list; it's a systematic approach to preparedness. It ensures you have the tools to handle common problems and survive an unexpected night outdoors. Think of these not as ten individual items, but as ten crucial systems.
Navigation: Your primary system for knowing where you are and where you’re going. This must include a physical topographic map of the area and a compass. A GPS device or a smartphone with downloaded offline maps is a great tool, but electronics can fail. A map and compass are your foolproof backup.
Illumination: You need to be able to see in the dark, period. Carry a headlamp or flashlight with a full charge, and always pack extra batteries. A headlamp is superior as it keeps your hands free for other tasks.
Sun Protection: Sunburn and sunstroke can be serious dangers on the trail. This system includes sunglasses, broad-spectrum sunscreen (SPF 30+), and a wide-brimmed hat. Sun-protective clothing can also be a game-changer.
First-Aid Supplies: You must have the ability to treat common trail injuries. Your kit should be equipped to handle blisters, cuts, scrapes, and sprains. A basic kit is good; a custom-built one is better.
Repair Kit and Tools: Gear can break. A multi-tool or knife is invaluable, and a small roll of duct tape can repair everything from a torn jacket to a broken tent pole.
Fire: In an emergency, fire provides warmth, a way to purify water, and a powerful psychological boost. Carry waterproof matches, a reliable lighter, and a dedicated fire starter like dryer lint or a commercial fire-starting block.
Insulation: Weather can change in an instant, especially at elevation. You must carry an extra layer of clothing beyond what you start the hike in, regardless of the forecast. This should be a moisture-wicking layer, like a fleece jacket or thermal top—never cotton, which loses all insulating properties when wet.
Nutrition: Always pack more food than you think you’ll need. An extra day’s worth of non-perishable, high-energy food is the standard. Items like protein bars, nuts, and dried fruit are perfect.
Hydration: Carry more water than you expect to need and have a way to purify more. This means carrying a water filter or purification tablets to safely treat water from streams or lakes in an emergency.
Emergency Shelter: If you’re forced to spend an unplanned night out, protection from the elements is critical to preventing hypothermia. This doesn't mean a tent. A lightweight, packable emergency space blanket or bivy sack is all you need.

For expert-vetted gear lists and detailed trail guides from seasoned creators, the TrekGuider Marketplace is an invaluable resource for taking your preparation to the next level.
"Never Get Lost Again": Mastering Trail Navigation
Of all the potential hiking dangers, getting lost is one of the most common and terrifying. A recent study of SAR missions revealed that "error in judgment" was a leading cause of hikers needing rescue, and a huge part of that is poor navigation. Relying solely on your phone’s GPS is one of the biggest hiking safety tips to ignore—service is unreliable in the backcountry, and batteries die. True navigational confidence comes from time-tested skills.
How to Use a Map and Compass
This fundamental skill is easier than you think and is your most reliable tool.
Place the Compass on the Map: Lay your map flat. Identify your current location and your destination. Place your compass so the long edge of its baseplate creates a line connecting the two points, with the "Direction of Travel" arrow on the compass pointing toward your destination.
Set the Compass Bezel: Keeping the baseplate still, rotate the round bezel (the dial) until the orienting lines inside it are parallel with the map's north-south grid lines. Make sure the "N" on the bezel is pointing to North on the map. The number on the bezel aligned with the Direction of Travel arrow is now your bearing.
Follow the Bearing: Lift the compass off the map and hold it level in front of you. Turn your body until the red magnetic needle is "in the shed"—that is, perfectly inside the red orienting arrow on the bezel. The Direction of Travel arrow now points precisely to your destination. Pick a landmark in that direction, walk to it, and repeat the process.
Pro-Tip: The difference between "true north" (on your map) and "magnetic north" (where your compass points) is called declination. For precise navigation, you must adjust your compass for the local declination, which will be printed on your map.

Wildlife on the Trail: A Guide to Safe Encounters
Seeing wildlife is a thrilling part of hiking, but it’s crucial to remember that you are a visitor in their home. The core principles of every encounter are to maintain a safe distance, never feed wildlife, and know how to react to avoid escalating a situation.
Bear Encounters (Black vs. Grizzly)
Making noise while you hike (talking, clapping) is the best way to avoid surprising a bear. If you do encounter one, your reaction depends on the species.
If a Black Bear Approaches: Never run. Make yourself look as large as possible by raising your arms and opening your jacket. Yell, clap, and make loud noises. If it attacks, fight back aggressively. Target the bear's face and nose with anything you have—rocks, trekking poles, your fists. Do not play dead.
If a Grizzly Bear Approaches/Charges: Do not run and do not make direct eye contact. Speak in a calm, low voice to show you are not a threat. If it charges, stand your ground and use bear spray when it is within 30 feet. If it makes contact, play dead. Lie flat on your stomach, protect the back of your neck with your hands, and use your pack as a shield.
Mountain Lion (Cougar) Encounters
These predators are ambush hunters, so an encounter is rare. If you see one, it has likely been watching you.
Protocol: Do not run, as this triggers their chase instinct. Make direct eye contact. Make yourself appear larger by raising your arms and opening your jacket. Speak in a loud, firm voice. Slowly back away, giving the cat an escape route.
If Attacked: Fight back with everything you've got. Use rocks, sticks, or your hands to target the animal's eyes and face.
Venomous Snake Encounters
Snakes have no interest in humans and will only strike if they feel threatened.
Protocol: If you see a snake, freeze. Do not make any sudden movements. Once you've located the snake, slowly back away and give it a wide berth to move on. Be careful where you step and place your hands, especially when scrambling over rocks or logs.
If Bitten: The priority is to stay calm to slow the spread of venom. Limit physical activity and get to a hospital as quickly and safely as possible for evaluation and potential antivenom treatment.
Handling Trail Emergencies: What to Do When Things Go Wrong
Even with perfect preparation, accidents can happen. A twisted ankle, a sudden illness, or getting turned around can escalate quickly. Your ability to stay calm and make rational decisions is your most valuable asset. If you find yourself in trouble, remember the acronym S.T.O.P.
Stop: The moment you realize you are in trouble, stop moving. Sit down.
Think: Assess your situation calmly. What went wrong? What resources do you have?
Observe: Look around you. Where is the sun? Can you see any landmarks? Is there a source of water or shelter nearby?
Plan: Formulate a simple, logical plan. Don't make panicked decisions.
First Aid on the Trail
Your first-aid kit from the 10 Essentials is your go-to tool for injuries. Here's how to handle the most common trail ailments:
Blisters: The moment you feel a "hot spot" on your foot, stop and address it. Clean the area and apply moleskin or a blister-specific pad. Don't wait for it to become a full-blown blister.
Sprains: For a twisted ankle or knee, use an elastic wrap bandage from your kit to provide compression and support. Loosen it if you feel any numbness or tingling. Elevate the joint when you rest, and use a trekking pole or sturdy branch as a crutch if needed.
Cuts and Scrapes: Control any bleeding with direct pressure using a sterile gauze pad. Once it stops, clean the wound thoroughly with an antiseptic wipe and apply antibiotic ointment before covering it with a bandage.
A well-stocked daypack is crucial, but so is a plan for the whole trip. Before you head out to explore our incredible national parks, make sure your vehicle and supplies are just as prepared as your hiking gear.
Your Ultimate Adventure Blueprint
Ready to hit the road? Don't leave home without our expert-vetted National Park Road Trip Checklist. This free guide covers everything from vehicle prep and essential gear to can't-miss stops, ensuring your adventure is seamless from start to finish. Download it for free now!
Hiking Safety FAQs
A prepared mind anticipates questions. Here are expert answers to common concerns.
1. What's the right way to signal for help?
If you determine you cannot get yourself out of a situation safely, you need to signal for help. The universal distress signal is three of anything: three whistle blasts, three flashes of a headlamp, or three piles of rocks. A whistle is a must-have item that uses far less energy and carries further than shouting. For serious backcountry travel, consider investing in a personal locator beacon (PLB) or satellite messenger, which can send an SOS signal with your exact location to emergency services.
2. Is it safe to hike alone?
Solo hiking can be an incredibly rewarding experience, but it requires a higher level of preparation and self-sufficiency. All the rules in this guide become even more critical. It is absolutely essential that you leave a detailed itinerary with a trusted friend or family member. Include your planned route, your start and end times, and a "panic time"—the specific time they should call for help if they haven't heard from you.
3. What do I do if the weather turns bad unexpectedly?
Your first priority is to get below the treeline if you're in an exposed area to reduce the risk of lightning strikes. Put on your extra insulating layer and your rain gear before you get wet and cold. Assess your map and your situation. It is often safer to turn back, even if you're close to your destination, than to push on into deteriorating conditions.
Pro-Tip: Always tell someone your plan. Before every hike, leave a detailed itinerary with a trusted friend or family member. This is the single most important safety net you have.

Your Adventure, Empowered by Preparation
The goal of these hiking safety tips is not to fill you with fear, but to arm you with confidence. Every piece of gear you pack and every skill you learn is a key that unlocks a new level of freedom on the trail. Preparation allows you to push your boundaries, explore wilder places, and immerse yourself in the beauty of nature without the nagging whisper of anxiety. By respecting the wilderness and committing to self-sufficiency, you transform from a simple visitor into a capable, confident adventurer.
Now that you have the skills for a safe hike, you can integrate that adventure into a larger, perfectly planned journey. For a complete master plan covering everything from budgeting and logistics to finding the best trails and tours, our all-encompassing Travel Guide is the only resource you'll ever need.
Don't Miss Out! Subscribe for Exclusive Content
SubscribeComments 0
No comments yet
Be the first to share your experience!
Dont Miss Out! Subscribe for Exclusive Content

How to Avoid Travel Scams: A Global Guide

Is Public WiFi Safe? How to Protect Your Data Abroad

A Woman's Guide to Safe Travel: 10 Critical Tips

7 Hotel Safety & Security Tips for Peace of Mind

9 Beach Safety Tips That Could Save Your Life
