Essential Affiliate Tools: From Tracking to Full Optimization
TrekGuider @trekguider
You’re a creator, not an administrator. Yet, you find yourself drowning in a sea of administrative tasks. You’re manually copying and pasting ugly, mile-long affiliate links, toggling between a dozen different program dashboards to check your stats, and spending more time wrestling with spreadsheets than you do creating the travel content you love. Your affiliate "business" feels less like a streamlined operation and more like a chaotic, time-sucking hobby that isn't paying the bills.
This inefficiency is more than just frustrating—it's a silent killer of your income. Every hour you spend on manual, repetitive tasks is an hour you’re not creating the next piece of content that could generate revenue for years to come. You're flying blind, guessing which strategies are working, unable to see which links are converting, and which pages are actually profitable. The reported average income of $13,847 a month for travel affiliates feels like a distant fantasy when you’re stuck in this administrative quicksand.

This guide is your way out. It is your curated, creator-friendly tech stack—a definitive list of the essential affiliate marketing tools that will automate the tedious, provide crystal-clear data, and free you up to focus on growth. We’ll cover the entire workflow, from foundational link management and tracking to the advanced tools needed for full-scale optimization. This is how you transform your passion project into a professional, efficient, and profitable business. For a complete command of the entire affiliate landscape, our definitive pillar page, Travel Affiliate Programs: The 2026 Ultimate Guide, is your essential command center for mastering the entire ecosystem.
The Foundational Layer: Your Operational Command Center
Before you can optimize, you must organize. This first set of tools forms the non-negotiable foundation of any serious affiliate marketing business. They are your central nervous system for managing links, ensuring compliance, and tracking performance from a single source of truth.
Link Management Plugins (The Digital Quartermaster)
If you run your travel blog on WordPress, a link management plugin is the single most important tool you will install. These plugins take the long, ugly, and intimidating affiliate links provided by programs and "cloak" them into short, clean, branded URLs that are far more trustworthy to your audience.
Think of it as your command center. Instead of embarking on a digital scavenger hunt through year-old posts to update a single expired link, you change it once in a central dashboard, and the plugin deploys that change site-wide instantly. This functionality alone will save you hundreds of hours over the life of your business. Furthermore, a link like yourblog.com/recommends/osprey-backpack is infinitely more professional and trustworthy to a reader than a long URL filled with random tracking parameters, directly impacting your click-through rates.

Top Tools in This Category:
ThirstyAffiliates: A powerhouse plugin built specifically for affiliate marketers. It offers advanced features like autolinking (automatically turning specific keywords into affiliate links), proactive link checking to find broken links, and detailed click analytics.
Pretty Links: A slightly simpler but highly effective alternative. It excels at link cloaking, redirection, and providing basic click-tracking reports right from your WordPress dashboard.
Pro-Tip: The best link management plugins, like ThirstyAffiliates, can automatically add the required rel="sponsored" tag to all of your affiliate links. This is a critical feature that ensures you stay compliant with Google's guidelines for paid links, protecting your site from potential SEO penalties without you having to think about it.
Affiliate Tracking Tools (Your Source of Truth)
"What gets measured gets managed." To grow your affiliate income, you need a crystal-clear understanding of what’s working. While many creators start by manually checking each affiliate network’s dashboard, a dedicated approach to tracking provides a more holistic, actionable view.
For most creators, your affiliate tracking tools will be a combination of your link management plugin’s analytics and the dashboards provided by your affiliate networks (like CJ Affiliate or Travelpayouts). These platforms show you crucial metrics like clicks, conversions, and commission earnings.
However, as your business matures, you'll want to track performance across different income models. For example, the TrekGuider Seller Platform includes a dedicated referral dashboard. This is a specialized tracking tool that shows you not just one-time sales, but the ongoing, passive income you’re earning from the new sellers you’ve brought to the platform. It’s a perfect example of how a modern platform provides the built-in affiliate tracking tools you need to monitor more sophisticated, high-margin income streams like revenue sharing.
The Growth Engine: Traffic & SEO Tools
With your operational house in order, the focus must pivot from organization to acquisition. A perfectly managed link is useless without a steady stream of the right people clicking on it. This is where your growth engine comes in—the tools designed to attract your ideal audience with precision.
SEO & Keyword Research Platforms
The most profitable affiliate content is created with intention. It targets keywords that signal a user is actively researching a purchase (e.g., "best carry-on luggage review"). SEO platforms are your treasure map for finding these "money" keywords and building a content strategy that attracts buyers, not just browsers.

These platforms are indispensable for:
Finding Profitable Keywords: Uncover what your audience is searching for, how many people are searching for it, and how difficult it will be to rank on Google.
Analyze the Competition: See exactly which keywords your competitors are ranking for and which pages are bringing them the most traffic.
Track Your Performance: Monitor your rankings for your target keywords over time to see what’s working and where you need to improve.
Top Tools in This Category:
Ahrefs: A comprehensive, professional-grade SEO toolkit. Its "Keywords Explorer" is second to none for finding high-value commercial investigation keywords, and its "Site Explorer" provides deep insights into any competitor's strategy.
SEMrush: Another all-in-one industry leader that offers a powerful suite of tools for keyword research, rank tracking, and competitive analysis.
Pro-Tip: Don't confine your keyword strategy to your blog. With video projected to account for a staggering 55% of all affiliate traffic by 2026, the same commercial-intent keywords you find for your articles are the exact titles you should be using for your YouTube videos and TikToks.
Analytics Platforms
While SEO tools help you get traffic, a web analytics platform tells you what that traffic does once it arrives. It’s essential for understanding your audience, diagnosing problems, and optimizing their journey from reader to buyer.
The Must-Have Tool:
Google Analytics: The free, industry-standard tool for website analytics. It's an incredibly powerful platform that provides all the data you need to understand user behavior, track conversions, and identify your top traffic sources, allowing you to double down on what works.
The Conversion Toolkit: Optimization & Social Media Tools
Attracting traffic is only half the battle. The final, crucial step is converting that traffic into clicks and commissions. This set of tools is designed to streamline your workflow and optimize your content for maximum impact.
"Link in Bio" Tools (For Social Dominance)
Platforms like Instagram and TikTok are powerful for audience building, but they famously limit your ability to use clickable links. A "link in bio" tool solves this by creating a simple, mobile-friendly landing page that can house all of your most important affiliate links, blog posts, and offers.

Top Tools in This Category:
Linktree: The most well-known tool in this space, offering a simple and effective way to create a micro-landing page for your social media bio.
Later: While primarily a social media scheduling tool, Later’s "Link in Bio" feature is excellent, allowing you to create a clickable grid of your Instagram posts, driving traffic directly to relevant blog posts and affiliate offers.
The Amazon Workflow Accelerator
For nearly every travel creator, Amazon Associates is a core part of their affiliate strategy. However, creating links for individual products can be a slow, manual process.
The Must-Have Tool:
Amazon SiteStripe: This is a free, official toolbar from Amazon that appears at the top of your browser whenever you’re on Amazon.com. It allows you to generate a custom affiliate link (text, image, or both) for any product page with a single click, dramatically speeding up your content creation workflow.
Your Strategy Blueprint: The Travel Creator's Toolkit
Feeling overwhelmed by the options? A powerful tech stack is only as good as the strategy behind it. To help you organize your entire affiliate marketing plan—from keyword research to content creation and promotion—we've created the ultimate resource bundle. It’s packed with the checklists, templates, and guides you need to build a professional and profitable system.
Download Your Free Bundle: The Travel Creator's Toolkit Today!
Frequently Asked Questions (FAQ)
1. Do I really need all these tools when I'm just starting out? When you're starting, focus on the foundation. A WordPress site with a link management plugin (like Pretty Links) and Google Analytics is your essential starting stack. This is a low-cost setup that allows you to organize your links and track your traffic from day one. You can invest in a premium SEO tool like Ahrefs once your site is generating enough revenue to justify the cost.
2. Are there any good free affiliate marketing tools? Absolutely. Google Analytics is free and non-negotiable. Amazon SiteStripe is also free. For keyword research, you can start with free tools like Google Keyword Planner or the free versions of various SEO tools, though they are more limited. The free versions of "link in bio" tools like Linktree are also perfectly sufficient for most creators.
3. How do these tools help with tracking beyond just clicks? Advanced tracking involves connecting data points. For instance, by using UTM parameters (which you can add manually or with some plugins), you can see in Google Analytics not just that someone came from your blog, but that they came from the specific button in your review of the Osprey backpack. This level of detail is what allows you to A/B test different calls-to-action and truly optimize your pages for conversion.
Conclusion: From Hobbyist to CEO
The difference between a creator earning a few dollars a month and one earning a full-time income often comes down to their systems. Top earners don't waste time on manual, low-value tasks. They leverage technology to work smarter, not harder. They treat their content not as a hobby, but as a business.

You now have a curated list of the best affiliate marketing tools to build your own professional tech stack. Start with the foundation: a link management plugin to organize and track your links. Then, layer in SEO and analytics tools to build a predictable stream of traffic. Finally, use optimization and workflow tools to convert that traffic with maximum efficiency.
These affiliate tracking tools and optimization platforms are not an expense; they are an investment in your own efficiency, professionalism, and profitability. By implementing this toolkit, you take a definitive step away from being a hobbyist and become the CEO of your own thriving travel content business.
Meta Data Suggestions:
SEO Meta Title (58 characters): 9 Essential Affiliate Marketing Tools for Travel Creators
URL Slug: essential-affiliate-marketing-tools
SEO Meta Description (154 characters): Discover the top affiliate marketing tools for travel creators. From link tracking to SEO, this guide covers the essential tech stack to automate and grow your income.
Read the full guide: The Travel Blogger's Playbook to Affiliate Marketing Mastery
Don't Miss Out! Subscribe for Exclusive Content
Subscribe


Comments 0
No comments yet
Be the first to share your experience!
Dont Miss Out! Subscribe for Exclusive Content

Ultimate USA Holidays Guide: Top Picks

FTC Affiliate Disclosure Essentials: Stay Compliant as a Travel Creator

Avoid These 5 Affiliate Landing Page Mistakes for Better Conversions

Affiliate Keyword Research Mastery for Travel Blogs

Booking.com Affiliate Program Review: Pros, Cons, and Earnings Potential

Decoding Affiliate Commission Rates: Benchmarks for Travel Creators
NYC Pride: Parade Route Essentials
TrekGuider @trekguider
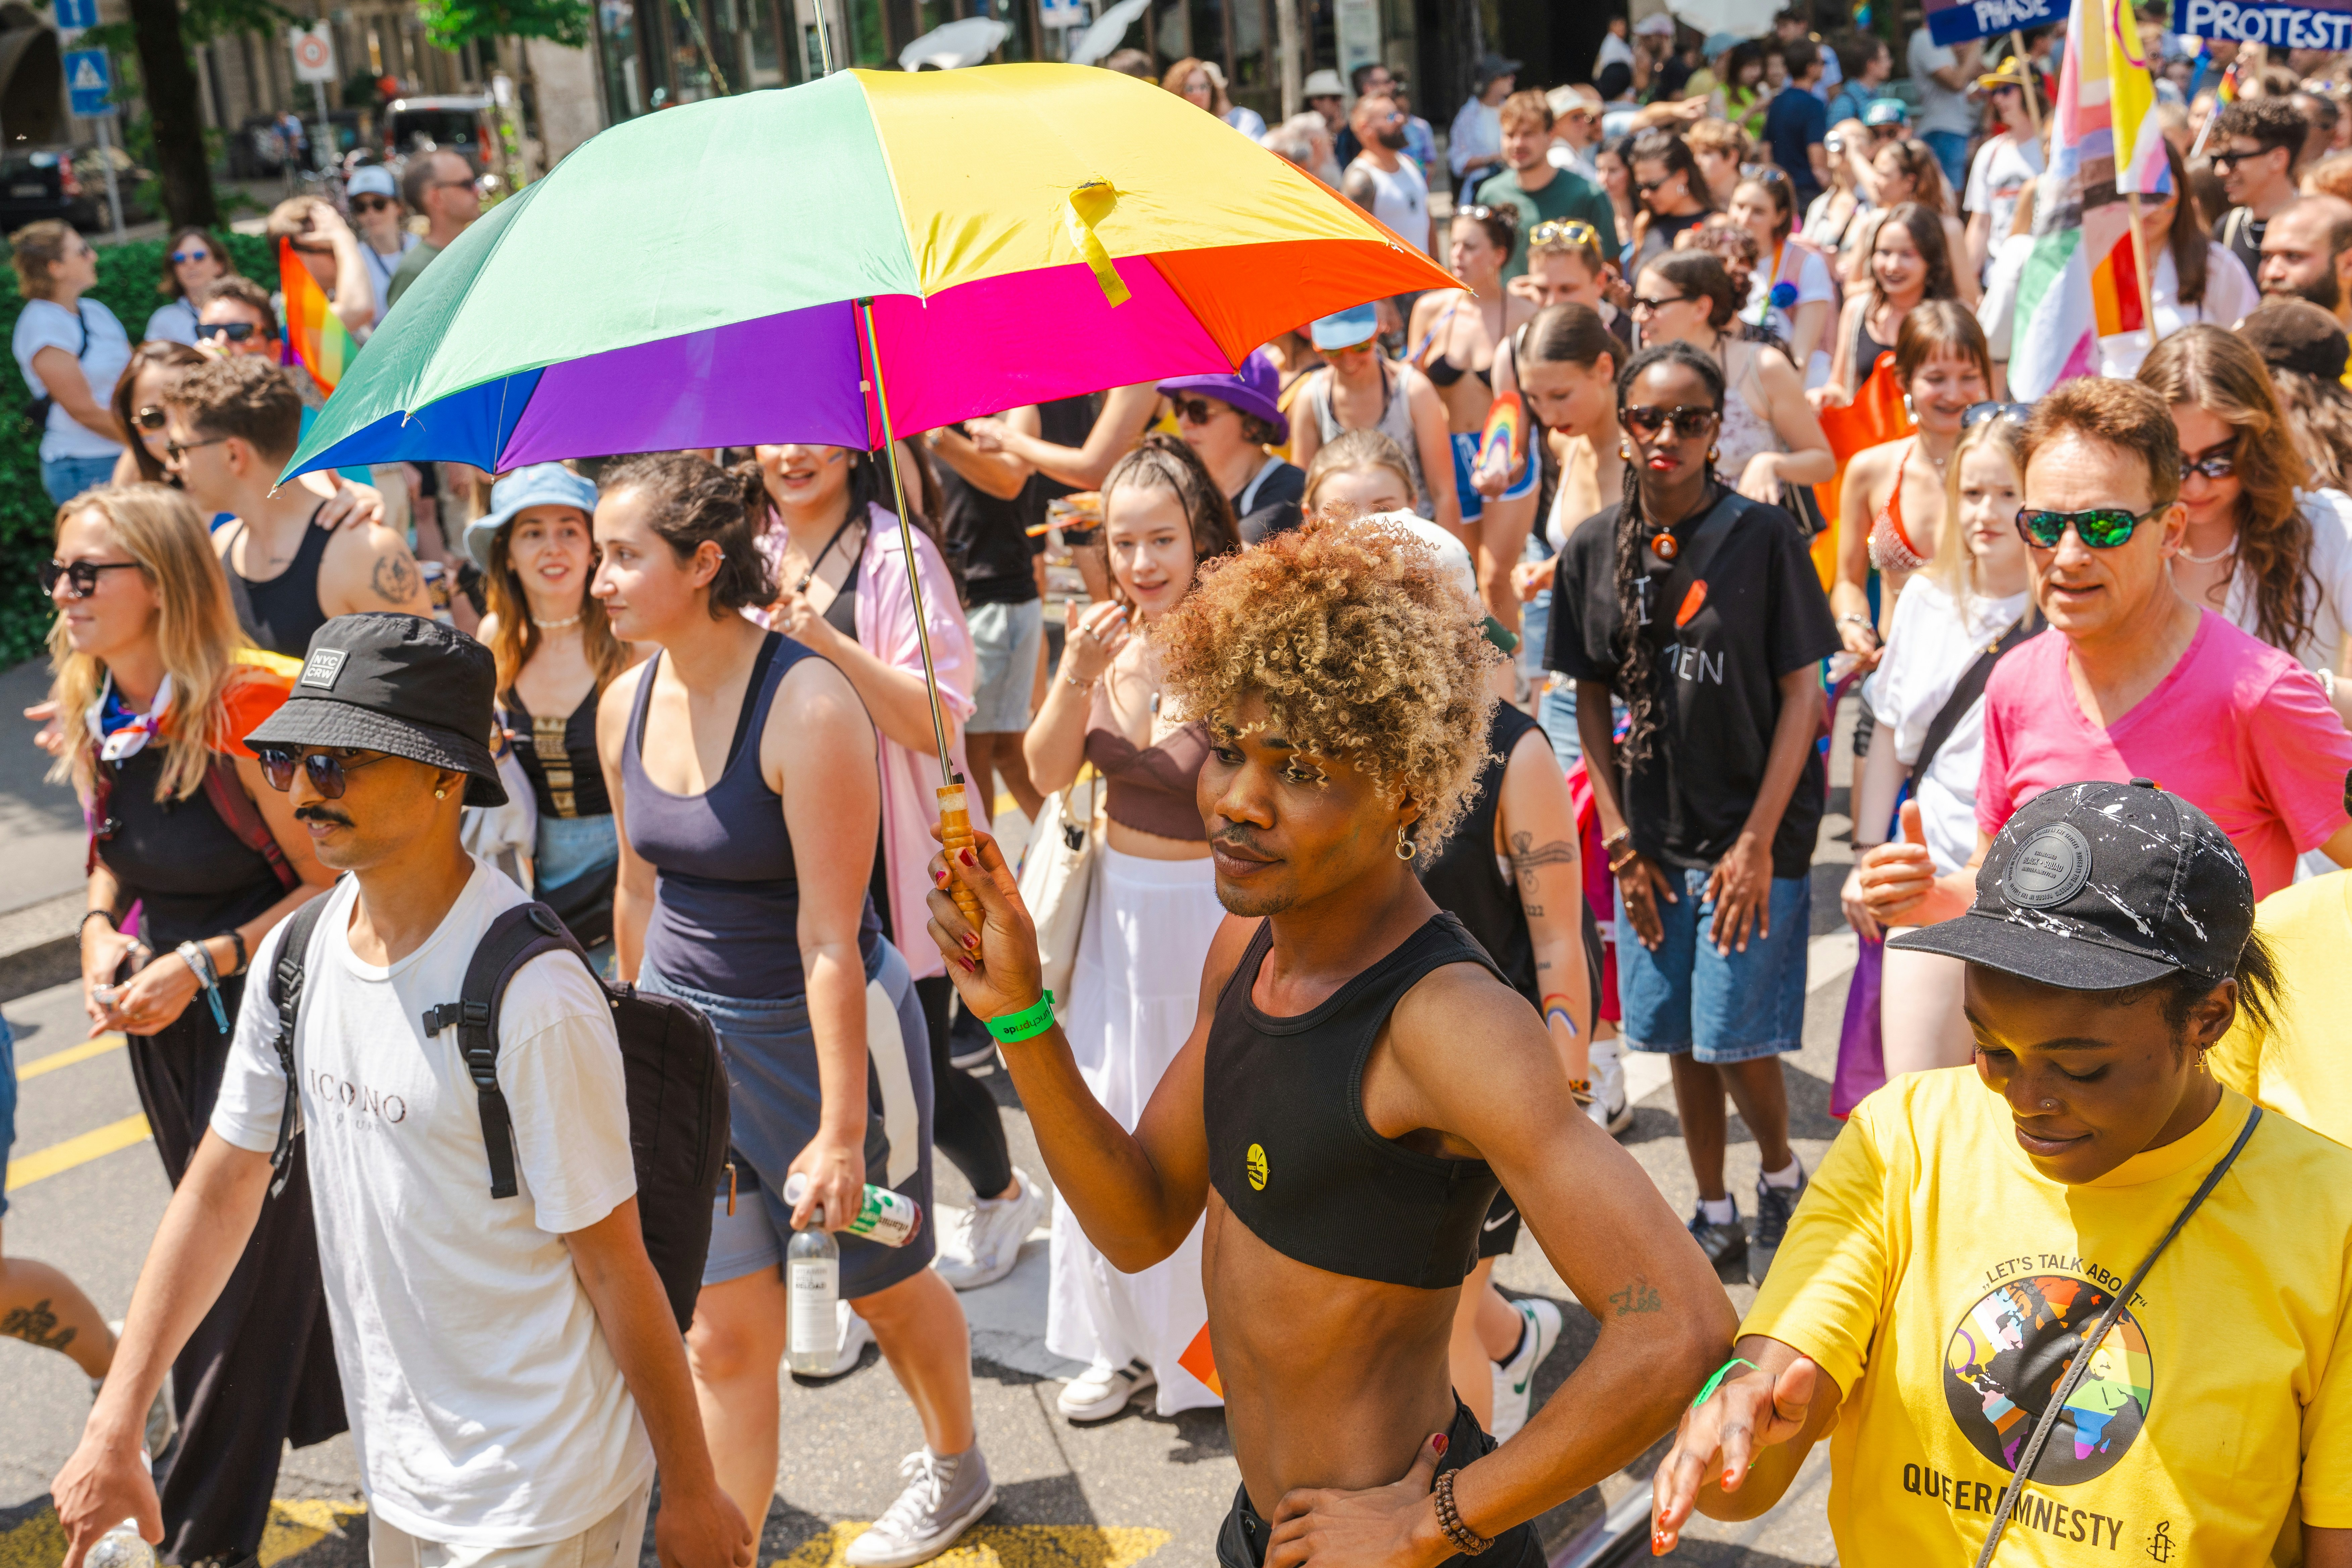
The air crackles with anticipation. You feel the bass from a distant float thumping in your chest, a rhythmic heartbeat for a city ready to explode in a celebration of love, identity, and history. The NYC Pride Parade is one of the most iconic, life-affirming events on the planet. But as you picture the cascade of rainbow flags, a knot of logistical questions tightens in your stomach. With millions of people flooding Manhattan, where do you even begin? How early is early enough? How do you navigate a multi-mile route to actually see the parade without getting swallowed by the crowd?
Without a smart plan, the dream experience can dissolve into a logistical nightmare. You risk being stuck ten-deep behind a wall of people, catching only glimpses of the spectacle. You could spend hours feeling overwhelmed, battling for a sliver of sidewalk instead of immersing yourself in the powerful current of community and celebration. The line between an unforgettable day of joy and a frustrating ordeal is drawn by preparation.
This is your definitive playbook for conquering the chaos. Forget the guesswork. We are breaking down the entire pride parade New York route, section by section, arming you with insider strategies and actionable essentials. From the electric energy of the formation zone to the historic heart of the Village, this guide will help you navigate the day like a seasoned pro. Get ready to transform potential stress into pure, unadulterated Pride.

The Heartbeat of Pride: A Journey from Protest to Celebration
But to truly appreciate the river of rainbow flags and joyous noise, you have to understand its source. This isn’t just a party; it’s a pilgrimage. The modern NYC Pride Parade is the direct descendant of the Christopher Street Liberation Day March, first held in 1970, exactly one year after the Stonewall Uprising of 1969. That rebellion, a series of spontaneous and defiant demonstrations against a police raid on the Stonewall Inn, was the flashpoint that ignited the modern gay rights movement.
What began as a protest march has evolved over decades into a powerful dual-purpose event: a joyous celebration of identity and a formidable platform for activism. In the 1980s, as the AIDS crisis devastated the community, the parade became a vital and visible front line for raising awareness and demanding action, cementing its role as the community's conscience and its loudest voice. Its deep historical roots and unwavering commitment to progress make it a key element event—and for good reason, a non-negotiable highlight in our definitive guide to New York Holidays: 10 Must-Do Events. Understanding this legacy enriches the entire experience, transforming you from a spectator into a participant in living history.
Mark Your Calendar: 2026 NYC Pride Parade Date and Time
Precision is your best friend when planning for an event of this magnitude. Get these details locked into your calendar now.
Date: Sunday, the last Sunday of June
Start Time: The parade officially kicks off between 11:00 AM and 12:00 PM.
A word of caution: Do not mistake the start time for your arrival time. The parade route is miles long, and the best viewing spots are claimed hours in advance. For a prime location, especially in the more popular sections, you should be in position no later than 9:00 AM. For the truly iconic spots, even earlier is better.

Deconstructing the Route: A Mile-by-Mile Guide to the Pride Parade New York
The official route for the pride parade New York is a journey through the city's cultural and historical soul. Each segment offers a distinct atmosphere and viewing experience. Your perfect spot depends entirely on the vibe you’re seeking.
The Kick-Off: 26th Street and 5th Avenue (The Formation Zone)
The Vibe: This is the epicenter of pure, unharnessed anticipation. The energy here is electric, a fascinating mix of organized chaos and raw excitement. You’ll see floats getting their final sound checks, dance troupes running through their choreography one last time, and thousands of marchers buzzing with adrenaline before they take their first official step. It’s less of a polished performance and more of an authentic, behind-the-scenes look at the massive human effort powering the event.
Viewing Advice: Standing near the start means you see every contingent at its absolute freshest. The costumes are pristine, the energy is at its peak, and the performances are sharp. It’s a fantastic spot for photographers wanting to capture candid moments and fine details. The crowds here are intense as everyone jockeys for that first glimpse.
Logistics: Arrive extra early—think 8:00 AM—to secure a spot with a clear line of sight. Amenities are scarcer here compared to further down the route. Pack what you need for the morning, as ducking into a local shop will be a major, time-consuming undertaking.
The Main Artery: South on 5th Avenue (The Spectator Hub)
The Vibe: As the parade marches down the world-famous 5th Avenue, it hits its full, spectacular stride. This is the quintessential big-city parade experience. The avenue is wide, the crowds are massive, and the backdrop is pure New York City grandeur. The sound of music and cheering reverberates off the tall buildings, creating an immersive wall of sound. You’ll be surrounded by a diverse mix of families, tourists, and locals, all united in a shared celebration.
Viewing Advice: This is the longest stretch of the parade and where most spectators naturally congregate. For a slightly less condensed crowd, try to find a spot further north, perhaps in the high 30s or 40s. The closer you get to the Village, the exponentially denser the crowds become.
Logistics: This section offers the best access to delis, coffee shops, and stores for restrooms and refreshments. However, be prepared for long lines for absolutely everything. Public transportation is your best friend here; the numerous subway stops along 6th Avenue run parallel to the route, making access relatively straightforward.
The Historic Turn: 8th Street to Christopher Street (The Soul of Pride)
The Vibe: This is the emotional and historical heart of the entire parade. As the route makes its key turn off 5th Avenue and winds through the narrower streets of Greenwich Village towards the Stonewall National Monument, the atmosphere shifts. It becomes more intimate, more intense, and deeply resonant. The sense of history is palpable. This is where the cheers often feel the loudest and the connection between the marchers and the crowd feels most profound.
Viewing Advice: This is, without question, the most meaningful and popular place to watch the parade. Consequently, it is the most crowded. To get a spot here, you must be committed. Arrive by 8:00 AM at the absolute latest, and be prepared to hold your ground for hours. The experience, however, is powerful and unparalleled.
Logistics: Once you’re in a spot here, you’re in for the duration. The narrow streets and dense crowds make movement nearly impossible. Pack everything you need for several hours. There are fewer commercial establishments directly on these streets, so plan accordingly.

Pro-Tip: For a less obstructed view, look for spots near intersections on the opposite side of the street from the parade's direction of travel. Crowd density is often slightly lower there as people tend to cluster on the inside of the turns.
The Grand Finale: Finishing Near 15th Street and 7th Avenue (The Dispersal Zone)
The Vibe: The energy at the end of the route is one of joyous exhaustion and collective accomplishment. Marchers, who have been on their feet for hours, are often interacting more freely with the crowd as they complete their long journey. It’s less of a formal procession and more of a massive, mobile street party winding down into its final, celebratory moments.
Viewing Advice: This is by far the least crowded section of the route, making it an excellent choice for families, those with accessibility concerns, or anyone who couldn't arrive at the crack of dawn. You’ll still see every float and group, but with significantly more room to breathe and move.
Logistics: This area offers the easiest exit strategy. With the parade dispersing, streets begin to reopen sooner, and access to multiple subway lines on 7th Avenue (like the 1, 2, and 3 trains) makes for a quicker trip home or to your next destination.
Your Strategic Viewing Plan: 7 Essential Tips for the Best Experience
A little strategy goes a long way in a crowd of millions. Follow these essential tips to ensure your day is smooth, safe, and spectacular.
Arrive Early, Then Arrive Earlier: This cannot be overstated. For a front-row spot anywhere south of 23rd Street, 9:00 AM is a good baseline. For a coveted spot in the West Village or near Christopher Street, you need to be thinking 7:30 AM or 8:00 AM. The most dedicated spectators arrive with breakfast and a blanket.
Pack Your Urban Survival Kit: You are essentially setting up a base camp for the day. Your kit should include: a large, reusable water bottle (staying hydrated is non-negotiable), high-SPF sunscreen, a portable phone charger, and plenty of snacks. Relying on local bodegas is a rookie mistake; they will be overwhelmed and may run out of supplies.
Master Public Transit: Driving is not an option. Street closures are extensive and begin in the early morning. The subway is your only logical choice. Use lines that run along 6th Avenue (B, D, F, M) or Lexington Avenue (4, 5, 6) and walk west. Avoid stations directly on the route, as they will be dangerously crowded.
Choose Your Vibe, Not Just a Spot: Before you pick a location, decide what kind of experience you want. Do you crave the high-energy launch? The massive midtown spectacle? The deeply emotional historic heart? Or the relaxed, celebratory finish? Matching the location to your desired vibe is the secret to a perfect day.
Stay Connected (But Have a Backup): With millions of people in one area, cell service can be notoriously unreliable. While you should keep your phone charged, don’t depend on it for communication. Use a buddy system, and if you’re with a group, establish a clear, physical meeting point and time in case you get separated.
Prioritize Accessibility: Organizers are continually working to make the event more accessible. Check the official NYC Pride website in the weeks leading up to the parade for detailed information on designated viewing areas for people with disabilities. These locations offer better sightlines and a less congested environment.
Embrace the Virtual Experience: If you can't make it in person or prefer to avoid massive crowds, don't worry. The NYC Pride Parade is live-streamed across multiple platforms. You can catch all the action from the comfort of your home, a powerful option for those who want to participate from afar.
Pro-Tip: The blocks just after the parade turns off 5th Avenue onto 8th Street can be a strategic viewing sweet spot. The crowd thins slightly as it navigates the corner, offering a brief window for better photos and a bit more breathing room before it swells again towards Christopher Street.
Beyond the Sidelines: Documenting Your Day
The spirit of Pride is participation. Even as a spectator, you are a vital part of the event. Wear your brightest colors, create a supportive sign, and cheer loudly for the groups that resonate with you. Your energy is what fuels the marchers on their long walk.
For many, capturing the day is part of the experience. The vibrant colors, powerful emotions, and incredible stories of the pride parade New York make it a content creator's dream. If you're looking to capture and share the experience like a pro, preparation is everything. To elevate your storytelling, our The Travel Creator's Toolkit provides the essential checklists and guides to turn your passion into compelling content that does justice to this incredible event.

Planning the Perfect Pride Weekend in NYC
The parade is the magnificent centerpiece of a city-wide, month-long celebration. Pride Month in New York is packed with parties, cultural events, and community gatherings. Don’t limit your experience to just a few hours on a Sunday afternoon. Make it the anchor of an unforgettable weekend or a longer trip to the city.
Navigating the parade is just one piece of an unforgettable trip. To build a complete itinerary—from finding the best LGBTQ+-friendly hotels in Chelsea or Hell's Kitchen to exploring other iconic city sights that have shaped queer history—our comprehensive Travel Guide is the ultimate resource for planning your entire New York adventure. It helps you weave the parade into a broader, richer travel experience.
Your Mission: Experience Pride to the Fullest
You are now armed with the essential knowledge to navigate the pride parade New York not just as a spectator, but as an informed participant in a powerful celebration. You know the history that fuels the march, the unique vibe of each section of the route, and the practical strategies to make your day a resounding success. The parade is more than a route on a map; it's a journey through history, proof of resilience, and an explosion of pure joy.
So pick your spot, pack your survival kit, and get ready to experience the love, history, and unbreakable community of NYC Pride. Go with an open heart, a loud voice, and a solid plan.
Meta Data Suggestions:
SEO Meta Title: NYC Pride Parade Route Guide: Best Viewing Spots & Tips 2026
URL Slug: /nyc-pride-parade-route-essentials
SEO Meta Description: Your ultimate guide to the 2026 NYC Pride Parade. Discover the best viewing spots, route map, start times, and essential tips to navigate the crowds.
Don't Miss Out! Subscribe for Exclusive Content
SubscribeComments 0
No comments yet
Be the first to share your experience!
Dont Miss Out! Subscribe for Exclusive Content

San Francisco Cherry Blossoms: A Local's Guide to the Blooms

Halloween SF: Haunts Without Horrors

SF Festivals: 7 Must-See Lineups

Christmas SF: Lights & Wharf Wonders

SF Pride: 6 Route & Party Hacks

Chinese New Year SF: Parade Essentials
San Francisco Cherry Blossoms: A Local's Guide to the Blooms
TrekGuider @trekguider
The cherry blossom experience in San Francisco is not a grand, sweeping spectacle. It’s something more intimate, more soulful. It’s about turning a corner in a vibrant, historic neighborhood and finding yourself under a delicate canopy of blossoms, the scent of ramen broth mixing with the faint fragrance of spring. It’s a celebration rooted not in diplomacy, but in the fierce resilience of a community.
This is a concentrated jewel box of culture. But that intimacy comes with its own challenges. The Northern California Cherry Blossom Festival, the largest on the West Coast, packs over 220,000 people into the tight-knit blocks of Japantown. A poorly planned visit can quickly devolve into a frustrating battle with crowds, leaving you with more stress than serenity.
This isn’t just another guide. This is your strategic playbook for experiencing San Francisco’s cherry blossoms like a local. We’ll deconstruct the bloom’s tricky timing, reveal the best viewing spots both in and out of the festival’s epicenter, and provide the transportation hacks you need to navigate the city like a pro. By the end of this, you’ll have a plan to witness one of America’s most meaningful cultural celebrations in all its glory.

A Story of Resilience: The Soul of the Festival
To truly appreciate the blossoms here, you have to understand their story. San Francisco’s are proof of a community’s will to survive. Japantown, or Nihonmachi, is one of only three remaining in the United States, a neighborhood that has weathered unimaginable challenges.
After the forced internment of Japanese Americans during WWII, the community returned to find their homes and businesses lost. In the 1960s, city redevelopment projects displaced thousands more. The Northern California Cherry Blossom Festival was born from this turmoil. First held in 1968, it was a defiant celebration of culture and a powerful statement that the community was here to stay.
So when you stand in the Peace Plaza, you’re standing on historic ground. That iconic, five-tiered structure is the Peace Pagoda, a gift from San Francisco’s sister city of Osaka, designed by the renowned Japanese architect Yoshiro Taniguchi. It’s not just a landmark; it’s the spiritual anchor of the entire festival. Every blossom that blooms here feels more meaningful because of the history it represents.
Decoding the Bloom: Festival Dates vs. Nature’s Whim
The first mistake visitors make is confusing the festival schedule with the flowers’ schedule. They are two separate things.
For your planning purposes, here are the official festival dates, which traditionally span two weekends in April:
2026 Northern California Cherry Blossom Festival: April 12-13 & April 19-20, 2026
But here’s the critical distinction every visitor must understand: the festival dates are not the bloom dates. The festival is a fixed celebration of culture, while the blossoms themselves are a fleeting, unpredictable miracle of nature. Your goal is to find the magic window where the two overlap.

The Nuance of "Peak Bloom" in the Bay Area
In San Francisco, "peak bloom" is a rolling event, not a single moment. It depends on the tree variety and the city’s famously fickle microclimates.
The First Wave (Yoshino): The delicate, pale pink Yoshino cherry trees are typically the first to bloom, usually from late March into early April. These are the classic, ethereal blossoms you see in the Japanese Tea Garden.
The Second Wave (Kwanzan): Following the Yoshino are the Kwanzan cherry trees, which produce much fuller, fluffier, and deeper pink blossoms. These are hardier and their bloom often coincides perfectly with the festival’s second weekend and the Grand Parade, making for a spectacular show in Japantown.
Predicting the bloom is an art, not a science. A warm, dry winter can sometimes delay the bloom, as the trees need a certain number of "chill hours" to properly set their buds. Your best bet is to monitor social media. The official festival website and the Instagram accounts for the Japanese Tea Garden and SF Botanical Garden are invaluable resources for real-time updates.
Your Strategic Viewing Guide
You can experience the blossoms in three distinct ways: embracing the festival’s vibrant chaos, seeking tranquil beauty in a world-class garden, or discovering a hidden gem beloved by locals.
1. The Epicenter: Japantown & The Peace Plaza
During the festival weekends, the blocks around the Peace Plaza transform into a bustling hub of Japanese culture. You’ll find everything from traditional music and martial arts demonstrations to mouth-watering street food.
In Japantown, timing isn’t just important—it’s everything. It’s the difference between a serene morning stroll among the blossoms and being swept up in a shoulder-to-shoulder river of festival-goers.
Pro-Tip for Foodies: The food booths, known as yatai, are a massive draw. Don't miss the Takoyaki (octopus balls) from Kagura or the sweet, red-bean-filled Imagawayaki. To beat the lines, arrive right at 11 AM when the festival opens and eat first. The lines can be an hour long by 1 PM.
Pro-Tip for Photographers: The best shot of the Peace Pagoda framed by blossoms is from the Webster Street Bridge overlooking the plaza. For street scenes, a weekday morning before the festival begins offers beautiful, soft light and empty streets.
Go Deeper: For those who want to go even deeper, this is the perfect opportunity to connect with a local expert. The history of Japantown is complex and deeply moving, and a guided walk can reveal stories you’d never find on your own.
2. The Oasis: Golden Gate Park
If you need a break from the festival energy, a short bus ride will take you to the serene landscapes of Golden Gate Park, home to two premier blossom-viewing locations.
The Japanese Tea Garden: This is the oldest public Japanese garden in the United States, and it is an absolute masterpiece. The cherry trees here are artfully placed around the Drum Bridge, pagodas, and koi ponds. It’s a photographer’s dream. There is an entrance fee, but it’s worth every penny. To avoid crowds, purchase your ticket online in advance and go on a weekday morning.
The San Francisco Botanical Garden: Just a short walk from the Tea Garden, the SFBG offers a more sprawling, less crowded experience. Head to the Temperate Asia collection to find their grove of cherry trees. It’s a perfect spot for a quiet picnic under the petals.
3. The Secret Spot: The Palace of Fine Arts
For a truly local experience, head to the Marina district. Tucked away behind the iconic rotunda of the Palace of Fine Arts is a small, enchanting grove of cherry trees. The blossoms here often peak a bit later, sometimes into early May. The sight of the delicate pink flowers against the Greco-Roman architecture is breathtaking and feels like a hidden secret. It’s the perfect place to escape the crowds and enjoy a quiet moment.
Logistics Masterclass: Getting Around
Rule number one: Do not drive to Japantown during the festival. You will spend your entire day circling for non-existent parking. Here’s how to do it right:
Public Transit (Muni): This is your best friend. The 38-Geary and 38R-Geary Rapid buses run constantly along a major corridor and stop one block from the festival. The 2-Clement and 22-Fillmore are also excellent options. Use a Clipper card or the MuniMobile app to make things seamless.
Parking (If You Absolutely Must): The only sane option is the Japan Center Main Garage. The entrance is on Geary Blvd. On festival weekends, you must arrive before 10 AM, or you will find it full.
Ride-Sharing: A good option, but set your drop-off and pick-up points at least three blocks away from the festival’s core (e.g., at Geary & Laguna or Post & Franklin) to avoid getting stuck in gridlock.
Don't-Miss Festival Highlights
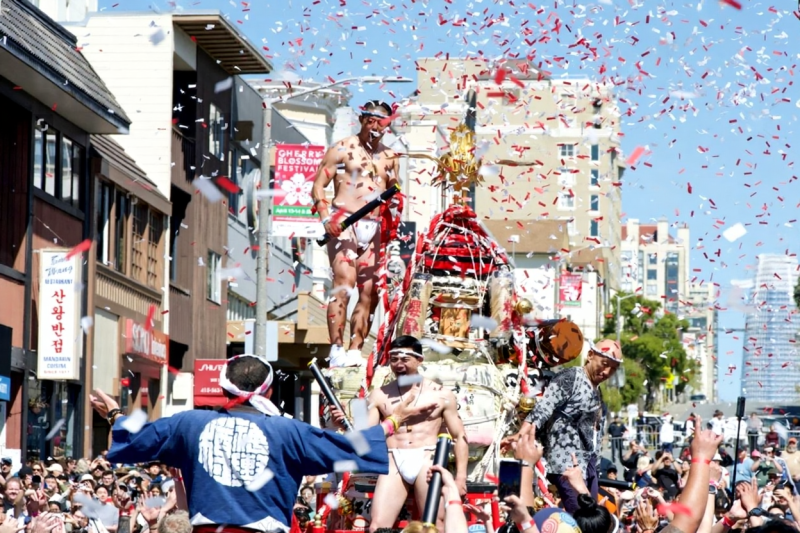
The festival’s crown jewel is the Grand Parade, which closes out the final Sunday of the event. This is a spectacular procession that starts near City Hall and travels up Post Street into the heart of Japantown. You’ll see everything from taiko drummers and dancers to the newly crowned Cherry Blossom Queen and her court—a leadership program for young Japanese American women.
The parade’s incredible finale is the Taru Mikoshi. This is a massive, ornate portable shrine weighing over 1,000 pounds, carried on the shoulders of over 100 chanting participants. It’s a powerful, energetic display of community spirit and a must-see spectacle.
Your Pre-Trip Checklist
A little preparation goes a long way in San Francisco.
Dress in Layers: This is the golden rule of SF. A chilly, foggy morning can become a sunny, breezy afternoon in an instant. A fleece or mid-layer under a windbreaker is the standard local uniform for a reason.
Comfortable Shoes: You will be walking. A lot. The hills are no joke. This is not the time to break in new shoes.
Portable Power Bank: Between navigating, taking photos, and using transit apps, your phone battery won’t stand a chance. A power bank is essential.
Cash: While most vendors take cards, the lines for ATMs are long and the smaller food stalls are often cash-only.
The Cherry Blossom Festival is one of the city's signature spring events. For a complete look at what's happening year-round, our complete guide to San Francisco Holidays: Bay Area Buzz is the essential next read for planning a trip around the city's top seasonal events.
An Unforgettable Bloom
San Francisco’s cherry blossom celebration offers something truly special: a world-class cultural event with the heart of a neighborhood block party. It’s a chance to not only witness the stunning beauty of spring but to feel the powerful spirit of a community that has refused to be erased.
By timing your visit strategically, knowing where to find your own quiet corner, and embracing the city’s public transit, you can bypass the stress and create a truly unforgettable memory. You’re no longer just a tourist; you’re an insider, ready to experience this beautiful and meaningful spectacle to its fullest.
Capture the Perfect Bloom
You’re going to take hundreds of photos of the cherry blossoms—don’t let them get lost on your camera roll. Our free collection of Travel Lightroom Presets is designed to make your photos pop with just one click. Transform your shots of the delicate pink petals and vibrant festival scenes into professional-quality images you’ll be proud to share.
Frequently Asked Questions (FAQ)
When is the absolute best time to see the cherry blossoms in San Francisco? While the festival is in mid-to-late April, the "best" time depends on what you want to see. For the most ethereal, classic blossoms in a garden setting, aim for the first week of April at the Japanese Tea Garden. For the full, vibrant festival experience with the fluffy Kwanzan blossoms, the second weekend of the festival is your best bet.
Is the Northern California Cherry Blossom Festival free? Yes, attending the festival in Japantown, including all the stage performances and watching the parade, is completely free. You will need to pay for food, drinks, and any items from craft vendors. Note that visiting the Japanese Tea Garden in Golden Gate Park requires a separate admission fee.
How much time should I budget for the festival? If you plan to eat, watch a few performances, and browse the stalls, give yourself at least 3-4 hours in Japantown. If you want to see the parade, plan for that to take an additional 2 hours of your day.
Is the festival kid-friendly? Absolutely. Kids love the energy, the food, and the parade. There are also often hands-on cultural activities like origami folding. However, the crowds can be overwhelming for small children, so a weekday visit or arriving right at the opening on a weekend is recommended.
Can I see cherry blossoms in San Francisco outside of Japantown and Golden Gate Park? Yes! Besides our "secret spot" at the Palace of Fine Arts, you can often find beautiful blooming trees scattered in residential neighborhoods like the Richmond and Sunset districts. Keep your eyes peeled in late March and April—you’ll be surprised where they pop up.
Don't Miss Out! Subscribe for Exclusive Content
SubscribeComments 0
No comments yet
Be the first to share your experience!
Dont Miss Out! Subscribe for Exclusive Content
Halloween SF: Haunts Without Horrors
SF Festivals: 7 Must-See Lineups
Christmas SF: Lights & Wharf Wonders
SF Pride: 6 Route & Party Hacks
Chinese New Year SF: Parade Essentials

San Francisco Holidays: Bay Area Buzz
The Ultimate Guide to Travel Safety: A 2026 Playbook
TrekGuider @trekguider
Travel holds a mirror up to the world and shows us who we can be within it. It’s a force that pushes our boundaries, reshapes our perspectives, and fills the pages of our lives with stories we’ll tell for decades. Yet, for all the joy it promises, a shadow of uncertainty—the thought of what could go wrong—can temper the most thrilling plans. In a world defined by its unpredictability, feeling prepared is the currency that buys a truly carefree adventure. That’s why we’ve created this ultimate guide to travel safety. This isn’t a list of warnings to scare you; it's your definitive playbook for navigating the globe with unwavering confidence. We’ve synthesized advice from the world’s leading health organizations, security experts, and seasoned travelers to bring you the most essential travel safety tips for every stage of your journey.

Think of this as your central command. We will cover the full spectrum of travel safety—health and medical preparedness, personal and digital security, accommodation and transportation smarts, and even the specific risks tied to your favorite activities. For each topic, we provide a powerful, actionable overview right here. When you’re ready to master a specific area, we’ll point you directly to our deep-dive guides. Let’s get you prepared, so you can focus on what travel is truly about: the experience.
Health First: Your Foundation for a Safe Trip
Nothing can sideline a trip faster than an unexpected health issue. From a common stomach bug to a more serious injury, being medically unprepared can turn a dream vacation into a logistical and physical nightmare. The good news is that with smart preparation, you can preemptively solve the vast majority of health-related travel risks. It all boils down to two pillars: understanding the potential challenges of your destination and equipping yourself with the right tools to handle them.

This means more than just throwing a few bandages in your suitcase. It’s about proactive prevention—knowing what to eat, what to drink, and how to protect yourself from the elements. And it’s about reactive readiness—having a carefully stocked first-aid kit and a clear grasp of your health insurance. In this section, we'll lay the groundwork for a healthy journey, so you can spend less time worrying and more time exploring.
Food & Water Safety: The Golden Rules of Eating Well Abroad
One of travel’s greatest thrills is diving into the local cuisine. But new flavors can mean new microbes your body isn’t accustomed to. It’s no surprise that traveler’s diarrhea is, by a massive margin, the most common travel-related illness, affecting up to 80% of international travelers depending on the destination. As the Centers for Disease Control and Prevention (CDC) confirms, it's most often caused by consuming food or water contaminated with bacteria. Beyond that, more severe illnesses like Hepatitis A and Typhoid Fever remain significant risks in many regions.
The key to staying healthy is a simple, unforgettable mantra: “Boil it, cook it, peel it, or forget it.” This single rule can guide nearly all your culinary decisions.
Boil It: Applies to all water and liquids. The safest bet is always commercially bottled water with an intact seal. If that's unavailable, bringing water to a rolling boil for at least one full minute is the most effective purification method. Hot beverages like coffee and tea, made with boiled water, are also generally safe.
Cook It: Heat is your best friend. Only eat food that is cooked thoroughly and served steaming hot. This is especially crucial for street food; if you can watch it being cooked fresh to order, it’s a much safer choice than something that’s been sitting in a tray.
Peel It: Contaminants often reside on the skin of raw fruits and vegetables. If you can peel it yourself (with clean hands), it’s safe. This makes bananas, mangoes, oranges, and avocados your go-to snacks.
Forget It: This is the most critical part of the rule. If it doesn’t meet the criteria above, skip it. This means no tap water, no ice cubes, no salads or raw leafy greens, and no unpeeled fruits like grapes or berries.

When choosing where to eat, trust the locals. A busy stall with a long line of residents is a glowing review of its safety and quality. High turnover means fresh ingredients. Conversely, avoid stalls that look dirty, have visible pests, or where the vendor uses the same unwashed hands or utensils for both raw and cooked foods.
For a complete strategy on choosing safe food and purifying water, see our guide on Food & Water Safety Abroad: How to Avoid Getting Sick.
The Essential Travel First-Aid Kit
A well-stocked first-aid kit isn't just an accessory; it's a non-negotiable piece of gear. While you can buy pre-made versions, building your own allows you to tailor it perfectly to your trip. A truly comprehensive kit moves beyond basic bandages to address the most common travel ailments: minor wounds, pain, digestive issues, and skin irritations.
Wound & Burn Care: The foundation of your kit.
Antiseptic wipes to clean wounds and hands.
Antibiotic ointment to prevent infection.
Assorted adhesive bandages, larger gauze pads, and medical tape.
Blister treatment pads (like moleskin) are a must for any walking-heavy trip.
Aloe vera gel for minor sunburns.
Pain, Fever & Sprains:
Pain relievers like Ibuprofen (Advil/Motrin) and Acetaminophen (Tylenol).
An elastic wrap bandage for joint support.
Digestive Issues: Since traveler’s diarrhea is the #1 travel illness, this section is vital.
Anti-diarrhea medication like Loperamide. Imodium is a top pharmacist-recommended brand.
Antacids for indigestion.
Oral rehydration salts to replenish critical fluids and electrolytes.
Allergies, Bites & Skin:
Antihistamine for allergic reactions.
Hydrocortisone cream for insect bites and rashes.
Insect repellent with DEET or Picaridin is essential for destinations with mosquito-borne diseases.

Finally, add the tools: fine-point tweezers, small scissors, and a digital thermometer. Most importantly, pack a sufficient supply of any personal prescription medications in their original containers, plus extra for delays. Before you leave, make sure it's all organized and you've double-checked every item against our International Travel Checklist.
Get the full, pharmacist-approved list in The Ultimate Travel First Aid Kit Checklist (2026).
Personal Security: Navigating the World with Confidence
Beyond health, personal security is often the biggest source of travel anxiety. The thought of scams, theft, or cultural misunderstandings can be intimidating, especially for first-time or solo travelers. But personal safety isn’t about paranoia; it’s about presence. It’s a mindset built on situational awareness, confident decision-making, and an informed understanding of your environment.

By knowing the common challenges and arming yourself with simple, proven strategies, you shift from being a potential target to being a savvy, hard-to-fool traveler. This section will give you those tools, covering everything from outsmarting common tourist scams to specific, empowering advice for solo and female travelers.
How to Avoid the Top 10 Travel Scams
Travel scams persist for a simple reason: they exploit human nature. Scammers are masters of distraction, confusion, and a traveler's own politeness or desire for a deal. Your best defense is to know their script before the show starts. From the "broken taxi meter" to the "friendship bracelet" gambit, recognizing the setup is the key to sidestepping the con entirely. In most cases, a firm, polite "No, thank you" while confidently walking away is your most effective tool.
Learn to spot and disengage from every common con in our detailed breakdown: How to Avoid Travel Scams: A Global Guide.
Essential Tips for Solo Travelers
The currency of safe solo travel is confidence. It’s a mindset, a posture, and a projection that transforms you from a potential target into a savvy, self-assured traveler. This journey begins at home, by researching your destination’s culture and learning a few phrases in the local language. When you arrive, walk with purpose. If you need to check a map, step into a café to orient yourself discreetly. Above all, trust your intuition; that gut feeling is a powerful, primitive security system. If a person or situation feels wrong, it is. Don't hesitate to remove yourself immediately.
For gender-neutral advice on navigation, confidence-building, and socializing safely, read 11 Essential Solo Travel Safety Tips You Need to Know.
A Woman's Guide to Safe Travel
While many safety principles are universal, women often navigate an additional layer of gender-specific risks and cultural nuances. Safe and empowered travel as a woman is rooted in preparation. A critical aspect is respecting and understanding local dress codes. In many cultures, dressing modestly by covering shoulders and knees isn't just a sign of respect—it’s a powerful tool that helps you blend in and deter unwanted attention. It’s equally vital to research norms around social interaction. Beyond your own research, one of the best resources is other women who have been there before. On the TrekGuider platform, you can explore our Catalog of Authors to discover and follow trusted female travel creators, accessing their expert guides and articles all in one place.

For a deeper dive into empowerment, cultural respect, and navigating harassment, see A Woman's Guide to Safe Travel: 10 Critical Tips.
Safe Spaces: Accommodation & Transportation Security
Your safety isn't just about how you navigate crowded streets; it's also about ensuring your private spaces—your hotel room, your train cabin, your taxi—are secure sanctuaries. Every transition point on a journey, from checking into a hotel to hailing a ride, is a moment where a quick, deliberate safety check can provide immense peace of mind.

A few simple, repeatable habits can drastically reduce your vulnerability. These aren't complicated procedures; they are the smart, swift routines that become second nature to seasoned travelers.
Your Hotel Room Security Checklist
The moment you cross the threshold of a new hotel room, perform this 60-second security sweep. First, prop the door open with your luggage and do a quick visual clear of the room—behind curtains, under the bed, in the closet, and shower. Once clear, close the door and test every single lock: the deadbolt, the security chain, the latch. They should all feel solid and function smoothly.
Next, find the emergency evacuation map on the back of the door. Don't just glance at it. Identify the two nearest exits and physically count the doors between your room and the closest one. This knowledge is invaluable if you ever need to navigate a dark or smoke-filled hallway. Check that the room phone works, and ensure all windows and connecting doors lock securely. For your valuables, use the room safe. If one isn't available, avoid obvious hiding spots. Taping an envelope with cash to the underside of a heavy desk or the back of a drawer is far more secure than leaving it in your suitcase.
Find a complete, step-by-step process in our guide: 7 Hotel Safety & Security Tips for Peace of Mind.
Transportation Safety: Planes, Trains, and Automobiles
Getting from A to B safely is about protecting both yourself and your belongings while in transit. Each mode of transport has its own playbook.
In the Airport: The TSA recommends using TSA-recognized locks on checked baggage, which allows security to inspect a bag without destroying the lock. The golden rule: never pack valuables in your checked luggage. Electronics, medications, documents, and jewelry belong in your carry-on. Make your bag instantly identifiable with a colorful strap to prevent mix-ups at the carousel.
On Trains: On an overnight journey, secure your main bag to a fixed object like a luggage rack with a small cable lock. Keep your absolute essentials—passport, phone, wallet—on your person in a money belt or in a small bag you can use as a pillow. In a private or shared cabin, always lock the door from the inside at night.
In Taxis & Ride-Shares: Before getting in, verify. For a ride-share, match the license plate, car model, and driver's photo with your app. Ask the driver, “Who are you here for?” so they confirm your name. Don't volunteer it. Once moving, use the app’s “Share Trip” feature to send your live location to a trusted contact.

For a mode-by-mode breakdown of best practices, read our Transportation Safety: Staying Safe on Planes & Trains guide.
Digital Defenses: Protecting Your Data Abroad
In our hyper-connected world, travel safety extends far beyond the physical. Your digital identity is one of your most valuable assets, and it's never more vulnerable than when you're on the road, connecting to unfamiliar networks. Public WiFi, shared computers, and even public USB charging ports can be gateways for data thieves.
Hackers specifically target travelers, but you don’t need to be a cybersecurity expert to defend yourself. A few fundamental habits and one essential tool can build a powerful fortress around your digital life.
The Dangers of Public WiFi and How to Stay Safe
Public WiFi is a minefield. These networks are the primary hunting ground for "Man-in-the-Middle" attacks. A hacker simply sets up a fake WiFi network with a believable name, like "CoffeeShop Guest WiFi." The moment you connect, they become an invisible eavesdropper, capturing every password, credit card number, and private message you send.
Your single most effective defense is a Virtual Private Network (VPN). A VPN is a simple app that encrypts your internet connection, creating a secure, private tunnel that makes your data completely unreadable to anyone else on the network. Before you travel, subscribe to a reputable VPN service and install the app on your phone and laptop. Then, every time you use public WiFi, just open the app and tap “Connect.” It’s that simple. Also, practice good device hygiene: lock your devices with strong passphrases and avoid public USB charging ports, which can be used for "juice jacking" to install malware. Always use your own power adapter or a portable power bank.
Get our simple, step-by-step instructions in Is Public WiFi Safe? How to Protect Your Data Abroad.
Adventure-Ready: Activity-Specific Safety
Many of the best trips are built around specific adventures—trekking through mountains or relaxing on a perfect beach. While these experiences create lifelong memories, they carry unique risks that demand specific preparation. General safety knowledge is a great start, but understanding the particular challenges of your environment is what truly prepares you for a safe and successful adventure.

From packing the right gear for the wilderness to knowing how to spot a dangerous rip current, this specialized knowledge can make all the difference.
Hiking Safety: Be Prepared on the Trail
Heading into the great outdoors requires a commitment to self-sufficiency. The National Park Service promotes the "10 Essentials," a system of critical gear every hiker must carry. This includes Navigation (map, compass), Illumination (headlamp), Sun Protection, a First-Aid Kit, Tools, Fire starters, extra Insulation (clothing), extra Nutrition, extra Hydration, and an Emergency Shelter. If you're looking for expert-vetted packing lists or detailed trail guides for your next adventure, the TrekGuider Marketplace is an invaluable resource where seasoned hikers and outdoor creators share their knowledge. Beyond gear, wildlife safety is key. Never run from a bear. Instead, make noise and make yourself look large. For mountain lions, maintain eye contact and back away slowly.

For a full gear list and wildlife protocols, check out How to Stay Safe While Hiking: A Hiker's Safety Guide.
Beach Safety: Know Before You Go
A day at the beach can feel idyllic, but the ocean demands constant respect. The most critical skill is spotting a rip current. According to NOAA, look for a channel of choppy water, a break in the wave pattern, or a line of foam moving away from shore. If you're caught in one, don't fight it. Swim parallel to the shore until you're free of the current's pull. Also, always heed the beach warning flag system. A yellow flag signifies moderate surf/currents, while a red flag means high hazard, and swimming is discouraged. The absence of flags doesn't guarantee safety, so always be vigilant.

For more on rip currents, sun safety, and marine life, read our 9 Beach Safety Tips That Could Save Your Life.
Financial Protection: The Safety Net of Travel Insurance
Even the best-laid plans can be upended. A canceled flight, lost luggage, or a sudden medical emergency can be financially devastating in a foreign country. Travel insurance is your ultimate financial safety net. However, policies are filled with fine print that can confuse even savvy travelers.
Understanding what you’re buying is as important as buying it. Knowing the key terms and common red flags ensures your policy will be there for you when it matters most. Before finalizing any travel plans, make sure you're covered with both a good insurance policy and a solid plan using our International Travel Checklist.
Demystifying Travel Insurance
Choosing the right policy means looking for common red flags. The pre-existing medical conditions exclusion is a big one; many policies won't cover issues from a condition you had before purchase. Another is the exclusion for high-risk activities; if you plan to ski or scuba dive, you likely need an add-on.
It’s also crucial to understand key terms. The deductible is what you pay out-of-pocket before the insurer pays. Primary coverage is better than secondary coverage because it pays first, resulting in faster claims. For ultimate flexibility, a “Cancel for Any Reason” (CFAR) upgrade lets you cancel for any reason not covered in the base policy and still recoup 50-80% of your non-refundable costs. A small investment in the right policy—and our all-encompassing Travel Guide—can save you a fortune.
Learn to decode policy jargon and spot bad deals with our guide on 7 Travel Insurance Red Flags to Spot Before You Buy.
Travel with Confidence
The world is a magnificent, welcoming place, and the goal of travel is to experience it with an open heart. Being prepared isn't about building walls of fear; it's about building a foundation of knowledge that gives you the freedom to embrace the unexpected with confidence. By internalizing these travel safety tips, you invest in your own peace of mind, ensuring your focus remains on the beauty, connection, and growth that every journey offers. From packing a smart first-aid kit to recognizing a scam, each act of preparation contributes to a safer, more rewarding adventure. So go—plan the trip, book the ticket, and step out into the world. You’ve got this.

Are you a travel expert with hard-won knowledge to share? If this guide resonated with you, and you have your own expertise in a specific destination or travel style, consider becoming a creator on TrekGuider. Our Publishing Platform and Monetization Tools empower travel bloggers and experts like you to build authority, share your wisdom, and sell your own digital products to a community that values authentic, on-the-ground knowledge.
Don't Miss Out! Subscribe for Exclusive Content
SubscribeComments 0
No comments yet
Be the first to share your experience!
Dont Miss Out! Subscribe for Exclusive Content
Ultimate USA Holidays Guide: Top Picks
FTC Affiliate Disclosure Essentials: Stay Compliant as a Travel Creator

Essential Affiliate Tools: From Tracking to Full Optimization
Booking.com Affiliate Program Review: Pros, Cons, and Earnings Potential
Decoding Affiliate Commission Rates: Benchmarks for Travel Creators
