Solo Travel in the USA: 10 Incredible Itinerary Ideas
TrekGuider @trekguider
The sheer scale of the United States is both its greatest allure and its most intimidating feature. You see the photos and feel the pull—the sun-drenched coast of California, the majestic canyons of Zion, the vibrant rhythm of New Orleans. The dream of a great American adventure is powerful, but it’s often followed by a wave of logistical anxiety. How do you even begin to plan a trip across a country with such staggering diversity? You worry about the complexities of a solo road trip, the safety of hiking alone in vast national parks, and the overwhelming number of choices. The dream feels big, but the planning feels bigger, turning wanderlust into a source of stress.

This guide is your solution—the antidote to overwhelm. It’s a strategic blueprint designed to transform your dream of solo female travel USA into a confident, actionable plan. We’re moving beyond general advice to give you ten distinct, road-tested itinerary ideas, each packed with US-specific logistical tips to empower your journey. This isn't just about seeing the USA; it's about discovering its landscapes, its cultures, and your own boundless capability along the way. While this guide dives deep into American itineraries, your journey to becoming a confident globetrotter starts with the essentials we cover in our comprehensive pillar article, The Ultimate Guide to Solo Female Travel (15 Essential Tips).
The Call of the Open Road: Mastering USA Solo Trip Logistics
Before you pick a destination, it’s crucial to understand the unique challenges and opportunities of a US-based solo trip. Unlike Europe with its dense train networks, much of America is built around the automobile. Mastering a few key logistics is the first step to a smooth, safe, and stress-free adventure.
Navigating the Car Rental Maze
A solo road trip is an iconic journey of freedom, but it comes with specific hurdles.
One-Way Fees: Renting a car in one city and dropping it off in another almost always incurs a "drop charge." This fee can add hundreds of dollars to your cost. The most effective strategy is to plan your road trips as loops that begin and end in the same city. If a one-way trip is unavoidable, compare prices across multiple agencies and book as far in advance as possible.
Insurance Coverage: Car rental insurance is a common point of confusion. Before your trip, call both your personal auto insurance provider and your credit card company to get a clear, written explanation of your existing coverage. Many credit cards offer secondary rental car insurance, but understanding its limitations is key to avoiding the expensive Collision Damage Waiver (CDW) offered at the counter.
Finding Your Safe Haven: A Solo Traveler's Guide to Lodging
For a solo road tripper, finding lodging that is not only affordable but also safe matters most, especially when arriving in an unfamiliar town after dark.
Vet the Location Digitally: Before booking, use Google Maps and its Street View feature to visually inspect the hotel's neighborhood. Look for well-lit streets, a well-maintained area, and proximity to main roads. Be wary of motels with exterior-facing room doors in poorly lit areas.
Leverage Solo Traveler Reviews: On booking platforms, use the review filters to see feedback specifically from "solo travelers." Their comments often directly address feelings of safety and the suitability of the location for a person traveling alone.
Prioritize Interior Corridors: For roadside lodging, hotels with rooms that open onto an interior hallway are generally more secure than motels where every room door opens directly to the parking lot.
Book Your Next Stop in Advance: One of the biggest safety risks is arriving in a new town late at night with no reservation. Always book at least the next night's accommodation before you start your day's drive to avoid a stressful search in the dark.
Once you have your lodging strategy locked down, you can turn your attention from the nation’s highways to its wild heart: the National Parks. These breathtaking landscapes are central to many of the best solo female travel USA itineraries, but they demand a unique approach to safety.

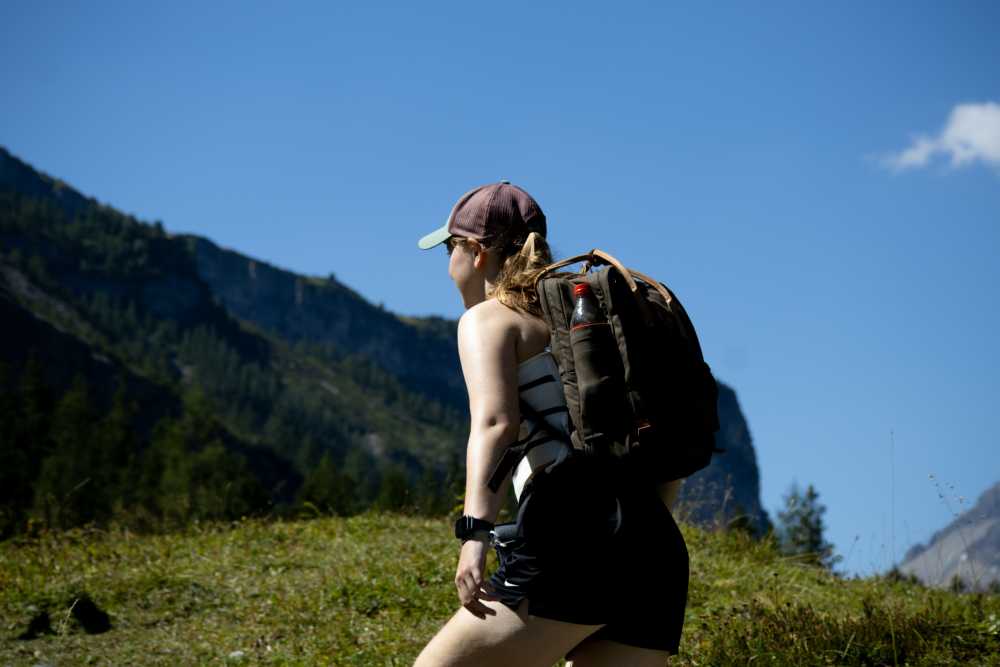
Wild and Safe: Essential Protocols for National Park Adventures
Many of the best itineraries for solo female travel USA involve our stunning national parks. These wild spaces offer unparalleled solitude and beauty but require specific preparation distinct from urban travel.
Establish a Redundant Communication & Navigation Plan: Cell service in most national parks is unreliable at best and completely non-existent in most backcountry areas. Before you go, download offline maps of the entire region onto your phone using an app like Google Maps or AllTrails. As a critical backup, always carry a physical, waterproof map of the park and a compass, and know how to use them. For any remote travel, a satellite messaging device (like a Garmin inReach) is an essential piece of gear, allowing you to send "I'm okay" messages or trigger an SOS alert in a true emergency.
Inform a Ranger and a Friend of Your Itinerary: Leave a detailed copy of your itinerary with a trusted friend. Upon arriving at the park, make your first stop the visitor center. Speak with a ranger about your plans. They can provide invaluable, up-to-the-minute information on trail conditions, weather, and recent wildlife activity.
Adhere to Strict Wildlife Protocol: In bear country, carrying bear spray and knowing how to deploy it is non-negotiable. It's not a suggestion; it's essential safety equipment. Make consistent noise while hiking solo to avoid surprising an animal—talk aloud to yourself, sing, or attach a bear bell to your pack. Never store food or any scented items (including toiletries) in your tent; use designated bear-proof food lockers at campsites or a proper bear canister.
Your Ultimate Park Planning Tool
Ready to hit the trails with confidence? A solid plan is the key to a safe and unforgettable adventure in America's wild spaces. Our checklist covers everything from gear essentials to wildlife safety protocols, ensuring you're prepared for the trail ahead.
Download Your Free National Park Road Trip Checklist Here
10 Incredible Itineraries for Your Solo Female Travel USA Adventure
With the core logistics covered, it's time for the fun part: choosing your adventure. Each of these itineraries is designed with a solo traveler in mind, offering a perfect mix of exploration, safety, and unforgettable moments.

1. The Classic California Dream: Pacific Coast Highway
Best for: Scenery, Adventure, Photography
Duration: 5-7 Days
Route: San Francisco -> Carmel-by-the-Sea -> Big Sur -> Santa Barbara -> Los Angeles
This is the quintessential American road trip. Fly into San Francisco, rent a car (a convertible is worth the splurge!), and wind your way south on the dramatic coastal Highway 1. The drive itself is the destination, with countless turnoffs for breathtaking photos. As a solo traveler, you have the ultimate freedom to stop whenever a view strikes you. The route is well-traveled and has reliable cell service for most of its length, making it a very manageable and safe first solo road trip.
2. The New England Historical Tour
Best for: History, Culture, Walkability
Duration: 4-5 Days
Route: Boston with day trips to Salem and Concord/Lexington
For the history buff who’d rather trace Paul Revere’s ride on foot than battle Boston traffic, this car-free itinerary is a dream come true. Base yourself in Boston and spend a few days exploring the city's Freedom Trail and world-class museums. The city is compact and safe to navigate. Then, use the efficient and easy-to-use commuter rail for day trips. You can explore the infamous witch trials history in Salem or stand on the very ground where the American Revolution began in Concord and Lexington, all without the stress of driving or parking.
3. The Southern Culinary & Music Trail
Best for: Food, Music, Culture
Duration: 7 Days
Route: Nashville -> Memphis -> New Orleans
This road trip is a feast for the senses. Start in Nashville, the heart of country music, for live shows and legendary hot chicken. Drive to Memphis to experience the raw, soulful blues on Beale Street and pay homage to The King at Graceland. End your journey in New Orleans, where the air is thick with the sounds of jazz and the scent of Creole cuisine. These cities are incredibly welcoming, and sitting alone at a bar to listen to music is a common and celebrated activity.
4. The Southwest National Parks Loop
Best for: Nature, Hiking, Epic Landscapes
Duration: 7-10 Days
Route: Las Vegas -> Zion National Park -> Bryce Canyon National Park -> Grand Canyon -> Las Vegas
This is an epic loop for the avid hiker. Fly into Las Vegas (a cheap flight hub), rent a car, and prepare to be awestruck. The proximity of these three iconic parks makes for a visually stunning and logistically manageable itinerary. From the majestic canyon hikes in Zion to the otherworldly hoodoos of Bryce Canyon and the sheer scale of the Grand Canyon, this trip offers profound moments of solitude in nature.
Pro-Tip: National Park lodging books up almost a year in advance. If you can't get a room inside the park, look for accommodations in nearby gateway towns like Springdale (for Zion) or Tusayan (for the Grand Canyon).
5. The Rocky Mountain High
Best for: Outdoor Adventure, Wellness
Duration: 4-5 Days
Route: Base in Boulder, Colorado, with a day trip to Rocky Mountain National Park
Combine a vibrant, safe, and progressive city with majestic mountain scenery. Base yourself in Boulder, a city known for its wellness culture and pedestrian-friendly Pearl Street Mall. Spend your days hiking the iconic Flatirons that form the city's backdrop. Then, take an easy and scenic day trip into the heart of the Rockies to drive the Trail Ridge Road (in summer) and spot wildlife in Rocky Mountain National Park.
6. The Florida Keys Escape
Best for: Relaxation, Beaches, Scenery
Duration: 5 Days
Route: Miami -> Key Largo -> Islamorada -> Key West
For a laid-back trip focused on decompressing, this is paradise. Fly into Miami, rent that convertible, and drive the scenic Overseas Highway down to the continental USA's southernmost point. The journey is the experience, with endless opportunities to stop for snorkeling in Key Largo, fresh seafood in Islamorada, and a slice of key lime pie anywhere you can find it. The Keys have a unique, relaxed, and safe culture perfect for unwinding solo.
7. The Pacific Northwest Vibe
Best for: Urban Exploration, Nature, Food
Duration: 6 Days
Route: Portland, Oregon -> Seattle, Washington
Experience two of America's most unique cities in one car-free trip. Start in Portland, exploring its incredible food cart scene, wandering through Powell's City of Books, and soaking in its quirky, independent vibe. Then, take a scenic and comfortable 3-hour Amtrak train ride to Seattle. Explore the famous Pike Place Market, the original Starbucks, and the beautiful waterfront. Both cities are surrounded by nature, offering easy escapes for a hike.
8. The Charleston & Savannah Southern Charm
Best for: Architecture, Food, History
Duration: 5-6 Days
Route: Charleston, South Carolina -> Savannah, Georgia
Immerse yourself in the beauty and history of the Old South. Start in Charleston, exploring its acclaimed culinary scene, fine art galleries, and historic cobblestone streets. Then take a short 2-hour drive to Savannah to wander its famous, moss-draped squares and explore the historic riverfront. Both cities are incredibly walkable and renowned for their hospitality, making them a comfortable and enchanting solo trip.

Pro-Tip: The best way to get your bearings and learn the rich history of these cities is by joining a walking tour on your first day. It's also a low-pressure way to chat with other travelers.
9. The Arizona Wellness & Spirituality Retreat
Best for: Wellness, Scenery, Relaxation
Duration: 4 Days
Route: Base in Sedona, Arizona
This itinerary is less about doing and more about being. Sedona is world-renowned for its stunning red rock landscapes, which many believe are centers of spiritual energy called vortexes. This trip is focused on rejuvenation. Plan for spa treatments, gentle hikes among the red rocks, yoga classes, and exploring the town's vibrant new-age community. It's the perfect destination to reconnect with yourself in a serene and stunningly beautiful environment.
10. The Chicago Architectural Immersion
Best for: Urban Exploration, Arts, Architecture
Duration: 4 Days
Route: Base in Chicago, Illinois
For the city lover, this is a deep dive into one of America's greatest urban centers. This itinerary is built around Chicago's world-class architecture. An absolute must-do is the Chicago Architecture Center River Cruise. Spend your days visiting Frank Lloyd Wright's homes, exploring Millennium Park, and visiting world-class museums like the Art Institute of Chicago. In the evenings, you can catch a show in the Theater District or listen to live music at a legendary blues club.

Frequently Asked Questions for a USA Solo Trip
Even the most prepared traveler has questions. Here are answers to some of the most common concerns for a solo trip in the States.
What's the best way to stay safe on a solo US road trip?
Safety is about preparation and awareness. Always share your detailed itinerary with a friend. For your car, have a roadside emergency kit and know your rental company's assistance number. When driving, stick to main highways and well-lit gas stations, especially at night. In your lodging, always use the deadbolt and chain lock. Above all, trust your intuition—if a place or situation feels wrong, leave immediately.
Is it expensive to travel solo in the USA?
It can be, but it doesn't have to be. The biggest costs are lodging and transportation. Save money by planning loop road trips to avoid one-way car rental fees, staying in well-reviewed budget hotels or private rooms in hostels, and preparing your own meals. Visiting national parks is very affordable; an annual "America the Beautiful" pass is just $80 and grants access to all of them. To get an idea of real-world costs, check out the itineraries and guides published by other solo travelers on the TrekGuider platform for real-world budget examples.
How do I handle long, lonely driving days?
Embrace the solitude! This is your time. Create an epic playlist or download a queue of fascinating podcasts and audiobooks. Plan interesting stops along your route—a quirky roadside attraction, a scenic overlook, a local diner—to break up the drive. A long driving day is less about endurance and more about curating a perfect personal experience.
Are there good alternatives to driving for solo travel in the US?
Yes! While not as comprehensive as in Europe, the US has options. Amtrak train routes offer scenic journeys, especially on routes like the California Zephyr (Chicago to San Francisco) or the Pacific Surfliner. For travel between major cities on the East Coast (e.g., Boston, NYC, D.C.), the train is often faster and more convenient than flying. For long distances, combining flights with ride-shares in your destination city is also a great car-free strategy.
Your Journey Awaits
The United States offers a vast and rewarding landscape for the solo female traveler. It’s a country built for the open road, for discovery, and for the kind of freedom that can only be found when you are the sole captain of your journey. With these ten incredible itinerary ideas and the logistical know-how to tackle them, your dream of a great American adventure is no longer an intimidating fantasy—it’s a plan waiting to be executed. The confidence and self-reliance you build on a solo female travel USA trip will last a lifetime. The open road is calling.

For even more detailed planning on destinations around the globe, explore our collection of expert-written Travel Guide resources.
Meta Data Suggestions:
SEO Meta Title (58 characters): Solo Travel USA: 10 Epic Itinerary Ideas for 2026
URL Slug: solo-female-travel-usa-itinerary-ideas
SEO Meta Description (154 characters): Planning a solo female travel USA adventure? Discover 10 incredible, safe, and unforgettable itinerary ideas, from epic national park road trips to city escapes.
Don't Miss Out! Subscribe for Exclusive Content
Subscribe


Comments 0
No comments yet
Be the first to share your experience!
Dont Miss Out! Subscribe for Exclusive Content

San Francisco Cherry Blossoms: A Local's Guide to the Blooms

Halloween SF: Haunts Without Horrors

SF Festivals: 7 Must-See Lineups

Christmas SF: Lights & Wharf Wonders

SF Pride: 6 Route & Party Hacks

Chinese New Year SF: Parade Essentials
5 Passive Income Ideas for Your Travel Blog
TrekGuider @trekguider
Let’s be honest: you didn’t launch a travel blog to build yourself a different kind of cubicle. The dream was freedom—an income untethered from a desk, a business that could fund your adventures. Yet the reality for most creators is a hamster wheel of content creation. You’re stuck on a content treadmill, constantly creating, posting, and promoting just to stay afloat. Your blog feels less like a passport to freedom and more like a demanding job that has followed you around the world.
The problem is a strategic one. You’re trapped trading time directly for money through freelance articles or one-off sponsorships, which means if you stop working, the money stops flowing. This constant hustle is the fast track to burnout, leaving your dream of a truly independent lifestyle feeling impossibly out of reach.

It’s time to stop trading hours for dollars and start building assets. The solution is to fundamentally shift your strategy toward building a portfolio of passive income streams—systems and products that work for you 24/7, whether you’re on a plane, exploring a new city, or fast asleep. This guide provides five proven, actionable ideas for passive income blogging. This is your blueprint for creating automated revenue engines that will finally decouple your income from the hours you work. Think of this as a crucial chapter in your business education; for the complete curriculum on building a modern creator enterprise, be sure to read our ultimate guide to How to Make Money Online: A Creator's Guide for 2026.
The Fundamental Shift: Trading Hours for Assets
Before we dive into the tactics, it's critical to internalize the foundational mindset shift required for success. Passive income isn't "money for nothing." As defined in lifestyle business design, it is revenue that, after an initial investment of time and effort, continues to be generated with minimal ongoing labor.
It’s the difference between Active and Passive Income:
Active Income is when you get paid for your direct effort. Think of a freelance article, a sponsored Instagram post, or a one-on-one coaching call. The work is finite, and so is the payment.
Passive Income is when you get paid because you own an asset that creates value. Think of an SEO-optimized blog post that earns affiliate commissions for years, or a digital guide that sells automatically every single day.

You are moving from the role of a service provider to an asset builder. Every idea that follows is a different type of digital asset you can build. Your goal is to create a portfolio of them.
1. Craft Evergreen Affiliate Content That Ranks and Earns for Years
Affiliate marketing is often a blogger's first foray into making money, but not all affiliate content is created equal. The key to making it a source of true passive income is to focus exclusively on creating evergreen content that is optimized for search engines (SEO). A post about a fleeting travel trend might get a burst of traffic, but an in-depth guide to "The 5 Best Carry-On Backpacks for Digital Nomads" can attract a steady stream of visitors from Google—and generate commissions—for years after you hit publish.
This is the very definition of a passive income asset. According to performance marketing industry analysis, a single piece of high-ranking content can generate commissions for years with no additional effort, making it an incredibly scalable model.
Your Action Plan for Passive Affiliate Income:
Identify High-Intent Keywords: Use an SEO tool to find long-tail keywords that signal a user is close to making a purchase. Think "best travel insurance for Europe," "what to pack for Southeast Asia," or "REI vs. Patagonia backpack review."
Go Deeper Than the Competition: Your goal is to create the single best resource on the internet for that specific query. This often means writing long-form articles (2,000+ words) that are well-researched and packed with your genuine, first-hand experience.
Build Strategic Comparison Tables: For product-focused articles, a well-structured comparison table is a conversion powerhouse. These tables organize key features, pros, and cons, allowing the reader to make an informed decision easily. Place your affiliate links within a clear "Check Price & Availability" button to capture the user at their highest point of intent.
Prioritize Trust Above All: The currency of affiliate marketing is trust. Only recommend products and services you have personally used and genuinely believe in. Write balanced, honest reviews that include both the good and the bad. This authenticity is what will ultimately drive conversions.
Pro-Tip: Focus your efforts on promoting "high-ticket" items or recurring subscriptions. Earning a 6% commission on a $2,600 G Adventures tour ($156) is a much higher-leverage use of your time than earning 3% on a $20 travel adapter. Similarly, promoting a service like Dollar Flight Club with a 50% recurring commission builds a predictable, compounding income stream.

2. Monetize Traffic with Premium Display Ads for True Passive Income Blogging
Display advertising is perhaps the purest form of passive income for bloggers. Once your blog achieves a consistent level of traffic, you can join a premium ad network that will automatically place high-quality ads on your site. You get paid based on the number of impressions (views), meaning your entire back catalog of content becomes a revenue-generating asset. An old, popular post about "Things to Do in Paris" can earn money from ads every single day without you ever touching it again.
The key is to understand that this is a volume game. Meaningful income from ads is only possible after you've built a substantial audience.
Your Action Plan for Passive Ad Revenue:
Focus 100% on SEO Traffic: Your single objective to unlock this income stream is to grow your organic traffic from Google. The strategy is simple: consistently publish high-quality, helpful content optimized around keywords your target audience is searching for.
Aim for Premium Network Thresholds: Forget about beginner networks like Google AdSense. The payouts are incredibly low. Your goal should be to qualify for a premium ad network, which will dramatically increase your revenue. The industry benchmarks are:
Mediavine: Requires 50,000 monthly sessions.
Raptive (formerly Adthrive): Requires 100,000 monthly pageviews.
Optimize for User Experience: While it may seem counterintuitive, the best way to maximize ad revenue is to create a great user experience. A fast-loading site with well-structured, easy-to-read content will keep readers on your pages longer, which in turn increases ad impressions and revenue. Ensure your site is mobile-friendly, as the majority of traffic comes from mobile devices.
3. Create a "Sell While You Sleep" Digital Travel Guide
Transitioning from promoting others' products to creating and selling your own is the ultimate step in building a scalable business. Digital products, like eBooks or guides, are the perfect "create once, sell forever" asset. After an initial investment of time to create a comprehensive, high-value digital guide, you can sell it an unlimited number of times, generating revenue automatically with each download.
This model offers exceptionally high profit margins and gives you full control over the product and pricing. It’s how you build a truly independent business in a creator economy projected to nearly double from $250 billion to almost $500 billion by 2027.

Your Action Plan for Creating a Digital Guide:
Validate Your Idea First: The biggest mistake is creating a product nobody wants. Dive into your audience's comments and emails. What destination do they ask about most? What part of trip planning do they find most stressful? Their pain points are your product ideas.
Outline and Write with Intense Value: A great guide is both inspirational and intensely practical. Structure your content logically with a hyperlinked table of contents for easy navigation on mobile. Go beyond generic advice and share your unique, hard-won insider tips that can't be found elsewhere.
Design with a User-Friendly Tool: You don't need to be a graphic designer. A tool like Canva offers professional, easy-to-use templates that allow you to create a beautiful, polished guide. Prioritize a clean layout, large fonts, and your own high-quality photos.
Sell on a Specialized Platform: Once your masterpiece is complete, you need a world-class storefront. A dedicated marketplace like TrekGuider is the ideal place to sell your high-quality Travel Guide. It provides a professional, ready-made platform to connect with a global audience of passionate travelers who are actively searching for expert resources just like yours.
4. Sell Lightroom Presets and Digital Templates
A fantastic and highly popular passive income stream for travel creators with a distinct visual style is selling Lightroom presets. These are pre-packaged photo editing settings that allow your followers to achieve your signature aesthetic in their own photos with a single click. Like a digital guide, presets are created once and can be sold infinitely, providing a highly scalable and passive source of income.
Beyond presets, you can apply this same model to any digital template that saves your audience time and stress. This could include:
Customizable Itinerary Templates: Structured planning documents in Notion or Google Sheets.
Printable Travel Planners: A PDF pack including budget trackers, packing lists, and journal prompts.
Video LUTs: Color grading presets for fellow videographers.
Your Action Plan for Selling Presets & Templates:
Define Your Unique Style: Your visual brand is your product. Analyze your most popular photos. What makes them stand out? Is it a moody, cinematic look or a bright and airy feel? Package this style into a cohesive set of 5-10 presets.
Create a High-Converting Sales Page: Your sales page must visually demonstrate the transformation. Use compelling before-and-after photos to show customers exactly what your presets can do for their images.
Leverage a "Pay What You Want" Freebie: The best way to build an audience for your paid presets is to offer one or two for free as a lead magnet. This gives potential customers a risk-free way to try your product and see the quality for themselves.

CTA Block: Get Your Free Travel Lightroom Presets!
Ready to make your travel photos look stunning with a single click? Download our exclusive Free Travel Lightroom Presets! This starter pack is designed to give your images a professional, polished look and is the perfect introduction to the power of preset editing.
5. License Your Stock Photos and Videos
As a travel blogger, your hard drive is a goldmine. The thousands of high-quality images and video clips you've captured on your journeys are valuable assets. By uploading this content to stock photography platforms, you can license it to businesses, marketers, and other creators around the world, creating a small royalty for each download with no further effort required per sale.
While a single sale might be small, hundreds or thousands of downloads over many years can accumulate into a significant and remarkably passive income stream. You are simply monetizing the byproducts of the work you are already doing.
Your Action Plan for Selling Stock Media:
Sign Up for Major Platforms: Focus your efforts on the largest stock media marketplaces to maximize your potential audience. Top platforms include:
Adobe Stock
Shutterstock
Getty Images
Curate and Keyword Carefully: Don't just upload everything. Select your sharpest, best-lit, and highest-quality images. The key to getting your content discovered is careful keywording. Be descriptive and specific. Instead of "beach," use tags like "tropical beach, white sand, turquoise water, palm trees, sunrise, Thailand."
Remove Branding and Logos: To be commercially viable, your photos must be clean of any recognizable branding, logos, or trademarks.
Pro-Tip: Start shooting with stock in mind. When you're traveling, take a few extra minutes to capture generic, "evergreen" shots. These include landscapes without people, close-ups of food, architectural details, and shots that evoke a mood like "adventure" or "relaxation." These types of images have a much broader commercial appeal.
Your Journey to Financial Freedom Starts Now
Building a profitable blog that provides true freedom is a marathon, not a sprint. The path requires a strategic and deliberate shift in focus from being a content creator who gets paid for their time to a business owner who gets paid for the assets they own. The five ideas outlined above are your blueprint for building those assets.

You now have a clear answer to the question of how to achieve passive income blogging. Don't let yourself be overwhelmed by trying to do everything at once. Choose one idea that excites you the most and aligns with your current strengths. If you're a talented photographer, start with presets. If you have deep expertise in a specific destination, start outlining your digital guide. Take the first step today to build an asset that will pay you back for years to come.
Frequently Asked Questions (FAQ)
1. Is it better to focus on one passive income stream or build several at once?
Focus on one, then stack. The most successful creators follow a "Monetization Ladder." They don't try to do everything at once. Master creating evergreen affiliate content first. Once that system is working, use your authority and cash flow to invest time in building your first digital product. Mastering one stream before moving to the next is the key to sustainable growth.
2. How much traffic do I need to start earning passive income?
This depends entirely on the model. For affiliate marketing or selling your own low-cost digital product, you can start earning with as little as a few thousand pageviews per month if your audience is highly targeted and engaged. For display advertising to be truly worthwhile, you should aim for the 50,000+ monthly session threshold required by premium networks.
3. What's the most common mistake bloggers make when trying to earn passive income?
The biggest mistake is impatience. Passive income streams are assets that take time to build and appreciate. Bloggers often give up on SEO after a few months or launch a digital product to a tiny audience and get discouraged by low sales. True passive income is the reward for long-term, strategic effort.
Meta Data Suggestions:
SEO Meta Title (Under 60 characters):
5 Passive Income Ideas for Your Travel Blog (2026)
URL Slug:
passive-income-ideas-travel-blog
SEO Meta Description (Under 155 characters):
Discover 5 proven passive income ideas for your travel blog. Learn to build assets that make money 24/7, from digital guides to affiliate marketing.
Read the full guide: The Travel Blog Business Plan: How to Make Real Money in 2026
Don't Miss Out! Subscribe for Exclusive Content
SubscribeComments 0
No comments yet
Be the first to share your experience!
Dont Miss Out! Subscribe for Exclusive Content

FTC Affiliate Disclosure Essentials: Stay Compliant as a Travel Creator

Essential Affiliate Tools: From Tracking to Full Optimization

Avoid These 5 Affiliate Landing Page Mistakes for Better Conversions

Affiliate Keyword Research Mastery for Travel Blogs

Booking.com Affiliate Program Review: Pros, Cons, and Earnings Potential

Decoding Affiliate Commission Rates: Benchmarks for Travel Creators
NYE Times Square: How to Survive Crowds
TrekGuider @trekguider
The image is seared into our collective consciousness: a million smiling faces turned upward, a cascade of confetti, and the glittering descent of the Waterford Crystal ball marking the start of a new year. Experiencing New York's Eve Times Square is a bucket-list dream for travelers worldwide. But behind that minute of pure magic lies a grueling, 12-hour urban endurance test. The reality is a battle against massive crowds, freezing temperatures, and a complete lack of basic amenities. Without a solid strategy, your once-in-a-lifetime dream can quickly devolve into a miserable, claustrophobic nightmare, leaving you with nothing but cold feet and regret.
You’ve seen the celebration on TV, but you haven’t seen the real story: the hours spent standing in a single spot, the desperate need for a bathroom that doesn’t exist, and the crushing disappointment of arriving too late only to have your view blocked by a skyscraper. This isn’t just a party; it’s a logistical gauntlet. But what if you could walk into that chaos armed with the knowledge of a seasoned local? What if you knew exactly when to arrive, what to bring, and how to navigate the human labyrinth to secure a prime spot?
Consider this your definitive survival guide. We’re cutting through the noise to give you the actionable, step-by-step playbook required to not just survive the chaos, but to conquer it and forge an unforgettable memory. This single event is the crown jewel of the city's festive calendar, a spectacle we put into context in our complete guide to New York Holidays: 10 Must-Do Events. Now, let's master the art of the ball drop.

The Gauntlet Defined: What to Really Expect on New Year's Eve Times Square
Before you even think about your outfit, you need a crystal-clear understanding of the environment you’re about to enter. The Times Square ball drop is one of the most heavily secured and controlled public events on the planet. Forget a casual, free-flowing party; this is a highly structured affair managed by the New York City Police Department (NYPD).
The entire area, from 42nd Street to 47th Street between Broadway and 7th Avenue, is sectioned off into a series of viewing pens. Think of them as metal-barricaded corrals. Once the NYPD deems a pen full, they close it for good. You cannot move between pens, and crucially, if you leave your pen for any reason—food, bathroom, a moment of fresh air—you will not be allowed back in. There is no re-entry.
Here’s a breakdown of the harsh realities:
The Timeline is Brutal: Streets in and around Times Square begin closing in the early afternoon. To get a decent viewing spot, the official recommendation is to arrive by 3:00 PM. That means you’ll be standing in your designated spot for at least nine hours until the ball drops at midnight.
Zero Public Bathrooms: This is the single most challenging aspect for most attendees. There are absolutely no public restrooms or portable toilets available within the viewing areas. Once you are in a pen, you have no options. This requires careful planning regarding your food and drink intake.
Security is Absolute: You will pass through a security screening to enter the viewing areas. Security is absolute, a high-tech fortress of surveillance that includes everything from drones overhead to NYPD scuba divers in the nearby waters. All bags will be checked, and there is a long list of prohibited items.
The Weather is Unforgiving: Late December in New York City is predictably cold. Temperatures often dip below freezing, and wind chill can make it feel even colder as it funnels between the skyscrapers. You will be exposed to the elements for the entire duration.
Knowing these truths isn't meant to discourage you, but to prepare you. Success on New Year's Eve Times Square is 90% preparation and 10% endurance.
The Strategic Arrival: Your Step-by-Step Game Plan
Your experience will be made or broken in the first few hours. A well-executed arrival strategy is the difference between a prime view of the ball drop and being stuck blocks away staring at the back of a building.
When to Arrive: The 3 PM Deadline is Non-Negotiable
The official guidance confirms what veterans know: arriving by 3:00 PM is essential. For the upcoming celebration on Wednesday, December 31, 2026, you should treat this as your final deadline. The pens closest to One Times Square (where the ball descends) fill up the fastest. The NYPD systematically fills the area, starting from the south at 42nd Street and moving north. If you arrive at 5:00 PM or 6:00 PM, you will likely end up miles away, with your only view of the event coming from a distant Jumbotron. Arriving early doesn't just get you a better view; it guarantees you get a view at all.
Where to Enter: Navigating the Frozen Zones
As streets close, navigating Midtown Manhattan becomes a confusing maze. Driving is impossible. Your only viable option is public transportation.
Take the Subway: The New York City subway system is your best friend. However, the Times Sq-42nd St station will be chaos, with many exits likely closed or designated for egress only.
Aim for Peripheral Stations: Instead of heading directly to Times Square, get off at a station a few blocks away and walk. Good options include:
Rockefeller Center (B, D, F, M lines): Walk south and west.
49th Street (N, Q, R, W lines): This is close, so be prepared for crowds.
50th Street (C, E lines): Walk east.
Follow NYPD Instructions: As you approach the secured zone, you will see barricades and police officers. They will direct you to official entry points, which are typically located on 6th Avenue and 8th Avenue. Be polite, listen to their instructions, and be prepared for a slow, shuffling walk to the screening areas.
The Art of the "Pen": Securing Your Viewing Spot
Once you’re through security, you’ll be herded into one of the viewing pens. You won't have much choice in the matter, as officers fill them sequentially. However, the goal is to get into a pen with a direct line of sight to the One Times Square building. This is where the ball is. A spot further north on Broadway or 7th Avenue is generally better than being shunted off to a side street. Once you’re in, stake out a small piece of territory with your group and prepare to settle in for the long haul.

The Ultimate Survival Kit: What to Pack (and What to Leave Behind)
Packing for this event is like preparing for a winter camping trip in the middle of a city. You need to be strategic, minimalist, and focused on warmth and sustenance.
Essential Gear for the Urban Tundra
Everything you bring must be carried on your person. Think pockets, not bags.
Extreme Winter Wear: This is not the time for fashion. Dress in warm, waterproof layers.
Base Layer: Thermal, moisture-wicking underwear (top and bottom).
Mid Layer: Fleece or a down vest.
Outer Layer: A heavy, insulated, and waterproof winter coat.
Accessories: A warm hat that covers your ears, a scarf or neck gaiter, insulated gloves, and thick wool socks are all non-negotiable.
Hand and Foot Warmers: These small, air-activated heat packs are a game-changer. Bring several pairs and activate a new set every few hours to keep your extremities from freezing.
Food and Water: Pack high-energy, easy-to-eat snacks like protein bars, nuts, and chocolate. Bring your own water in a plastic bottle. Avoid caffeine and other diuretics for obvious reasons.
Portable Phone Charger: Your phone battery will drain quickly in the cold. A fully charged power bank is essential for communication and capturing the midnight moment.
Simple Entertainment: A book, a deck of cards, or downloaded podcasts can help pass the time.

Pro-Tip: Pack a few large, empty plastic water bottles with secure caps. While it’s not glamorous, they can serve as a last-resort emergency "bathroom" for men and a more challenging but still possible option for women, a well-known but unspoken hack for veterans of the event.
The Forbidden List: Items That Will Get You Turned Away
The NYPD is extremely strict about what is allowed into the viewing areas. Bringing any of these items will result in them being confiscated, or you being denied entry.
Backpacks, Large Purses, or Any Large Bags: This is the most common mistake. You will be turned away. Use your pockets.
Alcohol: Absolutely forbidden.
Umbrellas: They block the view for others and are considered a security risk. Wear a waterproof coat with a hood instead.
Strollers: While not always explicitly banned, navigating the dense crowds with a stroller is practically impossible and unsafe.
Coolers, Chairs, or Blankets: There is simply no room for these items.
Mastering the Marathon: How to Endure the 9-Hour Wait
The wait is a mental and physical challenge. Success lies in conserving energy, staying warm, and keeping your spirits up.
Fueling Your Body: The Right Way to Eat and Drink
Your strategy for consumption should be carefully managed. Eat a large, hearty meal before you leave for Times Square. A meal rich in protein and complex carbs will provide sustained energy. Once you are in your pen, ration your snacks. The goal is to keep your energy levels stable without over-consuming liquids. Sip your water slowly and methodically throughout the evening. This isn't the time to chug a whole bottle.
Staying Sane: Entertainment and Mental Fortitude
The nine-hour wait can be tedious. Keeping morale high, especially in a group, is a skill unto itself. It requires patience and planning—the same principles that make any challenging journey a success. For a deeper dive into managing group dynamics and keeping everyone happy during long waits, our Stress-Free Flying with Kids Guide offers timeless strategies that work just as well on the ground in Times Square as they do at 30,000 feet.
Here’s how to manage the wait:
Befriend Your Neighbors: You’ll be standing shoulder-to-shoulder with the same people for hours. Strike up a conversation! Sharing stories with people from around the world is one of the most unique parts of the experience.
Enjoy the Show: The Times Square Alliance puts on a live show starting around 6:00 PM. There are musical performances, celebrity appearances, and hourly countdowns that help break up the monotony.
Stay Active (in Place): Do small exercises to keep your blood flowing. Wiggle your toes, shift your weight from foot to foot, and do small leg stretches. This will help prevent stiffness and keep you warmer.

The Grand Finale and The Great Escape
After hours of waiting, the final moments are a whirlwind of excitement. But your strategic planning doesn’t end when the ball drops.
The Ball Drop: Savoring the Moment
At 11:59 PM, the 12,000-pound geodesic sphere begins its 60-second descent. The energy of the crowd is electric. This is the moment you’ve been waiting for. Put your phone away for a few seconds and be fully present. Absorb the sounds, the sights, and the feeling of shared celebration with a million other people. The confetti drop, the cheering, the fireworks—it’s a truly magical experience that justifies the entire ordeal.

Post-Midnight Exodus: Navigating the Human River
Once the celebration peaks, the next challenge begins: the exit. A million people will be trying to leave a very small area at the exact same time.
Do Not Rush: The biggest mistake is trying to push your way out immediately. The initial surge is dangerous and stressful. Be patient. Wait 15-20 minutes in your spot for the thickest crowds to begin to disperse.
Have a Predetermined Exit Route: Before you even arrive, decide which direction you will walk. Do not just follow the herd. Plan to walk at least 10-15 blocks away from Times Square before even attempting to find a subway or hail a rideshare.
Avoid the Main Subway Hubs: The Times Sq-42nd St station will be dangerously overcrowded. Walk further to a less central station to begin your journey home.
Pro-Tip: Pre-book a table at a restaurant or bar a 15-20 minute walk away from Times Square for 12:45 AM. This gives you a warm place to decompress, use a real bathroom, and have a proper celebratory drink while the worst of the crowds clear out.
Your Unforgettable New Year's Eve Awaits
Attending the New Year's Eve Times Square ball drop is not for the faint of heart. It is an intense, demanding, and often uncomfortable experience. But by following this guide, you are no longer just a hopeful tourist; you are a prepared strategist. You have the expert-level knowledge to navigate the chaos, endure the wait, and place yourself in the perfect position to witness one of the world's most iconic celebrations. The cold, the crowds, and the long hours will fade into the background, replaced by the unforgettable memory of counting down to a new year in the heart of the world.
You've conquered the ultimate urban challenge. To discover what other incredible adventures await you in the city and beyond, our comprehensive Travel Guide is the only resource you'll need. It’s your all-access pass to mastering travel like a pro.
Meta Data Suggestions:
SEO Meta Title: NYE Times Square Survival Guide: Beat The Crowds & See The Ball
URL Slug: /nye-times-square-crowds-survival-guide
SEO Meta Description: A complete guide to surviving New Year's Eve in Times Square. Learn when to arrive, what to pack, and how to get the best view of the ball drop.
Don't Miss Out! Subscribe for Exclusive Content
SubscribeComments 0
No comments yet
Be the first to share your experience!
Dont Miss Out! Subscribe for Exclusive Content
San Francisco Cherry Blossoms: A Local's Guide to the Blooms
Halloween SF: Haunts Without Horrors
SF Festivals: 7 Must-See Lineups
Christmas SF: Lights & Wharf Wonders
SF Pride: 6 Route & Party Hacks