Thanksgiving Parade: 6 Prime Spots
TrekGuider @trekguider
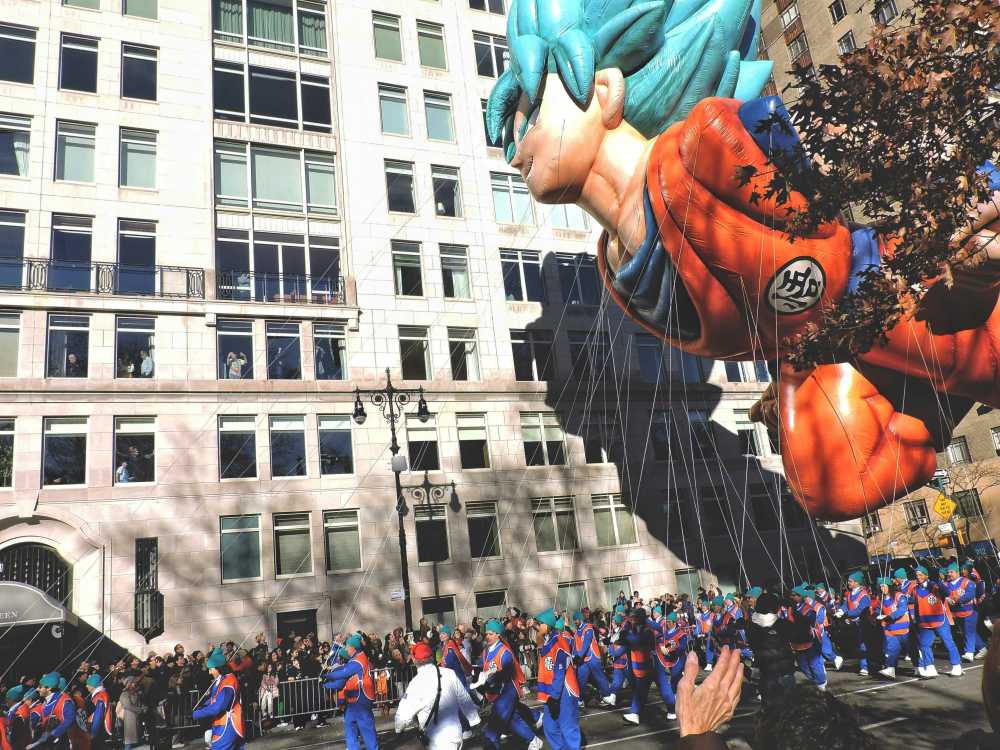
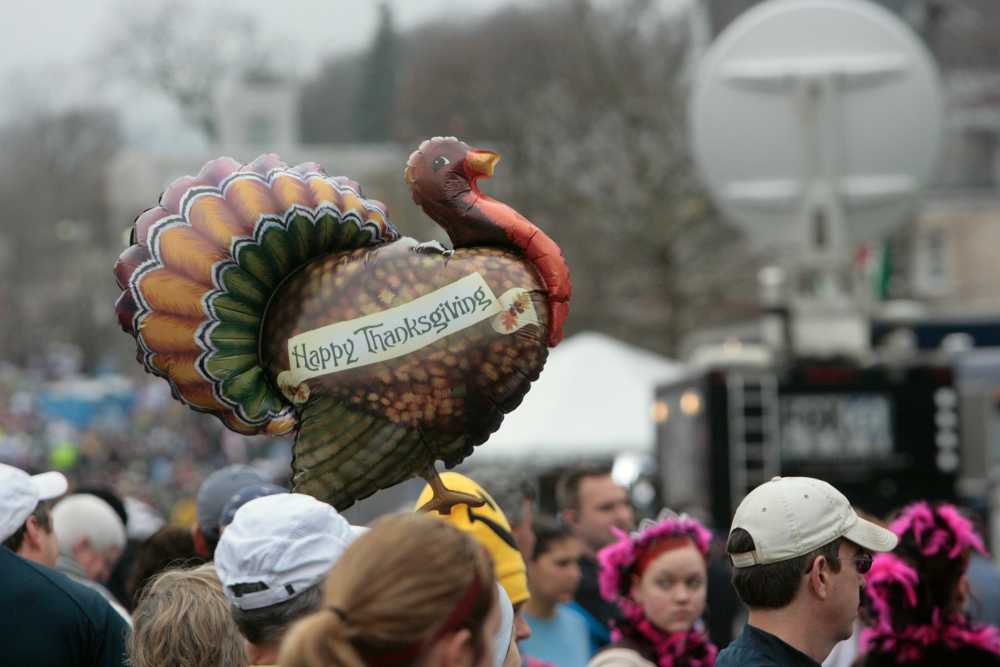
You’ve seen it on television your whole life: colossal cartoon characters floating between skyscrapers, world-class marching bands sending echoes through the avenues, and the final, festive arrival of Santa Claus himself. The Macy's Thanksgiving Day Parade is an American institution, the magical kick-off to the holiday season. But the dream of seeing it in person is often haunted by a logistical nightmare. You’re worried about battling millions for a tiny patch of sidewalk, only to have your view blocked, your kids get restless, and the entire enchanting experience devolve into a cold, stressful ordeal.
That anxiety is completely valid. Every year, over 3.5 million people descend on the route, and without a rock-solid plan, you’ll see more of the back of someone’s head than you will of the giant Snoopy balloon. You risk waking up before dawn only to find every good spot claimed, leaving your family disappointed and shivering. The magic you traveled for feels impossibly out of reach, lost in a sea of chaos. You deserve to experience the wonder, not the worry.
Forget the frustration. This is your strategic blueprint for success. We’re going to bypass the chaos and transform you into a parade-viewing expert. We’ll unveil the six prime spots to watch the spectacle, complete with insider strategies on timing, what to pack, and how to navigate the city like a local. This is your definitive plan for conquering the Thanksgiving parade in New York and creating memories that will last a lifetime. It’s one of the most iconic events in the city, a true highlight that we cover in our broader guide to New York Holidays: 10 Must-Do Events.
Understanding the Parade Route: Your Strategic Map
Before you can pick your spot, you need to understand the battlefield. The Macy's Thanksgiving Day Parade is a massive operation, and its route is the key to everything. Knowing the path, the timing, and—most importantly—the restricted zones will give you a powerful advantage.
The parade officially kicks off at 8:30 AM sharp on Thanksgiving morning, Thursday, the fourth Thursday of November. It begins on the Upper West Side and marches for 2.5 miles, concluding around noon.
Here’s the official step-by-step route:
Starts: 77th Street & Central Park West at 8:30 AM.
Travels South: Proceeds down Central Park West to Columbus Circle.
Turns: At Columbus Circle, it turns onto Broadway.
Continues South: It follows Broadway through the heart of Midtown.
Ends: The parade concludes around noon at the iconic Macy's Herald Square on 34th Street.
Our internal research confirms two critical areas to avoid at all costs: the start zone around 77th Street and the finish zone near Herald Square (from 34th to 38th Street). These areas have heavily restricted public viewing and are reserved for television broadcasting. Trying to watch from here is a rookie mistake that guarantees disappointment. Your strategy must focus on the long stretches in between.
The 6 Prime Viewing Spots for the Thanksgiving Parade in New York
Now for the main event. Choosing your location is the single most important decision you’ll make. Each of these six spots offers a unique advantage, whether it’s fewer crowds, better photo opportunities, or more family-friendly conditions.
1. The Upper West Side: The Classic Family Choice
Location: Along Central Park West, from 77th Street down to Columbus Circle (specifically the west side of the street).
Why It’s Prime: As the parade’s very first leg, this 16-block stretch is where the magic is freshest. The performers are electric with energy, the marching bands are at their most thunderous, and the balloon handlers are still wrangling their colossal characters into perfect formation. Because it's more residential, the crowds feel slightly more manageable and family-oriented than in the commercial chaos of Midtown. The backdrop of Central Park on one side and historic apartment buildings on the other makes for stunning photos.
Your Strategy:
Timing is Everything: You must arrive by 6:00 AM. The front-row spots are often claimed by locals before the sun is up. By 6:30 AM, the area will be packed several rows deep.
Positioning: Plant yourself on the west side of Central Park West. This gives you a direct, unobstructed view as the parade marches south.
What to Expect: It will be cold and dark when you arrive. This spot requires a commitment to waiting, but the payoff is a fantastic, high-energy viewing experience.
2. The Shops at Columbus Circle: The VIP Indoor View
Location: The second and third floors of The Shops at Columbus Circle, overlooking the parade’s turn from Central Park West onto Broadway.
Why It’s Prime: This is the ultimate parade hack for those who want to avoid the cold and the crowds. You get a warm, elevated, bird’s-eye view of the entire spectacle. Plus, you have immediate access to restrooms, coffee, and food—luxuries that are unthinkable for those on the street.
Your Strategy:
This Isn't Free: This is not a public viewing area. Access is typically granted to customers of the shops and restaurants within the mall.
Plan Months Ahead: Check with stores like Williams-Sonoma or restaurants with windows facing the circle. Many host private, ticketed viewing events that sell out far in advance.
Be Prepared to Spend: You will need to make a purchase or pay for a breakfast event to gain entry. Consider it the price of unparalleled comfort and convenience.

3. The Sixth Avenue Stretch: The Urban Canyon Experience
Location: Along Sixth Avenue (Avenue of the Americas) from 59th Street down to 38th Street.
Why It’s Prime: This is the longest and straightest portion of the route, offering dozens of blocks for potential viewing. Watching the giant balloons squeeze between the towering skyscrapers of Midtown is a uniquely New York experience. The sheer scale of the buildings creates a dramatic "urban canyon" effect that makes the parade feel even more grand.
Your Strategy:
Arrive Early: The secret is out on this spot. To get a decent view, be in position by 6:30 AM at the latest. The blocks closest to Central Park (59th to 50th) fill up the fastest.
Avoid Corners: Set up in the middle of a block. Corners are notoriously crowded and chaotic, with people constantly moving and blocking views.
Look for Scaffolding: Sometimes, construction scaffolding can be a blessing in disguise, creating a covered area that offers some protection from the elements and can deter massive crowds from forming in that exact spot.
Pro-Tip: The area between 70th and 75th streets on Central Park West offers a slightly wider sidewalk, giving you a little more breathing room. Pack a thermos of hot chocolate to stay warm while you wait—it’s a game-changer.
4. The "Quiet Zone" Near Radio City Music Hall
Location: The stretch of Sixth Avenue between 49th and 51st Streets.
Why It’s Prime: While no part of the route is truly "quiet," this section is designated as a no-marching-band-performance zone to accommodate the national television broadcast headquartered at Radio City. This means you get a brief respite from the loudest musical numbers—a great option for families with young children or those with sensory sensitivities.
Your Strategy:
Know the Trade-Off: You will see all the floats and balloons perfectly, but you will miss the live performances from the marching bands as they pass this specific area.
Use the Location: This spot is fantastic for its iconic backdrop. You can capture incredible photos of the balloons with the famous Radio City Music Hall marquee in the background.
Post-Parade Plans: You are perfectly positioned to see the Rockettes' Christmas Spectacular later in the day or head over to Rockefeller Center.

5. The South Side of 38th Street: The Late-Arrival Lifeline
Location: The blocks along Sixth Avenue from 40th Street down to 38th Street.
Why It’s Prime: Let's be realistic: not everyone can wake up at 4 AM. If you’re running late, this is your last best chance. As the parade nears its end at 34th Street, the area becomes a restricted broadcast zone. Therefore, the blocks just before this cutoff are the final public viewing areas.
Your Strategy:
Manage Expectations: You will not get a front-row view here. This is a spot for seeing the tops of the balloons and catching the general energy of the event.
Look Up: Your view will be mostly vertical. It’s less about seeing the performers on the street and more about witnessing the spectacle of the giant balloons against the sky.
Quick Exit: The advantage of being near the end of the route is that you can make a quick exit once the final float passes, beating some of the mass exodus heading for the subway.
6. The Virtual View: Your Hotel Room Perch
Location: Any hotel with rooms directly overlooking the parade route on Central Park West or Sixth Avenue.
Why It’s Prime: This is the most comfortable, stress-free, and luxurious way to experience the Thanksgiving parade in New York. You can watch the entire event from the warmth of your room, in your pajamas, with a cup of coffee in hand. You have your own bathroom, your own food, and an unbeatable, unobstructed view.
Your Strategy:
Book a Year in Advance: Rooms with parade views are often booked a year or more ahead and come at a significant premium.
Confirm the View: When booking, you must call the hotel directly to confirm that your specific room has a "parade view." An "avenue view" is not always sufficient.
Notable Hotels: Some hotels famous for their parade views include the JW Marriott Essex House, the Mandarin Oriental, New York, the Warwick New York, and the New York Hilton Midtown.
Pro-Level Survival Guide for Parade Day
Securing a great spot is only half the battle. You need a solid plan for the hours you’ll spend waiting. Follow these tips to ensure your experience is comfortable and memorable for all the right reasons.
The Ultimate Timing Strategy
The golden rule, confirmed by years of experience, is to arrive by 6:00 AM. This is non-negotiable for a front-row or second-row spot along Central Park West or the prime stretches of Sixth Avenue. By 6:30 AM, these areas are typically full. By 7:00 AM, you’ll be lucky to find a spot where you can see anything at all. Set your alarm, bundle up, and get there early. The early bird gets the best view of the parade.
What to Wear and Pack: The Family Checklist
New York in late November is cold. Standing still for hours makes it feel even colder.
Dress in Layers: Start with a thermal base layer, add a fleece or sweater, and top it off with a warm, wind-resistant winter coat. Don't forget a hat, gloves, and a scarf.
Comfortable Footwear: Wear warm, waterproof boots. Your feet will thank you.
The Essentials Bag: Pack a backpack with:
Snacks and Drinks: A thermos of hot chocolate or coffee is a must. Bring water and easy-to-eat snacks like granola bars and fruit.
Entertainment: A book, a deck of cards, or a fully charged phone with headphones can help pass the time.
Portable Phone Charger: Your battery will drain faster in the cold.
Small Folding Stools: If you have space, these can be a lifesaver for your back and legs.
For a comprehensive list of what to bring on any family adventure, our National Park Road Trip Checklist has you covered, with tips that apply just as well to an urban expedition.

Navigating the Crowds with Kids
The parade is a magical experience for children, but the crowds and waiting can be tough.
Avoid Strollers: In the most crowded areas, strollers are more of a liability than a help. They are difficult to maneuver and take up valuable space. A carrier is a much better option for very young children.
Establish a Meeting Point: As soon as you claim your spot, pick a clear, fixed landmark (e.g., a specific lamppost, a store entrance) as your family's meeting point in case you get separated.
Use a Buddy System: Ensure everyone has a partner.
Ladders: You will see people with small ladders for their kids to see over the crowd. If you bring one, be sure to place it a safe distance from the street and be courteous to those around you.
Pro-Tip: Skip the car. Public transportation is your best friend. The subway will be running on a holiday schedule, but expect crowded stations near the route. Plan your subway route in advance and buy your MetroCard the day before to avoid long lines at the machines on Thanksgiving morning.
Beyond the Parade: Making it a Full Thanksgiving Experience
Remember, the parade ends around noon, leaving you with a full day to enjoy the city. Many people head straight to a Thanksgiving dinner. If you plan to eat out, you must make reservations weeks, if not months, in advance. New York City is one of the world's culinary capitals, and a festive meal is the perfect way to cap off a magical morning.
Planning the perfect holiday trip, from the parade to the feast, requires expert knowledge. Our comprehensive Travel Guide provides detailed itineraries and booking advice for major US cities, ensuring your entire vacation is seamless and spectacular.

Your Mission, Should You Choose to Accept It
Watching the Macy's Thanksgiving Day Parade in person is a bucket-list dream, and with this guide, it’s a dream you can turn into a flawless reality. You now have the route, the prime locations, and the pro-level strategies to outsmart the crowds and secure a fantastic viewing experience. You’re no longer a tourist hoping for a glimpse; you’re a prepared strategist ready to claim your prime spot and soak in every moment of the magic. The Thanksgiving parade in New York is waiting for you.
Now go make those once-in-a-lifetime memories!
Meta Data Suggestions:
SEO Meta Title: 6 Prime Spots for the NYC Thanksgiving Day Parade (2026)
URL Slug: thanksgiving-parade-new-york-viewing-spots
SEO Meta Description: Don't just watch the Thanksgiving parade in New York, conquer it. Our guide reveals 6 prime viewing spots and insider tips for a stress-free family experience.
Don't Miss Out! Subscribe for Exclusive Content
Subscribe


Comments 0
No comments yet
Be the first to share your experience!
Dont Miss Out! Subscribe for Exclusive Content

San Francisco Cherry Blossoms: A Local's Guide to the Blooms

Halloween SF: Haunts Without Horrors

SF Festivals: 7 Must-See Lineups

Christmas SF: Lights & Wharf Wonders

SF Pride: 6 Route & Party Hacks

Chinese New Year SF: Parade Essentials
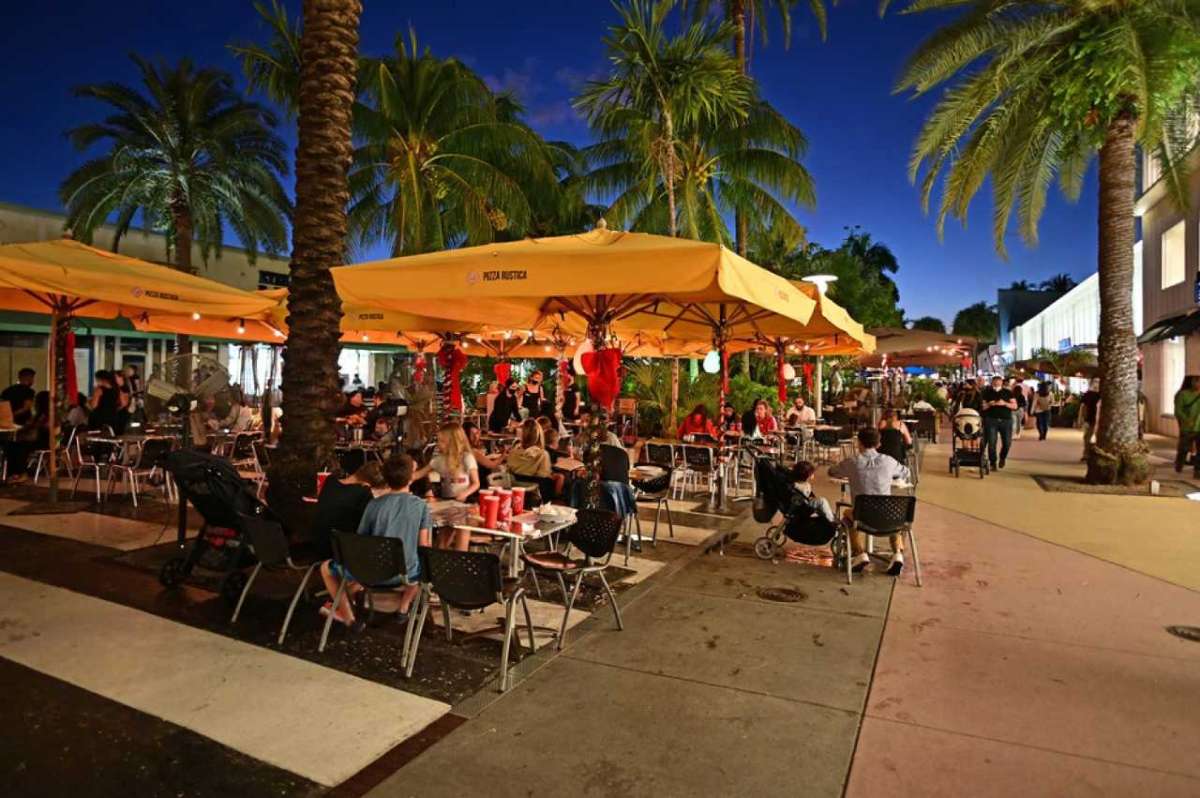
Christmas Miami: Tropical Lights Tour
TrekGuider @trekguider
You’re dreaming of a classic Christmas—the kind with roaring fires, frosty windowpanes, and the scent of pine in the air. But you look outside, and the reality is 80 degrees, sun-drenched, with palm trees swaying in a gentle sea breeze. You crave that magical, festive spirit, but it’s hard to find when you’re swapping snow boots for sandals.
This disconnect can be jarring. The calendar says December, the stores are playing carols, but the subtropical warmth makes it feel like just another beautiful day in paradise. A nagging worry creeps in: will you miss out on the cozy, twinkling magic of the season? Will your holiday lack the festive punch you look forward to all year? How can you possibly capture the enchantment of Christmas in a place where snowflakes are replaced by sea spray?
The secret is to stop trying to replicate a winter wonderland and instead embrace the vibrant, utterly unique spectacle of a tropical holiday. Consider this your expert-led mission to unlock that magic. We’re going beyond the obvious to build your definitive tour of the dazzling tropical light displays and waterfront events that make a Christmas in Miami truly unforgettable. Forget the sleigh—here, we celebrate with glittering yachts and glowing shorelines. We’ll show you where to find enchanted parks and floating festivals of light, proving that a Miami Christmas doesn’t just rival the traditional version; it offers a brand of high-wattage magic all its own.

The Magic of Contrast: Why a Miami Christmas Shines Brighter
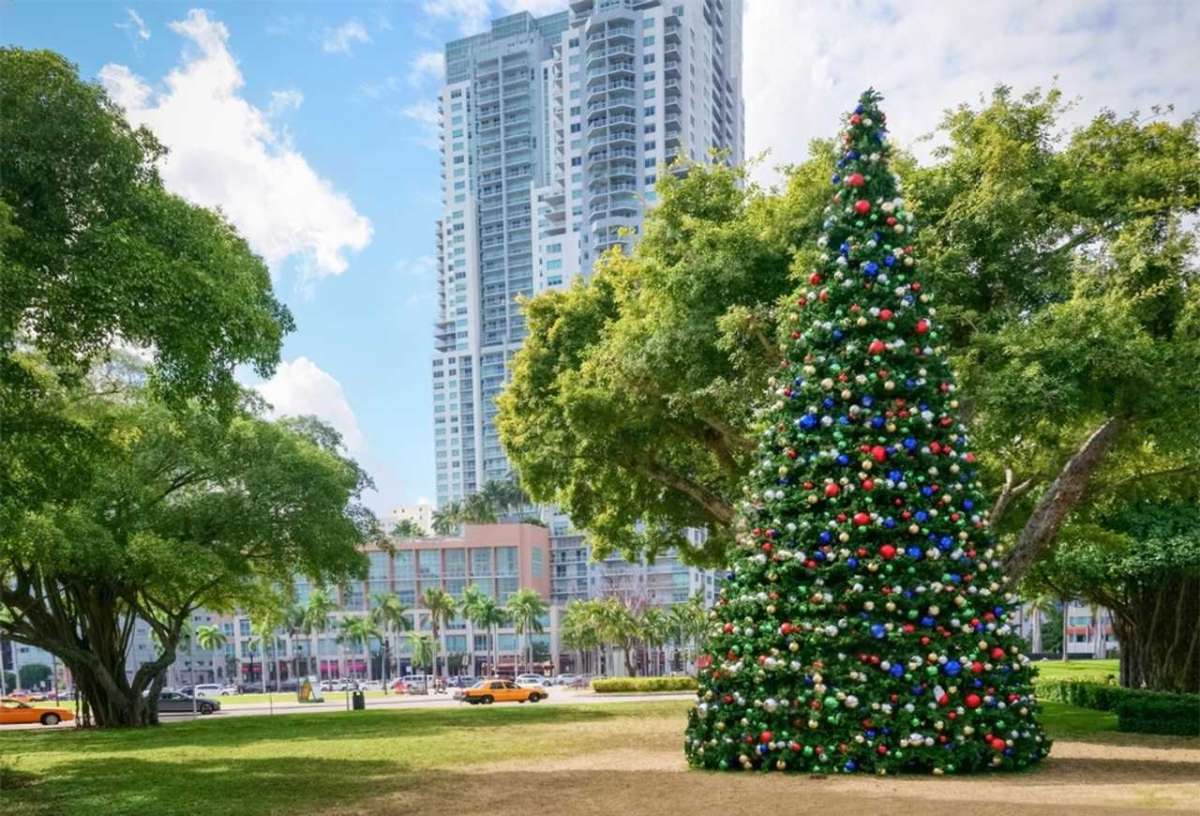
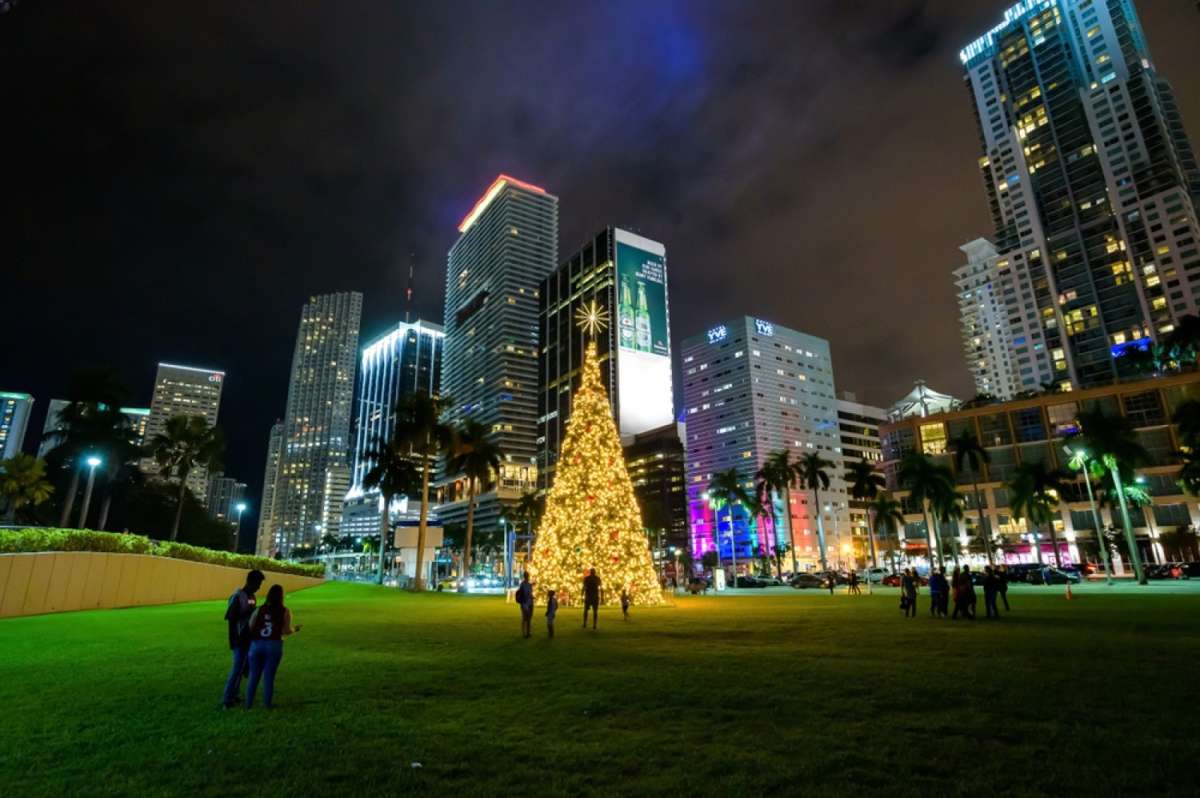
A Christmas in the Magic City is an exercise in brilliant contrasts. It’s where classic holiday traditions get a sun-kissed, subtropical makeover. Instead of pines and firs heavy with snow, you’ll find majestic Royal Palms wrapped from trunk to frond in thousands of shimmering lights, their silhouettes glowing against the warm twilight sky. The crisp, cold air of a northern winter is replaced by gentle, salty breezes carrying the faint sound of distant salsa music mixed with familiar holiday carols.
This fusion of high-energy festivity and laid-back beach culture creates an atmosphere you simply won’t find anywhere else. While our complete guide to Miami Holidays: 8 Beach Fest Vibes gives you the 30,000-foot view of the season, this deep dive is dedicated to the glittering, electric heart of a Miami Christmas: the lights. The city’s profound connection to the water is central to its identity, and this is never more apparent than during the holidays. The reflection of a million tiny lights dancing on the calm surface of Biscayne Bay is a sight that rivals any snow-covered landscape—a holiday experience that is both deeply festive and unapologetically Miami.
The Crown Jewel of a Christmas in Miami: The Holiday Boat Parades
While other cities have their tree-lighting ceremonies, Miami’s signature holiday tradition takes to the water. The holiday boat parades are the quintessential Christmas in Miami event, a dazzling display of nautical creativity and festive spirit that perfectly captures the city's coastal soul. Forget static neighborhood displays; this is a moving festival of light, a dynamic spectacle that draws thousands to the shores of Biscayne Bay.
What to Expect: A Floating Festival of Lights
Imagine a procession of vessels, from 100-foot luxury yachts and powerful sport-fishers to charming sailboats and even humble dinghies, all transformed into glowing works of art. Each boat is carefully decorated in thousands of colorful lights, often arranged into elaborate and animated designs. You’ll see everything from tropical Santas lounging on flamingo-drawn sleighs to shimmering nativity scenes and synchronized light shows pulsing to holiday music. Many participants add onboard carolers and costumed characters who wave to the cheering crowds, turning the parade into an interactive performance.
The atmosphere is electric and communal. Families and friends gather along the waterfront hours in advance, laying out blankets and setting up picnics as they wait for the show to begin. The air fills with palpable excitement as the first glowing vessel rounds the bend, its lights casting a long, shimmering trail on the dark water.
Pro-Level Viewing Guide: Where to Secure the Best Views
A good vantage point is the difference between a fleeting glimpse and a front-row seat to the magic. Since the parade routes typically traverse Biscayne Bay, any public space with an unobstructed view of the water is a prime candidate.

Bayfront Park: As the city's epicenter for major events, Bayfront Park is the most popular and accessible choice. Its sprawling lawns and waterfront promenades offer ample room, but they fill up fast. Arrive by late afternoon to claim a spot near the water's edge.
Venetian Causeway: For a slightly less congested experience, the sidewalks along the Venetian Causeway offer excellent, slightly elevated views of the parade as it moves through the central part of the bay.
Restaurant Patios: Many waterfront restaurants in Downtown, Brickell, and Miami Beach offer fantastic (and comfortable) viewing spots. This requires planning and reservations weeks in advance, but it allows you to enjoy a festive meal with a world-class show.
Key Biscayne: The parks and beaches on the western side of Key Biscayne that face the bay, such as Hobie Island Beach Park, provide a more relaxed and family-friendly atmosphere away from the downtown hustle.
Pro-Tip: Treat it like a beach day. Arrive at your chosen spot at least 90 minutes before the parade's scheduled start. Pack a cooler with drinks and snacks, bring blankets or foldable chairs for comfort, and download a local radio app—some stations broadcast parade commentary and synchronized music.
Land-Based Spectacles: Immersive Worlds of Light
While the boat parades are a must-see, Miami’s land-based light displays offer weeks of festive enchantment. These attractions provide a more immersive experience, allowing you to walk through glowing landscapes and enjoy a full evening of holiday activities.
Christmas Wonderland at Tropical Park: A Festive Theme Park
For a one-stop holiday destination that caters to all ages, Christmas Wonderland at Tropical Park is an institution. This sprawling event transforms a beloved local park into a high-energy festive theme park. It’s an ideal outing for families, packed with everything from thrilling rides to gentle carousels, all set against a backdrop of millions of spectacular lights.
The park is designed as a walk-through experience with different themed areas. You can wander through illuminated tunnels synchronized to music, marvel at towering light sculptures of holiday characters, and take photos at countless Instagram-worthy spots. Beyond the lights and rides, Christmas Wonderland features live entertainment, holiday-themed food and drinks (think churros and hot cocoa), and artisan markets perfect for last-minute gift shopping.
The Enchanted Walk: Neighborhoods That Go All Out
One of the simple joys of Christmas in Miami is discovering the festive spirit in its residential neighborhoods. While Miami may not have a single, world-famous district for lights like Brooklyn's Dyker Heights, many of its affluent, waterfront communities embrace the season with gusto.
Take a slow evening drive through the neighborhoods along the Venetian Islands, Key Biscayne, or the Gables-by-the-Sea in Coral Gables. Here, you’ll see magnificent homes and gardens adorned with professional-grade light displays. The true Miami touch is seeing not just the houses, but also the towering palm trees, ancient banyan trees, and private docks lit up in festive colors, their lights reflecting beautifully in the canals and waterways.
Capturing the Glow: Photography Tips for Tropical Lights
Photographing holiday lights, especially moving ones on water, can be tricky. Here’s how to get shots worthy of the spectacle.
Use Night Mode: Modern smartphone cameras have incredible night mode capabilities. Use them. This feature keeps the shutter open longer to capture more light, resulting in brighter, clearer photos without harsh flash.
Find Stability: To avoid blurry shots, especially with longer exposures, brace your phone or camera against a solid object like a railing, a post, or a tripod.
Tap to Focus: Don't just point and shoot. Tap on the brightest part of the light display on your screen. This tells the camera where to focus and properly expose the shot, preventing the lights from becoming blown-out white blobs.
Capture Reflections: Miami's biggest advantage is water. Angle your shots to include the reflections of the lights on the bay or canals. This adds depth, color, and a sense of place to your photos.
Planning Your Tropical Lights Tour: A Step-by-Step Guide
A little strategic planning will elevate your lights tour from a casual outing to a seamless and memorable adventure.
Step 1: Choose Your Experience (Event vs. Exploration)
First, decide on your preferred vibe.
The Boat Parade: This is a high-energy, single-night event. It’s perfect if you love the excitement of a big crowd and a one-of-a-kind spectacle. The trade-off is that it’s a fixed date and can be very crowded.
Land-Based Displays: Attractions like Christmas Wonderland or self-guided neighborhood tours offer far more flexibility. They typically run for several weeks, allowing you to choose a less-crowded weeknight for your visit. This is often the better choice for families with young children.
Step 2: Lock In Your Itinerary
Once you’ve chosen your focus, confirm the details. For official events, check their websites for exact dates, times, and ticket information. Boat parades are weather-dependent, so always check social media channels on the day of the event for any last-minute changes. For a self-guided tour, map out a route in advance to maximize your viewing time.
Step 3: Pack for a Miami "Winter" Night
Packing for a Miami holiday can be deceptive. While days are warm, evenings on the water can get surprisingly cool and breezy. A light jacket, sweater, or pashmina is essential. Comfortable walking shoes are non-negotiable. If you're visiting from abroad and juggling different climates, our International Travel Checklist is an indispensable tool. It’s designed to help you remember everything from travel insurance to the perfect light layer for a breezy bayfront evening.
Step 4: Master Transportation and Logistics
Parking near major holiday attractions in Miami ranges from difficult to impossible.
Rideshares: Services like Uber and Lyft are your best friends. They eliminate the stress of finding and paying for parking.
Public Transit: For events centered around Bayfront Park, leave the car behind. Miami’s elevated Metromover is a free and surprisingly scenic way to get downtown, connecting directly to major Metrorail stations and parking garages further afield.
Book Parking: If you must drive, use an app like SpotHero to reserve a parking spot in a garage in advance. This is a pro move that can save you an hour of circling packed streets.
Pro-Tip: For ticketed light displays like Christmas Wonderland, always visit on a Tuesday or Wednesday evening if possible. Crowds are significantly smaller, traffic is lighter, and you’ll have a much more relaxed and enjoyable experience.
Beyond the Lights: Crafting Your Complete Holiday Itinerary
Your tropical lights tour is the perfect centerpiece for a festive Miami getaway, but it’s just the beginning. To build a truly immersive holiday experience, weave in some of the city’s other seasonal offerings. Pair an evening of light-viewing with a festive dinner at a restaurant in Brickell or Coconut Grove. Explore the luxury shops at the Design District or Bal Harbour, which feature stunning, museum-worthy holiday window displays.
A perfect lights tour is just one piece of an unforgettable holiday vacation. To build a complete itinerary—from finding the best seasonal Cuban coffee to planning day trips—our comprehensive Travel Guide provides the expert, local insights you need to experience the magic of a Christmas in Miami like a seasoned traveler. It’s your ultimate resource for crafting a holiday that is perfectly tailored to you.
Your Blueprint for a Brilliant Miami Christmas
You don’t need snow or a roaring fireplace to have a spectacular and magical holiday. A Christmas in Miami offers a vibrant, sun-kissed alternative, trading frosty landscapes for the dazzling reflection of a million lights on the water. From the unforgettable spectacle of a holiday boat parade on Biscayne Bay to the family-friendly enchantment of a park transformed into a winterless wonderland, the city is alive with a unique and powerful festive spirit.
You now have the ultimate blueprint to design your own tropical lights tour. You know the signature events to see, the best places to watch them from, and the pro-level tips to make your experience seamless and joyful. You are empowered to create holiday memories that are as warm, bright, and full of life as the city itself. So grab your sunglasses and a Santa hat, and get ready to experience a Christmas that shines brighter than any star on a frosty night.
Don't Miss Out! Subscribe for Exclusive Content
SubscribeComments 0
No comments yet
Be the first to share your experience!
Dont Miss Out! Subscribe for Exclusive Content
San Francisco Cherry Blossoms: A Local's Guide to the Blooms
Halloween SF: Haunts Without Horrors
SF Festivals: 7 Must-See Lineups
Christmas SF: Lights & Wharf Wonders
SF Pride: 6 Route & Party Hacks
Chinese New Year SF: Parade Essentials
9 Beach Safety Tips That Could Save Your Life
TrekGuider @trekguider
There’s a moment on every beach trip that feels like pure magic. It’s the feeling of warm sand between your toes, the hypnotic sound of waves crashing, and the endless blue horizon stretching out before you. It’s a picture of perfect relaxation. But beneath that tranquil surface, the ocean holds immense and impartial power. A beautiful day can turn dangerous in an instant from a hidden current, underestimated waves, or the relentless sun, transforming a dream vacation into a terrifying emergency. Every year, countless beachgoers find themselves in preventable peril simply because they misread the water or weren't prepared for the environment.
This isn't a guide to make you fear the ocean; it's a playbook to empower you to respect it. We’re here to give you the essential, expert-backed beach safety tips that can mean the difference between a blissful day and a life-altering one. These strategies, drawn from lifeguarding associations and national weather experts, are a critical component of the situational awareness we cover in our comprehensive guide, The Ultimate Guide to Travel Safety: A 2026 Playbook. By learning to see the beach not just as a playground, but as a dynamic natural environment, you can ensure your only takeaways are seashells and incredible memories. Let’s dive in.

Master the Water: Essential Ocean Safety Tips
The vast majority of beach-related dangers originate in the water itself. From powerful currents to unpredictable surf, understanding the ocean's behavior is the most critical skill any beachgoer can possess. These are the foundational beach safety tips for staying safe in the surf.
1. Become an Expert at Spotting Rip Currents
Rip currents are the number one danger at most surf beaches, responsible for the majority of ocean rescues performed by lifeguards. They are not undertows that pull you under the water; they are powerful, narrow channels of water that flow away from the shore at high speed. According to NOAA and the United States Lifesaving Association (USLA), knowing how to visually identify one from the shore is your first and best line of defense.
Here’s what to look for, especially from an elevated position like the dunes or a lifeguard tower:
A Channel of Churning, Choppy Water: Look for a specific area where the water seems agitated or rough, moving in a different direction than the surrounding waves.
A Break in the Incoming Wave Pattern: This is often the easiest sign to spot. You'll see a gap in the line of breaking waves—an area that looks deceptively calm. This flat spot is the rip current pulling water back out to sea, disrupting the incoming waves.
A Difference in Water Color: Because the current is carrying sand and sediment offshore, the water within a rip current often appears darker, murky, or sandy brown compared to the clearer, greener water on either side.
A Line of Foam or Debris Moving Seaward: This is a dead giveaway. If you see a line of foam, seaweed, or other floating debris moving steadily away from the beach, perpendicular to the shore, you are looking directly at a rip current.
Pro-Tip: Before you even set up your umbrella, take five minutes to stand back and observe the water. Actively look for these signs. Identifying potential rip currents before you get in the water is the single most important safety action you can take.
2. Know the "Flip, Float, Follow" Rule for Rip Current Survival
If you do get caught in a rip current, your instinctive reaction—to panic and swim directly against it back to shore—is the most dangerous thing you can do. Fighting a rip current will exhaust you to the point of drowning. The correct response is simple and could save your life.
Flip: Flip onto your back to stay afloat and conserve energy.
Float: The current will not pull you under; it will only pull you away from shore. Stay calm and float with it.
Follow: Once you are out of the main pull of the current, begin swimming parallel to the shoreline. Do not swim toward the beach. Once you have swum out of the current, you can then turn and swim back to shore, ideally at an angle away from where you were caught.
If you are unable to swim out of it, continue to float and wave your arms and yell for help to attract the attention of a lifeguard or other swimmers.

3. Understand and Obey the Beach Warning Flag System
While knowing how to escape an invisible current is a vital reactive skill, your most powerful proactive tool is the one flapping in the breeze. Beach warning flags are a simple, universal language used by lifeguards to communicate the current water conditions. This system, adopted by the International Lifesaving Federation, provides a quick, visual assessment of the hazard level. Ignoring these flags is a gamble you should never take.
Green Flag: Low Hazard. Conditions are calm, but you should still exercise caution.
Yellow Flag: Medium Hazard. Moderate surf and/or currents are present. Weak swimmers should stay out of the water, and everyone else should use extra care.
Red Flag: High Hazard. The surf is high, and/or strong currents make conditions dangerous. It is recommended that no one enters the water.
Double Red Flag: Water Closed to Public. Conditions are extremely dangerous. The water is closed to all swimming, and entering it is prohibited.
Purple Flag: Dangerous Marine Life. This flag indicates that potentially hazardous marine life, like jellyfish or sharks, has been spotted. It is always flown with another color flag that indicates the surf conditions.
Pro-Tip: The absence of flags does not automatically mean the water is safe. If there is no flag, it likely means there is no lifeguard on duty. In that case, you are swimming entirely at your own risk. Always try to swim at a beach protected by lifeguards.
Master the Environment: Sun and Shoreline Safety Tips
While the ocean poses the most immediate threats, the beach environment itself has its own set of risks. The sun, sand, and heat can cause serious health issues if not managed properly. These beach safety tips will keep you safe on the shore.
4. Know the Signs of Heat Exhaustion vs. Heatstroke
That perfect, sun-drenched beach day holds a hidden danger. When the temperature climbs, the line between bliss and a medical emergency can blur with alarming speed. According to the Red Cross, it's crucial to know the difference between heat exhaustion and the more severe, life-threatening heatstroke (sunstroke).
Heat Exhaustion Symptoms:
Headache, dizziness, and confusion
Excessive sweating with cool, moist, or pale skin
Nausea and muscle cramps
A rapid, weak pulse
First-Aid for Heat Exhaustion:
Move to a Cool Place: Immediately get the person out of the direct sun and into shade or air conditioning.
Cool Them Down: Loosen their clothing and apply cool, wet cloths or spray them with cool water.
Rehydrate: If they are conscious and able to swallow, have them sip small amounts of a sports drink or water.
If their condition doesn't improve or they start vomiting, call for emergency help immediately, as it can progress to heatstroke.
5. Recognize the Emergency of Heatstroke (Sunstroke)
Heatstroke is a full-blown medical emergency where the body's internal cooling system completely fails.
Heatstroke Symptoms:
Changes in mental status (confusion, agitation, loss of consciousness)
Hot, flushed, and often dry skin (sweating may have stopped)
A dangerously high body temperature (often above 104°F / 40°C)
A rapid, strong pulse, which may become weak later
First-Aid for Heatstroke:
Call 911 Immediately: This is a life-threatening emergency that requires professional medical intervention.
Begin Rapid Cooling: While waiting for help, do everything you can to cool the person's body. Immerse them in cool water if possible, or douse them with water and apply ice packs to the neck, groin, and armpits.

6. Practice Proactive Sun Protection
The best way to deal with a heat-related illness is to never let it start. Sun protection is a continuous strategy, not a one-time action.
Hydrate Constantly: Drink plenty of water throughout the day, even before you feel thirsty.
Use Broad-Spectrum Sunscreen: Apply a sunscreen with at least SPF 30 and reapply it every two hours, and always immediately after swimming or excessive sweating.
Seek Shade: Use an umbrella and take breaks from the sun, especially during the peak intensity hours of 10 a.m. to 4 p.m.
Wear Protective Clothing: A wide-brimmed hat and UV-blocking sunglasses are non-negotiable.
7. The "Stingray Shuffle" Rule
In many coastal areas, stingrays bury themselves in the sand in shallow water. Stepping directly on one can result in an excruciatingly painful sting from the barb on their tail. To avoid this, never walk normally through the shallows. Instead, shuffle your feet along the sand. The vibrations from the shuffle will alert any nearby stingrays to your presence, giving them a chance to swim away peacefully.
Master Your Preparation: Final Beach Safety Tips
A safe and relaxing beach day begins before you even leave home. Smart planning and having the right gear can make all the difference, especially when traveling with family.
8. Pack a Dedicated Beach First-Aid Kit
While your main travel medical kit should be comprehensive, your beach bag needs a few specific items to handle common coastal issues:
Waterproof Bandages: For minor cuts and scrapes from shells or rocks.
Aloe Vera Gel: For immediate relief from minor sunburn.
Antihistamine Cream: To soothe the itch from insect bites.
Tweezers: For removing splinters or shell fragments.
Vinegar: A small bottle of white vinegar is a secret weapon; it can help neutralize the sting from some types of jellyfish.
9. Always Designate a "Water Watcher"
When you're at the beach with a group, especially with children, it's easy to fall into the trap of "diffusion of responsibility," where everyone assumes someone else is watching the kids in the water. The solution is to formally designate one adult as the "Water Watcher" for a set period (e.g., 15-20 minutes). During their shift, that person's only job is to watch the water without distraction—no phones, no books, no conversations. Then, you switch. This simple system ensures there are always eyes on the swimmers.
Your Ultimate Guide to Family Beach Travel
Keeping kids safe and entertained at the beach is a unique challenge. From packing the right gear to navigating meltdowns and keeping them safe in the sun and surf, a little extra preparation goes a long way. Our specialized guide takes the stress out of the equation.
Download our free Stress-Free Flying with Kids Guide for expert tips on making every part of your family vacation, from the airport to the beach, a breeze!
Beach Safety FAQs
A prepared mind is a safe mind. Here are quick answers to other common beach safety questions.
1. What’s the right way to treat a jellyfish sting?
First, get out of the water. Rinse the affected area with vinegar (if available) for about 30 seconds to deactivate the stingers. Do not use fresh water, as it can make it worse. Carefully pluck out any visible tentacles with tweezers. Soaking the skin in hot water (as hot as can be tolerated without burning) for 20-45 minutes can also help relieve the pain.
2. Is it safe to dig deep holes in the sand?
Digging in the sand is a classic beach activity, but deep holes can be incredibly dangerous. They can collapse unexpectedly, burying a person in seconds. Never dig a hole deeper than the knees of the smallest person in your group, and always fill in any holes you dig before you leave the beach.
3. What should I do if I see someone in trouble in the water?
Do not attempt a swimming rescue yourself unless you are trained in water rescue. An untrained rescuer can quickly become a second victim. The best course of action is to call for help immediately. Yell to alert a lifeguard and call 911. If you can, throw the person something that floats, like a cooler or a boogie board.
By embracing these nine essential beach safety tips, you shift from being a passive visitor to an active, aware, and prepared participant in one of nature’s most magnificent environments. The goal isn't to diminish the fun but to ensure it. A healthy respect for the ocean and a solid plan for your day are the keys to unlocking a truly carefree and unforgettable experience by the sea.

Now that you've mastered the art of staying safe on the coast, you can focus on the rest of your adventure. For a complete, deep-dive into every facet of trip planning, from health and safety to budgeting and logistics, our comprehensive Travel Guide is the only resource you'll ever need.
Don't Miss Out! Subscribe for Exclusive Content
SubscribeComments 0
No comments yet
Be the first to share your experience!
Dont Miss Out! Subscribe for Exclusive Content

Ultimate USA Holidays Guide: Top Picks

FTC Affiliate Disclosure Essentials: Stay Compliant as a Travel Creator

Essential Affiliate Tools: From Tracking to Full Optimization

Booking.com Affiliate Program Review: Pros, Cons, and Earnings Potential

Decoding Affiliate Commission Rates: Benchmarks for Travel Creators
