NYC Pride: Parade Route Essentials
TrekGuider @trekguider
The air crackles with anticipation. You feel the bass from a distant float thumping in your chest, a rhythmic heartbeat for a city ready to explode in a celebration of love, identity, and history. The NYC Pride Parade is one of the most iconic, life-affirming events on the planet. But as you picture the cascade of rainbow flags, a knot of logistical questions tightens in your stomach. With millions of people flooding Manhattan, where do you even begin? How early is early enough? How do you navigate a multi-mile route to actually see the parade without getting swallowed by the crowd?
Without a smart plan, the dream experience can dissolve into a logistical nightmare. You risk being stuck ten-deep behind a wall of people, catching only glimpses of the spectacle. You could spend hours feeling overwhelmed, battling for a sliver of sidewalk instead of immersing yourself in the powerful current of community and celebration. The line between an unforgettable day of joy and a frustrating ordeal is drawn by preparation.
This is your definitive playbook for conquering the chaos. Forget the guesswork. We are breaking down the entire pride parade New York route, section by section, arming you with insider strategies and actionable essentials. From the electric energy of the formation zone to the historic heart of the Village, this guide will help you navigate the day like a seasoned pro. Get ready to transform potential stress into pure, unadulterated Pride.
The Heartbeat of Pride: A Journey from Protest to Celebration
But to truly appreciate the river of rainbow flags and joyous noise, you have to understand its source. This isn’t just a party; it’s a pilgrimage. The modern NYC Pride Parade is the direct descendant of the Christopher Street Liberation Day March, first held in 1970, exactly one year after the Stonewall Uprising of 1969. That rebellion, a series of spontaneous and defiant demonstrations against a police raid on the Stonewall Inn, was the flashpoint that ignited the modern gay rights movement.
What began as a protest march has evolved over decades into a powerful dual-purpose event: a joyous celebration of identity and a formidable platform for activism. In the 1980s, as the AIDS crisis devastated the community, the parade became a vital and visible front line for raising awareness and demanding action, cementing its role as the community's conscience and its loudest voice. Its deep historical roots and unwavering commitment to progress make it a key element event—and for good reason, a non-negotiable highlight in our definitive guide to New York Holidays: 10 Must-Do Events. Understanding this legacy enriches the entire experience, transforming you from a spectator into a participant in living history.
Mark Your Calendar: 2026 NYC Pride Parade Date and Time
Precision is your best friend when planning for an event of this magnitude. Get these details locked into your calendar now.
Date: Sunday, the last Sunday of June
Start Time: The parade officially kicks off between 11:00 AM and 12:00 PM.
A word of caution: Do not mistake the start time for your arrival time. The parade route is miles long, and the best viewing spots are claimed hours in advance. For a prime location, especially in the more popular sections, you should be in position no later than 9:00 AM. For the truly iconic spots, even earlier is better.
Deconstructing the Route: A Mile-by-Mile Guide to the Pride Parade New York
The official route for the pride parade New York is a journey through the city's cultural and historical soul. Each segment offers a distinct atmosphere and viewing experience. Your perfect spot depends entirely on the vibe you’re seeking.
The Kick-Off: 26th Street and 5th Avenue (The Formation Zone)
The Vibe: This is the epicenter of pure, unharnessed anticipation. The energy here is electric, a fascinating mix of organized chaos and raw excitement. You’ll see floats getting their final sound checks, dance troupes running through their choreography one last time, and thousands of marchers buzzing with adrenaline before they take their first official step. It’s less of a polished performance and more of an authentic, behind-the-scenes look at the massive human effort powering the event.
Viewing Advice: Standing near the start means you see every contingent at its absolute freshest. The costumes are pristine, the energy is at its peak, and the performances are sharp. It’s a fantastic spot for photographers wanting to capture candid moments and fine details. The crowds here are intense as everyone jockeys for that first glimpse.
Logistics: Arrive extra early—think 8:00 AM—to secure a spot with a clear line of sight. Amenities are scarcer here compared to further down the route. Pack what you need for the morning, as ducking into a local shop will be a major, time-consuming undertaking.
The Main Artery: South on 5th Avenue (The Spectator Hub)
The Vibe: As the parade marches down the world-famous 5th Avenue, it hits its full, spectacular stride. This is the quintessential big-city parade experience. The avenue is wide, the crowds are massive, and the backdrop is pure New York City grandeur. The sound of music and cheering reverberates off the tall buildings, creating an immersive wall of sound. You’ll be surrounded by a diverse mix of families, tourists, and locals, all united in a shared celebration.
Viewing Advice: This is the longest stretch of the parade and where most spectators naturally congregate. For a slightly less condensed crowd, try to find a spot further north, perhaps in the high 30s or 40s. The closer you get to the Village, the exponentially denser the crowds become.
Logistics: This section offers the best access to delis, coffee shops, and stores for restrooms and refreshments. However, be prepared for long lines for absolutely everything. Public transportation is your best friend here; the numerous subway stops along 6th Avenue run parallel to the route, making access relatively straightforward.
The Historic Turn: 8th Street to Christopher Street (The Soul of Pride)
The Vibe: This is the emotional and historical heart of the entire parade. As the route makes its key turn off 5th Avenue and winds through the narrower streets of Greenwich Village towards the Stonewall National Monument, the atmosphere shifts. It becomes more intimate, more intense, and deeply resonant. The sense of history is palpable. This is where the cheers often feel the loudest and the connection between the marchers and the crowd feels most profound.
Viewing Advice: This is, without question, the most meaningful and popular place to watch the parade. Consequently, it is the most crowded. To get a spot here, you must be committed. Arrive by 8:00 AM at the absolute latest, and be prepared to hold your ground for hours. The experience, however, is powerful and unparalleled.
Logistics: Once you’re in a spot here, you’re in for the duration. The narrow streets and dense crowds make movement nearly impossible. Pack everything you need for several hours. There are fewer commercial establishments directly on these streets, so plan accordingly.

Pro-Tip: For a less obstructed view, look for spots near intersections on the opposite side of the street from the parade's direction of travel. Crowd density is often slightly lower there as people tend to cluster on the inside of the turns.
The Grand Finale: Finishing Near 15th Street and 7th Avenue (The Dispersal Zone)
The Vibe: The energy at the end of the route is one of joyous exhaustion and collective accomplishment. Marchers, who have been on their feet for hours, are often interacting more freely with the crowd as they complete their long journey. It’s less of a formal procession and more of a massive, mobile street party winding down into its final, celebratory moments.
Viewing Advice: This is by far the least crowded section of the route, making it an excellent choice for families, those with accessibility concerns, or anyone who couldn't arrive at the crack of dawn. You’ll still see every float and group, but with significantly more room to breathe and move.
Logistics: This area offers the easiest exit strategy. With the parade dispersing, streets begin to reopen sooner, and access to multiple subway lines on 7th Avenue (like the 1, 2, and 3 trains) makes for a quicker trip home or to your next destination.
Your Strategic Viewing Plan: 7 Essential Tips for the Best Experience
A little strategy goes a long way in a crowd of millions. Follow these essential tips to ensure your day is smooth, safe, and spectacular.
Arrive Early, Then Arrive Earlier: This cannot be overstated. For a front-row spot anywhere south of 23rd Street, 9:00 AM is a good baseline. For a coveted spot in the West Village or near Christopher Street, you need to be thinking 7:30 AM or 8:00 AM. The most dedicated spectators arrive with breakfast and a blanket.
Pack Your Urban Survival Kit: You are essentially setting up a base camp for the day. Your kit should include: a large, reusable water bottle (staying hydrated is non-negotiable), high-SPF sunscreen, a portable phone charger, and plenty of snacks. Relying on local bodegas is a rookie mistake; they will be overwhelmed and may run out of supplies.
Master Public Transit: Driving is not an option. Street closures are extensive and begin in the early morning. The subway is your only logical choice. Use lines that run along 6th Avenue (B, D, F, M) or Lexington Avenue (4, 5, 6) and walk west. Avoid stations directly on the route, as they will be dangerously crowded.
Choose Your Vibe, Not Just a Spot: Before you pick a location, decide what kind of experience you want. Do you crave the high-energy launch? The massive midtown spectacle? The deeply emotional historic heart? Or the relaxed, celebratory finish? Matching the location to your desired vibe is the secret to a perfect day.
Stay Connected (But Have a Backup): With millions of people in one area, cell service can be notoriously unreliable. While you should keep your phone charged, don’t depend on it for communication. Use a buddy system, and if you’re with a group, establish a clear, physical meeting point and time in case you get separated.
Prioritize Accessibility: Organizers are continually working to make the event more accessible. Check the official NYC Pride website in the weeks leading up to the parade for detailed information on designated viewing areas for people with disabilities. These locations offer better sightlines and a less congested environment.
Embrace the Virtual Experience: If you can't make it in person or prefer to avoid massive crowds, don't worry. The NYC Pride Parade is live-streamed across multiple platforms. You can catch all the action from the comfort of your home, a powerful option for those who want to participate from afar.
Pro-Tip: The blocks just after the parade turns off 5th Avenue onto 8th Street can be a strategic viewing sweet spot. The crowd thins slightly as it navigates the corner, offering a brief window for better photos and a bit more breathing room before it swells again towards Christopher Street.
Beyond the Sidelines: Documenting Your Day
The spirit of Pride is participation. Even as a spectator, you are a vital part of the event. Wear your brightest colors, create a supportive sign, and cheer loudly for the groups that resonate with you. Your energy is what fuels the marchers on their long walk.
For many, capturing the day is part of the experience. The vibrant colors, powerful emotions, and incredible stories of the pride parade New York make it a content creator's dream. If you're looking to capture and share the experience like a pro, preparation is everything. To elevate your storytelling, our The Travel Creator's Toolkit provides the essential checklists and guides to turn your passion into compelling content that does justice to this incredible event.
Planning the Perfect Pride Weekend in NYC
The parade is the magnificent centerpiece of a city-wide, month-long celebration. Pride Month in New York is packed with parties, cultural events, and community gatherings. Don’t limit your experience to just a few hours on a Sunday afternoon. Make it the anchor of an unforgettable weekend or a longer trip to the city.
Navigating the parade is just one piece of an unforgettable trip. To build a complete itinerary—from finding the best LGBTQ+-friendly hotels in Chelsea or Hell's Kitchen to exploring other iconic city sights that have shaped queer history—our comprehensive Travel Guide is the ultimate resource for planning your entire New York adventure. It helps you weave the parade into a broader, richer travel experience.
Your Mission: Experience Pride to the Fullest
You are now armed with the essential knowledge to navigate the pride parade New York not just as a spectator, but as an informed participant in a powerful celebration. You know the history that fuels the march, the unique vibe of each section of the route, and the practical strategies to make your day a resounding success. The parade is more than a route on a map; it's a journey through history, proof of resilience, and an explosion of pure joy.
So pick your spot, pack your survival kit, and get ready to experience the love, history, and unbreakable community of NYC Pride. Go with an open heart, a loud voice, and a solid plan.
Meta Data Suggestions:
SEO Meta Title: NYC Pride Parade Route Guide: Best Viewing Spots & Tips 2026
URL Slug: /nyc-pride-parade-route-essentials
SEO Meta Description: Your ultimate guide to the 2026 NYC Pride Parade. Discover the best viewing spots, route map, start times, and essential tips to navigate the crowds.
Don't Miss Out! Subscribe for Exclusive Content
Subscribe


Comments 0
No comments yet
Be the first to share your experience!
Dont Miss Out! Subscribe for Exclusive Content

San Francisco Cherry Blossoms: A Local's Guide to the Blooms

Halloween SF: Haunts Without Horrors

SF Festivals: 7 Must-See Lineups

Christmas SF: Lights & Wharf Wonders

SF Pride: 6 Route & Party Hacks

Chinese New Year SF: Parade Essentials
Solo Travel for Men: An Honest Guide to the Road Less Traveled
TrekGuider @trekguider
You feel that pull, don't you? It's the spark you get from a photo of a rugged coastline or a bustling foreign market—the call to adventure, to test your limits, and see the world on your own terms. But then the "what ifs" rush in. Are the logistics too complicated? Will it be lonely? Is it weird to travel by yourself? This guide is here to tell you those fears are normal, but they shouldn't be the reason you stay home. This is your definitive playbook for planning and executing your first incredible solo trip.
This hesitation is the silent thief of profound, life-altering experiences. It keeps you anchored in the familiar while a world of opportunity for growth, resilience, and radical self-discovery passes you by. Every year you put it off is a year you don't learn what you're truly made of when no one else is around to rely on. The comfort zone, once a safe harbor, slowly becomes a cage.
While the ultimate goal for many is creating unforgettable memories with loved ones, a journey of self-discovery through solo travel can be the most profound preparation. It builds the confidence and worldview that enriches every future trip, including those you'll find in Family Travel Ideas: The 2026 Guide to Unforgettable Trips.
Let's cut through the noise. This isn't another blog post filled with vague platitudes. This is an operational playbook, a mission briefing for one of the most rewarding journeys you'll ever undertake. We will dismantle every one of your concerns and equip you with the tools, tactics, and confidence to take that first monumental step. By the end of this guide, the idea of traveling alone won't be an intimidating fantasy; it will be your next actionable, exciting mission.

Why Going It Alone is a Modern Rite of Passage
In our day-to-day lives, men are often slotted into specific roles: the provider, the leader, the planner, the rock. These roles, while important, can also be limiting. Solo travel is a powerful antidote, a hard reset that strips away these external expectations and forces you to confront a more fundamental question: Who are you when no one is watching? The benefits aren't just about cool stories; they are tangible upgrades to your character.
Radical Self-Reliance: When you're alone in a new country and you miss the last train, there's no one to turn to for a solution. You have to figure it out. This isn't a hypothetical exercise; it's a real-time test of your problem-solving skills. You learn to trust your own judgment, navigate ambiguity, and find solutions under pressure. This builds a deep, unshakable confidence that permeates every other area of your life.
The Power of Decisive Action: At home, decisions can be made by committee. On the road, you are the committee. Where to eat, what to see, when to splurge, when to save—every choice is yours. This constant cycle of decision and consequence sharpens your instincts and teaches you to be decisive, cutting through the paralysis of overthinking.
A Hard Reset for the Mind: Routine is the enemy of growth. Solo travel is the ultimate pattern interrupt. It forces you out of your physical, mental, and social comfort zones, exposing you to new perspectives, cultures, and ways of thinking. This novelty stimulates your brain, fostering a level of creativity and open-mindedness that's difficult to achieve when you're stuck in a rut.
Forging Genuine Human Connection: Traveling with a partner or group can create a social bubble. When you travel alone, you are more approachable and more motivated to connect with others. These interactions—with fellow travelers in a hostel common room, a local shopkeeper, or a guide—are often more authentic and memorable. You learn to listen more and connect with people from vastly different backgrounds, building empathy and social skills.
A Step-by-Step Playbook for Launching Your Solo Journey
The biggest hurdle isn't the cost or the time off; it's inertia. Faced with a world of options, it's easy to get stuck in the planning phase forever. This playbook is designed to break that inertia and propel you from your couch to the boarding gate.
Step 1: Define Your Mission. What Kind of Solo Trip Are You After?
Before you look at a map, look in the mirror. Why are you doing this? Your motivation should define your destination.
The Recharge: Is the goal to decompress and escape the daily grind? You're looking for low-stress, high-comfort environments. Think a quiet coastal town in Portugal, a laid-back island in Thailand, or a cabin in a national park. The mission is relaxation, not a logistical marathon.
The Skill Acquisition: Do you want to learn something new? Pick a place that's a hub for that skill. Head to Costa Rica to learn to surf, to Chiang Mai for a Thai cooking course, or to the Alps for an introductory mountaineering class. This gives your trip a clear purpose and a built-in social structure.
The Frontier Test: Is this about pushing your limits and seeing what you're made of? This calls for a more adventurous destination. Consider trekking in Patagonia, motorbiking through Vietnam, or exploring the cultural depths of Colombia. These trips build maximum resilience.
Step 2: Choose Your Destination
Your first solo trip should be a win. It's about building confidence, not testing your absolute limits. Here are three archetypes for a successful first mission:
The Easy-Win (English-Speaking & High-Infrastructure): These are destinations where the learning curve is gentle. Think Ireland, Scotland, Australia, or New Zealand. The lack of a language barrier removes a major layer of stress, and the well-trodden tourist paths mean logistics are straightforward. You can focus on the experience of being alone without battling constant communication challenges.
The Adventure Hub (Activity-Focused): If your goal is to be active, choose a place known for it. The national parks of the Western USA for hiking, the mountains of British Columbia for biking, or Queenstown, New Zealand for adrenaline sports. These places are full of other active, often solo, travelers, making it easy to meet like-minded people.
The Backpacker's Trail (Social & Budget-Friendly): Southeast Asia (Thailand, Vietnam) or parts of South America (Peru, Colombia) are legendary for a reason. They offer an incredible value for money and a built-in social infrastructure of hostels, tours, and transportation that caters specifically to independent travelers. It's almost impossible not to meet people.
Step 3: The Budget
Your budget dictates your trip's style and duration. Be realistic and thorough. A well-structured plan, perhaps organized with a Travel Itinerary Template, is your best friend here.
Big Ticket Items: Start with the non-negotiables: flights and accommodation. Use tools like Google Flights and Skyscanner to track prices. For lodging, hostels are the most budget-friendly and social option, while private rooms on Airbnb or budget hotels offer more solitude.
Daily Expenses: Research the average daily cost in your chosen destination using sites like Numbeo. This includes food, local transport, and activities. A good rule of thumb is to estimate this and then add a 20% buffer.
Contingency Fund: This is non-negotiable. Have access to an extra $500-$1000 for emergencies—a missed flight, a medical issue, or a lost phone. This isn't for souvenirs; it's your get-out-of-jail-free card.
Pro-Tip: Always carry a portable power bank. A dead phone in an unfamiliar city isn't just an inconvenience; it's a safety risk. It’s your map, translator, and lifeline. Charge it religiously every night.
Step 4: Packing
Overpacking is a rookie mistake. Every item you bring is something you have to carry. The goal is to be prepared, not to bring your entire apartment.

The Right Bag: A travel backpack (40-50L) is far more versatile than a rolling suitcase. It forces you to be disciplined and can handle cobblestone streets, crowded trains, and hostel staircases with ease.
The Clothing Trinity: Pack items that are versatile, quick-drying, and layerable. Merino wool is the gold standard for travel clothing; it's temperature-regulating, odor-resistant, and comfortable. Aim for a week's worth of clothes and plan to do laundry.
3-4 merino wool t-shirts/henleys
1-2 pairs of versatile travel pants (not jeans)
1 pair of shorts (if climate appropriate)
1 packable rain jacket
1 mid-layer fleece or hoodie
4-5 pairs of wool socks and underwear
Essential Gear:
Packing cubes to organize everything.
A quick-dry travel towel.
A universal power adapter.
A basic first-aid kit with pain relievers, blister care, and any personal medications.
A padlock for hostel lockers.
Your Free Toolkit for Smarter Packing
Packing light is a skill. Our free How to Pack Light Guide is a masterclass in efficiency, showing you exactly how to fit everything you need into a single carry-on. Download it now and transform the way you prepare for any trip.
Tactics for Mastering the Solo Experience
Planning is only half the battle. Thriving on the road requires a specific mindset and a set of practical skills. This is where the real growth happens.
Neutralizing the "Big Three" Anxieties of Solo Travel for Men
Let’s address the elephants in the room head-on. These are the primary concerns that hold men back, and each one has a practical solution.
The Fear of Loneliness: This is the most common fear, but it's often misplaced. Being alone is not the same as being lonely.
Stay in Social Environments: Choose hostels with good common areas and organized events (like pub crawls or walking tours). This is the single easiest way to meet other travelers.
Embrace Day Tours: Joining a food tour, a hiking group, or a historical walking tour provides structured, low-pressure social interaction.
Learn a Few Key Phrases: Simply learning "Hello," "Please," and "Thank you" in the local language can break down barriers and make you seem more approachable.
Concerns About Safety: The world is generally safer than the news suggests, but being smart is non-negotiable.
Master Situational Awareness: This is your primary weapon. Constantly run a mental checklist: Where are the exits? Who seems out of place? Walk with purpose and confidence. Avoid flashing expensive electronics or large amounts of cash.
Secure Your Valuables: Keep your passport, extra cash, and credit cards locked in your accommodation. Carry only what you need for the day in a front pocket or a secure bag. Never put your wallet in your back pocket.
Inform Someone: Share your itinerary with a friend or family member back home and check in regularly.
Trust Your Gut: If a situation or a person feels off, it probably is. Remove yourself from the situation immediately. Don't worry about being polite; your safety is your only priority.
The Social Stigma (Is it "Weird"?): Let's be blunt: No one cares. The idea that it's strange for a man to travel alone is a self-imposed mental barrier. In the travel world, it's completely normal. You will see hundreds of other people doing the exact same thing.
How to Meet People Without Being Awkward
The Common Room is Your Stage: In a hostel, the common area is designed for interaction. Don't just sit in a corner on your phone. Sit at a communal table. A simple "Hey, where are you from?" is the universal icebreaker.
Ask for Advice: People love to be helpful. Asking another traveler for a restaurant recommendation is a low-stakes way to start a conversation that can easily lead to "Hey, I was about to head there now, want to join?"
Mastering the Art of Dining Alone: For many, this is surprisingly intimidating.
Sit at the Bar: It's more social and less formal than a table for one. You can chat with the bartender or the people next to you.
Bring a Prop: A book or a journal can make you feel less self-conscious, but try not to hide behind it. Make eye contact and be open to conversation.
Choose Casual Spots: Street food stalls, food halls, and casual eateries are much more comfortable for solo diners than formal restaurants.

Pro-Tip: The "Leading Question" technique is your best conversational tool. Instead of asking a closed question like "Are you having a good trip?" ask an open-ended one like, "What's been the most unexpected thing you've done in this city?" This invites a story, not a one-word answer.
Frequently Asked Questions
What's the best type of accommodation for a first-time solo male traveler?
For maximizing social opportunities and minimizing cost, hostels are unbeatable. Look for ones with highly-rated common areas and organized social events. If you need more privacy and have a larger budget, a private room in an Airbnb or a centrally-located hotel are also great options.
How do I handle eating alone in restaurants without feeling awkward?
Confidence is key. Sit at the bar whenever possible, as it's a more social and casual setting. Choosing less formal spots like food halls or bustling cafes can also feel more comfortable than a quiet, formal restaurant.
Is solo travel for men expensive?
It doesn't have to be. Your biggest expenses will be flights and accommodation. By choosing budget-friendly destinations (like Southeast Asia or Eastern Europe), staying in hostels, and eating like a local, you can travel for a fraction of what a typical resort vacation would cost.
What are some of the safest destinations for a first solo trip?
Countries with a strong tourism infrastructure and low crime rates are excellent starting points. Consider places like Portugal, Ireland, New Zealand, Japan, and South Korea. These destinations offer a great balance of adventure and security.
The Only Thing Left Is to Go
The journey of solo travel for men is far more than a simple vacation. It's a deliberate act of self-investment. It's an opportunity to strip away the noise of daily life, challenge your own preconceived limits, and build a more resilient, resourceful, and worldly version of yourself. The skills you learn are not just travel skills; they are life skills. You will return home not just with photos, but with a quiet confidence that can only be forged in the fires of experience.
The path is laid out. The excuses have been dismantled. The only thing left is to take the first step. Start the research, check the flights, and request the time off. Your adventure is waiting, but it demands that you go out and claim it.

Read the full guide: Family Travel Ideas: The 2026 Guide to Unforgettable Trips
Don't Miss Out! Subscribe for Exclusive Content
SubscribeComments 0
No comments yet
Be the first to share your experience!
Dont Miss Out! Subscribe for Exclusive Content

Ultimate USA Holidays Guide: Top Picks

FTC Affiliate Disclosure Essentials: Stay Compliant as a Travel Creator

Essential Affiliate Tools: From Tracking to Full Optimization

Booking.com Affiliate Program Review: Pros, Cons, and Earnings Potential

Decoding Affiliate Commission Rates: Benchmarks for Travel Creators

Amazon Associates for Travel: Strategies to Maximize Commissions
Solo Travel Blog Monetization: Turning Stories into Income
TrekGuider @trekguider
You've seen the Instagram posts tagged '#digitalnomad' and wondered if it's actually real. Can a solo travel blog—your solo travel blog—truly become a source of income, or is it just a path to burnout? The truth is, most new bloggers fail because they follow a random list of 'monetization ideas.' They're missing the most critical element: a strategic, time-based plan. This is not a list of ideas. This is your 24-month roadmap, grounded in real data from six-figure bloggers, showing you exactly what to do, when to do it, and the income you can realistically expect at each stage. This is your guide to successful solo travel blog monetization.

Moving from Hobbyist to Business Owner
The first and most critical shift you must make is mental. Your blog is no longer just a personal travel diary; it is the central asset of a new business. Every decision, from the topics you cover to the way you structure your articles, must be made with a clear purpose: to provide immense value to a specific audience. Before you can monetize effectively, you must provide that value, which starts with mastering the fundamentals. For a complete playbook on creating world-class content and navigating your journey, review our comprehensive .
This business-oriented mindset means prioritizing the single most important driver of revenue: Search Engine Optimization (SEO). While social media can provide fleeting traffic spikes, SEO delivers a consistent, sustainable stream of readers who are actively searching for the solutions you provide. These are the people who will click your links, book tours, and buy your products. From this day forward, think of yourself not as a blogger, but as the CEO of a media company whose primary asset is high-ranking, helpful content.
What to Expect and When
Forget the overnight success stories. Building a profitable blog is a marathon, not a sprint. Having a realistic timeline prevents discouragement and keeps you focused on the right tasks at the right time.

Year 1 Expectations: Building Traffic and Earning Your First ~$2,000
The first year is all about laying the foundation. Your primary goal is not to make a full-time income, but to publish a critical mass of high-quality, SEO-optimized content and establish topical authority in your niche. You'll spend the first few months writing and publishing consistently without seeing much traffic, and that's completely normal.
Data from established bloggers shows that you can expect to make your first affiliate sale around month four or five. By the end of the first year, a dedicated blogger can realistically earn between $1,000 and $5,000. This income will come almost exclusively from strategic affiliate marketing.
Year 2 Expectations: Scaling to a Viable Income ($20,000 - $40,000)
Year two is the scaling phase. The content you published in your first year begins to mature and rank higher in Google search results, leading to a significant increase in traffic. This is the year you'll likely cross the critical threshold needed to qualify for premium ad networks. This combination of escalating affiliate commissions and new, high-earning display ad revenue is what transforms your blog from a side hustle into a viable business. It's not uncommon for bloggers who were earning $200/month at the end of year one to be earning $2,000-$4,000/month by the end of year two.
(Months 1-6): Laying the Foundation for Your Solo Travel Blog Monetization
Welcome to the grind. In this foundational phase, you are building the powerful engine of your business long before you see significant fuel (i.e., traffic). Success here isn't measured in dollars; it's measured in discipline and consistent output.
Your Primary Focus: Publishing High-Quality, SEO-Optimized Content
Think of high-quality content as the real estate upon which you'll build your entire business. It's the non-negotiable asset that makes all future income possible. In these first six months, your goal should be to publish 25-40 thoroughly researched, long-form articles that target specific keywords your audience is searching for. Every article should aim to be the single best resource on the internet for its given topic. This early library of content is what Google will eventually reward with traffic.
Method 1: Strategic Affiliate Marketing (The Best First Step)
Affiliate marketing is the practice of earning a commission by promoting another company's products or services. It is the perfect first monetization method because most programs have no minimum traffic requirements. You can, and should, include affiliate links from day one.
The key is to recommend products you genuinely use and trust. Your recommendations must be woven naturally into helpful content. Don't just list products; explain why a certain backpack is perfect for a carry-on-only trip or how a specific travel insurance policy saved you during an emergency. A crucial element of this is transparency. Always include a clear affiliate disclosure at the top of your posts. This isn't just an FTC requirement; it's a critical component of building long-term trust with your audience.
Choosing the Right Affiliate Platforms: A Data-Driven Comparison
Start with a mix of affiliate aggregators and direct programs to maximize your opportunities.
Travelpayouts: An excellent starting point. It's an aggregator that gives you access to dozens of travel brands like Booking.com, GetYourGuide, and Hostelworld through a single platform, making it easy to manage your links and payments.
Stay22: A powerful, map-based tool specifically for accommodations. It often has a higher conversion rate than other hotel affiliate links because it shows users a variety of options on a map, which is incredibly helpful in the travel planning process.
Direct Programs: Many essential travel brands have their own programs. Be sure to sign up for:
Amazon Associates: For all the physical gear you recommend, from packing cubes to portable chargers.
Booking.com / Agoda: The top platforms for hotel bookings worldwide.
GetYourGuide / Viator: The leaders in tours, activities, and attraction tickets.
Pro-Tip: Don't go back and add affiliate links later. Research and include relevant links in every article as you write it. This saves an immense amount of time and ensures your monetization efforts start from the moment you hit "publish."
(Months 7-18): Scaling Traffic and Unlocking Serious Income
With a solid foundation of content beginning to rank, you now shift your focus from pure production to growing the one metric that unlocks the next level of income: monthly sessions.
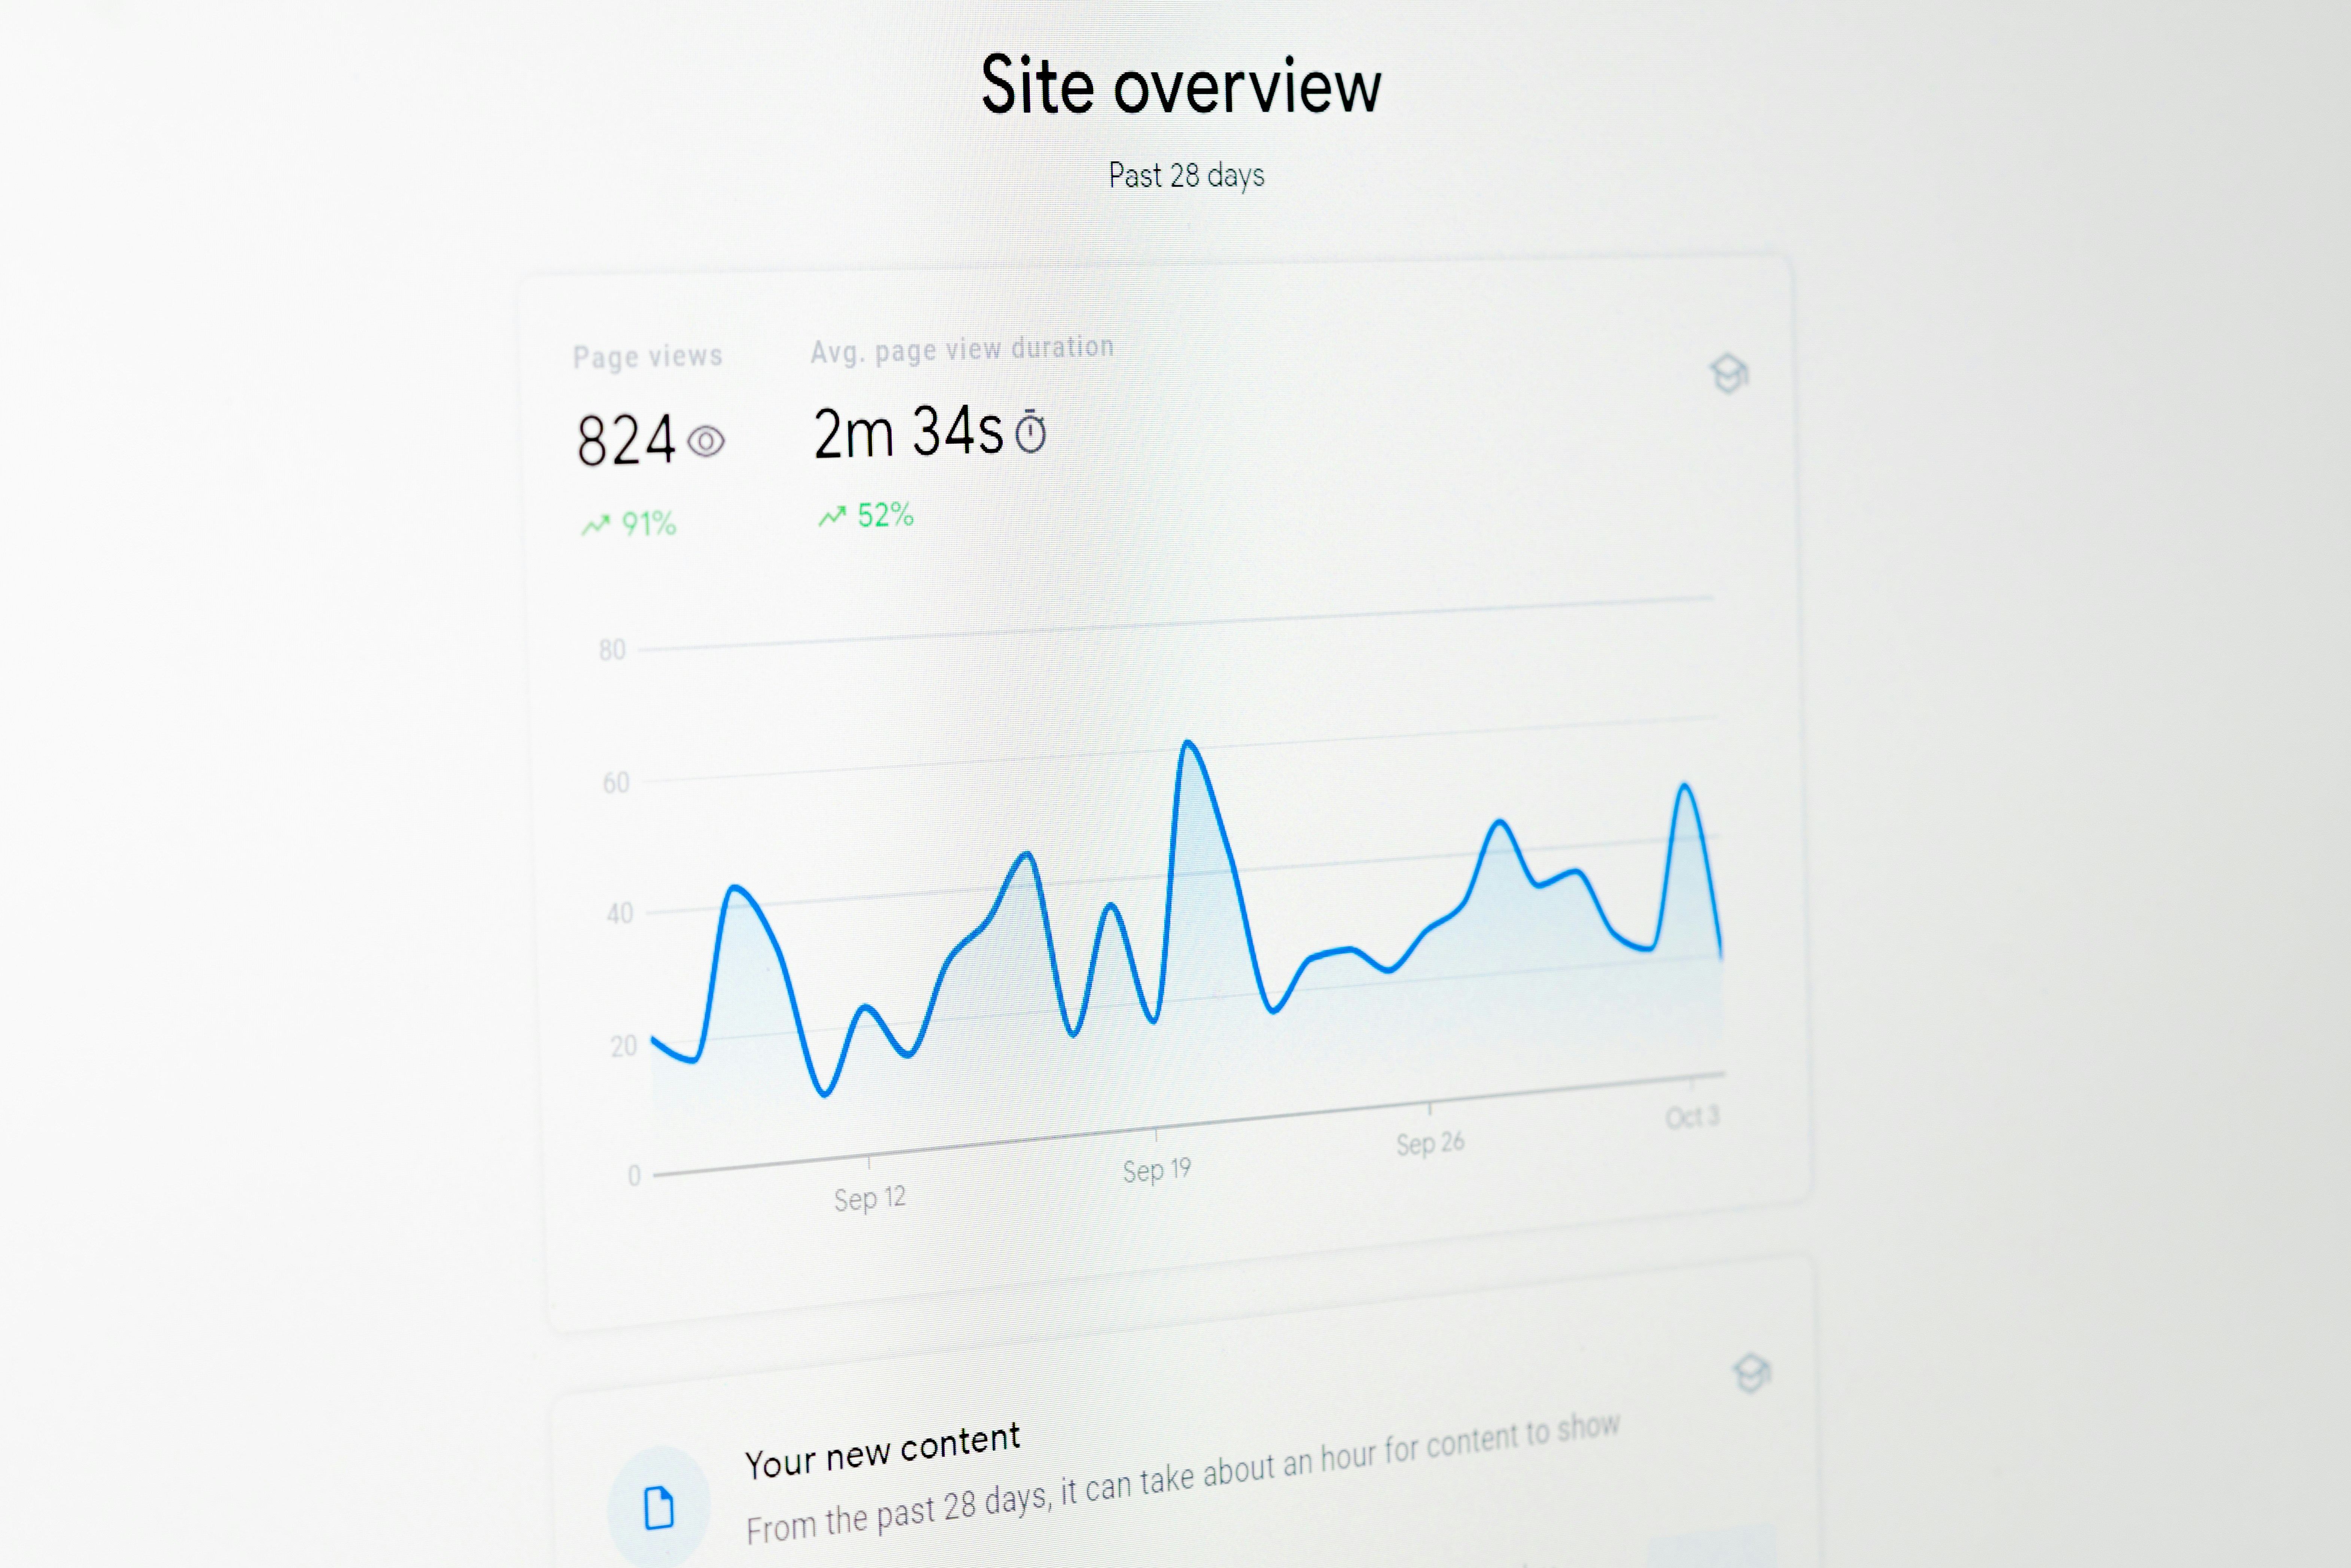
Your Primary Focus: Reaching 50,000+ Monthly Sessions
This is the magic number. Crossing the threshold of 50,000 monthly sessions (the number of visits to your site, as measured by Google Analytics) is the key inflection point where your income potential grows exponentially. It signals to premium ad networks that you have a substantial and engaged audience, making you a valuable partner. Reaching this level requires continued content production and a focus on building high-quality backlinks to your articles.

Method 2: Display Advertising (Unlocking Passive Income)
Display ads are the advertisements you see placed within the content of a website. When you have significant traffic, this becomes a powerful and almost entirely passive income stream. The key is to work with the right network.
The Ad Network Ladder: From Beginner to Premium
Not all ad networks are created equal. Your goal is to climb the ladder to a premium network as quickly as possible.
Avoid Google AdSense: Many new bloggers start here, which is a major mistake. AdSense pays extremely low rates, often resulting in an RPM (Revenue Per Mille, or earnings per 1,000 pageviews) of just $1-$3. It clutters your site for pennies.
Starter Networks (The Stepping Stone): Networks like Journey by Mediavine (requires 10,000 monthly sessions) or Ezoic offer a significant step up from AdSense. They are a great intermediate goal.
Premium Networks (The Goal): This is where serious income begins.
Mediavine: The gold standard for many bloggers. They require a minimum of 50,000 monthly sessions. Mediavine is known for its incredible support and high RPMs, often in the $20 - $40+ range. They command higher rates from advertisers because of their high-quality publisher network and direct sales teams.
Raptive (formerly AdThrive): The top tier. Raptive requires 100,000 monthly sessions and is known for having some of the highest RPMs in the industry for the same reasons.
Getting accepted into Mediavine is a major milestone. For a blog with 50,000 sessions, a $25 RPM translates to $1,250 in passive income per month. This is in addition to your growing affiliate revenue.
(Months 19+): The CEO Phase—Building a Diversified Travel Brand
Once you have stable traffic and income from ads and affiliates, you can move into the final phase: maximizing profitability by leveraging your most valuable asset—your audience's trust.
Building Brand Authority and Audience Trust
At this stage, your readers see you as a trusted expert. They've followed your advice, booked hotels you recommended, and bought gear you reviewed. This trust is the asset you will now monetize directly, leading to the highest profit margins possible.
Method 3: Selling Your Own Digital Products (The Highest Profit Margin)
Creating and selling your own products is the holy grail of solo travel blog monetization. You control the price, the product, and you keep nearly 100% of the revenue. This requires a loyal audience that trusts your expertise, which is why it's an advanced strategy.

Examples of high-value digital products for a solo travel audience include:
Comprehensive E-books: A deep dive into a specific topic, like "The Ultimate Guide to Solo Female Travel in Southeast Asia."
Printable Destination Itineraries: Detailed day-by-day plans for cities like Rome, Tokyo, or Lisbon that your readers can purchase and download.
Trip Planning Templates: Customizable spreadsheets or Notion templates that help your readers organize their own trips.
Digital Packing Lists: Niche-specific checklists for different types of travel (e.g., carry-on only, winter travel, hiking).
Pro-Tip: Validate your product idea before you build it. Send a survey to your email list or poll your audience on social media, asking what they struggle with most. If dozens of people say "planning my Italy itinerary is overwhelming," you have a winning product idea.
Method 4: Sponsored Content and Brand Partnerships
Sponsored content, where a brand pays you for a dedicated article or mention, represents a shift from passive to active income. While it can be lucrative, with sponsored posts often fetching $1,000 or more, you shouldn't just wait for opportunities to land in your inbox. As your brand authority grows, you can proactively pitch partnerships. Create a professional media kit—a one-page PDF outlining your website traffic, audience demographics, and core values—and reach out to brands you already use and love with a specific collaboration idea.
Frequently Asked Questions (FAQ Section)
How much money can you make from a travel blog?
In your first year, aim for $1,000-$5,000. By the end of year two, $20,000-$40,000 is a realistic target for dedicated bloggers. Established, six-figure travel bloggers who have diversified into ads, affiliates, and digital products can earn well over $100,000 per year.
How long does it take to make $1000 a month blogging?
For most travel bloggers who consistently publish high-quality, SEO-optimized content, it takes between 12 and 18 months to consistently earn $1,000 per month. This milestone typically occurs after being accepted into a premium ad network like Mediavine.
Do I need a large social media following to make money?
No. This is a common and damaging myth. The most profitable travel blogs focus on SEO. You can make a full-time income from a travel blog with fewer than 1,000 Instagram followers if your website traffic from Google is high and consistent.
What are the initial costs of starting a profitable travel blog?
The essential startup costs are minimal. You'll need a domain name (around $15/year) and web hosting (around $5-$15/month). Investing in a premium WordPress theme ($60 one-time) and an SEO tool like Keysearch ($17/month) are highly recommended but not strictly necessary on day one.
Turning your passion for solo travel into a profitable business is not a dream; it's a project. It requires a strategic plan, immense dedication, and an unwavering focus on providing real value. This roadmap has shown you the what and the when. By following this phased approach to solo travel blog monetization, you move beyond wishful thinking and begin the methodical work of building a business that can fund your travels and your life. The journey is long, but the destination—a life of freedom and financial independence—is worth every step.
Read the full guide: Anxious to Adventurous: The Ultimate Guide to Solo Travel Confidence
Don't Miss Out! Subscribe for Exclusive Content
SubscribeComments 0
No comments yet
Be the first to share your experience!
Dont Miss Out! Subscribe for Exclusive Content
FTC Affiliate Disclosure Essentials: Stay Compliant as a Travel Creator
Essential Affiliate Tools: From Tracking to Full Optimization

Avoid These 5 Affiliate Landing Page Mistakes for Better Conversions

Affiliate Keyword Research Mastery for Travel Blogs
Booking.com Affiliate Program Review: Pros, Cons, and Earnings Potential