July 4th Chicago: Fireworks Hotspots
TrekGuider @trekguider
The first explosive boom echoes across Lake Michigan, a flash of crimson and gold illuminating an entire wall of skyscrapers. From below, a collective gasp of pure wonder rises from a crowd of thousands. This is the postcard moment, the magic of July 4th in Chicago. But let’s be honest—the path to that perfect moment is often paved with stress. You’re grappling with the classic problem: finding a spot with a clear view that isn’t shoulder-to-shoulder with a million other people, a location you can reach without getting trapped in a traffic apocalypse, and a vantage point that truly does justice to the nation’s birthday.

The agitation is a familiar feeling. You can already picture yourself craning your neck around a forest of selfie sticks, only to catch a sliver of the show. You envision the gridlocked streets, the jaw-dropping parking fees, and that sinking feeling that you’ve missed the best part of the celebration while hunting for a decent patch of grass. The pressure is real, especially when you’re trying to fit this iconic celebration into a larger itinerary of Chicago Holidays: Windy City Thrills, where every moment is precious.
But that's not how your Fourth of July is going to play out. This guide is your strategic blueprint for outsmarting the crowds and securing a front-row seat to one of the country's most spectacular fireworks displays. We’re going to dismantle the chaos by breaking down every option, from the epicenter of the action at Navy Pier to exclusive rooftop lounges and serene lakeside parks. This is your definitive plan for a seamless, memorable, and breathtaking Independence Day Chicago.
The Epicenter: Conquering Navy Pier for Independence Day Chicago
When it comes to July 4th fireworks in Chicago, Navy Pier isn't just an option; it's the option. As the official host of the city’s largest and most dazzling display, the pier offers an unparalleled, up-close-and-personal experience. The fireworks are launched from a barge on Lake Michigan directly in front of the pier, meaning you are at ground zero for the spectacle. The energy of the massive, joyful crowd is electric. However, this prime real estate comes with a significant challenge: everyone wants it. Success here isn’t about luck; it’s about strategy.

The Ultimate Navy Pier Game Plan: A Step-by-Step Timeline
Treating your trip to Navy Pier like a casual evening stroll is the fastest way to disappointment. A successful visit requires a military-like precision that begins hours before the first firework is launched.
1. Early Afternoon (2:00 PM - 4:00 PM): The Arrival & Reconnaissance Phase Do not wait until dusk. Arriving in the early afternoon is your secret weapon against the worst of the traffic and security lines. Use this time to your advantage. Grab a Chicago-style hot dog or a slice of deep-dish from a food vendor before the lines snake around the building. Take a ride on the 200-foot Centennial Wheel for a staggering daytime panorama of the city and lakefront. This is your chance to relax and absorb the festive atmosphere before the masses descend.
2. Late Afternoon (4:00 PM - 7:00 PM): The Encampment Phase This is when the pier transforms from a tourist attraction into a high-stakes real estate market. The official advice is to arrive by 7:00 PM, but by then, you’re looking at leftover spots with obstructed views. Your mission is to claim a prime piece of turf along the South Dock. The farther east you venture down the pier, the more central your view will be. Lay down your blankets, set up your chairs, and establish your base camp. This is the time to settle in for the long, rewarding wait.
3. Evening (7:00 PM - 9:00 PM): The Anticipation Phase As the sun dips below the skyline, the energy on the pier builds to a palpable buzz. This is the perfect time for people-watching, playing a deck of cards, or just enjoying the cool lake breeze. Keep your group together; a simple trip to the restroom can become a challenging expedition through a sea of people. Be patient and soak in the shared sense of excitement.
4. The Main Event (9:00 PM): The Spectacle Just before 9:00 PM, the lights dim, a hush falls over the crowd, and the first firework shrieks into the night sky. For the next 15-20 minutes, you are immersed in a world-class pyrotechnic display. Because you planned ahead, you have a comfortable, direct view, making the entire day’s effort completely worth it.
5. Post-Show (9:30 PM onwards): The Strategic Retreat The moment the grand finale fades, resist the primal urge to bolt. Tens of thousands of people will be flooding the exits at once. Instead, execute a strategic delay. Let the initial human tidal wave recede. Pack up your belongings at a leisurely pace, enjoy the glittering skyline, and plan to start your journey home 30-45 minutes after the show. Your future self will thank you.
The Sensory Experience: More Than Just a Light Show
This isn’t just a visual show; it’s a full sensory assault. The fireworks are perfectly synchronized to a soaring patriotic soundtrack broadcast across the pier, with each concussive boom vibrating through the wooden planks beneath your feet. You can smell the faint, celebratory scent of gunpowder and lake water on the breeze. It’s an immersive experience that a distant view simply cannot replicate.
Your Navy Pier Survival Kit
An hours-long stakeout for fireworks demands a little comfort. Packing smart is non-negotiable.
Seating: A thick blanket or low-profile foldable chairs are essential.
Sustenance: Pack sealed water bottles and plenty of snacks. While food is available, having your own stash saves you from long lines and high prices.
Sun & Wind Protection: The afternoon sun reflecting off the lake is brutal. Bring sunscreen, sunglasses, and a hat. After dark, the breeze off the lake can be surprisingly chilly, so a light jacket is a wise addition.
Power Bank: Between taking photos, coordinating with friends, and passing the time, your phone battery will drain. A portable charger is a lifesaver.
Entertainment: A deck of cards, a book, or downloaded podcasts can make the waiting hours fly by.
To avoid feeling like a pack mule, mastering the art of minimalism is crucial. For pro-level tips on carrying only what you need, our How to Pack Light Guide is an essential read.
Beyond the Pier: Chicago's Best Alternative Fireworks Views
If the thought of the Navy Pier crowds gives you hives, don't worry. Chicago is brimming with fantastic alternative spots that offer breathtaking views without the same level of intensity.
Rooftop Revelry: An Elevated Experience
For a more civilized and comfortable viewing experience, nothing beats a rooftop bar. You trade the massive crowds for a reserved seat, craft cocktails, and an unbeatable panoramic perspective.
Offshore Rooftop & Bar: Perched at the very end of Navy Pier, this is officially the world's largest rooftop bar. It offers the most direct, spectacular view imaginable, but tickets for their July 4th party are a hot commodity, selling out months in advance at a premium price.
Cindy's Rooftop: Sitting atop the historic Chicago Athletic Association hotel, Cindy's provides a stunning, albeit more distant, view across Millennium Park toward the lake. The reflection of the fireworks on the polished surface of "The Bean" is a uniquely Chicago sight.
Terrace 16: Located in the Trump International Hotel & Tower, this elegant terrace offers a direct, sweeping vista of the lakefront and Navy Pier. It’s a high-end option for those looking to celebrate in true luxury.

Pro-Tip: Book any rooftop bar reservation or fireworks cruise ticket the moment they become available. These premium experiences are in high demand and often sell out by early spring. Set a calendar reminder for February or March to start your search.
Lakeside Serenity: Parks and Beaches with a View
For a classic, family-friendly picnic vibe, Chicago’s sprawling lakefront parks and sandy beaches are ideal.
Millennium Park & Grant Park: These iconic parks offer vast lawns perfect for spreading out a blanket. While some views might be partially obstructed by buildings, the atmosphere is wonderfully festive. The key is to find a spot east of DuSable Lake Shore Drive for the clearest line of sight to Navy Pier.
Ohio Street Beach & North Avenue Beach: Just north of the pier, these beaches offer a fantastic, slightly angled view of the fireworks exploding over the water. You get the added bonus of feeling the sand between your toes as you watch. These are beloved local spots, so arrive early to claim your space.
Museum Campus: The grassy areas surrounding the Field Museum, Shedd Aquarium, and Adler Planetarium offer arguably the most iconic skyline view in the city. Watching the fireworks burst behind Chicago’s architectural titans is a photographer’s dream come true.

Set Sail for the Spectacle: Fireworks Cruises on Lake Michigan
To completely escape the land-based crowds and get a truly unique perspective, watch the show from the water. Numerous companies offer special July 4th cruises.
Dinner & Cocktail Cruises: Companies like Odyssey Lake Michigan and Spirit of Chicago offer elegant evenings with dining, dancing, and guaranteed front-row seats on the water for the main event.
Architectural Tours: Many of the city’s famed architectural boat tours offer special holiday cruises that conclude by positioning themselves perfectly on the lake for the fireworks display.
Tall Ship Cruises: For a truly memorable experience, watch the show from the deck of a majestic tall ship like the Windy, adding a touch of nautical history to your patriotic celebration.
A Pro's Guide to July 4th Logistics
A flawless holiday is built on smart planning. Beyond choosing your spot, mastering transportation and safety will ensure your day is stress-free.

Getting Around the City: Transportation Hacks
On Independence Day Chicago, public transit is not just an option; it's a necessity.
CTA 'L' Trains: The elevated and subway trains are the most efficient way to get downtown. The State/Lake (Brown, Green, Orange, Pink, Purple Lines) and Washington/Wabash stops are your best bets for accessing Grant Park and the southern approach to Navy Pier.
CTA Buses: Several bus routes drop off directly at or near Navy Pier, including the #29 State, #65 Grand, #66 Chicago, and the #124 Navy Pier express route. Be prepared for holiday schedules and potential reroutes due to street closures.
Rideshare & Taxis: Avoid them if you can. Surge pricing will be in full effect before and especially after the fireworks. If you must use a rideshare, walk several blocks west of Michigan Avenue to request your ride in a less congested zone.
Safety First: Navigating Crowds Like a Pro
Large crowds require situational awareness. Keep these tips in mind:
Use the Buddy System: Stick with your group. It’s easy to get separated in the post-fireworks shuffle.
Establish a Meeting Point: Before your phone batteries die, pick a clear, specific meeting spot away from the main exit paths in case you get separated. "The front of the Ferris wheel" is a bad idea; "the corner of the W Chicago - Lakeshore hotel" is much better.
Supervise Children Closely: The crowds can be overwhelming for kids. Keep them close, and consider writing your phone number on their arm or a wristband.
Expect Strong Security: At Navy Pier and other major gathering points, expect bag checks and a heavy police presence. Prohibited items typically include alcohol, coolers, grills, and drones. Check the official Navy Pier website for the most up-to-date list.
Your Blueprint for a Flawless Fourth
You are now armed with the ultimate insider’s guide to experiencing the magic of July 4th in Chicago. The anxiety of the unknown has been replaced with a clear, actionable strategy. Whether you brave the vibrant energy of Navy Pier, opt for the chic ambiance of a rooftop bar, or choose the laid-back vibe of a lakeside park, you have a plan to make it happen. You are ready to navigate the crowds, secure the perfect view, and create unforgettable memories against the backdrop of one of America’s greatest cities. This is how you master Independence Day Chicago.
Now that you've conquered the city's biggest patriotic celebration, why stop there? Unlock all the secrets of the Windy City's year-round festivities and hidden gems. For the most comprehensive insights into making the most of your trip, from iconic landmarks to local favorites, our Travel Guide is your ultimate resource for exploring Chicago and beyond.
Meta Data Suggestions:
SEO Meta Title: July 4th Chicago Fireworks: 5 Best Viewing Hotspots
URL Slug: july-4th-chicago-fireworks-hotspots
SEO Meta Description: Planning your Independence Day in Chicago? Discover the best spots to watch the Navy Pier fireworks, from the pier itself to secret rooftops and cruises.
Don't Miss Out! Subscribe for Exclusive Content
Subscribe


Comments 0
No comments yet
Be the first to share your experience!
Dont Miss Out! Subscribe for Exclusive Content

San Francisco Cherry Blossoms: A Local's Guide to the Blooms

Halloween SF: Haunts Without Horrors

SF Festivals: 7 Must-See Lineups

Christmas SF: Lights & Wharf Wonders

SF Pride: 6 Route & Party Hacks

Chinese New Year SF: Parade Essentials
4 Unforgettable National Park Family Travel Ideas
TrekGuider @trekguider
Struggling to find a family vacation that pulls your kids away from screens and creates genuine memories, not just stress? You're not alone. The pressure to plan the perfect, budget-friendly trip often leads to analysis paralysis amid an overwhelming sea of options and the fear of getting it all wrong. This guide cuts through the noise.
This is where the timeless majesty of America’s national parks comes in. They are the ultimate solution—vast playgrounds of natural wonder that offer a powerful antidote to the digital saturation of modern life. Forget generic resort packages; this guide is a strategic playbook for crafting an unforgettable national park adventure. We’ll transform the daunting task of planning into an exciting journey.

As we explore these specific parks, remember they represent just one path to an amazing trip. For a complete overview of destinations for every budget and travel style, our Family Travel Ideas: The 2026 Guide to Unforgettable Trips is your ultimate resource. This article is your specialized map to sun-drenched trails, awe-inspiring wildlife, and the kind of shared experiences that strengthen family bonds for years to come.
Why National Parks are the Ultimate Family Travel Ideas for Summer
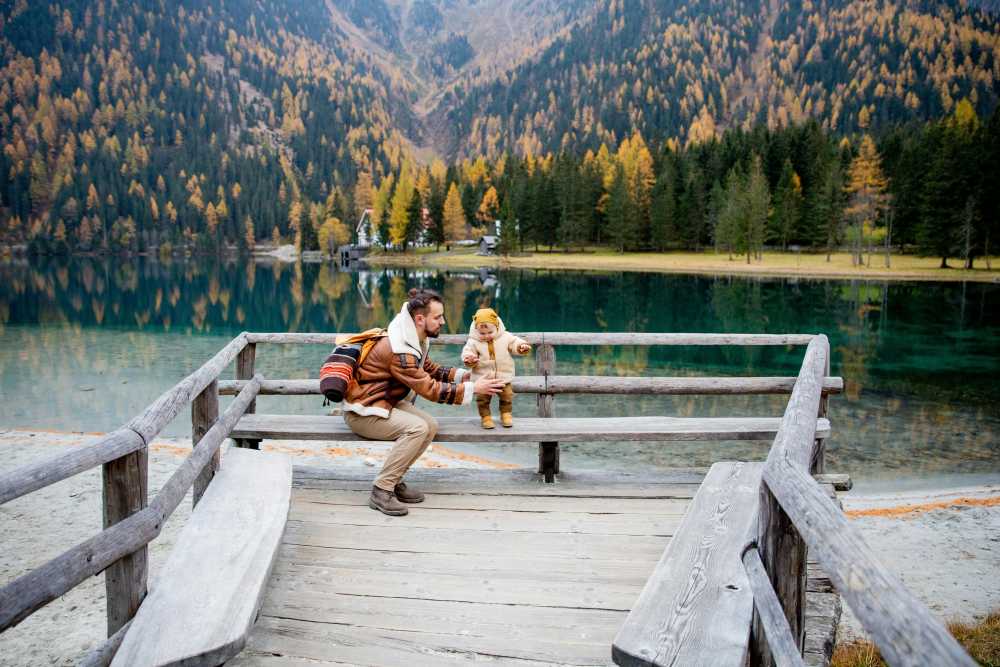
In a world of manufactured entertainment, national parks offer something profoundly real. They are living classrooms, natural gymnasiums, and sanctuaries for the soul. For families, they present a unique opportunity to disconnect from daily routines and reconnect with each other in a meaningful way.
Unmatched Educational Value: Where else can your child see the geological forces that shaped our planet firsthand at the Grand Canyon, or watch a bison herd thunder across the plains of Yellowstone? These parks are immersive, multi-sensory learning environments that bring textbook concepts to vivid life.
Built-in Adventure: From gentle, toddler-friendly nature walks to more challenging hikes for teens, the parks are structured for adventure at every skill level. The thrill is in the discovery—spotting a bald eagle, identifying a new wildflower, or conquering a trail together.
Remarkable Affordability: Compared to theme parks or international travel, a national park vacation can be incredibly budget-friendly. An annual "America the Beautiful" pass grants access to all parks for just $80 per vehicle. With options for camping or lodging in nearby towns, you can tailor the trip to your exact financial comfort level.
A Cure for Nature Deficit Disorder: Experts increasingly recognize that time spent in nature is critical for a child's physical and mental development. It reduces stress, improves focus, and fosters creativity. A week in the woods can be the most effective reset button you’ll ever press for your family.
They are, quite simply, America's best idea, and they are waiting to be the backdrop for your family's next great story.
Your National Park Summer Adventure Playbook
Success in the wild begins with careful planning at home. The immense popularity of national parks during the summer means that spontaneity can lead to sold-out signs and disappointment. Following a proven framework is key to a smooth and memorable trip.
Step 1: The 6-12 Month Countdown - Booking Your Basecamp
Let’s start with a non-negotiable truth: if you only get one thing right in your planning, make it your lodging. In-park accommodations and popular campsites are often booked solid the day they become available, sometimes a full year in advance.

Define Your Lodging Style:
In-Park Lodges: Offer unparalleled convenience and historic charm (think the Old Faithful Inn). They are the most expensive option and require the earliest booking.
Campgrounds: Provide the most immersive nature experience. Services range from primitive sites to full RV hookups. Reservations are typically made through Recreation.gov.
Gateway Towns: Towns just outside park entrances (like West Yellowstone, MT, or Springdale, UT) offer a wide range of hotels, motels, and vacation rentals. They provide more flexibility and amenities but require daily travel into the park.
Set Your Alarms: Identify the exact date and time that reservations open for your target dates and lodging. Be online and ready to book the second they become available.
Have Backup Plans: Research and be ready to book your second and third choices immediately if your first is unavailable.
Pro-Tip: How to Actually Win the Campground Lottery
Booking a popular national park campsite on Recreation.gov is a competitive sport. Here’s how to win: a few days before your booking day, log into your account, find your desired campground, and add it to your cart to confirm the exact release time (usually 10 a.m. ET). On the day, log in 10 minutes early, sync your computer clock to the official U.S. time (time.gov), and have all your information ready. Refresh your screen precisely at the release time and complete the booking in seconds.
Step 2: The 2-3 Month Check-In - Crafting Your Itinerary
With your basecamp secured, you can now build your daily plan. The key is to balance iconic sights with downtime to avoid burnout. Our guide on How to Make Family Travel Planning Actually Easy dives even deeper into this process.
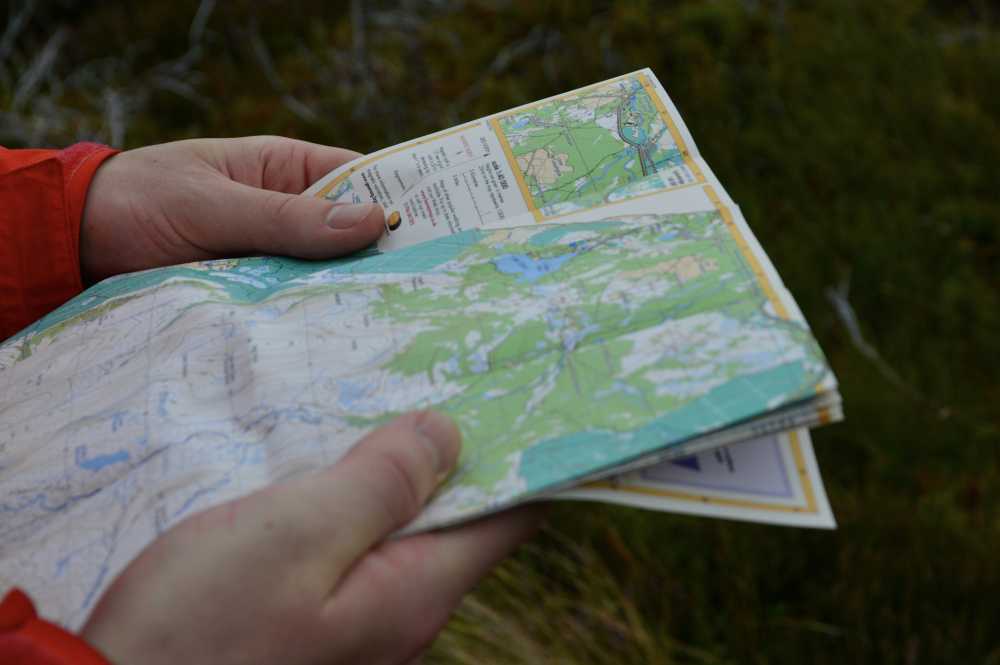
Cluster Your Activities: Parks are huge. Study the park map and group your desired activities by geographic area. Dedicate full days to specific regions, like the Yellowstone Lake area or the Tioga Road in Yosemite, to minimize driving time.
Prioritize the "Must-Sees": Identify the 2-3 iconic experiences your family absolutely cannot miss. Plan to visit these popular spots early in the morning (before 9 a.m.) or later in the afternoon (after 4 p.m.) to avoid the worst crowds and midday heat.
Involve the Kids: Give your children, especially older ones, a voice in the planning. Let them research and choose a specific trail they want to hike or a Ranger Program they want to attend. This ownership fosters excitement and cooperation.
Stay Organized from Start to Finish
A great road trip has a lot of moving parts. Our free checklist is designed to help you track everything from reservations to packing lists, ensuring nothing gets missed.
Download the free National Park Road Trip Checklist
Top National Parks for Summer Family Adventures (And What to Do There)
While every park is special, some are exceptionally well-suited for families during the summer months. Here are our top picks for incredible family travel ideas for summer in the national parks.
Yellowstone National Park: The Geothermal Wonderland

Best For: Ages 6+. The sheer scale and geothermal wonders are captivating for school-aged children and teens.
Can't-Miss Activities:
Watch Old Faithful Erupt: It’s iconic for a reason. Check the posted eruption times and find a spot on the boardwalk.
Explore the Grand Prismatic Spring: The vibrant colors of this massive hot spring are otherworldly. The best view is from the elevated overlook on the Fairy Falls Trail.
Wildlife Safari in Hayden Valley: Drive through this vast, open valley at dawn or dusk for the best chances of spotting bison, elk, grizzly bears, and even wolves.
Kid-Friendly Hike: The Storm Point Loop Trail is a relatively flat 2.3-mile loop that leads through forest to a scenic point on Yellowstone Lake.
Zion National Park: The Majestic Canyon Sanctuary
Best For: All ages, but especially families with active kids and teens.
Can't-Miss Activities:
Ride the Park Shuttle: During peak season, the mandatory shuttle is an experience in itself, offering narrated guidance and stunning views.
Walk The Narrows (Bottom-Up): Wading through the Virgin River in a 1,000-foot-deep canyon is the quintessential Zion experience. Rent proper water shoes from an outfitter in Springdale—it's a game-changer.
Hike to Emerald Pools: This series of trails leads to lush, spring-fed pools and waterfalls. The Lower Pool trail is paved and accessible for strollers.
Kid-Friendly Hike: The Pa'rus Trail is a 3.5-mile paved trail that follows the Virgin River. It's perfect for strollers, wheelchairs, and bikes.
Acadia National Park: The Coastal Gem of New England
Best For: All ages. The diversity of landscapes makes it a perfect fit for multi-generational trips.
Can't-Miss Activities:
Drive the Park Loop Road: This 27-mile road hits many of the park's highlights, including Sand Beach, Thunder Hole, and Otter Cliff.
Watch the Sunrise from Cadillac Mountain: Be one of the first people in the United States to see the sunrise. Vehicle reservations are now required and must be booked in advance.
Explore the Tide Pools: At low tide, the rocky coastline near Wonderland Trail reveals a fascinating world of sea stars, crabs, and anemones.
Kid-Friendly Hike: The Jordan Pond Path is a 3.3-mile loop around a crystal-clear pond, best capped off with popovers at the Jordan Pond House.
Olympic National Park: A World of Ecosystems

Best For: Families who crave variety and have kids aged 7+. Olympic is like visiting three parks in one.
Can't-Miss Activities:
Explore the Hoh Rainforest: Walk the Hall of Mosses Trail (.8 miles), an easy loop that immerses you in a temperate rainforest dripping with green. It’s pure magic.
Discover Rialto Beach: This is the iconic Pacific Northwest coastline. Explore tide pools, admire giant driftwood, and hike to the Hole-in-the-Wall sea arch (check tide charts!).
Drive to Hurricane Ridge: Ascend nearly a mile in elevation for breathtaking panoramic views of the Olympic Mountains.
Kid-Friendly Hike: Sol Duc Falls Nature Trail is a 1.6-mile roundtrip hike through a stunning old-growth forest to a powerful, picturesque waterfall.
Common Pitfalls and How to Avoid Them
The "Too Much, Too Fast" Itinerary: Don't try to see an entire park in two days. You’ll end up with cranky kids and only see the park through a car window. Embrace a slower pace. For more on this, explore The Sanity-Saving System for Your Next Family Road Trip.
Ignoring the Junior Ranger Program: This is a mistake. The free activity booklets available at any visitor center are the single best way to engage kids aged 5-12. It transforms them from passive passengers into active explorers.
Underestimating Wildlife Safety: Seeing a bear or bison is a thrill, but these are powerful wild animals. Know and respect the rules: stay at least 100 yards from bears and wolves, and 25 yards from all other large animals. Never, ever feed wildlife.
Pro-Tip: Download the official NPS (National Park Service) app before your trip. You can save park maps and content for offline use, a lifesaver in areas with no cell service.
Packing and In-Trip Strategies
Your gear and daily approach can make or break the experience. Focus on comfort, preparedness, and flexibility.
The Essential Family Packing List:

Layered Clothing: Summer weather in the mountains is notoriously unpredictable. Pack lightweight layers—t-shirts, fleeces, and a waterproof rain jacket—for everyone.
Sturdy Footwear: Do not attempt hikes in flip-flops. Everyone needs comfortable, broken-in shoes with good traction.
Sun Protection: The sun is more intense at higher elevations. Bring wide-brimmed hats, sunglasses, and high-SPF sunscreen.
Reusable Water Bottles: Staying hydrated is critical. A large water bladder for each adult and a reusable bottle for each child is a must.
A "Go-Bag" for the Car: Keep a small backpack in the car with essentials: a first-aid kit, endless snacks, binoculars, a physical park map, and wet wipes.
Frequently Asked Questions
What is the best time of year for a national park family vacation?
While summer offers the most accessible weather and open facilities, it's also the most crowded. For fewer crowds and beautiful scenery, consider the "shoulder seasons" of late spring (May-June) and early fall (September-October). Always check specific park conditions, as weather varies greatly by region.
How far in advance should I book lodging for a national park trip?
For popular in-park lodges, you should book 12 months in advance—often the day reservations become available. For campsites, the booking window is typically 6 months in advance. Planning this far ahead is crucial for securing the best locations.
Are national parks a good vacation idea for families with toddlers?
Absolutely! Many parks feature paved, stroller-friendly trails like the Pa'rus Trail in Zion or accessible boardwalks around Yellowstone's geysers. The key is to choose the right activities, keep hikes short, and take advantage of the Junior Ranger programs, which have activities for younger children.
What's the most important thing to pack for a national park trip?
Beyond your camera, the most critical items are layered clothing and proper footwear. Mountain weather can change in an instant, so having layers ensures everyone stays comfortable. Sturdy, broken-in shoes are essential for preventing blisters and navigating uneven trails safely.
Conclusion
The beauty of a national park vacation lies in its simplicity and its power. By investing in careful planning, you are not just organizing a trip; you are building a framework for connection and creating a reservoir of shared memories that your family will draw upon for a lifetime. These family travel ideas for summer are more than just a vacation—they are an investment in your family's story.
So, use this guide to book with confidence, pack with purpose, and get ready to discover the incredible wonders waiting in your own backyard.

Read the full guide: Family Travel Ideas: The 2026 Guide to Unforgettable Trips
Don't Miss Out! Subscribe for Exclusive Content
SubscribeComments 0
No comments yet
Be the first to share your experience!
Dont Miss Out! Subscribe for Exclusive Content
San Francisco Cherry Blossoms: A Local's Guide to the Blooms
Halloween SF: Haunts Without Horrors
SF Festivals: 7 Must-See Lineups
Christmas SF: Lights & Wharf Wonders
SF Pride: 6 Route & Party Hacks
Chinese New Year SF: Parade Essentials
How to Solo Travel Europe: A Step-by-Step First-Timer's Plan
TrekGuider @trekguider
You have a dozen tabs open, a saved folder of dream destinations on Instagram, and that creeping sense of anxiety that it’s all just too complicated. The dream of wandering through Parisian streets or watching a sunset in Lisbon feels buried under an avalanche of questions about budgets, safety, and the fear of being utterly alone. You're stuck in analysis paralysis, and the excitement is slowly being replaced by dread.
You don't need another list of vague 'tips.' You need a plan.
This guide is that plan. This is your complete roadmap for solo travel in Europe. We will walk you through every single step, from your first budget spreadsheet to your first solo dinner abroad, turning your overwhelming 'what ifs' into a confident, resounding, 'I'm ready.'

From Jitters to Jet-Set: Your Four-Week Plan to Conquer Pre-Trip Anxiety
The single greatest weapon against travel anxiety is a competent, actionable plan. Every item you check off a list is a small victory, a piece of tangible proof that you are capable and in control. This guide will provide the specific, step-by-step strategy for your European adventure. But before we dive in, it's vital to build a strong foundation. For a complete overview of the core principles and mindset needed for any solo journey, is the perfect place to start.
Your 4-Week Countdown: A Week-by-Week Planning Checklist
Transform anxiety into action by breaking down the process into manageable weekly goals.
4 Weeks Out: Finalize your budget and book your round-trip flights. Purchase comprehensive travel insurance (this is non-negotiable). Ensure your passport is valid for at least six months beyond your planned return date.
3 Weeks Out: Book your accommodation for the first city on your itinerary. Begin booking major train routes between countries, as prices often increase closer to the date.
2 Weeks Out: Plan your packing list and purchase any necessary gear, like a universal adapter or packing cubes. Notify your bank and credit card companies of your travel dates.
1 Week Out: Download offline maps (Google Maps) and language packs (Google Translate). Confirm all bookings and share your detailed itinerary with a trusted contact back home. Pack your carry-on.
Identifying Your Travel Fears (and How to Systematically Crush Them)
Write down your top three fears. Are they about safety? Loneliness? Getting lost? Now, for each one, write down one concrete, actionable step you can take to mitigate it.
Fear of safety? Research and book a hotel in a neighborhood with a high GeoSure Women's Safety score.
Fear of loneliness? Pre-book a group walking tour for your first full day in a new city.
Fear of getting lost? Spend 30 minutes on Google Street View "walking" the route from your arrival airport/train station to your hotel. Familiarity breeds confidence.
How to Master Your Money in Europe
Financial stress can suffocate an otherwise amazing trip. A clear, realistic budget is an act of self-care that empowers you to enjoy your adventure without worry. Understanding the real costs of solo travel in Europe is the first step to financial freedom on the road.
How Much Does a Solo Trip to Europe Actually Cost?
Let's talk numbers. While your personal travel style is the biggest variable, here are some realistic daily budgets to anchor your planning (these exclude flights):
The Budget Backpacker: $50 - $75/day. This means staying in hostel dorms, cooking some of your own meals, focusing on free activities like walking tours, and using buses or pre-booked trains.
The Mid-Range Explorer: $100 - $175/day. This allows for private rooms in hostels or budget hotels, a mix of restaurant meals and street food, museum entries, and more comfortable train travel.
The Comfort Seeker: $200+/day. This budget accommodates boutique hotels, multi-course dinners, guided tours, and last-minute travel plans.

Destination Cost Tiers
Not all of Europe is priced equally. Stretch your budget further by focusing on these regions:
Budget-Friendly: Portugal, Spain, Czechia, Hungary, Poland, and the Balkan countries (Croatia, Albania, Bosnia and Herzegovina).
Mid-Range: Italy, Germany, France (outside of Paris), Ireland, Slovenia.
Splurge-Worthy: Switzerland, Iceland, Norway, Denmark, Sweden, and the United Kingdom (especially London).
Pro-Tip: The easiest way to save money on food is to make lunch your main meal. Many European restaurants offer a prix fixe lunch menu (menu of the day) which includes multiple courses for a fraction of the evening price.
Choosing Your Perfect First Solo Adventure
Your first destination should be a launching pad for success. Prioritize countries known for safety, excellent tourist infrastructure, and ease of navigation. This isn't about being unadventurous; it's about setting yourself up for a win.
For the Cautious Explorer: The 5 Safest & Easiest Countries for a First Trip
These countries consistently rank high on the Global Peace Index and are incredibly welcoming to solo travelers.
Portugal: Safe, affordable, fantastic public transport, and English is widely spoken in tourist areas. Lisbon is arguably the perfect first-time solo travel city.
Iceland: Staggeringly safe with otherworldly landscapes. Ideal for nature lovers. Easy to navigate with tours, though it is expensive.
Slovenia: A hidden gem. It has the beauty of Switzerland at a fraction of the cost, is incredibly safe, and is small enough to explore thoroughly.
Ireland: Famously friendly locals, easy to navigate, and a cozy pub culture that makes it easy to strike up a conversation.
Austria: Clean, efficient, and beautiful. Vienna is a solo traveler's dream with its cafe culture and walkable city center.

Understanding the Schengen Zone: How to Maximize Your 90 Days
For U.S. citizens, the Schengen Area is a collection of 27 European countries that have abolished internal border controls. You can travel freely between these countries for up to 90 days within any 180-day period without a visa. Be sure to track your days carefully if you're planning a longer trip. Countries like the UK and Ireland are not in the Schengen Zone and have their own entry rules.
Navigating Europe Like a Pro
Europe's transportation network is a marvel of efficiency. Mastering it is a core skill that transforms you from a tourist into a traveler.
Flights vs. Trains vs. Buses
Flights: Use budget airlines like Ryanair or EasyJet for long distances (e.g., Lisbon to Rome). Book well in advance and be ruthless about their baggage weight limits to avoid exorbitant fees.
Trains: The best option for distances under 5 hours. It’s scenic, comfortable, and delivers you directly to the city center. A Eurail pass can be cost-effective if you plan on frequent, long-distance train travel, but always compare the pass price to buying individual tickets in advance.
Buses: The cheapest, but slowest, option. Companies like FlixBus and BlaBlaCar Bus are great for budget-conscious travelers and for routes not well-served by trains.

A Beginner's Guide to Navigating Europe's Train Systems
Booking trains can feel intimidating. The key is using the right tools. Apps like Trainline or Omio are great for comparing options, but they sometimes add a small service fee. For the best price, go directly to the website of the country's national rail service (e.g., Deutsche Bahn in Germany, Trenitalia in Italy).
Pro-Tip: In some countries (like Italy and France), you must validate your paper ticket in a small machine on the platform before boarding. Forgetting this step can result in a steep fine. When in doubt, watch what the locals do!
Finding Your Home Away From Home
Where you sleep is your sanctuary. It’s your base of operations, your charging station, and your place to feel secure.
Hostels vs. Hotels vs. Airbnbs for Solo Travelers
Hostels: The best choice for budget and social connection. Modern hostels offer private rooms, female-only dorms, and organized social events. They are the easiest place to meet fellow travelers.
Hotels: The right choice when you prioritize privacy, comfort, and security. A hotel gives you a guaranteed quiet space to decompress after a long day of exploring.
Airbnbs: Can offer great value and a local feel, but can also be isolating. For a first-timer, a "private room" in a host's apartment is a good middle ground, offering a local connection with more privacy than a hostel.
How to Pick a Safe and Social Hostel (Even If You're Not 21)
Read recent reviews like a detective, specifically filtering for "solo traveler" or "solo female traveler." Prioritize properties with:
24-hour reception
Secure individual lockers (bring your own padlock)
A well-lit, central location
Organized events like walking tours or group dinners

Your Guide to Staying Safe and Savvy on a Solo Travel in Europe
Let’s be clear: safety isn't about paranoia; it's about preparation. It's the quiet confidence that comes from being aware and intentional, which makes you a less appealing target from the start.
Blending In and Walking with Purpose
Dress to blend: Observe what local women are wearing. Ditching the tourist "uniform" of athletic wear can help you stand out less.
Walk with confidence: Even when lost, walk like you know where you're going. Duck into a cafe or shop to consult your map rather than stopping in the middle of the sidewalk.
Avoid "distracted" behaviors: Keep your phone away when walking through crowded areas. Being present and aware of your surroundings is your number one deterrent.
Proven Tactics to Beat Pickpockets
Major European cities are notorious for pickpockets who target distracted tourists.
Use a crossbody bag worn in front of your body, always with the zipper closed.
Never put your phone or wallet in your back pocket.
At restaurants, don't hang your bag on the back of your chair or place your phone on the table. Keep your belongings in your lap.
The Art of Solo Socializing
One of the biggest anxieties about a solo travel Europe trip is loneliness. The beauty of it is that you are in complete control of your social meter. You can dial it up or down at will.
How to Confidently Eat Alone (and Actually Enjoy It)
Reframe this act. It's not a sign of loneliness; it's a moment of luxurious self-indulgence.
Sit at the bar: It's more casual and invites conversation with the bartender or neighbors.
Bring a prop: A book signals "I'm content," while a journal signals "I'm an interesting person reflecting on my day."
Engage with the experience: Focus on the food. Take notes. Be present. You'll forget to feel self-conscious.

5 Easy Ways to Meet Other Travelers
Free Walking Tours: The #1 hack. Instant group for a few hours.
Cooking Classes: A shared activity is a natural icebreaker.
Hostel Common Areas: Simply being present in these spaces makes you approachable.
Meetup.com: Find events for locals and expats interested in everything from hiking to language exchange.
Small Group Day Trips: Use platforms like GetYourGuide or Viator to join tours to nearby attractions.
Your Solo Travel Europe Questions, Answered
What is the best European country to visit for the first time alone?
For its unbeatable combination of safety, affordability, friendly locals, and excellent tourist infrastructure, Portugal is widely considered the best choice for a first-time solo trip in Europe.
Is Europe safe for a young solo female traveler?
Yes, overwhelmingly so. By choosing safe destinations, practicing situational awareness, and following standard safety protocols like those outlined in this guide, Europe is an incredibly safe and rewarding place for solo female travelers.
How do I handle language barriers when traveling alone?
In most major tourist destinations, English will be sufficient. However, learning a few key phrases in the local language ("Hello," "Please," "Thank you," "Excuse me") shows respect and will be greatly appreciated. Use the Google Translate app's offline and camera features for menus and signs.
The journey of solo travel in Europe is one of the most empowering experiences a person can have. It will challenge you, thrill you, and teach you more about your own resilience and capability than you thought possible. You've read the plan, you have the tools, and you understand the strategies. The fear you feel now will be a distant memory the moment you navigate a new city's metro system by yourself for the first time. That feeling of profound competence and freedom is what awaits. The adventure is yours to claim.
Read the full guide: Anxious to Adventurous: The Ultimate Guide to Solo Travel Confidence
Don't Miss Out! Subscribe for Exclusive Content
SubscribeComments 0
No comments yet
Be the first to share your experience!
Dont Miss Out! Subscribe for Exclusive Content

Ultimate USA Holidays Guide: Top Picks

FTC Affiliate Disclosure Essentials: Stay Compliant as a Travel Creator

Essential Affiliate Tools: From Tracking to Full Optimization

Booking.com Affiliate Program Review: Pros, Cons, and Earnings Potential

Decoding Affiliate Commission Rates: Benchmarks for Travel Creators
