July 4th NYC: Best Fireworks Views
TrekGuider @trekguider
Trying to see the Macy's 4th of July fireworks in New York City can feel like plotting a military campaign. You know it’s one of the most spectacular patriotic displays on the planet, a dazzling barrage of color and sound against the world’s most famous skyline. But the thought of navigating the colossal crowds, deciphering the cryptic official viewing spots, and battling for a sliver of sidewalk with a view of a brick wall is enough to trigger a full-blown anxiety attack.
You’re haunted by visions of being pinned for hours in a human gridlock, craning your neck to see absolutely nothing, with no access to a restroom or a bottle of water. What if you spend all day planning, only to find your chosen spot has been unceremoniously cordoned off by the NYPD? The dream of a magical Independence Day quickly sours into a logistical nightmare, leaving you sweating on a crowded street corner wondering why you didn't just stay home and watch it on TV.
Forget the chaos. This is your definitive battle plan for conquering the crowds and securing a breathtaking view. We’ve distilled the official intel and insider secrets into a foolproof strategy. Whether you want a free patch of grass with a picnic or a more civilized vantage point, this guide will equip you for an unforgettable Fourth of July in New York.

Understanding the Main Event: The Macy's Fireworks Spectacular
Let’s be clear about the sheer scale of this operation. The Macy's 4th of July Fireworks isn't just a show; it's the nation's largest pyrotechnic spectacle, a city-shaking tradition that paints the skyline with thousands of carefully choreographed shells launched from barges on the water. For Friday, July 4, 2026, the show continues its reign on the East River, meaning the most coveted views will be found along the waterfronts of Brooklyn, Queens, and Manhattan.
This isn't a casual affair where you can wander up a few minutes before showtime. It's a massive, city-wide celebration that demands a solid game plan. While the fireworks are an undisputed summer highlight, they're just one piece of the city's vibrant celebratory calendar, which we cover in our definitive guide to New York Holidays: 10 Must-Do Events. Thinking about your trip through this lens—as one epic event among many—is the key to unlocking a truly memorable visit.
The Best Free Viewing Spots for the Fourth of July in New York
Securing a great free spot is the holy grail for most spectators. It requires a healthy dose of patience and impeccable timing, but the reward is a front-row seat to history without spending a dime. The secret is knowing precisely where to go and, just as critically, which tourist traps to avoid.
Brooklyn's Cinematic Waterfront Views
For years, the Brooklyn waterfront has offered the most cinematic views of the fireworks, framing the pyrotechnics against the iconic Manhattan skyline. This is where you go for the postcard shot.
Transmitter Park (Greenpoint): Consistently hailed as a top-tier viewing location, this park offers a direct, jaw-droppingly clear sightline across the East River. Its open, grassy layout is a godsend, providing more room to spread out a blanket than the narrow promenades elsewhere. But its reputation precedes it. To claim a decent piece of turf, you must arrive by 6 PM at the absolute latest.
Domino Park (Williamsburg): With its clever multi-level design, reclaimed factory artifacts, and ample seating, Domino Park is a phenomenal—and popular—option. The elevated walkway provides a unique perspective, and the park's modern amenities (hello, clean restrooms!) make the long wait far more civilized.
East River State Park (Williamsburg): Just a short walk from Domino Park, this location offers a more traditional park experience with a sprawling grassy lawn. It’s a magnet for families and larger groups looking to set up a proper picnic and make a full day of it.
Manhattan's Official Front Lines (and What to Expect)
Manhattan offers official, NYPD-managed viewing points that get you incredibly close to the action. However, this proximity comes at the cost of the highest crowd density and the tightest security.
Official Access Points: The city announces these designated entry points a few days before the event, typically along the FDR Drive in the East Village, Murray Hill, and Midtown East. Check the official Macy's or NYC websites on the day of the event for the exact cross-streets.
The No-Go Zones: Heed the official warnings. The city explicitly advises spectators to avoid FDR Drive in Midtown, Battery Park, and the Brooklyn Heights Promenade. These areas will either be completely closed to the public or offer severely obstructed views. Don't be the tourist who wastes hours trekking to a dead end.
Queens: The Savvy Spectator's Choice
Often overlooked by the masses flocking to Brooklyn, the Queens waterfront in Long Island City provides views that are every bit as stunning, but often with slightly more breathing room.
Gantry Plaza State Park: This park is a true gem, famous for its iconic Pepsi-Cola sign and beautifully restored waterfront gantries. It offers a sweeping panorama of the Midtown skyline, which serves as the ultimate canvas for the fireworks display.
Hunter's Point South Park: Located just south of Gantry Plaza, this park boasts a vast, open green space perfect for laying down a blanket. It’s an excellent alternative for those looking to escape the most intense choke points in Manhattan and Brooklyn.

Pro-Level Strategy: Navigating Security and Human Gridlock
Experiencing the Fourth of July in New York is as much about logistical prowess as it is about patriotic fervor. This is not a casual security checkpoint. The NYPD's presence is comprehensive, involving everything from drones providing aerial surveillance and metal detectors at entry points to NYPD scuba divers patrolling the river itself. This isn't to intimidate, but to ensure a safe event for millions.
Your Arrival and Entry Checklist
Embrace the Early Bird Ethos: We cannot overstate this. For prime real estate like Transmitter Park, a 6 PM arrival is the bare minimum. For the official Manhattan zones, dedicated viewers begin lining up in the early afternoon. The later you arrive, the more likely you are to be watching the back of someone's head.
Pack Like a Pro: You will be on your feet or sitting on the ground for hours. Comfort matters most, but you also need to breeze through security. Large backpacks, coolers, alcohol, and lawn chairs are almost always prohibited. Knowing what to bring—and what to leave behind—is crucial. Our How to Pack Light Guide offers brilliant strategies for carrying just the essentials, a skill that's just as valuable for a day in the city as it is for a week-long trip.
Trust but Verify (Your Sources): On July 4th, follow the NYPD and Macy's on social media or refresh their websites. Viewing points can and do change or close without notice based on crowd capacity. A quick check before you head out can save you from a massive, frustrating detour.
The Buddy System is Non-Negotiable: In crowds of this magnitude, getting separated is incredibly easy. Establish a clear, unambiguous meeting point in advance (e.g., "the corner of X and Y," not "by the hot dog stand"). Keep your phones fully charged, and consider sharing your location with your group via a mapping app.
Pro-Tip: Public transportation is your only sane option. Do not even entertain the idea of driving. Street closures begin in the early afternoon, and parking is a fantasy. The subway is the most efficient way to get close to the action, but expect platforms and train cars to be packed to capacity. Plan your route, buy your MetroCard in advance, and budget at least double the normal travel time.

Beyond the Fireworks: Mastering the All-American Picnic
The fireworks are the grand finale, but Independence Day is an all-day affair. A classic American picnic is the perfect way to spend the afternoon, soaking in the city's festive energy in a more relaxed setting before diving into the waterfront fray.
Prime Picnic Parks (Well Away from the Fireworks Chaos)
Central Park: It’s the quintessential NYC experience for a reason. Head to the vast Sheep Meadow or the Great Lawn, find a spot under a tree, and enjoy the people-watching. You won't see the main fireworks from here, but it’s the perfect stage for your pre-show festivities.
Prospect Park, Brooklyn: Often called Brooklyn's answer to Central Park, the Long Meadow in Prospect Park offers a similarly idyllic and expansive setting. It’s a favorite among locals and provides a more laid-back, community-focused vibe.
Governors Island: A quick and scenic ferry ride away, Governors Island is a true urban oasis. With its sprawling lawns, hammocks, and unparalleled views of the Statue of Liberty, it’s an ideal place to decompress for the day before heading back for the evening's main event.
Your Picnic Pack-Out List
The Spread: Stick to classics that travel well: gourmet sandwiches, cold fried chicken, pasta salads, and fresh fruit. Most importantly, bring more water than you think you'll need. Remember that alcohol is prohibited in public parks.
The Comfort Kit: A large, durable blanket is your foundation. Sunscreen, hats, and sunglasses are absolutely essential for a long day outdoors.
The Clean-Up Crew: Pack a dedicated trash bag and commit to the golden rule of picnicking: leave your spot cleaner than you found it.

Paid Options for a Crowd-Free Fourth of July in New York
If the idea of battling the masses for a patch of grass makes you want to run for the hills, several paid alternatives offer a more comfortable and exclusive experience. These options require booking far in advance and come at a premium, but for many, the guaranteed view and amenities are worth every penny.
Rooftop Bars and Viewing Parties
Many hotels and restaurants with prime real estate in Midtown East, Williamsburg, and Long Island City host ticketed fireworks viewing parties. These events typically include an open bar, food, and live music, all with an elevated, unobstructed view high above the street-level chaos. Expect tickets to start in the low hundreds and sell out weeks, if not months, ahead of time.
Fireworks Cruises on the East River
For a truly cinematic experience, watch the fireworks from the water itself. Numerous companies offer July 4th dinner cruises that place you directly on the East River, offering an unparalleled, up-close perspective of the show.
The Perks: You get a completely unobstructed view, dinner and drinks are often included, and you have access to clean, private restrooms—a luxury that cannot be overstated.
The Price: This is the most expensive option, with prices frequently ranging from $150 to over $500 per person. They are incredibly popular and must be booked months in advance.
Pro-Tip: When booking any ticketed event, do your due diligence. Scrutinize the venue's location on a map to confirm its viewing position relative to the fireworks barges. Search for reviews and photos from previous years' events to ensure the view is as spectacular as advertised. Not all "river views" are created equal.

Your Mission: An Unforgettable Independence Day
You are now armed with the strategy and insider intelligence to make your Fourth of July in New York a resounding success. The key is to decide on your desired experience—a free-for-all on the grass, a civilized seat at a rooftop bar, or a luxurious view from the water—and plan with precision. Arrive early, pack smart, and stay informed.
This is about more than just watching fireworks; it's about taking part in a quintessential American tradition in the most dynamic city on Earth. You're no longer a tourist hoping for a lucky break; you're an insider with a plan. Go forth, claim your spot, and create some dazzling memories. And when you're ready to plan your next great urban adventure, our comprehensive Travel Guide is packed with the expert resources you need to make every trip a masterpiece.
Don't Miss Out! Subscribe for Exclusive Content
Subscribe


Comments 0
No comments yet
Be the first to share your experience!
Dont Miss Out! Subscribe for Exclusive Content

San Francisco Cherry Blossoms: A Local's Guide to the Blooms

Halloween SF: Haunts Without Horrors

SF Festivals: 7 Must-See Lineups

Christmas SF: Lights & Wharf Wonders

SF Pride: 6 Route & Party Hacks

Chinese New Year SF: Parade Essentials
9 Beach Safety Tips That Could Save Your Life
TrekGuider @trekguider
There’s a moment on every beach trip that feels like pure magic. It’s the feeling of warm sand between your toes, the hypnotic sound of waves crashing, and the endless blue horizon stretching out before you. It’s a picture of perfect relaxation. But beneath that tranquil surface, the ocean holds immense and impartial power. A beautiful day can turn dangerous in an instant from a hidden current, underestimated waves, or the relentless sun, transforming a dream vacation into a terrifying emergency. Every year, countless beachgoers find themselves in preventable peril simply because they misread the water or weren't prepared for the environment.
This isn't a guide to make you fear the ocean; it's a playbook to empower you to respect it. We’re here to give you the essential, expert-backed beach safety tips that can mean the difference between a blissful day and a life-altering one. These strategies, drawn from lifeguarding associations and national weather experts, are a critical component of the situational awareness we cover in our comprehensive guide, The Ultimate Guide to Travel Safety: A 2026 Playbook. By learning to see the beach not just as a playground, but as a dynamic natural environment, you can ensure your only takeaways are seashells and incredible memories. Let’s dive in.

Master the Water: Essential Ocean Safety Tips
The vast majority of beach-related dangers originate in the water itself. From powerful currents to unpredictable surf, understanding the ocean's behavior is the most critical skill any beachgoer can possess. These are the foundational beach safety tips for staying safe in the surf.
1. Become an Expert at Spotting Rip Currents
Rip currents are the number one danger at most surf beaches, responsible for the majority of ocean rescues performed by lifeguards. They are not undertows that pull you under the water; they are powerful, narrow channels of water that flow away from the shore at high speed. According to NOAA and the United States Lifesaving Association (USLA), knowing how to visually identify one from the shore is your first and best line of defense.
Here’s what to look for, especially from an elevated position like the dunes or a lifeguard tower:
A Channel of Churning, Choppy Water: Look for a specific area where the water seems agitated or rough, moving in a different direction than the surrounding waves.
A Break in the Incoming Wave Pattern: This is often the easiest sign to spot. You'll see a gap in the line of breaking waves—an area that looks deceptively calm. This flat spot is the rip current pulling water back out to sea, disrupting the incoming waves.
A Difference in Water Color: Because the current is carrying sand and sediment offshore, the water within a rip current often appears darker, murky, or sandy brown compared to the clearer, greener water on either side.
A Line of Foam or Debris Moving Seaward: This is a dead giveaway. If you see a line of foam, seaweed, or other floating debris moving steadily away from the beach, perpendicular to the shore, you are looking directly at a rip current.
Pro-Tip: Before you even set up your umbrella, take five minutes to stand back and observe the water. Actively look for these signs. Identifying potential rip currents before you get in the water is the single most important safety action you can take.
2. Know the "Flip, Float, Follow" Rule for Rip Current Survival
If you do get caught in a rip current, your instinctive reaction—to panic and swim directly against it back to shore—is the most dangerous thing you can do. Fighting a rip current will exhaust you to the point of drowning. The correct response is simple and could save your life.
Flip: Flip onto your back to stay afloat and conserve energy.
Float: The current will not pull you under; it will only pull you away from shore. Stay calm and float with it.
Follow: Once you are out of the main pull of the current, begin swimming parallel to the shoreline. Do not swim toward the beach. Once you have swum out of the current, you can then turn and swim back to shore, ideally at an angle away from where you were caught.
If you are unable to swim out of it, continue to float and wave your arms and yell for help to attract the attention of a lifeguard or other swimmers.

3. Understand and Obey the Beach Warning Flag System
While knowing how to escape an invisible current is a vital reactive skill, your most powerful proactive tool is the one flapping in the breeze. Beach warning flags are a simple, universal language used by lifeguards to communicate the current water conditions. This system, adopted by the International Lifesaving Federation, provides a quick, visual assessment of the hazard level. Ignoring these flags is a gamble you should never take.
Green Flag: Low Hazard. Conditions are calm, but you should still exercise caution.
Yellow Flag: Medium Hazard. Moderate surf and/or currents are present. Weak swimmers should stay out of the water, and everyone else should use extra care.
Red Flag: High Hazard. The surf is high, and/or strong currents make conditions dangerous. It is recommended that no one enters the water.
Double Red Flag: Water Closed to Public. Conditions are extremely dangerous. The water is closed to all swimming, and entering it is prohibited.
Purple Flag: Dangerous Marine Life. This flag indicates that potentially hazardous marine life, like jellyfish or sharks, has been spotted. It is always flown with another color flag that indicates the surf conditions.
Pro-Tip: The absence of flags does not automatically mean the water is safe. If there is no flag, it likely means there is no lifeguard on duty. In that case, you are swimming entirely at your own risk. Always try to swim at a beach protected by lifeguards.
Master the Environment: Sun and Shoreline Safety Tips
While the ocean poses the most immediate threats, the beach environment itself has its own set of risks. The sun, sand, and heat can cause serious health issues if not managed properly. These beach safety tips will keep you safe on the shore.
4. Know the Signs of Heat Exhaustion vs. Heatstroke
That perfect, sun-drenched beach day holds a hidden danger. When the temperature climbs, the line between bliss and a medical emergency can blur with alarming speed. According to the Red Cross, it's crucial to know the difference between heat exhaustion and the more severe, life-threatening heatstroke (sunstroke).
Heat Exhaustion Symptoms:
Headache, dizziness, and confusion
Excessive sweating with cool, moist, or pale skin
Nausea and muscle cramps
A rapid, weak pulse
First-Aid for Heat Exhaustion:
Move to a Cool Place: Immediately get the person out of the direct sun and into shade or air conditioning.
Cool Them Down: Loosen their clothing and apply cool, wet cloths or spray them with cool water.
Rehydrate: If they are conscious and able to swallow, have them sip small amounts of a sports drink or water.
If their condition doesn't improve or they start vomiting, call for emergency help immediately, as it can progress to heatstroke.
5. Recognize the Emergency of Heatstroke (Sunstroke)
Heatstroke is a full-blown medical emergency where the body's internal cooling system completely fails.
Heatstroke Symptoms:
Changes in mental status (confusion, agitation, loss of consciousness)
Hot, flushed, and often dry skin (sweating may have stopped)
A dangerously high body temperature (often above 104°F / 40°C)
A rapid, strong pulse, which may become weak later
First-Aid for Heatstroke:
Call 911 Immediately: This is a life-threatening emergency that requires professional medical intervention.
Begin Rapid Cooling: While waiting for help, do everything you can to cool the person's body. Immerse them in cool water if possible, or douse them with water and apply ice packs to the neck, groin, and armpits.

6. Practice Proactive Sun Protection
The best way to deal with a heat-related illness is to never let it start. Sun protection is a continuous strategy, not a one-time action.
Hydrate Constantly: Drink plenty of water throughout the day, even before you feel thirsty.
Use Broad-Spectrum Sunscreen: Apply a sunscreen with at least SPF 30 and reapply it every two hours, and always immediately after swimming or excessive sweating.
Seek Shade: Use an umbrella and take breaks from the sun, especially during the peak intensity hours of 10 a.m. to 4 p.m.
Wear Protective Clothing: A wide-brimmed hat and UV-blocking sunglasses are non-negotiable.
7. The "Stingray Shuffle" Rule
In many coastal areas, stingrays bury themselves in the sand in shallow water. Stepping directly on one can result in an excruciatingly painful sting from the barb on their tail. To avoid this, never walk normally through the shallows. Instead, shuffle your feet along the sand. The vibrations from the shuffle will alert any nearby stingrays to your presence, giving them a chance to swim away peacefully.
Master Your Preparation: Final Beach Safety Tips
A safe and relaxing beach day begins before you even leave home. Smart planning and having the right gear can make all the difference, especially when traveling with family.
8. Pack a Dedicated Beach First-Aid Kit
While your main travel medical kit should be comprehensive, your beach bag needs a few specific items to handle common coastal issues:
Waterproof Bandages: For minor cuts and scrapes from shells or rocks.
Aloe Vera Gel: For immediate relief from minor sunburn.
Antihistamine Cream: To soothe the itch from insect bites.
Tweezers: For removing splinters or shell fragments.
Vinegar: A small bottle of white vinegar is a secret weapon; it can help neutralize the sting from some types of jellyfish.
9. Always Designate a "Water Watcher"
When you're at the beach with a group, especially with children, it's easy to fall into the trap of "diffusion of responsibility," where everyone assumes someone else is watching the kids in the water. The solution is to formally designate one adult as the "Water Watcher" for a set period (e.g., 15-20 minutes). During their shift, that person's only job is to watch the water without distraction—no phones, no books, no conversations. Then, you switch. This simple system ensures there are always eyes on the swimmers.
Your Ultimate Guide to Family Beach Travel
Keeping kids safe and entertained at the beach is a unique challenge. From packing the right gear to navigating meltdowns and keeping them safe in the sun and surf, a little extra preparation goes a long way. Our specialized guide takes the stress out of the equation.
Download our free Stress-Free Flying with Kids Guide for expert tips on making every part of your family vacation, from the airport to the beach, a breeze!
Beach Safety FAQs
A prepared mind is a safe mind. Here are quick answers to other common beach safety questions.
1. What’s the right way to treat a jellyfish sting?
First, get out of the water. Rinse the affected area with vinegar (if available) for about 30 seconds to deactivate the stingers. Do not use fresh water, as it can make it worse. Carefully pluck out any visible tentacles with tweezers. Soaking the skin in hot water (as hot as can be tolerated without burning) for 20-45 minutes can also help relieve the pain.
2. Is it safe to dig deep holes in the sand?
Digging in the sand is a classic beach activity, but deep holes can be incredibly dangerous. They can collapse unexpectedly, burying a person in seconds. Never dig a hole deeper than the knees of the smallest person in your group, and always fill in any holes you dig before you leave the beach.
3. What should I do if I see someone in trouble in the water?
Do not attempt a swimming rescue yourself unless you are trained in water rescue. An untrained rescuer can quickly become a second victim. The best course of action is to call for help immediately. Yell to alert a lifeguard and call 911. If you can, throw the person something that floats, like a cooler or a boogie board.
By embracing these nine essential beach safety tips, you shift from being a passive visitor to an active, aware, and prepared participant in one of nature’s most magnificent environments. The goal isn't to diminish the fun but to ensure it. A healthy respect for the ocean and a solid plan for your day are the keys to unlocking a truly carefree and unforgettable experience by the sea.

Now that you've mastered the art of staying safe on the coast, you can focus on the rest of your adventure. For a complete, deep-dive into every facet of trip planning, from health and safety to budgeting and logistics, our comprehensive Travel Guide is the only resource you'll ever need.
Don't Miss Out! Subscribe for Exclusive Content
SubscribeComments 0
No comments yet
Be the first to share your experience!
Dont Miss Out! Subscribe for Exclusive Content

Ultimate USA Holidays Guide: Top Picks

FTC Affiliate Disclosure Essentials: Stay Compliant as a Travel Creator

Essential Affiliate Tools: From Tracking to Full Optimization

Booking.com Affiliate Program Review: Pros, Cons, and Earnings Potential

Decoding Affiliate Commission Rates: Benchmarks for Travel Creators

Amazon Associates for Travel: Strategies to Maximize Commissions
Lollapalooza: 7 Stage-Hopping Tips
TrekGuider @trekguider
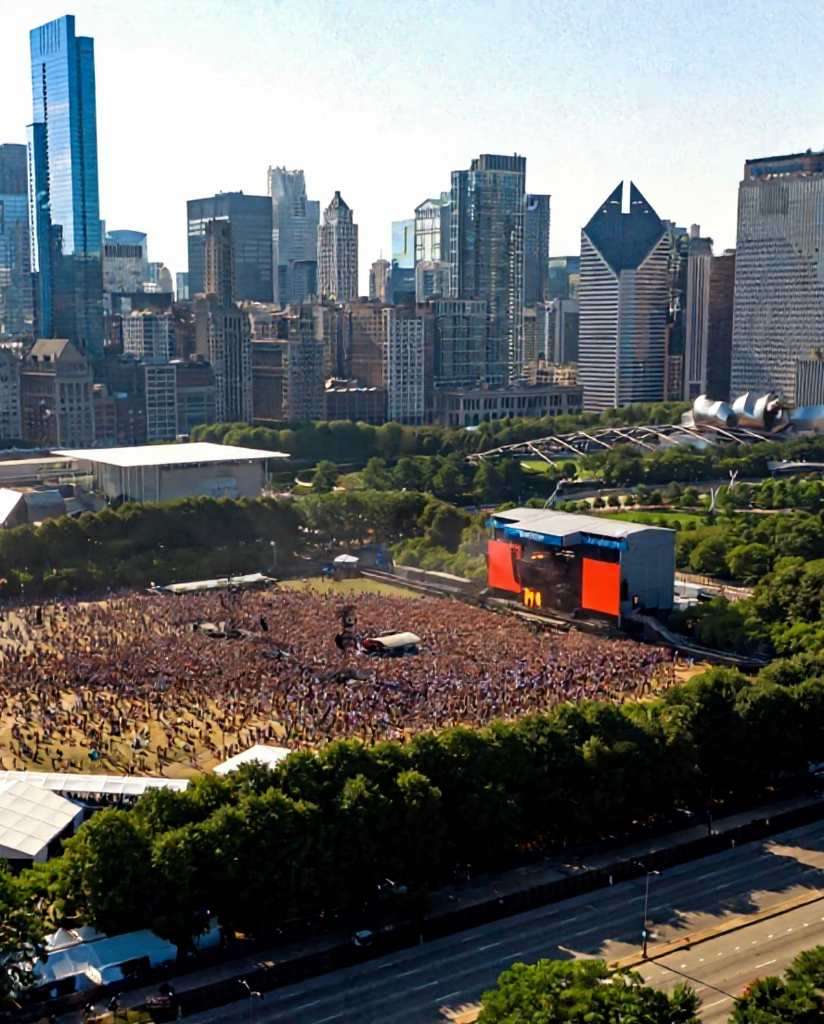
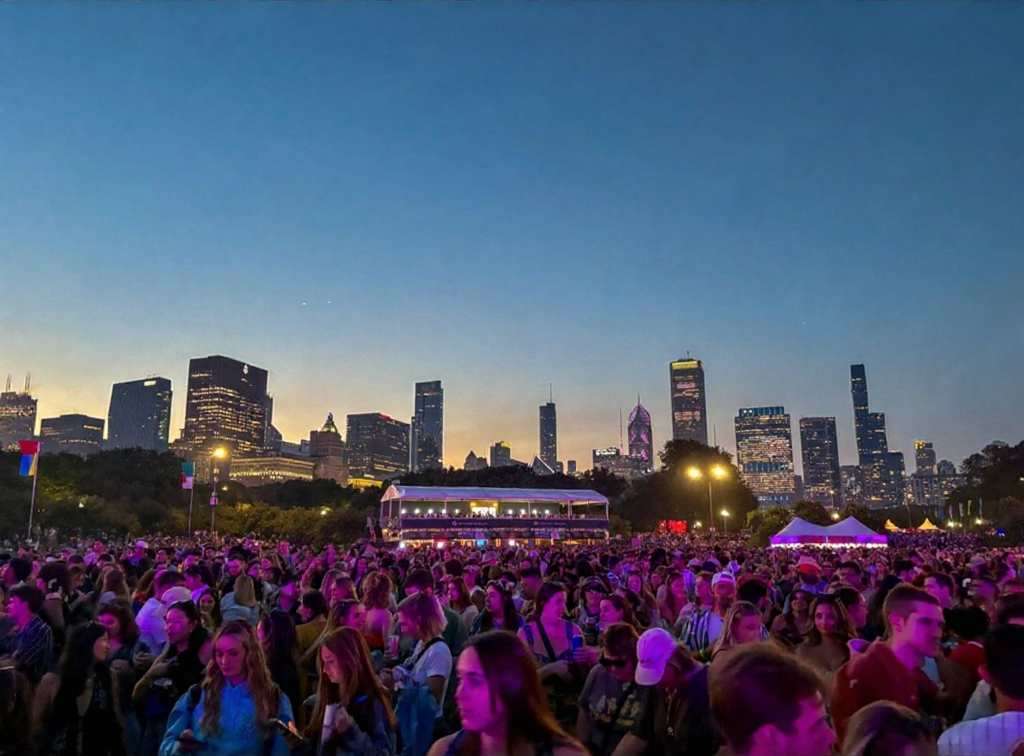
You’ve done it. You scored the golden ticket to Lollapalooza, the four-day musical marathon that transforms Chicago’s Grant Park into the center of the universe. But now, staring at a schedule that looks more like a complex circuit board than a concert lineup, the reality sets in. Dozens of artists you’re dying to see are scattered across a dozen stages, their set times overlapping in a cruel twist of fate. The sheer scale of the festival, with its massive crowds and sprawling grounds, suddenly feels less like a dream and more like a daunting logistical nightmare.
The anxiety begins to bubble. You picture yourself spending half the day trudging from the T-Mobile stage at the south end to the Bud Light stage at the north, only to arrive sweaty, exhausted, and just in time to hear the final chords of your favorite song. The fear of missing out becomes a palpable threat, turning the promise of unforgettable musical moments into a frantic race against the clock. Without a rock-solid plan, your festival experience could be defined by endless walks, missed opportunities, and the nagging feeling of being perpetually in the wrong place. This isn't just about seeing bands; it's about conquering one of the keystone events in a city known for its epic celebrations, a true highlight among the many experiences we cover in our definitive guide to Chicago Holidays: Windy City Thrills.
Forget the stress. This guide is your strategic playbook for navigating the glorious chaos of Lollapalooza Chicago. We’re breaking down the art of stage-hopping into seven actionable, pro-level tips that will transform you from a frantic fan into a festival veteran. From mastering the map before you even step foot in Grant Park to planning a seamless exit, these strategies will ensure you maximize your time, conserve your energy, and catch every single performance on your must-see list.
1. Become a Pre-Festival Master of the Map & Schedule
The biggest mistake a Lollapalooza rookie can make is showing up and trying to figure it all out on the fly. Grant Park is a massive urban oasis, and when it’s filled with stages, vendors, and hundreds of thousands of people, it becomes a complex, pulsating labyrinth. Your success begins long before you scan your wristband.
Download the Official App Immediately
Long before you even think about packing, your first move is to download the official Lollapalooza app. Consider it your digital command center for the entire weekend, running from July 31 to the final day of the festival. The app provides the most up-to-date schedule, a detailed festival map, and, most importantly, real-time push notifications. If a set time changes, a stage is delayed, or a surprise guest appears, the app will be the first to tell you. It also sends out crucial emergency alerts, making it an indispensable tool for staying safe and informed.
Create Your Artist Tiers
Once the full schedule drops, it’s time for strategy. Open the lineup—featuring titans like Olivia Rodrigo, Tyler the Creator, Sabrina Carpenter, and A$AP Rocky for the 2026 festival—and categorize every artist into two simple lists:
Tier 1 (Must-See): These are your non-negotiables. The artists you bought the ticket for. You will be at their set, no matter what.
Tier 2 (Nice-to-See): These are the artists you’d love to catch if the timing and location work out. They are your flexible options, the happy bonuses.
This simple act of prioritization is the bedrock of your stage-hopping plan. It allows you to build your day around your top-tier artists and fill the gaps with others, preventing the decision paralysis that comes from having too many choices.
Internalize the Grant Park Layout
Study the festival map like you’re planning a heist. The two main stages are typically located at the far north and south ends of Grant Park, a walk that can easily take 20-30 minutes through a thick crowd. Identify the locations of your Tier 1 artists and mentally map the routes between them. Note the locations of smaller stages, food courts (Chow Town), and, critically, the free water stations. Understanding the physical distances involved will help you make realistic calls about which back-to-back sets are doable and which are pure fantasy.

2. Master the "Perimeter Path" to Navigate Crowds
The center of any festival crowd is a slow-moving, densely packed sea of humanity. Trying to cut directly through the middle to get from one stage to another is a rookie move that wastes time and energy. The secret to swift movement is to think like a river, flowing where the resistance is lowest.
Stick to the Arteries
The most effective way to navigate Lollapalooza Chicago is by using the perimeter paths. Instead of plunging into the heart of the crowd, stick to the designated walkways along the sides. These paths, often lining the edges of the park or separating vendor areas, are the festival's arteries. While they may look like the longer route on a map, they are almost always faster than trying to push through a stationary audience. Make a mental note of these pathways when you first arrive.
Live by the 15-Minute Rule
If your next Tier 1 artist is on a stage across the park, you need to be ruthless with your timing. Implement the 15-Minute Rule: leave the current set 15 minutes before it ends. This gives you a critical head start, allowing you to exit the immediate crowd before the mass exodus begins when the music stops. It might sting to walk away from the end of a great performance, but that small sacrifice ensures you’re in a good position for the next one, rather than hearing it faintly from a quarter-mile away.
3. Hydrate and Fuel Like a Seasoned Athlete
Stage-hopping is a sport. You’ll be on your feet for 10 hours a day, walking several miles under the summer sun. You’re not just attending a concert; you’re entering a temporary city that generates a staggering economic impact—estimated at over $440 million. That scale demands respect and a bit of preparation.
Make Water Your First Priority
Lollapalooza provides free water refill stations throughout the grounds. When you first enter Grant Park, make it your mission to locate the station nearest the entrance and the stages you’ll be frequenting. Dehydration is the number one enemy of the festival-goer; it saps your energy, causes headaches, and can ruin your entire weekend. Make it a personal rule to refill your water bottle every single time you pass a station.
Pro-Tip: Bring a collapsible water bottle or an empty hydration pack. It's light, complies with security rules, and allows you to carry more water than a standard bottle. This means fewer trips to the refill station and more time enjoying the music.

4. Dress for a Four-Day Marathon, Not a Fashion Sprint
While Lollapalooza is a prime spot for people-watching and showing off your style, practicality should be your guiding principle. Your fashion choices can make or break your physical ability to enjoy the festival.
Your Shoes Are Your Most Important Gear
You will be walking and standing on concrete, grass, and uneven ground for hours on end. This is not the time for brand-new boots that need breaking in, flimsy sandals, or anything with a heel. Your number one priority should be comfortable, supportive, and already broken-in sneakers or walking shoes. Your feet are your foundation for the entire weekend; treat them well.
Prepare for All Four Chicago Seasons in One Day
Chicago weather is famously unpredictable. A day that starts hot and sunny can quickly turn cool and rainy. The key is to dress in layers. Start with a lightweight, breathable base layer and bring a flannel, hoodie, or light jacket that you can tie around your waist during the day and put on after the sun goes down. Most importantly, pack a poncho. It’s small, light, and will be an absolute lifesaver if a sudden downpour occurs.
5. Establish a "Home Base" for Your Crew
Navigating Lollapalooza Chicago with friends is a core part of the experience, but it’s incredibly easy to get separated. Cell service is notoriously unreliable when tens of thousands of people are trying to use it at once, so you can’t count on a text message or call to find your group.
Why a Meeting Point is Non-Negotiable
Before you even think about splitting up to see different artists, establish a clear, specific, and easy-to-find meeting point. This is your group’s "home base." If anyone gets lost, their phone dies, or you just need to regroup, everyone knows exactly where to go.
How to Choose a Good Spot
Don’t pick a generic spot like "the fountain" or "the food court." Choose a unique and unmistakable landmark. A good meeting point is something like, "the giant silver sculpture near the Buckingham Fountain" or "the corner of the 'Deep Dish' pizza stand in Chow Town." Pick a spot that is slightly away from the main walkways to avoid being constantly jostled. Check in at your home base at pre-determined times to ensure everyone is safe and accounted for.

6. Embrace the Journey Between the Stages
Stage-hopping isn’t just a commute; it’s an opportunity. The journey from one performance to another is part of the festival experience itself. Instead of seeing it as a chore, reframe it as a chance for discovery and inspiration.
Discover Your Next Favorite Band
As you walk the perimeter paths, you’ll pass smaller stages where artists you’ve never heard of are playing. Pause for a few minutes and listen. This is how you stumble upon incredible new music. Some of the most memorable Lollapalooza moments happen not at the massive headliner stages, but in the intimate settings of the BMI or Grove stages. Let your ears guide you.
Explore the Full Festival Experience
Lollapalooza is more than just a concert. It’s a massive cultural event filled with creativity. On your way from one stage to the next, take a detour through the art installations, check out the merch tents, or see what activations the sponsors have set up. This spirit of creative discovery is what fuels the best entrepreneurs. If you're feeling inspired by the artistry around you, channel that energy into your own project with our free Digital Product Ideas Guide. By exploring, you break up the monotony of walking and get a richer, more complete festival experience.

7. Plan Your Grand Escape in Advance
How you leave the festival is just as important as how you navigate it. At 10 PM, when the final headliner finishes, a massive wave of people will pour out of the Grant Park exits, creating a human traffic jam that can be overwhelming and slow.
Beat the Final Rush
Just as with the 15-Minute Rule for stage-hopping, consider leaving a few minutes before the absolute end of the night. Slipping out during the last song or just before the encore can save you up to an hour of being stuck in a slow-moving crowd. You’ll get to public transit or your rideshare pickup spot ahead of the main surge, which is a priceless advantage after a long day.
Know Your Public Transit Route Cold
The best way to get to and from Lollapalooza Chicago is by using the CTA rail system. Multiple downtown street closures make driving or using rideshares near the park a nightmare. Before the festival, identify the closest CTA station to your accommodation and memorize the route to and from the park exits. Having this plan locked in will prevent you from wandering aimlessly with a dead phone at the end of a long day.
Pro-Tip: If you must use a rideshare, set your pickup location several blocks away from the Grant Park exits. Walk away from the chaos and toward your pin. You'll escape the immediate surge pricing, and your driver will be able to find you much more easily than in the gridlock traffic near the festival grounds.
Your Blueprint for Lollapalooza Domination
The overwhelming scale of Lollapalooza can intimidate even the most enthusiastic music fan, but it doesn’t have to. With a strategic approach, the festival transforms from a logistical puzzle into the ultimate musical playground. By preparing in advance, navigating smartly, and taking care of your body, you shift from being a passive attendee to the master of your own experience. With these stage-hopping tips, you're now fully equipped with the knowledge of a seasoned pro, ready to conquer Lollapalooza Chicago and create a weekend of flawless, unforgettable memories.

Your Lollapalooza adventure is just one part of an incredible trip. To make the most of your time in the Windy City and beyond, check out our comprehensive Travel Guide. It’s packed with insider tips for exploring the best destinations across the USA.
Don't Miss Out! Subscribe for Exclusive Content
SubscribeComments 0
No comments yet
Be the first to share your experience!
Dont Miss Out! Subscribe for Exclusive Content
San Francisco Cherry Blossoms: A Local's Guide to the Blooms
Halloween SF: Haunts Without Horrors
SF Festivals: 7 Must-See Lineups
Christmas SF: Lights & Wharf Wonders
SF Pride: 6 Route & Party Hacks