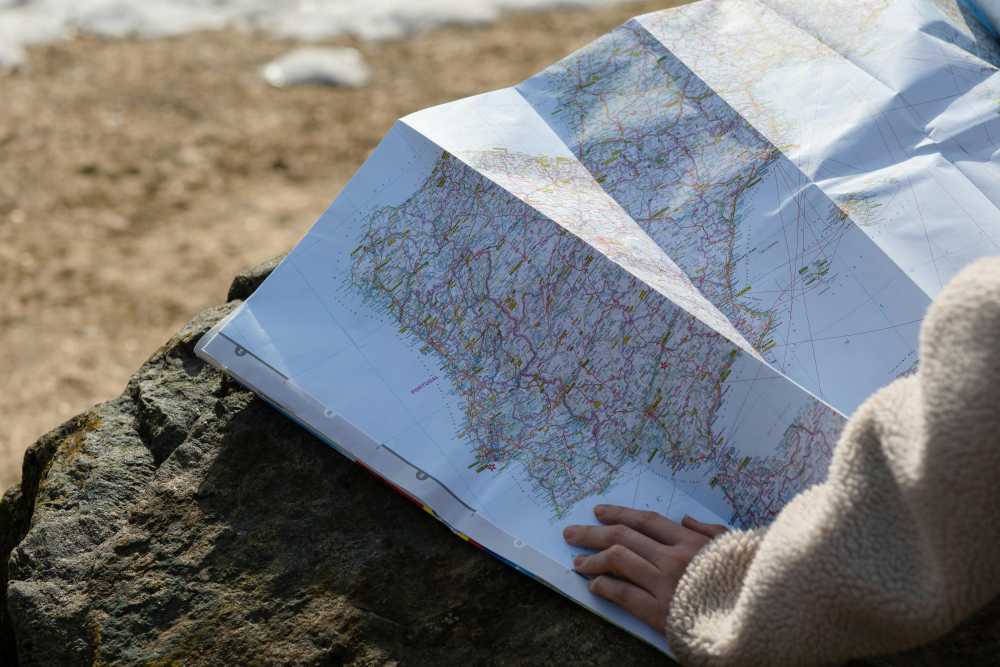
How to Create a Digital Travel Guide People Will Buy
TrekGuider @trekguider
You’re a travel expert. Your notes are filled with hidden gems, your camera roll is a treasure trove of untold stories, and your advice could save fellow travelers hundreds of dollars and hours of stress. You know your expertise has value, but packaging it into a real, scalable income stream feels like a monumental task. Relying on the slow trickle of ad revenue or the unpredictability of affiliate sales is a frustrating grind, keeping your dream of a truly independent business just out of reach.
This uncertainty keeps you on the content treadmill, trading your valuable time for pennies. You see other creators launching their own products and achieving a level of financial freedom that feels like a distant fantasy. The path forward is a confusing fog of questions about design, content, pricing, and technology, leaving you stuck in analysis paralysis while the immense opportunity of the creator economy—a market projected to nearly double from $250 billion to almost $500 billion by 2027—passes you by.
It’s time to stop trading hours for dollars and start building assets. This is your chronological, step-by-step playbook. We will demystify the entire process and show you exactly how to create a digital travel guide that people will not only buy but will also love and recommend. This is your complete workflow for transforming your hard-won expertise into a polished, professional product that generates passive income for years to come. Think of this as a critical chapter in your business plan; for the complete blueprint on building a modern creator enterprise, be sure to read our ultimate guide to How to Make Money Online: A Creator's Guide for 2026.

Why a Digital Guide is Your Ultimate Scalable Asset
Before diving into the "how," it's critical to understand the "why." Transitioning from promoting others' products to creating and selling your own is the single most powerful step you can take toward building a profitable, independent business. While ads and affiliate links have their place, digital products offer a level of control and scalability that other models simply can't match.
The advantages are transformative:
Infinite Scalability: Digital products operate on a "create once, sell forever" model. Whether you sell 10 copies or 10,000, your workload remains the same. There is no inventory to manage and no shipping to worry about.
Exceptionally High Profit Margins: With no manufacturing or distribution costs, the profit margins are extraordinary. Once you recoup your initial time investment, nearly every sale is pure profit.
Full Ownership and Control: When you sell your own guide, you own the entire process. You control the product, the pricing, the marketing, and the customer relationship. You are no longer dependent on an affiliate partner’s commission rates or an ad network's traffic requirements.
Solidifies Your Authority: Creating and selling a high-quality product instantly positions you as an expert. It builds deep trust with your audience, as you are no longer just recommending other people's stuff—you are standing behind your own valuable creation.
The market reflects this opportunity. The e-learning sector alone, a huge component of the digital product world, is projected to surge to an incredible $848 billion by 2030. This isn't a fleeting trend; it's a fundamental shift in how creators build resilient businesses.
The Blueprint – Research and Validation
The costliest mistake a creator can make is to spend months building a product nobody asked for. Thorough research and validation aren't optional; they are the foundation upon which a profitable product is built.
Identify Audience Needs and Define a Specific Niche
Your first job isn't to be a brilliant inventor; it's to be a sharp detective, uncovering the real, recurring problems your audience is desperate to solve.
Listen to Your Audience: The best ideas are hidden in plain sight. Dive into your blog comments, email replies, and social media DMs. What destinations are people constantly asking about? What part of the travel planning process do they find most challenging or stressful? Their recurring questions are your product ideas.
Define a Hyper-Specific Niche: Avoid creating a generic guide. A broad guide to "Mexico" will get lost in a sea of competition. A highly specific product like "A First-Timer's Foodie Guide to Mexico City's Roma Norte Neighborhood" is more valuable, easier to market, and instantly positions you as a niche expert.
Conduct Keyword and Market Research to Validate Demand
Once you have an idea, you must validate it with data.
Analyze Search Volume: Use an SEO tool to check the search volume for terms related to your guide idea. High search volume for long-tail keywords like "7-day Japan itinerary for foodies" or "what to do in Lisbon with kids" is a strong data signal that a ready market exists for a guide on that topic.
Conduct Competitor Analysis: Find 3-5 comparable digital travel guides in your niche. Your goal isn’t to copy them, but to identify a gap in the market. Analyze their price points, what they include, and, most importantly, read their reviews. What are customers praising? What are they complaining about? This will show you exactly how to create a superior product.
Pro-Tip: True validation comes from the intersection of qualitative and quantitative data. A great product idea is one that your audience is asking for (qualitative) and that a significant number of people are searching for online (quantitative).

The Core – Outlining and Content Creation
With a validated idea, it’s time to build the heart of your product: the content. This is where your unique expertise, voice, and experience shine.
Develop a Logical Structure
A good guide flows intuitively and is easy to navigate. Before you write a single word, create a detailed table of contents. This will be your roadmap and ensure you don't miss any crucial information. A typical structure includes:
Introduction: A brief overview of the destination, essential facts (currency, language), and why your guide is the ultimate resource.
Logistics: The practical nuts and bolts—getting there, getting around, visa requirements, and curated recommendations on where to stay for different budgets.
Experiences: The core of your guide. This includes top attractions, detailed daily itineraries, and deep dives into your niche (e.g., food and drink recommendations, hiking trails, photo spots).
Practicalities: The crucial final details like safety tips, packing lists, a budget breakdown, and useful local phrases.
Write Compelling and Useful Content
This is where you go beyond the generic advice found on a thousand other blogs.
Gather Your Assets: Compile all of your personal notes, journal entries, and high-quality photographs from your travels to the destination. Your first-hand experience and unique visuals are your primary competitive advantage.
Be Both Inspirational and Intensely Practical: Write in an engaging, personal tone. Share anecdotes and insider tips that bring the destination to life. Go beyond simply listing facts; tell your readers why a place is special. Share the hard-won wisdom that can't be found elsewhere, like "skip the line at the Colosseum by booking this specific tour" or "the best gelato is actually found two blocks away from the main square at this tiny shop."
With your raw content compiled, the next step is to give it a professional polish that signals its immense value.

The Polish – Professional Design for Non-Designers
Your guide's content may be brilliant, but in the digital world, packaging matters. A professional, user-friendly design signals quality and dramatically improves the customer experience.
Select a User-Friendly Design Tool
You don't need to be a graphic designer to create a stunning product. For a travel blogger whose primary goal is to efficiently create a static PDF travel guide, a template-based tool like Canva is the strategically superior choice. While powerful professional software like Figma or Adobe Illustrator has a steep learning curve that can delay your launch by weeks, Canva is built specifically for this type of project. Its intuitive, drag-and-drop interface is designed to help non-designers produce high-quality visuals quickly.
Feeling inspired to build your own assets but not sure where to begin? Creating high-value products is the core of a modern creator business. To accelerate your journey, we've bundled together some of our most powerful resources. The Travel Creator's Toolkit is a free collection of checklists, templates, and guides designed to help you streamline your workflow and build your business faster.
5 Essential Mobile-First Design Principles for a User-Friendly Guide
Your guide will almost certainly be used on a mobile phone while your customer is in-destination. Designing with a mobile-first user experience (UX) is not an option; it is essential for your product to be functional and valuable.
Prioritize Legibility and High Contrast: The content must be effortlessly readable on a small screen, often in bright sunlight. Use a clean, simple font of at least 11 points so users don't need to pinch-and-zoom. Crucially, ensure a high contrast ratio between the text and background—at least 4.5:1 as recommended by Web Content Accessibility Guidelines (WCAG)—to maintain readability.
Implement Simplified Navigation: The single most important navigation element is a hyperlinked Table of Contents at the beginning of the document. This allows users to jump directly to the section they need with a single tap, which is crucial when they're trying to find information quickly on a busy street.
Design for Touch with Finger-Friendly Targets: Any included hyperlinks (e.g., a link to a restaurant's website or a Google Maps location) must have a clickable area large enough to be easily tapped with a finger—the industry standard is a minimum touch target size of 44x44 points (approximately 7-10mm).
Minimize Cognitive Load by Eliminating Clutter: Mobile users are often distracted. Their interaction with a guide is typically in short bursts or "micro-tasks". To accommodate this, use short paragraphs, bulleted lists, bolded text for key information, and generous white space. A clean, uncluttered interface helps users find what they need with minimum effort.
Optimize for Performance and Portrait Orientation: The vast majority (94%) of mobile users hold their phones vertically. Your guide must be designed with a portrait layout (e.g., A4 or US Letter size). Crucially, keep the final PDF file size as small as possible by compressing all images before inserting them into your document. A large file will download slowly on a weak cellular connection, creating a poor user experience.

The Launchpad – How to Create a Digital Travel Guide for Sale
You've created a valuable, beautifully designed resource. The final phase is to package it, price it for profit, and get it into the hands of your customers.
How to Price Your First Digital Product
Pricing is one of the most challenging decisions. The most effective strategy for a knowledge-based product is value-based pricing. Instead of focusing on your production costs, price your product based on the transformation it provides to the customer. If your guide saves a user 20 hours of stressful research and helps them discover priceless experiences they would have otherwise missed, its value is immense.
A practical process for setting your price:
Step 1: Research the Market: Identify 3-5 comparable digital travel guides in your niche to establish a realistic market range.
Step 2: Articulate the Value: Make a specific list of the tangible outcomes your guide provides (e.g., "Saves over 15 hours of planning," "Includes a pre-planned 7-day itinerary worth over $100 in planning fees").
Step 3: Set an Initial Price and Test: For a high-quality, first-time travel guide, a price point between $19 and $49 is a strong starting position. It communicates significant value without creating sticker shock for the buyer.
Choose a Sales Platform That Works for You
You need a platform to handle the sale and secure digital delivery of your product. While you can use e-commerce plugins on your own blog, the smartest strategy is to leverage a platform that puts you in front of a built-in audience of motivated buyers.
Pro-Tip: Don't just build a product; build your business inside an ecosystem. A specialized marketplace like TrekGuider is the ideal place to sell your high-quality Travel Guide. It provides a professional, ready-made storefront and connects you with a global audience of passionate travelers who are actively searching for expert resources. You can publish articles to attract new customers directly on the platform, creating a powerful marketing funnel that leads right back to your product page.
Frequently Asked Questions (FAQ)
1. How long should my digital travel guide be?
Value is not measured in page count. A concise, 50-page guide packed with unique, actionable advice is far more valuable than a rambling 200-page guide filled with generic information. Focus on comprehensively solving the specific problem your niche audience has.
2. Do I need to have visited the destination very recently?
While recent, first-hand experience is ideal, an "evergreen" guide focused on core attractions, culture, and logistics can have a long shelf life. The key is transparency. Be clear about when you last visited and focus on information that doesn't change rapidly. You can always update your guide with new editions.
3. What if I'm not a professional writer or photographer?
You don't need to be. Your audience values authenticity and expertise over perfect prose. Write in your natural, conversational voice, as if you were giving advice to a friend. For photos, a modern smartphone can capture high-quality images. The goal is to be clear, helpful, and genuine.

Your Journey from Expert to Entrepreneur Starts Now
You now have the complete, A-to-Z workflow. You've moved from the vague idea of a product to a concrete, actionable blueprint that covers research, content creation, professional design, and a smart launch strategy. The path from being a passionate travel expert to a successful digital entrepreneur is no longer a fog of confusion.
You have the definitive answer to the question of how to create a digital travel guide that provides immense value and generates a sustainable income. The only thing left to do is take the first step. Start the research, outline your expertise, and begin building the asset that will power your business and fund your adventures for years to come.
SEO Meta Data Suggestions:
SEO Meta Title (58 characters): How to Create a Digital Travel Guide People Will Actually Buy
URL Slug: how-to-create-digital-travel-guide
SEO Meta Description (154 characters): A step-by-step playbook for travel creators on how to create a digital travel guide, from research and writing to design, pricing, and selling your product.
Read the full guide: The Travel Blog Business Plan: How to Make Real Money in 2026
Don't Miss Out! Subscribe for Exclusive Content
Subscribe


Comments 0
No comments yet
Be the first to share your experience!
Dont Miss Out! Subscribe for Exclusive Content

FTC Affiliate Disclosure Essentials: Stay Compliant as a Travel Creator

Essential Affiliate Tools: From Tracking to Full Optimization

Avoid These 5 Affiliate Landing Page Mistakes for Better Conversions

Affiliate Keyword Research Mastery for Travel Blogs

Booking.com Affiliate Program Review: Pros, Cons, and Earnings Potential

Decoding Affiliate Commission Rates: Benchmarks for Travel Creators
7 Hotel Safety & Security Tips for Peace of Mind
TrekGuider @trekguider
You’ve finally made it. After a long day of navigating airports, taxis, and unfamiliar streets, you slide the key card into your hotel room door and a wave of relief washes over you. This is your sanctuary, your home base for the adventures ahead. But as you drop your bags, another feeling can creep in, spoiling the moment. Let’s be honest: that sterile, anonymous hotel room doesn't feel as secure as your own home. It’s a vulnerability that can cast a shadow over an entire trip, a persistent whisper of "what if" that prevents you from ever truly relaxing.

The good news is that safety isn't a matter of luck; it's a repeatable skill. This guide is your new ritual, a systematic playbook for transforming any hotel room into a personal fortress. We’ve synthesized advice from former hotel security personnel and fire safety experts to bring you seven essential hotel safety tips. This isn’t about paranoia; it's about empowerment. By making these simple checks a habit, you can ensure your peace of mind is the most valuable thing you pack. These strategies are a critical part of the accommodation-specific awareness we cover in our comprehensive guide to The Ultimate Guide to Travel Safety: A 2026 Playbook.
The 60-Second Security Sweep: Your First Check-In Ritual
Your first minute inside a new hotel room is the most important. This is your window to verify, secure, and orient yourself before you get distracted by unpacking or collapsing on the bed. By turning the following steps into an unbreakable habit, you proactively eliminate the most common security and safety risks. Think of it as a professional-grade inspection that takes less time than it does to check your email.
Tip 1: Secure the Door and Verify the Room is Empty
Before you do anything else, take control of your entry point. A common mistake is to walk in, close the door, and immediately turn your back to it while dealing with luggage. This makes you vulnerable. Instead, follow this security-conscious procedure.
Prop the Door: As you enter, use your luggage to prop the door open so it can't be closed behind you.
Conduct a Visual Clear: From the doorway, quickly scan the room to ensure it is empty. This includes a glance behind the curtains, in the closet, under the bed, and inside the shower.
Close and Lock: Once you've confirmed the room is unoccupied, remove your luggage from the entryway, close the door, and immediately test every single locking mechanism. This includes the primary deadbolt and any secondary security devices like a security chain or a flip latch. Ensure they are all functional and engage smoothly. Don't assume they work; physically test them.
Tip 2: Check Your Communication and Safety Gear
Now that the room is secure, your next step is to verify your lifelines. You need to know that the room’s built-in safety equipment is present and functional.
Test the Phone: Pick up the in-room phone and confirm there’s a dial tone or call the front desk for a quick "hello." This ensures you have a reliable way to call for help if your cell phone has no service or the battery dies.
Locate Safety Devices: Visually identify the smoke detector and fire alarm sprinkler heads. It’s also wise to check for a carbon monoxide detector, especially in hotels with in-room fireplaces or those attached to large parking garages. If one isn't present and you have concerns, report it to the front desk.
Tip 3: Create a Mental Fire Escape Map
This is one of the most critical hotel safety tips, yet it's the one most often ignored. In the event of a fire, heavy smoke can reduce visibility to absolute zero. The evacuation map on the back of your door is not decoration; it's your key to survival.

According to fire safety experts, you must identify three key things:
Your Primary and Secondary Exits: The map will show the nearest emergency exit stairwell. Crucially, you must also identify an alternative, secondary exit in case your primary route is blocked by fire or smoke. Remember, elevators must never be used in a fire.
The Door Count: This is the most important part. Physically walk out into the hallway and count the number of doors between your room and the nearest emergency exit. Memorize this number. In a dark, smoke-filled hallway, this knowledge will allow you to feel your way along the wall to safety, counting the doors as you go.
Location of Safety Equipment: As you identify your route, note the location of fire alarm pull stations and fire extinguishers in the hallway.
Tip 4: Fortify Your Privacy
Your final step in the initial sweep is to ensure your room is a truly private space.
Check Windows and Connecting Doors: Go to every window and make sure it is locked securely. If your room has a connecting door to an adjacent room, verify that it is locked from your side. A good practice is to slide a chair or your luggage in front of a connecting door as an extra physical and audible barrier.
Close the Curtains: Fully close the curtains to ensure privacy from the outside, especially in ground-floor rooms or those that face other buildings.
Scan for Oddities: While rare, hidden cameras are a modern concern. Conduct a quick visual scan for any electronics or objects that seem out of place. Pay attention to smoke detectors, alarm clocks, and USB wall outlets, looking for unusual pinholes or lenses.
Beyond the Locks: Advanced Hotel Safety Tips
Okay, the room is secure. But a locked door is just the first line of defense. Now it’s time to think like a pro and protect your belongings with the kind of savvy that separates seasoned travelers from the rest.
Tip 5: Outsmart a Thief: How to Hide Your Valuables
The in-room safe should always be your first choice for storing passports, extra cash, and small electronics. However, if a safe is unavailable, broken, or you simply don't trust it, you need a smart hiding strategy. The key is to avoid the first places a thief would look: in drawers, under the mattress, and inside your suitcase.

Security consultants recommend using non-obvious, "high-friction" hiding spots that take time and effort to find.
Taped in an Inconspicuous Location: Use a small amount of duct tape to secure an envelope containing cash or cards to a surface that is out of sight. Think creatively: the underside of a heavy desk, the back panel of a chest of drawers, or high up on a closet shelf.
Inside a Common, Uninteresting Object: Hide valuables in plain sight by placing them inside items a thief would ignore. A popular tactic is to place cash inside a bag of dirty laundry, as it's highly unlikely to be searched. You can also slip flat items like cash or cards inside the hotel room's bible or another book on a shelf.
Within the Room's Fixtures: Some parts of a hotel room offer clever nooks. For a laptop, a surprisingly effective tactic is to hide it inside a pillowcase on the bed, then pile the other pillows on top to disguise its shape.
Pro-Tip: When hiding cash or cards in an envelope, tape it flat against a surface and choose a dark color for the envelope (e.g., black or brown) to prevent it from being seen through any gaps.
Tip 6: Bring Your Own Security: Portable Safety Devices
For the ultimate peace of mind, especially when staying in older hotels, budget accommodations, or short-term rentals, consider investing in a portable security device. These lightweight gadgets are designed to provide an extra layer of defense against unauthorized entry.
Portable Door Locks: These devices brace against the door frame from the inside, making it physically impossible for the door to be opened from the outside, even with a key.
Door Stop Alarms: These are simple, wedge-shaped door stops that you place under your door from the inside. If the door is pushed open, it triggers a piercingly loud alarm, startling the intruder and alerting you and others to the breach.
The Final Layer of Protection: Personal Habits
Your physical security measures are only half the battle. The other half is cultivating smart habits and maintaining a high level of situational awareness throughout your stay.
Tip 7: Practice Smart "Hotel Habits"
Small, consistent habits can significantly reduce your risk profile.
Sanitize High-Touch Surfaces: Upon arrival, use a disinfectant wipe to clean the objects that are most frequently handled but often overlooked by cleaning staff: the TV remote, light switches, doorknobs, and the phone.
Be Discreet with Your Room Number: When checking in, if the front desk clerk announces your room number out loud, politely ask for a different room and for them to write it down for you instead. Never leave your key card sleeve, which often has the room number written on it, lying around in public areas.
Use the "Do Not Disturb" Sign: When you are in your room, hang the "Do Not Disturb" sign on the outside of your door. This is a clear signal that the room is occupied and can deter someone from trying to enter, whether by mistake or with ill intent.
Verify All Visitors: Never blindly open your door. If someone knocks claiming to be hotel staff, call the front desk to verify that they sent someone to your room before opening the door.
Pro-Tip: If you order room service or have hotel staff coming to your room, call the front desk to verify the person's identity before opening the door. It's a simple step that confirms the visitor is legitimate.
A secure hotel stay is at the heart of a well-planned trip. To ensure every other aspect of your journey is just as prepared, from packing lists to financial planning, a comprehensive resource is essential. The right Travel Guide can be the difference between a good trip and a flawless one.
Your Pre-Trip Master Plan
A secure hotel room is just one piece of your travel safety puzzle. To ensure you don't overlook a single essential item—from documents and finances to clothing and gear—a master checklist is your most powerful tool. Our comprehensive, free checklist has you covered for every stage of your trip.

Download Your Free International Travel Checklist Now!
Hotel Safety FAQs
A prepared mind anticipates questions. Here are expert answers to common concerns.
1. Is an in-room safe really the most secure option?
For the vast majority of travelers, yes. Modern electronic safes are quite secure against opportunistic theft. However, hotel management does have a master key or code for emergencies. The greatest risk often comes from user error (choosing an obvious code like 1234) or a dishonest staff member (which is rare in reputable hotels). For irreplaceable items, using a smart hiding spot in addition to the safe, or keeping them on your person, can provide an extra layer of security.
2. Are short-term rentals (like an Airbnb) more or less secure than hotels?
It varies dramatically. A professionally managed rental in a secure building can be safer than a budget motel. However, rentals lack the 24/7 staff, multiple security cameras, and controlled access points of a hotel. When booking a rental, read reviews carefully for any mention of safety concerns, check the lock quality upon arrival, and consider bringing your own portable door lock.
3. What should I do if hotel staff need to enter my room while I'm out?
If you have requested maintenance or housekeeping, you have a reasonable expectation they will enter. Secure all valuables in the safe or hide them before you leave. If you are concerned, you can request that these services only be performed while you are present in the room. Always leave the "Do Not Disturb" sign on your door when you leave if you do not want anyone entering.
Travel with True Peace of Mind
Your hotel room should be a sanctuary—a place where you can recharge after a day of exploration and sleep soundly through the night. It shouldn't be a source of anxiety. By incorporating these seven hotel safety tips into your check-in routine, you are taking active control of your environment. You are replacing uncertainty with a plan and vulnerability with empowerment. This simple, 60-second ritual does more than just secure a room; it secures your peace of mind, freeing you to focus on the real purpose of your journey: the adventure that awaits outside your door.

Meta Data Suggestions:
SEO Meta Title (Under 60 characters):
7 Essential Hotel Safety Tips for Travelers
URL Slug:
hotel-safety-security-tips
SEO Meta Description (Under 155 characters):
Sleep soundly on your next trip. Our expert-backed hotel safety tips cover room security, hiding valuables, fire safety, and more for total peace of mind.
Don't Miss Out! Subscribe for Exclusive Content
SubscribeComments 0
No comments yet
Be the first to share your experience!
Dont Miss Out! Subscribe for Exclusive Content

Ultimate USA Holidays Guide: Top Picks
FTC Affiliate Disclosure Essentials: Stay Compliant as a Travel Creator
Essential Affiliate Tools: From Tracking to Full Optimization
Booking.com Affiliate Program Review: Pros, Cons, and Earnings Potential
Decoding Affiliate Commission Rates: Benchmarks for Travel Creators

Amazon Associates for Travel: Strategies to Maximize Commissions
5 Passive Income Ideas for Your Travel Blog
TrekGuider @trekguider
Let’s be honest: you didn’t launch a travel blog to build yourself a different kind of cubicle. The dream was freedom—an income untethered from a desk, a business that could fund your adventures. Yet the reality for most creators is a hamster wheel of content creation. You’re stuck on a content treadmill, constantly creating, posting, and promoting just to stay afloat. Your blog feels less like a passport to freedom and more like a demanding job that has followed you around the world.
The problem is a strategic one. You’re trapped trading time directly for money through freelance articles or one-off sponsorships, which means if you stop working, the money stops flowing. This constant hustle is the fast track to burnout, leaving your dream of a truly independent lifestyle feeling impossibly out of reach.

It’s time to stop trading hours for dollars and start building assets. The solution is to fundamentally shift your strategy toward building a portfolio of passive income streams—systems and products that work for you 24/7, whether you’re on a plane, exploring a new city, or fast asleep. This guide provides five proven, actionable ideas for passive income blogging. This is your blueprint for creating automated revenue engines that will finally decouple your income from the hours you work. Think of this as a crucial chapter in your business education; for the complete curriculum on building a modern creator enterprise, be sure to read our ultimate guide to How to Make Money Online: A Creator's Guide for 2026.
The Fundamental Shift: Trading Hours for Assets
Before we dive into the tactics, it's critical to internalize the foundational mindset shift required for success. Passive income isn't "money for nothing." As defined in lifestyle business design, it is revenue that, after an initial investment of time and effort, continues to be generated with minimal ongoing labor.
It’s the difference between Active and Passive Income:
Active Income is when you get paid for your direct effort. Think of a freelance article, a sponsored Instagram post, or a one-on-one coaching call. The work is finite, and so is the payment.
Passive Income is when you get paid because you own an asset that creates value. Think of an SEO-optimized blog post that earns affiliate commissions for years, or a digital guide that sells automatically every single day.

You are moving from the role of a service provider to an asset builder. Every idea that follows is a different type of digital asset you can build. Your goal is to create a portfolio of them.
1. Craft Evergreen Affiliate Content That Ranks and Earns for Years
Affiliate marketing is often a blogger's first foray into making money, but not all affiliate content is created equal. The key to making it a source of true passive income is to focus exclusively on creating evergreen content that is optimized for search engines (SEO). A post about a fleeting travel trend might get a burst of traffic, but an in-depth guide to "The 5 Best Carry-On Backpacks for Digital Nomads" can attract a steady stream of visitors from Google—and generate commissions—for years after you hit publish.
This is the very definition of a passive income asset. According to performance marketing industry analysis, a single piece of high-ranking content can generate commissions for years with no additional effort, making it an incredibly scalable model.
Your Action Plan for Passive Affiliate Income:
Identify High-Intent Keywords: Use an SEO tool to find long-tail keywords that signal a user is close to making a purchase. Think "best travel insurance for Europe," "what to pack for Southeast Asia," or "REI vs. Patagonia backpack review."
Go Deeper Than the Competition: Your goal is to create the single best resource on the internet for that specific query. This often means writing long-form articles (2,000+ words) that are well-researched and packed with your genuine, first-hand experience.
Build Strategic Comparison Tables: For product-focused articles, a well-structured comparison table is a conversion powerhouse. These tables organize key features, pros, and cons, allowing the reader to make an informed decision easily. Place your affiliate links within a clear "Check Price & Availability" button to capture the user at their highest point of intent.
Prioritize Trust Above All: The currency of affiliate marketing is trust. Only recommend products and services you have personally used and genuinely believe in. Write balanced, honest reviews that include both the good and the bad. This authenticity is what will ultimately drive conversions.
Pro-Tip: Focus your efforts on promoting "high-ticket" items or recurring subscriptions. Earning a 6% commission on a $2,600 G Adventures tour ($156) is a much higher-leverage use of your time than earning 3% on a $20 travel adapter. Similarly, promoting a service like Dollar Flight Club with a 50% recurring commission builds a predictable, compounding income stream.

2. Monetize Traffic with Premium Display Ads for True Passive Income Blogging
Display advertising is perhaps the purest form of passive income for bloggers. Once your blog achieves a consistent level of traffic, you can join a premium ad network that will automatically place high-quality ads on your site. You get paid based on the number of impressions (views), meaning your entire back catalog of content becomes a revenue-generating asset. An old, popular post about "Things to Do in Paris" can earn money from ads every single day without you ever touching it again.
The key is to understand that this is a volume game. Meaningful income from ads is only possible after you've built a substantial audience.
Your Action Plan for Passive Ad Revenue:
Focus 100% on SEO Traffic: Your single objective to unlock this income stream is to grow your organic traffic from Google. The strategy is simple: consistently publish high-quality, helpful content optimized around keywords your target audience is searching for.
Aim for Premium Network Thresholds: Forget about beginner networks like Google AdSense. The payouts are incredibly low. Your goal should be to qualify for a premium ad network, which will dramatically increase your revenue. The industry benchmarks are:
Mediavine: Requires 50,000 monthly sessions.
Raptive (formerly Adthrive): Requires 100,000 monthly pageviews.
Optimize for User Experience: While it may seem counterintuitive, the best way to maximize ad revenue is to create a great user experience. A fast-loading site with well-structured, easy-to-read content will keep readers on your pages longer, which in turn increases ad impressions and revenue. Ensure your site is mobile-friendly, as the majority of traffic comes from mobile devices.
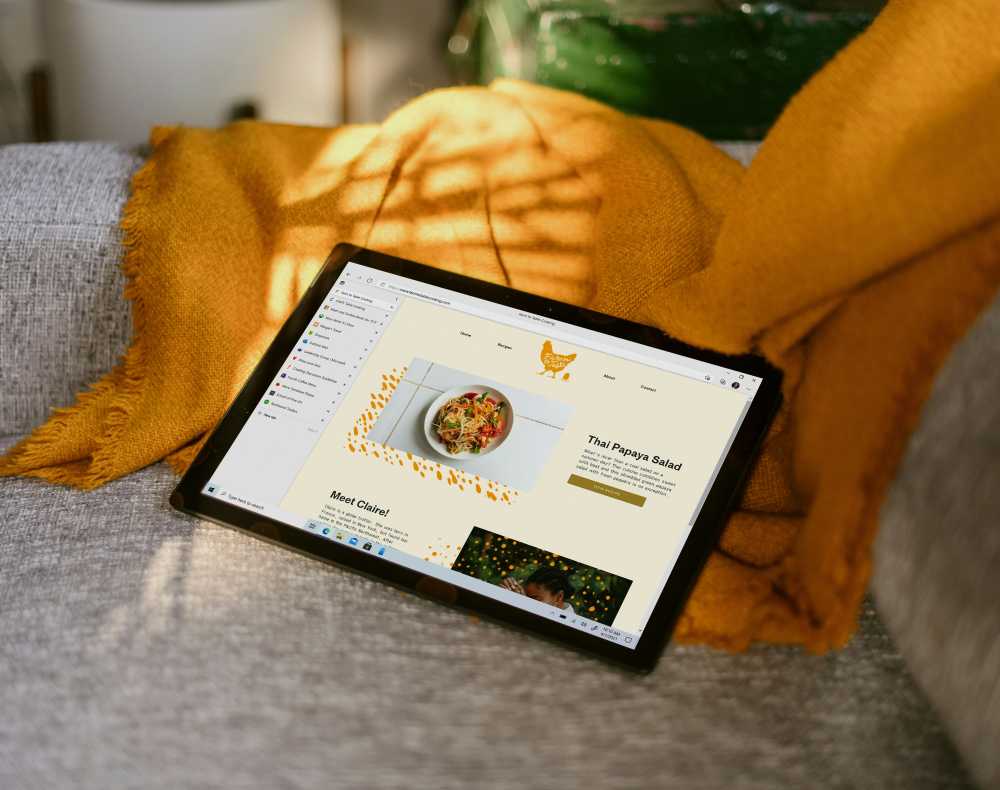
3. Create a "Sell While You Sleep" Digital Travel Guide
Transitioning from promoting others' products to creating and selling your own is the ultimate step in building a scalable business. Digital products, like eBooks or guides, are the perfect "create once, sell forever" asset. After an initial investment of time to create a comprehensive, high-value digital guide, you can sell it an unlimited number of times, generating revenue automatically with each download.
This model offers exceptionally high profit margins and gives you full control over the product and pricing. It’s how you build a truly independent business in a creator economy projected to nearly double from $250 billion to almost $500 billion by 2027.

Your Action Plan for Creating a Digital Guide:
Validate Your Idea First: The biggest mistake is creating a product nobody wants. Dive into your audience's comments and emails. What destination do they ask about most? What part of trip planning do they find most stressful? Their pain points are your product ideas.
Outline and Write with Intense Value: A great guide is both inspirational and intensely practical. Structure your content logically with a hyperlinked table of contents for easy navigation on mobile. Go beyond generic advice and share your unique, hard-won insider tips that can't be found elsewhere.
Design with a User-Friendly Tool: You don't need to be a graphic designer. A tool like Canva offers professional, easy-to-use templates that allow you to create a beautiful, polished guide. Prioritize a clean layout, large fonts, and your own high-quality photos.
Sell on a Specialized Platform: Once your masterpiece is complete, you need a world-class storefront. A dedicated marketplace like TrekGuider is the ideal place to sell your high-quality Travel Guide. It provides a professional, ready-made platform to connect with a global audience of passionate travelers who are actively searching for expert resources just like yours.
4. Sell Lightroom Presets and Digital Templates
A fantastic and highly popular passive income stream for travel creators with a distinct visual style is selling Lightroom presets. These are pre-packaged photo editing settings that allow your followers to achieve your signature aesthetic in their own photos with a single click. Like a digital guide, presets are created once and can be sold infinitely, providing a highly scalable and passive source of income.
Beyond presets, you can apply this same model to any digital template that saves your audience time and stress. This could include:
Customizable Itinerary Templates: Structured planning documents in Notion or Google Sheets.
Printable Travel Planners: A PDF pack including budget trackers, packing lists, and journal prompts.
Video LUTs: Color grading presets for fellow videographers.
Your Action Plan for Selling Presets & Templates:
Define Your Unique Style: Your visual brand is your product. Analyze your most popular photos. What makes them stand out? Is it a moody, cinematic look or a bright and airy feel? Package this style into a cohesive set of 5-10 presets.
Create a High-Converting Sales Page: Your sales page must visually demonstrate the transformation. Use compelling before-and-after photos to show customers exactly what your presets can do for their images.
Leverage a "Pay What You Want" Freebie: The best way to build an audience for your paid presets is to offer one or two for free as a lead magnet. This gives potential customers a risk-free way to try your product and see the quality for themselves.
CTA Block: Get Your Free Travel Lightroom Presets!
Ready to make your travel photos look stunning with a single click? Download our exclusive Free Travel Lightroom Presets! This starter pack is designed to give your images a professional, polished look and is the perfect introduction to the power of preset editing.
5. License Your Stock Photos and Videos
As a travel blogger, your hard drive is a goldmine. The thousands of high-quality images and video clips you've captured on your journeys are valuable assets. By uploading this content to stock photography platforms, you can license it to businesses, marketers, and other creators around the world, creating a small royalty for each download with no further effort required per sale.
While a single sale might be small, hundreds or thousands of downloads over many years can accumulate into a significant and remarkably passive income stream. You are simply monetizing the byproducts of the work you are already doing.
Your Action Plan for Selling Stock Media:
Sign Up for Major Platforms: Focus your efforts on the largest stock media marketplaces to maximize your potential audience. Top platforms include:
Adobe Stock
Shutterstock
Getty Images
Curate and Keyword Carefully: Don't just upload everything. Select your sharpest, best-lit, and highest-quality images. The key to getting your content discovered is careful keywording. Be descriptive and specific. Instead of "beach," use tags like "tropical beach, white sand, turquoise water, palm trees, sunrise, Thailand."
Remove Branding and Logos: To be commercially viable, your photos must be clean of any recognizable branding, logos, or trademarks.
Pro-Tip: Start shooting with stock in mind. When you're traveling, take a few extra minutes to capture generic, "evergreen" shots. These include landscapes without people, close-ups of food, architectural details, and shots that evoke a mood like "adventure" or "relaxation." These types of images have a much broader commercial appeal.
Your Journey to Financial Freedom Starts Now
Building a profitable blog that provides true freedom is a marathon, not a sprint. The path requires a strategic and deliberate shift in focus from being a content creator who gets paid for their time to a business owner who gets paid for the assets they own. The five ideas outlined above are your blueprint for building those assets.

You now have a clear answer to the question of how to achieve passive income blogging. Don't let yourself be overwhelmed by trying to do everything at once. Choose one idea that excites you the most and aligns with your current strengths. If you're a talented photographer, start with presets. If you have deep expertise in a specific destination, start outlining your digital guide. Take the first step today to build an asset that will pay you back for years to come.
Frequently Asked Questions (FAQ)
1. Is it better to focus on one passive income stream or build several at once?
Focus on one, then stack. The most successful creators follow a "Monetization Ladder." They don't try to do everything at once. Master creating evergreen affiliate content first. Once that system is working, use your authority and cash flow to invest time in building your first digital product. Mastering one stream before moving to the next is the key to sustainable growth.
2. How much traffic do I need to start earning passive income?
This depends entirely on the model. For affiliate marketing or selling your own low-cost digital product, you can start earning with as little as a few thousand pageviews per month if your audience is highly targeted and engaged. For display advertising to be truly worthwhile, you should aim for the 50,000+ monthly session threshold required by premium networks.
3. What's the most common mistake bloggers make when trying to earn passive income?
The biggest mistake is impatience. Passive income streams are assets that take time to build and appreciate. Bloggers often give up on SEO after a few months or launch a digital product to a tiny audience and get discouraged by low sales. True passive income is the reward for long-term, strategic effort.
Meta Data Suggestions:
SEO Meta Title (Under 60 characters):
5 Passive Income Ideas for Your Travel Blog (2026)
URL Slug:
passive-income-ideas-travel-blog
SEO Meta Description (Under 155 characters):
Discover 5 proven passive income ideas for your travel blog. Learn to build assets that make money 24/7, from digital guides to affiliate marketing.
Read the full guide: The Travel Blog Business Plan: How to Make Real Money in 2026
Don't Miss Out! Subscribe for Exclusive Content
SubscribeComments 0
No comments yet
Be the first to share your experience!
Dont Miss Out! Subscribe for Exclusive Content
FTC Affiliate Disclosure Essentials: Stay Compliant as a Travel Creator
Essential Affiliate Tools: From Tracking to Full Optimization
Avoid These 5 Affiliate Landing Page Mistakes for Better Conversions
Affiliate Keyword Research Mastery for Travel Blogs
Booking.com Affiliate Program Review: Pros, Cons, and Earnings Potential