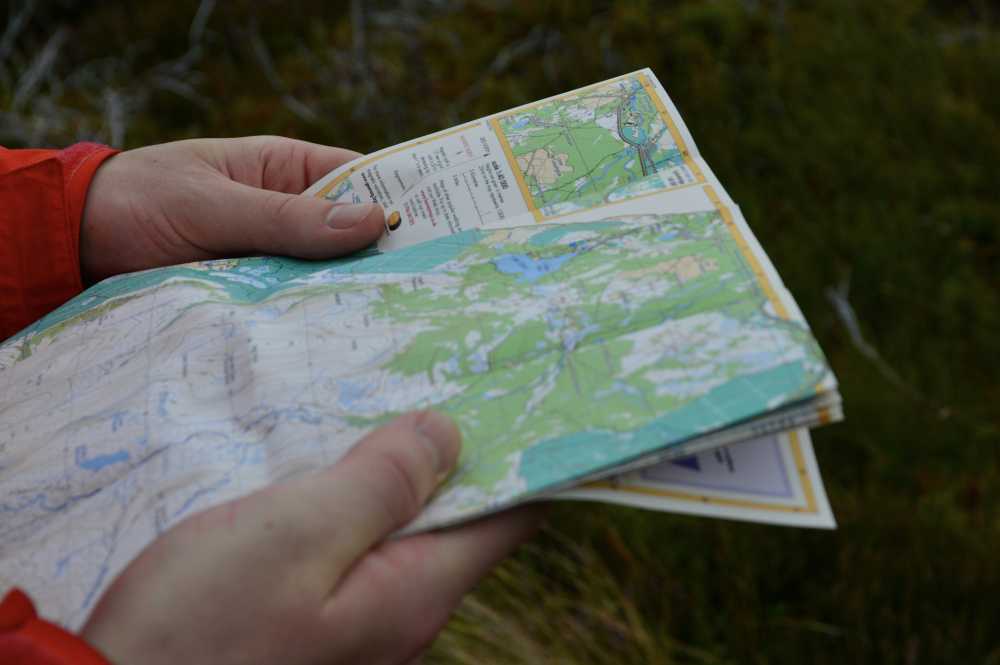
How to Create a Digital Travel Guide People Will Buy
TrekGuider @trekguider
You’re a travel expert. Your notes are filled with hidden gems, your camera roll is a treasure trove of untold stories, and your advice could save fellow travelers hundreds of dollars and hours of stress. You know your expertise has value, but packaging it into a real, scalable income stream feels like a monumental task. Relying on the slow trickle of ad revenue or the unpredictability of affiliate sales is a frustrating grind, keeping your dream of a truly independent business just out of reach.
This uncertainty keeps you on the content treadmill, trading your valuable time for pennies. You see other creators launching their own products and achieving a level of financial freedom that feels like a distant fantasy. The path forward is a confusing fog of questions about design, content, pricing, and technology, leaving you stuck in analysis paralysis while the immense opportunity of the creator economy—a market projected to nearly double from $250 billion to almost $500 billion by 2027—passes you by.
It’s time to stop trading hours for dollars and start building assets. This is your chronological, step-by-step playbook. We will demystify the entire process and show you exactly how to create a digital travel guide that people will not only buy but will also love and recommend. This is your complete workflow for transforming your hard-won expertise into a polished, professional product that generates passive income for years to come. Think of this as a critical chapter in your business plan; for the complete blueprint on building a modern creator enterprise, be sure to read our ultimate guide to How to Make Money Online: A Creator's Guide for 2026.

Why a Digital Guide is Your Ultimate Scalable Asset
Before diving into the "how," it's critical to understand the "why." Transitioning from promoting others' products to creating and selling your own is the single most powerful step you can take toward building a profitable, independent business. While ads and affiliate links have their place, digital products offer a level of control and scalability that other models simply can't match.
The advantages are transformative:
Infinite Scalability: Digital products operate on a "create once, sell forever" model. Whether you sell 10 copies or 10,000, your workload remains the same. There is no inventory to manage and no shipping to worry about.
Exceptionally High Profit Margins: With no manufacturing or distribution costs, the profit margins are extraordinary. Once you recoup your initial time investment, nearly every sale is pure profit.
Full Ownership and Control: When you sell your own guide, you own the entire process. You control the product, the pricing, the marketing, and the customer relationship. You are no longer dependent on an affiliate partner’s commission rates or an ad network's traffic requirements.
Solidifies Your Authority: Creating and selling a high-quality product instantly positions you as an expert. It builds deep trust with your audience, as you are no longer just recommending other people's stuff—you are standing behind your own valuable creation.
The market reflects this opportunity. The e-learning sector alone, a huge component of the digital product world, is projected to surge to an incredible $848 billion by 2030. This isn't a fleeting trend; it's a fundamental shift in how creators build resilient businesses.
The Blueprint – Research and Validation
The costliest mistake a creator can make is to spend months building a product nobody asked for. Thorough research and validation aren't optional; they are the foundation upon which a profitable product is built.
Identify Audience Needs and Define a Specific Niche
Your first job isn't to be a brilliant inventor; it's to be a sharp detective, uncovering the real, recurring problems your audience is desperate to solve.
Listen to Your Audience: The best ideas are hidden in plain sight. Dive into your blog comments, email replies, and social media DMs. What destinations are people constantly asking about? What part of the travel planning process do they find most challenging or stressful? Their recurring questions are your product ideas.
Define a Hyper-Specific Niche: Avoid creating a generic guide. A broad guide to "Mexico" will get lost in a sea of competition. A highly specific product like "A First-Timer's Foodie Guide to Mexico City's Roma Norte Neighborhood" is more valuable, easier to market, and instantly positions you as a niche expert.
Conduct Keyword and Market Research to Validate Demand
Once you have an idea, you must validate it with data.
Analyze Search Volume: Use an SEO tool to check the search volume for terms related to your guide idea. High search volume for long-tail keywords like "7-day Japan itinerary for foodies" or "what to do in Lisbon with kids" is a strong data signal that a ready market exists for a guide on that topic.
Conduct Competitor Analysis: Find 3-5 comparable digital travel guides in your niche. Your goal isn’t to copy them, but to identify a gap in the market. Analyze their price points, what they include, and, most importantly, read their reviews. What are customers praising? What are they complaining about? This will show you exactly how to create a superior product.
Pro-Tip: True validation comes from the intersection of qualitative and quantitative data. A great product idea is one that your audience is asking for (qualitative) and that a significant number of people are searching for online (quantitative).

The Core – Outlining and Content Creation
With a validated idea, it’s time to build the heart of your product: the content. This is where your unique expertise, voice, and experience shine.
Develop a Logical Structure
A good guide flows intuitively and is easy to navigate. Before you write a single word, create a detailed table of contents. This will be your roadmap and ensure you don't miss any crucial information. A typical structure includes:
Introduction: A brief overview of the destination, essential facts (currency, language), and why your guide is the ultimate resource.
Logistics: The practical nuts and bolts—getting there, getting around, visa requirements, and curated recommendations on where to stay for different budgets.
Experiences: The core of your guide. This includes top attractions, detailed daily itineraries, and deep dives into your niche (e.g., food and drink recommendations, hiking trails, photo spots).
Practicalities: The crucial final details like safety tips, packing lists, a budget breakdown, and useful local phrases.
Write Compelling and Useful Content
This is where you go beyond the generic advice found on a thousand other blogs.
Gather Your Assets: Compile all of your personal notes, journal entries, and high-quality photographs from your travels to the destination. Your first-hand experience and unique visuals are your primary competitive advantage.
Be Both Inspirational and Intensely Practical: Write in an engaging, personal tone. Share anecdotes and insider tips that bring the destination to life. Go beyond simply listing facts; tell your readers why a place is special. Share the hard-won wisdom that can't be found elsewhere, like "skip the line at the Colosseum by booking this specific tour" or "the best gelato is actually found two blocks away from the main square at this tiny shop."
With your raw content compiled, the next step is to give it a professional polish that signals its immense value.

The Polish – Professional Design for Non-Designers
Your guide's content may be brilliant, but in the digital world, packaging matters. A professional, user-friendly design signals quality and dramatically improves the customer experience.
Select a User-Friendly Design Tool
You don't need to be a graphic designer to create a stunning product. For a travel blogger whose primary goal is to efficiently create a static PDF travel guide, a template-based tool like Canva is the strategically superior choice. While powerful professional software like Figma or Adobe Illustrator has a steep learning curve that can delay your launch by weeks, Canva is built specifically for this type of project. Its intuitive, drag-and-drop interface is designed to help non-designers produce high-quality visuals quickly.
Feeling inspired to build your own assets but not sure where to begin? Creating high-value products is the core of a modern creator business. To accelerate your journey, we've bundled together some of our most powerful resources. The Travel Creator's Toolkit is a free collection of checklists, templates, and guides designed to help you streamline your workflow and build your business faster.
5 Essential Mobile-First Design Principles for a User-Friendly Guide
Your guide will almost certainly be used on a mobile phone while your customer is in-destination. Designing with a mobile-first user experience (UX) is not an option; it is essential for your product to be functional and valuable.
Prioritize Legibility and High Contrast: The content must be effortlessly readable on a small screen, often in bright sunlight. Use a clean, simple font of at least 11 points so users don't need to pinch-and-zoom. Crucially, ensure a high contrast ratio between the text and background—at least 4.5:1 as recommended by Web Content Accessibility Guidelines (WCAG)—to maintain readability.
Implement Simplified Navigation: The single most important navigation element is a hyperlinked Table of Contents at the beginning of the document. This allows users to jump directly to the section they need with a single tap, which is crucial when they're trying to find information quickly on a busy street.
Design for Touch with Finger-Friendly Targets: Any included hyperlinks (e.g., a link to a restaurant's website or a Google Maps location) must have a clickable area large enough to be easily tapped with a finger—the industry standard is a minimum touch target size of 44x44 points (approximately 7-10mm).
Minimize Cognitive Load by Eliminating Clutter: Mobile users are often distracted. Their interaction with a guide is typically in short bursts or "micro-tasks". To accommodate this, use short paragraphs, bulleted lists, bolded text for key information, and generous white space. A clean, uncluttered interface helps users find what they need with minimum effort.
Optimize for Performance and Portrait Orientation: The vast majority (94%) of mobile users hold their phones vertically. Your guide must be designed with a portrait layout (e.g., A4 or US Letter size). Crucially, keep the final PDF file size as small as possible by compressing all images before inserting them into your document. A large file will download slowly on a weak cellular connection, creating a poor user experience.

The Launchpad – How to Create a Digital Travel Guide for Sale
You've created a valuable, beautifully designed resource. The final phase is to package it, price it for profit, and get it into the hands of your customers.
How to Price Your First Digital Product
Pricing is one of the most challenging decisions. The most effective strategy for a knowledge-based product is value-based pricing. Instead of focusing on your production costs, price your product based on the transformation it provides to the customer. If your guide saves a user 20 hours of stressful research and helps them discover priceless experiences they would have otherwise missed, its value is immense.
A practical process for setting your price:
Step 1: Research the Market: Identify 3-5 comparable digital travel guides in your niche to establish a realistic market range.
Step 2: Articulate the Value: Make a specific list of the tangible outcomes your guide provides (e.g., "Saves over 15 hours of planning," "Includes a pre-planned 7-day itinerary worth over $100 in planning fees").
Step 3: Set an Initial Price and Test: For a high-quality, first-time travel guide, a price point between $19 and $49 is a strong starting position. It communicates significant value without creating sticker shock for the buyer.
Choose a Sales Platform That Works for You
You need a platform to handle the sale and secure digital delivery of your product. While you can use e-commerce plugins on your own blog, the smartest strategy is to leverage a platform that puts you in front of a built-in audience of motivated buyers.
Pro-Tip: Don't just build a product; build your business inside an ecosystem. A specialized marketplace like TrekGuider is the ideal place to sell your high-quality Travel Guide. It provides a professional, ready-made storefront and connects you with a global audience of passionate travelers who are actively searching for expert resources. You can publish articles to attract new customers directly on the platform, creating a powerful marketing funnel that leads right back to your product page.
Frequently Asked Questions (FAQ)
1. How long should my digital travel guide be?
Value is not measured in page count. A concise, 50-page guide packed with unique, actionable advice is far more valuable than a rambling 200-page guide filled with generic information. Focus on comprehensively solving the specific problem your niche audience has.
2. Do I need to have visited the destination very recently?
While recent, first-hand experience is ideal, an "evergreen" guide focused on core attractions, culture, and logistics can have a long shelf life. The key is transparency. Be clear about when you last visited and focus on information that doesn't change rapidly. You can always update your guide with new editions.
3. What if I'm not a professional writer or photographer?
You don't need to be. Your audience values authenticity and expertise over perfect prose. Write in your natural, conversational voice, as if you were giving advice to a friend. For photos, a modern smartphone can capture high-quality images. The goal is to be clear, helpful, and genuine.

Your Journey from Expert to Entrepreneur Starts Now
You now have the complete, A-to-Z workflow. You've moved from the vague idea of a product to a concrete, actionable blueprint that covers research, content creation, professional design, and a smart launch strategy. The path from being a passionate travel expert to a successful digital entrepreneur is no longer a fog of confusion.
You have the definitive answer to the question of how to create a digital travel guide that provides immense value and generates a sustainable income. The only thing left to do is take the first step. Start the research, outline your expertise, and begin building the asset that will power your business and fund your adventures for years to come.
SEO Meta Data Suggestions:
SEO Meta Title (58 characters): How to Create a Digital Travel Guide People Will Actually Buy
URL Slug: how-to-create-digital-travel-guide
SEO Meta Description (154 characters): A step-by-step playbook for travel creators on how to create a digital travel guide, from research and writing to design, pricing, and selling your product.
Read the full guide: The Travel Blog Business Plan: How to Make Real Money in 2026
Don't Miss Out! Subscribe for Exclusive Content
Subscribe


Comments 0
No comments yet
Be the first to share your experience!
Dont Miss Out! Subscribe for Exclusive Content

FTC Affiliate Disclosure Essentials: Stay Compliant as a Travel Creator

Essential Affiliate Tools: From Tracking to Full Optimization

Avoid These 5 Affiliate Landing Page Mistakes for Better Conversions

Affiliate Keyword Research Mastery for Travel Blogs

Booking.com Affiliate Program Review: Pros, Cons, and Earnings Potential

Decoding Affiliate Commission Rates: Benchmarks for Travel Creators
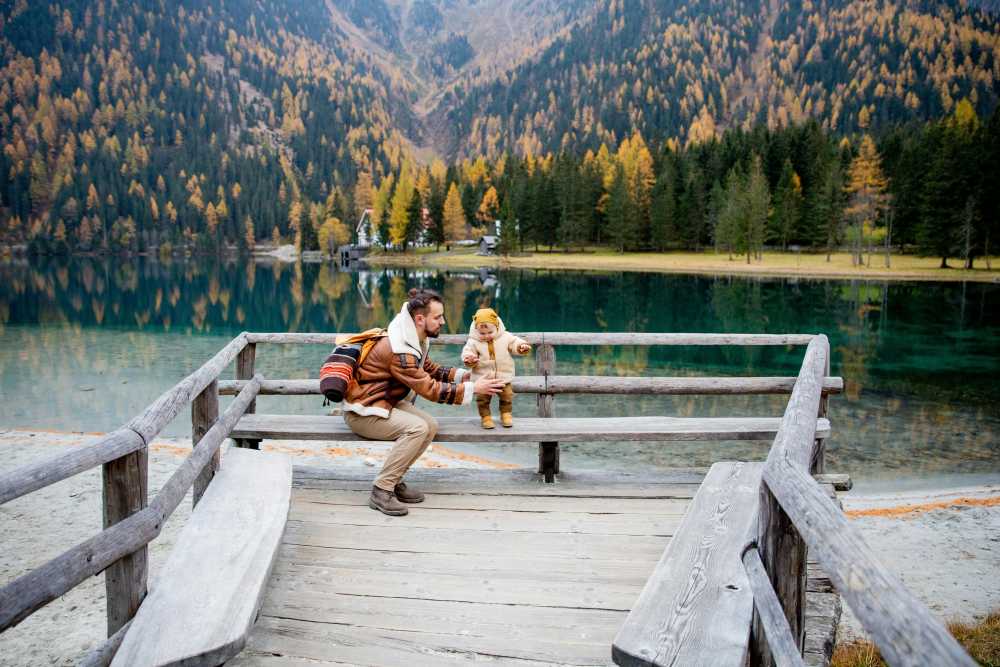
4 Unforgettable National Park Family Travel Ideas
TrekGuider @trekguider
Struggling to find a family vacation that pulls your kids away from screens and creates genuine memories, not just stress? You're not alone. The pressure to plan the perfect, budget-friendly trip often leads to analysis paralysis amid an overwhelming sea of options and the fear of getting it all wrong. This guide cuts through the noise.
This is where the timeless majesty of America’s national parks comes in. They are the ultimate solution—vast playgrounds of natural wonder that offer a powerful antidote to the digital saturation of modern life. Forget generic resort packages; this guide is a strategic playbook for crafting an unforgettable national park adventure. We’ll transform the daunting task of planning into an exciting journey.
As we explore these specific parks, remember they represent just one path to an amazing trip. For a complete overview of destinations for every budget and travel style, our Family Travel Ideas: The 2026 Guide to Unforgettable Trips is your ultimate resource. This article is your specialized map to sun-drenched trails, awe-inspiring wildlife, and the kind of shared experiences that strengthen family bonds for years to come.
Why National Parks are the Ultimate Family Travel Ideas for Summer
In a world of manufactured entertainment, national parks offer something profoundly real. They are living classrooms, natural gymnasiums, and sanctuaries for the soul. For families, they present a unique opportunity to disconnect from daily routines and reconnect with each other in a meaningful way.
Unmatched Educational Value: Where else can your child see the geological forces that shaped our planet firsthand at the Grand Canyon, or watch a bison herd thunder across the plains of Yellowstone? These parks are immersive, multi-sensory learning environments that bring textbook concepts to vivid life.
Built-in Adventure: From gentle, toddler-friendly nature walks to more challenging hikes for teens, the parks are structured for adventure at every skill level. The thrill is in the discovery—spotting a bald eagle, identifying a new wildflower, or conquering a trail together.
Remarkable Affordability: Compared to theme parks or international travel, a national park vacation can be incredibly budget-friendly. An annual "America the Beautiful" pass grants access to all parks for just $80 per vehicle. With options for camping or lodging in nearby towns, you can tailor the trip to your exact financial comfort level.
A Cure for Nature Deficit Disorder: Experts increasingly recognize that time spent in nature is critical for a child's physical and mental development. It reduces stress, improves focus, and fosters creativity. A week in the woods can be the most effective reset button you’ll ever press for your family.
They are, quite simply, America's best idea, and they are waiting to be the backdrop for your family's next great story.
Your National Park Summer Adventure Playbook
Success in the wild begins with careful planning at home. The immense popularity of national parks during the summer means that spontaneity can lead to sold-out signs and disappointment. Following a proven framework is key to a smooth and memorable trip.
Step 1: The 6-12 Month Countdown - Booking Your Basecamp
Let’s start with a non-negotiable truth: if you only get one thing right in your planning, make it your lodging. In-park accommodations and popular campsites are often booked solid the day they become available, sometimes a full year in advance.
Define Your Lodging Style:
In-Park Lodges: Offer unparalleled convenience and historic charm (think the Old Faithful Inn). They are the most expensive option and require the earliest booking.
Campgrounds: Provide the most immersive nature experience. Services range from primitive sites to full RV hookups. Reservations are typically made through Recreation.gov.
Gateway Towns: Towns just outside park entrances (like West Yellowstone, MT, or Springdale, UT) offer a wide range of hotels, motels, and vacation rentals. They provide more flexibility and amenities but require daily travel into the park.
Set Your Alarms: Identify the exact date and time that reservations open for your target dates and lodging. Be online and ready to book the second they become available.
Have Backup Plans: Research and be ready to book your second and third choices immediately if your first is unavailable.
Pro-Tip: How to Actually Win the Campground Lottery
Booking a popular national park campsite on Recreation.gov is a competitive sport. Here’s how to win: a few days before your booking day, log into your account, find your desired campground, and add it to your cart to confirm the exact release time (usually 10 a.m. ET). On the day, log in 10 minutes early, sync your computer clock to the official U.S. time (time.gov), and have all your information ready. Refresh your screen precisely at the release time and complete the booking in seconds.
Step 2: The 2-3 Month Check-In - Crafting Your Itinerary
With your basecamp secured, you can now build your daily plan. The key is to balance iconic sights with downtime to avoid burnout. Our guide on How to Make Family Travel Planning Actually Easy dives even deeper into this process.
Cluster Your Activities: Parks are huge. Study the park map and group your desired activities by geographic area. Dedicate full days to specific regions, like the Yellowstone Lake area or the Tioga Road in Yosemite, to minimize driving time.
Prioritize the "Must-Sees": Identify the 2-3 iconic experiences your family absolutely cannot miss. Plan to visit these popular spots early in the morning (before 9 a.m.) or later in the afternoon (after 4 p.m.) to avoid the worst crowds and midday heat.
Involve the Kids: Give your children, especially older ones, a voice in the planning. Let them research and choose a specific trail they want to hike or a Ranger Program they want to attend. This ownership fosters excitement and cooperation.
Stay Organized from Start to Finish
A great road trip has a lot of moving parts. Our free checklist is designed to help you track everything from reservations to packing lists, ensuring nothing gets missed.
Download the free National Park Road Trip Checklist
Top National Parks for Summer Family Adventures (And What to Do There)
While every park is special, some are exceptionally well-suited for families during the summer months. Here are our top picks for incredible family travel ideas for summer in the national parks.
Yellowstone National Park: The Geothermal Wonderland
Best For: Ages 6+. The sheer scale and geothermal wonders are captivating for school-aged children and teens.
Can't-Miss Activities:
Watch Old Faithful Erupt: It’s iconic for a reason. Check the posted eruption times and find a spot on the boardwalk.
Explore the Grand Prismatic Spring: The vibrant colors of this massive hot spring are otherworldly. The best view is from the elevated overlook on the Fairy Falls Trail.
Wildlife Safari in Hayden Valley: Drive through this vast, open valley at dawn or dusk for the best chances of spotting bison, elk, grizzly bears, and even wolves.
Kid-Friendly Hike: The Storm Point Loop Trail is a relatively flat 2.3-mile loop that leads through forest to a scenic point on Yellowstone Lake.
Zion National Park: The Majestic Canyon Sanctuary
Best For: All ages, but especially families with active kids and teens.
Can't-Miss Activities:
Ride the Park Shuttle: During peak season, the mandatory shuttle is an experience in itself, offering narrated guidance and stunning views.
Walk The Narrows (Bottom-Up): Wading through the Virgin River in a 1,000-foot-deep canyon is the quintessential Zion experience. Rent proper water shoes from an outfitter in Springdale—it's a game-changer.
Hike to Emerald Pools: This series of trails leads to lush, spring-fed pools and waterfalls. The Lower Pool trail is paved and accessible for strollers.
Kid-Friendly Hike: The Pa'rus Trail is a 3.5-mile paved trail that follows the Virgin River. It's perfect for strollers, wheelchairs, and bikes.
Acadia National Park: The Coastal Gem of New England
Best For: All ages. The diversity of landscapes makes it a perfect fit for multi-generational trips.
Can't-Miss Activities:
Drive the Park Loop Road: This 27-mile road hits many of the park's highlights, including Sand Beach, Thunder Hole, and Otter Cliff.
Watch the Sunrise from Cadillac Mountain: Be one of the first people in the United States to see the sunrise. Vehicle reservations are now required and must be booked in advance.
Explore the Tide Pools: At low tide, the rocky coastline near Wonderland Trail reveals a fascinating world of sea stars, crabs, and anemones.
Kid-Friendly Hike: The Jordan Pond Path is a 3.3-mile loop around a crystal-clear pond, best capped off with popovers at the Jordan Pond House.
Olympic National Park: A World of Ecosystems

Best For: Families who crave variety and have kids aged 7+. Olympic is like visiting three parks in one.
Can't-Miss Activities:
Explore the Hoh Rainforest: Walk the Hall of Mosses Trail (.8 miles), an easy loop that immerses you in a temperate rainforest dripping with green. It’s pure magic.
Discover Rialto Beach: This is the iconic Pacific Northwest coastline. Explore tide pools, admire giant driftwood, and hike to the Hole-in-the-Wall sea arch (check tide charts!).
Drive to Hurricane Ridge: Ascend nearly a mile in elevation for breathtaking panoramic views of the Olympic Mountains.
Kid-Friendly Hike: Sol Duc Falls Nature Trail is a 1.6-mile roundtrip hike through a stunning old-growth forest to a powerful, picturesque waterfall.
Common Pitfalls and How to Avoid Them
The "Too Much, Too Fast" Itinerary: Don't try to see an entire park in two days. You’ll end up with cranky kids and only see the park through a car window. Embrace a slower pace. For more on this, explore The Sanity-Saving System for Your Next Family Road Trip.
Ignoring the Junior Ranger Program: This is a mistake. The free activity booklets available at any visitor center are the single best way to engage kids aged 5-12. It transforms them from passive passengers into active explorers.
Underestimating Wildlife Safety: Seeing a bear or bison is a thrill, but these are powerful wild animals. Know and respect the rules: stay at least 100 yards from bears and wolves, and 25 yards from all other large animals. Never, ever feed wildlife.
Pro-Tip: Download the official NPS (National Park Service) app before your trip. You can save park maps and content for offline use, a lifesaver in areas with no cell service.
Packing and In-Trip Strategies
Your gear and daily approach can make or break the experience. Focus on comfort, preparedness, and flexibility.
The Essential Family Packing List:

Layered Clothing: Summer weather in the mountains is notoriously unpredictable. Pack lightweight layers—t-shirts, fleeces, and a waterproof rain jacket—for everyone.
Sturdy Footwear: Do not attempt hikes in flip-flops. Everyone needs comfortable, broken-in shoes with good traction.
Sun Protection: The sun is more intense at higher elevations. Bring wide-brimmed hats, sunglasses, and high-SPF sunscreen.
Reusable Water Bottles: Staying hydrated is critical. A large water bladder for each adult and a reusable bottle for each child is a must.
A "Go-Bag" for the Car: Keep a small backpack in the car with essentials: a first-aid kit, endless snacks, binoculars, a physical park map, and wet wipes.
Frequently Asked Questions
What is the best time of year for a national park family vacation?
While summer offers the most accessible weather and open facilities, it's also the most crowded. For fewer crowds and beautiful scenery, consider the "shoulder seasons" of late spring (May-June) and early fall (September-October). Always check specific park conditions, as weather varies greatly by region.
How far in advance should I book lodging for a national park trip?
For popular in-park lodges, you should book 12 months in advance—often the day reservations become available. For campsites, the booking window is typically 6 months in advance. Planning this far ahead is crucial for securing the best locations.
Are national parks a good vacation idea for families with toddlers?
Absolutely! Many parks feature paved, stroller-friendly trails like the Pa'rus Trail in Zion or accessible boardwalks around Yellowstone's geysers. The key is to choose the right activities, keep hikes short, and take advantage of the Junior Ranger programs, which have activities for younger children.
What's the most important thing to pack for a national park trip?
Beyond your camera, the most critical items are layered clothing and proper footwear. Mountain weather can change in an instant, so having layers ensures everyone stays comfortable. Sturdy, broken-in shoes are essential for preventing blisters and navigating uneven trails safely.
Conclusion
The beauty of a national park vacation lies in its simplicity and its power. By investing in careful planning, you are not just organizing a trip; you are building a framework for connection and creating a reservoir of shared memories that your family will draw upon for a lifetime. These family travel ideas for summer are more than just a vacation—they are an investment in your family's story.
So, use this guide to book with confidence, pack with purpose, and get ready to discover the incredible wonders waiting in your own backyard.

Read the full guide: Family Travel Ideas: The 2026 Guide to Unforgettable Trips
Don't Miss Out! Subscribe for Exclusive Content
SubscribeComments 0
No comments yet
Be the first to share your experience!
Dont Miss Out! Subscribe for Exclusive Content

San Francisco Cherry Blossoms: A Local's Guide to the Blooms

Halloween SF: Haunts Without Horrors

SF Festivals: 7 Must-See Lineups

Christmas SF: Lights & Wharf Wonders

SF Pride: 6 Route & Party Hacks

Chinese New Year SF: Parade Essentials
San Francisco Cherry Blossoms: A Local's Guide to the Blooms
TrekGuider @trekguider
The cherry blossom experience in San Francisco is not a grand, sweeping spectacle. It’s something more intimate, more soulful. It’s about turning a corner in a vibrant, historic neighborhood and finding yourself under a delicate canopy of blossoms, the scent of ramen broth mixing with the faint fragrance of spring. It’s a celebration rooted not in diplomacy, but in the fierce resilience of a community.
This is a concentrated jewel box of culture. But that intimacy comes with its own challenges. The Northern California Cherry Blossom Festival, the largest on the West Coast, packs over 220,000 people into the tight-knit blocks of Japantown. A poorly planned visit can quickly devolve into a frustrating battle with crowds, leaving you with more stress than serenity.
This isn’t just another guide. This is your strategic playbook for experiencing San Francisco’s cherry blossoms like a local. We’ll deconstruct the bloom’s tricky timing, reveal the best viewing spots both in and out of the festival’s epicenter, and provide the transportation hacks you need to navigate the city like a pro. By the end of this, you’ll have a plan to witness one of America’s most meaningful cultural celebrations in all its glory.

A Story of Resilience: The Soul of the Festival
To truly appreciate the blossoms here, you have to understand their story. San Francisco’s are proof of a community’s will to survive. Japantown, or Nihonmachi, is one of only three remaining in the United States, a neighborhood that has weathered unimaginable challenges.
After the forced internment of Japanese Americans during WWII, the community returned to find their homes and businesses lost. In the 1960s, city redevelopment projects displaced thousands more. The Northern California Cherry Blossom Festival was born from this turmoil. First held in 1968, it was a defiant celebration of culture and a powerful statement that the community was here to stay.
So when you stand in the Peace Plaza, you’re standing on historic ground. That iconic, five-tiered structure is the Peace Pagoda, a gift from San Francisco’s sister city of Osaka, designed by the renowned Japanese architect Yoshiro Taniguchi. It’s not just a landmark; it’s the spiritual anchor of the entire festival. Every blossom that blooms here feels more meaningful because of the history it represents.
Decoding the Bloom: Festival Dates vs. Nature’s Whim
The first mistake visitors make is confusing the festival schedule with the flowers’ schedule. They are two separate things.
For your planning purposes, here are the official festival dates, which traditionally span two weekends in April:
2026 Northern California Cherry Blossom Festival: April 12-13 & April 19-20, 2026
But here’s the critical distinction every visitor must understand: the festival dates are not the bloom dates. The festival is a fixed celebration of culture, while the blossoms themselves are a fleeting, unpredictable miracle of nature. Your goal is to find the magic window where the two overlap.

The Nuance of "Peak Bloom" in the Bay Area
In San Francisco, "peak bloom" is a rolling event, not a single moment. It depends on the tree variety and the city’s famously fickle microclimates.
The First Wave (Yoshino): The delicate, pale pink Yoshino cherry trees are typically the first to bloom, usually from late March into early April. These are the classic, ethereal blossoms you see in the Japanese Tea Garden.
The Second Wave (Kwanzan): Following the Yoshino are the Kwanzan cherry trees, which produce much fuller, fluffier, and deeper pink blossoms. These are hardier and their bloom often coincides perfectly with the festival’s second weekend and the Grand Parade, making for a spectacular show in Japantown.
Predicting the bloom is an art, not a science. A warm, dry winter can sometimes delay the bloom, as the trees need a certain number of "chill hours" to properly set their buds. Your best bet is to monitor social media. The official festival website and the Instagram accounts for the Japanese Tea Garden and SF Botanical Garden are invaluable resources for real-time updates.
Your Strategic Viewing Guide
You can experience the blossoms in three distinct ways: embracing the festival’s vibrant chaos, seeking tranquil beauty in a world-class garden, or discovering a hidden gem beloved by locals.
1. The Epicenter: Japantown & The Peace Plaza
During the festival weekends, the blocks around the Peace Plaza transform into a bustling hub of Japanese culture. You’ll find everything from traditional music and martial arts demonstrations to mouth-watering street food.
In Japantown, timing isn’t just important—it’s everything. It’s the difference between a serene morning stroll among the blossoms and being swept up in a shoulder-to-shoulder river of festival-goers.
Pro-Tip for Foodies: The food booths, known as yatai, are a massive draw. Don't miss the Takoyaki (octopus balls) from Kagura or the sweet, red-bean-filled Imagawayaki. To beat the lines, arrive right at 11 AM when the festival opens and eat first. The lines can be an hour long by 1 PM.
Pro-Tip for Photographers: The best shot of the Peace Pagoda framed by blossoms is from the Webster Street Bridge overlooking the plaza. For street scenes, a weekday morning before the festival begins offers beautiful, soft light and empty streets.
Go Deeper: For those who want to go even deeper, this is the perfect opportunity to connect with a local expert. The history of Japantown is complex and deeply moving, and a guided walk can reveal stories you’d never find on your own.
2. The Oasis: Golden Gate Park
If you need a break from the festival energy, a short bus ride will take you to the serene landscapes of Golden Gate Park, home to two premier blossom-viewing locations.
The Japanese Tea Garden: This is the oldest public Japanese garden in the United States, and it is an absolute masterpiece. The cherry trees here are artfully placed around the Drum Bridge, pagodas, and koi ponds. It’s a photographer’s dream. There is an entrance fee, but it’s worth every penny. To avoid crowds, purchase your ticket online in advance and go on a weekday morning.
The San Francisco Botanical Garden: Just a short walk from the Tea Garden, the SFBG offers a more sprawling, less crowded experience. Head to the Temperate Asia collection to find their grove of cherry trees. It’s a perfect spot for a quiet picnic under the petals.
3. The Secret Spot: The Palace of Fine Arts
For a truly local experience, head to the Marina district. Tucked away behind the iconic rotunda of the Palace of Fine Arts is a small, enchanting grove of cherry trees. The blossoms here often peak a bit later, sometimes into early May. The sight of the delicate pink flowers against the Greco-Roman architecture is breathtaking and feels like a hidden secret. It’s the perfect place to escape the crowds and enjoy a quiet moment.
Logistics Masterclass: Getting Around
Rule number one: Do not drive to Japantown during the festival. You will spend your entire day circling for non-existent parking. Here’s how to do it right:
Public Transit (Muni): This is your best friend. The 38-Geary and 38R-Geary Rapid buses run constantly along a major corridor and stop one block from the festival. The 2-Clement and 22-Fillmore are also excellent options. Use a Clipper card or the MuniMobile app to make things seamless.
Parking (If You Absolutely Must): The only sane option is the Japan Center Main Garage. The entrance is on Geary Blvd. On festival weekends, you must arrive before 10 AM, or you will find it full.
Ride-Sharing: A good option, but set your drop-off and pick-up points at least three blocks away from the festival’s core (e.g., at Geary & Laguna or Post & Franklin) to avoid getting stuck in gridlock.
Don't-Miss Festival Highlights
The festival’s crown jewel is the Grand Parade, which closes out the final Sunday of the event. This is a spectacular procession that starts near City Hall and travels up Post Street into the heart of Japantown. You’ll see everything from taiko drummers and dancers to the newly crowned Cherry Blossom Queen and her court—a leadership program for young Japanese American women.
The parade’s incredible finale is the Taru Mikoshi. This is a massive, ornate portable shrine weighing over 1,000 pounds, carried on the shoulders of over 100 chanting participants. It’s a powerful, energetic display of community spirit and a must-see spectacle.

Your Pre-Trip Checklist
A little preparation goes a long way in San Francisco.
Dress in Layers: This is the golden rule of SF. A chilly, foggy morning can become a sunny, breezy afternoon in an instant. A fleece or mid-layer under a windbreaker is the standard local uniform for a reason.
Comfortable Shoes: You will be walking. A lot. The hills are no joke. This is not the time to break in new shoes.
Portable Power Bank: Between navigating, taking photos, and using transit apps, your phone battery won’t stand a chance. A power bank is essential.
Cash: While most vendors take cards, the lines for ATMs are long and the smaller food stalls are often cash-only.
The Cherry Blossom Festival is one of the city's signature spring events. For a complete look at what's happening year-round, our complete guide to San Francisco Holidays: Bay Area Buzz is the essential next read for planning a trip around the city's top seasonal events.
An Unforgettable Bloom
San Francisco’s cherry blossom celebration offers something truly special: a world-class cultural event with the heart of a neighborhood block party. It’s a chance to not only witness the stunning beauty of spring but to feel the powerful spirit of a community that has refused to be erased.
By timing your visit strategically, knowing where to find your own quiet corner, and embracing the city’s public transit, you can bypass the stress and create a truly unforgettable memory. You’re no longer just a tourist; you’re an insider, ready to experience this beautiful and meaningful spectacle to its fullest.
Capture the Perfect Bloom
You’re going to take hundreds of photos of the cherry blossoms—don’t let them get lost on your camera roll. Our free collection of Travel Lightroom Presets is designed to make your photos pop with just one click. Transform your shots of the delicate pink petals and vibrant festival scenes into professional-quality images you’ll be proud to share.
Frequently Asked Questions (FAQ)
When is the absolute best time to see the cherry blossoms in San Francisco? While the festival is in mid-to-late April, the "best" time depends on what you want to see. For the most ethereal, classic blossoms in a garden setting, aim for the first week of April at the Japanese Tea Garden. For the full, vibrant festival experience with the fluffy Kwanzan blossoms, the second weekend of the festival is your best bet.
Is the Northern California Cherry Blossom Festival free? Yes, attending the festival in Japantown, including all the stage performances and watching the parade, is completely free. You will need to pay for food, drinks, and any items from craft vendors. Note that visiting the Japanese Tea Garden in Golden Gate Park requires a separate admission fee.
How much time should I budget for the festival? If you plan to eat, watch a few performances, and browse the stalls, give yourself at least 3-4 hours in Japantown. If you want to see the parade, plan for that to take an additional 2 hours of your day.
Is the festival kid-friendly? Absolutely. Kids love the energy, the food, and the parade. There are also often hands-on cultural activities like origami folding. However, the crowds can be overwhelming for small children, so a weekday visit or arriving right at the opening on a weekend is recommended.
Can I see cherry blossoms in San Francisco outside of Japantown and Golden Gate Park? Yes! Besides our "secret spot" at the Palace of Fine Arts, you can often find beautiful blooming trees scattered in residential neighborhoods like the Richmond and Sunset districts. Keep your eyes peeled in late March and April—you’ll be surprised where they pop up.
Don't Miss Out! Subscribe for Exclusive Content
SubscribeComments 0
No comments yet
Be the first to share your experience!
Dont Miss Out! Subscribe for Exclusive Content
Halloween SF: Haunts Without Horrors
SF Festivals: 7 Must-See Lineups
Christmas SF: Lights & Wharf Wonders
SF Pride: 6 Route & Party Hacks
Chinese New Year SF: Parade Essentials
