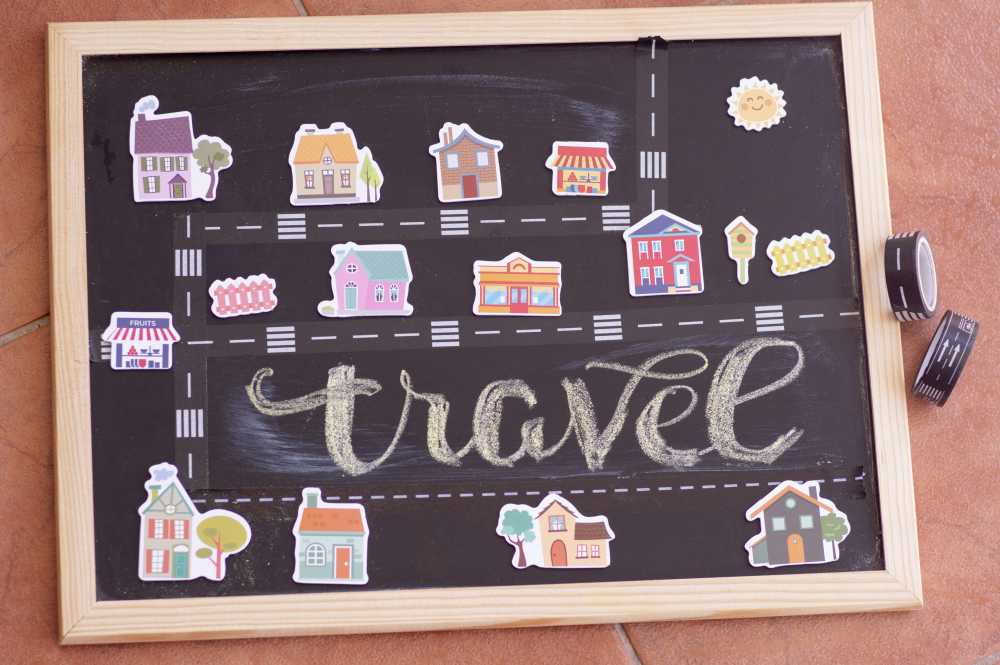
How to Make a Solo Travel Budget (That You'll Actually Keep)
TrekGuider @trekguider
You have the destination pinned on a map, the screenshots saved, the dream of a life-changing solo trip burning bright. But a huge, intimidating question mark looms over the entire fantasy: the money. You have no real idea how much it costs, how to save for it, or how you’ll manage it all on your own. This financial uncertainty is paralyzing, isn't it? It’s the anchor that keeps your dream moored in the harbor of "someday," while you watch others set sail. You worry that you’ll either never save enough or, even worse, that you’ll miscalculate and run out of money halfway through your adventure, turning a dream trip into a stressful nightmare.
This guide is your anchor chain cutter. It is the definitive, step-by-step system to create a realistic, achievable, and stress-free financial plan for your adventure. We’re going to demystify the process of how to budget for solo travel, breaking down every potential cost, from pre-flight essentials to daily gelato. This isn't about restriction; it's about empowerment. It's about giving you the clarity and control to turn "someday" into a firm departure date. For a complete roadmap of your entire journey, start with our foundational pillar article, [The Ultimate Guide to Solo Female Travel (15 Essential Tips)].
The "Why" Before the "How": A Solo Traveler's Financial Mindset
Before we open a single spreadsheet, let's establish a crucial mindset shift. For a solo traveler, a budget is not a cage—it is the key that unlocks the cage. When you travel with others, costs are often shared or split. When you travel alone, you bear 100% of the financial responsibility for every room, ride, and meal. While this may seem daunting, it grants you an unparalleled superpower: absolute financial agility and control.
You, and you alone, decide where to splurge and where to save. You can choose a hostel in Prague to save for a Michelin-starred meal in Paris. This level of autonomy is a core part of the solo travel experience, a movement dominated by women who make up a staggering 84% of the market. Mastering your budget is the first and most critical step in mastering the art of traveling on your own terms.
From Dream to Departure: Your Step-by-Step Guide on How to Budget for Solo Travel
Creating a comprehensive travel budget isn't guesswork; it's a systematic process that transforms a vague dream into an actionable financial goal. Follow these four steps to build a plan you can trust.
Step 1: Research and Estimate Your "Big Three" Costs
Your first task is to get a realistic, high-level estimate of what your trip will cost. Focus your research on the three largest categories of expense that will form the foundation of your budget.
Pre-Trip Fixed Costs: These are the one-time expenses you'll incur before you even leave home. This category includes things like necessary visas, travel insurance (an absolute non-negotiable), essential gear you need to buy (like a good backpack or walking shoes), and any required vaccinations.
Major Transportation: For most trips, this will be your round-trip flight to and from your destination region. Use tools like Google Flights or Skyscanner and search with flexible dates to get a ballpark figure for this significant cost.
Average Daily On-the-Ground Cost: This is the most variable part of your budget, and it's heavily influenced by your destination and travel style. Research is key here. As we'll see below, the difference between regions is dramatic. A budget-conscious solo traveler could comfortably explore Prague on around €65 per day, while maintaining a similar travel style in Paris would require at least €115 per day, according to cost-of-living data.

Step 2: Build Your Master Budget Spreadsheet
Once you have your "Big Three" estimates, it's time to get granular. Create a detailed spreadsheet or use a budgeting app to break down your total estimated cost into specific, itemized categories. This detailed view is crucial because it shows you exactly where your money is going and helps you identify areas where you can potentially cut back.
Your spreadsheet should include the following categories:
Pre-Trip Costs: (Visa fees, travel insurance, vaccinations, new gear)
International Transport: (Flights, long-distance trains)
Daily Lodging: (Your estimated nightly cost x number of nights)
Daily Food: (Your estimated daily cost x number of days)
Daily Activities: (Museum tickets, tours, special experiences)
Local Transport: (Subway passes, buses, occasional taxis)
Miscellaneous: (Souvenirs, laundry, toiletries)
Your Ultimate Planning Companion
A great budget is the foundation of a great itinerary. To help you organize every aspect of your trip, from flight details and accommodation confirmations to your daily spending plan, we've created the perfect tool to put this plan into action.
Download your free [Travel Itinerary Template] now! This comprehensive template will help you keep all your essential information in one organized place, making your planning process seamless and stress-free.
Step 3: Set a Savings Goal and Automate Your Success
With a tangible number in your sights, the path to your departure date sharpens from a hazy dream into simple, motivating math. Divide the total cost by the number of months you have until your departure. This number is your required monthly savings target.
The single most effective strategy for hitting this target is automation. Don't rely on willpower. Set up an automatic, recurring transfer from your checking account to a dedicated high-yield savings account for the day after you get paid. By treating your travel savings as a non-negotiable monthly bill, you pay your future self first and ensure you stay on track without having to think about it.
Step 4: The Golden Rule: Build a 15-20% Contingency Fund
This is the most crucial, and most often overlooked, step in building a resilient budget. After you’ve calculated your total estimated trip cost, add a buffer of 15% to 20% on top of that total. This is your contingency fund.
This fund is not just for emergencies like a missed flight or a medical issue. It is also your "opportunity fund." It’s the financial freedom to say "yes" to a spontaneous, can't-miss experience—like a last-minute ticket to the opera or a day trip with new friends from your hostel. This buffer is what prevents financial stress on the road and allows you to travel with confidence and flexibility.
The Cost of Style: Decoding Daily Expenses for Three Travel Tiers
That four-step framework gives you the how, but the biggest variable will always be the where and the what. To give you tangible financial targets, let's break down what those "on-the-ground costs" actually look like across three distinct travel styles, based on global averages for popular destinations. These figures are for a single person in USD and do not include major pre-trip costs like international flights.

The Budget Backpacker: Stays in hostel dorms, primarily eats street food or cooks in the hostel kitchen, and focuses on free activities like walking tours.
The Mid-Range Comfort Seeker: Stays in private hostel rooms or budget hotels, eats a mix of cafe meals and local restaurants, and enjoys a paid activity each day.
The Affordable Luxury Traveler: Stays in boutique hotels, dines out for most meals, uses ride-shares, and books multiple guided tours or unique experiences.
To see these numbers in action, explore the [Travel Guide] marketplace on TrekGuider. Many of our expert guides, published by seasoned solo travelers, include detailed budget breakdowns from their own trips, giving you invaluable real-world insight.
Hacking the System: 5 Actionable Tips for Slashing Your Biggest Costs
For a solo traveler, flights and accommodation are the two largest line items in the budget. Employing a few savvy strategies can dramatically reduce these costs, freeing up more of your hard-earned money for actual experiences.
Travel in the Shoulder Season: The months just before and after peak tourist season (typically spring and autumn) are the sweet spot. You’ll enjoy pleasant weather, fewer crowds, and flight and accommodation costs that can be 25-50% cheaper than in peak summer.
Embrace Modern Hostels (and Their Private Rooms): The stereotype of dingy dorms is long gone. Many modern hostels are stylish, social hubs that offer private rooms with ensuite bathrooms at a fraction of the cost of a hotel. You get privacy plus access to money-saving amenities like a communal kitchen.
Filter for Single Rooms: When searching on booking sites, specifically look for "single rooms" or studios. Many traditional European guesthouses offer smaller rooms designed for one person at a lower price than a standard double.
Use Flight Scanners with Flexible Date Searches: Instead of searching for a specific date on Google Flights or Skyscanner, use their calendar or "whole month" functions. You’ll often find that shifting your departure by just a day or two can result in massive savings.
Leverage Loyalty Programs: Before your trip, sign up for the free loyalty programs of the airlines and hotel chains you plan to use. More significantly, using a travel-focused credit card to pay for your trip expenses can earn valuable points and miles for free flights and hotel stays in the future.

How to Budget for Solo Travel and Avoid the "Budget Busters"
Even a perfect plan can be derailed by unexpected expenses. Being aware of these common "hidden" costs allows you to account for them in your contingency fund from the start.
The Single Supplement: The most notorious cost for solo travelers. Many tours and cruises base their pricing on double occupancy and charge extra for a single person. Always look for companies that cater to solo travelers or offer to pair you with a roommate to waive this fee.
ATM and Foreign Transaction Fees: This is death by a thousand cuts. Using the wrong card can mean paying a 3% fee on every purchase and $5-$10 for every cash withdrawal.
Baggage Fees: Budget airlines are famous for their exorbitant fees for both checked and carry-on luggage. Always read the fine print on baggage allowances before booking.
Local Tourist Taxes: Many cities charge a small tourist tax per person, per night, that is often not included in your prepaid booking price and must be paid in cash at your hotel.
International Data: Relying on your home carrier's roaming plan can be incredibly expensive. Budget for a local SIM card or an eSIM to ensure affordable connectivity.
Pro-Tip: Your most powerful tool against hidden fees is a strategic financial setup. Travel with two key products: a credit card that has no foreign transaction fees (like the Chase Sapphire Preferred®) and a debit card from a bank that offers worldwide ATM fee reimbursements (like the Charles Schwab Bank High Yield Investor Checking Account). This combination alone can save you hundreds of dollars.
Pro-Tip: Before you leave, create a "financial lifeline." Photocopy the front and back of every credit and debit card you plan to carry. Leave one copy with a trusted emergency contact at home and keep a digital copy in a secure cloud storage service. If your wallet is lost or stolen, having the card numbers and the international toll-free numbers on the back will make the cancellation process infinitely smoother.
Frequently Asked Questions About Solo Travel Budgeting
How far in advance should I start budgeting for a big solo trip?
Ideally, start your high-level research 9-12 months out. This gives you plenty of time to track flight deals, understand seasonal price shifts, and, most importantly, allows you to set a smaller, less intimidating monthly savings goal over a longer period.
Is it better to bring a lot of cash or just use cards?
Never carry large amounts of cash. The best strategy is a multi-pronged approach. Use a no-foreign-transaction-fee credit card for the majority of your purchases (hotels, restaurants, tours) to maximize security and rewards. Use a fee-reimbursing debit card to withdraw small amounts of local currency every few days for things like small market purchases, tips, or cash-only street food.
The 15-20% contingency fund seems like a lot. Is it really necessary?
Absolutely. Think of it as buying peace of mind. On a $3,000 trip, a 15% buffer is $450. That single fund could cover a last-minute flight change, a necessary trip to a doctor, or the spontaneous decision to take a ferry to a Greek island with new friends. Without it, any unexpected event becomes a major crisis. With it, it’s just a manageable part of the adventure.
Your Journey to Financial Freedom Awaits
A budget is not about what you can't do; it's about empowering everything you can do. It transforms a vague, anxiety-inducing dream into a clear, tangible, and achievable goal. By following this systematic approach, you now have the tools to build a financial plan that is not just a spreadsheet of numbers, but a roadmap to the world. You have a framework for how to budget for solo travel that puts you in complete control of your adventure.
This financial competence is the foundation upon which the most incredible solo journeys are built. With your budget sorted, you can focus on the real magic: planning your itinerary, discovering new cultures, and, most importantly, discovering yourself.

SEO Meta Data Suggestions:
SEO Meta Title (59 characters): How to Make a Solo Travel Budget You'll Actually Stick To
URL Slug: /how-to-budget-for-solo-travel
SEO Meta Description (154 characters): A step-by-step guide on how to budget for solo travel. Learn to estimate costs, save effectively, and avoid hidden fees for your next adventure.
Don't Miss Out! Subscribe for Exclusive Content
Subscribe


Comments 0
No comments yet
Be the first to share your experience!
Dont Miss Out! Subscribe for Exclusive Content

Ultimate USA Holidays Guide: Top Picks

FTC Affiliate Disclosure Essentials: Stay Compliant as a Travel Creator

Essential Affiliate Tools: From Tracking to Full Optimization

Booking.com Affiliate Program Review: Pros, Cons, and Earnings Potential

Decoding Affiliate Commission Rates: Benchmarks for Travel Creators

Top 11 High-Paying Affiliate Programs for Travel Bloggers
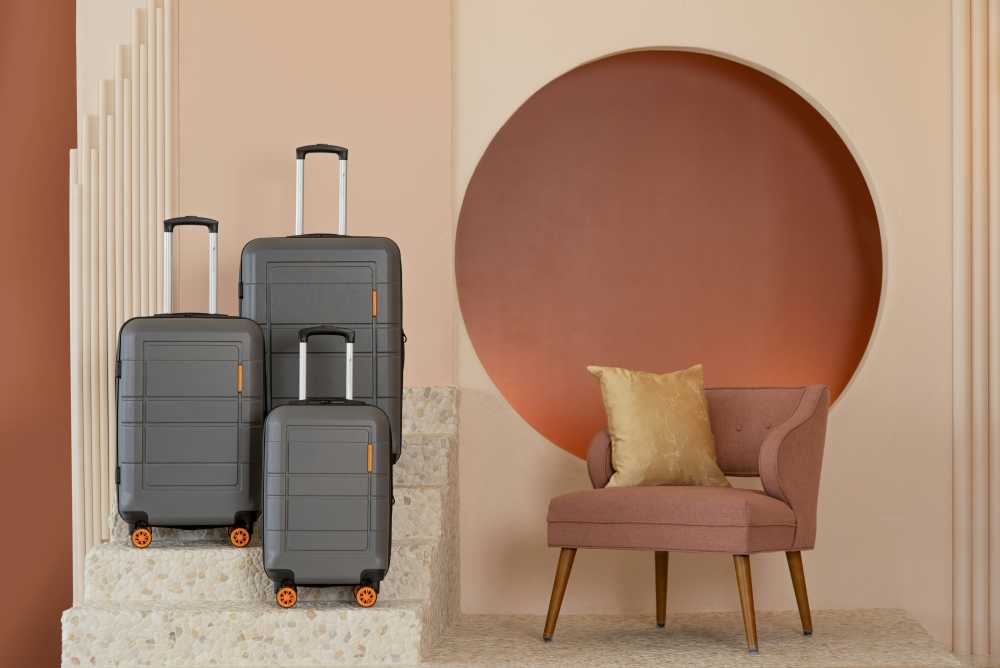
Luxury Solo Travel: How to Plan an Upscale Independent Journey
TrekGuider @trekguider
You're dreaming of a different kind of solo trip—one defined by five-star comfort and total freedom, not spartan hostels. You imagine indulging in exquisite meals and unwinding in a beautiful hotel, all on your own terms. The problem? The world of upscale travel often feels built for two, and the logistical hurdles of planning a high-end trip for one—from navigating single supplements to ensuring your safety—can feel daunting enough to keep your dream grounded.
This is where that narrative changes. Planning a luxury solo travel experience isn't about extravagance for its own sake; it's about mindfully curating a journey that prioritizes your comfort, interests, and personal growth. It's about trading frantic group schedules for the quiet confidence of a bespoke itinerary designed just for you.
This guide is your strategic roadmap to crafting that exact journey. While many travel styles exist, the art of the independent, upscale journey offers a unique form of enrichment. Even those accustomed to coordinating complex group getaways with help from guides like our «Family Travel Ideas: The 2026 Guide to Unforgettable Trips» will find that planning for one requires a different, more introspective approach. We will deconstruct every element of the process, transforming the complexities of planning into clear, actionable steps.

The Unmatched Freedom of Going It Alone
Before diving into logistics, the first and most crucial step is a mental one. True luxury solo travel is defined not just by thread counts and Michelin stars, but by the unparalleled freedom it affords. It's the freedom to be gloriously selfish with your time.
Freedom of Pace: Wake up with the sun for a private yoga session or sleep in until noon. Spend six hours captivated by a single gallery in a museum or tick off a dozen sights in a day. There are no compromises and no negotiations—only your own rhythm.
Freedom of Interest: Pursue your passions without reservation. This is your opportunity to take that week-long Italian cooking course, go on a multi-day wildlife photography safari, or simply read a novel from cover to cover on a private balcony overlooking the sea.
Freedom of Connection: Traveling alone doesn’t mean being lonely. It means you control your social interactions. You can choose solitude and introspection or engage with fellow travelers and locals at your leisure, leading to more authentic and meaningful connections.
When you truly embrace this mindset, the journey transforms from a simple vacation into a powerful investment in yourself—an act of deliberate self-care and discovery, set against a backdrop of impeccable comfort.
How to Budget for a Solo Trip (Without Sacrificing the Luxury)
An upscale journey requires a strategic financial plan, but it's more flexible than you might think. The key is to define what "luxury" means to you and allocate your resources accordingly. For one person, it might be a business-class flight; for another, it's a private guide for a historical site.
Define Your Luxury Priorities: What are the 3-5 elements that will make this trip feel truly special? Is it the hotel? The dining experiences? The unique activities? Be honest with yourself and make these the key elements of your budget.
Navigate the "Single Supplement": This is an infamous surcharge that hotels and tour operators sometimes add for single occupancy. However, it's becoming less common as smart companies recognize the growing market of solo travelers. When researching, look for "no single supplement" deals or book with companies that specialize in solo travel. Boutique hotels are often more flexible than large chains.
The 40/40/20 Rule for Solo Luxury: A helpful framework for budgeting is:

40% on Accommodations & Transport: This is your foundation. Secure your high-quality hotel and comfortable travel first.
40% on Experiences & Dining: This is the heart of your trip. Allocate generously for bespoke tours, fine dining, spa treatments, and any classes or activities that align with your passions.
20% on Ancillaries & Contingency: This covers shopping, local transport, tips, and a crucial buffer for spontaneous opportunities or unforeseen needs.
Pro-Tip: Consider traveling during the "shoulder season" (the months just before or after the peak season). You'll often find significantly lower prices on flights and five-star hotels, fewer crowds, and a more relaxed atmosphere, allowing your luxury budget to stretch even further.
Your Sanctuary: Why a Boutique Hotel Is Your Best Bet
Your accommodation is more than just a place to sleep; it’s your home base, your sanctuary, and a critical component of the luxury experience. For a solo traveler, the right choice balances comfort, security, and opportunities for connection.

For the discerning solo traveler, boutique hotels are almost always the superior choice. They operate on a human scale, creating an environment that feels both exclusive and welcoming. Here’s why they excel:
Personalized Service: Staff are more likely to know your name and preferences, providing a sense of being cared for that can be comforting when traveling alone.
Prime Locations: They are often situated in the most vibrant, walkable neighborhoods, making it easy and safe to explore on foot.
Curated Atmosphere: From chic design to intimate common areas like a library bar or rooftop terrace, boutique hotels provide pleasant spaces to relax outside of your room without feeling isolated.
Enhanced Security: With fewer guests and a more attentive front desk, security is often implicitly higher.
When booking your stay, look beyond the photos. Dig into the details and prioritize properties that offer a 24/7 front desk, high-quality on-site dining (a wonderful, safe option for dinner), and rave reviews from other solo travelers.
Dining Solo: How to Savor the Experience
One of the biggest anxieties for first-time solo travelers is the thought of eating alone. It's time to reframe this. Dining solo is not a fallback; it's a culinary experience in its purest form, free from the distraction of conversation. It's a chance to truly focus on the food, the atmosphere, and your own thoughts.
Own Your Table: Walk in with confidence. When the host asks, "Just one?" answer with a warm, "Yes, a table for one, please." There is no shame in it—in fact, it's a power move.
Choose Your Perch: The best seat in the house for a solo diner is often at the bar or a chef's counter. It feels more natural, provides a bit of entertainment, and opens the door for casual conversation with the bartender or chef if you're in the mood.
Come Prepared: Bring a book or a journal. It’s a perfect companion that signals you're content and engaged in your own world.
Try a Social Dining App: If you want a guaranteed social experience, look into services like Eatwith, which connects travelers with local hosts for authentic, home-cooked meals.
A Blueprint for the Perfect Solo Pace
The beauty of a solo itinerary is its absolute flexibility. The goal is to create a structure that guides your trip without constraining it. A well-designed plan ensures you experience the highlights while leaving ample room for spontaneity.

The "Anchor & Explore" Method
A highly effective strategy is to anchor each day with one significant, pre-booked activity and leave the surrounding hours free for exploration.
Book Your Anchors: Before you leave, book the one thing you absolutely do not want to miss each day. This could be a 10:00 AM ticket to the Uffizi Gallery (our Italy Travel Guide can help with this), a 2:00 PM private surfing lesson, or a 7:00 PM dinner reservation at a coveted restaurant. This provides a gentle structure and ensures you don't miss out.
Research the Periphery: Identify points of interest, cafes, shops, and parks located near your anchor activity. Make a list of these potential spots in a digital map app.
Embrace Serendipity: After your anchor activity, wander. Use your researched list as a loose guide, but allow yourself to be drawn in by an interesting side street or a charming bookstore. This blend of planning and spontaneity is the sweet spot of solo travel.
Pro-Tip: Hire a private guide for your first full day in a new city. This is an incredible investment for a solo traveler. It serves as a comprehensive orientation, provides deep cultural context, helps you feel more confident navigating, and gives you a local contact who can offer personalized recommendations for the rest of your trip.
A Proactive Guide to Luxury Solo Travel Safety
For many, safety is the primary concern associated with traveling alone. A proactive, systems-based approach can mitigate risks and build the quiet confidence needed to explore freely.
Digital & Financial Security
Use a VPN: Always use a Virtual Private Network (VPN) on your phone and laptop when connecting to public Wi-Fi. This encrypts your data, protecting it from prying eyes.
Inform Your Bank: Notify your bank and credit card companies of your travel dates to prevent your accounts from being frozen.
Carry a Backup: Have at least two different credit cards and a small amount of local currency. Keep them in separate places (e.g., one in your wallet, one in the hotel safe).
Situational Awareness & Physical Safety
The Morning Photo Protocol: A simple but brilliant tactic: take a quick photo of your outfit each morning. In the unlikely event you need assistance, it provides an exact, current visual reference.
Project Confidence: Walk with purpose and be aware of your surroundings. Avoid staring at your phone while walking in unfamiliar areas.
Trust Your Intuition: If a situation or a person feels off, it probably is. Remove yourself immediately without worrying about being polite.
Share Your Itinerary: Leave a copy of your itinerary, including hotel details and flight numbers, with a trusted friend or family member back home. Arrange for regular, brief check-ins.
Your Essential Safety Toolkit
Feeling confident and prepared is the ultimate travel luxury. To help you master the art of awareness and risk mitigation, we’ve created a comprehensive resource filled with expert, field-tested advice. Download your free copy of the Solo Female Travel Safety Guide and travel with total peace of mind.
Packing for Effortless Elegance
Packing for a high-end journey is about selecting versatile, high-quality pieces, not about bringing a massive wardrobe. The goal is elegant efficiency. Our How to Pack Light Guide offers a masterclass on this, but here are the core principles:

Adopt a Color Palette: Choose a base of two or three neutral colors (like black, navy, or beige) and one or two accent colors. This ensures every piece can be mixed and matched.
Focus on Fabrics: Prioritize fabrics that travel well, resist wrinkles, and are comfortable, such as merino wool, cashmere, and high-quality knits.
The Power of Accessories: A beautiful scarf, a statement piece of jewelry, or a fine leather belt can completely transform a simple outfit, taking it from daytime exploring to an elegant dinner.
Your Carry-On is Command Central: It should contain all medications, a full change of clothes, electronics, and travel documents.
By investing in versatile, quality pieces, you can pack light without sacrificing an ounce of style.
Frequently Asked Questions
What is the best way to avoid the "single supplement" fee?
The best strategies are to travel during the shoulder season when demand is lower, look for tour companies and cruise lines that specifically offer "no single supplement" deals, and favor boutique hotels, which are often more willing to negotiate or offer single-occupancy rates.
Is luxury solo travel safe, especially for women?
Yes, it is very safe with the right preparation. The key is proactive risk mitigation: choosing safe accommodations, maintaining situational awareness, protecting your digital information, and having contingency plans. Our
provides an in-depth framework for this.
How can I avoid feeling lonely when traveling by myself?
Balance your solitude with planned social interactions. Book a small group tour, take a cooking class, or stay at a boutique hotel with inviting common areas. Choosing to dine at a chef's counter or bar is also a great way to open the door for casual, low-pressure conversation.
The Ultimate Reward
The path to a remarkable luxury solo travel experience is paved with mindful preparation. By shifting your mindset to embrace freedom, strategically planning your budget, and choosing your accommodations and activities with intention, you transform a potentially intimidating prospect into an empowering and deeply personal adventure.
This is your opportunity to reconnect with yourself and see the world through a lens that is uniquely your own. You now possess the framework and expert strategies to move from dreaming to doing. The world of upscale independent travel is not a secret club; it’s a rewarding path available to anyone with the confidence to plan it, and our
library is the perfect place to start researching your first destination.
Don't Miss Out! Subscribe for Exclusive Content
SubscribeComments 0
No comments yet
Be the first to share your experience!
Dont Miss Out! Subscribe for Exclusive Content
Ultimate USA Holidays Guide: Top Picks
FTC Affiliate Disclosure Essentials: Stay Compliant as a Travel Creator
Essential Affiliate Tools: From Tracking to Full Optimization
Booking.com Affiliate Program Review: Pros, Cons, and Earnings Potential
Decoding Affiliate Commission Rates: Benchmarks for Travel Creators

Amazon Associates for Travel: Strategies to Maximize Commissions
How to Stay Safe While Hiking: A Hiker's Safety Guide
TrekGuider @trekguider
The call of the trail is a powerful one. It promises sweeping vistas, the quiet solitude of the forest, and the profound satisfaction of reaching a summit under your own power. But for all its beauty, the wilderness is impartial and unforgiving. The same trail that offers bliss on a sunny morning can present serious danger when the weather turns, a wrong turn is made, or an ankle is twisted. This is the problem every hiker faces: the gap between the adventure we dream of and the preparation it demands.
That gap is often filled with anxiety. A flicker of doubt about reading the map, a worry about the approaching clouds, or a sudden fear of what that noise was in the undergrowth can rob an incredible experience of its joy. Too often, hikers—both novice and experienced—find themselves in serious trouble simply by underestimating the trail and overestimating their preparedness. According to Search and Rescue (SAR) teams, most emergencies are the result of small, preventable mistakes. This guide is your definitive playbook for closing that gap for good. We’re providing the essential, expert-backed hiking safety tips you need to move through the backcountry with unwavering confidence. This isn't about fear; it's about empowerment. By mastering these skills, you’re ensuring every hike is a safe one, a core pillar of the responsible adventurer’s mindset we explore in our definitive [The Ultimate Guide to Travel Safety: A 2026 Playbook]. Let’s gear up, get smart, and get you ready to hit the trail.

This journey from novice to self-sufficient hiker begins not on the trail itself, but with a simple, powerful philosophy of preparedness that has been tested and refined by generations of mountaineers and wilderness experts. It all starts with your pack.
The Foundation of Safety: The 10 Essentials System
Long before your boots touch the dirt, your safety on the trail has already been decided by one thing: what’s inside your pack. Endorsed by the National Park Service and outdoor organizations like REI, the "10 Essentials" is not just a packing list; it's a systematic approach to preparedness. It ensures you have the tools to handle common problems and survive an unexpected night outdoors. Think of these not as ten individual items, but as ten crucial systems.
Navigation: Your primary system for knowing where you are and where you’re going. This must include a physical topographic map of the area and a compass. A GPS device or a smartphone with downloaded offline maps is a great tool, but electronics can fail. A map and compass are your foolproof backup.
Illumination: You need to be able to see in the dark, period. Carry a headlamp or flashlight with a full charge, and always pack extra batteries. A headlamp is superior as it keeps your hands free for other tasks.
Sun Protection: Sunburn and sunstroke can be serious dangers on the trail. This system includes sunglasses, broad-spectrum sunscreen (SPF 30+), and a wide-brimmed hat. Sun-protective clothing can also be a game-changer.
First-Aid Supplies: You must have the ability to treat common trail injuries. Your kit should be equipped to handle blisters, cuts, scrapes, and sprains. A basic kit is good; a custom-built one is better.
Repair Kit and Tools: Gear can break. A multi-tool or knife is invaluable, and a small roll of duct tape can repair everything from a torn jacket to a broken tent pole.
Fire: In an emergency, fire provides warmth, a way to purify water, and a powerful psychological boost. Carry waterproof matches, a reliable lighter, and a dedicated fire starter like dryer lint or a commercial fire-starting block.
Insulation: Weather can change in an instant, especially at elevation. You must carry an extra layer of clothing beyond what you start the hike in, regardless of the forecast. This should be a moisture-wicking layer, like a fleece jacket or thermal top—never cotton, which loses all insulating properties when wet.
Nutrition: Always pack more food than you think you’ll need. An extra day’s worth of non-perishable, high-energy food is the standard. Items like protein bars, nuts, and dried fruit are perfect.
Hydration: Carry more water than you expect to need and have a way to purify more. This means carrying a water filter or purification tablets to safely treat water from streams or lakes in an emergency.
Emergency Shelter: If you’re forced to spend an unplanned night out, protection from the elements is critical to preventing hypothermia. This doesn't mean a tent. A lightweight, packable emergency space blanket or bivy sack is all you need.

For expert-vetted gear lists and detailed trail guides from seasoned creators, the TrekGuider Marketplace is an invaluable resource for taking your preparation to the next level.
"Never Get Lost Again": Mastering Trail Navigation
Of all the potential hiking dangers, getting lost is one of the most common and terrifying. A recent study of SAR missions revealed that "error in judgment" was a leading cause of hikers needing rescue, and a huge part of that is poor navigation. Relying solely on your phone’s GPS is one of the biggest hiking safety tips to ignore—service is unreliable in the backcountry, and batteries die. True navigational confidence comes from time-tested skills.
How to Use a Map and Compass
This fundamental skill is easier than you think and is your most reliable tool.
Place the Compass on the Map: Lay your map flat. Identify your current location and your destination. Place your compass so the long edge of its baseplate creates a line connecting the two points, with the "Direction of Travel" arrow on the compass pointing toward your destination.
Set the Compass Bezel: Keeping the baseplate still, rotate the round bezel (the dial) until the orienting lines inside it are parallel with the map's north-south grid lines. Make sure the "N" on the bezel is pointing to North on the map. The number on the bezel aligned with the Direction of Travel arrow is now your bearing.
Follow the Bearing: Lift the compass off the map and hold it level in front of you. Turn your body until the red magnetic needle is "in the shed"—that is, perfectly inside the red orienting arrow on the bezel. The Direction of Travel arrow now points precisely to your destination. Pick a landmark in that direction, walk to it, and repeat the process.
Pro-Tip: The difference between "true north" (on your map) and "magnetic north" (where your compass points) is called declination. For precise navigation, you must adjust your compass for the local declination, which will be printed on your map.

Wildlife on the Trail: A Guide to Safe Encounters
Seeing wildlife is a thrilling part of hiking, but it’s crucial to remember that you are a visitor in their home. The core principles of every encounter are to maintain a safe distance, never feed wildlife, and know how to react to avoid escalating a situation.
Bear Encounters (Black vs. Grizzly)
Making noise while you hike (talking, clapping) is the best way to avoid surprising a bear. If you do encounter one, your reaction depends on the species.
If a Black Bear Approaches: Never run. Make yourself look as large as possible by raising your arms and opening your jacket. Yell, clap, and make loud noises. If it attacks, fight back aggressively. Target the bear's face and nose with anything you have—rocks, trekking poles, your fists. Do not play dead.
If a Grizzly Bear Approaches/Charges: Do not run and do not make direct eye contact. Speak in a calm, low voice to show you are not a threat. If it charges, stand your ground and use bear spray when it is within 30 feet. If it makes contact, play dead. Lie flat on your stomach, protect the back of your neck with your hands, and use your pack as a shield.
Mountain Lion (Cougar) Encounters
These predators are ambush hunters, so an encounter is rare. If you see one, it has likely been watching you.
Protocol: Do not run, as this triggers their chase instinct. Make direct eye contact. Make yourself appear larger by raising your arms and opening your jacket. Speak in a loud, firm voice. Slowly back away, giving the cat an escape route.
If Attacked: Fight back with everything you've got. Use rocks, sticks, or your hands to target the animal's eyes and face.
Venomous Snake Encounters
Snakes have no interest in humans and will only strike if they feel threatened.
Protocol: If you see a snake, freeze. Do not make any sudden movements. Once you've located the snake, slowly back away and give it a wide berth to move on. Be careful where you step and place your hands, especially when scrambling over rocks or logs.
If Bitten: The priority is to stay calm to slow the spread of venom. Limit physical activity and get to a hospital as quickly and safely as possible for evaluation and potential antivenom treatment.
Handling Trail Emergencies: What to Do When Things Go Wrong
Even with perfect preparation, accidents can happen. A twisted ankle, a sudden illness, or getting turned around can escalate quickly. Your ability to stay calm and make rational decisions is your most valuable asset. If you find yourself in trouble, remember the acronym S.T.O.P.
Stop: The moment you realize you are in trouble, stop moving. Sit down.
Think: Assess your situation calmly. What went wrong? What resources do you have?
Observe: Look around you. Where is the sun? Can you see any landmarks? Is there a source of water or shelter nearby?
Plan: Formulate a simple, logical plan. Don't make panicked decisions.
First Aid on the Trail
Your first-aid kit from the 10 Essentials is your go-to tool for injuries. Here's how to handle the most common trail ailments:
Blisters: The moment you feel a "hot spot" on your foot, stop and address it. Clean the area and apply moleskin or a blister-specific pad. Don't wait for it to become a full-blown blister.
Sprains: For a twisted ankle or knee, use an elastic wrap bandage from your kit to provide compression and support. Loosen it if you feel any numbness or tingling. Elevate the joint when you rest, and use a trekking pole or sturdy branch as a crutch if needed.
Cuts and Scrapes: Control any bleeding with direct pressure using a sterile gauze pad. Once it stops, clean the wound thoroughly with an antiseptic wipe and apply antibiotic ointment before covering it with a bandage.
A well-stocked daypack is crucial, but so is a plan for the whole trip. Before you head out to explore our incredible national parks, make sure your vehicle and supplies are just as prepared as your hiking gear.
Your Ultimate Adventure Blueprint
Ready to hit the road? Don't leave home without our expert-vetted [National Park Road Trip Checklist]. This free guide covers everything from vehicle prep and essential gear to can't-miss stops, ensuring your adventure is seamless from start to finish. Download it for free now!
Hiking Safety FAQs
A prepared mind anticipates questions. Here are expert answers to common concerns.
1. What's the right way to signal for help?
If you determine you cannot get yourself out of a situation safely, you need to signal for help. The universal distress signal is three of anything: three whistle blasts, three flashes of a headlamp, or three piles of rocks. A whistle is a must-have item that uses far less energy and carries further than shouting. For serious backcountry travel, consider investing in a personal locator beacon (PLB) or satellite messenger, which can send an SOS signal with your exact location to emergency services.
2. Is it safe to hike alone?
Solo hiking can be an incredibly rewarding experience, but it requires a higher level of preparation and self-sufficiency. All the rules in this guide become even more critical. It is absolutely essential that you leave a detailed itinerary with a trusted friend or family member. Include your planned route, your start and end times, and a "panic time"—the specific time they should call for help if they haven't heard from you.
3. What do I do if the weather turns bad unexpectedly?
Your first priority is to get below the treeline if you're in an exposed area to reduce the risk of lightning strikes. Put on your extra insulating layer and your rain gear before you get wet and cold. Assess your map and your situation. It is often safer to turn back, even if you're close to your destination, than to push on into deteriorating conditions.
Pro-Tip: Always tell someone your plan. Before every hike, leave a detailed itinerary with a trusted friend or family member. This is the single most important safety net you have.

Your Adventure, Empowered by Preparation
The goal of these hiking safety tips is not to fill you with fear, but to arm you with confidence. Every piece of gear you pack and every skill you learn is a key that unlocks a new level of freedom on the trail. Preparation allows you to push your boundaries, explore wilder places, and immerse yourself in the beauty of nature without the nagging whisper of anxiety. By respecting the wilderness and committing to self-sufficiency, you transform from a simple visitor into a capable, confident adventurer.
Now that you have the skills for a safe hike, you can integrate that adventure into a larger, perfectly planned journey. For a complete master plan covering everything from budgeting and logistics to finding the best trails and tours, our all-encompassing [Travel Guide] is the only resource you'll ever need.
Don't Miss Out! Subscribe for Exclusive Content
SubscribeComments 0
No comments yet
Be the first to share your experience!
Dont Miss Out! Subscribe for Exclusive Content

How to Avoid Travel Scams: A Global Guide

Is Public WiFi Safe? How to Protect Your Data Abroad

A Woman's Guide to Safe Travel: 10 Critical Tips

7 Hotel Safety & Security Tips for Peace of Mind

9 Beach Safety Tips That Could Save Your Life
