5 Ways to Confidently Eat Alone While Traveling
TrekGuider @trekguider
You’ve done it. You’ve booked the flight, mapped out the museums, and conquered the logistics of your solo adventure. But a single, persistent scenario keeps playing out in your mind, a small moment that feels disproportionately terrifying: walking into a restaurant, meeting the host’s gaze, and uttering the three quietest, loudest words in the English language: "Table for one."
For countless aspiring and even experienced solo travelers, this is the final boss of social anxiety. It’s a fear so potent it can dictate an entire trip. A recent study confirmed that for many first-timers, the thought of dining alone is a major source of apprehension, ranking among top concerns like safety and loneliness.
This fear is a thief. It doesn’t just steal your appetite; it steals your access to the very soul of a destination—the vibrant, chaotic, delicious culture that happens around the dinner table. It convinces you that a sad takeaway eaten on the edge of your hotel bed is preferable to the perceived judgment of a room full of strangers. It whispers that your solitude is a spotlight.
But what if that spotlight was actually a stage, and a table for one was the best seat in the house?

This guide is your step-by-step plan to reframe that narrative. These aren’t just tips; they are five actionable, confidence-building strategies designed to transform the experience of eating alone while traveling from a source of dread into an empowering, delicious, and deeply memorable ritual. For a complete roadmap of your entire journey, start with our foundational pillar guide, The Ultimate Guide to Solo Female Travel (15 Essential Tips).
Strategy #1: Master the Art of the Bar Seat
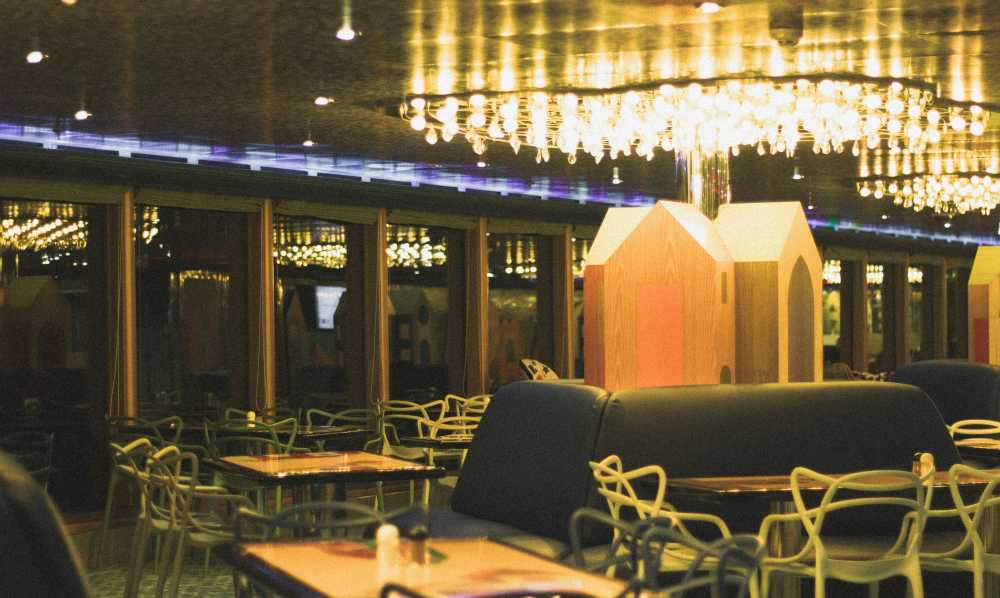
The single most effective way to immediately diffuse the anxiety of solo dining is to bypass the traditional tables altogether and make a beeline for the bar or counter. This isn't a compromise; it's a strategic upgrade to your dining experience, a universally accepted and comfortable spot for any solo diner.
Sitting at a two- or four-top table by yourself can sometimes feel like you’re occupying "empty" space, drawing attention to your solo status. The bar, however, is a fundamentally different social landscape. It's a dynamic, linear space designed for individuals and pairs. Here, you are not "alone"; you are simply another patron in a row of patrons, part of the restaurant's fluid, buzzing energy.
This vantage point offers a multitude of benefits. It often provides a front-row seat to the theater of the restaurant—the craft of the bartender mixing cocktails, the rhythm of the kitchen, the flow of patrons coming and going. It’s an environment that provides endless built-in entertainment. More importantly, it creates a low-pressure opportunity for social connection if you want it. The bartender is a professional at conversation, often happy to offer menu recommendations or share local insights. You might strike up a casual chat with the person next to you, or you can remain comfortably anonymous, absorbed in the ambiance. The choice is entirely yours, and that control is empowering.
Pro-Tip: When researching restaurants, specifically look for photos of the interior that show a substantial bar or counter seating area. Places like tapas bars in Spain, ramen counters in Japan, and classic bistros in France are almost always designed with excellent bar seating, making them perfect venues for a comfortable solo meal.

Strategy #2: Arm Yourself with a Purposeful Prop
One of the biggest sources of anxiety when eating alone while traveling is the fear of just sitting there with nothing to do during the lulls of the meal, such as after you’ve ordered and are waiting for your food. This is where a "prop" becomes your most valuable tool. Having a purposeful object with you completely reframes the narrative, both for any observer and, more importantly, for yourself.
A prop signals that you are not passively waiting for a companion or feeling lonely; you are actively and contentedly engaged in your own company. It fills the silence and gives your hands and eyes a focus, instantly dissolving any feelings of awkwardness. The key is to choose your prop with intention.
A Travel Journal: This is perhaps the ultimate solo dining companion. Use the time to write about your day's adventures, document the sights and sounds around you, or sketch the street scene outside the window. It turns your meal into a productive, reflective, and creative session.
A Good Book: Getting lost in a compelling story is a timeless pleasure. A book is an unambiguous sign that you are happily occupied and content in your solitude.
A Map or Guidebook: Spreading out a map to plan the next leg of your journey is a classic traveler move. It’s practical, engaging, and makes you look like a seasoned, confident explorer engrossed in your adventure.
The Psychology Behind the Prop
It’s a psychological pattern interrupt. When you feel anxious, your brain looks for evidence to support that feeling—you scan the room for people looking at you, you interpret neutral expressions as judgmental. A prop gives you an alternative focus. You are consciously giving your brain a different task to focus on, preventing it from spiraling into self-conscious thoughts. By bringing a prop, you transform your "table for one" into your personal command center, a space for reflection, planning, or escape. You're no longer just a person eating alone; you're a writer, a reader, an adventurer deep in thought.
Strategy #3: Become a Master of Timing
The ambiance of a restaurant can change dramatically depending on the time of day. A chaotic, packed dining room at the peak of the dinner rush can feel overwhelming and intensify feelings of self-consciousness. By strategically choosing when you dine, you can curate a much more relaxed and enjoyable experience for yourself.
Dining during "off-peak" hours is a simple but incredibly effective tactic. Arriving for a late lunch around 2:30 PM or an early dinner at 6:00 PM, before the main crowds descend, offers several advantages. The restaurant will be calmer and quieter, allowing you to choose a desirable table—perhaps one tucked into a cozy corner or with a great view for people-watching. The service staff will likely be less rushed and more attentive, giving you the space to ask questions about the menu and savor your meal without feeling hurried.
This strategy is particularly effective in countries with distinct dining schedules. In Italy, for example, locals often don't eat dinner until 8:00 PM or later. Arriving at a trattoria at 7:00 PM means you'll have the place almost to yourself, allowing you to build your confidence in a low-stakes environment. This deep understanding of local rhythms is something we explore in our comprehensive Italy Guide, which is packed with the kind of insider knowledge that makes a solo trip seamless and authentic.
Before you start scouting trattorias, let's get your master plan organized.
Your Ultimate Planning Companion
A great solo dining experience starts with a great plan. Knowing which restaurants you want to try and when to go is a key part of building a confident itinerary. Our free, downloadable template is the perfect tool to help you organize every aspect of your trip, from your daily schedule to your must-try foodie destinations.
Download your free Travel Itinerary Template here!
Strategy #4: Choose Your Venue with Intention
Not all restaurants are created equal when it comes to the solo dining experience. The venue you choose plays an enormous role in your comfort level. Actively seeking out establishments with a solo-friendly ambiance and avoiding those geared toward formal or romantic occasions can make all the difference.
Your mission is to find places that are inherently lively, casual, and built for a fluid mix of patrons. Here’s what to look for:
Casual Bistros and Cafes: These are often the lifeblood of a neighborhood, with a constant, friendly buzz. Outdoor seating is a huge bonus, as it turns your table into a front-row seat for people-watching—the ultimate solo-dining pastime.
Bustling Food Halls and Markets: These are a solo traveler’s paradise. With a multitude of vendors and communal seating, the entire environment is built around individual choice and a dynamic, social-but-anonymous atmosphere. You can sample a wide variety of local dishes without the formality of a traditional restaurant.
Restaurants with Communal Tables: Many modern eateries feature large, shared tables. Choosing to sit at one of these signals an openness to interaction and creates a natural opportunity for conversation to spark with fellow diners, if you’re in the mood.
Ethnic Restaurants: Places like sushi bars, ramen shops, pho counters, or tapas bars are often culturally geared toward individual diners and counter service, making them incredibly comfortable and natural-feeling environments for eating alone.
Pro-Tip: Use Google Maps and restaurant review sites to do some digital reconnaissance before you head out. Don’t just read the reviews; look at the photos uploaded by patrons. You can get a great feel for the restaurant's layout, see if it has a good bar or counter, and gauge the overall vibe to see if it aligns with what will make you feel most at ease.

Strategy #5: Start with a "Gateway" Food Tour
If the idea of a full, sit-down meal by yourself still feels like too big a leap, then start with a "gateway drug" to confident solo dining: a food tour. Joining a small-group food tour on your first or second day in a new city is one of the most effective and enjoyable ways to build your culinary confidence.
A food tour is a structured, social, and low-pressure experience. You get to sample a wide variety of local specialties from different vendors and restaurants, but you do it as part of a small, friendly group. This immediately removes the "all eyes on me" feeling and replaces it with a fun, shared experience.
This approach is powerful for several reasons. First, it demystifies the local cuisine and ordering process, giving you the knowledge and vocabulary to feel more confident on your own later. Second, it's a fantastic way to meet other travelers and get their recommendations. Third, and most importantly, it provides you with a vetted list of fantastic, friendly restaurants. The casual street food stall or family-run bakery you visit on the tour can become a place you feel completely comfortable returning to on your own, because you've already been there and established a positive connection. It’s a confidence-building exercise disguised as a delicious adventure.
Frequently Asked Questions About Dining Solo
Even with a solid plan, a few lingering questions can cause anxiety. Here are the answers you need.
What if I don't drink alcohol? Is it still okay to sit at the bar?
Absolutely. A modern bar is a full-service part of the restaurant. It's completely normal to sit at the bar and order a mocktail, a soda, or even just a glass of water while you enjoy a full meal. The bartender's job is to serve all patrons, and they will be more than happy to accommodate you.
How do I handle getting a bad table (e.g., right by the kitchen or bathroom)?
As a solo diner, you have the right to be just as comfortable as any other guest. If you're led to a table you don't like, it is perfectly acceptable to politely ask if another is available. A simple, "I was hoping for something a little quieter, is one of the tables by the window available?" is all it takes. Most restaurants will gladly accommodate a reasonable request.
How much should I budget for dining alone?
This varies dramatically by destination and your travel style. A meal in Portugal can be a third of the price of a similar meal in Switzerland. The best approach is to find real-world examples. On the TrekGuider marketplace, you can explore detailed itineraries and guides published by seasoned solo travelers, many of whom include specific restaurant recommendations and budget breakdowns from their own trips.
Your Table is Waiting
The fear of eating alone while traveling is valid, but it is not a permanent barrier. It is a skill waiting to be learned, a confidence muscle waiting to be built. By being strategic—by choosing the bar seat, bringing a journal, dining early, selecting a casual venue, or starting with a food tour—you systematically dismantle the anxiety and replace it with a sense of mastery and enjoyment.
You will soon discover that dining solo is not a consolation prize; it is a unique and powerful way to experience the world. It’s a moment for quiet reflection, a front-row seat to a new culture, and an unfiltered connection to the taste and rhythm of a place. It is an act of radical self-reliance and a declaration of your right to be there, to take up space, and to savor every last bite. Your journey to becoming a confident solo diner is one of the most rewarding parts of the adventure, proving that the best company you can have at the table is often your own.
Meta Data Suggestions:
SEO Meta Title (59 characters): Confidently Eat Alone While Traveling: 5 Expert Tips
URL Slug: confidently-eat-alone-traveling
SEO Meta Description (154 characters): Nervous about dining solo? Our guide offers 5 practical ways to confidently eat alone while traveling, turning social anxiety into an empowering experience.
Don't Miss Out! Subscribe for Exclusive Content
Subscribe


Comments 0
No comments yet
Be the first to share your experience!
Dont Miss Out! Subscribe for Exclusive Content

Chicago Beer Fests: Top 6 Tastings

Ultimate USA Holidays Guide: Top Picks

FTC Affiliate Disclosure Essentials: Stay Compliant as a Travel Creator

Essential Affiliate Tools: From Tracking to Full Optimization

Booking.com Affiliate Program Review: Pros, Cons, and Earnings Potential

Decoding Affiliate Commission Rates: Benchmarks for Travel Creators
5 Passive Income Ideas for Your Travel Blog
TrekGuider @trekguider
Let’s be honest: you didn’t launch a travel blog to build yourself a different kind of cubicle. The dream was freedom—an income untethered from a desk, a business that could fund your adventures. Yet the reality for most creators is a hamster wheel of content creation. You’re stuck on a content treadmill, constantly creating, posting, and promoting just to stay afloat. Your blog feels less like a passport to freedom and more like a demanding job that has followed you around the world.
The problem is a strategic one. You’re trapped trading time directly for money through freelance articles or one-off sponsorships, which means if you stop working, the money stops flowing. This constant hustle is the fast track to burnout, leaving your dream of a truly independent lifestyle feeling impossibly out of reach.

It’s time to stop trading hours for dollars and start building assets. The solution is to fundamentally shift your strategy toward building a portfolio of passive income streams—systems and products that work for you 24/7, whether you’re on a plane, exploring a new city, or fast asleep. This guide provides five proven, actionable ideas for passive income blogging. This is your blueprint for creating automated revenue engines that will finally decouple your income from the hours you work. Think of this as a crucial chapter in your business education; for the complete curriculum on building a modern creator enterprise, be sure to read our ultimate guide to How to Make Money Online: A Creator's Guide for 2026.
The Fundamental Shift: Trading Hours for Assets
Before we dive into the tactics, it's critical to internalize the foundational mindset shift required for success. Passive income isn't "money for nothing." As defined in lifestyle business design, it is revenue that, after an initial investment of time and effort, continues to be generated with minimal ongoing labor.
It’s the difference between Active and Passive Income:
Active Income is when you get paid for your direct effort. Think of a freelance article, a sponsored Instagram post, or a one-on-one coaching call. The work is finite, and so is the payment.
Passive Income is when you get paid because you own an asset that creates value. Think of an SEO-optimized blog post that earns affiliate commissions for years, or a digital guide that sells automatically every single day.

You are moving from the role of a service provider to an asset builder. Every idea that follows is a different type of digital asset you can build. Your goal is to create a portfolio of them.
1. Craft Evergreen Affiliate Content That Ranks and Earns for Years
Affiliate marketing is often a blogger's first foray into making money, but not all affiliate content is created equal. The key to making it a source of true passive income is to focus exclusively on creating evergreen content that is optimized for search engines (SEO). A post about a fleeting travel trend might get a burst of traffic, but an in-depth guide to "The 5 Best Carry-On Backpacks for Digital Nomads" can attract a steady stream of visitors from Google—and generate commissions—for years after you hit publish.
This is the very definition of a passive income asset. According to performance marketing industry analysis, a single piece of high-ranking content can generate commissions for years with no additional effort, making it an incredibly scalable model.
Your Action Plan for Passive Affiliate Income:
Identify High-Intent Keywords: Use an SEO tool to find long-tail keywords that signal a user is close to making a purchase. Think "best travel insurance for Europe," "what to pack for Southeast Asia," or "REI vs. Patagonia backpack review."
Go Deeper Than the Competition: Your goal is to create the single best resource on the internet for that specific query. This often means writing long-form articles (2,000+ words) that are well-researched and packed with your genuine, first-hand experience.
Build Strategic Comparison Tables: For product-focused articles, a well-structured comparison table is a conversion powerhouse. These tables organize key features, pros, and cons, allowing the reader to make an informed decision easily. Place your affiliate links within a clear "Check Price & Availability" button to capture the user at their highest point of intent.
Prioritize Trust Above All: The currency of affiliate marketing is trust. Only recommend products and services you have personally used and genuinely believe in. Write balanced, honest reviews that include both the good and the bad. This authenticity is what will ultimately drive conversions.
Pro-Tip: Focus your efforts on promoting "high-ticket" items or recurring subscriptions. Earning a 6% commission on a $2,600 G Adventures tour ($156) is a much higher-leverage use of your time than earning 3% on a $20 travel adapter. Similarly, promoting a service like Dollar Flight Club with a 50% recurring commission builds a predictable, compounding income stream.

2. Monetize Traffic with Premium Display Ads for True Passive Income Blogging
Display advertising is perhaps the purest form of passive income for bloggers. Once your blog achieves a consistent level of traffic, you can join a premium ad network that will automatically place high-quality ads on your site. You get paid based on the number of impressions (views), meaning your entire back catalog of content becomes a revenue-generating asset. An old, popular post about "Things to Do in Paris" can earn money from ads every single day without you ever touching it again.
The key is to understand that this is a volume game. Meaningful income from ads is only possible after you've built a substantial audience.
Your Action Plan for Passive Ad Revenue:
Focus 100% on SEO Traffic: Your single objective to unlock this income stream is to grow your organic traffic from Google. The strategy is simple: consistently publish high-quality, helpful content optimized around keywords your target audience is searching for.
Aim for Premium Network Thresholds: Forget about beginner networks like Google AdSense. The payouts are incredibly low. Your goal should be to qualify for a premium ad network, which will dramatically increase your revenue. The industry benchmarks are:
Mediavine: Requires 50,000 monthly sessions.
Raptive (formerly Adthrive): Requires 100,000 monthly pageviews.
Optimize for User Experience: While it may seem counterintuitive, the best way to maximize ad revenue is to create a great user experience. A fast-loading site with well-structured, easy-to-read content will keep readers on your pages longer, which in turn increases ad impressions and revenue. Ensure your site is mobile-friendly, as the majority of traffic comes from mobile devices.
3. Create a "Sell While You Sleep" Digital Travel Guide
Transitioning from promoting others' products to creating and selling your own is the ultimate step in building a scalable business. Digital products, like eBooks or guides, are the perfect "create once, sell forever" asset. After an initial investment of time to create a comprehensive, high-value digital guide, you can sell it an unlimited number of times, generating revenue automatically with each download.
This model offers exceptionally high profit margins and gives you full control over the product and pricing. It’s how you build a truly independent business in a creator economy projected to nearly double from $250 billion to almost $500 billion by 2027.

Your Action Plan for Creating a Digital Guide:
Validate Your Idea First: The biggest mistake is creating a product nobody wants. Dive into your audience's comments and emails. What destination do they ask about most? What part of trip planning do they find most stressful? Their pain points are your product ideas.
Outline and Write with Intense Value: A great guide is both inspirational and intensely practical. Structure your content logically with a hyperlinked table of contents for easy navigation on mobile. Go beyond generic advice and share your unique, hard-won insider tips that can't be found elsewhere.
Design with a User-Friendly Tool: You don't need to be a graphic designer. A tool like Canva offers professional, easy-to-use templates that allow you to create a beautiful, polished guide. Prioritize a clean layout, large fonts, and your own high-quality photos.
Sell on a Specialized Platform: Once your masterpiece is complete, you need a world-class storefront. A dedicated marketplace like TrekGuider is the ideal place to sell your high-quality Travel Guide. It provides a professional, ready-made platform to connect with a global audience of passionate travelers who are actively searching for expert resources just like yours.
4. Sell Lightroom Presets and Digital Templates
A fantastic and highly popular passive income stream for travel creators with a distinct visual style is selling Lightroom presets. These are pre-packaged photo editing settings that allow your followers to achieve your signature aesthetic in their own photos with a single click. Like a digital guide, presets are created once and can be sold infinitely, providing a highly scalable and passive source of income.
Beyond presets, you can apply this same model to any digital template that saves your audience time and stress. This could include:
Customizable Itinerary Templates: Structured planning documents in Notion or Google Sheets.
Printable Travel Planners: A PDF pack including budget trackers, packing lists, and journal prompts.
Video LUTs: Color grading presets for fellow videographers.
Your Action Plan for Selling Presets & Templates:
Define Your Unique Style: Your visual brand is your product. Analyze your most popular photos. What makes them stand out? Is it a moody, cinematic look or a bright and airy feel? Package this style into a cohesive set of 5-10 presets.
Create a High-Converting Sales Page: Your sales page must visually demonstrate the transformation. Use compelling before-and-after photos to show customers exactly what your presets can do for their images.
Leverage a "Pay What You Want" Freebie: The best way to build an audience for your paid presets is to offer one or two for free as a lead magnet. This gives potential customers a risk-free way to try your product and see the quality for themselves.
CTA Block: Get Your Free Travel Lightroom Presets!
Ready to make your travel photos look stunning with a single click? Download our exclusive Free Travel Lightroom Presets! This starter pack is designed to give your images a professional, polished look and is the perfect introduction to the power of preset editing.
5. License Your Stock Photos and Videos
As a travel blogger, your hard drive is a goldmine. The thousands of high-quality images and video clips you've captured on your journeys are valuable assets. By uploading this content to stock photography platforms, you can license it to businesses, marketers, and other creators around the world, creating a small royalty for each download with no further effort required per sale.
While a single sale might be small, hundreds or thousands of downloads over many years can accumulate into a significant and remarkably passive income stream. You are simply monetizing the byproducts of the work you are already doing.
Your Action Plan for Selling Stock Media:
Sign Up for Major Platforms: Focus your efforts on the largest stock media marketplaces to maximize your potential audience. Top platforms include:
Adobe Stock
Shutterstock
Getty Images
Curate and Keyword Carefully: Don't just upload everything. Select your sharpest, best-lit, and highest-quality images. The key to getting your content discovered is careful keywording. Be descriptive and specific. Instead of "beach," use tags like "tropical beach, white sand, turquoise water, palm trees, sunrise, Thailand."
Remove Branding and Logos: To be commercially viable, your photos must be clean of any recognizable branding, logos, or trademarks.
Pro-Tip: Start shooting with stock in mind. When you're traveling, take a few extra minutes to capture generic, "evergreen" shots. These include landscapes without people, close-ups of food, architectural details, and shots that evoke a mood like "adventure" or "relaxation." These types of images have a much broader commercial appeal.
Your Journey to Financial Freedom Starts Now
Building a profitable blog that provides true freedom is a marathon, not a sprint. The path requires a strategic and deliberate shift in focus from being a content creator who gets paid for their time to a business owner who gets paid for the assets they own. The five ideas outlined above are your blueprint for building those assets.

You now have a clear answer to the question of how to achieve passive income blogging. Don't let yourself be overwhelmed by trying to do everything at once. Choose one idea that excites you the most and aligns with your current strengths. If you're a talented photographer, start with presets. If you have deep expertise in a specific destination, start outlining your digital guide. Take the first step today to build an asset that will pay you back for years to come.
Frequently Asked Questions (FAQ)
1. Is it better to focus on one passive income stream or build several at once?
Focus on one, then stack. The most successful creators follow a "Monetization Ladder." They don't try to do everything at once. Master creating evergreen affiliate content first. Once that system is working, use your authority and cash flow to invest time in building your first digital product. Mastering one stream before moving to the next is the key to sustainable growth.
2. How much traffic do I need to start earning passive income?
This depends entirely on the model. For affiliate marketing or selling your own low-cost digital product, you can start earning with as little as a few thousand pageviews per month if your audience is highly targeted and engaged. For display advertising to be truly worthwhile, you should aim for the 50,000+ monthly session threshold required by premium networks.
3. What's the most common mistake bloggers make when trying to earn passive income?
The biggest mistake is impatience. Passive income streams are assets that take time to build and appreciate. Bloggers often give up on SEO after a few months or launch a digital product to a tiny audience and get discouraged by low sales. True passive income is the reward for long-term, strategic effort.
Meta Data Suggestions:
SEO Meta Title (Under 60 characters):
5 Passive Income Ideas for Your Travel Blog (2026)
URL Slug:
passive-income-ideas-travel-blog
SEO Meta Description (Under 155 characters):
Discover 5 proven passive income ideas for your travel blog. Learn to build assets that make money 24/7, from digital guides to affiliate marketing.
Read the full guide: The Travel Blog Business Plan: How to Make Real Money in 2026
Don't Miss Out! Subscribe for Exclusive Content
SubscribeComments 0
No comments yet
Be the first to share your experience!
Dont Miss Out! Subscribe for Exclusive Content
FTC Affiliate Disclosure Essentials: Stay Compliant as a Travel Creator
Essential Affiliate Tools: From Tracking to Full Optimization

Avoid These 5 Affiliate Landing Page Mistakes for Better Conversions

Affiliate Keyword Research Mastery for Travel Blogs
Booking.com Affiliate Program Review: Pros, Cons, and Earnings Potential
Decoding Affiliate Commission Rates: Benchmarks for Travel Creators
How to Start a Travel Blog (And Get Noticed)
TrekGuider @trekguider
You have a passion for travel that borders on obsession. Your camera roll is a treasure map of untold stories, and your notes app is filled with the kind of hard-won wisdom that could save a fellow traveler time, money, and stress. The idea of starting a travel blog feels like the perfect way to share it all—a potential path to a life with more freedom and adventure.
But there’s a problem. The moment you consider the "how," a wave of technical overwhelm washes over you. Domains, hosting, WordPress, plugins, SEO—it’s a foreign language, a dense fog of conflicting advice that makes the entire project feel intimidating and out of reach. You see other creators living the dream, and you're stuck in analysis paralysis, believing you need to be a web developer just to get started. Every day you wait, you feel the immense opportunity of the creator economy—a market projected to swell from $250 billion to nearly $500 billion by 2027—slipping through your fingers.
Forget the confusion. This is the guide that cuts through the noise. The old way of starting a travel blog is dead. You don't need to build a website from scratch. This is your chronological, step-by-step playbook that will show you how to start a travel blog presence on a powerful marketplace, letting you focus on what you do best: creating. We'll walk you through building a professional home for your brand in minutes, not months. This is your A-to-Z blueprint for building the foundational asset of your future business. Once this home base is built, you can begin the journey of transforming it into a real enterprise, a journey we map out in our ultimate guide to How to Make Money Online: A Creator's Guide for 2026.
Why a Marketplace? The Smarter Foundation for Your Creator Empire
Before we dive in, it's critical to understand why starting on a creator marketplace like TrekGuider is a fundamentally better strategy than building a self-hosted blog from scratch. While owning a website was once the only path, today it's a detour filled with technical headaches, maintenance costs, and the slow, grinding challenge of building traffic from zero.
The most resilient and profitable creators still operate on a "Hub-and-Spoke" model, but the "hub" has evolved.
The Old Hub: A self-hosted blog you have to build, manage, and secure yourself.
The New Hub: Your professional creator page on a marketplace like TrekGuider. This is the core business asset you control, supercharged with a built-in audience, e-commerce tools, and the collective SEO power of the entire platform.
The Spokes: Social media platforms remain your powerful distribution channels, used to capture attention and drive traffic back to your new, high-powered hub.
Starting on a marketplace isn't just about creating a profile; it's about plugging into a pre-built ecosystem designed for your success. You get to skip the entire technical setup and focus day-one on content and commerce.

The Strategic Blueprint – Nailing Your Niche
Even on a powerful platform, the single biggest real advantage you can give yourself is specificity. Trying to be a travel expert for "everyone" is a recipe for getting lost in the noise. Choosing a well-defined niche allows you to build authority faster, attract a dedicated audience, and stand out in a catalog of creators.
How to Find a Profitable Niche
A successful niche sits at the intersection of three circles: your genuine passion, your audience's pressing problems, and its potential for profitability. Before you commit, you must validate your idea.
Keyword & Platform Search: Use keyword research tools to check Google search volume, but also search within the marketplace itself. Are other creators successfully selling products in this niche? Is there a healthy amount of interest? This is your data-driven sign of audience demand.
Competitor & Market Analysis: The presence of a few successful creators in your niche is a good thing; it proves a market exists. Analyze their products, articles, and pricing. If others are generating revenue, it validates the niche's commercial potential.
5 Promising Travel Blog Niche Ideas to Spark Inspiration
To get your brainstorming started, here are five less-saturated niches with huge potential for 2026:
Eco-Friendly & Sustainable Travel: Focus on low-impact tourism, conservation-focused experiences, and green-certified brands. This niche attracts a passionate, value-driven audience.
Remote Work & "Workation" Travel: Become the go-to resource for digital nomads by creating guides on finding reliable WiFi, navigating visa requirements, and discovering the best long-term accommodations.
Culinary Tourism (Hyper-Niche): Don't just be a "food travel" blog. Go deeper. Focus on a specific cuisine (e.g., "Exploring the Regional Cuisines of Southern Italy") or a dietary need (e.g., "A Vegan's Guide to Japan").
Accessible Travel: A critically underserved and deeply important niche. Create practical guides and resources for travelers with disabilities, focusing on wheelchair-accessible hotels, attractions, and transportation.
Micro-Destination Blog: Instead of trying to cover the world, become the undisputed expert on a single city, region, or small country (e.g., "The Ultimate Guide to Visiting Malta"). You can dominate local affiliate partnerships and product sales for that area.
How to Start a Travel Blog on a Marketplace – Your 10-Minute Setup
This is where you leapfrog months of technical work. Instead of wrestling with hosting and code, you'll build a professional home for your brand in less time than it takes to drink a cup of coffee.

Step 1: Claim Your Professional Creator Page
Getting started is simple. Navigate to the TrekGuider marketplace and register. The platform is actively creating pages for established bloggers using public data, so your first step is to search the author catalog to see if a page already exists for you.
If you find your page, you can claim it and gain full control.
If not, you can create a new one from scratch in minutes.
Step 2: Customize Your Digital Home Base
Your creator page is your professional landing page. It's designed to be your central hub, consolidating your entire brand in one place. Fill out every section to build trust and showcase your expertise:
Basic Information: Add a high-quality photo and a compelling bio that tells your story and explains who you help.
Social & External Links: Integrate your social media profiles and link out to any other personal websites or online stores you may have.
Monetization Tools: Enable the donation feature to allow your most loyal fans to support you through one-time payments or recurring subscriptions.
Step 3: Build Your Product Showcase
This is your integrated storefront. You don't need to install any clunky e-commerce plugins. Simply start uploading the digital products you want to sell:
Guides and E-books
Custom Maps and Routes
Itinerary Templates
The platform handles secure payment processing (via Stripe) and instant digital delivery, so you can focus on creating, not logistics.
The Foundational Content – Publishing on the Platform
With your digital home base established, it's time to furnish it with value. On a marketplace, you don't need to worry about building a blog from zero. Your mission is to publish 5-10 high-quality, in-depth articles directly to the platform's article section. This is your primary strategy for getting discovered.

Why Publishing on the Marketplace is a Superpower
Instant Audience: You tap into the marketplace's existing audience of passionate travelers who are already there to read articles and buy products.
Shared SEO Authority: You benefit from the domain authority of the entire platform, giving your articles a better chance to rank on Google much faster than a brand-new website.
Direct Traffic to Your Products: Every article you publish is linked back to your creator page, acting as a powerful, built-in funnel that drives readers directly to your product showcase and donation buttons.
Writing Your First Authority-Building Articles
Your first articles should be "key elements"—long, in-depth, evergreen posts that solve a major problem for your niche audience. Examples include:
A definitive guide to your niche destination (e.g., "The Ultimate First-Timer's Guide to Visiting Bali").
An exhaustive packing list (e.g., "What to Pack for a 2-Week Trip to Italy").
A detailed "how-to" post (e.g., "How to Plan a Trip to Japan on a Budget").
Feeling Overwhelmed by Trip Planning?
Creating a detailed itinerary is one of the most time-consuming parts of travel planning. To help you streamline the process for your own adventures—and to give you an example of a high-value resource you can one day create for your own readers—we've built the ultimate tool. Our comprehensive, plug-and-play itinerary template takes the stress out of organizing your next trip.
Download Your Free Plug-and-Play Itinerary Template Now
This type of high-value resource is exactly what your audience is looking for. Once you've created a helpful freebie, the next step is to package your unique expertise into a premium Travel Guide, which you can sell directly on your TrekGuider creator page to a global audience of passionate travelers.
Getting Noticed – The Basics of Promotion
With your page set up and a foundation of great content published, you can finally shift your focus to promotion.
Master Marketplace SEO From Day One
SEO is still your most critical long-term strategy, but now you apply it to the articles you publish on TrekGuider. For every post you write, you should:
Target a Keyword: Choose a specific phrase your ideal reader would search for.
Use the Keyword: Place your keyword naturally in the article's title, the first paragraph, and at least one subheading.
Optimize Images: Use descriptive file names and add "alt text" to every image.
Use Social Media as Your Amplifier
Your social media channels are your "spokes." Their job is to drive traffic back to your TrekGuider "hub." Share your newly published articles and link directly to your creator page or specific products in your social profiles. This creates a powerful feedback loop, funneling your existing audience to the place where they can best support you and buy your products.
Pro-Tip: Your creator page bio is your elevator pitch. It's the first thing a potential customer will read. Use it to tell a compelling story, clearly state who you serve, and explain the unique value you provide. This builds an instant, human connection that turns a casual browser into a loyal follower.
Frequently Asked Questions About Starting a Travel Blog
1. Is it free to start a travel blog on TrekGuider?
Yes. Creating your personal author page, publishing articles, and listing products is free. The platform makes money by taking a small, transparent commission on the products you sell, so we only succeed when you succeed.
2. Do I need my own website to use the marketplace?
No, and that's the biggest advantage. TrekGuider provides you with your own professional landing page, so you can have a credible, feature-rich home for your brand without any of the costs or technical hassles of building and maintaining your own site.
3. How does the platform help me get discovered?
The marketplace helps in two key ways: First, your articles and products are showcased to the platform's entire audience of travelers. Second, by publishing on a high-authority domain, your content has a much better chance of ranking on search engines like Google, attracting new users to the platform and, ultimately, to your page.
Your Journey Starts Now
The path from a vague dream to a published, professional travel blog presence is no longer a fog. It's a clear, actionable checklist. You now have the complete blueprint that details how to start a travel blog the modern, smarter way—by leveraging the power of a creator marketplace.
The most challenging part of any great journey is taking the first step. You have the map to a faster, more direct route. The only thing left to do is to begin your adventure.
SEO Meta Data Suggestions:
SEO Meta Title (58 characters): How to Start a Travel Blog in 2026 (Beginner's Guide)
URL Slug: how-to-start-a-travel-blog
SEO Meta Description (154 characters): A step-by-step guide for beginners on how to start a travel blog. Learn how to choose a niche, set up your creator page, and publish content that gets noticed.
Read the full guide: The Travel Blog Business Plan: How to Make Real Money in 2026
Don't Miss Out! Subscribe for Exclusive Content
SubscribeComments 0
No comments yet
Be the first to share your experience!
Dont Miss Out! Subscribe for Exclusive Content
FTC Affiliate Disclosure Essentials: Stay Compliant as a Travel Creator
Essential Affiliate Tools: From Tracking to Full Optimization
Avoid These 5 Affiliate Landing Page Mistakes for Better Conversions
Affiliate Keyword Research Mastery for Travel Blogs
Booking.com Affiliate Program Review: Pros, Cons, and Earnings Potential