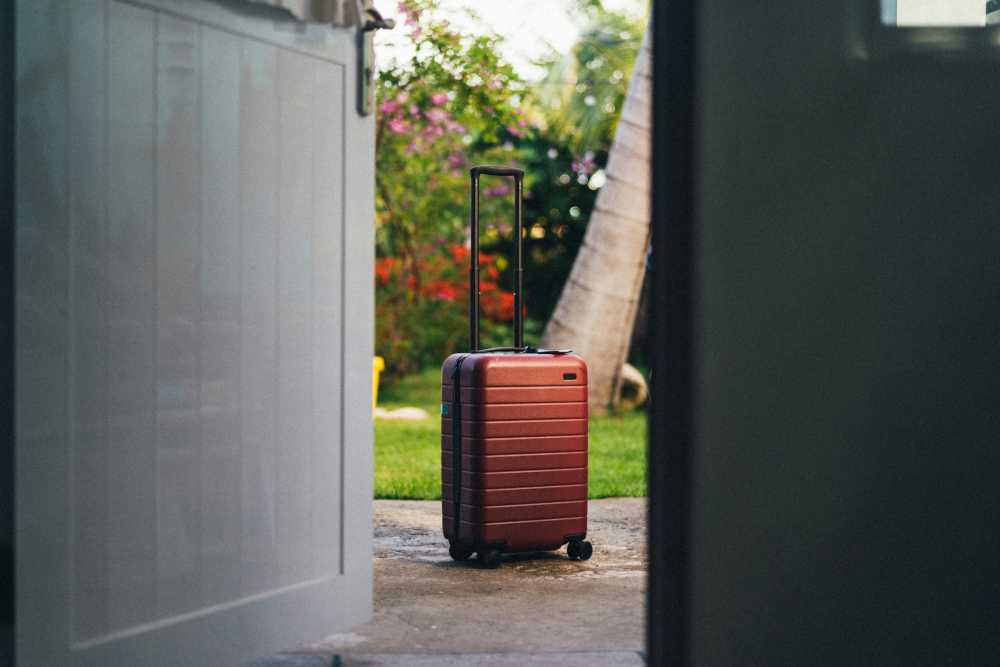
Anxious to Adventurous: The Ultimate Guide to Solo Travel Confidence
TrekGuider @trekguider
The thought of solo travel often brings two images to mind: the breathtaking vista from a mountaintop, enjoyed in peaceful solitude, and the quiet dinner table for one, feeling conspicuously alone. For years, the advice has been to simply "embrace the loneliness." We believe that's outdated and, frankly, unhelpful advice. In today's hyper-connected world, the modern solo traveler is never truly alone—they're empowered. This guide is the official TrekGuider playbook of actionable solo travel tips that use the best digital tools, safety apps, and planning technology to transform anxiety into confidence and navigate the world with unprecedented freedom and security. Let's begin.
The Solo Mindset: How to Conquer Fear and Travel with Confidence
Before you ever book a flight, choose an anti-theft bag, or pack a single sock, the most significant journey begins in your mind. Overcoming the initial psychological hurdles isn't just the first step; it's the foundation upon which every great solo trip is built. This is where you shift your perspective from a hesitant "Can I do this?" to a determined "How will I do this?"
Is It Weird to Travel Alone? (The Answer is No, and Here’s Why)
Let's dismantle this fear immediately: traveling alone is not weird. It is a powerful, intentional, and increasingly popular way to experience the world. The old, tired stigma of the "loner" is being rapidly replaced by a cultural admiration for independence, courage, and self-reliance.
If you feel like an outlier, the data says otherwise. Pinterest has seen an explosion in searches for "solo travel" over the past few years—it's one of the fastest-growing travel categories on the platform. You are not an anomaly; you are on the leading edge of a global movement. Choosing to travel solo doesn't broadcast that you lack friends; it broadcasts that you possess the curiosity and confidence to forge your own path—a trait universally recognized as a strength. It's a declaration that your desire to grow and explore is more powerful than your fear of judgment.

A Practical Guide to Telling Friends and Family About Your Trip
One of the most surprising sources of pre-trip anxiety can be the well-intentioned concerns of friends and family. Their worries, born from love, can inadvertently plant seeds of doubt. The key to navigating these conversations is to approach them not as a petitioner seeking approval, but as a competent leader presenting a well-researched plan.
Present a Confident Decision: Language matters. Instead of tentatively asking, "I was thinking about maybe going to Italy alone...," state your plan with calm assurance: "I'm so excited to share that I'm planning a solo trip to Italy this spring." This immediately reframes the conversation from a debate into an announcement of a positive life event.
Lead with Competence: Immediately follow your announcement with two or three key details that demonstrate your thoroughness. "I've already found a fantastic hotel in a very safe neighborhood in Rome, my travel insurance is booked, and I have an app that will let me share my location with you so you can see where I am." This proactively answers their biggest questions and showcases you as a responsible planner.
Establish a Communication Rhythm: The fear of the unknown is what fuels their worry. Eliminate it by defining a clear communication plan. "Just so you don't worry, my plan is to send a quick WhatsApp message every evening to check in." This simple commitment provides immense reassurance and prevents them from imagining the worst if they don't hear from you for a day.
For First-Timers: Start Small to Build Momentum
You do not need to book a six-month, one-way ticket to Southeast Asia to claim the title of "solo traveler." The goal is to build confidence, and confidence is a muscle built through repetition. We call this "confidence stacking"—the process of accumulating small, successful experiences that prove your capability to yourself.
Begin with a solo weekend trip to a city a few hours from home. The mission is simple: navigate a new public transit system, confidently ask for a table for one at a busy restaurant, and be solely responsible for your own entertainment and itinerary for 48 hours. The skills you build and the comfort you gain are precisely the same ones you'll use in a foreign country, just in a lower-stakes environment. After that, perhaps a four-day domestic trip by plane. By the time you're ready for that grand international journey, it will feel like a natural, exciting next step, not a terrifying leap into the abyss.
With that foundational confidence in place, it’s time to channel it into the single greatest antidote to anxiety: a bulletproof plan.
Your Pre-Flight Digital Checklist
Great solo trips don't happen by accident; they are born from careful, thoughtful planning. For the "Cautious Planner," this is where your natural tendencies become your superpower. A methodical approach is one of the most important solo travel tips we can offer, as it systematically dismantles pre-trip anxiety. Every detail you confirm is another piece of evidence that you are ready, capable, and in control.
Key Takeaways:
Prioritize Safe Destinations: Set yourself up for success by choosing a first destination known for its safety, strong tourist infrastructure, and ease of navigation. Use official, data-driven resources. are your first stop for any official warnings.
Build a Bulletproof Budget: Use a structured framework to manage your finances, which prevents stress and empowers smart decision-making on the road.
Master Your Tech: Load your smartphone with essential apps for navigation, safety, and communication, and learn their features before you depart.
Secure Your Digital Life: Arrange for an eSIM for instant connectivity upon arrival and have a VPN ready to protect your data on all public Wi-Fi networks.
The TrekGuider Take: The single biggest mistake we see first-time solo travelers make is underestimating the power of pre-planning. A well-researched itinerary isn't a restriction; it's a foundation for freedom. It allows you to be spontaneous because you've already handled the essentials.
How to Choose Your First Solo Destination (Safety & Ease)
Your choice of destination is the most critical decision you'll make. For a first-time trip, the goal is to set yourself up for success. Prioritize locations celebrated for their safety, strong tourist infrastructure, and overall ease of navigation. Use this three-point filter to guide your research:
Prioritize Objective Safety: Don't rely on anecdotes. Use official, data-driven resources. The U.S. Department of State's travel advisories are your first stop for any official warnings. Go deeper by consulting the Global Peace Index, an annual report that ranks countries on metrics of safety and security. Destinations that consistently top this list—like Iceland, New Zealand, Portugal, Japan, and Costa Rica—are popular for solo travelers for very good reason.
Filter for "Low-Friction" Travel: Make it easy on yourself. Does the destination have a simple, reliable public transportation system? Is English widely spoken, at least in tourist areas? Is the culture generally open and welcoming to visitors? A city like Lisbon, with its superb walkability and friendly atmosphere, is often a much better first choice than a more chaotic, off-the-beaten-path destination where you'll face more logistical and cultural hurdles.
Let Genuine Passion Be Your Guide: This is the magic ingredient. The ultimate advantage of solo travel is that the entire itinerary is 100% yours. Don't choose a destination because it's popular on Instagram; choose it because it genuinely ignites your curiosity. Whether you're obsessed with the art museums of Florence, the hiking trails of Patagonia, or the food markets of Tokyo, letting your passion lead the way is the ultimate guarantee that you'll stay engaged and motivated. For those with remote work flexibility, exploring options from our guide to the 10 Best International Destinations for Digital Nomads can also be a fantastic starting point.

A Framework and Recommended Apps for Budgeting
When you're the sole traveler, you're also the sole CFO. Mastering your budget is a core competency that prevents stress and empowers you to make smart decisions on the road.
The 5-Category Solo Budget Framework:
Pre-Trip Fixed Costs (10%): Flights, comprehensive travel insurance, necessary visas, and any specific gear you must purchase before you go.
Accommodation (30%): Typically your largest daily expense. Research average hostel, guesthouse, or budget hotel prices in your destination to set a realistic per-night cost.
Food & Drink (25%): This is a huge part of the experience! A smart budget allows for a mix of everything: iconic restaurant meals, casual street food, and visits to local grocery stores for snacks and simple breakfasts.
Activities & In-Country Transport (20%): Museum entries, day tours, cooking classes, subway passes, and inter-city train tickets all fall into this category.
The "Oh Sh*t" Fund (15%): This is your contingency fund for anything from a missed flight or a minor medical issue to a spontaneous, can't-miss opportunity like a last-minute ticket to a concert.

Download an app like Trail Wallet or YNAB (You Need A Budget) before you go. Diligently tracking your spending in real-time is the key to staying in control and avoiding that dreaded post-trip credit card bill. One of the best ways to stick to your budget is by avoiding costly baggage fees. Master the art of carry-on-only with our free How to Pack Light Guide.
Finding Safe Accommodations and Flexible Flights
Where you sleep is your sanctuary. For a solo traveler, safety and location matter most, far outweighing luxury or price.
For Hostels: Read the reviews like a detective, specifically searching for mentions of "solo female traveler" or "solo traveler." Prioritize properties with 24-hour reception, individual secure lockers in the dorms (always bring your own high-quality padlock), and, if it makes you more comfortable, female-only dorm options.
For Hotels & Airbnbs: Use the map view relentlessly. Ensure you're in a central, well-lit neighborhood with good access to public transport. Read recent reviews that comment specifically on the safety of the area at night. Paying a little extra for a room in a prime location is the best investment you can make in your peace of mind.
When booking flights, become a power user of tools like Google Flights and Skyscanner. Their "flexible date" and "entire month" views are your best friends, allowing you to see the cheapest days to fly at a glance. Shifting your departure by just one or two days can often save hundreds of dollars.
From the TrekGuider Toolkit: Feeling overwhelmed by the planning process? Streamline your entire pre-trip organization with our free Ultimate Travel Itinerary Template. It's a tool we've designed to help travelers build checklists, track budgets, and design perfect itineraries.
Tech & App Solo Travel Tips: 15 Essential Tools
Your smartphone is the most powerful tool ever created for an independent traveler. It's your navigator, translator, research assistant, and safety device all in one. Loading it with the right apps and tech transforms it from a simple phone into a digital Swiss Army knife for navigating the globe.

Navigation & Logistics: Google Maps, Rome2rio, and Citymapper
This trio forms a holy trinity of travel navigation that makes getting lost virtually impossible.
Google Maps: It’s the undisputed champion for a reason, but the single most important pro-move is this: before you ever leave home, download offline maps for your entire destination. Treat it like packing your passport. This turns your phone into a fully functional GPS, no data or Wi-Fi required, which is an absolute lifesaver. Go a step further by "starring" your hotel, key sights, and restaurants in advance to create a fully customized, interactive travel map.
Rome2rio: This is your master planner for country-wide travel. Wondering how to get from Naples to Florence? Rome2rio will instantly show you every possible combination—plane, train, bus, or car—complete with estimated costs and travel times. It demystifies long-distance logistics.
Citymapper: In major metropolitan hubs like London, Paris, or New York, Citymapper often outperforms Google Maps for urban public transit. It offers hyper-accurate, real-time departure info, disruption alerts, and the fastest routes, even suggesting "rain-safe" options.
Safety & Peace of Mind: GeoSure, MayDay, and Location Sharing
This suite of apps creates a digital safety net, providing invaluable peace of mind for both you and your loved ones back home.
GeoSure: Think of this as a credit score for neighborhood safety. GeoSure provides granular, localized safety ratings for cities across the globe, broken down by critical categories like Women's Safety, Theft, and Physical Harm. Use it to vet a neighborhood before you book your Airbnb or decide where to go for a late-night dinner.
MayDay: A brilliantly simple but powerful safety tool. You pre-load emergency contacts, and with a single tap, the app sends them an alert and your precise GPS location.
Native Location Sharing: This is the easiest win of all. Both Google Maps ("Location Sharing") and Apple's "Find My" app allow you to share your real-time location with a trusted friend or family member. Set it for the duration of your trip so they can have the passive reassurance of knowing where you are without you needing to constantly check in.
Digital Security 101: Why You Need a VPN on Public Wi-Fi
You'll be logging into countless public Wi-Fi networks in cafes, airports, and hotels. These networks are notoriously insecure, making them a playground for data thieves who can potentially intercept your passwords, banking details, and other private information.
A VPN (Virtual Private Network) is your personal bodyguard for the digital world. It creates a secure, encrypted tunnel between your device and the internet, making your data completely unreadable to anyone trying to snoop on the network. Using a reputable VPN service like NordVPN or ExpressVPN every single time you connect to public Wi-Fi is a non-negotiable step for protecting your digital life.
The TrekGuider Take: We consider a VPN non-negotiable for modern travel. Connecting to public Wi-Fi without one is like leaving your hotel room door wide open with your valuables on the bed. It’s a small, inexpensive investment in protecting your entire digital life.
Communication: Google Translate and Getting a Local eSIM
Language barriers are no longer the insurmountable walls they once were.
Google Translate: Master its advanced features. The real-time conversation mode is a miracle for basic interactions. The camera function, which can instantly translate a restaurant menu or a street sign, feels like magic. Before you go, download the language pack for your destination for full offline functionality.
Get an eSIM: The days of hunting for a physical SIM card shop upon arrival are over. An eSIM (embedded SIM) is a digital SIM you can purchase online and install on your phone before you even leave home. Companies like Airalo and Holafly offer affordable data packages for virtually any country on earth. This means you are connected the second your plane touches down—a massive advantage for safety and convenience.
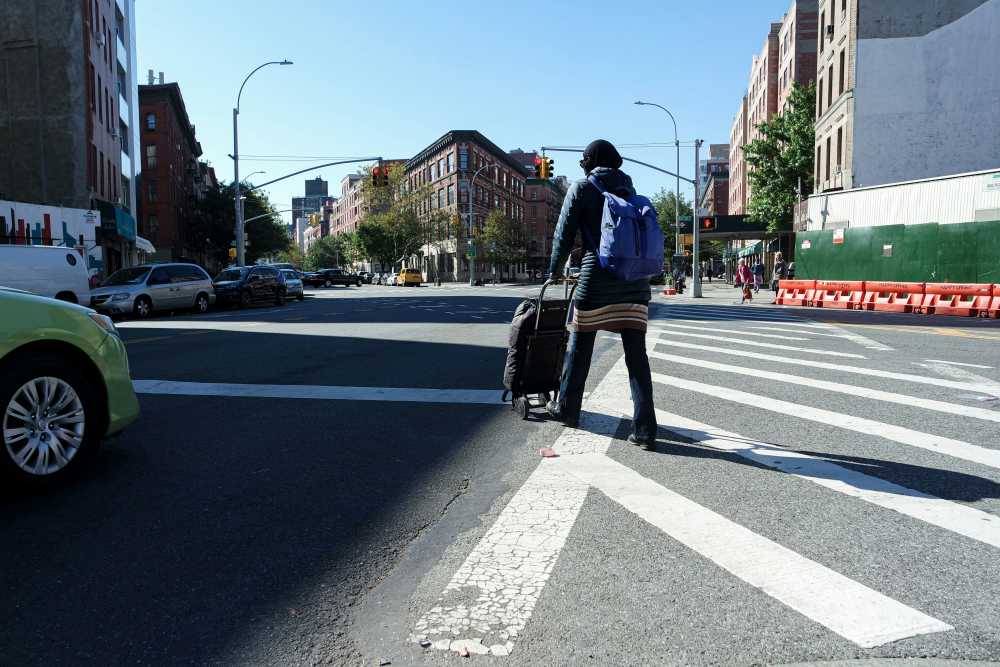
Packing Smart: The Art of Carry-On Only
For the solo traveler, mobility is the ultimate currency. Being burdened by heavy, cumbersome luggage is a rookie mistake. It makes you a more conspicuous target for theft, exhausts you physically, and turns simple tasks like navigating a flight of stairs into a monumental struggle. The solution? Master the art of carry-on-only travel.
The "Roll, Don't Fold" Philosophy
This is the central doctrine of efficient packing. Tightly rolling your clothes not only minimizes wrinkles far more effectively than folding but also compresses them, saving a remarkable amount of space.
Packing cubes are the tools that elevate this philosophy into a system. These zippered organizers allow you to compartmentalize everything. Use one large cube for pants and sweaters, a medium one for tops, and a small one for underwear and socks. This system not only keeps your bag impeccably organized (no more digging for a clean pair of socks) but also compresses your clothing even further, creating pockets of free space you never thought possible.
A Minimalist's Tech Gear List
Your technology is your lifeline. Pack smart to stay powered and connected.
Portable Power Bank: This is not optional; it's essential. Choose a model with at least 10,000mAh capacity, which will provide 2-3 full charges for your smartphone. Keep it charged, and keep it in your daypack.
Universal Travel Adapter: Ditch the bag of miscellaneous adapters. Invest in a single, high-quality universal adapter that includes multiple USB ports. This allows you to charge your phone, power bank, and camera simultaneously from one wall outlet—a godsend in hostels where outlets are a precious commodity.
Noise-Canceling Headphones: Your personal "do not disturb" sign for the world. They are invaluable on loud flights, rumbling trains, and in bustling hostel dorms, creating a private bubble of calm wherever you are.
Kindle or E-reader: Carrying even one book is a waste of space and weight. An e-reader gives you access to an entire library in a device that weighs less than a paperback.
The Reddit-Approved Solo Traveler's Packing Checklist
We've synthesized wisdom from expert communities like r/onebag and r/solotravel to create a definitive checklist—a collection of the best packing-related solo travel tips you'll find. The guiding principle is versatility. Every item should serve multiple purposes.
Clothing (The 5-4-3-2-1 Rule):
5 sets of socks and underwear.
4 versatile tops (merino wool is the holy grail for its odor resistance).
3 bottoms (e.g., one pair of travel pants, one pair of jeans, one skirt or pair of shorts).
2 pairs of shoes (one comfortable all-day walking shoe, one slightly dressier flat or loafer).
1 jacket (a waterproof shell) and 1 mid-layer (a fleece or sweater).
Toiletries (Go Solid):
Solid shampoo, conditioner, and soap bars eliminate the hassle of liquid restrictions.
Toothbrush, toothpaste tablets, and solid deodorant.
A basic first-aid kit: band-aids, pain relievers, antiseptic wipes, and blister treatment.
Documents & Money:
Passport/Visa (with digital copies in your email and physical copies stored separately from the original).
2 different credit cards and 1 debit card (never store them all in the same place).
A small stash of emergency US dollars and some local currency.
Essentials:
Quick-dry microfiber travel towel.
Collapsible water bottle.
High-quality padlock.
Sleep mask and earplugs.
The TrekGuider Take: We've analyzed countless packing strategies, and the data is clear: embracing a minimalist, two-shoe rule is a game-changer. One pair of ultra-comfortable, all-day walkers and one versatile pair of flats or loafers will cover 99% of travel scenarios without weighing you down.
To make sure you don't forget a single thing, download our free and printable Ultimate International Travel Checklist. It's the perfect final review before you zip up your bag.

A Masterclass in Solo Travel Safety Tips
Safety is the essential concern for most solo travelers, but it should be approached as a skill to be mastered, not a fear to be managed. Being safe isn't about being paranoid; it's about being prepared, aware, and intentional. These solo travel tips will help you move through the world with a quiet confidence that makes you a less appealing target.
Key Takeaways:
Become a Hard Target: Project confidence through your body language and maintain situational awareness to deter opportunistic criminals.
Layer Your Security: Actively use anti-theft gear for your daypack, a high-quality lock for your hostel locker, and extra security measures for your room.
Plan for the Night: Always know how you're getting home after dark. Be mindful of your surroundings and moderate alcohol consumption.
Trust Your Intuition: Your gut feeling is your most reliable safety tool. If a person, place, or situation feels off, leave immediately. No exceptions.

Situational Awareness: Becoming a Hard Target
Your most effective safety tool is your own mind. Predatory individuals are opportunistic; they scan for "soft targets"—people who look lost, distracted, vulnerable, or unaware. Your job is to project the opposite impression: that of a "hard target."
Master "Purposeful Walking": Even if you're just exploring, walk with direction. Keep your head up, your shoulders back, and your pace steady. If you need to consult your map, don't stop abruptly in the middle of the sidewalk. Instead, duck into a shop or cafe to get your bearings.
Control Your Body Language: Avoid looking at the ground. Make brief, deliberate eye contact with people as you walk. This non-verbally communicates, "I see you. I am aware of my surroundings."
The "Scan & Assess" Habit: When you enter any new space—a cafe, a train car, a public square—take 3-5 seconds to consciously scan your environment. Note the exits. Get a feel for the general vibe. This simple habit pulls you out of your phone and into a state of active presence.
Securing Your Belongings
Protecting your valuables requires more than just a lock.
The Hostel Locker is Sacred: Use it without fail. Your passport, laptop, and extra cash should live in your locked locker unless they are on your person. Use your own sturdy padlock.
Employ an Anti-Theft Daypack: For ultimate peace of mind, invest in a daypack from a brand like Pacsafe or Travelon. Features like slash-proof straps, locking zippers, and RFID-blocking pockets are specifically designed to foil common theft tactics.
Hotel Room Security: The room safe is good, but a portable door jam or door stop alarm provides an extra layer of security and peace of mind against unauthorized entry while you're sleeping. Never leave valuables out in the open, even in a locked room.
Rules for Staying Safe After Dark
Exploring a city after dark is one of travel's great pleasures, but it demands heightened awareness.
Know Your Exit Strategy: Before you even leave for the evening, know exactly how you will get back to your accommodation. Have you checked the time of the last train? Do you have a reputable ride-sharing app like Uber or Bolt installed and working?
Nurse Your Drink: Be mindful of your alcohol consumption. Your judgment is your primary defense. Always buy your own drinks and never leave your drink unattended, even for a second.
Trust Your Gut Instinct: This is your oldest and most reliable security system. If a person, a place, or a situation feels wrong, it is wrong. Do not hesitate. Do not worry about being rude. Remove yourself from the situation immediately.
The TrekGuider Take: Veteran travelers unanimously agree on one thing: your intuition is your most reliable safety tool. If a situation feels wrong, it is. There is no need to be polite or justify your feeling—your only priority is to remove yourself from the situation immediately.
Setting Boundaries and Handling Unwanted Attention
As a solo traveler, you will likely encounter unwanted attention at some point. Having a pre-planned script for how to handle it is incredibly empowering.
The "Firm & Cold" Response: For persistent touts or unwanted suitors, a simple, sharp "No" delivered with direct eye contact and a complete lack of a smile is incredibly effective. Do not engage in further conversation. Turn and walk away.
The Power of the White Lie: You are under no obligation to be truthful with strangers who make you uncomfortable. "I'm on my way to meet my husband" is a universally understood and effective deterrent.
Create a Public Scene: In a worst-case scenario where you feel physically threatened, do not be afraid to draw attention. A loud, sharp "Leave me alone!" or "Get away from me!" in the local language (learn this phrase) will attract the help of others.
For a deep dive into managing these risks, a comprehensive travel insurance policy is the ultimate safety net. Explore our Travel Insurance Guide: Avoid Mistakes & Travel Worry-Free to ensure you're fully covered.
Social Solo Travel Tips: How to Meet People and Thrive
The social dynamic of solo travel is a beautiful paradox. It is at once a journey into profound self-reliance and an opportunity for incredible human connection. The key is to recognize that you are always in control. You can dial your social life up or down as you see fit, and mastering this balance is one of the most rewarding skills you'll learn.
The Introvert's Guide to Making Friends
If the thought of "putting yourself out there" is intimidating, relax. The secret is to let shared activities do the heavy lifting for you.
Leverage Hostel Common Areas: Even if you book a private room, the hostel's common area is a social superpower. Simply sitting and reading a book can lead to organic conversations. The unspoken rule is that everyone there is open to connection.
Join a Free Walking Tour: This is the #1 hack for meeting people on your first day in a new city. You have a built-in group of fellow travelers for several hours. At the end, be the one to say, "That was great! I'm grabbing lunch at that place the guide recommended, does anyone want to join?"
Sign Up for a Class: A local cooking class, a surf lesson, a pottery workshop—these are social goldmines. The shared activity provides an instant icebreaker and a natural foundation for friendship.
How to Confidently Dine Alone (and Actually Enjoy It)
The "table for one" is a classic source of anxiety. It's time to reframe it. Dining alone is not a social failure; it is an act of luxurious self-care. It's a chance to people-watch, to savor your food without distraction, and to be alone with your thoughts.
Own the Bar: The bar or chef's counter is your best friend. It's a more casual, socially acceptable place to sit alone, and it puts you in easy conversation range of the bartender or your neighbors.
Bring a Purposeful Prop: A book or headphones can signal "do not disturb." But a journal or a local map can signal "I'm an interesting traveler open to conversation." Choose your prop based on your mood.
Become a Food Critic: Engage fully with the experience. Take notes on the flavors in your journal. Take a beautiful photo of the dish. When you treat the meal as an activity in itself, you'll forget to feel self-conscious.
The TrekGuider Take: To instantly feel more comfortable dining alone, head for the bar or a chef's counter. It's a socially designated space for individuals, offers a great view, and often leads to the best conversations with staff and other diners. It's the ultimate solo dining power move.

The Art of Taking Your Own Photos
You will want proof that you were on this incredible adventure.
Get a Mini-Tripod: A small, flexible tripod like a GorillaPod combined with your phone's self-timer is your new best friend. You can prop it on ledges, wrap it around railings, and compose beautiful shots that go way beyond the selfie.
Ask a Fellow Photographer: If you need someone to take your photo, don't ask a random person. Look for another tourist holding a DSLR camera. They will understand composition and will likely be happy to help a fellow traveler. Offer to take one for them in return.
The Video Screenshot Hack: This is a pro-level trick. Prop your phone up, hit record, and then walk through the scene, look at the view, or interact with your environment. Later, you can scrub through the video and pull perfectly candid, natural-looking still photos from it.

Loneliness: What It Feels Like and How to Move Through It
Let's be real: at some point, you will likely feel a pang of loneliness. It might be during a beautiful sunset or a delicious meal that you wish you could share. It's a normal, valid human emotion. The trick is to acknowledge it, honor it, and then have a plan to move through it.
When it hits, don't stew in it. Take action. Call a friend from home. Go to the hostel common room. Write down how you're feeling in your journal. Often, the simple act of acknowledging the emotion and taking one small, positive step is enough to dissolve it. It's just a passing cloud, not a permanent weather system.
Frequently Asked Questions (FAQ Section)
How much does a solo trip typically cost?
This varies wildly by destination and travel style. A good baseline for a mid-range solo traveler in destinations like Southern Europe or Southeast Asia is $75-$150 USD per day. This covers a private room in a quality hostel or budget hotel, a mix of restaurant meals and street food, daily activities, and local transport. A strict budget backpacker can survive on under $50, while a luxury traveler could spend thousands.
What are the best countries for a first-time solo female traveler?
For a first trip, prioritize countries known for world-class safety, excellent tourist infrastructure, and a high degree of gender equality. Top-tier destinations include Iceland, New Zealand, Finland, Japan, Portugal, Costa Rica, Singapore, and Canada. Others like Austria, Denmark, and the Netherlands are also fantastic choices. Choosing any of these will let you focus on the joy of travel, not stress.
Is it better to stay in a hotel or a hostel when traveling alone?
This is a personal choice based on your priorities. Choose a hostel if your primary goals are to meet other people and save money; they are designed to be social incubators. Choose a hotel if you deeply value privacy, quiet, and comfort; sometimes the ability to close your own door and recharge in silence is priceless.
How do you handle medical emergencies when you are by yourself?
Preparation is everything. First, you must have comprehensive travel insurance; keep digital and physical copies of your policy. Second, before you arrive, research the local emergency number (it's not always 911) and save it in your phone's contacts. Finally, carry a small "In Case of Emergency" card with your emergency contact's info, blood type, and any critical allergies, ideally translated into the local language.
Your Journey from Anxious to Adventurous Starts Now
You have the knowledge, now it's time to unlock the confidence to match. The profound freedom, deep self-reliance, and unforgettable moments of discovery that await you are more than worth navigating the initial waves of uncertainty. By embracing modern technology and adopting a mindset of prepared confidence, you systematically minimize the risks and amplify the incredible rewards.
We've compiled our most critical safety protocols into one essential resource to help you take that final step: our free Solo Female Travel Safety Guide. Download it to equip yourself with the expert strategies you need to navigate the world safely and confidently. This guide is your playbook, but the adventure itself is yours—and yours alone—to write. The world is ready for you.
Don't Miss Out! Subscribe for Exclusive Content
Subscribe


Comments 0
No comments yet
Be the first to share your experience!
Dont Miss Out! Subscribe for Exclusive Content

Ultimate USA Holidays Guide: Top Picks

FTC Affiliate Disclosure Essentials: Stay Compliant as a Travel Creator

Essential Affiliate Tools: From Tracking to Full Optimization

Booking.com Affiliate Program Review: Pros, Cons, and Earnings Potential

Decoding Affiliate Commission Rates: Benchmarks for Travel Creators

Amazon Associates for Travel: Strategies to Maximize Commissions
Is Public WiFi Safe? How to Protect Your Data Abroad
TrekGuider @trekguider
You’ve just touched down in a new country, a city buzzing with unfamiliar energy. You’re desperate to check the map to your hotel, message family that you’ve arrived safely, or book that last-minute tour. Then you see it, a digital oasis in the chaos of travel: "Free_Airport_WiFi." It feels like a lifesaver. But the moment you connect to that open network, you might as well be shouting your passwords, credit card numbers, and private messages in the middle of a crowded town square.
This isn’t a hypothetical threat; it’s a silent, digital mugging that happens every single day in airports and cafes around the globe. Every unsecured connection is a wide-open door for digital thieves who are masters at exploiting the trust of travelers. They can intercept your data, steal your identity, and drain your bank account before you’ve even claimed your luggage. This menace can cast a shadow of anxiety over your entire trip, turning a tool of convenience into a source of vulnerability.
But it doesn’t have to be this way. This guide is your solution—a simple, non-technical playbook for protecting your digital life abroad. We will demystify the dangers and provide a clear, step-by-step process for using any public network with total confidence. Mastering public wifi safety is a critical skill for the modern traveler and a key part of the masterclass in preparedness we offer in our definitive guide, The Ultimate Guide to Travel Safety: A 2026 Playbook.

The Hidden Danger: What Really Happens on Public WiFi?
The fundamental problem with most public WiFi networks—in cafes, hotels, airports, and libraries—is that they are unencrypted. Think of it like sending a postcard through the mail. Anyone who handles it along the way can read the message written on the back. When you log into your email or check your bank account on an unencrypted network, your data is sent "in the clear," making it trivially easy for a hacker on the same network to intercept and read it.
These hackers don’t need sophisticated government-level equipment. They use readily available software to "sniff" the digital airwaves, plucking your sensitive information out of the stream of data flowing around them. Their primary method for doing this is a shockingly simple and effective strategy known as a "Man-in-the-Middle" attack.
Understanding the "Man-in-the-Middle" Attack
A "Man-in-the-Middle" (MitM) attack is exactly what it sounds like. A hacker secretly positions their computer between your device (your phone or laptop) and the legitimate internet connection point (the WiFi router). You believe you’re communicating directly and securely with the websites you’re visiting, but in reality, the hacker is intercepting, reading, and potentially even altering every piece of information you send and receive.
The most common way they achieve this is through a tactic called a "malicious hotspot" or "evil twin" attack:
The Setup: A hacker sits in a busy airport or coffee shop and sets up a new WiFi network on their laptop. They give it a believable, trustworthy-sounding name, like "Airport_Guest_WiFi" or "Starbucks_Free," often mimicking the name of the legitimate network.
The Connection: Your phone, set to connect to known networks automatically, might connect to this stronger, malicious signal without you even noticing. Or, you might manually select it, assuming it’s the official network.
The Interception: The moment you connect, all of your internet traffic is routed directly through the hacker's computer. They become an invisible eavesdropper on your digital life, capturing your login credentials when you check Facebook, your credit card details when you buy something online, and the contents of your private messages.
To you, the internet works perfectly. You can browse websites and use your apps as usual. You have no idea that a digital thief is silently recording your every move.
Your Digital Bodyguard: The Ultimate Guide to Using a VPN
If an unencrypted network is like sending a postcard, then using a Virtual Private Network (VPN) is like sealing that same message inside a locked, armored briefcase before sending it. A VPN is the single most powerful and essential tool for ensuring your public wifi safety. In simple terms, a VPN is an app for your phone or computer that creates a secure, encrypted tunnel for all your internet traffic, making your data completely unreadable to anyone who tries to intercept it.
When you connect to a VPN, even if you’re on a hacker’s malicious hotspot, all they can see is a stream of indecipherable gibberish. Your passwords, bank details, and messages are completely shielded from prying eyes.
How to Set Up a VPN on Your Smartphone in 4 Simple Steps
You don’t need to be a tech expert to use a VPN. Modern VPN services are designed to be incredibly user-friendly. Here’s a simple, step-by-step guide for any non-technical traveler.
Step 1: Choose and Subscribe to a VPN Service
Before you travel, you need to sign up for a reputable, subscription-based VPN provider. Do some research by reading reviews from trusted tech websites like Wired or The Verge. Crucially, avoid "free" VPN services. These companies have to make money somehow, and they often do it by logging your online activity, selling your data to advertisers, or, in the worst cases, embedding malware in their own software. A paid subscription to a well-known provider is a small investment for ironclad security.
Step 2: Download and Install the VPN App
Once you’ve created an account on the VPN provider’s website, the next step is to get the app on your phone.
On an iPhone: Go to the App Store, search for the name of your chosen VPN (e.g., NordVPN, ExpressVPN, Surfshark), and tap "Get" to download and install it.
On an Android phone: Go to the Google Play Store, search for the name of your VPN provider, and tap "Install."
Step 3: Log In and Grant Permissions
Open the newly installed app. You’ll be prompted to log in using the email and password you created when you subscribed. The very first time you try to connect, the app will ask for permission to add a VPN configuration to your phone's settings. A standard system pop-up from iOS or Android will appear. You must tap "Allow" or "OK." This is a necessary and safe step that allows the app to manage your phone's internet connection.
Step 4: Connect to a VPN Server
This is the easiest part. Most VPN apps are designed for one-tap simplicity.
The app’s main screen will almost always feature a large "Quick Connect" or "Connect" button. Tapping this will automatically connect you to the fastest or nearest server available. For general security on public WiFi, this is all you need to do.
If you want to appear as if you are browsing from a specific country (useful for accessing home-country content), you can tap on the "Locations" or "Servers" list within the app and select a country to connect through.
Once you tap connect, the app will confirm your "Connected" status, and a small VPN icon will appear in your phone’s status bar at the very top of the screen. That’s it. Your internet connection is now fully encrypted and secure.

Pro-Tip: For travelers who work on the road, like digital nomads or content creators, a VPN isn't just a recommendation—it's an essential business tool. Consistent use is key to protecting client data and financial information. This level of professional-grade security is at the heart of the resources we provide in The Travel Creator's Toolkit.
Are You a Travel Creator or Digital Nomad?
Protecting your data is just the beginning. To thrive on the road, you need the right tools for content creation, productivity, and monetization. Our free toolkit has you covered with expert-vetted recommendations for the apps, gear, and platforms that power a successful location-independent career.
Beyond the VPN: 3 Essential Habits for Ironclad Public WiFi Safety
While a VPN is your star player, a few additional habits will complete your digital defense, creating a multi-layered security strategy that protects you from a wider range of threats.
1. Practice Impeccable Device and Password Hygiene
Your first line of defense is the device itself. Before you leave home, make sure your digital house is in order.
Secure Your Devices: Ensure all your devices—laptop, smartphone, tablet—are updated with the latest operating system and security patches. Lock every single device with a strong, complex passphrase or, even better, biometric protection like a fingerprint or facial recognition.
Manage Passwords Securely: Never store passwords in a plain text file on your device. Use a reputable, cloud-based password manager app to generate and store unique, complex passwords for every account.
Perform a Digital "Clean Up": Before you travel, clear your browser's history, cache, and saved passwords. When you return home, make it a habit to change the passwords for any critical accounts you accessed while you were away, especially banking and email.
2. Avoid "Juice Jacking": The Threat of Public USB Ports
Those convenient USB charging stations you see in airports, cafes, and hotel lobbies are a potential security risk. Hackers can modify these public ports in a practice known as "juice jacking," where the USB connection is used not only to charge your device but also to secretly install malware or steal data from it. The data pins on a USB cable can transmit information while the power pins are charging your device.
The solution is simple and non-negotiable: never plug your device directly into a public USB port. Instead, use your own AC power adapter and plug it into a standard electrical outlet, or carry a portable power bank to recharge your devices safely.

3. Beware of Digital Trojan Horses: Untrusted Accessories
This same principle applies to any untrusted digital accessory. If you find a USB drive left behind in a hotel business center or a cafe, do not plug it into your laptop out of curiosity. Criminals sometimes intentionally leave these "bait" drives in public places, loaded with malware that will auto-install the moment it's connected to a computer. Treat any found accessory as a potential threat.
Pro-Tip: Before you leave, do a digital 'pack-up.' Log out of all non-essential apps on your phone and laptop. This reduces your 'attack surface,' meaning that even if your device is compromised, the hacker has access to far less of your personal data.
Public WiFi Safety FAQs
A prepared mind anticipates questions. Here are expert answers to common concerns about staying safe online while traveling.
1. Is WiFi on a plane or in a reputable hotel safer than in a coffee shop?
Not necessarily. While a hotel network may require a password, that doesn't mean the connection itself is encrypted or secure from other guests on the same network. The rule of thumb is to treat any WiFi network you do not personally own and control as untrusted. The same risks of interception and Man-in-the-Middle attacks can apply anywhere, from a budget hostel to a five-star resort. Always use your VPN.
2. Are "Free VPNs" really that bad?
Yes. A reliable VPN service requires significant infrastructure—servers, software development, and security maintenance—which costs money. If a "free" VPN provider isn't charging you a subscription fee, they are making money from you in other ways. Many have been caught logging user activity, selling browsing data to third parties, or even injecting extra ads into your browsing. In the worst cases, the "free VPN" itself is just a front for harvesting your data. A reputable, paid VPN service is a small investment for a massive gain in privacy and security.
3. Can't I just use my phone's cellular data plan instead?
Yes, and you should when possible. Your phone's 4G or 5G cellular data connection is significantly more secure than public WiFi. However, international data roaming charges can be astronomically expensive. Learning to use public WiFi safely is a crucial skill for budget-conscious travelers who need to stay connected without breaking the bank.
Connect with Confidence
Public WiFi is not inherently evil. It is a powerful tool that has become an indispensable part of modern travel. But like any powerful tool, it demands respect and the right safety equipment. The fear and uncertainty surrounding public wifi safety stem from a lack of knowledge, not from an insurmountable threat.
You now possess that knowledge. By understanding the simple risks and adopting the straightforward solutions—led by your essential VPN—you can transform any public hotspot from a potential liability into a trusted resource. You are now equipped to connect with confidence, anywhere in the world, freeing your mind to focus on the adventure in front of you.
This level of digital preparedness is just one part of a truly seamless travel experience. To master every aspect of your journey, from planning and packing to health and logistics, our all-encompassing Travel Guide is the only resource you'll ever need.
Don't Miss Out! Subscribe for Exclusive Content
SubscribeComments 0
No comments yet
Be the first to share your experience!
Dont Miss Out! Subscribe for Exclusive Content

How to Avoid Travel Scams: A Global Guide

A Woman's Guide to Safe Travel: 10 Critical Tips

7 Hotel Safety & Security Tips for Peace of Mind

9 Beach Safety Tips That Could Save Your Life

How to Stay Safe While Hiking: A Hiker's Safety Guide

7 Travel Insurance Red Flags to Spot Before You Buy
Ultra Festival: Beat the Heat Guide
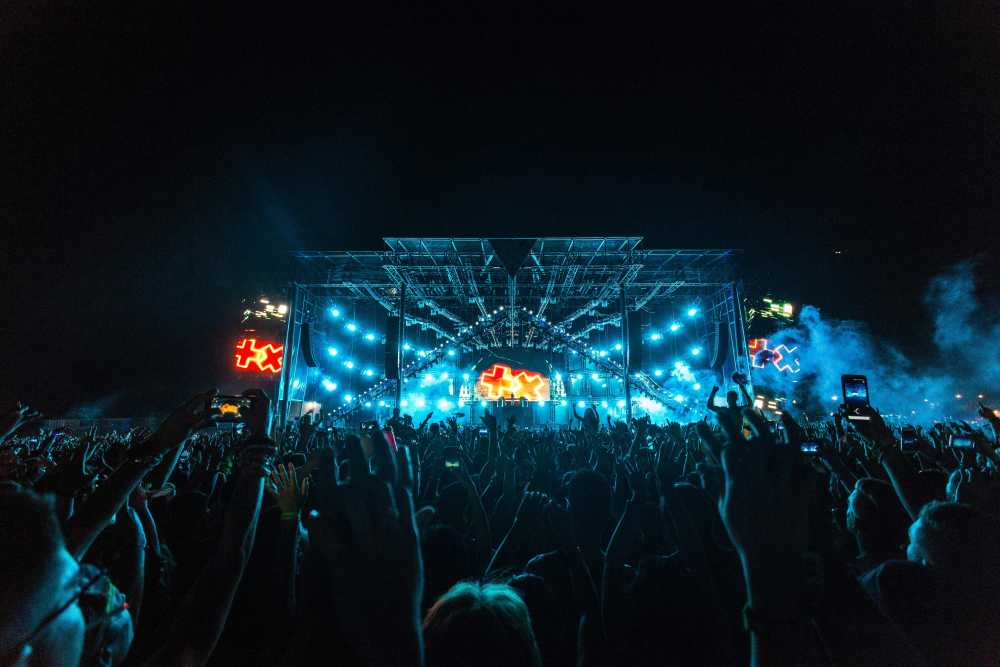
TrekGuider @trekguider
You’ve done it. You scored the golden ticket to Ultra Music Festival, a three-day sonic pilgrimage in the heart of Miami where the world’s greatest DJs command colossal stages and the energy is nothing short of electric. But as the bass drops, so does the relentless Florida sun. The real problem isn't just the heat; it's the brutal combination of scorching temperatures, suffocating humidity, and tens of thousands of dancing bodies that can quickly turn your dream festival into a dehydrated, sun-stroked nightmare.
Imagine the agony of missing Skrillex’s closing set because you’re dizzy and nauseous, huddled in a medical tent. Picture the sheer frustration of tapping out before sunset on day one, your energy completely drained, while your friends rave on into the night. This isn't a scare tactic; it's a common reality for unprepared attendees who fatally underestimate the physical toll of partying under the Miami sun for three straight days. The line between an unforgettable weekend and a miserable, potentially dangerous one is drawn by a single thing: a bulletproof strategy.
This is that strategy. Forget the generic "drink water" advice you’ve heard a thousand times. This is your new bible for not just surviving, but truly conquering the heat at Ultra. We’re providing a pro-level, comprehensive blueprint covering everything from tactical gear selection and advanced hydration science to strategic stage navigation and leveraging festival tech for your safety. Follow these steps, and you won't just beat the heat—you'll own the entire experience, from the opening beat on Friday to the final fireworks on Sunday.
Understanding the Ultra Music Festival Environment: Sun, Crowds, and Sound
Before you can build a plan, you must understand the battlefield. Ultra Music Festival unfolds in late March at Bayfront Park, a beautiful but notoriously exposed venue. For 2026, the festival runs from March 28-30 (and for you long-term planners, March 27-29 in 2026), a time when Miami’s weather is deceptively intense. While the festival is at the heart of the city's vibrant event calendar—a scene we detail in our complete guide to Miami Holidays: 8 Beach Fest Vibes—its unique environment presents a specific set of challenges you must be prepared for.
The festival operates on a strict "rain or shine" policy, meaning you need to be ready for anything. The schedule itself is a marathon, not a sprint:
Friday, March 28: 4:00 PM – 12:00 AM
Saturday, March 29: 12:00 PM – 12:00 AM
Sunday, March 30: 12:00 PM – 10:00 PM
Notice that Saturday and Sunday demand ten to twelve hours of exposure. The primary obstacles you will face are:
Intense Solar Radiation: The Florida sun is powerful. Without adequate shade, direct exposure can lead to severe sunburn and rapidly increase your core body temperature.
Oppressive Humidity: Miami's humidity cripples your body's natural cooling system. It prevents sweat from evaporating effectively, making 85°F feel like a suffocating 95°F.
Massive Crowds: Dense crowds trap body heat, creating microclimates that are significantly hotter than the ambient air. Navigating these human seas requires immense physical energy.
Constant Movement: You’ll be walking, standing, and dancing for hours on end, burning calories and losing fluids at a dangerously accelerated rate.
The first and most critical mindset shift is to treat Ultra like an athletic event. Your preparation starts long before you ever step foot in Bayfront Park.

Pre-Festival Prep: Your Foundation for Success
Victory is won in the preparation. What you do in the days leading up to the festival and what you pack in your bag will absolutely dictate your endurance and enjoyment.
The Ultimate Packing List: Beyond the Basics
Your packing list is your first line of defense. Every single item should serve a purpose, primarily focused on cooling, hydration, and comfort.
Clothing (The Three B’s: Breathable, Bright, and Barely-There):
Fabrics: Choose lightweight, moisture-wicking materials like polyester, nylon, or bamboo blends. These technical fabrics pull sweat away from your skin, allowing it to evaporate and cool you down. Avoid cotton at all costs; it absorbs moisture, becoming a heavy, suffocating trap for heat.
Colors: Opt for light-colored clothing. White, beige, and pastels reflect sunlight rather than absorbing it like dark colors do.
Fit: Loose-fitting garments are your best friend. They allow for crucial airflow against your skin, preventing heat from getting trapped.
Footwear (Your Most Important Gear): You will be on your feet for 30+ hours over the weekend. Comfortable, well-worn sneakers are non-negotiable. Do not, under any circumstances, wear brand-new shoes, flimsy sandals, or heavy boots. Running or athletic shoes with proven arch support are ideal.
Hydration Hardware:
Hydration Pack: This is the single most important piece of gear you can bring. A CamelBak or a similar backpack with a water bladder allows you to carry 2-3 liters of water and sip continuously without fumbling with a bottle. Ensure it complies with the latest festival size and pocket regulations before you go.
Electrolyte Packets: Pack single-serving powders or tablets (like Liquid I.V., Nuun, or Pedialyte packets). They are small, light, and absolutely essential for true hydration.
Sun & Heat Protection Arsenal:
Sweatproof Sunscreen: A broad-spectrum, water-resistant sunscreen with an SPF of 50 or higher is mandatory. Apply it generously 30 minutes before you enter and reapply every two hours, no exceptions.
Wide-Brimmed Hat: A bucket hat or other wide-brimmed hat provides a portable oasis of shade for your face, neck, and ears, significantly reducing your perceived temperature.
UV-Protective Sunglasses: Protect your eyes from the relentless glare and long-term sun damage.
Cooling Towel: These hyper-evaporative towels, when soaked in water, provide incredible cooling relief when worn around your neck.
Handheld Fan/Mister: A small, battery-operated fan can be a godsend in a stagnant, dense crowd, creating a personal breeze when you need it most.
Physical Conditioning: Don't Underestimate the Marathon
You wouldn't run a 10k without training, and you shouldn't tackle Ultra without some physical prep.
Pre-Hydrate Aggressively: Begin increasing your water intake 2-3 days before the festival. Your goal is to start Day 1 with your body in a state of optimal hydration, not playing a desperate game of catch-up.
Build Endurance: In the weeks leading up, incorporate some light cardio into your routine. Even 30 minutes of brisk walking or jogging a few times a week will dramatically improve your stamina.
Prioritize Sleep: Get a full 8 hours of sleep each night in the week before the festival. A sleep deficit severely impairs your body's ability to regulate temperature and recover.
Just as detailed planning is key for a scenic road trip, like the one we map out in our Big Sur Map & Itinerary, careful preparation is essential for a massive festival. Don't leave your experience to chance.
Mastering Hydration: The Core of Your Ultra Music Festival Strategy
This is the most critical section of this guide. Proper hydration at Ultra is a science. Simply drinking water when you feel thirsty is a recipe for disaster; by the time you feel thirst, you are already significantly dehydrated.

Water Isn't Enough: The Critical Role of Electrolytes
When you sweat, you don't just lose water; you lose vital minerals called electrolytes—primarily sodium, potassium, and magnesium. These minerals are the spark plugs of your body, responsible for regulating nerve and muscle function, hydrating your cells, and balancing blood pressure. Replenishing them is just as important as replenishing water.
Why It Matters: Drinking excessive amounts of plain water without replacing electrolytes can lead to a dangerous condition called hyponatremia, where the sodium levels in your blood become dangerously diluted. Symptoms can mimic dehydration (nausea, headache, confusion) but can be far more severe.
Your Game Plan: For every two refills of your hydration pack with plain water, make the third refill an electrolyte mix. This simple rule ensures you are constantly replenishing what you're sweating out. Avoid relying on sugary energy drinks or sodas for hydration; they can often make dehydration worse.
Your Hydration Schedule: A Sip-by-Sip Plan
Discipline is everything. You need a proactive hydration schedule, not a reactive one.
The Morning Load-Up: Drink at least 16-20 ounces (about half a liter) of water with an electrolyte packet before you even leave for the festival.
The Immediate Refill: The very first thing you do upon entering Bayfront Park is locate a water station and fill your hydration pack to its maximum capacity.
The 15-Minute Rule: Take a few big sips of water from your pack every 15 minutes. Set a recurring alarm on your phone or watch if you have to. Do not wait until you feel thirsty.
The Proactive Refill: Never wait until your pack is empty to refill it. When it's about one-third full, make your way to a water station. The lines are shortest during non-peak times (e.g., during a headliner's set when everyone is at one stage, or early in the day).
The End-of-Night Recovery: Drink another 16-20 ounces of electrolyte-infused water before you go to sleep. This will supercharge your body's recovery overnight and prepare you for the next day.
Pro-Tip: As soon as you get inside, open the festival map on the official app and screenshot the locations of all free water refill stations. The stations located near smaller stages or along the perimeter of the park often have significantly shorter lines than the ones near the main stage.
Strategic Navigation and Lineup Planning
How you move through the festival and plan your day is just as important as what you pack. Wasting energy is a luxury you simply cannot afford.

Decoding the Festival Map for Heat Evasion
The festival grounds are a maze of stages, vendors, and people. Use the map to your real advantage.
Identify Cool Zones: Before you even start thinking about artists, scan the map for any designated shade structures, indoor stages (like the iconic Megastructure), or air-conditioned brand activations. These are your recovery oases.
Plan Efficient Routes: When moving from the Main Stage to the Resistance stage, don't just try to cut through the thickest part of the crowd. Use the perimeter walkways. It might be a slightly longer distance, but it will be faster and require far less energy than pushing through a human traffic jam.
Building a Smart Schedule: Pacing is Everything
With a 2026 lineup featuring titans like John Summit & Dom Dolla, Armin van Buuren, Tiësto, Chase & Status, and Deadmau5, the temptation is to sprint from stage to stage. This is a rookie mistake that will burn you out by 9 PM on Friday.
Prioritize Ruthlessly: Accept that you cannot see every artist. Pick your top 3-4 "can't-miss" sets for each day and build your schedule around them as anchors.
Schedule Deliberate Downtime: The hottest part of the day is typically between 2 PM and 5 PM. This is the perfect time to schedule a tactical break. Find a shady spot, sit down, focus on hydrating, and eat a proper meal. This planned rest will give you the energy you need for the headlining acts at night.
Embrace Discovery: Use the time between your must-see sets to explore smaller stages. They are often less crowded, providing more space to dance, breathe, and discover your new favorite artist.
Pro-Tip: When moving through a dense crowd to get closer to a stage, conserve energy by following directly behind a larger, determined person or group. Let them carve a path for you. It's a simple "drafting" trick that saves a surprising amount of physical effort.
Leveraging Technology and Safety Resources at Ultra Music Festival
In the modern festival era, your phone is an essential survival tool. Ultra has integrated technology to enhance attendee safety, and you should take full advantage of every resource.
Your Phone is Your Lifeline
The Official Ultra App: Download it well in advance. It contains the most up-to-date festival map, set times, and, most importantly, will send push notifications for any emergency alerts or important announcements.
The SaferWatch App: Ultra has partnered with the SaferWatch app, which allows you to report any safety or security concerns (medical emergencies, suspicious activity) directly and anonymously to festival staff in real-time. Have it downloaded and set up before you arrive.
Portable Charger: Your phone is useless with a dead battery. A fully charged portable power bank is not optional; it's mandatory.
Knowing Where to Go for Help
Even with perfect preparation, things can go wrong. Knowing how to recognize a problem and where to get help is crucial.
Locate Medical Tents: Just like the water stations, the first thing you should do is identify the location of all medical tents on your map. They are staffed with professionals who are there to help you, no questions asked. There is no shame in seeking help.
Recognize the Signs of Heat Exhaustion: Be aware of these symptoms in yourself and your friends:
Heavy sweating
Dizziness or lightheadedness
Nausea or vomiting
A throbbing headache
Cool, pale, clammy skin
If you or a friend experience these, get to a medical tent immediately. Do not try to "tough it out."
Be a Good Raver: The Ultra community is known for looking out for one another. If you see someone who looks unwell or is in distress, ask if they need help and guide them toward a medical tent or alert festival staff.

You're Ready to Conquer Ultra
The roar of the crowd, the earth-shaking bass, the Miami skyline lit up against the night sky—these are the moments that define the Ultra Music Festival experience. By approaching the weekend with the mindset of an endurance athlete, you are no longer at the mercy of the elements. You are in control. Preparation is your armor, hydration is your fuel, and a smart strategy is your map to victory. You now have the expert knowledge to stay cool, energized, and safe from the first set to the final encore.
You are now equipped to handle the heat, navigate the crowds, and fully immerse yourself in the magic of one of the world's greatest music festivals. This level of detailed planning is what transforms a good trip into an unforgettable one. For comprehensive strategies on navigating destinations and events worldwide, our master Travel Guide is the ultimate resource for the serious traveler. Now go, stay hydrated, and have the time of your life.
Don't Miss Out! Subscribe for Exclusive Content
SubscribeComments 0
No comments yet
Be the first to share your experience!
Dont Miss Out! Subscribe for Exclusive Content

San Francisco Cherry Blossoms: A Local's Guide to the Blooms

Halloween SF: Haunts Without Horrors

SF Festivals: 7 Must-See Lineups

Christmas SF: Lights & Wharf Wonders

SF Pride: 6 Route & Party Hacks
