Christmas Miami: Tropical Lights Tour
TrekGuider @trekguider
You’re dreaming of a classic Christmas—the kind with roaring fires, frosty windowpanes, and the scent of pine in the air. But you look outside, and the reality is 80 degrees, sun-drenched, with palm trees swaying in a gentle sea breeze. You crave that magical, festive spirit, but it’s hard to find when you’re swapping snow boots for sandals.
This disconnect can be jarring. The calendar says December, the stores are playing carols, but the subtropical warmth makes it feel like just another beautiful day in paradise. A nagging worry creeps in: will you miss out on the cozy, twinkling magic of the season? Will your holiday lack the festive punch you look forward to all year? How can you possibly capture the enchantment of Christmas in a place where snowflakes are replaced by sea spray?
The secret is to stop trying to replicate a winter wonderland and instead embrace the vibrant, utterly unique spectacle of a tropical holiday. Consider this your expert-led mission to unlock that magic. We’re going beyond the obvious to build your definitive tour of the dazzling tropical light displays and waterfront events that make a Christmas in Miami truly unforgettable. Forget the sleigh—here, we celebrate with glittering yachts and glowing shorelines. We’ll show you where to find enchanted parks and floating festivals of light, proving that a Miami Christmas doesn’t just rival the traditional version; it offers a brand of high-wattage magic all its own.

The Magic of Contrast: Why a Miami Christmas Shines Brighter
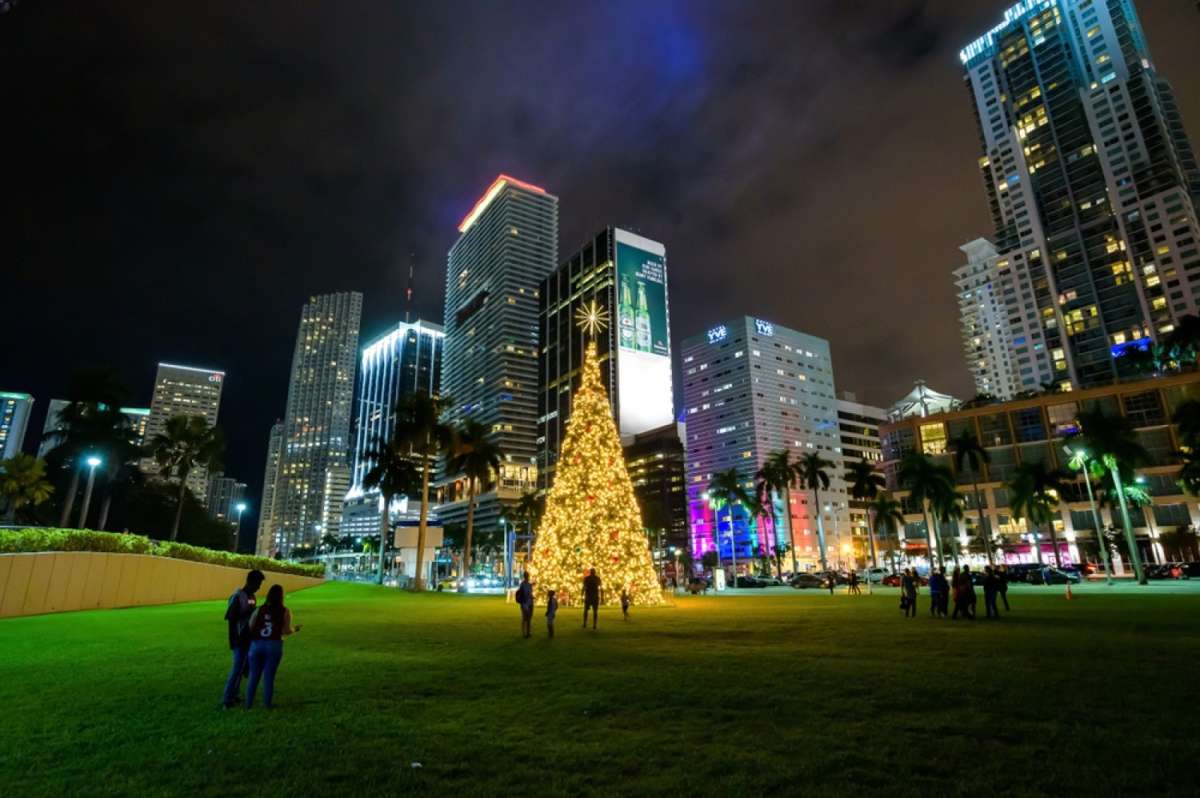
A Christmas in the Magic City is an exercise in brilliant contrasts. It’s where classic holiday traditions get a sun-kissed, subtropical makeover. Instead of pines and firs heavy with snow, you’ll find majestic Royal Palms wrapped from trunk to frond in thousands of shimmering lights, their silhouettes glowing against the warm twilight sky. The crisp, cold air of a northern winter is replaced by gentle, salty breezes carrying the faint sound of distant salsa music mixed with familiar holiday carols.
This fusion of high-energy festivity and laid-back beach culture creates an atmosphere you simply won’t find anywhere else. While our complete guide to Miami Holidays: 8 Beach Fest Vibes gives you the 30,000-foot view of the season, this deep dive is dedicated to the glittering, electric heart of a Miami Christmas: the lights. The city’s profound connection to the water is central to its identity, and this is never more apparent than during the holidays. The reflection of a million tiny lights dancing on the calm surface of Biscayne Bay is a sight that rivals any snow-covered landscape—a holiday experience that is both deeply festive and unapologetically Miami.
The Crown Jewel of a Christmas in Miami: The Holiday Boat Parades
While other cities have their tree-lighting ceremonies, Miami’s signature holiday tradition takes to the water. The holiday boat parades are the quintessential Christmas in Miami event, a dazzling display of nautical creativity and festive spirit that perfectly captures the city's coastal soul. Forget static neighborhood displays; this is a moving festival of light, a dynamic spectacle that draws thousands to the shores of Biscayne Bay.
What to Expect: A Floating Festival of Lights
Imagine a procession of vessels, from 100-foot luxury yachts and powerful sport-fishers to charming sailboats and even humble dinghies, all transformed into glowing works of art. Each boat is carefully decorated in thousands of colorful lights, often arranged into elaborate and animated designs. You’ll see everything from tropical Santas lounging on flamingo-drawn sleighs to shimmering nativity scenes and synchronized light shows pulsing to holiday music. Many participants add onboard carolers and costumed characters who wave to the cheering crowds, turning the parade into an interactive performance.

The atmosphere is electric and communal. Families and friends gather along the waterfront hours in advance, laying out blankets and setting up picnics as they wait for the show to begin. The air fills with palpable excitement as the first glowing vessel rounds the bend, its lights casting a long, shimmering trail on the dark water.
Pro-Level Viewing Guide: Where to Secure the Best Views
A good vantage point is the difference between a fleeting glimpse and a front-row seat to the magic. Since the parade routes typically traverse Biscayne Bay, any public space with an unobstructed view of the water is a prime candidate.

Bayfront Park: As the city's epicenter for major events, Bayfront Park is the most popular and accessible choice. Its sprawling lawns and waterfront promenades offer ample room, but they fill up fast. Arrive by late afternoon to claim a spot near the water's edge.
Venetian Causeway: For a slightly less congested experience, the sidewalks along the Venetian Causeway offer excellent, slightly elevated views of the parade as it moves through the central part of the bay.
Restaurant Patios: Many waterfront restaurants in Downtown, Brickell, and Miami Beach offer fantastic (and comfortable) viewing spots. This requires planning and reservations weeks in advance, but it allows you to enjoy a festive meal with a world-class show.
Key Biscayne: The parks and beaches on the western side of Key Biscayne that face the bay, such as Hobie Island Beach Park, provide a more relaxed and family-friendly atmosphere away from the downtown hustle.
Pro-Tip: Treat it like a beach day. Arrive at your chosen spot at least 90 minutes before the parade's scheduled start. Pack a cooler with drinks and snacks, bring blankets or foldable chairs for comfort, and download a local radio app—some stations broadcast parade commentary and synchronized music.
Land-Based Spectacles: Immersive Worlds of Light
While the boat parades are a must-see, Miami’s land-based light displays offer weeks of festive enchantment. These attractions provide a more immersive experience, allowing you to walk through glowing landscapes and enjoy a full evening of holiday activities.
Christmas Wonderland at Tropical Park: A Festive Theme Park
For a one-stop holiday destination that caters to all ages, Christmas Wonderland at Tropical Park is an institution. This sprawling event transforms a beloved local park into a high-energy festive theme park. It’s an ideal outing for families, packed with everything from thrilling rides to gentle carousels, all set against a backdrop of millions of spectacular lights.
The park is designed as a walk-through experience with different themed areas. You can wander through illuminated tunnels synchronized to music, marvel at towering light sculptures of holiday characters, and take photos at countless Instagram-worthy spots. Beyond the lights and rides, Christmas Wonderland features live entertainment, holiday-themed food and drinks (think churros and hot cocoa), and artisan markets perfect for last-minute gift shopping.
The Enchanted Walk: Neighborhoods That Go All Out
One of the simple joys of Christmas in Miami is discovering the festive spirit in its residential neighborhoods. While Miami may not have a single, world-famous district for lights like Brooklyn's Dyker Heights, many of its affluent, waterfront communities embrace the season with gusto.
Take a slow evening drive through the neighborhoods along the Venetian Islands, Key Biscayne, or the Gables-by-the-Sea in Coral Gables. Here, you’ll see magnificent homes and gardens adorned with professional-grade light displays. The true Miami touch is seeing not just the houses, but also the towering palm trees, ancient banyan trees, and private docks lit up in festive colors, their lights reflecting beautifully in the canals and waterways.
Capturing the Glow: Photography Tips for Tropical Lights
Photographing holiday lights, especially moving ones on water, can be tricky. Here’s how to get shots worthy of the spectacle.
Use Night Mode: Modern smartphone cameras have incredible night mode capabilities. Use them. This feature keeps the shutter open longer to capture more light, resulting in brighter, clearer photos without harsh flash.
Find Stability: To avoid blurry shots, especially with longer exposures, brace your phone or camera against a solid object like a railing, a post, or a tripod.
Tap to Focus: Don't just point and shoot. Tap on the brightest part of the light display on your screen. This tells the camera where to focus and properly expose the shot, preventing the lights from becoming blown-out white blobs.
Capture Reflections: Miami's biggest advantage is water. Angle your shots to include the reflections of the lights on the bay or canals. This adds depth, color, and a sense of place to your photos.
Planning Your Tropical Lights Tour: A Step-by-Step Guide
A little strategic planning will elevate your lights tour from a casual outing to a seamless and memorable adventure.
Step 1: Choose Your Experience (Event vs. Exploration)
First, decide on your preferred vibe.
The Boat Parade: This is a high-energy, single-night event. It’s perfect if you love the excitement of a big crowd and a one-of-a-kind spectacle. The trade-off is that it’s a fixed date and can be very crowded.
Land-Based Displays: Attractions like Christmas Wonderland or self-guided neighborhood tours offer far more flexibility. They typically run for several weeks, allowing you to choose a less-crowded weeknight for your visit. This is often the better choice for families with young children.
Step 2: Lock In Your Itinerary
Once you’ve chosen your focus, confirm the details. For official events, check their websites for exact dates, times, and ticket information. Boat parades are weather-dependent, so always check social media channels on the day of the event for any last-minute changes. For a self-guided tour, map out a route in advance to maximize your viewing time.
Step 3: Pack for a Miami "Winter" Night
Packing for a Miami holiday can be deceptive. While days are warm, evenings on the water can get surprisingly cool and breezy. A light jacket, sweater, or pashmina is essential. Comfortable walking shoes are non-negotiable. If you're visiting from abroad and juggling different climates, our International Travel Checklist is an indispensable tool. It’s designed to help you remember everything from travel insurance to the perfect light layer for a breezy bayfront evening.
Step 4: Master Transportation and Logistics
Parking near major holiday attractions in Miami ranges from difficult to impossible.
Rideshares: Services like Uber and Lyft are your best friends. They eliminate the stress of finding and paying for parking.
Public Transit: For events centered around Bayfront Park, leave the car behind. Miami’s elevated Metromover is a free and surprisingly scenic way to get downtown, connecting directly to major Metrorail stations and parking garages further afield.
Book Parking: If you must drive, use an app like SpotHero to reserve a parking spot in a garage in advance. This is a pro move that can save you an hour of circling packed streets.
Pro-Tip: For ticketed light displays like Christmas Wonderland, always visit on a Tuesday or Wednesday evening if possible. Crowds are significantly smaller, traffic is lighter, and you’ll have a much more relaxed and enjoyable experience.
Beyond the Lights: Crafting Your Complete Holiday Itinerary
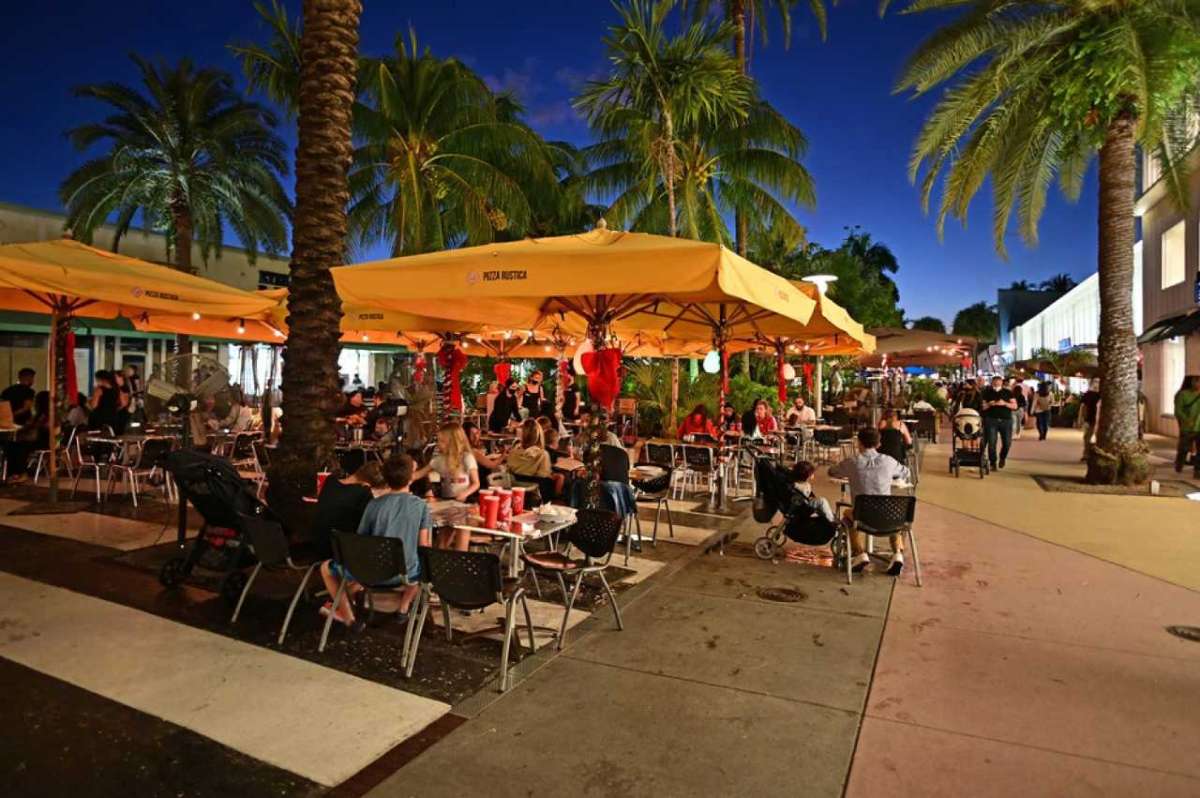
Your tropical lights tour is the perfect centerpiece for a festive Miami getaway, but it’s just the beginning. To build a truly immersive holiday experience, weave in some of the city’s other seasonal offerings. Pair an evening of light-viewing with a festive dinner at a restaurant in Brickell or Coconut Grove. Explore the luxury shops at the Design District or Bal Harbour, which feature stunning, museum-worthy holiday window displays.
A perfect lights tour is just one piece of an unforgettable holiday vacation. To build a complete itinerary—from finding the best seasonal Cuban coffee to planning day trips—our comprehensive Travel Guide provides the expert, local insights you need to experience the magic of a Christmas in Miami like a seasoned traveler. It’s your ultimate resource for crafting a holiday that is perfectly tailored to you.
Your Blueprint for a Brilliant Miami Christmas
You don’t need snow or a roaring fireplace to have a spectacular and magical holiday. A Christmas in Miami offers a vibrant, sun-kissed alternative, trading frosty landscapes for the dazzling reflection of a million lights on the water. From the unforgettable spectacle of a holiday boat parade on Biscayne Bay to the family-friendly enchantment of a park transformed into a winterless wonderland, the city is alive with a unique and powerful festive spirit.
You now have the ultimate blueprint to design your own tropical lights tour. You know the signature events to see, the best places to watch them from, and the pro-level tips to make your experience seamless and joyful. You are empowered to create holiday memories that are as warm, bright, and full of life as the city itself. So grab your sunglasses and a Santa hat, and get ready to experience a Christmas that shines brighter than any star on a frosty night.
Don't Miss Out! Subscribe for Exclusive Content
Subscribe


Comments 0
No comments yet
Be the first to share your experience!
Dont Miss Out! Subscribe for Exclusive Content

San Francisco Cherry Blossoms: A Local's Guide to the Blooms

Halloween SF: Haunts Without Horrors

SF Festivals: 7 Must-See Lineups

Christmas SF: Lights & Wharf Wonders

SF Pride: 6 Route & Party Hacks

Chinese New Year SF: Parade Essentials
50+ Travel Blog Name Ideas (And How to Choose)
TrekGuider @trekguider
You feel it in your bones—the burning desire to turn your travel adventures into something more. You're ready to build a brand, share your stories, and launch the travel blog you've been dreaming of. But you’re stuck. You’re staring at a blank screen, trapped by the single most paralyzing question every creator faces: What do I call it?
The pressure to find the perfect name is immense. Every brilliant idea you have feels either too generic, too cheesy, or, most frustratingly, already taken. You worry about choosing a name you’ll outgrow or one that fails to capture the essence of your vision, and this single decision is holding you back from ever hitting "publish."
Forget the endless, frustrating brainstorming sessions. This guide is your definitive branding workshop. We’re not just going to give you a list of generic travel blog name ideas; we’re going to equip you with a proven, step-by-step framework for brainstorming, vetting, and choosing a powerful, memorable, and—most importantly—available brand name. Consider this the final resource you’ll need to overcome the naming hurdle and finally launch your travel media business.

Why Your Blog’s Name is a Critical Business Decision
In the competitive world of travel content, your blog's name is far more than just a URL; it’s the foundation of your entire brand. It’s the first impression you make on a potential reader, a signal of your niche, and a promise of the value you provide. The right name can convey authority, personality, and trustworthiness in a split second.
As the digital world becomes more crowded, a unique and memorable name is a key differentiator that helps you stand out and build a loyal community. Choosing the right name is the very first step in joining the ranks of The Best Travel Blogs to Follow in 2026, transforming your passion from a simple hobby into a legitimate media brand. It sets the tone for your content, guides your visual identity, and becomes the anchor for the entire business you are about to build.
The 5-Step Framework for Choosing the Perfect Travel Blog Name
Treat this framework as your strategic playbook. By following these five steps systematically, you’ll move from a state of overwhelming uncertainty to one of confident clarity, ensuring you select a name that is not only creative but also commercially viable.

Step 1: The Foundation — Brainstorm Core Keywords
Before you can think of a single name, you must first define what your brand is about. This initial step is all about creating a "word bank" of concepts that are central to your blog. Don’t self-censor here; just write.
Create lists of words associated with these four categories:
Your Niche: Are you focused on luxury, budget, adventure, family, food, or solo travel? List every related term. For example, a family adventure blog might list: family, kids, teens, journey, trek, quest, wild, explore, outdoors.
Your Target Audience: Who are you writing for? Digital nomads, parents, retirees, college students? List words that describe them or resonate with them. For example: nomad, creator, parent, wanderer, seeker, adventurer.
Your Tone & Voice: What feeling do you want to evoke? Is your brand inspiring, funny, practical, sophisticated, or rugged? List adjectives. For example: witty, curious, bold, serene, classic, heirloom, luxe.
Travel & Exploration Verbs/Nouns: List general travel-related words that you like the sound of. For example: atlas, compass, globe, passport, voyage, roam, wander, seek, journey, passage, trail.
At the end of this exercise, you’ll have a rich palette of keywords to work with in the next steps.
Step 2: The Spark — Apply Proven Naming Formulas
Now, take the keywords from your word bank and start combining them using these common, effective naming formulas. This is where the magic happens.
The Alliteration Formula (Same Letter): This technique makes names catchy and memorable.
Examples: Roaming Roads, Compass Chronicles, Summit Stories.
The Portmanteau Formula (Blend Words): Combine two words to create a new, unique one.
Examples: Foodventure (Food + Adventure), Staycationist (Stay + Vacation), Technomad (Tech + Nomad).
The "Your Name" Formula (Personal Brand): Using your own name builds a personal connection and positions you as the expert.
Examples: Adventurous Kate, Nomadic Matt, Travels with Taylor.
The "Adjective + Noun" Formula (Descriptive): This is a classic, straightforward approach.
Examples: The Wandering Wagars, The Broke Backpacker, The Travel Bite.
Experiment by mixing and matching words from your Step 1 list into these formulas. Generate a long list of 20-30 potential names without judgment.
Step 3: The Inspiration — Use Blog Name Generators (Wisely)
Online blog name generators can be helpful, but they should be used for inspiration, not as a final answer. Input your top keywords from Step 1 into a few of these tools. Most of the suggestions will be generic or unusable, but occasionally, a generator can spark a new idea or a creative word combination you hadn't considered. Add any interesting options to your long list.
Pro-Tip: Think five or ten years into the future. Will the name you choose still fit if your travel style evolves? A name like "Backpacking a Twenty-Something" might feel perfect now, but it has a built-in expiration date. Aim for a name that allows your brand to grow with you.

Step 4: The Reality Check — Verify Availability
This is the most critical and often most disheartening step, but it’s non-negotiable. You must thoroughly check if your favorite names are available.
Check the Domain: Your primary goal is to secure a .com domain. Our market analysis consistently shows that a professional, easy-to-navigate website is a direct signal of brand investment. A .com domain is at the heart of that perception, inspiring a level of trust that other extensions simply don't. Use a domain registrar like Namecheap or GoDaddy to see if YourBlogName.com is available. If it’s taken, you should strongly consider moving on to the next name on your list.
Check Social Media Handles: Once you find an available .com, immediately check if the name is available as a consistent handle across your target social media platforms (e.g., Instagram, TikTok, Pinterest, YouTube). Having @YourBlogName everywhere is crucial for brand consistency.
If your top name passes both checks, put it on your shortlist. If not, cross it off and move on. Do not get emotionally attached to a name you can't own outright.
Step 5: The Final Hurdle — Conduct a Conflict Check
Before you purchase the domain, perform one last check to avoid future headaches.
Google It: Do a simple Google search for your chosen name. Is another brand, especially in a related industry, already using it? Even if the .com is available, you don’t want to compete with an established brand for name recognition.
Check Trademarks: For extra diligence, perform a basic search on the U.S. Patent and Trademark Office (USPTO) database. This can help you avoid obvious trademark conflicts down the road.
The name that makes it through all five steps is your winner.
Ready to Build Your Brand?
Choosing a name is the first step. Building a successful travel blog requires a full suite of tools for content creation, SEO, and monetization. Get a head start with our comprehensive, expert-curated toolkit.
The Travel Creator's Toolkit
75+ Travel Blog Name Ideas to Spark Your Creativity
To help you with Step 1 and 2, here is a categorized list of over 75 travel blog name ideas. Use these as a starting point to fuel your own unique combinations.

Puns & Wordplay
In Tents Exploration
The Globe Trotters
Suitcase Stories
Miles and Smiles
Pretty Plane Sailing
Frequent Flier Finds
Life is a Trip
Home is Where the Bag is
Have Luggage, Will Travel
Check-In & Check-Out
Alliteration & Rhyme
Roaming Roads
Compass Chronicles
Voyage Vision
Summit Stories
Passage Planner
Wayward Wanderings
The Travel Tribe
Seeker’s Saga
Trekking Threads
The Global Guide
Niche-Specific Names
Family: The Family Fold, Park Pack, Teen Travel Tribe, Little Luggage Life, The Wandering Weans
Solo: Solo Sphere, One Woman’s World, The Independent Itinerary, Just Me Journeys, The Singular Seeker
Luxury: The Gilded Getaway, First Class Compass, The Curated Journey, Velvet Atlas, Heritage & Hideaways
Budget: The Frugal Flier, Penny-Wise Passage, The Backpacker's Billfold, Thrifty Trails, The Value Voyager
Adventure: Adventure Atlas, Summit & Scale, The Adrenaline Almanac, Off-Grid Odyssey, The Wild Wayfarer
Action-Oriented & Evocative
Chase the Horizon
Seek the Summit
Beyond the Map
Find Your Path
Cross the Meridian
The Saffron Trail
Saltwater Soul
Alpenglow Atlas
Terra Incognita
The Far-Flung
Modern & Simple
The Travel Edit
Wayward Co.
Compass Collective
The Getaway Guide
Trip Theory
Atlas & Anchor
Itinerary & Ink
The Local Lens
Foreign & Familiar
The Departure Desk
Food Travel
Feast Finder
Culinary Compass
The Hungry Horizon
Fork & Globe
Spice Routes
The Traveling Table
Street Food Stories
Plates & Passports
The Foodie Flight
Cravings & Capitals
Photography Travel
The Shutter Sphere
Aperture Abroad
Focus Finder
The Framing Fellow
Light & Landmark
Pixel Passport
The Wandering Lens
ISO Elsewhere
The Photo Trekker
Viewfinder Voyages

Frequently Asked Questions About Naming Your Blog
Should my blog name include my destination niche (e.g., "Awesome Italy")?
It can be a powerful strategy for building authority quickly. It tells readers and search engines exactly what you're about. However, it can be limiting if you decide to travel elsewhere. If you're certain you'll focus on one area for years, go for it. If you think you might expand, a broader name offers more long-term flexibility.
What if the .com for my name is taken, but .net or .co is free?
We strongly advise against it. As mentioned, the .com extension is the gold standard; it conveys professionalism and trust. Other extensions can appear less credible and are harder for people to remember. Your audience will instinctively type .com, and you don’t want to send your hard-earned traffic to another website. It’s better to find a new name with an available .com.
Is it a bad idea to use my own name for my travel blog?
Not at all! Using your own name is an excellent way to build a personal brand, positioning yourself as the face of your business. Industry leaders like Nomadic Matt and Adventurous Kate have done this with massive success. The only downside is a potential lack of privacy, so be sure you're comfortable with putting your name out there publicly.
How important is having a keyword in my blog name for SEO?
It's less important than it used to be. Today, search engines prioritize the quality of your content over having an exact-match keyword in your domain. Focus on choosing a name that is memorable, unique, and brandable. A strong brand name is far more valuable for long-term SEO than a clunky, keyword-stuffed domain.
The Final Step: From Name to Brand
Once you’ve successfully navigated the framework and chosen your perfect name, act immediately. The internet moves fast, and you don’t want someone else to grab your idea.

Pro-Tip: As soon as you decide on a name that is available, purchase the .com domain and claim the social media handles on all relevant platforms. Do this immediately, even before you have a website built. Owning these assets is the first real step in making your brand a reality.
With your name secured, you’re no longer just dreaming; you’re building. The next step is to create a platform where you can share your expertise and begin monetizing your content. While traditional methods like advertising exist, the most profitable and sustainable path is to sell your own unique digital products—like itineraries, guides, or workshops. This is where you transition from being a content creator to a media entrepreneur. The TrekGuider Platform is the ultimate ecosystem designed for creators like you, providing the tools and marketplace to sell your digital products and build a thriving business from day one.
Your Journey Starts Now
Choosing a name for your travel blog can feel like an insurmountable obstacle, but it doesn’t have to be. By shifting your mindset from searching for a "cool name" to executing a strategic branding process, you can move forward with confidence and clarity. You now have a repeatable framework and a wealth of travel blog name ideas to break through the creative block that has been holding you back.
The perfect name is a strategic blend of personal expression and practical verification. You are equipped with the knowledge to find it. You're no longer just a traveler with an idea; you're a founder. Go claim your name, and start building your empire.
Meta Data Suggestions:
SEO Meta Title (58 characters): 75+ Travel Blog Name Ideas & How to Choose the Perfect One
URL Slug: travel-blog-name-ideas
SEO Meta Description (154 characters): Stuck on naming your travel blog? Get unstuck with our 5-step framework and 75+ creative travel blog name ideas to find the perfect brand name for you today.
Don't Miss Out! Subscribe for Exclusive Content
SubscribeComments 0
No comments yet
Be the first to share your experience!
Dont Miss Out! Subscribe for Exclusive Content

Ultimate USA Holidays Guide: Top Picks

FTC Affiliate Disclosure Essentials: Stay Compliant as a Travel Creator

Essential Affiliate Tools: From Tracking to Full Optimization

Avoid These 5 Affiliate Landing Page Mistakes for Better Conversions

Affiliate Keyword Research Mastery for Travel Blogs

Booking.com Affiliate Program Review: Pros, Cons, and Earnings Potential
Solo Travel Europe Without Going Broke: A Realist's Guide
TrekGuider @trekguider
Does the dream of a solo trip through Europe—wandering Rome’s ancient streets, finding the perfect café in Lisbon, or watching the sunset over the Danube in Budapest—feel just out of reach because of one major hurdle? The cost. For years, the myth has persisted that a European adventure requires a massive savings account. You've seen the glamorous photos, but you’re agitated by the nagging fear that traveling alone means paying double for everything and draining your bank account.

Let's put that fear to rest. The fantastic news is that this financial barrier is crumbling. The travel industry is finally waking up to the power of the solo traveler, and a smarter, more affordable way to explore the continent has emerged. This guide is your complete playbook for an incredible solo travel Europe adventure on a budget. We'll show you how to leverage Europe’s incredible network of hostels and trains, not as a sacrifice, but as a real advantage for a richer journey. These are the essential that transform financial anxiety into confident exploration.
The First, Most Important Decision: Mastering Europe's Budget Map
The single most powerful decision you will make for your budget happens before you book a single hostel or train ticket: choosing where to go. The secret to affordable solo travel Europe is understanding that the continent has two distinct economic personalities. Your first strategic move is to divide your map into two zones: the pricier West and North, and the wonderfully affordable East and South.

This isn’t about sacrificing iconic experiences; it’s about being smart. A daily backpacker budget in Western Europe (think France, the UK, Switzerland) can easily run you $75-$125. That same travel style in Eastern Europe (Hungary, Poland, Czech Republic) will cost closer to $40-$70. To put it bluntly: a single dinner in Zurich can cost more than your entire day’s budget in Krakow.
Your Budget-Friendly Hubs (East & South): These regions are your financial superpower. They offer world-class history and vibrant culture at a fraction of the cost. Prioritize cities like:
Budapest, Hungary: Famous for its stunning architecture and thermal baths.
Krakow, Poland: A historical gem with a lively, youthful energy.
Prague, Czech Republic: A fairytale city of spires and bridges.
Lisbon, Portugal: Coastal charm, fantastic food, and a laid-back vibe.
Seville, Spain: The heart of Andalusia, with passionate culture and sunny plazas.
Athens, Greece: The cradle of Western civilization, with ancient wonders at every turn.
The Splurge-Worthy Destinations (West & North): This doesn't mean you have to skip London, Paris, or Amsterdam. It just means you visit them strategically.
Pro-Tip: Embrace the "Hybrid Trip" Strategy. Don't think in terms of "either/or." Plan to spend the bulk of your trip—say, two weeks—exploring the more affordable regions. This allows you to "bank" significant savings, which you can then deploy for a shorter, more focused four or five-day splurge in a bucket-list city like Paris without breaking the bank.
Forging Your Financial Compass
A budget isn’t a restriction; it’s a tool of empowerment. It’s what allows you to travel without financial stress. Instead of a single magic number, let's break down the costs so you can build a personalized plan.
Deconstructing the Daily Costs: Where Does the Money Go?
Forget generic advice. Your daily budget is a deeply personal number that hinges on your travel style. To give you a real-world compass, we’ve broken down the three most common approaches we see on the road:
The Bare-Bones Backpacker: $45-$65 per day. This is for the traveler who stays exclusively in hostel dorms, cooks most meals in the hostel kitchen, and focuses on free activities like walking tours and exploring neighborhoods on foot.
The Savvy Mid-Ranger: $75-$130 per day. This is the sweet spot for most. It allows for a mix of hostel dorms with the occasional private room, eating one meal out per day at a casual spot, visiting paid attractions, and enjoying the local nightlife.
The Comfort-Conscious Budgeter: $135+ per day. This budget allows for private rooms in hostels or budget hotels, dining out more frequently, and participating in unique paid experiences or guided tours.
Pre-Trip Savings vs. On-the-Ground Spending
Remember that a significant chunk of your budget will be spent before you even leave home. Factor in these major upfront costs:
International Flights: Use tools like Google Flights and Skyscanner with flexible date searches to find the best deals.
Travel Insurance: This is non-negotiable. It’s your ultimate safety net for medical emergencies or trip cancellations.
Essential Gear: A quality, comfortable backpack and two pairs of versatile shoes are your most important investments.
For your money on the ground, be a financial ninja. Get a credit or debit card with no foreign transaction fees (like the Chase Sapphire Preferred or Capital One Venture). These 2-3% charges on every purchase add up shockingly fast. Crucially, always avoid the bright blue and yellow Euronet ATMs. They are predatory, charging outrageous conversion rates and hidden fees. Stick to official bank ATMs—look for the logos of major national banks like Deutsche Bank, BNP Paribas, or Santander. Your wallet will thank you.
Sleep Smart, Save Big
For solo travelers, where you sleep is more than just a bed—it’s your social hub, your sanctuary, and your savings engine.
Hostels: Your Social Hub and Savings Engine
Hostels are the undisputed key element of budget travel in Europe. A dorm bed will typically cost between $25 and $45, a massive saving compared to a hotel. But their true value lies beyond the price tag.

Built-in Community: Hostels are designed for social interaction. The common areas, shared kitchens, and organized events (like free walking tours or pub crawls) make it incredibly easy to meet other travelers if you choose to.
Safety & Security: Modern hostels are safer than ever. Look for properties with 24-hour reception, secure individual lockers for your valuables (always bring your own padlock), and female-only dorms if that makes you more comfortable.
Amenities that Save: The communal kitchen is a budget game-changer. Cooking just a few meals a week can save you hundreds over a long trip.
When booking on sites like Hostelworld, read recent reviews like a detective. Pay close attention to comments on cleanliness, location, security, and the overall "vibe" to find the perfect fit for you.
Beyond the Dorm: Other Budget-Friendly Options
While hostels are king, they aren't your only choice. The rise of "lifestyle" hotel brands like Moxy offers smaller, stylish single rooms that can be a great value. Renting a private room on Airbnb is another option, though often pricier than a hostel. A key piece of good news: the dreaded "single supplement" fee is slowly dying. The industry has recognized the solo travel boom, and more companies are offering true single-person pricing. Once you've locked in your home base, the next piece of the puzzle is mastering the art of getting from A to B without draining your travel fund.
Mastering the Rails & Roads
Europe’s transport network is a marvel, but choosing the cheapest option requires a strategic trade-off between cost, time, and convenience. This is a critical component of your plan for solo travel Europe on a budget.

Eurail Pass vs. Point-to-Point Tickets
Is a Eurail Pass worth it for a solo traveler? The answer is: it depends.
Get a Eurail Pass if: You crave ultimate flexibility and plan to travel extensively through expensive countries like Germany, Switzerland, and Austria, where last-minute train tickets are costly.
Buy Point-to-Point Tickets if: You have a relatively fixed itinerary and are focusing on Southern or Eastern Europe. Booking individual bus or train tickets in advance on platforms like Omio or Trainline is almost always cheaper.
Pro-Tip: Before you buy a pass, map out your ideal route and price out each individual leg of the journey. Compare that total to the cost of the pass. This simple exercise can save you hundreds of dollars.
Eating Like Royalty on a Pauper's Budget
Forget surviving on instant noodles. Eating affordably in Europe can be one of the most delicious and authentic parts of your journey.
The Holy Trinity of Budget Eating
Supermarkets & Picnics: This is your #1 money-saving tactic. Visit a local grocery store or an outdoor market. Buy a fresh baguette, some regional cheese, local cured meats, fruit, and a bottle of wine for a few euros. Enjoying this feast in a Parisian park or along a Venetian canal is a 5-star experience at a 1-star price.
Hostel Kitchens: Cooking dinner with new friends in the hostel kitchen is a quintessential backpacking experience. It’s social, fun, and incredibly cheap.
Street Food & Local Markets: From gyros in Greece to pierogi in Poland, covered food halls and street food stalls are where you’ll find authentic, delicious local food for just a few dollars.

Smart Restaurant Hacks
When you do dine out, eat smart. Embrace the lunch special. Across Europe, especially the menu del día in Spain (which typically includes a starter, main, dessert, and a drink for a set price), restaurants offer multi-course lunch menus for a fraction of their dinner prices. And always use the Five Block Rule: walk at least five blocks away from any major tourist attraction before choosing a restaurant. You’ll almost always find better food at a lower price.
Two Field-Tested Budget Itineraries
Let's make this real. Here are two sample itineraries showing these principles in action.
The 3-Week Eastern Europe Classic (€50/day)
Route: Prague → Krakow → Budapest → Belgrade
The Vibe: This is the ultimate budget-friendly route through the heart of Central and Eastern Europe. You’ll experience stunning history, incredible nightlife, and delicious food and beer, all while your daily costs stay incredibly low. Transportation between these cities is fast, cheap, and easy via bus or train.
The 3-Week "Best of Both" Hybrid (€85/day)
Route: Lisbon → Seville → (Fly to) Rome → Florence → (Overnight bus to) Ljubljana
The Vibe: This itinerary demonstrates the Hybrid Strategy. You start in affordable and beautiful Portugal and Spain, then take a strategic budget flight to tackle your Italian bucket list. You finish in charming, budget-friendly Slovenia, using an overnight bus from Italy to save on both transport and a night's accommodation.
Your Top Budget Questions, Answered
How much money do I need for 1 month of solo travel in Europe?
A solo traveler can expect to spend between $1,500 (frugal backpacker in the East) and $4,500 (mid-range traveler including the West) for a one-month trip. Your destination choices and travel style are the biggest factors.
Is Europe safe for a first-time solo female traveler?
Absolutely. Europe is generally very safe for solo female travelers. Countries like Iceland, Portugal, and Slovenia are consistently ranked among the safest in the world. Standard precautions—being aware of your surroundings, securing your belongings, and trusting your gut—are key.
What is the absolute cheapest way to travel between countries in Europe?
The bus is almost always the cheapest option. Companies like Flixbus have an extensive network with fares as low as $5, making them a backpacker's best friend.
Should I travel in the summer or the off-season?
For budget travel, the shoulder seasons (April-May, September-October) are perfect. You’ll get pleasant weather with far fewer crowds and significantly lower prices for flights and accommodation compared to the peak summer months.
You now have the framework for an affordable and unforgettable European adventure. The key to a successful solo travel Europe journey on a budget isn't about restriction; it's about smart, strategic planning. By choosing your destinations wisely, embracing the social and economic power of hostels, and mastering the continent's incredible public transport, you transform a dream into an achievable, actionable plan. The freedom of the open road—and the railway—is yours for the taking.
Read the full guide: Anxious to Adventurous: The Ultimate Guide to Solo Travel Confidence
Don't Miss Out! Subscribe for Exclusive Content
SubscribeComments 0
No comments yet
Be the first to share your experience!
Dont Miss Out! Subscribe for Exclusive Content

Top 11 High-Paying Affiliate Programs for Travel Bloggers

High-Paying Affiliate Opportunities for Individual Travel Affiliates

Amazon Associates for Travel: Strategies to Maximize Commissions

How to Avoid Travel Scams: A Global Guide

A Woman's Guide to Safe Travel: 10 Critical Tips
