Email Marketing for Bloggers: A Step-by-Step Playbook
TrekGuider @trekguider
Every creator knows the feeling. You pour a week into a single, well-researched article, hit publish, and watch the initial traffic spike... only for it to fade into the digital silence. Your audience is a ghost, arriving from the ether of a search result only to vanish just as quickly, leaving your business at the mercy of unpredictable algorithms.

This is the fundamental vulnerability of the modern creator. You’re building your brand on “rented land.” A single Google update can obliterate your traffic overnight. A shift in a social media algorithm can make your account virtually invisible. This constant instability is exhausting, and it makes building a sustainable business feel impossible. You’re shouting into the void, hoping someone hears you, instead of having a direct conversation with a community that wants to listen.
This ends today. This is your definitive playbook for building your single most valuable business asset: your email list. We are going to provide a clear, step-by-step system to turn casual website visitors into a loyal, engaged community you own. This is the core engine that powers a modern creator business, a critical strategy we explore in our ultimate guide on How to Make Money Online: A Creator's Guide for 2026. Welcome to your masterclass on email marketing for blogging.
Why Your Email List is Your Most Valuable Business Asset
Before we dive into the "how," you must internalize the "why." In a creator economy projected to swell to nearly $500 billion by 2027, the opportunity is immense. But the data reveals a harsh reality: success is highly stratified, with only about 4% of creators earning over $100,000 a year. The difference is strategy. The top earners operate as "Creator CEOs," and they understand that their email list isn't just another marketing channel; it is the core asset of their entire digital enterprise.
It’s the one audience you truly own.
Think of it as the "Hub-and-Spoke" model of a modern business. Your blog is the hub—the central asset you control. Social media platforms and search engines are the spokes—powerful, but ultimately rented, channels for discovery. The strategic goal of every spoke is to drive traffic back to the hub, where you can convert a fleeting visitor into a permanent member of your community by capturing their email address.

An email list gives you:
Direct, Unfiltered Access: When you send an email, you are not fighting an algorithm for reach. You land directly in your subscriber's inbox, creating a personal and reliable line of communication.
A Loyal Community: Email is an intimate medium. It allows you to build a deep, trust-based relationship with your readers over time, transforming them from passive consumers into true fans.
A Powerful Sales Channel: When it comes time to launch a product or promote an affiliate offer, your email list will be, by far, your highest-converting channel. These are the people who have raised their hands to say they want to hear from you.
In a digital world defined by volatility, your email list is your insurance policy. It is the stable, appreciating asset upon which a durable and profitable business is built.
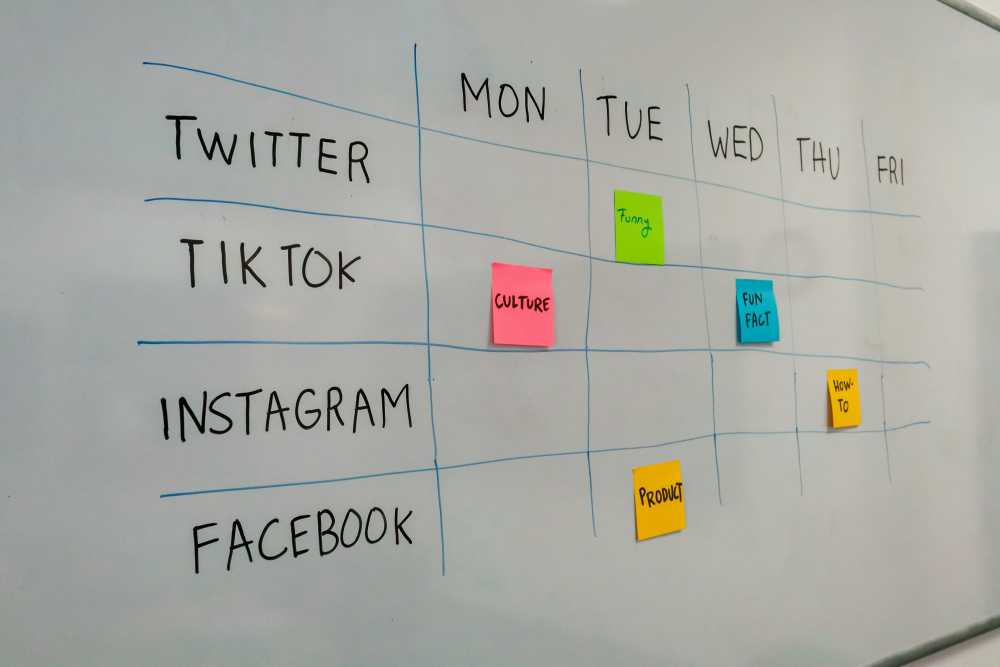
The Blogger's Email Marketing Funnel: A Step-by-Step Process
Internalizing why this asset is non-negotiable is the first step. Now, let’s build the engine that creates it. An email marketing funnel is simply a system designed to attract subscribers and automatically build a relationship with them. This three-step process is the engine that will power your audience growth.
Step 1: Create an Irresistible Lead Magnet
A lead magnet is a free, high-value resource you offer to visitors in exchange for their email address. It must solve a specific, urgent problem for your target audience. The key is to provide a "quick win" that is so valuable, trading an email for it feels like a bargain.
For a travel blog, effective lead magnets include:
A printable packing checklist for a specific destination (e.g., "The Ultimate Southeast Asia Backpacking Checklist").
A short, beautifully designed PDF guide (e.g., "5 Hidden Gems in Paris Most Tourists Miss").
A 3-day itinerary for a popular city.
A plug-and-play template for planning a travel budget.

Pro-Tip: Don't guess what your audience wants. The best lead magnet ideas come directly from your readers. Look at your blog comments, social media DMs, and most popular posts. What questions are people asking over and over? Create a resource that answers that one question perfectly.
The goal is to create something your ideal reader needs right now. It doesn’t have to be long, but it must be incredibly useful.
Your Audience-Building Starter Kit
Creating high-value assets is the core of a modern creator business. To accelerate your journey, we've bundled together some of our most powerful resources. The Travel Creator's Toolkit is a free collection of checklists, templates, and guides designed to help you streamline your workflow and build your business faster.
Step 2: Implement High-Converting Opt-in Forms
Once you have your lead magnet, you need a way to offer it to your website visitors. An opt-in form is the mechanism for capturing their email addresses. Strategic placement is crucial for maximizing your sign-up rate.
Effective placements include:
Embedded Within Relevant Blog Posts: Place a form directly within an article where it makes the most contextual sense. For example, offer your Paris guide in the middle of a post about "What to Do in Paris."
As an Exit-Intent Pop-up: This form appears when a user is about to leave your site, giving you one last chance to offer them your valuable lead magnet.
In Your Blog's Header or Footer: A permanent, site-wide placement ensures every visitor has an opportunity to subscribe.
On a Dedicated Landing Page: Create a simple page whose sole purpose is to promote your lead magnet. This is the page you will link to from social media or other external sources.
Step 3: Master the 3-Part Automated Welcome Sequence
This is the most critical part of your funnel. Once someone subscribes, they should immediately be entered into an automated series of emails. This "welcome sequence" is your opportunity to make a great first impression and begin building a real relationship.
Here is a simple, proven 3-part sequence:
Email 1: Deliver the Goods & Welcome
Objective: Fulfill your promise instantly and set expectations.
Content: The email should have a clear subject line like "Here's your free guide!" and immediately provide the link to download the lead magnet. Welcome the subscriber to your community, briefly re-introduce yourself and your blog's mission, and tell them what to expect from future emails (e.g., "Every Tuesday, I'll send you my best travel tips and stories.").
Email 2: Provide Pure Value & Build Authority
Objective: Establish your expertise and prove that subscribing was a smart decision.
Content: A day or two later, send an email that is purely helpful. Share a personal story or your single best piece of advice related to the lead magnet's topic. Link to 2-3 of your most popular and relevant blog posts. There should be no sales pitch here; this email is all about giving.
Email 3: Engage & Segment
Objective: Encourage interaction and learn more about your new subscriber.
Content: On the final day, send an email that asks a simple, direct question to encourage a reply. For example: "What's the #1 destination on your bucket list? Just hit reply and let me know—I read every response!" This interaction boosts your email deliverability and gives you priceless insight into your audience's desires. This is the relationship that eventually allows you to confidently launch a course or sell your own Travel Guide on a specialized marketplace like TrekGuider.
This automated sequence ensures every new subscriber has a consistent, positive first experience with your brand, turning them from a name on a list into an engaged member of your community.
Choosing Your Platform: A Guide to Email Service Providers
To manage your email list and automations, you'll need an Email Service Provider (ESP). These platforms are the command center for your entire email marketing operation. For beginners, the choice can be overwhelming, but a few stand out for their features and user-friendliness.

MailerLite:
Best For: Beginners on a tight budget.
Pros: MailerLite offers an excellent free plan (up to 500 subscribers) that includes automation and landing pages. Its drag-and-drop editor is one of the most intuitive and beginner-friendly on the market.
Cons: The automation capabilities are less powerful than more advanced platforms, and the account approval process can sometimes be slow.
ConvertKit:
Best For: Serious creators who are ready to invest in their business.
Pros: ConvertKit is built specifically for creators. Its flexible tag-based system allows for powerful audience segmentation, and its visual automation builder is both intuitive and robust. It's the industry standard for professional bloggers for a reason.
Cons: It comes with a higher price point. The free plan is limited, and paid plans are more expensive than competitors as your list grows.
Selzy:
Best For: Beginners who prioritize customer support.
Pros: Selzy offers a user-friendly interface at a competitive price. Its standout feature is 24/7 chat and email support, even for users on the free plan—a huge advantage for beginners who may need help with setup.
Cons: As a newer player, it has fewer native integrations with other software compared to the more established platforms.
Staying Compliant: A Blogger’s Guide to Email Privacy Laws
Effective email marketing for blogging isn't just about strategy; it's about trust and legal compliance. Any blogger collecting email addresses must adhere to data privacy regulations. Failure to do so can result in massive fines and destroy your audience's trust. The two most important laws to understand are CAN-spam (U.S.) and GDPR (E.U.).

Understanding CAN-SPAM (The U.S. Rules)
The CAN-SPAM Act governs all commercial email messages in the United States. Its core requirements are:
Don't use false or misleading header information.
Don't use deceptive subject lines.
Identify the message as an advertisement.
Tell recipients where you're located by including a valid physical postal address.
Provide a clear and conspicuous way to opt out of future emails.
Honor opt-out requests promptly (within 10 business days).
Navigating GDPR (The E.U. Rules)
The General Data Protection Regulation (GDPR) is much stricter and applies to you if you process the personal data of any E.U. citizen, regardless of where your blog is based. Its key principles include:
Explicit Consent: You must have unambiguous, affirmative consent to email someone. This means using unchecked boxes on your sign-up forms. Pre-checked boxes are not compliant.
Right to Access: Subscribers can request a copy of all the personal data you hold on them.
Right to be Forgotten: Subscribers can request that you erase all of their personal data.
Pro-Tip: The easiest way to ensure compliance is to adopt the strictest standard (GDPR) for all subscribers and use a reputable ESP like ConvertKit or MailerLite. These platforms have built-in tools that make compliance, such as adding an unsubscribe link and your physical address, automatic.
Frequently Asked Questions About Email Marketing for Bloggers
1. How often should I email my list?
Consistency is more important than frequency. For most bloggers, a weekly email is a great starting point. It's frequent enough to stay top-of-mind but not so frequent that it becomes overwhelming. The key is to choose a schedule you can stick to and deliver value every single time.
2. What should I write about in my emails?
Your emails should be a mix of personal stories, exclusive tips that aren't on the blog, links to your latest content, and occasional promotions. Use the 80/20 rule: 80% of your content should be purely valuable and relationship-building, while 20% can be promotional. Always ask yourself, "Is this genuinely helpful for my reader?"
3. How long does it take to see results from email marketing?
You will see results immediately in the form of building a valuable asset. However, turning that asset into a significant source of income takes time. The key is to focus on consistently growing your list and nurturing the relationship. When you do that, the monetization will follow naturally as you build trust.
Your Journey to an Owned Audience Starts Now
In the creator economy, your email list is the engine of your business. It is the foundation upon which all other monetization strategies are built. It’s how you build a real community, establish lasting trust, and create a predictable, profitable enterprise that isn't dependent on the whims of an algorithm.
You now have the complete playbook for successful email marketing for blogging. You understand why it’s critical, and you have the step-by-step process to implement your own funnel—from creating a compelling lead magnet to welcoming new subscribers and staying compliant with the law. The path is clear. Take the first step today and start building your most valuable asset.
Read the full guide: The Travel Blog Business Plan: How to Make Real Money in 2026
Don't Miss Out! Subscribe for Exclusive Content
Subscribe


Comments 0
No comments yet
Be the first to share your experience!
Dont Miss Out! Subscribe for Exclusive Content

FTC Affiliate Disclosure Essentials: Stay Compliant as a Travel Creator

Essential Affiliate Tools: From Tracking to Full Optimization

Avoid These 5 Affiliate Landing Page Mistakes for Better Conversions

Affiliate Keyword Research Mastery for Travel Blogs

Booking.com Affiliate Program Review: Pros, Cons, and Earnings Potential

Decoding Affiliate Commission Rates: Benchmarks for Travel Creators
Mardi Gras: 6 Parade Survival Tips
TrekGuider @trekguider
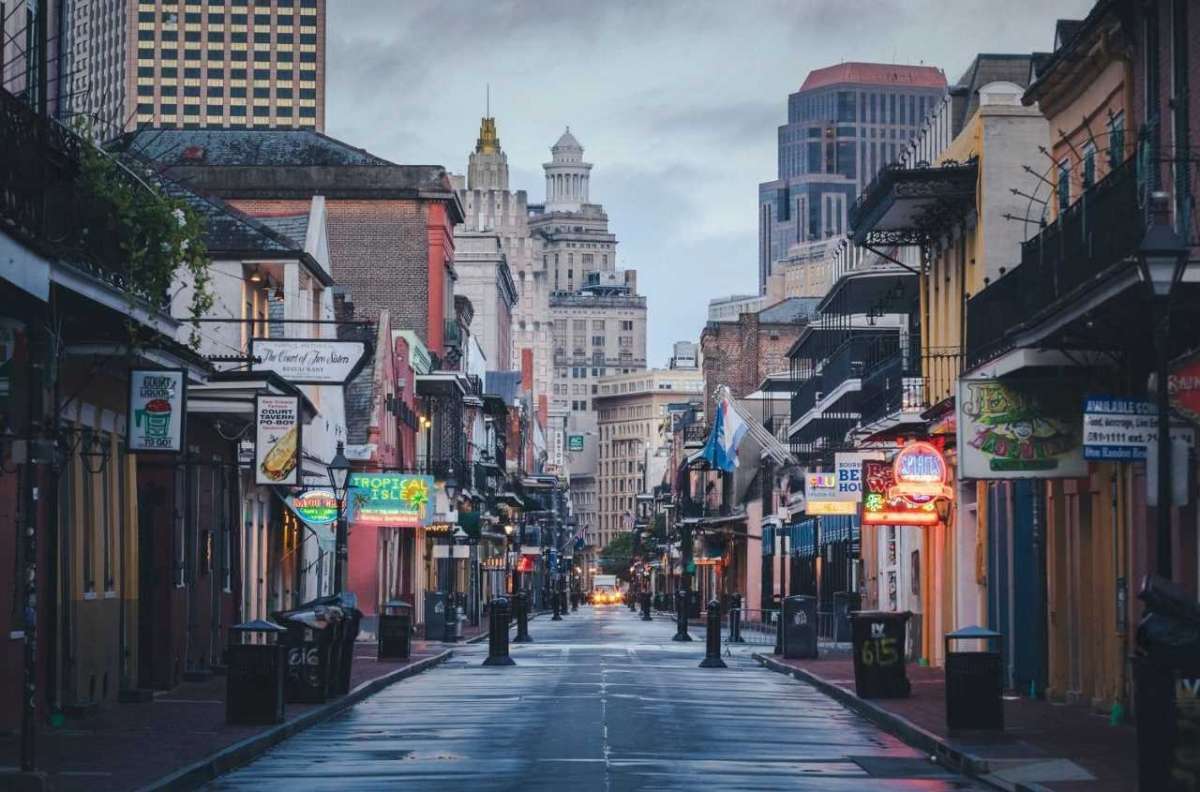
You’ve seen the photos—a blizzard of purple, green, and gold beads flying through the air. You’ve heard the stories of jazz music spilling onto streets packed with revelers. The dream of Mardi Gras in New Orleans is a powerful one, a siren call to the world’s greatest free party. It’s a bucket-list spectacle of dazzling floats, complex costumes, and pure, unadulterated joy. But let’s be honest: the reality behind that dream can be intimidating. The sheer scale of the crowds, the labyrinthine parade schedules, and the logistical hurdles can turn a fantasy trip into a frantic mess.
Without a battle plan, you risk becoming just another overwhelmed tourist. Imagine traveling all that way only to be stuck ten rows deep, craning your neck for a fleeting glimpse of a float. Picture the rising panic of losing your friends in a sea of humanity with zero cell service, or the bone-deep exhaustion that sets in after hours on your feet, unprepared. The magic of Carnival can fade fast when you’re fighting the chaos instead of embracing it.
This is where you stop worrying. Consider this your official playbook for not just surviving, but thriving at the parades. We’re going to arm you with the insider knowledge to navigate the festivities like a seasoned pro. These six essential survival tips will transform your Mardi Gras New Orleans experience from stressful to unforgettable. This is just one of the incredible cultural celebrations we explore in our complete guide to New Orleans Holidays: Cultural Feasts, but for now, let’s master the art of the parade.

Tip 1: Decode the Schedule & Choose Your Krewes Like a Local
First, let’s clear up a common misconception: Mardi Gras isn't just one day. It's an entire season, a cultural crescendo that officially begins on January 6th and leads to the city-wide blowout of "Fat Tuesday." The parades, organized by social clubs known as "krewes," are the lifeblood of the celebration, and they hit a fever pitch in the final two weeks. Knowing which parades to see—and when—is the first step to crafting your perfect experience.
The final weekend before Fat Tuesday is when the legendary "super-krewes" roll, drawing the biggest crowds and delivering the most spectacular shows. For 2026, these are the dates to circle in red on your calendar:
Saturday, the weekend before Mardi Gras: A marathon day featuring the massive Krewe of Endymion, an evening parade so spectacular it feels like a rolling blockbuster.
Sunday, the days leading up to Fat Tuesday: The Krewe of Bacchus, another titan of Carnival, hits the streets at 5:15 PM with its own celebrity monarch and jaw-dropping floats.
Monday, the Monday before Mardi Gras (Lundi Gras): Witness history with the Krewes of Proteus and Orpheus, two stunning nighttime parades that light up the city.
Tuesday, late February (dates shift each year—check nola.com for the exact schedule) (Fat Tuesday): The grand finale. The day kicks off with the Krewe of Zulu at 8:00 AM, famous for its coveted hand-painted coconut throws, followed by the regal Krewe of Rex at 10:30 AM, whose leader is the official "King of Carnival."
Not all krewes offer the same experience. Daytime parades often have a more relaxed, family-centric vibe. Nighttime parades are a different animal entirely—lit by historic gaslight torches called "flambeaux," they are dazzling, high-energy spectacles that draw a more party-oriented crowd. Do a little research on each krewe's theme and history to find the ones that match your style.
Pro-Tip: Before you even leave your hotel, download a real-time parade tracker app from a local New Orleans news station. These GPS-powered apps show you the exact location of the parade's lead float, giving you the intel to know if you have time for a bathroom break or a food run before the action reaches you.

Tip 2: Location is Everything: How to Claim Your Parade Turf
Your viewing spot will define your entire parade experience. The primary routes snake through the stately Uptown/St. Charles Avenue corridor and along the edge of the French Quarter. For a more traditional, family-friendly atmosphere, plant yourself along St. Charles Avenue. Under the canopy of ancient oak trees, you’ll find generations of families who have claimed the same spot for decades. For a more intense, high-octane experience, the sections of the route closer to Canal Street are where the crowds roar loudest.
Let’s be clear: the golden rule of securing a good spot is to arrive obscenely early. For a super-krewe on that final weekend, we’re not talking 30 minutes ahead—we’re talking hours. This is a marathon of patience. You’ll see locals set up their full camp—chairs, coolers, and ladders—long before the first siren wails. About those ladders: you’ll see many custom-built ladder seats designed to give kids a safe, elevated view. It’s a brilliant tradition, but if you use one, follow the local etiquette: place it at least six feet back from the curb to avoid obstructing the view of those in front and to stay clear of the massive floats.
Remember, the major parades do not go through the narrow, historic streets of the French Quarter. While Bourbon Street is its own unique Mardi Gras spectacle, it is not the place to watch the krewes roll.

Tip 3: Master the Art of the "Throw" for Your Mardi Gras New Orleans Haul
The quintessential Mardi Gras New Orleans experience is reaching up and catching a string of colorful beads. These items, tossed from the floats by krewe members, are called "throws," and they are the currency of Carnival. But it’s so much more than just beads. Each krewe has its own signature throws, from decorated plastic cups and doubloon coins to light-up toys and stuffed animals. Some are true collector's items, like the exquisitely hand-decorated shoes from the all-female Krewe of Muses or the legendary painted coconuts from Zulu.
Catching the best stuff is a skill. Here’s how to improve your odds:
Engage and Make Eye Contact: Float riders are scanning the crowd for energy. Wave your arms, smile, and yell the classic line: "Throw me something, mister!" They are more likely to toss something special to someone who is clearly having a great time.
Practice Good Karma: Be aware of the people around you, especially children. If a coveted throw lands near a kid, let them have it. The spirit of Mardi Gras is communal joy, not competition.
Bring a Designated Bag: You will catch far more than you can wear or carry. A simple tote bag or small backpack is essential for stashing your loot.
Above all, be safe. The number one rule is never, ever run into the street or chase a float for a throw. These floats are enormous, pulled by tractors with limited visibility. Wait for the throws to come to you and never reach under a float. No plastic necklace is worth the risk.
Tip 4: Pack Your Ultimate Parade Survival Kit
A day on the parade route is an urban endurance event. You’ll be on your feet for hours, exposed to the elements, and a long way from your home base. A well-packed day bag is non-negotiable. Being prepared for any great American adventure requires the right checklist, and just as you’d use our National Park Road Trip Checklist to prepare for the wild, this kit will ensure you conquer the urban jungle of Carnival.
These are the absolute essentials for your Mardi Gras survival kit:
Hydration: Pack more water than you think you need. Staying hydrated is critical.
Fuel: High-energy, easy-to-carry snacks like protein bars, trail mix, and pretzels will keep your energy levels up.
Sun & Rain Gear: New Orleans weather is fickle. Pack sunscreen, a hat, and sunglasses for daytime parades, but also throw in a cheap poncho. A sudden downpour can’t ruin your day if you’re prepared for it.
Layers: A sunny 70-degree afternoon can plummet to a chilly 50 degrees after sunset. Wear layers you can easily shed or add.
Portable Power Bank: Between taking photos, coordinating with friends, and running a parade tracker, your phone battery will vanish. A portable charger is a modern-day necessity.
Sanitation Supplies: Public restrooms are of the port-a-potty variety and see heavy use. A travel-sized pack of tissues and a bottle of hand sanitizer will feel like pure luxury.
A Throw Bag: A lightweight, foldable tote is perfect for your haul.

Tip 5: Navigate the Crowds & Stay Safe Like a Pro
The sheer scale of the crowds can be staggering—this is, after all, an event that generated an $891 million economic impact in 2024. Navigating this joyful mass of humanity requires a proactive approach to safety.
First, the buddy system is not optional. Stick with your group. Before you even head out, establish a non-obvious, hyper-specific meeting point. "Under the clock at the hotel" is good. "The corner of Canal and St. Charles" is a recipe for disaster. Cell service will be spotty at best, so you cannot rely on your phone to reunite.
When it comes to getting around, forget driving. Street closures and traffic make it a nightmare. Parking, if you can find it, will be exorbitant—reserve a spot in a garage well in advance if you must bring a car. Your best bets are walking, using public transit, or grabbing a rideshare, but be prepared for surge pricing and long waits after a parade.
Pro-Tip: To move through a thick crowd, don't try to bull your way through the middle. The pro move is to retreat one block off the parade route, walk parallel to it in the direction you want to go, and then cut back in. It’s a slightly longer walk that will save you immense time and frustration.
Tip 6: Embrace the Spirit of "Laissez les Bons Temps Rouler"
Finally, the most crucial tip of all: embrace the official motto of Mardi Gras, Laissez les bons temps rouler—Let the good times roll. This isn't just a slogan; it's the city's philosophy. This celebration is a profound expression of New Orleans' unique Creole heritage, a season defined by king cake feasts, brass bands, and an unbreakable sense of community. Don't get so wrapped up in logistics that you forget to be present.
Strike up a conversation with the family next to you. Compliment a stranger's incredible costume. Share your snacks. New Orleanians are famously hospitable and love sharing their traditions. Participate in the culture, don't just observe it. To truly understand the soul of this festival and others like it, our comprehensive Travel Guide offers a deep dive into the cultural fabric of America's most fascinating cities, providing the context that turns a great trip into a meaningful one.
Your Mission: Go Forth and Conquer Carnival
You are now officially prepared. Armed with these insider strategies, you can confidently tackle your Mardi Gras New Orleans adventure. You have the knowledge to decode the schedule, claim the best spots, pack for success, and stay safe in the joyous chaos. You are no longer just a tourist hoping for the best; you are an informed participant, ready to dive into the heart of one of the world's greatest cultural spectacles.
So book the ticket, pack your most festive attire, and get ready to let the good times roll. The magic of Mardi Gras is waiting for you.
Don't Miss Out! Subscribe for Exclusive Content
SubscribeComments 0
No comments yet
Be the first to share your experience!
Dont Miss Out! Subscribe for Exclusive Content

San Francisco Cherry Blossoms: A Local's Guide to the Blooms

Halloween SF: Haunts Without Horrors

SF Festivals: 7 Must-See Lineups

Christmas SF: Lights & Wharf Wonders

SF Pride: 6 Route & Party Hacks

Chinese New Year SF: Parade Essentials
11 Essential Solo Travel Safety Tips You Need to Know
TrekGuider @trekguider
Let's be honest: the idea of solo travel is a mix of exhilaration and pure terror. It’s the ultimate promise of freedom, shadowed by the persistent question, "But will I be safe?" The thought of navigating an unfamiliar city alone, fending off unwanted attention, or feeling vulnerable can be enough to keep the most adventurous spirit grounded. This anxiety is real, and it can paralyze your plans or, worse, follow you on your trip, robbing you of the joy you set out to find.
But safety isn’t a matter of luck; it’s a matter of skill. It’s a mindset you can cultivate and a set of practices you can master. This guide is your new playbook. We’ve distilled insights from security experts, psychologists, and veteran solo travelers into 11 essential, gender-neutral solo travel safety tips. This isn't a list of warnings designed to scare you. It’s a practical framework for building unshakeable confidence, mastering situational awareness, and empowering yourself to explore the globe. While these strategies are crucial for any solo traveler, they are one part of a larger safety ecosystem, which we cover in our comprehensive guide to The Ultimate Guide to Travel Safety: A 2026 Playbook.

The Foundation: Building Unshakeable Confidence and Awareness
True safety begins in your mind long before your boots hit the ground. It’s a foundation built on proactive awareness and a confident mindset. By mastering these core principles, you transform yourself from a potential target into a "hard target"—someone who looks like they know exactly what they’re doing, even when they're just soaking it all in.
1. Master the Art of Situational Awareness
Situational awareness is not paranoia; it's a state of relaxed observation. Security experts emphasize that it’s about consciously understanding your environment by first establishing a baseline and then learning to spot anomalies.
Establish a Baseline: Wherever you are—a train station, a market, a park—take a moment to observe the normal rhythm. How are people walking? What’s the general noise level? This is the "normal" for that environment.
Identify Anomalies: Once you know the baseline, things that deviate will immediately stand out: someone moving against the flow of foot traffic, wearing a heavy coat in hot weather, or loitering without purpose near an entrance. These anomalies are your early warning system.
Limit Distractions: "Tunnel vision" is a solo traveler’s enemy. Keep your headphones out and your phone in your pocket when walking through crowded areas. Keep your head up.
Practice Active Scanning: Make a habit of periodically looking around in a full 360-degree arc. This simple act keeps you aware of who is behind and beside you, preventing you from being caught by surprise.
Project Confident Body Language: Your posture speaks volumes. Walk with a purposeful stride, keep your head held high, and make brief, deliberate eye contact with those around you. This non-verbally communicates that you are aware and not an easy target.
2. Trust Your Intuition—It's Your Best Guide
Psychologists and security experts agree: that "gut feeling" is a real and powerful threat-detection tool. It's your subconscious mind recognizing thousands of tiny cues that something is wrong long before your conscious mind can articulate why. If a person, a street, or a situation feels "off," do not ignore it. Treat that feeling as a valid warning. Cross the street, leave the bar, get in a taxi—do whatever you need to do to honor that instinct without apology or hesitation.
3. Build Confidence with "Practice Runs" Before You Go
The confidence to navigate a foreign capital alone isn't born on the plane; it's built at home. Start with small, local "practice runs" to build your self-reliance.
Take yourself on a solo date to a new restaurant or movie in your own city.
Spend an afternoon exploring a neighborhood you don’t know well, navigating by yourself.
Take a solo day trip to a nearby town using only public transportation.
These small wins prove to yourself that you are capable and resourceful, which is the bedrock of the confidence you'll carry with you across the globe.

Navigating Like a Pro: Practical Solo Travel Safety Tips
Once you’ve calibrated your internal compass with a confident mindset, it’s time to translate that awareness into action. How you move, what you wear, and how you interact with your environment are the practical skills that complete your safety toolkit.
4. Walk with Purpose, Navigate with Discretion
Looking lost is like wearing a sign that says "vulnerable." Your goal is to navigate with quiet confidence.
Plan Before You Leave: Study your route before you walk out the door of your hotel or hostel. Having a clear mental map allows you to walk with purpose, which is a powerful deterrent.
Be Discreet with Maps: Avoid standing on a busy corner staring at a large paper map or your phone. If you need to check your directions, step into a shop, cafe, or hotel lobby to reorient yourself away from prying eyes.
Manage Your Tourist Gear: An expensive camera hanging around your neck and a bulky backpack are clear signals that you're a tourist. Keep your camera in a non-descript bag until you’re ready to use it, and consider using a more subtle crossbody bag for daily exploring instead of a large daypack.
5. Dress to Blend, Not to Stand Out
Your clothing is your first and most obvious cultural handshake. Observe what locals are wearing and aim for a similar level of formality.
Avoid Loud Logos: Leave the clothing with your home country's flag, university, or sports team logos at home. Opt for neutral, less conspicuous attire.
Respect Local Norms: In more conservative regions, dressing modestly (covering shoulders and knees) is not just a sign of respect; it’s a key safety strategy that helps you blend in and avoid unwanted attention.
Pro-Tip: Pack a lightweight scarf. It takes up almost no space and is incredibly versatile. You can use it to cover your head when entering a religious site, cover your shoulders for modesty, or add a layer of warmth.
6. Learn a Few Key Local Phrases
You don't need to be fluent, but knowing a few words in the local language is a massive confidence booster and a sign of respect. Focus on the essentials:
Hello
Please
Thank you
Excuse me
Do you speak English?
Being able to handle simple transactions or politely ask for help shows you've made an effort and can make interactions much smoother.

Your Safe Haven: Accommodation and Socializing Strategies
As a solo traveler, where you stay and how you choose to meet people are critical safety decisions. Your accommodation is your sanctuary, and your social life should be a source of joy, not anxiety.
7. Perform a 60-Second Hotel Security Sweep
The moment you first enter your hotel room or rental, take a minute to perform this essential security check.
Prop the Door: Keep the door propped open with your luggage while you do a quick visual sweep to ensure the room is empty (check the closet, behind the shower curtain, under the bed).
Test the Locks: Close the door and test every lock from the inside—the deadbolt, the security chain, and the latch. They should all feel solid.
Find Your Exits & Count: Locate the fire escape map on the back of the door. Identify the two nearest exits and count the number of doors between your room and the closest one. Fire safety experts stress this is crucial for navigating in a dark or smoke-filled hallway.
Check for Privacy: Ensure windows and any connecting doors lock properly. Close the curtains fully.
8. Choose Social Accommodations for Safe Connections
Hostels are the original social network for travelers and remain one of the best and safest ways to meet people. They are designed for interaction, with common areas and organized events like walking tours or group dinners. Even if you book a private room in a hostel, you get the benefit of privacy combined with a built-in, vetted community right outside your door.
9. Join Group Tours and Classes to Meet Like-Minded People
A shared interest is a natural foundation for friendship. Signing up for group activities is a fantastic way to connect with other travelers and locals in a structured, safe environment.
Free Walking Tours: Most major cities have them. They're a great way to get oriented and chat with fellow travelers.
Specialty Day Tours: A food tour or historical excursion brings together people with a common passion.
Local Classes: A cooking workshop or language class provides an authentic cultural experience and an easy way to start conversations.
Pro-Tip: If you connect with people on a tour, suggest meeting up later in a public place. "A few of us are going to grab a bite at that market we saw, want to join?" is a low-pressure way to extend the connection.

Your Digital Safety Net
In the modern era, technology provides some of the most powerful solo travel safety tips. Your smartphone can be your lifeline, your map, and your guardian angel—if you set it up correctly.
10. Arm Yourself with Personal Safety Apps
Before you leave, download a personal safety app and set it up with your trusted contacts back home. These apps can share your location, send distress signals, and even connect you with emergency services.
bSafe: A comprehensive app that features a voice-activated SOS alarm, live location sharing ("Follow Me"), and even automatically records video and audio during an emergency.
Noonlight: Acts as a silent panic button. You press and hold a button on the screen when you feel unsafe. If you release it and don't enter your PIN within 10 seconds, it automatically sends your location to professional dispatchers who coordinate with local police.
Life360: Excellent for creating a private location-sharing map ("Circle") with family or friends. It includes an SOS alert that messages your entire circle and can even detect if you've been in a car crash.
11. Keep Your Trusted Contacts in the Loop
Beyond apps, make a habit of sharing your itinerary with someone back home before you leave. A quick text or email saying, "Just arrived at my hostel in Lisbon, all is good!" provides peace of mind for both you and them.

A Note for Women Traveling Solo
While all the tips in this guide are universal, women often face a unique set of challenges and cultural nuances on the road. For advice tailored specifically to navigating these issues—from understanding cultural dress codes to responding to harassment and leveraging female-focused networks—our specialized guide is an essential resource.
Deep Dive: The Solo Female Traveler's Playbook
Ready for a resource that speaks directly to the female experience? Download our free, in-depth Solo Female Travel Safety Guide for expert advice on cultural etiquette, empowerment, and staying safe and confident on your own terms.
Solo Travel Safety FAQ
A prepared mind is a safe mind. Here are answers to a few common questions that solo travelers ask.
1. What's the best way to handle street harassment?
Security experts advise a tiered response. First, try to ignore it. Often, a harasser's goal is a reaction. Avoid eye contact and keep walking with purpose as if you heard nothing. If they persist, get loud and firm. Use a strong voice and say a simple command like "Stop" or "Leave me alone." Finally, your priority is to get to a safe place. Duck into a busy shop, hotel lobby, or cafe. Don't lead them back to where you're staying.
2. Are hostels really safe for solo travelers?
Yes, reputable hostels are generally very safe. They are designed for travelers and often have excellent security measures like key-card access, 24/7 reception, and lockers for your valuables (bring your own padlock). They are one of the best ways to meet other travelers in a secure environment. Read recent reviews before booking, and consider choosing a female-only dorm if it makes you more comfortable.
3. How can I avoid looking like a tourist?
It's a combination of the tips above. Navigate with discretion (plan your route in advance), dress to blend in (avoid flashy logos and follow local clothing norms), and manage your tourist gear (keep the big camera in a bag). The biggest factor, however, is confident body language. Walk like you belong there, and most people will assume you do.

The World is Waiting
Solo travel is one of the most rewarding experiences a person can have. It will challenge you, change you, and fill your life with stories. The goal of these solo travel safety tips is not to make you fearful, but to make you fearless. By replacing anxiety with awareness and confidence with preparation, you give yourself the freedom to say "yes" to adventure and to fully embrace the incredible journey of discovering the world, and yourself, on your own.
Now that you're equipped with the strategies for a safe and confident solo journey, you can focus on the bigger picture. For a complete master guide to planning every aspect of your next adventure, from budgeting and packing to booking and logistics, our all-encompassing Travel Guide is the only resource you'll ever need.
Don't Miss Out! Subscribe for Exclusive Content
SubscribeComments 0
No comments yet
Be the first to share your experience!
Dont Miss Out! Subscribe for Exclusive Content

Ultimate USA Holidays Guide: Top Picks
FTC Affiliate Disclosure Essentials: Stay Compliant as a Travel Creator
Essential Affiliate Tools: From Tracking to Full Optimization
Booking.com Affiliate Program Review: Pros, Cons, and Earnings Potential
Decoding Affiliate Commission Rates: Benchmarks for Travel Creators
