5 Ways to Confidently Eat Alone While Traveling
TrekGuider @trekguider
You’ve done it. You’ve booked the flight, mapped out the museums, and conquered the logistics of your solo adventure. But a single, persistent scenario keeps playing out in your mind, a small moment that feels disproportionately terrifying: walking into a restaurant, meeting the host’s gaze, and uttering the three quietest, loudest words in the English language: "Table for one."
For countless aspiring and even experienced solo travelers, this is the final boss of social anxiety. It’s a fear so potent it can dictate an entire trip. A recent study confirmed that for many first-timers, the thought of dining alone is a major source of apprehension, ranking among top concerns like safety and loneliness.
This fear is a thief. It doesn’t just steal your appetite; it steals your access to the very soul of a destination—the vibrant, chaotic, delicious culture that happens around the dinner table. It convinces you that a sad takeaway eaten on the edge of your hotel bed is preferable to the perceived judgment of a room full of strangers. It whispers that your solitude is a spotlight.
But what if that spotlight was actually a stage, and a table for one was the best seat in the house?

This guide is your step-by-step plan to reframe that narrative. These aren’t just tips; they are five actionable, confidence-building strategies designed to transform the experience of eating alone while traveling from a source of dread into an empowering, delicious, and deeply memorable ritual. For a complete roadmap of your entire journey, start with our foundational pillar guide, The Ultimate Guide to Solo Female Travel (15 Essential Tips).
Strategy #1: Master the Art of the Bar Seat
The single most effective way to immediately diffuse the anxiety of solo dining is to bypass the traditional tables altogether and make a beeline for the bar or counter. This isn't a compromise; it's a strategic upgrade to your dining experience, a universally accepted and comfortable spot for any solo diner.
Sitting at a two- or four-top table by yourself can sometimes feel like you’re occupying "empty" space, drawing attention to your solo status. The bar, however, is a fundamentally different social landscape. It's a dynamic, linear space designed for individuals and pairs. Here, you are not "alone"; you are simply another patron in a row of patrons, part of the restaurant's fluid, buzzing energy.
This vantage point offers a multitude of benefits. It often provides a front-row seat to the theater of the restaurant—the craft of the bartender mixing cocktails, the rhythm of the kitchen, the flow of patrons coming and going. It’s an environment that provides endless built-in entertainment. More importantly, it creates a low-pressure opportunity for social connection if you want it. The bartender is a professional at conversation, often happy to offer menu recommendations or share local insights. You might strike up a casual chat with the person next to you, or you can remain comfortably anonymous, absorbed in the ambiance. The choice is entirely yours, and that control is empowering.
Pro-Tip: When researching restaurants, specifically look for photos of the interior that show a substantial bar or counter seating area. Places like tapas bars in Spain, ramen counters in Japan, and classic bistros in France are almost always designed with excellent bar seating, making them perfect venues for a comfortable solo meal.

Strategy #2: Arm Yourself with a Purposeful Prop
One of the biggest sources of anxiety when eating alone while traveling is the fear of just sitting there with nothing to do during the lulls of the meal, such as after you’ve ordered and are waiting for your food. This is where a "prop" becomes your most valuable tool. Having a purposeful object with you completely reframes the narrative, both for any observer and, more importantly, for yourself.
A prop signals that you are not passively waiting for a companion or feeling lonely; you are actively and contentedly engaged in your own company. It fills the silence and gives your hands and eyes a focus, instantly dissolving any feelings of awkwardness. The key is to choose your prop with intention.
A Travel Journal: This is perhaps the ultimate solo dining companion. Use the time to write about your day's adventures, document the sights and sounds around you, or sketch the street scene outside the window. It turns your meal into a productive, reflective, and creative session.
A Good Book: Getting lost in a compelling story is a timeless pleasure. A book is an unambiguous sign that you are happily occupied and content in your solitude.
A Map or Guidebook: Spreading out a map to plan the next leg of your journey is a classic traveler move. It’s practical, engaging, and makes you look like a seasoned, confident explorer engrossed in your adventure.
The Psychology Behind the Prop
It’s a psychological pattern interrupt. When you feel anxious, your brain looks for evidence to support that feeling—you scan the room for people looking at you, you interpret neutral expressions as judgmental. A prop gives you an alternative focus. You are consciously giving your brain a different task to focus on, preventing it from spiraling into self-conscious thoughts. By bringing a prop, you transform your "table for one" into your personal command center, a space for reflection, planning, or escape. You're no longer just a person eating alone; you're a writer, a reader, an adventurer deep in thought.
Strategy #3: Become a Master of Timing
The ambiance of a restaurant can change dramatically depending on the time of day. A chaotic, packed dining room at the peak of the dinner rush can feel overwhelming and intensify feelings of self-consciousness. By strategically choosing when you dine, you can curate a much more relaxed and enjoyable experience for yourself.
Dining during "off-peak" hours is a simple but incredibly effective tactic. Arriving for a late lunch around 2:30 PM or an early dinner at 6:00 PM, before the main crowds descend, offers several advantages. The restaurant will be calmer and quieter, allowing you to choose a desirable table—perhaps one tucked into a cozy corner or with a great view for people-watching. The service staff will likely be less rushed and more attentive, giving you the space to ask questions about the menu and savor your meal without feeling hurried.
This strategy is particularly effective in countries with distinct dining schedules. In Italy, for example, locals often don't eat dinner until 8:00 PM or later. Arriving at a trattoria at 7:00 PM means you'll have the place almost to yourself, allowing you to build your confidence in a low-stakes environment. This deep understanding of local rhythms is something we explore in our comprehensive Italy Guide, which is packed with the kind of insider knowledge that makes a solo trip seamless and authentic.
Before you start scouting trattorias, let's get your master plan organized.
Your Ultimate Planning Companion
A great solo dining experience starts with a great plan. Knowing which restaurants you want to try and when to go is a key part of building a confident itinerary. Our free, downloadable template is the perfect tool to help you organize every aspect of your trip, from your daily schedule to your must-try foodie destinations.
Download your free Travel Itinerary Template here!
Strategy #4: Choose Your Venue with Intention
Not all restaurants are created equal when it comes to the solo dining experience. The venue you choose plays an enormous role in your comfort level. Actively seeking out establishments with a solo-friendly ambiance and avoiding those geared toward formal or romantic occasions can make all the difference.
Your mission is to find places that are inherently lively, casual, and built for a fluid mix of patrons. Here’s what to look for:
Casual Bistros and Cafes: These are often the lifeblood of a neighborhood, with a constant, friendly buzz. Outdoor seating is a huge bonus, as it turns your table into a front-row seat for people-watching—the ultimate solo-dining pastime.
Bustling Food Halls and Markets: These are a solo traveler’s paradise. With a multitude of vendors and communal seating, the entire environment is built around individual choice and a dynamic, social-but-anonymous atmosphere. You can sample a wide variety of local dishes without the formality of a traditional restaurant.
Restaurants with Communal Tables: Many modern eateries feature large, shared tables. Choosing to sit at one of these signals an openness to interaction and creates a natural opportunity for conversation to spark with fellow diners, if you’re in the mood.
Ethnic Restaurants: Places like sushi bars, ramen shops, pho counters, or tapas bars are often culturally geared toward individual diners and counter service, making them incredibly comfortable and natural-feeling environments for eating alone.
Pro-Tip: Use Google Maps and restaurant review sites to do some digital reconnaissance before you head out. Don’t just read the reviews; look at the photos uploaded by patrons. You can get a great feel for the restaurant's layout, see if it has a good bar or counter, and gauge the overall vibe to see if it aligns with what will make you feel most at ease.

Strategy #5: Start with a "Gateway" Food Tour
If the idea of a full, sit-down meal by yourself still feels like too big a leap, then start with a "gateway drug" to confident solo dining: a food tour. Joining a small-group food tour on your first or second day in a new city is one of the most effective and enjoyable ways to build your culinary confidence.
A food tour is a structured, social, and low-pressure experience. You get to sample a wide variety of local specialties from different vendors and restaurants, but you do it as part of a small, friendly group. This immediately removes the "all eyes on me" feeling and replaces it with a fun, shared experience.
This approach is powerful for several reasons. First, it demystifies the local cuisine and ordering process, giving you the knowledge and vocabulary to feel more confident on your own later. Second, it's a fantastic way to meet other travelers and get their recommendations. Third, and most importantly, it provides you with a vetted list of fantastic, friendly restaurants. The casual street food stall or family-run bakery you visit on the tour can become a place you feel completely comfortable returning to on your own, because you've already been there and established a positive connection. It’s a confidence-building exercise disguised as a delicious adventure.
Frequently Asked Questions About Dining Solo
Even with a solid plan, a few lingering questions can cause anxiety. Here are the answers you need.
What if I don't drink alcohol? Is it still okay to sit at the bar?
Absolutely. A modern bar is a full-service part of the restaurant. It's completely normal to sit at the bar and order a mocktail, a soda, or even just a glass of water while you enjoy a full meal. The bartender's job is to serve all patrons, and they will be more than happy to accommodate you.
How do I handle getting a bad table (e.g., right by the kitchen or bathroom)?
As a solo diner, you have the right to be just as comfortable as any other guest. If you're led to a table you don't like, it is perfectly acceptable to politely ask if another is available. A simple, "I was hoping for something a little quieter, is one of the tables by the window available?" is all it takes. Most restaurants will gladly accommodate a reasonable request.
How much should I budget for dining alone?
This varies dramatically by destination and your travel style. A meal in Portugal can be a third of the price of a similar meal in Switzerland. The best approach is to find real-world examples. On the TrekGuider marketplace, you can explore detailed itineraries and guides published by seasoned solo travelers, many of whom include specific restaurant recommendations and budget breakdowns from their own trips.
Your Table is Waiting
The fear of eating alone while traveling is valid, but it is not a permanent barrier. It is a skill waiting to be learned, a confidence muscle waiting to be built. By being strategic—by choosing the bar seat, bringing a journal, dining early, selecting a casual venue, or starting with a food tour—you systematically dismantle the anxiety and replace it with a sense of mastery and enjoyment.
You will soon discover that dining solo is not a consolation prize; it is a unique and powerful way to experience the world. It’s a moment for quiet reflection, a front-row seat to a new culture, and an unfiltered connection to the taste and rhythm of a place. It is an act of radical self-reliance and a declaration of your right to be there, to take up space, and to savor every last bite. Your journey to becoming a confident solo diner is one of the most rewarding parts of the adventure, proving that the best company you can have at the table is often your own.
Meta Data Suggestions:
SEO Meta Title (59 characters): Confidently Eat Alone While Traveling: 5 Expert Tips
URL Slug: confidently-eat-alone-traveling
SEO Meta Description (154 characters): Nervous about dining solo? Our guide offers 5 practical ways to confidently eat alone while traveling, turning social anxiety into an empowering experience.
Don't Miss Out! Subscribe for Exclusive Content
Subscribe


Comments 0
No comments yet
Be the first to share your experience!
Dont Miss Out! Subscribe for Exclusive Content

Chicago Beer Fests: Top 6 Tastings

Ultimate USA Holidays Guide: Top Picks

FTC Affiliate Disclosure Essentials: Stay Compliant as a Travel Creator

Essential Affiliate Tools: From Tracking to Full Optimization

Booking.com Affiliate Program Review: Pros, Cons, and Earnings Potential

Decoding Affiliate Commission Rates: Benchmarks for Travel Creators
How to Plan a Stress-Free Hawaii Family Trip
TrekGuider @trekguider
Planning a family trip to Hawaii should feel exciting, but the reality can be overwhelming. You're juggling how to pack for unpredictable weather, what activities will actually entertain everyone from toddlers to teens, and how to manage the logistics without losing your mind. The fear of getting it wrong—forgetting something crucial or planning a day that ends in meltdowns—can quickly overshadow the promise of paradise.

Imagine arriving on Maui only to realize you’ve forgotten the reef-safe sunscreen now required by law, forcing a frantic, expensive search. Picture the meltdowns—from kids and adults alike—when a carefully planned beach day is met with groans of boredom, or the crushing disappointment of discovering the lūʻau you dreamed of has been sold out for weeks. Without a strategic plan, the logistical details can overshadow the magic you’re seeking.
This guide is the antidote to that anxiety. It’s your strategic playbook, crafted from hard-won experience to eliminate the guesswork and transform your planning process into an exciting prelude to your adventure. While this article drills down into Hawaii-specifics, it's part of our complete library of Family Travel Ideas: The 2026 Guide to Unforgettable Trips. Consider this your roadmap to a seamless, stress-free, and truly magical Hawaiian escape.
What to Bring and What to Leave Behind
A successful packing strategy for Hawaii isn't about bringing everything; it's about bringing the right things. The islands’ unique environment—from intense equatorial sun to sudden tropical showers—demands a thoughtful approach. For a deep dive into the core principles, our How to Pack Light Guide is a great resource. This Hawaii-specific blueprint ensures you’re prepared for every possibility without hauling unnecessary weight across the Pacific.
Your In-Flight & First-Day Survival Kit
Think of your carry-on bag as your mission-critical command center. If your checked luggage gets delayed, this bag should contain everything you need to not just survive, but thrive for the first 24 hours.
A Complete Change of Clothes for Everyone: One full, lightweight outfit per person. Don't forget underwear and socks.
Swimsuits: This is non-negotiable. You can change in the lobby restroom and head straight to the pool, starting your vacation immediately.
Essential Medications: All prescription medications, plus a small first-aid kit with children’s pain relievers, allergy medicine, band-aids, and antibacterial ointment.
Documents & Valuables: IDs, credit cards, and digital or printed copies of your key reservations (hotel, rental car, first big tour).
The "Boredom Buster" Kit: Fully charge all electronics and pre-load them with movies and games. For younger kids, pack a small bag with a new coloring book or a few wrapped dollar-store toys to reveal mid-flight.
A Feast of Snacks: Pack more than you think you’ll need to combat travel delays and grumpy tummies.
Empty Reusable Water Bottles: Fill them up post-security to stay hydrated and save money.
Your Flight Plan for Happy Kids
The long flight to Hawaii is often the most dreaded part of the trip. To make it a breeze, download our free, sanity-saving checklist.
Stress-Free Flying with Kids Guide
It's packed with simple, actionable tips to keep kids of all ages happy and occupied from takeoff to landing.
The Checked Luggage
Chaos is the enemy of a relaxing vacation. To combat this, we rely on a modular system built around packing cubes. This simple technique transforms your luggage from a chaotic pit into a structured, mobile dresser where everything has its place.

The Clothing System (Lightweight & Layered): Hawaii’s climate is defined by humidity and trade winds. Pack lightweight, breathable fabrics like cotton and linen. Focus on mix-and-match pieces. For a week, plan on 5-6 tops and 3-4 bottoms per person. Everyone should have a light jacket or cardigan for breezy evenings and a packable rain jacket.
The Beach Gear System (Protect & Play): This is the core of your Hawaii packing.
Reef-Safe Sunscreen: An absolute must. Pack at least one large tube of mineral-based (zinc oxide or titanium dioxide) sunscreen lotion.
Total Sun Protection: Wide-brimmed sun hats, UV-protective sunglasses, and long-sleeved rash guards for every family member.
Minimalist Beach Toys: A collapsible bucket and a few small shovels are all you need.
Goggles: For kids who love to put their face in the water, a good pair of goggles is invaluable.
The Footwear System (The Rule of Three): You only need three pairs of shoes per person.
Water Shoes/Aqua Socks: Essential for exploring rocky tide pools or beaches with sharp lava rock.
Sandals/Flip-Flops: For the beach, pool, and casual strolls.
Closed-Toe Shoes: A comfortable pair of sneakers for travel days, hikes, or activities like ziplining.
What to Leave at Home (And Rent or Buy in Hawaii)
Beach Towels: Every hotel and condo complex will provide these.
Bulky Floaties and Pool Noodles: Buy them there and leave them for another family when you depart.
Full-Sized Snorkel Sets: Renting high-quality, sanitized equipment on the island is far more convenient.
Formal Wear: Hawaii is overwhelmingly casual. A sundress or a collared shirt with nice shorts is as dressed-up as you’ll need to get.
Pro-Tip: Assign each family member a specific color of packing cubes. This simple trick makes it incredibly easy to identify whose clothes are whose.
Crafting Your Perfect Itinerary for Family Beach Vacations in Hawaii
While building sandcastles is a rite of passage, the true magic of Hawaii lies in its diverse experiences. Tailoring activities to your children's developmental stage is the secret to a trip that engages everyone. And to keep it all organized, our Travel Itinerary Template is a game-changer.
For Families with Toddlers & Preschoolers (Ages 0-5)
At this age, the goals are safety, sensory engagement, and maintaining routines. Focus on manageable outings that spark wonder without causing overstimulation.
Master the Art of the Lagoon: The man-made lagoons of Ko Olina on Oahu are a toddler parent’s paradise. The water is virtually waveless, creating a giant, safe saltwater pool. On Kauai, Lydgate Beach Park offers similarly protected swimming.
Meet the Marine Life (Up Close): The Maui Ocean Center is a world-class aquarium with a walk-through tunnel and touch pools. The Waikiki Aquarium on Oahu is smaller but equally captivating.
Discover the Magic of Shave Ice: Don't underestimate the joy of this simple treat. Trying authentic Hawaiian shave ice is a core memory on a hot afternoon.

For School-Aged Kids (Ages 6-12)
This is the golden age of family travel. Kids are old enough for bigger activities and to truly learn from their experiences.
Become a Junior Snorkeler: This is the perfect age to introduce kids to the underwater world. Start at an ultra-calm spot like Kapalua Bay on Maui or Hanauma Bay on Oahu (reservations required!).
Experience a Family Lūʻau: A lūʻau is a quintessential Hawaiian experience. Opt for one known for being family-friendly, like the Smith Family Garden Lūʻau on Kauai.
Become a Volcano Voyager: On the Big Island, a visit to Hawaiʻi Volcanoes National Park is like a real-life science lesson. Pick up a Junior Ranger booklet to transform your kids into active explorers.

For Teenagers (Ages 13-18)
For teenagers, the key is balancing family time with a sense of independence and adventure. Involve them in the planning.
Learn to Surf: Book a group lesson from a reputable surf school in a beginner-friendly area like Waikiki on Oahu or Kihei on Maui.
Conquer an Epic Hike: Challenge your teens with an iconic hike like the summit of Diamond Head on Oahu, which offers panoramic vistas of Waikiki.
Zipline Through Paradise: Soaring through the rainforest canopy on a zipline is a pure adrenaline rush that provides a thrilling adventure for the whole family.

Pro-Tip: The most popular activities in Hawaii—especially lūʻaus, timed-entry parks like Hanauma Bay, and surf lessons—book up weeks, if not months, in advance. Make your reservations the moment you have your travel dates confirmed.
The Aloha Code: Essential Rules for a Safe and Respectful Trip
A little local knowledge goes a long way. These are the non-negotiable rules for any family visiting the islands.
Ocean Safety Comes First
The Pacific Ocean is powerful. The most important rule in Hawaii is "Never turn your back on the ocean." Rogue waves can appear on even the calmest-looking days.
Swim at Lifeguarded Beaches: Whenever possible, choose a beach with a lifeguard on duty.
Understand Shore Break: Many Hawaiian beaches have a powerful shore break, where waves crash directly onto the sand. This can be dangerous for young children.
Respect the Warnings: Pay attention to all posted warning signs regarding strong currents, high surf, or dangerous marine life.
Protecting the 'Āina (Land)
Hawaii's coral reefs are fragile, living ecosystems. Protecting them is not just a suggestion; it's the law.

Use Mineral-Based LOTION Only: By law, you must only use sunscreens with zinc oxide or titanium dioxide. Critically, avoid aerosol sprays. Even "reef-safe" sprays settle on the sand and wash into the ocean, harming the reef.
Apply Early and Often: Apply sunscreen 20 minutes before sun exposure and reapply every two hours, or immediately after swimming.
Respecting the Wildlife
Hawaii is home to the Hawaiian green sea turtle (honu) and the endangered Hawaiian monk seal.

Keep Your Distance—It's the Law: You must maintain a distance of at least 10 feet (3 meters) from sea turtles and 50 feet (15 meters) from monk seals. It is illegal to touch, chase, or harass them.
View Responsibly: Use a zoom lens for photos. If an animal approaches you, calmly and slowly move away.
Frequently Asked Questions
What is the single most important thing to pack for a Hawaii family trip?
The most crucial item is reef-safe, mineral-based sunscreen LOTION. Sunscreens containing oxybenzone and octinoxate are banned in Hawaii to protect the coral reefs, and aerosol sprays are highly discouraged as they pollute the sand and water.
Is Hawaii a safe destination for toddlers and young children?
Absolutely. Many beaches are perfect for little ones, especially the man-made lagoons at Ko Olina on Oahu or the protected rock ponds at Lydgate Beach Park on Kauai, which have calm, waveless water perfect for safe splashing.
Do I really need to book Hawaiian activities in advance?
Yes, it is critical. Popular activities like lūʻaus, boat tours, surf lessons, and timed-entry parks like Hanauma Bay on Oahu often sell out weeks or even months in advance. Booking ahead is essential to avoid disappointment.
What are the essential types of shoes to bring to Hawaii?
You only need three pairs per person: water shoes for rocky beaches and tide pools, comfortable sandals or flip-flops for the beach and pool, and a pair of closed-toe sneakers for travel days and hiking.
Conclusion
The key to crafting the perfect trip isn’t about finding a secret beach; it’s about making a series of smart, informed choices. By implementing a strategic packing system and thoughtfully selecting age-appropriate activities, you transform the stress of planning into the joy of anticipation. You now have the framework to pack with confidence and design an itinerary that weaves together relaxation, adventure, and connection. This is how you create the legendary Hawaiian family vacation that becomes a key part of your family's story. For even more in-depth strategies on planning unforgettable trips anywhere in the world, explore our comprehensive Travel Guide. Aloha.
Read the full guide: Family Travel Ideas: The 2026 Guide to Unforgettable Trips
Don't Miss Out! Subscribe for Exclusive Content
SubscribeComments 0
No comments yet
Be the first to share your experience!
Dont Miss Out! Subscribe for Exclusive Content
Ultimate USA Holidays Guide: Top Picks
FTC Affiliate Disclosure Essentials: Stay Compliant as a Travel Creator
Essential Affiliate Tools: From Tracking to Full Optimization
Booking.com Affiliate Program Review: Pros, Cons, and Earnings Potential
Decoding Affiliate Commission Rates: Benchmarks for Travel Creators

Amazon Associates for Travel: Strategies to Maximize Commissions
July 4th NYC: Best Fireworks Views
TrekGuider @trekguider
Trying to see the Macy's 4th of July fireworks in New York City can feel like plotting a military campaign. You know it’s one of the most spectacular patriotic displays on the planet, a dazzling barrage of color and sound against the world’s most famous skyline. But the thought of navigating the colossal crowds, deciphering the cryptic official viewing spots, and battling for a sliver of sidewalk with a view of a brick wall is enough to trigger a full-blown anxiety attack.
You’re haunted by visions of being pinned for hours in a human gridlock, craning your neck to see absolutely nothing, with no access to a restroom or a bottle of water. What if you spend all day planning, only to find your chosen spot has been unceremoniously cordoned off by the NYPD? The dream of a magical Independence Day quickly sours into a logistical nightmare, leaving you sweating on a crowded street corner wondering why you didn't just stay home and watch it on TV.
Forget the chaos. This is your definitive battle plan for conquering the crowds and securing a breathtaking view. We’ve distilled the official intel and insider secrets into a foolproof strategy. Whether you want a free patch of grass with a picnic or a more civilized vantage point, this guide will equip you for an unforgettable Fourth of July in New York.

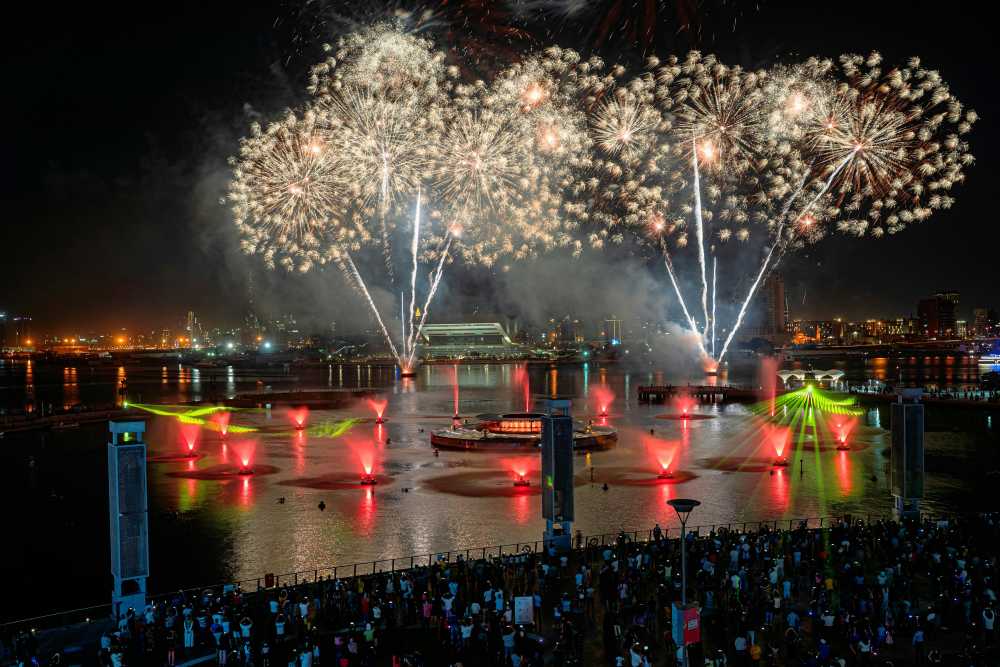
Understanding the Main Event: The Macy's Fireworks Spectacular
Let’s be clear about the sheer scale of this operation. The Macy's 4th of July Fireworks isn't just a show; it's the nation's largest pyrotechnic spectacle, a city-shaking tradition that paints the skyline with thousands of carefully choreographed shells launched from barges on the water. For Friday, July 4, 2026, the show continues its reign on the East River, meaning the most coveted views will be found along the waterfronts of Brooklyn, Queens, and Manhattan.
This isn't a casual affair where you can wander up a few minutes before showtime. It's a massive, city-wide celebration that demands a solid game plan. While the fireworks are an undisputed summer highlight, they're just one piece of the city's vibrant celebratory calendar, which we cover in our definitive guide to New York Holidays: 10 Must-Do Events. Thinking about your trip through this lens—as one epic event among many—is the key to unlocking a truly memorable visit.
The Best Free Viewing Spots for the Fourth of July in New York
Securing a great free spot is the holy grail for most spectators. It requires a healthy dose of patience and impeccable timing, but the reward is a front-row seat to history without spending a dime. The secret is knowing precisely where to go and, just as critically, which tourist traps to avoid.
Brooklyn's Cinematic Waterfront Views
For years, the Brooklyn waterfront has offered the most cinematic views of the fireworks, framing the pyrotechnics against the iconic Manhattan skyline. This is where you go for the postcard shot.
Transmitter Park (Greenpoint): Consistently hailed as a top-tier viewing location, this park offers a direct, jaw-droppingly clear sightline across the East River. Its open, grassy layout is a godsend, providing more room to spread out a blanket than the narrow promenades elsewhere. But its reputation precedes it. To claim a decent piece of turf, you must arrive by 6 PM at the absolute latest.
Domino Park (Williamsburg): With its clever multi-level design, reclaimed factory artifacts, and ample seating, Domino Park is a phenomenal—and popular—option. The elevated walkway provides a unique perspective, and the park's modern amenities (hello, clean restrooms!) make the long wait far more civilized.
East River State Park (Williamsburg): Just a short walk from Domino Park, this location offers a more traditional park experience with a sprawling grassy lawn. It’s a magnet for families and larger groups looking to set up a proper picnic and make a full day of it.
Manhattan's Official Front Lines (and What to Expect)
Manhattan offers official, NYPD-managed viewing points that get you incredibly close to the action. However, this proximity comes at the cost of the highest crowd density and the tightest security.
Official Access Points: The city announces these designated entry points a few days before the event, typically along the FDR Drive in the East Village, Murray Hill, and Midtown East. Check the official Macy's or NYC websites on the day of the event for the exact cross-streets.
The No-Go Zones: Heed the official warnings. The city explicitly advises spectators to avoid FDR Drive in Midtown, Battery Park, and the Brooklyn Heights Promenade. These areas will either be completely closed to the public or offer severely obstructed views. Don't be the tourist who wastes hours trekking to a dead end.
Queens: The Savvy Spectator's Choice
Often overlooked by the masses flocking to Brooklyn, the Queens waterfront in Long Island City provides views that are every bit as stunning, but often with slightly more breathing room.
Gantry Plaza State Park: This park is a true gem, famous for its iconic Pepsi-Cola sign and beautifully restored waterfront gantries. It offers a sweeping panorama of the Midtown skyline, which serves as the ultimate canvas for the fireworks display.
Hunter's Point South Park: Located just south of Gantry Plaza, this park boasts a vast, open green space perfect for laying down a blanket. It’s an excellent alternative for those looking to escape the most intense choke points in Manhattan and Brooklyn.

Pro-Level Strategy: Navigating Security and Human Gridlock
Experiencing the Fourth of July in New York is as much about logistical prowess as it is about patriotic fervor. This is not a casual security checkpoint. The NYPD's presence is comprehensive, involving everything from drones providing aerial surveillance and metal detectors at entry points to NYPD scuba divers patrolling the river itself. This isn't to intimidate, but to ensure a safe event for millions.
Your Arrival and Entry Checklist
Embrace the Early Bird Ethos: We cannot overstate this. For prime real estate like Transmitter Park, a 6 PM arrival is the bare minimum. For the official Manhattan zones, dedicated viewers begin lining up in the early afternoon. The later you arrive, the more likely you are to be watching the back of someone's head.
Pack Like a Pro: You will be on your feet or sitting on the ground for hours. Comfort matters most, but you also need to breeze through security. Large backpacks, coolers, alcohol, and lawn chairs are almost always prohibited. Knowing what to bring—and what to leave behind—is crucial. Our How to Pack Light Guide offers brilliant strategies for carrying just the essentials, a skill that's just as valuable for a day in the city as it is for a week-long trip.
Trust but Verify (Your Sources): On July 4th, follow the NYPD and Macy's on social media or refresh their websites. Viewing points can and do change or close without notice based on crowd capacity. A quick check before you head out can save you from a massive, frustrating detour.
The Buddy System is Non-Negotiable: In crowds of this magnitude, getting separated is incredibly easy. Establish a clear, unambiguous meeting point in advance (e.g., "the corner of X and Y," not "by the hot dog stand"). Keep your phones fully charged, and consider sharing your location with your group via a mapping app.
Pro-Tip: Public transportation is your only sane option. Do not even entertain the idea of driving. Street closures begin in the early afternoon, and parking is a fantasy. The subway is the most efficient way to get close to the action, but expect platforms and train cars to be packed to capacity. Plan your route, buy your MetroCard in advance, and budget at least double the normal travel time.

Beyond the Fireworks: Mastering the All-American Picnic
The fireworks are the grand finale, but Independence Day is an all-day affair. A classic American picnic is the perfect way to spend the afternoon, soaking in the city's festive energy in a more relaxed setting before diving into the waterfront fray.
Prime Picnic Parks (Well Away from the Fireworks Chaos)
Central Park: It’s the quintessential NYC experience for a reason. Head to the vast Sheep Meadow or the Great Lawn, find a spot under a tree, and enjoy the people-watching. You won't see the main fireworks from here, but it’s the perfect stage for your pre-show festivities.
Prospect Park, Brooklyn: Often called Brooklyn's answer to Central Park, the Long Meadow in Prospect Park offers a similarly idyllic and expansive setting. It’s a favorite among locals and provides a more laid-back, community-focused vibe.
Governors Island: A quick and scenic ferry ride away, Governors Island is a true urban oasis. With its sprawling lawns, hammocks, and unparalleled views of the Statue of Liberty, it’s an ideal place to decompress for the day before heading back for the evening's main event.
Your Picnic Pack-Out List
The Spread: Stick to classics that travel well: gourmet sandwiches, cold fried chicken, pasta salads, and fresh fruit. Most importantly, bring more water than you think you'll need. Remember that alcohol is prohibited in public parks.
The Comfort Kit: A large, durable blanket is your foundation. Sunscreen, hats, and sunglasses are absolutely essential for a long day outdoors.
The Clean-Up Crew: Pack a dedicated trash bag and commit to the golden rule of picnicking: leave your spot cleaner than you found it.
Paid Options for a Crowd-Free Fourth of July in New York
If the idea of battling the masses for a patch of grass makes you want to run for the hills, several paid alternatives offer a more comfortable and exclusive experience. These options require booking far in advance and come at a premium, but for many, the guaranteed view and amenities are worth every penny.
Rooftop Bars and Viewing Parties
Many hotels and restaurants with prime real estate in Midtown East, Williamsburg, and Long Island City host ticketed fireworks viewing parties. These events typically include an open bar, food, and live music, all with an elevated, unobstructed view high above the street-level chaos. Expect tickets to start in the low hundreds and sell out weeks, if not months, ahead of time.
Fireworks Cruises on the East River
For a truly cinematic experience, watch the fireworks from the water itself. Numerous companies offer July 4th dinner cruises that place you directly on the East River, offering an unparalleled, up-close perspective of the show.
The Perks: You get a completely unobstructed view, dinner and drinks are often included, and you have access to clean, private restrooms—a luxury that cannot be overstated.
The Price: This is the most expensive option, with prices frequently ranging from $150 to over $500 per person. They are incredibly popular and must be booked months in advance.
Pro-Tip: When booking any ticketed event, do your due diligence. Scrutinize the venue's location on a map to confirm its viewing position relative to the fireworks barges. Search for reviews and photos from previous years' events to ensure the view is as spectacular as advertised. Not all "river views" are created equal.

Your Mission: An Unforgettable Independence Day
You are now armed with the strategy and insider intelligence to make your Fourth of July in New York a resounding success. The key is to decide on your desired experience—a free-for-all on the grass, a civilized seat at a rooftop bar, or a luxurious view from the water—and plan with precision. Arrive early, pack smart, and stay informed.
This is about more than just watching fireworks; it's about taking part in a quintessential American tradition in the most dynamic city on Earth. You're no longer a tourist hoping for a lucky break; you're an insider with a plan. Go forth, claim your spot, and create some dazzling memories. And when you're ready to plan your next great urban adventure, our comprehensive Travel Guide is packed with the expert resources you need to make every trip a masterpiece.
Don't Miss Out! Subscribe for Exclusive Content
SubscribeComments 0
No comments yet
Be the first to share your experience!
Dont Miss Out! Subscribe for Exclusive Content

San Francisco Cherry Blossoms: A Local's Guide to the Blooms

Halloween SF: Haunts Without Horrors

SF Festivals: 7 Must-See Lineups

Christmas SF: Lights & Wharf Wonders

SF Pride: 6 Route & Party Hacks
