Top 11 High-Paying Affiliate Programs for Travel Bloggers
TrekGuider @trekguider
You pour your soul into creating breathtaking travel content. You’ve built an audience that trusts you, carefully crafting guides and reviews that genuinely help people. Yet, when you check your affiliate income reports, there’s a chasm between your effort and your earnings. You’re stuck promoting programs with paper-thin commissions and cookie windows so short they expire before your reader can even find their wallet.
This isn't just a frustration; it's a fundamental flaw in the business model. You see other creators funding their global adventures through their content, and you know the potential is there. After all, the affiliate marketing industry is a $93 billion juggernaut, with the travel vertical alone accounting for about 16% of all revenue. The secret isn't just getting more traffic; it's a strategic pivot—partnering with programs that value your influence and reward you accordingly.
This guide is that pivot. We’re cutting through the noise of mediocre partnerships to deliver a data-driven list of the top 11 high-paying affiliate programs for travel creators. We’re focusing on what actually moves the needle: elite commission rates, generous cookie durations, recurring revenue, and high-ticket products that generate real income from a single click. This is your playbook for a smarter, more profitable affiliate strategy. For a complete command of the entire landscape, our definitive pillar page, Travel Affiliate Programs: The 2026 Ultimate Guide, is your essential next read.

What Defines a Truly High-Paying Affiliate Program?
Let's get one thing straight: "high-paying" is about more than a big commission percentage. A truly lucrative program is a strategic asset, and it excels in one of four key areas:
High Commission Percentage: The obvious starting point. We're looking for programs offering 8%, 10%, or more on every sale.
Generous Cookie Duration: Travel is a high-consideration purchase. A 30, 60, or 90-day cookie window gives your audience time to research and book while ensuring you get paid for your influence.
High-Ticket Products: A 6% commission on a $3,000 adventure tour is $180. A 10% commission on a $50 travel gadget is $5. The math is simple.
Recurring Revenue: The holy grail. Programs that pay you every time a customer renews create a stable, compounding source of passive income.
Our list is curated to feature programs that are champions in these categories, allowing you to build a powerful portfolio of high-paying affiliate programs.

1. SafetyWing: The Recurring Revenue Powerhouse
For any creator with an audience of digital nomads, long-term travelers, or remote workers, SafetyWing is non-negotiable. It’s travel medical insurance built by nomads, for nomads, and its affiliate program is one of the most innovative and lucrative in the industry.
Commission Rate: 10% (recurring)
Cookie Duration: 364 days
Best For: Digital nomad, long-term travel, and remote work niches.
What makes SafetyWing an elite partner is its recurring commission model. You don't just get paid once; you earn 10% every month the policy is renewed, for up to a year. This transforms a single conversion into a reliable income stream that builds on itself. The 364-day cookie is simply best-in-class, ensuring you capture value from readers who take their time to decide.
2. G Adventures: High-Ticket Tours & Epic Commissions
G Adventures specializes in small-group adventure tours—a high-ticket item that translates directly into substantial commissions. Their focus on authentic, sustainable travel resonates deeply with modern audiences, making their trips an easy and ethical recommendation.
Commission Rate: 6%
Cookie Duration: 90 days
Best For: Adventure travel, solo travel, and sustainable tourism niches.
While 6% might not seem like the highest rate on this list, its power is in the average order value. These tours often cost thousands of dollars, meaning a single booking can net you a commission of $150−300 or more. The generous 90-day cookie duration is perfectly suited for this type of considered purchase, giving your audience three full months to plan, commit, and book.
3. Viator: The King of Tours and Activities
Owned by Tripadvisor, Viator is the market leader in tours, activities, and experiences, boasting over 300,000 bookable options worldwide. For creators who build detailed itineraries or "what to do" guides, Viator is an essential monetization engine.
Commission Rate: 8%
Cookie Duration: 30 days
Best For: City guides, family travel, and itinerary-focused content.
Viator's 8% commission is at the top end for the tours and activities sector. Its massive inventory means you can find a relevant, bookable experience for virtually any destination you cover. The 30-day cookie provides a solid window for conversion, and the platform's high brand trust helps turn your clicks into cash.
4. World Nomads: The Adventure Insurance Standard
World Nomads has long been a trusted name in travel insurance, especially for independent and adventure travelers. Their brand is synonymous with comprehensive coverage for the kinds of activities many other insurers won't touch.
Commission Rate: 10%
Cookie Duration: 60 days
Best For: Backpacking, adventure travel, and youth travel niches.
A flat 10% commission on a high-value product like travel insurance is a powerful earner. Combined with a 60-day cookie duration, World Nomads provides a fantastic opportunity to earn significant income while promoting a product that is a responsible and essential recommendation.
Pro-Tip: The most successful travel creators build a diversified affiliate portfolio. Don't rely on a single program. A strategic mix covering accommodations, tours, insurance, and gear creates a more resilient and stable income stream that can weather any market shift.

5. REI: The Gold Standard for Outdoor Gear
For any creator in the hiking, camping, or outdoor adventure space, REI is a premier partner. They are a trusted retailer known for high-quality gear and have an intensely loyal customer base that is primed to convert.
Commission Rate: 5-8%
Cookie Duration: 15 days
Best For: Outdoor, hiking, camping, and adventure travel niches.
While Amazon is often the default for gear, REI's higher commission rate and focus on premium products make it a more lucrative choice for specialized content. Promoting a $700 tent or a $400 backpack from REI will yield a much higher commission than the 3-4% offered by Amazon. Their loyal membership and trusted brand name lead to excellent conversion rates.
6. Expedia Group: The Strategic Choice for Accommodations
Many new creators flock to Booking.com due to brand recognition, but savvy affiliates often choose the Expedia Group program instead. It covers major brands like Hotels.com and Vrbo and offers one crucial advantage: a vastly superior cookie policy.
Commission Rate: Up to 6%
Cookie Duration: 7 days
Best For: Hotel reviews, luxury travel, and accommodation-heavy content.
Booking.com’s infamous session-based cookie means you only get paid if the user books in the same session they click—a crippling disadvantage for a product that requires days of research. Expedia’s 7-day cookie is structurally safer and far more profitable. A 6% commission on a multi-night hotel stay adds up quickly, making this a key element program.
7. Tripadvisor: Earn from Clicks, Not Just Bookings
Tripadvisor offers a unique and powerful affiliate model that sets it apart. While they offer an 8% commission on Viator tours, their primary hotel program allows you to earn money even if your reader doesn't book.
Commission Rate: Up to 50% of Tripadvisor's commission from hotel partners (per click); 8% on tours.
Cookie Duration: 14 days
Best For: High-traffic blogs, destination guides, and hotel comparison content.
Tripadvisor’s model is a form of pay-per-click. When a user clicks your affiliate link and is sent to one of Tripadvisor's hotel partners, you earn a commission—regardless of whether they book. For websites with significant traffic, this can generate a substantial income stream that isn't solely dependent on final sales.
8. Skyscanner: Monetize the Search for Flights
Monetizing flights is notoriously difficult, but Skyscanner provides one of the best solutions available. As a leading flight comparison engine, they offer customizable search widgets you can embed directly into your content.
Commission Rate: Revenue share (up to 50% of their commission)
Cookie Duration: 30 days
Best For: Budget travel, flight deal, and transport-focused content.
The revenue share model means you get a piece of the commission Skyscanner earns from the airline or travel agent when a user books. This can be highly effective when integrated into content about finding cheap flights or planning travel routes. The 30-day cookie and trusted brand make it a top choice for the flight vertical.
9. Discover Cars: Tap Into the Lucrative Rental Market
Car rentals are a frequently overlooked but highly profitable affiliate vertical. Discover Cars is a leading car rental comparison site with a strong affiliate program that can be a great complement to your other travel recommendations.
Commission Rate: Varies (revenue share model)
Cookie Duration: Varies
Best For: Road trip itineraries, family travel, and guides for destinations where a car is essential.
By embedding their search box or using contextual links, you can earn a share of the revenue from every completed booking. For content focused on road trips or exploring destinations outside of major city centers, this can become a significant and consistent source of income.
Pro-Tip: Look beyond the commission percentage and monitor your EPC (Earnings Per Click) in your affiliate dashboard. A program with a lower commission but a much higher EPC might actually be more profitable because it converts your specific audience more effectively.

10. The TrekGuider Referral Program: A Paradigm Shift
The highest-paying opportunities often come from a big change. While traditional programs pay you for selling someone else's product, a referral program pays you for building a network. The TrekGuider Seller Platform is built on this powerful model, offering a unique way to generate long-term, passive income.
Commission Rate: Ongoing revenue share (25% for 30 days, 12.5% for 11 months) from the marketplace's share of revenue from sales made by attracted sellers.
Cookie Duration: N/A (Lifetime attribution for referred sellers)
Best For: Creators ready to build a diversified, passive income stream and empower their community.
Instead of a one-time commission, you earn a percentage of TrekGuider's platform fees from every new seller you bring to the platform—for a full year. This creates a compounding, passive revenue stream. By helping your fellow creators launch their own digital products on TrekGuider, you build a business asset that pays you month after month. It's a powerful addition to your portfolio of traditional high-paying affiliate programs.
11. Amazon Associates: The High-Volume Essential
It’s the elephant in the room: a program with a 3-4% commission on a list of heavy hitters. But leaving Amazon Associates off this list would be malpractice. Its power isn’t in the commission rate; it’s in its unmatched conversion gravity and the sheer volume of commerce it commands.
Commission Rate: 3-4% for most travel categories
Cookie Duration: 24 hours
Best For: Gear reviews, packing lists, and any content recommending physical products.
The 24-hour cookie has a secret weapon: you earn a commission on everything the customer adds to their cart in that window, not just the product you linked to. A reader who clicks your link for a travel adapter might also buy a new camera and a suitcase, and you'll get a commission on it all. For this reason, Amazon remains a top earner for nearly every travel creator.
Beyond Affiliate Links: Create Your Own High-Paying Product
The world's top-earning creators understand a vital secret: the most profitable product you can ever promote is your own. Affiliate marketing is a phenomenal way to generate income, but creating and selling your own digital products—like travel guides, itineraries, or photo presets—offers unparalleled profit margins and brand authority.
You already have the expertise. Why not package that knowledge into a premium digital product? This is the ultimate strategy for diversifying your income and taking full control of your earnings.

Ready to build your own product but not sure where to start?
Download our free Digital Product Ideas Guide today! It’s packed with dozens of proven ideas specifically for travel creators, helping you identify the perfect product for your audience and start building your content empire.
Frequently Asked Questions (FAQ)
1. How many affiliate programs should I join? Start with 3-5 core programs that are a perfect fit for your niche. It's better to deeply integrate a few high-performing programs than to sprinkle links from dozens of them. As you grow, you can expand, but start with a focused, strategic selection.
2. Can I really make a full-time income from this? Absolutely. The reported average monthly income for travel affiliates is over $13,000. However, it requires treating it like a real business: creating high-value content, understanding SEO, and strategically selecting partners like the ones on this list.
3. Should I use a link management plugin? Yes. Tools like Pretty Links or ThirstyAffiliates are essential. They cloak long, ugly affiliate links into clean, branded URLs and allow you to manage all your links from a central dashboard, which is a massive time-saver.
Your Blueprint for a More Profitable Future
Choosing the right affiliate partners is one of the most critical decisions you will make as a travel creator. By moving away from low-value programs and focusing on this curated list of high-paying affiliate programs, you can dramatically increase your earnings without needing to triple your traffic.
The key is to build a diversified portfolio that aligns with your audience's needs. Combine recurring revenue from SafetyWing, high-ticket commissions from G Adventures, and high-volume sales from Amazon. This is how you build a resilient, profitable, and sustainable business that not only funds your travels but transforms your passion into your career.
Read the full guide: The Travel Blogger's Playbook to Affiliate Marketing Mastery
Don't Miss Out! Subscribe for Exclusive Content
Subscribe


Comments 0
No comments yet
Be the first to share your experience!
Dont Miss Out! Subscribe for Exclusive Content

FTC Affiliate Disclosure Essentials: Stay Compliant as a Travel Creator

Essential Affiliate Tools: From Tracking to Full Optimization

Avoid These 5 Affiliate Landing Page Mistakes for Better Conversions

Affiliate Keyword Research Mastery for Travel Blogs

Booking.com Affiliate Program Review: Pros, Cons, and Earnings Potential

Decoding Affiliate Commission Rates: Benchmarks for Travel Creators
9 Beach Safety Tips That Could Save Your Life
TrekGuider @trekguider
There’s a moment on every beach trip that feels like pure magic. It’s the feeling of warm sand between your toes, the hypnotic sound of waves crashing, and the endless blue horizon stretching out before you. It’s a picture of perfect relaxation. But beneath that tranquil surface, the ocean holds immense and impartial power. A beautiful day can turn dangerous in an instant from a hidden current, underestimated waves, or the relentless sun, transforming a dream vacation into a terrifying emergency. Every year, countless beachgoers find themselves in preventable peril simply because they misread the water or weren't prepared for the environment.
This isn't a guide to make you fear the ocean; it's a playbook to empower you to respect it. We’re here to give you the essential, expert-backed beach safety tips that can mean the difference between a blissful day and a life-altering one. These strategies, drawn from lifeguarding associations and national weather experts, are a critical component of the situational awareness we cover in our comprehensive guide, The Ultimate Guide to Travel Safety: A 2026 Playbook. By learning to see the beach not just as a playground, but as a dynamic natural environment, you can ensure your only takeaways are seashells and incredible memories. Let’s dive in.

Master the Water: Essential Ocean Safety Tips
The vast majority of beach-related dangers originate in the water itself. From powerful currents to unpredictable surf, understanding the ocean's behavior is the most critical skill any beachgoer can possess. These are the foundational beach safety tips for staying safe in the surf.
1. Become an Expert at Spotting Rip Currents
Rip currents are the number one danger at most surf beaches, responsible for the majority of ocean rescues performed by lifeguards. They are not undertows that pull you under the water; they are powerful, narrow channels of water that flow away from the shore at high speed. According to NOAA and the United States Lifesaving Association (USLA), knowing how to visually identify one from the shore is your first and best line of defense.
Here’s what to look for, especially from an elevated position like the dunes or a lifeguard tower:
A Channel of Churning, Choppy Water: Look for a specific area where the water seems agitated or rough, moving in a different direction than the surrounding waves.
A Break in the Incoming Wave Pattern: This is often the easiest sign to spot. You'll see a gap in the line of breaking waves—an area that looks deceptively calm. This flat spot is the rip current pulling water back out to sea, disrupting the incoming waves.
A Difference in Water Color: Because the current is carrying sand and sediment offshore, the water within a rip current often appears darker, murky, or sandy brown compared to the clearer, greener water on either side.
A Line of Foam or Debris Moving Seaward: This is a dead giveaway. If you see a line of foam, seaweed, or other floating debris moving steadily away from the beach, perpendicular to the shore, you are looking directly at a rip current.
Pro-Tip: Before you even set up your umbrella, take five minutes to stand back and observe the water. Actively look for these signs. Identifying potential rip currents before you get in the water is the single most important safety action you can take.
2. Know the "Flip, Float, Follow" Rule for Rip Current Survival
If you do get caught in a rip current, your instinctive reaction—to panic and swim directly against it back to shore—is the most dangerous thing you can do. Fighting a rip current will exhaust you to the point of drowning. The correct response is simple and could save your life.
Flip: Flip onto your back to stay afloat and conserve energy.
Float: The current will not pull you under; it will only pull you away from shore. Stay calm and float with it.
Follow: Once you are out of the main pull of the current, begin swimming parallel to the shoreline. Do not swim toward the beach. Once you have swum out of the current, you can then turn and swim back to shore, ideally at an angle away from where you were caught.
If you are unable to swim out of it, continue to float and wave your arms and yell for help to attract the attention of a lifeguard or other swimmers.

3. Understand and Obey the Beach Warning Flag System
While knowing how to escape an invisible current is a vital reactive skill, your most powerful proactive tool is the one flapping in the breeze. Beach warning flags are a simple, universal language used by lifeguards to communicate the current water conditions. This system, adopted by the International Lifesaving Federation, provides a quick, visual assessment of the hazard level. Ignoring these flags is a gamble you should never take.
Green Flag: Low Hazard. Conditions are calm, but you should still exercise caution.
Yellow Flag: Medium Hazard. Moderate surf and/or currents are present. Weak swimmers should stay out of the water, and everyone else should use extra care.
Red Flag: High Hazard. The surf is high, and/or strong currents make conditions dangerous. It is recommended that no one enters the water.
Double Red Flag: Water Closed to Public. Conditions are extremely dangerous. The water is closed to all swimming, and entering it is prohibited.
Purple Flag: Dangerous Marine Life. This flag indicates that potentially hazardous marine life, like jellyfish or sharks, has been spotted. It is always flown with another color flag that indicates the surf conditions.
Pro-Tip: The absence of flags does not automatically mean the water is safe. If there is no flag, it likely means there is no lifeguard on duty. In that case, you are swimming entirely at your own risk. Always try to swim at a beach protected by lifeguards.
Master the Environment: Sun and Shoreline Safety Tips
While the ocean poses the most immediate threats, the beach environment itself has its own set of risks. The sun, sand, and heat can cause serious health issues if not managed properly. These beach safety tips will keep you safe on the shore.
4. Know the Signs of Heat Exhaustion vs. Heatstroke
That perfect, sun-drenched beach day holds a hidden danger. When the temperature climbs, the line between bliss and a medical emergency can blur with alarming speed. According to the Red Cross, it's crucial to know the difference between heat exhaustion and the more severe, life-threatening heatstroke (sunstroke).
Heat Exhaustion Symptoms:
Headache, dizziness, and confusion
Excessive sweating with cool, moist, or pale skin
Nausea and muscle cramps
A rapid, weak pulse
First-Aid for Heat Exhaustion:
Move to a Cool Place: Immediately get the person out of the direct sun and into shade or air conditioning.
Cool Them Down: Loosen their clothing and apply cool, wet cloths or spray them with cool water.
Rehydrate: If they are conscious and able to swallow, have them sip small amounts of a sports drink or water.
If their condition doesn't improve or they start vomiting, call for emergency help immediately, as it can progress to heatstroke.
5. Recognize the Emergency of Heatstroke (Sunstroke)
Heatstroke is a full-blown medical emergency where the body's internal cooling system completely fails.
Heatstroke Symptoms:
Changes in mental status (confusion, agitation, loss of consciousness)
Hot, flushed, and often dry skin (sweating may have stopped)
A dangerously high body temperature (often above 104°F / 40°C)
A rapid, strong pulse, which may become weak later
First-Aid for Heatstroke:
Call 911 Immediately: This is a life-threatening emergency that requires professional medical intervention.
Begin Rapid Cooling: While waiting for help, do everything you can to cool the person's body. Immerse them in cool water if possible, or douse them with water and apply ice packs to the neck, groin, and armpits.

6. Practice Proactive Sun Protection
The best way to deal with a heat-related illness is to never let it start. Sun protection is a continuous strategy, not a one-time action.
Hydrate Constantly: Drink plenty of water throughout the day, even before you feel thirsty.
Use Broad-Spectrum Sunscreen: Apply a sunscreen with at least SPF 30 and reapply it every two hours, and always immediately after swimming or excessive sweating.
Seek Shade: Use an umbrella and take breaks from the sun, especially during the peak intensity hours of 10 a.m. to 4 p.m.
Wear Protective Clothing: A wide-brimmed hat and UV-blocking sunglasses are non-negotiable.
7. The "Stingray Shuffle" Rule
In many coastal areas, stingrays bury themselves in the sand in shallow water. Stepping directly on one can result in an excruciatingly painful sting from the barb on their tail. To avoid this, never walk normally through the shallows. Instead, shuffle your feet along the sand. The vibrations from the shuffle will alert any nearby stingrays to your presence, giving them a chance to swim away peacefully.
Master Your Preparation: Final Beach Safety Tips
A safe and relaxing beach day begins before you even leave home. Smart planning and having the right gear can make all the difference, especially when traveling with family.
8. Pack a Dedicated Beach First-Aid Kit
While your main travel medical kit should be comprehensive, your beach bag needs a few specific items to handle common coastal issues:
Waterproof Bandages: For minor cuts and scrapes from shells or rocks.
Aloe Vera Gel: For immediate relief from minor sunburn.
Antihistamine Cream: To soothe the itch from insect bites.
Tweezers: For removing splinters or shell fragments.
Vinegar: A small bottle of white vinegar is a secret weapon; it can help neutralize the sting from some types of jellyfish.
9. Always Designate a "Water Watcher"
When you're at the beach with a group, especially with children, it's easy to fall into the trap of "diffusion of responsibility," where everyone assumes someone else is watching the kids in the water. The solution is to formally designate one adult as the "Water Watcher" for a set period (e.g., 15-20 minutes). During their shift, that person's only job is to watch the water without distraction—no phones, no books, no conversations. Then, you switch. This simple system ensures there are always eyes on the swimmers.
Your Ultimate Guide to Family Beach Travel
Keeping kids safe and entertained at the beach is a unique challenge. From packing the right gear to navigating meltdowns and keeping them safe in the sun and surf, a little extra preparation goes a long way. Our specialized guide takes the stress out of the equation.
Download our free Stress-Free Flying with Kids Guide for expert tips on making every part of your family vacation, from the airport to the beach, a breeze!
Beach Safety FAQs
A prepared mind is a safe mind. Here are quick answers to other common beach safety questions.
1. What’s the right way to treat a jellyfish sting?
First, get out of the water. Rinse the affected area with vinegar (if available) for about 30 seconds to deactivate the stingers. Do not use fresh water, as it can make it worse. Carefully pluck out any visible tentacles with tweezers. Soaking the skin in hot water (as hot as can be tolerated without burning) for 20-45 minutes can also help relieve the pain.
2. Is it safe to dig deep holes in the sand?
Digging in the sand is a classic beach activity, but deep holes can be incredibly dangerous. They can collapse unexpectedly, burying a person in seconds. Never dig a hole deeper than the knees of the smallest person in your group, and always fill in any holes you dig before you leave the beach.
3. What should I do if I see someone in trouble in the water?
Do not attempt a swimming rescue yourself unless you are trained in water rescue. An untrained rescuer can quickly become a second victim. The best course of action is to call for help immediately. Yell to alert a lifeguard and call 911. If you can, throw the person something that floats, like a cooler or a boogie board.
By embracing these nine essential beach safety tips, you shift from being a passive visitor to an active, aware, and prepared participant in one of nature’s most magnificent environments. The goal isn't to diminish the fun but to ensure it. A healthy respect for the ocean and a solid plan for your day are the keys to unlocking a truly carefree and unforgettable experience by the sea.

Now that you've mastered the art of staying safe on the coast, you can focus on the rest of your adventure. For a complete, deep-dive into every facet of trip planning, from health and safety to budgeting and logistics, our comprehensive Travel Guide is the only resource you'll ever need.
Don't Miss Out! Subscribe for Exclusive Content
SubscribeComments 0
No comments yet
Be the first to share your experience!
Dont Miss Out! Subscribe for Exclusive Content

Ultimate USA Holidays Guide: Top Picks
FTC Affiliate Disclosure Essentials: Stay Compliant as a Travel Creator
Essential Affiliate Tools: From Tracking to Full Optimization
Booking.com Affiliate Program Review: Pros, Cons, and Earnings Potential
Decoding Affiliate Commission Rates: Benchmarks for Travel Creators

Amazon Associates for Travel: Strategies to Maximize Commissions
How to Plan a Stress-Free Hawaii Family Trip
TrekGuider @trekguider
Planning a family trip to Hawaii should feel exciting, but the reality can be overwhelming. You're juggling how to pack for unpredictable weather, what activities will actually entertain everyone from toddlers to teens, and how to manage the logistics without losing your mind. The fear of getting it wrong—forgetting something crucial or planning a day that ends in meltdowns—can quickly overshadow the promise of paradise.

Imagine arriving on Maui only to realize you’ve forgotten the reef-safe sunscreen now required by law, forcing a frantic, expensive search. Picture the meltdowns—from kids and adults alike—when a carefully planned beach day is met with groans of boredom, or the crushing disappointment of discovering the lūʻau you dreamed of has been sold out for weeks. Without a strategic plan, the logistical details can overshadow the magic you’re seeking.
This guide is the antidote to that anxiety. It’s your strategic playbook, crafted from hard-won experience to eliminate the guesswork and transform your planning process into an exciting prelude to your adventure. While this article drills down into Hawaii-specifics, it's part of our complete library of Family Travel Ideas: The 2026 Guide to Unforgettable Trips. Consider this your roadmap to a seamless, stress-free, and truly magical Hawaiian escape.
What to Bring and What to Leave Behind
A successful packing strategy for Hawaii isn't about bringing everything; it's about bringing the right things. The islands’ unique environment—from intense equatorial sun to sudden tropical showers—demands a thoughtful approach. For a deep dive into the core principles, our How to Pack Light Guide is a great resource. This Hawaii-specific blueprint ensures you’re prepared for every possibility without hauling unnecessary weight across the Pacific.
Your In-Flight & First-Day Survival Kit
Think of your carry-on bag as your mission-critical command center. If your checked luggage gets delayed, this bag should contain everything you need to not just survive, but thrive for the first 24 hours.
A Complete Change of Clothes for Everyone: One full, lightweight outfit per person. Don't forget underwear and socks.
Swimsuits: This is non-negotiable. You can change in the lobby restroom and head straight to the pool, starting your vacation immediately.
Essential Medications: All prescription medications, plus a small first-aid kit with children’s pain relievers, allergy medicine, band-aids, and antibacterial ointment.
Documents & Valuables: IDs, credit cards, and digital or printed copies of your key reservations (hotel, rental car, first big tour).
The "Boredom Buster" Kit: Fully charge all electronics and pre-load them with movies and games. For younger kids, pack a small bag with a new coloring book or a few wrapped dollar-store toys to reveal mid-flight.
A Feast of Snacks: Pack more than you think you’ll need to combat travel delays and grumpy tummies.
Empty Reusable Water Bottles: Fill them up post-security to stay hydrated and save money.
Your Flight Plan for Happy Kids
The long flight to Hawaii is often the most dreaded part of the trip. To make it a breeze, download our free, sanity-saving checklist.
Stress-Free Flying with Kids Guide
It's packed with simple, actionable tips to keep kids of all ages happy and occupied from takeoff to landing.
The Checked Luggage
Chaos is the enemy of a relaxing vacation. To combat this, we rely on a modular system built around packing cubes. This simple technique transforms your luggage from a chaotic pit into a structured, mobile dresser where everything has its place.

The Clothing System (Lightweight & Layered): Hawaii’s climate is defined by humidity and trade winds. Pack lightweight, breathable fabrics like cotton and linen. Focus on mix-and-match pieces. For a week, plan on 5-6 tops and 3-4 bottoms per person. Everyone should have a light jacket or cardigan for breezy evenings and a packable rain jacket.
The Beach Gear System (Protect & Play): This is the core of your Hawaii packing.
Reef-Safe Sunscreen: An absolute must. Pack at least one large tube of mineral-based (zinc oxide or titanium dioxide) sunscreen lotion.
Total Sun Protection: Wide-brimmed sun hats, UV-protective sunglasses, and long-sleeved rash guards for every family member.
Minimalist Beach Toys: A collapsible bucket and a few small shovels are all you need.
Goggles: For kids who love to put their face in the water, a good pair of goggles is invaluable.
The Footwear System (The Rule of Three): You only need three pairs of shoes per person.
Water Shoes/Aqua Socks: Essential for exploring rocky tide pools or beaches with sharp lava rock.
Sandals/Flip-Flops: For the beach, pool, and casual strolls.
Closed-Toe Shoes: A comfortable pair of sneakers for travel days, hikes, or activities like ziplining.
What to Leave at Home (And Rent or Buy in Hawaii)
Beach Towels: Every hotel and condo complex will provide these.
Bulky Floaties and Pool Noodles: Buy them there and leave them for another family when you depart.
Full-Sized Snorkel Sets: Renting high-quality, sanitized equipment on the island is far more convenient.
Formal Wear: Hawaii is overwhelmingly casual. A sundress or a collared shirt with nice shorts is as dressed-up as you’ll need to get.
Pro-Tip: Assign each family member a specific color of packing cubes. This simple trick makes it incredibly easy to identify whose clothes are whose.
Crafting Your Perfect Itinerary for Family Beach Vacations in Hawaii
While building sandcastles is a rite of passage, the true magic of Hawaii lies in its diverse experiences. Tailoring activities to your children's developmental stage is the secret to a trip that engages everyone. And to keep it all organized, our Travel Itinerary Template is a game-changer.
For Families with Toddlers & Preschoolers (Ages 0-5)
At this age, the goals are safety, sensory engagement, and maintaining routines. Focus on manageable outings that spark wonder without causing overstimulation.
Master the Art of the Lagoon: The man-made lagoons of Ko Olina on Oahu are a toddler parent’s paradise. The water is virtually waveless, creating a giant, safe saltwater pool. On Kauai, Lydgate Beach Park offers similarly protected swimming.
Meet the Marine Life (Up Close): The Maui Ocean Center is a world-class aquarium with a walk-through tunnel and touch pools. The Waikiki Aquarium on Oahu is smaller but equally captivating.
Discover the Magic of Shave Ice: Don't underestimate the joy of this simple treat. Trying authentic Hawaiian shave ice is a core memory on a hot afternoon.
For School-Aged Kids (Ages 6-12)
This is the golden age of family travel. Kids are old enough for bigger activities and to truly learn from their experiences.
Become a Junior Snorkeler: This is the perfect age to introduce kids to the underwater world. Start at an ultra-calm spot like Kapalua Bay on Maui or Hanauma Bay on Oahu (reservations required!).
Experience a Family Lūʻau: A lūʻau is a quintessential Hawaiian experience. Opt for one known for being family-friendly, like the Smith Family Garden Lūʻau on Kauai.
Become a Volcano Voyager: On the Big Island, a visit to Hawaiʻi Volcanoes National Park is like a real-life science lesson. Pick up a Junior Ranger booklet to transform your kids into active explorers.

For Teenagers (Ages 13-18)
For teenagers, the key is balancing family time with a sense of independence and adventure. Involve them in the planning.
Learn to Surf: Book a group lesson from a reputable surf school in a beginner-friendly area like Waikiki on Oahu or Kihei on Maui.
Conquer an Epic Hike: Challenge your teens with an iconic hike like the summit of Diamond Head on Oahu, which offers panoramic vistas of Waikiki.
Zipline Through Paradise: Soaring through the rainforest canopy on a zipline is a pure adrenaline rush that provides a thrilling adventure for the whole family.
Pro-Tip: The most popular activities in Hawaii—especially lūʻaus, timed-entry parks like Hanauma Bay, and surf lessons—book up weeks, if not months, in advance. Make your reservations the moment you have your travel dates confirmed.
The Aloha Code: Essential Rules for a Safe and Respectful Trip
A little local knowledge goes a long way. These are the non-negotiable rules for any family visiting the islands.
Ocean Safety Comes First
The Pacific Ocean is powerful. The most important rule in Hawaii is "Never turn your back on the ocean." Rogue waves can appear on even the calmest-looking days.
Swim at Lifeguarded Beaches: Whenever possible, choose a beach with a lifeguard on duty.
Understand Shore Break: Many Hawaiian beaches have a powerful shore break, where waves crash directly onto the sand. This can be dangerous for young children.
Respect the Warnings: Pay attention to all posted warning signs regarding strong currents, high surf, or dangerous marine life.
Protecting the 'Āina (Land)
Hawaii's coral reefs are fragile, living ecosystems. Protecting them is not just a suggestion; it's the law.

Use Mineral-Based LOTION Only: By law, you must only use sunscreens with zinc oxide or titanium dioxide. Critically, avoid aerosol sprays. Even "reef-safe" sprays settle on the sand and wash into the ocean, harming the reef.
Apply Early and Often: Apply sunscreen 20 minutes before sun exposure and reapply every two hours, or immediately after swimming.
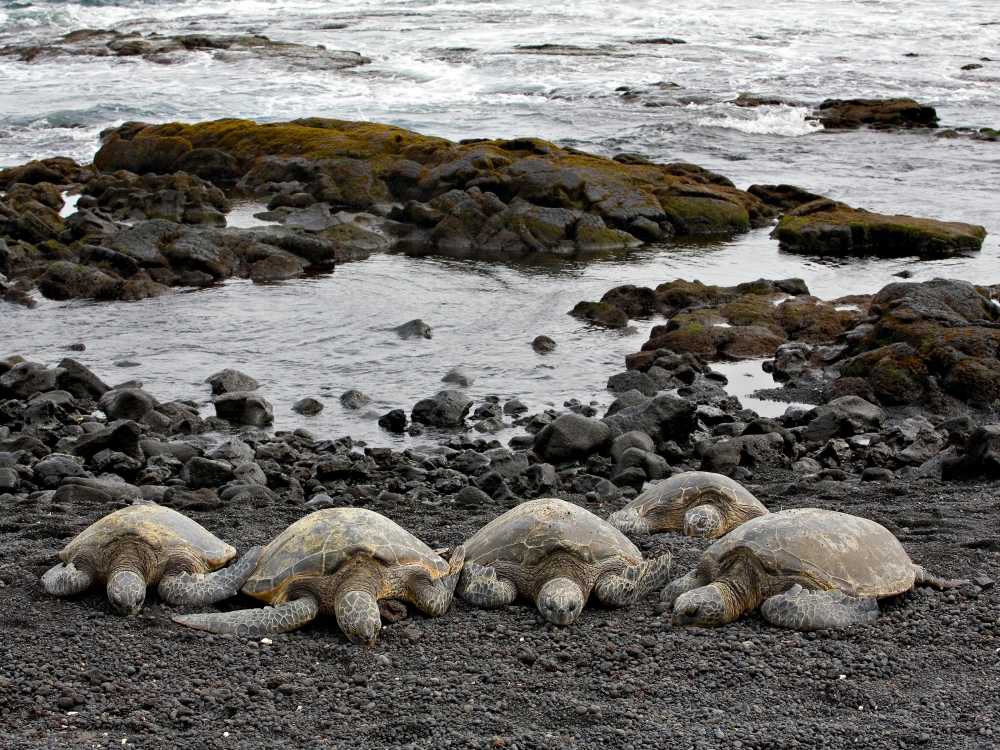
Respecting the Wildlife
Hawaii is home to the Hawaiian green sea turtle (honu) and the endangered Hawaiian monk seal.

Keep Your Distance—It's the Law: You must maintain a distance of at least 10 feet (3 meters) from sea turtles and 50 feet (15 meters) from monk seals. It is illegal to touch, chase, or harass them.
View Responsibly: Use a zoom lens for photos. If an animal approaches you, calmly and slowly move away.
Frequently Asked Questions
What is the single most important thing to pack for a Hawaii family trip?
The most crucial item is reef-safe, mineral-based sunscreen LOTION. Sunscreens containing oxybenzone and octinoxate are banned in Hawaii to protect the coral reefs, and aerosol sprays are highly discouraged as they pollute the sand and water.
Is Hawaii a safe destination for toddlers and young children?
Absolutely. Many beaches are perfect for little ones, especially the man-made lagoons at Ko Olina on Oahu or the protected rock ponds at Lydgate Beach Park on Kauai, which have calm, waveless water perfect for safe splashing.
Do I really need to book Hawaiian activities in advance?
Yes, it is critical. Popular activities like lūʻaus, boat tours, surf lessons, and timed-entry parks like Hanauma Bay on Oahu often sell out weeks or even months in advance. Booking ahead is essential to avoid disappointment.
What are the essential types of shoes to bring to Hawaii?
You only need three pairs per person: water shoes for rocky beaches and tide pools, comfortable sandals or flip-flops for the beach and pool, and a pair of closed-toe sneakers for travel days and hiking.
Conclusion
The key to crafting the perfect trip isn’t about finding a secret beach; it’s about making a series of smart, informed choices. By implementing a strategic packing system and thoughtfully selecting age-appropriate activities, you transform the stress of planning into the joy of anticipation. You now have the framework to pack with confidence and design an itinerary that weaves together relaxation, adventure, and connection. This is how you create the legendary Hawaiian family vacation that becomes a key part of your family's story. For even more in-depth strategies on planning unforgettable trips anywhere in the world, explore our comprehensive Travel Guide. Aloha.
Read the full guide: Family Travel Ideas: The 2026 Guide to Unforgettable Trips
Don't Miss Out! Subscribe for Exclusive Content
SubscribeComments 0
No comments yet
Be the first to share your experience!
Dont Miss Out! Subscribe for Exclusive Content
Ultimate USA Holidays Guide: Top Picks
FTC Affiliate Disclosure Essentials: Stay Compliant as a Travel Creator
Essential Affiliate Tools: From Tracking to Full Optimization
Booking.com Affiliate Program Review: Pros, Cons, and Earnings Potential
Decoding Affiliate Commission Rates: Benchmarks for Travel Creators