Food & Water Safety Abroad: How to Avoid Getting Sick
TrekGuider @trekguider
There’s a moment on every trip where the true magic happens: the first bite of a dish you can’t pronounce from a street cart buzzing with locals, the refreshing sip of a regional drink, the discovery of a flavor that will forever define a place in your memory. Food is culture, connection, and the fastest way to the heart of a destination. And that’s the traveler’s paradox, isn’t it? The very experiences that promise the most profound connection also carry a potent, gut-wrenching risk.
One bad meal or a single sip of contaminated water can derail your entire adventure, swapping days of discovery for days spent locked in a hotel room. This fear is agitated by horror stories from fellow travelers and the sheer unpredictability of an unfamiliar environment. It's a valid concern—traveler's diarrhea is unequivocally the most common travel-related illness, affecting up to 80% of international travelers depending on the destination. The fear of getting sick can make you timid, causing you to stick to bland, "safe" foods and miss out on the rich tapestry of flavors your destination has to offer. It can rob you of the very experiences you traveled so far to find.

But it doesn't have to be this way. This guide is your solution, a definitive and practical playbook for mastering food and water safety abroad. We’ve synthesized actionable advice from the world’s leading health organizations, including the Centers for Disease Control and Prevention (CDC) and the World Health Organization (WHO), to empower you to eat boldly and drink safely. This isn’t a list of things to fear; it’s a set of simple, memorable rules for prevention, identification, and, if necessary, management. This is a critical deep-dive into a core pillar of preparedness we cover in [The Ultimate Guide to Travel Safety: A 2026 Playbook], designed to give you the confidence to dive fork-first into the heart of a culture.
The Golden Rule of Food and Water Safety: "Boil It, Cook It, Peel It, or Forget It"
If you remember only one thing from this guide, make it this simple, five-word mantra. Promoted by the CDC and other global health bodies, this single rule is a powerful and easy-to-use filter for nearly every culinary decision you'll make on the road. It’s the foundation of your entire food and water safety strategy.
Boil It: Your Safest Bet for Liquids
Pathogens like bacteria, viruses, and parasites are killed by heat. This makes boiling the most effective method for purifying liquids.
Examples: Drinking water that has been brought to a vigorous, rolling boil for at least one full minute. Hot beverages like tea or coffee that are served steaming hot are also generally safe. Any milk products you consume should be confirmed to be pasteurized or have been boiled.
Cook It: The Power of Heat
Thoroughly cooking food kills the harmful microorganisms that cause illness. The key is to ensure it is cooked all the way through and served hot.
Examples: Meat, poultry, or seafood that is well-cooked (not rare or raw) and served steaming hot to the touch. This is especially crucial for street food; dishes that are cooked fresh to order in front of you are a much safer bet than those that have been sitting out.
Peel It: Nature’s Own Packaging
For raw fruits and vegetables, the contamination is almost always on the outside surface. By peeling it yourself with clean hands, you remove the risk.
Examples: Fruits with a thick, peelable skin like bananas, oranges, mangoes, and avocados are your safest and best friends for a healthy snack. Similarly, vegetables you can peel, such as cucumbers, are also a great option.
Forget It: When in Doubt, Go Without
This is the most critical and sometimes most difficult part of the rule to follow. It requires discipline, but it’s your ultimate defense. If an item of food or drink doesn't meet one of the three criteria above, you must skip it.
Examples: Tap water and ice cubes made from tap water are the biggest culprits. Salads and raw leafy greens like lettuce are high-risk because they are difficult to clean thoroughly and may have been washed in contaminated water. You should also avoid fruits that cannot be peeled, such as grapes and berries, and any unpasteurized dairy products like milk or cheese. Finally, be very wary of any food served at room temperature, such as from a buffet.
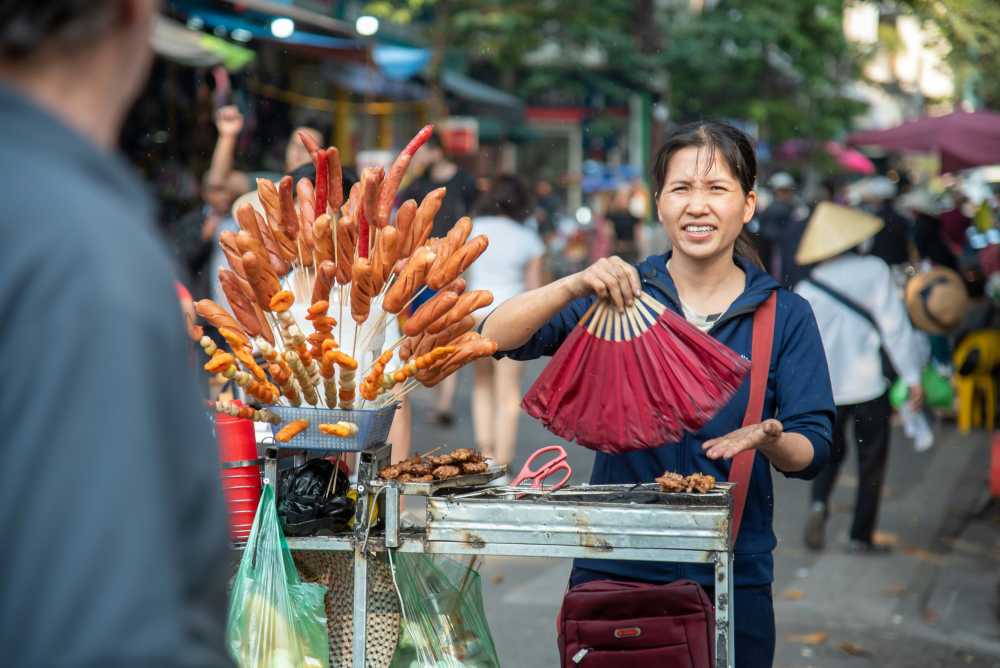
Navigating the Streets: A Visual Guide to Spotting Unsafe Food
Street food is often the soul of a city's cuisine, but not all vendors are created equal. Your eyes are your best tool for vetting a stall. Before you order, take thirty seconds to perform a quick visual inspection. Look for these five clear signs of a safe or unsafe operation.
Poor General Cleanliness: This is the most obvious indicator. Red flags include dirty workstations with unwiped spills, visible food waste, rubbish on the ground, and the presence of pests like flies or wasps. The vendor themselves should also appear clean, with tidy clothes and hands.
Improper Food Temperatures: Food left in the "danger zone" (room temperature) is a breeding ground for bacteria. Avoid stalls where cooked food, especially meat, is sitting out in large trays. The safest option is always food that is cooked fresh to order, right in front of you. Hot food should be visibly steaming.
Obvious Cross-Contamination: Watch how the vendor handles ingredients. A major red flag is using the same cutting board, knife, or unwashed hands to handle raw meat and then touch ready-to-eat items like bread, salad, or cooked food.
Use of Contaminated Water: Look at the vendor’s water source. Rinsing dishes, utensils, or vegetables in a single bucket of murky, stagnant water is a sign of a high-risk operation. Likewise, avoid ice in your drinks unless you can confirm it was made from purified water (commercially bagged ice is usually a safe sign).
Lack of a Crowd (Especially Locals): A busy stall with a long line, particularly of local residents, is one of the best indicators of a trusted and safe food source. High customer turnover means the food is fresh and hasn't been sitting out for long. An empty stall is often empty for a reason.
Pro-Tip: Make "follow the locals" your street food mantra. A long line of residents is a walking, talking five-star review of a vendor's quality and safety. It's the most reliable seal of approval you can find.
Securing Your Water Supply: A Deep Dive into Hydration and Purification
Staying hydrated is non-negotiable for your health and energy while traveling, but assuming tap water is safe is one of the most common and dangerous mistakes a traveler can make. Here’s how to ensure every sip you take is safe.
Identifying Safe and Unsafe Drinking Water Sources
The CDC and WHO have clear guidelines. Unless you are in a country with a known, highly-developed sanitation system, you should assume all tap water is unsafe.
Safest Sources: Commercially bottled water in a factory-sealed, tamper-proof container is your most reliable option. Carbonated water is even safer, as a broken seal is immediately obvious. The second safest source is water that you have personally brought to a rolling boil for at least one minute.
Unsafe Sources to Avoid: Tap water, well water, ice made from tap water, fountain drinks mixed with tap water, and even water from clear mountain streams (which can contain germs) should all be avoided unless they have been purified.
Your Purification Playbook: The Top 3 Methods
When bottled or boiled water isn't available, you need a backup plan. Here are the top three recommended purification methods.
Boiling (The Gold Standard): This is consistently ranked by the CDC and WHO as the single most effective method. It kills all known disease-causing microorganisms, including viruses, bacteria, and parasites. Simply bring clear water to a rolling boil for 1 minute (or 3 minutes at elevations above 6,500 feet / 2,000 meters).
Filtration: A high-quality portable water filter is highly effective at removing bacteria and protozoan parasites like Giardia and Cryptosporidium. Look for a filter with an absolute pore size of 1 micron or smaller. The main limitation is that most portable filters do not remove viruses, so in high-risk areas, the CDC recommends following filtration with chemical disinfection.
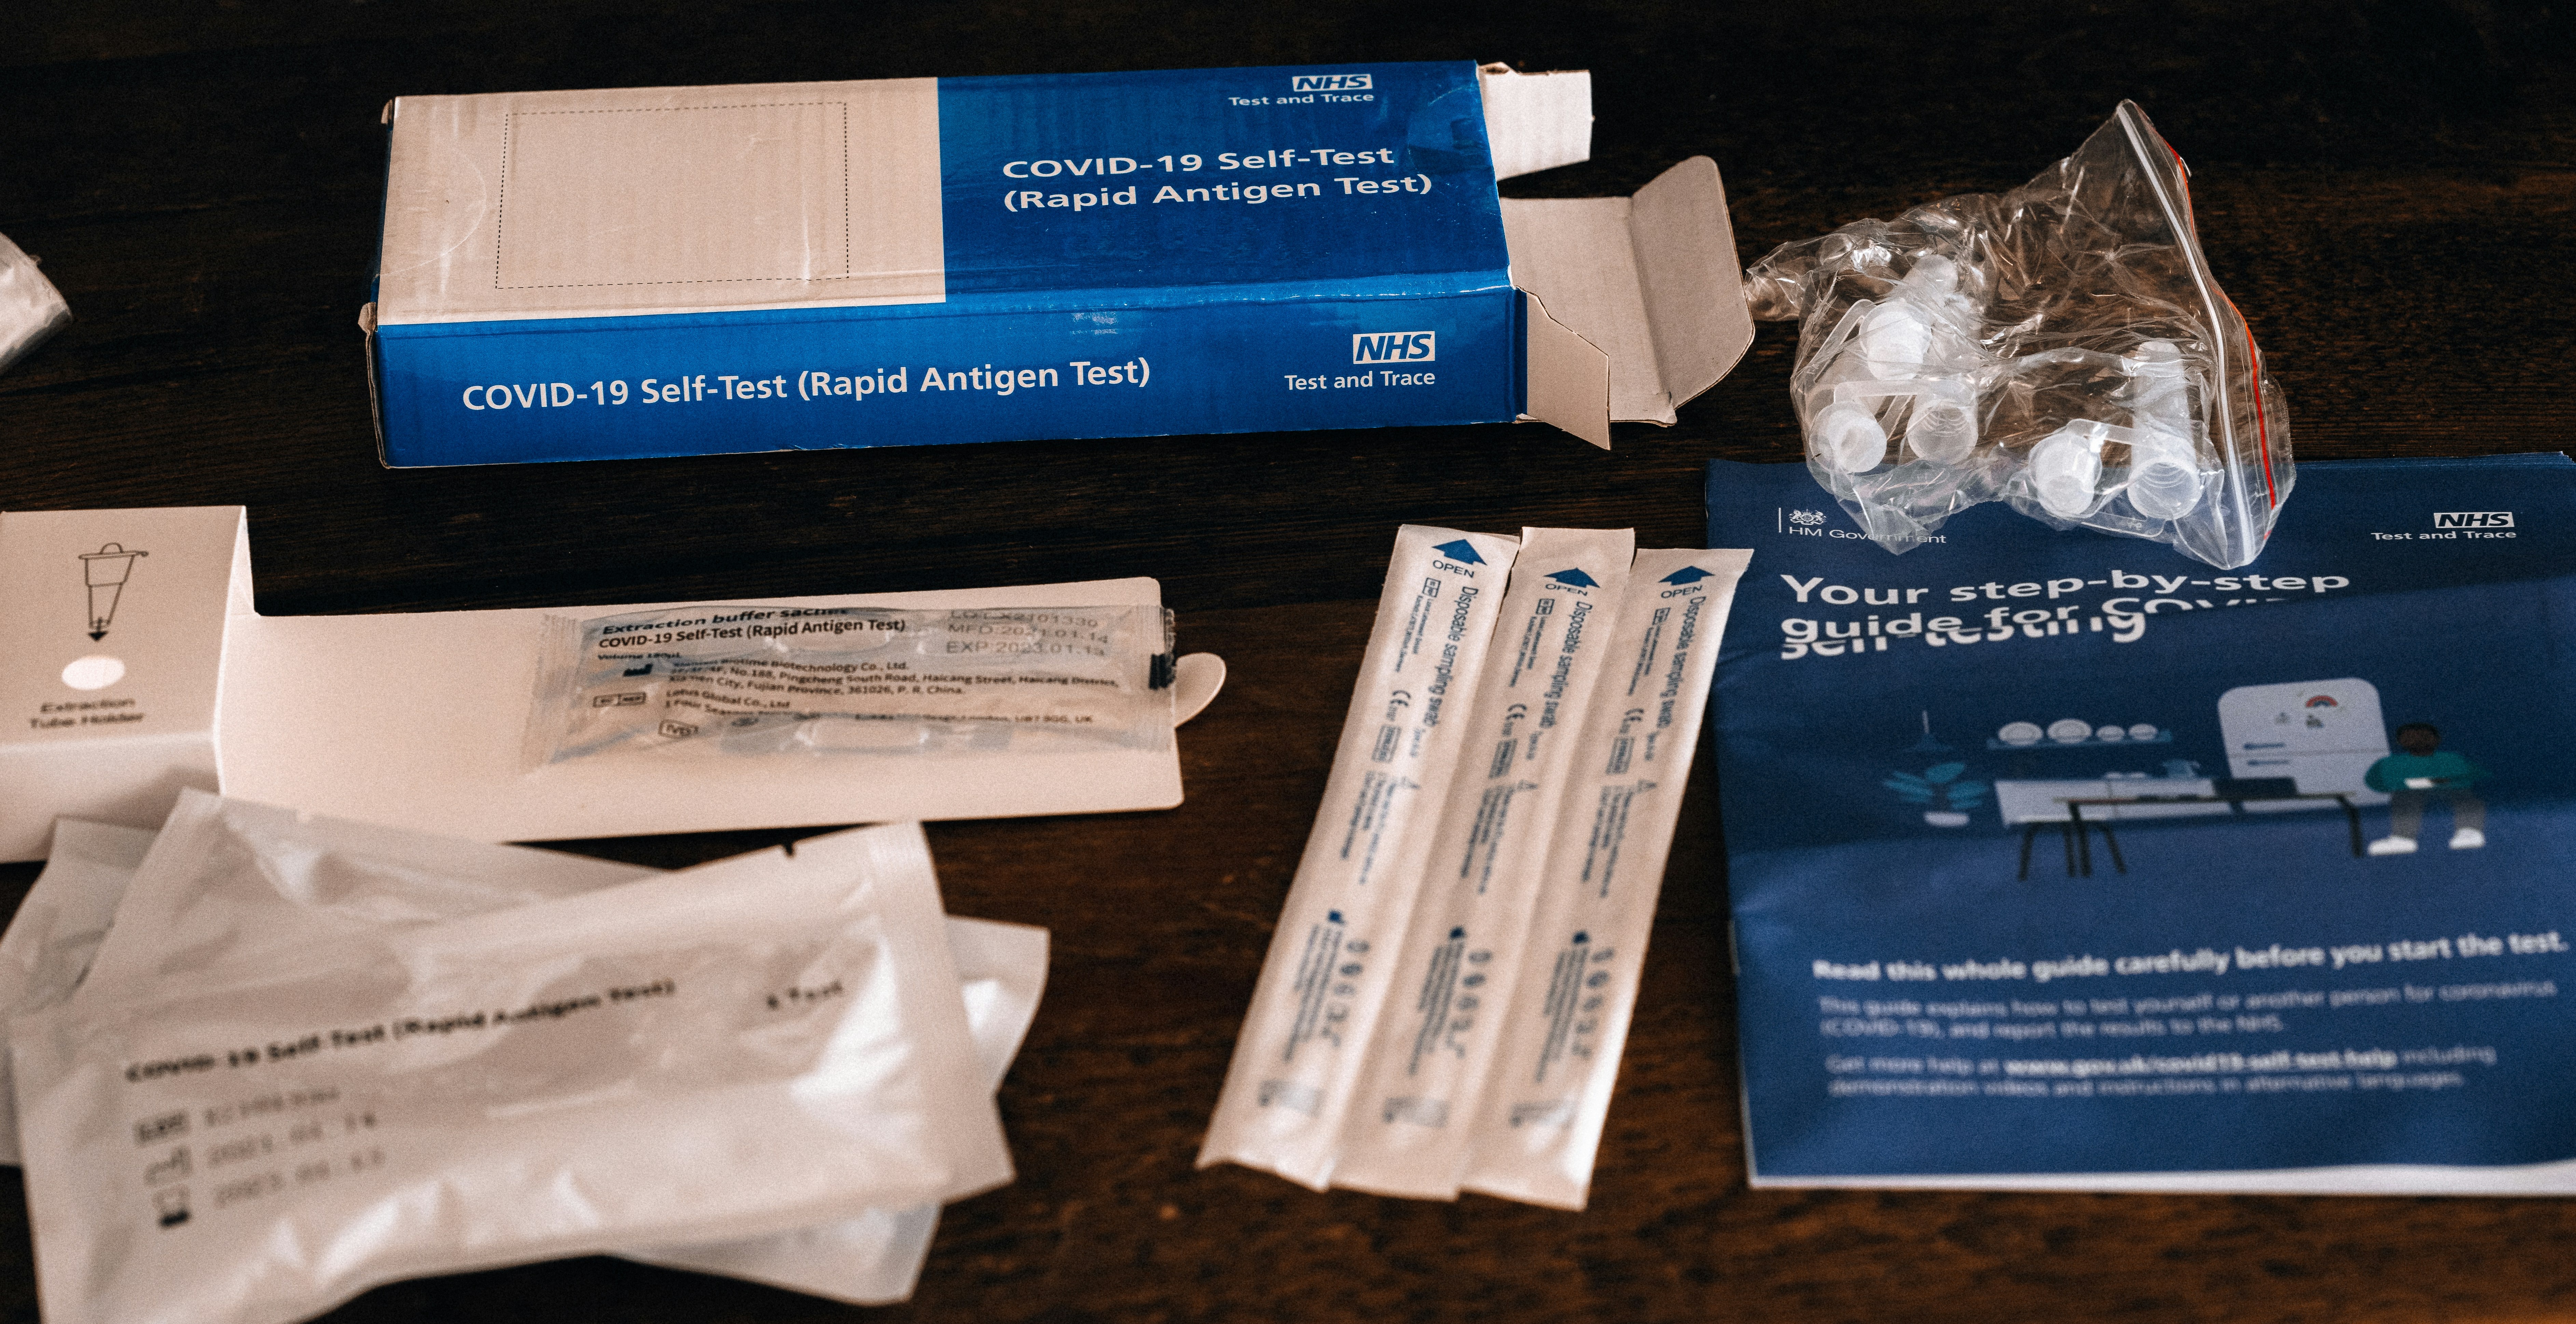
Chemical Disinfection: Chlorine, iodine, or chlorine dioxide tablets/drops are a lightweight and easy way to kill viruses and bacteria. However, they are not consistently effective against the parasite Cryptosporidium and require a contact time of at least 30 minutes.
For in-depth planning on what gear to pack for every type of trip, from water filters to first-aid supplies, our all-encompassing [Travel Guide] is the only resource you'll ever need.
Damage Control: How to Manage Traveler's Diarrhea
But let’s be realistic: even the most diligent traveler can have a bad day. When that happens, knowing exactly what to do—and what not to do—can be the difference between a 24-hour nuisance and a trip-ruining ordeal. This is the damage control phase of your food and water safety plan.
The First and Most Critical Step: Oral Rehydration
According to travel medicine doctors, dehydration is the single most likely and dangerous complication of traveler's diarrhea. Replacing lost fluids and electrolytes is your absolute first priority.
Method: The best way to rehydrate is with a dedicated Oral Rehydration Solution (ORS), which comes in packets of salts and sugars that you mix with boiled or bottled water. In a pinch, sports drinks or clear soups can also be used.
Symptomatic Treatment for Mild to Moderate Cases
If the diarrhea is tolerable and not accompanied by a high fever or blood, over-the-counter medications can provide relief and help you get through a travel day.
Medications: An antimotility agent like Loperamide (the active ingredient in Imodium, a top pharmacist-recommended brand) can reduce the frequency of bowel movements. Bismuth Subsalicylate (found in Pepto-Bismol, another pharmacist favorite) can also help decrease the frequency and shorten the duration of the illness.
When to Use Standby Antibiotics (For Severe Cases)
If diarrhea is distressing, incapacitating, or contains blood or mucus, a prescribed antibiotic may be necessary.
Method: Before you travel, speak with your doctor or a travel medicine clinic. For travelers heading to high-risk destinations, they may provide a prescription for a standby antibiotic, such as Azithromycin, to carry with you. A single dose is often highly effective at treating severe cases.
Pro-Tip: Within your main travel first-aid kit, create a dedicated "Digestive Distress" module. Keep it in a separate, clearly-labeled zip-top bag containing a few packets of Oral Rehydration Salts, a strip of Loperamide, and a few antacids. This way, when you need it, you won't have to rummage through your entire kit.

Ready to Pack Like a Pro?
A smart food and water safety strategy is just one piece of your pre-trip preparation. To ensure you don't overlook a single essential item—from documents and finances to clothing and medical supplies—a master checklist is your most powerful tool. Our comprehensive, free checklist has you covered for every stage of your journey.
Download Your Free [International Travel Checklist] Now!
Food and Water Safety FAQs
A prepared mind is a safe mind. Here are expert answers to common questions that take your preparedness to the next level.
1. Besides traveler's diarrhea, what are the most common travel illnesses?
While traveler's diarrhea is number one, the CDC reports that other common issues include acute respiratory infections (like influenza or COVID-19, often acquired in transit), vector-borne fevers like Dengue and Malaria in tropical regions, and other food-borne illnesses like Hepatitis A and Typhoid Fever. Skin conditions from insect bites are also extremely common.
2. Is it safe to eat at a restaurant if I'm worried about street food?
Generally, restaurants can be safer, but the same principles apply. A busy restaurant full of locals is a great sign. Be cautious with the same high-risk items: salads, unpeeled fruits, and tap water or ice. If you want to find trusted, local-approved gems, explore the TrekGuider platform, where travel creators often share their own curated guides to safe and authentic eats.
3. Should I carry a standby antibiotic in my first-aid kit?
This is a question for your doctor or a travel medicine clinic. For travelers heading to high-risk destinations where severe traveler's diarrhea is common, many doctors will provide a prescription for a standby antibiotic like Azithromycin. It’s not for mild cases but can significantly shorten the duration of a severe bout of illness. Discuss your itinerary with your doctor to see if this is right for you.
Eat Boldly, Travel Well
The world of food is a landscape of incredible diversity and connection, and it deserves to be explored with an open mind and a curious palate. The goal of mastering food and water safety is not to build a wall of fear that separates you from authentic experiences. It is about building a foundation of knowledge that gives you the freedom to be adventurous. By internalizing the golden rule of "Boil it, cook it, peel it, or forget it," learning to trust your own visual assessment of a food stall, and knowing exactly what to do if you get sick, you replace anxiety with empowerment. You are now equipped with the skills to navigate the world's most exciting cuisines with confidence, ensuring your focus remains on the flavor, connection, and joy that every journey promises. Go explore, eat boldly, and travel well.

Meta Data Suggestions:
SEO Meta Title (Under 60 characters): Food & Water Safety Abroad: How to Avoid Getting Sick
URL Slug: food-water-safety-abroad
SEO Meta Description (Under 155 characters): Avoid traveler's diarrhea with our expert guide to food and water safety abroad. Learn the golden rules for eating street food, purifying water, and staying healthy.
Don't Miss Out! Subscribe for Exclusive Content
Subscribe


Comments 0
No comments yet
Be the first to share your experience!
Dont Miss Out! Subscribe for Exclusive Content

Chicago Beer Fests: Top 6 Tastings

Ultimate USA Holidays Guide: Top Picks

FTC Affiliate Disclosure Essentials: Stay Compliant as a Travel Creator

Essential Affiliate Tools: From Tracking to Full Optimization

Booking.com Affiliate Program Review: Pros, Cons, and Earnings Potential

Decoding Affiliate Commission Rates: Benchmarks for Travel Creators
Ultra Festival: Beat the Heat Guide
TrekGuider @trekguider
You’ve done it. You scored the golden ticket to Ultra Music Festival, a three-day sonic pilgrimage in the heart of Miami where the world’s greatest DJs command colossal stages and the energy is nothing short of electric. But as the bass drops, so does the relentless Florida sun. The real problem isn't just the heat; it's the brutal combination of scorching temperatures, suffocating humidity, and tens of thousands of dancing bodies that can quickly turn your dream festival into a dehydrated, sun-stroked nightmare.
Imagine the agony of missing Skrillex’s closing set because you’re dizzy and nauseous, huddled in a medical tent. Picture the sheer frustration of tapping out before sunset on day one, your energy completely drained, while your friends rave on into the night. This isn't a scare tactic; it's a common reality for unprepared attendees who fatally underestimate the physical toll of partying under the Miami sun for three straight days. The line between an unforgettable weekend and a miserable, potentially dangerous one is drawn by a single thing: a bulletproof strategy.
This is that strategy. Forget the generic "drink water" advice you’ve heard a thousand times. This is your new bible for not just surviving, but truly conquering the heat at Ultra. We’re providing a pro-level, comprehensive blueprint covering everything from tactical gear selection and advanced hydration science to strategic stage navigation and leveraging festival tech for your safety. Follow these steps, and you won't just beat the heat—you'll own the entire experience, from the opening beat on Friday to the final fireworks on Sunday.

Understanding the Ultra Music Festival Environment: Sun, Crowds, and Sound
Before you can build a plan, you must understand the battlefield. Ultra Music Festival unfolds in late March at Bayfront Park, a beautiful but notoriously exposed venue. For 2025, the festival runs from March 28-30 (and for you long-term planners, March 27-29 in 2026), a time when Miami’s weather is deceptively intense. While the festival is a cornerstone of the city's vibrant event calendar—a scene we detail in our complete guide to [Miami Holidays: 8 Beach Fest Vibes]—its unique environment presents a specific set of challenges you must be prepared for.
The festival operates on a strict "rain or shine" policy, meaning you need to be ready for anything. The schedule itself is a marathon, not a sprint:
Friday, March 28: 4:00 PM – 12:00 AM
Saturday, March 29: 12:00 PM – 12:00 AM
Sunday, March 30: 12:00 PM – 10:00 PM
Notice that Saturday and Sunday demand ten to twelve hours of exposure. The primary obstacles you will face are:
Intense Solar Radiation: The Florida sun is powerful. Without adequate shade, direct exposure can lead to severe sunburn and rapidly increase your core body temperature.
Oppressive Humidity: Miami's humidity cripples your body's natural cooling system. It prevents sweat from evaporating effectively, making 85°F feel like a suffocating 95°F.
Massive Crowds: Dense crowds trap body heat, creating microclimates that are significantly hotter than the ambient air. Navigating these human seas requires immense physical energy.
Constant Movement: You’ll be walking, standing, and dancing for hours on end, burning calories and losing fluids at a dangerously accelerated rate.
The first and most critical mindset shift is to treat Ultra like an athletic event. Your preparation starts long before you ever step foot in Bayfront Park.

Pre-Festival Prep: Your Foundation for Success
Victory is won in the preparation. What you do in the days leading up to the festival and what you pack in your bag will absolutely dictate your endurance and enjoyment.
The Ultimate Packing List: Beyond the Basics
Your packing list is your first line of defense. Every single item should serve a purpose, primarily focused on cooling, hydration, and comfort.
Clothing (The Three B’s: Breathable, Bright, and Barely-There):
Fabrics: Choose lightweight, moisture-wicking materials like polyester, nylon, or bamboo blends. These technical fabrics pull sweat away from your skin, allowing it to evaporate and cool you down. Avoid cotton at all costs; it absorbs moisture, becoming a heavy, suffocating trap for heat.
Colors: Opt for light-colored clothing. White, beige, and pastels reflect sunlight rather than absorbing it like dark colors do.
Fit: Loose-fitting garments are your best friend. They allow for crucial airflow against your skin, preventing heat from getting trapped.
Footwear (Your Most Important Gear): You will be on your feet for 30+ hours over the weekend. Comfortable, well-worn sneakers are non-negotiable. Do not, under any circumstances, wear brand-new shoes, flimsy sandals, or heavy boots. Running or athletic shoes with proven arch support are ideal.
Hydration Hardware:
Hydration Pack: This is the single most important piece of gear you can bring. A CamelBak or a similar backpack with a water bladder allows you to carry 2-3 liters of water and sip continuously without fumbling with a bottle. Ensure it complies with the latest festival size and pocket regulations before you go.
Electrolyte Packets: Pack single-serving powders or tablets (like Liquid I.V., Nuun, or Pedialyte packets). They are small, light, and absolutely essential for true hydration.
Sun & Heat Protection Arsenal:
Sweatproof Sunscreen: A broad-spectrum, water-resistant sunscreen with an SPF of 50 or higher is mandatory. Apply it generously 30 minutes before you enter and reapply every two hours, no exceptions.
Wide-Brimmed Hat: A bucket hat or other wide-brimmed hat provides a portable oasis of shade for your face, neck, and ears, significantly reducing your perceived temperature.
UV-Protective Sunglasses: Protect your eyes from the relentless glare and long-term sun damage.
Cooling Towel: These hyper-evaporative towels, when soaked in water, provide incredible cooling relief when worn around your neck.
Handheld Fan/Mister: A small, battery-operated fan can be a godsend in a stagnant, dense crowd, creating a personal breeze when you need it most.
Physical Conditioning: Don't Underestimate the Marathon
You wouldn't run a 10k without training, and you shouldn't tackle Ultra without some physical prep.
Pre-Hydrate Aggressively: Begin increasing your water intake 2-3 days before the festival. Your goal is to start Day 1 with your body in a state of optimal hydration, not playing a desperate game of catch-up.
Build Endurance: In the weeks leading up, incorporate some light cardio into your routine. Even 30 minutes of brisk walking or jogging a few times a week will dramatically improve your stamina.
Prioritize Sleep: Get a full 8 hours of sleep each night in the week before the festival. A sleep deficit severely impairs your body's ability to regulate temperature and recover.
Just as detailed planning is key for a scenic road trip, like the one we map out in our [Big Sur Map & Itinerary], meticulous preparation is essential for a massive festival. Don't leave your experience to chance.
Mastering Hydration: The Core of Your Ultra Music Festival Strategy
This is the most critical section of this guide. Proper hydration at Ultra is a science. Simply drinking water when you feel thirsty is a recipe for disaster; by the time you feel thirst, you are already significantly dehydrated.

Water Isn't Enough: The Critical Role of Electrolytes
When you sweat, you don't just lose water; you lose vital minerals called electrolytes—primarily sodium, potassium, and magnesium. These minerals are the spark plugs of your body, responsible for regulating nerve and muscle function, hydrating your cells, and balancing blood pressure. Replenishing them is just as important as replenishing water.
Why It Matters: Drinking excessive amounts of plain water without replacing electrolytes can lead to a dangerous condition called hyponatremia, where the sodium levels in your blood become dangerously diluted. Symptoms can mimic dehydration (nausea, headache, confusion) but can be far more severe.
Your Game Plan: For every two refills of your hydration pack with plain water, make the third refill an electrolyte mix. This simple rule ensures you are constantly replenishing what you're sweating out. Avoid relying on sugary energy drinks or sodas for hydration; they can often make dehydration worse.
Your Hydration Schedule: A Sip-by-Sip Plan
Discipline is everything. You need a proactive hydration schedule, not a reactive one.
The Morning Load-Up: Drink at least 16-20 ounces (about half a liter) of water with an electrolyte packet before you even leave for the festival.
The Immediate Refill: The very first thing you do upon entering Bayfront Park is locate a water station and fill your hydration pack to its maximum capacity.
The 15-Minute Rule: Take a few big sips of water from your pack every 15 minutes. Set a recurring alarm on your phone or watch if you have to. Do not wait until you feel thirsty.
The Proactive Refill: Never wait until your pack is empty to refill it. When it's about one-third full, make your way to a water station. The lines are shortest during non-peak times (e.g., during a headliner's set when everyone is at one stage, or early in the day).
The End-of-Night Recovery: Drink another 16-20 ounces of electrolyte-infused water before you go to sleep. This will supercharge your body's recovery overnight and prepare you for the next day.
Pro-Tip: As soon as you get inside, open the festival map on the official app and screenshot the locations of all free water refill stations. The stations located near smaller stages or along the perimeter of the park often have significantly shorter lines than the ones near the main stage.
Strategic Navigation and Lineup Planning
How you move through the festival and plan your day is just as important as what you pack. Wasting energy is a luxury you simply cannot afford.

Decoding the Festival Map for Heat Evasion
The festival grounds are a maze of stages, vendors, and people. Use the map to your strategic advantage.
Identify Cool Zones: Before you even start thinking about artists, scan the map for any designated shade structures, indoor stages (like the iconic Megastructure), or air-conditioned brand activations. These are your recovery oases.
Plan Efficient Routes: When moving from the Main Stage to the Resistance stage, don't just try to cut through the thickest part of the crowd. Use the perimeter walkways. It might be a slightly longer distance, but it will be faster and require far less energy than pushing through a human traffic jam.
Building a Smart Schedule: Pacing is Everything
With a 2025 lineup featuring titans like John Summit & Dom Dolla, Armin van Buuren, Tiësto, Chase & Status, and Deadmau5, the temptation is to sprint from stage to stage. This is a rookie mistake that will burn you out by 9 PM on Friday.
Prioritize Ruthlessly: Accept that you cannot see every artist. Pick your top 3-4 "can't-miss" sets for each day and build your schedule around them as anchors.
Schedule Deliberate Downtime: The hottest part of the day is typically between 2 PM and 5 PM. This is the perfect time to schedule a tactical break. Find a shady spot, sit down, focus on hydrating, and eat a proper meal. This planned rest will give you the energy you need for the headlining acts at night.
Embrace Discovery: Use the time between your must-see sets to explore smaller stages. They are often less crowded, providing more space to dance, breathe, and discover your new favorite artist.
Pro-Tip: When moving through a dense crowd to get closer to a stage, conserve energy by following directly behind a larger, determined person or group. Let them carve a path for you. It's a simple "drafting" trick that saves a surprising amount of physical effort.
Leveraging Technology and Safety Resources at Ultra Music Festival
In the modern festival era, your phone is an essential survival tool. Ultra has integrated technology to enhance attendee safety, and you should take full advantage of every resource.
Your Phone is Your Lifeline
The Official Ultra App: Download it well in advance. It contains the most up-to-date festival map, set times, and, most importantly, will send push notifications for any emergency alerts or important announcements.
The SaferWatch App: Ultra has partnered with the SaferWatch app, which allows you to report any safety or security concerns (medical emergencies, suspicious activity) directly and anonymously to festival staff in real-time. Have it downloaded and set up before you arrive.
Portable Charger: Your phone is useless with a dead battery. A fully charged portable power bank is not optional; it's mandatory.
Knowing Where to Go for Help
Even with perfect preparation, things can go wrong. Knowing how to recognize a problem and where to get help is crucial.
Locate Medical Tents: Just like the water stations, the first thing you should do is identify the location of all medical tents on your map. They are staffed with professionals who are there to help you, no questions asked. There is no shame in seeking help.
Recognize the Signs of Heat Exhaustion: Be aware of these symptoms in yourself and your friends:
Heavy sweating
Dizziness or lightheadedness
Nausea or vomiting
A throbbing headache
Cool, pale, clammy skin
If you or a friend experience these, get to a medical tent immediately. Do not try to "tough it out."
Be a Good Raver: The Ultra community is known for looking out for one another. If you see someone who looks unwell or is in distress, ask if they need help and guide them toward a medical tent or alert festival staff.

You're Ready to Conquer Ultra
The roar of the crowd, the earth-shaking bass, the Miami skyline lit up against the night sky—these are the moments that define the Ultra Music Festival experience. By approaching the weekend with the mindset of an endurance athlete, you are no longer at the mercy of the elements. You are in control. Preparation is your armor, hydration is your fuel, and a smart strategy is your map to victory. You now have the expert knowledge to stay cool, energized, and safe from the first set to the final encore.
You are now equipped to handle the heat, navigate the crowds, and fully immerse yourself in the magic of one of the world's greatest music festivals. This level of detailed planning is what transforms a good trip into an unforgettable one. For comprehensive strategies on navigating destinations and events worldwide, our master [Travel Guide] is the ultimate resource for the serious traveler. Now go, stay hydrated, and have the time of your life.
Don't Miss Out! Subscribe for Exclusive Content
SubscribeComments 0
No comments yet
Be the first to share your experience!
Dont Miss Out! Subscribe for Exclusive Content

San Francisco Cherry Blossoms: A Local's Guide to the Blooms

Halloween SF: Haunts Without Horrors

SF Festivals: 7 Must-See Lineups

Christmas SF: Lights & Wharf Wonders

SF Pride: 6 Route & Party Hacks

Chinese New Year SF: Parade Essentials
Top 10 Travel Affiliate Programs for 2026
TrekGuider @trekguider
You’ve launched your travel blog, pouring hours into crafting beautiful, helpful content. The passion is there, but a critical piece of the puzzle is missing: a reliable income stream. You know that affiliate marketing is a cornerstone of a profitable blog, but stepping into that world feels like navigating a dense, fog-covered jungle. Which programs are legitimate? Which ones actually pay well? And how do you choose partners that your audience will genuinely thank you for recommending?
The wrong choice can be costly. You risk wasting months promoting programs with rock-bottom commission rates, impossibly short cookie durations, or, worst of all, recommending subpar products that shatter the trust you’ve worked so hard to build. This indecision is a major roadblock, keeping your blog a passion project when it has the potential to be a profitable business.
This guide is your machete to clear a path through that jungle. We are cutting through the noise to bring you a curated, vetted, and strategic list of the top 10 travel affiliate programs for 2026. This isn't just a list; it's a strategic analysis designed to equip you with the knowledge to build a powerful and profitable travel affiliate marketing foundation. Think of this as a tactical deep-dive—one essential component of the much larger business strategy we cover in our ultimate guide to [How to Make Money Online: A Creator's Guide for 2026].

The Anatomy of a Winning Affiliate Program
Before we dive into the list, it’s crucial to understand the criteria that separate the best programs from the rest. A successful travel affiliate marketing strategy isn’t just about chasing the highest commission rate; it's about building a portfolio of reliable partners that align with your brand and serve your audience.
Commission Rate & Type: This is the percentage or flat fee you earn per sale. Look for rates that fairly compensate you for the value you provide. For high-ticket items like multi-day tours, a 6% commission can be far more lucrative than a 10% commission on a low-cost item.
Cookie Duration: When a reader clicks your affiliate link, a small tracking file (a "cookie") is placed on their browser. The cookie duration is the period during which you will be credited for the sale if they make a purchase. A 30, 60, or even 90-day cookie is vastly superior to a "session-based" cookie that expires as soon as the user closes their browser.
Brand Recognition & Trust: Promoting well-known, trusted brands like Booking.com or REI leads to higher conversion rates. Your audience is already familiar with them and is more likely to make a purchase.
Average Order Value (AOV): This is the average amount a customer spends in a single transaction. A program with a high AOV, like a tour company, can result in substantial commissions even with a modest commission rate. A $2,600 tour booking with a 6% commission earns you $156 from a single click.

The Top 10 Travel Affiliate Programs for Bloggers in 2026
Here is our definitive list, broken down by category to help you build a diversified affiliate portfolio that covers every stage of the travel planning process.
Accommodation Affiliate Programs
For most travelers, booking accommodation is the first and most expensive part of their trip, making this category a foundational pillar of your affiliate income.
1. Booking.com
Let's start with the undisputed heavyweight. Booking.com is a global powerhouse, a name so synonymous with travel that it’s practically a verb. That massive inventory and ironclad reputation translate directly into higher conversions for you.
Commission Rate: 25-40% of Booking.com's commission (which nets out to roughly 4% of the total booking value for you).
Cookie Duration: Session-based.
Strategic Insight: The session-based cookie is a major drawback—your reader must book immediately. However, the conversion rate is so high that it remains an essential program. The key is to link to specific properties at the exact moment a reader is making a decision (e.g., within a hotel review or a "Where to Stay" guide).
2. Expedia Group
The Expedia Group affiliate program is your versatile all-in-one tool, giving you access to a huge portfolio of brands including Expedia, Hotels.com, and the vacation rental giant Vrbo under a single umbrella.
Commission Rate: 2-6% on hotels and vacation rentals.
Cookie Duration: 7 days.
Strategic Insight: Access to Vrbo is the main prize here, allowing you to monetize the lucrative vacation rental market. The 7-day cookie, while not long, is a significant improvement over Booking.com's model, giving your readers a bit more time to decide.
Tours & Activities Affiliate Programs
This is where you can earn some of the highest commissions per sale. Tours and activities have a high AOV and are a natural fit for itinerary-based blog posts and destination guides.

3. GetYourGuide
With a modern, user-friendly platform and an excellent selection of tours worldwide, GetYourGuide has become a favorite among travel creators for a reason.
Commission Rate: 8-10%.
Cookie Duration: 30 days.
Strategic Insight: GetYourGuide excels in its creator tools, including easy-to-embed widgets that showcase tours visually within your posts. A solid commission rate and a generous 30-day cookie make this a top-tier, reliable choice.
4. Viator
Owned by TripAdvisor, Viator is one of the largest tour marketplaces online, boasting a massive inventory that covers virtually every corner of the globe.
Commission Rate: 8%.
Cookie Duration: 30 days.
Strategic Insight: The sheer breadth of Viator's offerings is its superpower. No matter how niche your destination, you will almost certainly find a relevant tour to promote. This makes it an invaluable tool for creators who cover a wide range of locations.
5. G Adventures
Specializing in small-group adventure travel, G Adventures offers high-ticket, multi-day tours that can result in massive commissions.
Commission Rate: 6% of booking value.
Cookie Duration: 60 days.
Strategic Insight: This program is all about the Average Order Value. With an average booking of approximately $2,600, a 6% commission translates to over $150 from a single sale. The long 60-day cookie is essential for these high-consideration purchases.
6. Take Walks
This program focuses on high-quality, small-group walking tours in major cities across the globe, led by expert local guides.
Commission Rate: 15%.
Cookie Duration: 45 days.
Strategic Insight: A massive 15% commission rate is almost unheard of in this space. For bloggers who focus on major European and North American cities, this program can be an absolute goldmine. Promoting their unique "skip-the-line" tours is an easy sell.
Ready to Build Your Own Products?
Seeing the high commissions on tours and experiences should get you thinking. Once you've mastered earning from other people's products, the next step is to create your own. Selling your own digital products offers unparalleled profit margins and gives you full control. But what should you create?
Our free [Digital Product Ideas Guide] is the perfect brainstorming tool. It’s packed with proven concepts for travel creators, from eBooks and templates to interactive maps and presets that your audience will love.
[Download Your Free Digital Product Ideas Guide Here]
Flights & Deals Affiliate Programs
While direct flight commissions are notoriously low, these programs offer creative ways to monetize this essential part of travel planning.
7. Skyscanner
As one of the world's most trusted flight search engines, Skyscanner is a brand your audience already knows and uses.
Commission Rate: 20% of Skyscanner's revenue per click-out.
Cookie Duration: 30 days.
Strategic Insight: You don't get paid for a flight booking, but for the traffic you send. While per-click earnings are small, this allows you to monetize readers in the early, research phase of planning. It’s a volume game, best for blogs with significant traffic.
8. Dollar Flight Club
This is a subscription-based service that sends cheap flight alerts directly to its members. Its affiliate program is incredibly lucrative.
Commission Rate: 50% recurring commission.
Cookie Duration: 90 days.
Strategic Insight: A 50% recurring commission is a game-changer. You get half of the subscription fee not just once, but for as long as the member you referred remains active. This is how you build a predictable, passive affiliate income stream.
Gear & Insurance Affiliate Programs
Recommending the gear you personally use and the insurance that protects you is an authentic way to serve your audience while earning a commission.
9. World Nomads
World Nomads is one of the most popular and trusted travel insurance providers, especially within the backpacking and adventure travel communities.
Commission Rate: ~10%.
Cookie Duration: 60 days.
Strategic Insight: Travel insurance is a necessary purchase you should be recommending for your audience's safety. Promoting a trusted brand is a valuable service, and the program rewards you with a solid commission and a generous 60-day cookie.
10. REI
For outdoor and adventure travel, REI is the gold standard for high-quality gear. The brand is synonymous with trust and quality, making it a high-converting partner.
Commission Rate: ~5%.
Cookie Duration: 15 days.
Strategic Insight: While the 5% commission seems modest, the AOV at REI is often high as customers purchase big-ticket items. Recommending a specific backpack or tent you’ve tested for months is one of the most authentic promotions you can make.

The Golden Rule: Diversify Your Portfolio
Pro-Tip: The most successful affiliate marketers build a diversified portfolio. Don't rely on a single program. This strategy of diversification is your only defense against platform risk. As we saw when Amazon dramatically slashed its commission rates with little warning, building your entire income on a single partner is a recipe for disaster. By joining programs across accommodations, tours, and gear, you create a more resilient business.
Getting Accepted and Maximizing Your Earnings
Getting accepted into these programs is just the entry ticket. The real work—and the real money—lies in your strategy. And at the heart of that strategy is one non-negotiable word: trust.
Always prioritize authenticity. Only recommend products and services you have personally used or thoroughly vetted. Your audience values your honest, first-hand experience above all else. When you integrate affiliate links, do so contextually within helpful content. A link to a Viator tour is most powerful inside a 3-day itinerary for that city. You can even package these recommendations into a premium Travel Guide, selling your expertise directly to your audience. A specialized marketplace like TrekGuider becomes an invaluable partner here, giving every creator a professional, customizable storefront to connect with travelers who are actively searching for expert resources.

Frequently Asked Questions (FAQ)
1. How many affiliate programs should I join as a beginner?
Start with 2-3 programs that are the absolute best fit for your niche. It's better to deeply integrate a few relevant programs into your content than to shallowly sprinkle links from a dozen different sources. Master these first before expanding.
2. Can I get rejected from affiliate programs? What should I do?
Yes, and it's common for new bloggers with low traffic. Don't be discouraged. Most rejections are automated. Focus on building your content library (aim for 15-20 high-quality posts) and growing your traffic. Re-apply in 3-6 months when your site's metrics have improved.
3. Is travel affiliate marketing still profitable in 2026?
Absolutely. The creator economy is projected to nearly double from $250 billion to almost $500 billion by 2027. While competition is higher, the audience of online buyers is also larger than ever. The key to success is building trust with a specific niche audience and promoting products that genuinely solve their problems.
Your Path to a Profitable Blog Starts Now
Choosing the right partners is one of the most critical decisions in your blogging journey. This curated list removes the guesswork, providing you with a powerful roster of the industry's best programs. By aligning with these trusted brands, you can confidently serve your audience with valuable recommendations while building a sustainable and profitable business.
You now have the blueprint. The next step is to take action. Review this list, identify the programs that best fit your niche, and start the application process. This is the foundational step in building a robust travel affiliate marketing strategy that will power your blog for years to come.
Meta Data
SEO Meta Title (Under 60 characters):
Top 10 Travel Affiliate Programs for Bloggers (2026)
URL Slug:
top-travel-affiliate-programs
SEO Meta Description (Under 155 characters):
Ready to monetize your blog? Discover the 10 best travel affiliate programs for 2026. We break down commissions, pros, and cons to boost your income.
Don't Miss Out! Subscribe for Exclusive Content
SubscribeComments 0
No comments yet
Be the first to share your experience!
Dont Miss Out! Subscribe for Exclusive Content
FTC Affiliate Disclosure Essentials: Stay Compliant as a Travel Creator
Essential Affiliate Tools: From Tracking to Full Optimization

Avoid These 5 Affiliate Landing Page Mistakes for Better Conversions

Affiliate Keyword Research Mastery for Travel Blogs
Booking.com Affiliate Program Review: Pros, Cons, and Earnings Potential