5 Passive Income Ideas for Your Travel Blog
TrekGuider @trekguider
Let’s be honest: you didn’t launch a travel blog to build yourself a different kind of cubicle. The dream was freedom—an income untethered from a desk, a business that could fund your adventures. Yet the reality for most creators is a hamster wheel of content creation. You’re stuck on a content treadmill, constantly creating, posting, and promoting just to stay afloat. Your blog feels less like a passport to freedom and more like a demanding job that has followed you around the world.
The problem is a strategic one. You’re trapped trading time directly for money through freelance articles or one-off sponsorships, which means if you stop working, the money stops flowing. This constant hustle is the fast track to burnout, leaving your dream of a truly independent lifestyle feeling impossibly out of reach.

It’s time to stop trading hours for dollars and start building assets. The solution is to fundamentally shift your strategy toward building a portfolio of passive income streams—systems and products that work for you 24/7, whether you’re on a plane, exploring a new city, or fast asleep. This guide provides five proven, actionable ideas for passive income blogging. This is your blueprint for creating automated revenue engines that will finally decouple your income from the hours you work. Think of this as a crucial chapter in your business education; for the complete curriculum on building a modern creator enterprise, be sure to read our ultimate guide to [How to Make Money Online: A Creator's Guide for 2026].
The Fundamental Shift: Trading Hours for Assets
Before we dive into the tactics, it's critical to internalize the foundational mindset shift required for success. Passive income isn't "money for nothing." As defined in lifestyle business design, it is revenue that, after an initial investment of time and effort, continues to be generated with minimal ongoing labor.
It’s the difference between Active and Passive Income:
Active Income is when you get paid for your direct effort. Think of a freelance article, a sponsored Instagram post, or a one-on-one coaching call. The work is finite, and so is the payment.
Passive Income is when you get paid because you own an asset that creates value. Think of an SEO-optimized blog post that earns affiliate commissions for years, or a digital guide that sells automatically every single day.

You are moving from the role of a service provider to an asset builder. Every idea that follows is a different type of digital asset you can build. Your goal is to create a portfolio of them.
1. Craft Evergreen Affiliate Content That Ranks and Earns for Years
Affiliate marketing is often a blogger's first foray into making money, but not all affiliate content is created equal. The key to making it a source of true passive income is to focus exclusively on creating evergreen content that is optimized for search engines (SEO). A post about a fleeting travel trend might get a burst of traffic, but an in-depth guide to "The 5 Best Carry-On Backpacks for Digital Nomads" can attract a steady stream of visitors from Google—and generate commissions—for years after you hit publish.
This is the very definition of a passive income asset. According to performance marketing industry analysis, a single piece of high-ranking content can generate commissions for years with no additional effort, making it an incredibly scalable model.
Your Action Plan for Passive Affiliate Income:
Identify High-Intent Keywords: Use an SEO tool to find long-tail keywords that signal a user is close to making a purchase. Think "best travel insurance for Europe," "what to pack for Southeast Asia," or "REI vs. Patagonia backpack review."
Go Deeper Than the Competition: Your goal is to create the single best resource on the internet for that specific query. This often means writing long-form articles (2,000+ words) that are well-researched and packed with your genuine, first-hand experience.
Build Strategic Comparison Tables: For product-focused articles, a well-structured comparison table is a conversion powerhouse. These tables organize key features, pros, and cons, allowing the reader to make an informed decision easily. Place your affiliate links within a clear "Check Price & Availability" button to capture the user at their highest point of intent.
Prioritize Trust Above All: The currency of affiliate marketing is trust. Only recommend products and services you have personally used and genuinely believe in. Write balanced, honest reviews that include both the good and the bad. This authenticity is what will ultimately drive conversions.
Pro-Tip: Focus your efforts on promoting "high-ticket" items or recurring subscriptions. Earning a 6% commission on a $2,600 G Adventures tour ($156) is a much higher-leverage use of your time than earning 3% on a $20 travel adapter. Similarly, promoting a service like Dollar Flight Club with a 50% recurring commission builds a predictable, compounding income stream.

2. Monetize Traffic with Premium Display Ads for True Passive Income Blogging
Display advertising is perhaps the purest form of passive income for bloggers. Once your blog achieves a consistent level of traffic, you can join a premium ad network that will automatically place high-quality ads on your site. You get paid based on the number of impressions (views), meaning your entire back catalog of content becomes a revenue-generating asset. An old, popular post about "Things to Do in Paris" can earn money from ads every single day without you ever touching it again.
The key is to understand that this is a volume game. Meaningful income from ads is only possible after you've built a substantial audience.
Your Action Plan for Passive Ad Revenue:
Focus 100% on SEO Traffic: Your single objective to unlock this income stream is to grow your organic traffic from Google. The strategy is simple: consistently publish high-quality, helpful content optimized around keywords your target audience is searching for.
Aim for Premium Network Thresholds: Forget about beginner networks like Google AdSense. The payouts are incredibly low. Your goal should be to qualify for a premium ad network, which will dramatically increase your revenue. The industry benchmarks are:
Mediavine: Requires 50,000 monthly sessions.
Raptive (formerly Adthrive): Requires 100,000 monthly pageviews.
Optimize for User Experience: While it may seem counterintuitive, the best way to maximize ad revenue is to create a great user experience. A fast-loading site with well-structured, easy-to-read content will keep readers on your pages longer, which in turn increases ad impressions and revenue. Ensure your site is mobile-friendly, as the majority of traffic comes from mobile devices.
3. Create a "Sell While You Sleep" Digital Travel Guide
Transitioning from promoting others' products to creating and selling your own is the ultimate step in building a scalable business. Digital products, like eBooks or guides, are the perfect "create once, sell forever" asset. After an initial investment of time to create a comprehensive, high-value digital guide, you can sell it an unlimited number of times, generating revenue automatically with each download.
This model offers exceptionally high profit margins and gives you full control over the product and pricing. It’s how you build a truly independent business in a creator economy projected to nearly double from $250 billion to almost $500 billion by 2027.

Your Action Plan for Creating a Digital Guide:
Validate Your Idea First: The biggest mistake is creating a product nobody wants. Dive into your audience's comments and emails. What destination do they ask about most? What part of trip planning do they find most stressful? Their pain points are your product ideas.
Outline and Write with Intense Value: A great guide is both inspirational and intensely practical. Structure your content logically with a hyperlinked table of contents for easy navigation on mobile. Go beyond generic advice and share your unique, hard-won insider tips that can't be found elsewhere.
Design with a User-Friendly Tool: You don't need to be a graphic designer. A tool like Canva offers professional, easy-to-use templates that allow you to create a beautiful, polished guide. Prioritize a clean layout, large fonts, and your own high-quality photos.
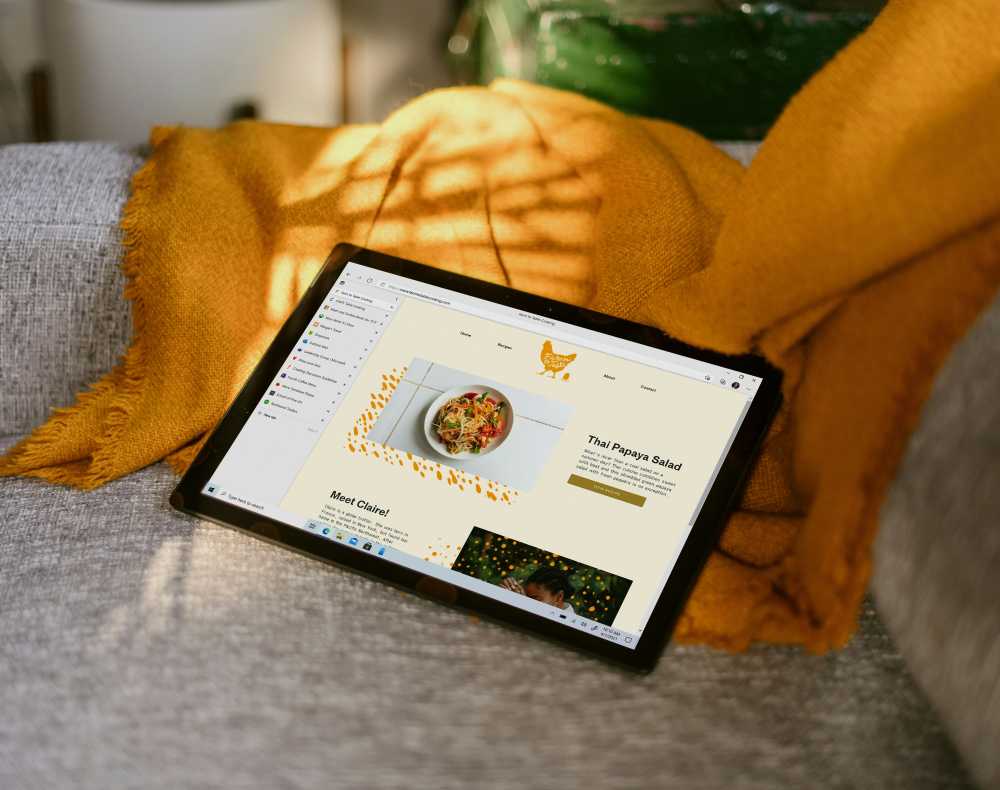
Sell on a Specialized Platform: Once your masterpiece is complete, you need a world-class storefront. A dedicated marketplace like TrekGuider is the ideal place to sell your high-quality [Travel Guide]. It provides a professional, ready-made platform to connect with a global audience of passionate travelers who are actively searching for expert resources just like yours.
4. Sell Lightroom Presets and Digital Templates
A fantastic and highly popular passive income stream for travel creators with a distinct visual style is selling Lightroom presets. These are pre-packaged photo editing settings that allow your followers to achieve your signature aesthetic in their own photos with a single click. Like a digital guide, presets are created once and can be sold infinitely, providing a highly scalable and passive source of income.
Beyond presets, you can apply this same model to any digital template that saves your audience time and stress. This could include:
Customizable Itinerary Templates: Structured planning documents in Notion or Google Sheets.
Printable Travel Planners: A PDF pack including budget trackers, packing lists, and journal prompts.
Video LUTs: Color grading presets for fellow videographers.
Your Action Plan for Selling Presets & Templates:
Define Your Unique Style: Your visual brand is your product. Analyze your most popular photos. What makes them stand out? Is it a moody, cinematic look or a bright and airy feel? Package this style into a cohesive set of 5-10 presets.
Create a High-Converting Sales Page: Your sales page must visually demonstrate the transformation. Use compelling before-and-after photos to show customers exactly what your presets can do for their images.
Leverage a "Pay What You Want" Freebie: The best way to build an audience for your paid presets is to offer one or two for free as a lead magnet. This gives potential customers a risk-free way to try your product and see the quality for themselves.
CTA Block: Get Your Free Travel Lightroom Presets!
Ready to make your travel photos look stunning with a single click? Download our exclusive [Free Travel Lightroom Presets]! This starter pack is designed to give your images a professional, polished look and is the perfect introduction to the power of preset editing.
5. License Your Stock Photos and Videos
As a travel blogger, your hard drive is a goldmine. The thousands of high-quality images and video clips you've captured on your journeys are valuable assets. By uploading this content to stock photography platforms, you can license it to businesses, marketers, and other creators around the world, creating a small royalty for each download with no further effort required per sale.
While a single sale might be small, hundreds or thousands of downloads over many years can accumulate into a significant and remarkably passive income stream. You are simply monetizing the byproducts of the work you are already doing.
Your Action Plan for Selling Stock Media:
Sign Up for Major Platforms: Focus your efforts on the largest stock media marketplaces to maximize your potential audience. Top platforms include:
Adobe Stock
Shutterstock
Getty Images
Curate and Keyword Meticulously: Don't just upload everything. Select your sharpest, best-lit, and highest-quality images. The key to getting your content discovered is careful keywording. Be descriptive and specific. Instead of "beach," use tags like "tropical beach, white sand, turquoise water, palm trees, sunrise, Thailand."
Remove Branding and Logos: To be commercially viable, your photos must be clean of any recognizable branding, logos, or trademarks.
Pro-Tip: Start shooting with stock in mind. When you're traveling, take a few extra minutes to capture generic, "evergreen" shots. These include landscapes without people, close-ups of food, architectural details, and shots that evoke a mood like "adventure" or "relaxation." These types of images have a much broader commercial appeal.
Your Journey to Financial Freedom Starts Now
Building a profitable blog that provides true freedom is a marathon, not a sprint. The path requires a strategic and deliberate shift in focus from being a content creator who gets paid for their time to a business owner who gets paid for the assets they own. The five ideas outlined above are your blueprint for building those assets.

You now have a clear answer to the question of how to achieve passive income blogging. Don't let yourself be overwhelmed by trying to do everything at once. Choose one idea that excites you the most and aligns with your current strengths. If you're a talented photographer, start with presets. If you have deep expertise in a specific destination, start outlining your digital guide. Take the first step today to build an asset that will pay you back for years to come.
Frequently Asked Questions (FAQ)
1. Is it better to focus on one passive income stream or build several at once?
Focus on one, then stack. The most successful creators follow a "Monetization Ladder." They don't try to do everything at once. Master creating evergreen affiliate content first. Once that system is working, use your authority and cash flow to invest time in building your first digital product. Mastering one stream before moving to the next is the key to sustainable growth.
2. How much traffic do I need to start earning passive income?
This depends entirely on the model. For affiliate marketing or selling your own low-cost digital product, you can start earning with as little as a few thousand pageviews per month if your audience is highly targeted and engaged. For display advertising to be truly worthwhile, you should aim for the 50,000+ monthly session threshold required by premium networks.
3. What's the most common mistake bloggers make when trying to earn passive income?
The biggest mistake is impatience. Passive income streams are assets that take time to build and appreciate. Bloggers often give up on SEO after a few months or launch a digital product to a tiny audience and get discouraged by low sales. True passive income is the reward for long-term, strategic effort.
Meta Data Suggestions:
SEO Meta Title (Under 60 characters):
5 Passive Income Ideas for Your Travel Blog (2026)
URL Slug:
passive-income-ideas-travel-blog
SEO Meta Description (Under 155 characters):
Discover 5 proven passive income ideas for your travel blog. Learn to build assets that make money 24/7, from digital guides to affiliate marketing.
Don't Miss Out! Subscribe for Exclusive Content
Subscribe


Comments 0
No comments yet
Be the first to share your experience!
Dont Miss Out! Subscribe for Exclusive Content

FTC Affiliate Disclosure Essentials: Stay Compliant as a Travel Creator

Essential Affiliate Tools: From Tracking to Full Optimization

Avoid These 5 Affiliate Landing Page Mistakes for Better Conversions

Affiliate Keyword Research Mastery for Travel Blogs

Booking.com Affiliate Program Review: Pros, Cons, and Earnings Potential

Decoding Affiliate Commission Rates: Benchmarks for Travel Creators
Food & Water Safety Abroad: How to Avoid Getting Sick
TrekGuider @trekguider
There’s a moment on every trip where the true magic happens: the first bite of a dish you can’t pronounce from a street cart buzzing with locals, the refreshing sip of a regional drink, the discovery of a flavor that will forever define a place in your memory. Food is culture, connection, and the fastest way to the heart of a destination. And that’s the traveler’s paradox, isn’t it? The very experiences that promise the most profound connection also carry a potent, gut-wrenching risk.
One bad meal or a single sip of contaminated water can derail your entire adventure, swapping days of discovery for days spent locked in a hotel room. This fear is agitated by horror stories from fellow travelers and the sheer unpredictability of an unfamiliar environment. It's a valid concern—traveler's diarrhea is unequivocally the most common travel-related illness, affecting up to 80% of international travelers depending on the destination. The fear of getting sick can make you timid, causing you to stick to bland, "safe" foods and miss out on the rich mix of flavors your destination has to offer. It can rob you of the very experiences you traveled so far to find.

But it doesn't have to be this way. This guide is your solution, a definitive and practical playbook for mastering food and water safety abroad. We’ve synthesized actionable advice from the world’s leading health organizations, including the Centers for Disease Control and Prevention (CDC) and the World Health Organization (WHO), to empower you to eat boldly and drink safely. This isn’t a list of things to fear; it’s a set of simple, memorable rules for prevention, identification, and, if necessary, management. This is a critical deep-dive into a core pillar of preparedness we cover in [The Ultimate Guide to Travel Safety: A 2026 Playbook], designed to give you the confidence to dive fork-first into the heart of a culture.
The Golden Rule of Food and Water Safety: "Boil It, Cook It, Peel It, or Forget It"
If you remember only one thing from this guide, make it this simple, five-word mantra. Promoted by the CDC and other global health bodies, this single rule is a powerful and easy-to-use filter for nearly every culinary decision you'll make on the road. It’s the foundation of your entire food and water safety strategy.
Boil It: Your Safest Bet for Liquids
Pathogens like bacteria, viruses, and parasites are killed by heat. This makes boiling the most effective method for purifying liquids.
Examples: Drinking water that has been brought to a vigorous, rolling boil for at least one full minute. Hot beverages like tea or coffee that are served steaming hot are also generally safe. Any milk products you consume should be confirmed to be pasteurized or have been boiled.
Cook It: The Power of Heat
Thoroughly cooking food kills the harmful microorganisms that cause illness. The key is to ensure it is cooked all the way through and served hot.
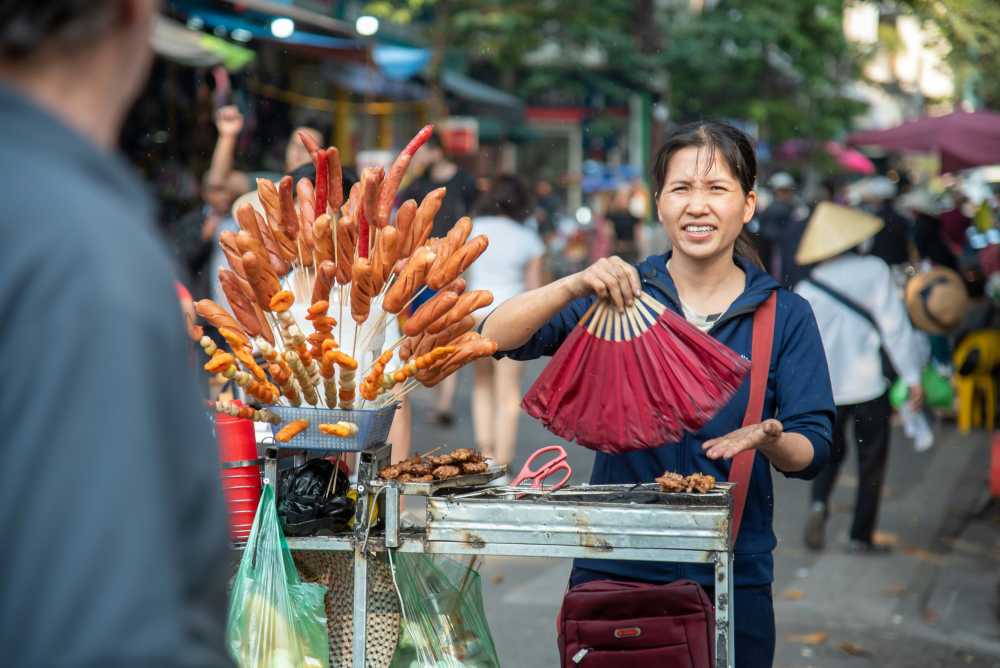
Examples: Meat, poultry, or seafood that is well-cooked (not rare or raw) and served steaming hot to the touch. This is especially crucial for street food; dishes that are cooked fresh to order in front of you are a much safer bet than those that have been sitting out.
Peel It: Nature’s Own Packaging
For raw fruits and vegetables, the contamination is almost always on the outside surface. By peeling it yourself with clean hands, you remove the risk.
Examples: Fruits with a thick, peelable skin like bananas, oranges, mangoes, and avocados are your safest and best friends for a healthy snack. Similarly, vegetables you can peel, such as cucumbers, are also a great option.
Forget It: When in Doubt, Go Without
This is the most critical and sometimes most difficult part of the rule to follow. It requires discipline, but it’s your ultimate defense. If an item of food or drink doesn't meet one of the three criteria above, you must skip it.
Examples: Tap water and ice cubes made from tap water are the biggest culprits. Salads and raw leafy greens like lettuce are high-risk because they are difficult to clean thoroughly and may have been washed in contaminated water. You should also avoid fruits that cannot be peeled, such as grapes and berries, and any unpasteurized dairy products like milk or cheese. Finally, be very wary of any food served at room temperature, such as from a buffet.
Navigating the Streets: A Visual Guide to Spotting Unsafe Food
Street food is often the soul of a city's cuisine, but not all vendors are created equal. Your eyes are your best tool for vetting a stall. Before you order, take thirty seconds to perform a quick visual inspection. Look for these five clear signs of a safe or unsafe operation.
Poor General Cleanliness: This is the most obvious indicator. Red flags include dirty workstations with unwiped spills, visible food waste, rubbish on the ground, and the presence of pests like flies or wasps. The vendor themselves should also appear clean, with tidy clothes and hands.
Improper Food Temperatures: Food left in the "danger zone" (room temperature) is a breeding ground for bacteria. Avoid stalls where cooked food, especially meat, is sitting out in large trays. The safest option is always food that is cooked fresh to order, right in front of you. Hot food should be visibly steaming.
Obvious Cross-Contamination: Watch how the vendor handles ingredients. A major red flag is using the same cutting board, knife, or unwashed hands to handle raw meat and then touch ready-to-eat items like bread, salad, or cooked food.
Use of Contaminated Water: Look at the vendor’s water source. Rinsing dishes, utensils, or vegetables in a single bucket of murky, stagnant water is a sign of a high-risk operation. Likewise, avoid ice in your drinks unless you can confirm it was made from purified water (commercially bagged ice is usually a safe sign).
Lack of a Crowd (Especially Locals): A busy stall with a long line, particularly of local residents, is one of the best indicators of a trusted and safe food source. High customer turnover means the food is fresh and hasn't been sitting out for long. An empty stall is often empty for a reason.
Pro-Tip: Make "follow the locals" your street food mantra. A long line of residents is a walking, talking five-star review of a vendor's quality and safety. It's the most reliable seal of approval you can find.
Securing Your Water Supply: A Deep Dive into Hydration and Purification
Staying hydrated is non-negotiable for your health and energy while traveling, but assuming tap water is safe is one of the most common and dangerous mistakes a traveler can make. Here’s how to ensure every sip you take is safe.
Identifying Safe and Unsafe Drinking Water Sources
The CDC and WHO have clear guidelines. Unless you are in a country with a known, highly-developed sanitation system, you should assume all tap water is unsafe.
Safest Sources: Commercially bottled water in a factory-sealed, tamper-proof container is your most reliable option. Carbonated water is even safer, as a broken seal is immediately obvious. The second safest source is water that you have personally brought to a rolling boil for at least one minute.
Unsafe Sources to Avoid: Tap water, well water, ice made from tap water, fountain drinks mixed with tap water, and even water from clear mountain streams (which can contain germs) should all be avoided unless they have been purified.
Your Purification Playbook: The Top 3 Methods
When bottled or boiled water isn't available, you need a backup plan. Here are the top three recommended purification methods.
Boiling (The Gold Standard): This is consistently ranked by the CDC and WHO as the single most effective method. It kills all known disease-causing microorganisms, including viruses, bacteria, and parasites. Simply bring clear water to a rolling boil for 1 minute (or 3 minutes at elevations above 6,500 feet / 2,000 meters).
Filtration: A high-quality portable water filter is highly effective at removing bacteria and protozoan parasites like Giardia and Cryptosporidium. Look for a filter with an absolute pore size of 1 micron or smaller. The main limitation is that most portable filters do not remove viruses, so in high-risk areas, the CDC recommends following filtration with chemical disinfection.
Chemical Disinfection: Chlorine, iodine, or chlorine dioxide tablets/drops are a lightweight and easy way to kill viruses and bacteria. However, they are not consistently effective against the parasite Cryptosporidium and require a contact time of at least 30 minutes.
For in-depth planning on what gear to pack for every type of trip, from water filters to first-aid supplies, our all-encompassing [Travel Guide] is the only resource you'll ever need.
Damage Control: How to Manage Traveler's Diarrhea
But let’s be realistic: even the most diligent traveler can have a bad day. When that happens, knowing exactly what to do—and what not to do—can be the difference between a 24-hour nuisance and a trip-ruining ordeal. This is the damage control phase of your food and water safety plan.
The First and Most Critical Step: Oral Rehydration
According to travel medicine doctors, dehydration is the single most likely and dangerous complication of traveler's diarrhea. Replacing lost fluids and electrolytes is your absolute first priority.
Method: The best way to rehydrate is with a dedicated Oral Rehydration Solution (ORS), which comes in packets of salts and sugars that you mix with boiled or bottled water. In a pinch, sports drinks or clear soups can also be used.
Symptomatic Treatment for Mild to Moderate Cases
If the diarrhea is tolerable and not accompanied by a high fever or blood, over-the-counter medications can provide relief and help you get through a travel day.
Medications: An antimotility agent like Loperamide (the active ingredient in Imodium, a top pharmacist-recommended brand) can reduce the frequency of bowel movements. Bismuth Subsalicylate (found in Pepto-Bismol, another pharmacist favorite) can also help decrease the frequency and shorten the duration of the illness.
When to Use Standby Antibiotics (For Severe Cases)
If diarrhea is distressing, incapacitating, or contains blood or mucus, a prescribed antibiotic may be necessary.
Method: Before you travel, speak with your doctor or a travel medicine clinic. For travelers heading to high-risk destinations, they may provide a prescription for a standby antibiotic, such as Azithromycin, to carry with you. A single dose is often highly effective at treating severe cases.
Pro-Tip: Within your main travel first-aid kit, create a dedicated "Digestive Distress" module. Keep it in a separate, clearly-labeled zip-top bag containing a few packets of Oral Rehydration Salts, a strip of Loperamide, and a few antacids. This way, when you need it, you won't have to rummage through your entire kit.

Ready to Pack Like a Pro?
A smart food and water safety strategy is just one piece of your pre-trip preparation. To ensure you don't overlook a single essential item—from documents and finances to clothing and medical supplies—a master checklist is your most powerful tool. Our comprehensive, free checklist has you covered for every stage of your journey.
Download Your Free [International Travel Checklist] Now!
Food and Water Safety FAQs
A prepared mind is a safe mind. Here are expert answers to common questions that take your preparedness to the next level.
1. Besides traveler's diarrhea, what are the most common travel illnesses?
While traveler's diarrhea is number one, the CDC reports that other common issues include acute respiratory infections (like influenza or COVID-19, often acquired in transit), vector-borne fevers like Dengue and Malaria in tropical regions, and other food-borne illnesses like Hepatitis A and Typhoid Fever. Skin conditions from insect bites are also extremely common.
2. Is it safe to eat at a restaurant if I'm worried about street food?
Generally, restaurants can be safer, but the same principles apply. A busy restaurant full of locals is a great sign. Be cautious with the same high-risk items: salads, unpeeled fruits, and tap water or ice. If you want to find trusted, local-approved gems, explore the TrekGuider platform, where travel creators often share their own curated guides to safe and authentic eats.
3. Should I carry a standby antibiotic in my first-aid kit?
This is a question for your doctor or a travel medicine clinic. For travelers heading to high-risk destinations where severe traveler's diarrhea is common, many doctors will provide a prescription for a standby antibiotic like Azithromycin. It’s not for mild cases but can significantly shorten the duration of a severe bout of illness. Discuss your itinerary with your doctor to see if this is right for you.
Eat Boldly, Travel Well
The world of food is a world of incredible diversity and connection, and it deserves to be explored with an open mind and a curious palate. The goal of mastering food and water safety is not to build a wall of fear that separates you from authentic experiences. It is about building a foundation of knowledge that gives you the freedom to be adventurous. By internalizing the golden rule of "Boil it, cook it, peel it, or forget it," learning to trust your own visual assessment of a food stall, and knowing exactly what to do if you get sick, you replace anxiety with empowerment. You are now equipped with the skills to navigate the world's most exciting cuisines with confidence, ensuring your focus remains on the flavor, connection, and joy that every journey promises. Go explore, eat boldly, and travel well.

Meta Data Suggestions:
SEO Meta Title (Under 60 characters): Food & Water Safety Abroad: How to Avoid Getting Sick
URL Slug: food-water-safety-abroad
SEO Meta Description (Under 155 characters): Avoid traveler's diarrhea with our expert guide to food and water safety abroad. Learn the golden rules for eating street food, purifying water, and staying healthy.
Don't Miss Out! Subscribe for Exclusive Content
SubscribeComments 0
No comments yet
Be the first to share your experience!
Dont Miss Out! Subscribe for Exclusive Content

Chicago Beer Fests: Top 6 Tastings

Ultimate USA Holidays Guide: Top Picks
FTC Affiliate Disclosure Essentials: Stay Compliant as a Travel Creator
Essential Affiliate Tools: From Tracking to Full Optimization
Booking.com Affiliate Program Review: Pros, Cons, and Earnings Potential
Decoding Affiliate Commission Rates: Benchmarks for Travel Creators
Jazz Fest: Ultimate Lineup Planner
TrekGuider @trekguider
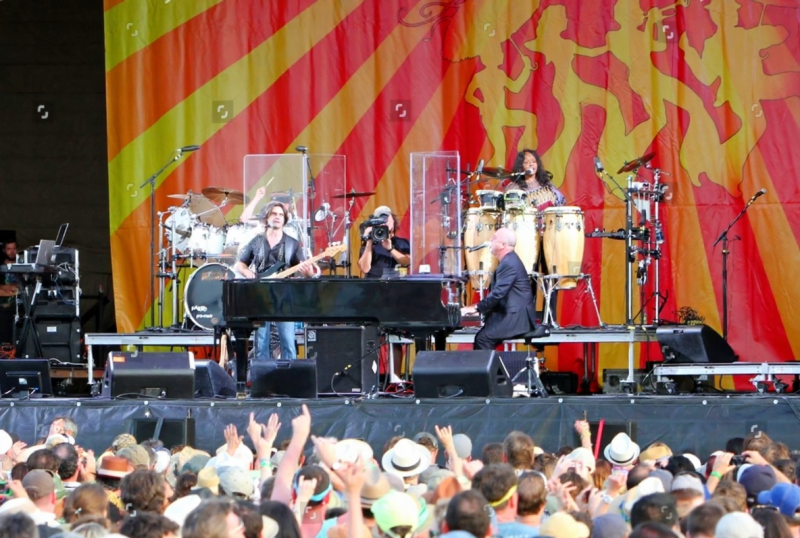
The New Orleans Jazz & Heritage Festival is a titan of American culture, a sprawling, soulful celebration that transforms the Fair Grounds Race Course into the center of the musical universe. But with that iconic status comes an overwhelming challenge: with a dozen stages, hundreds of artists, and a menu of Louisiana’s finest cuisine that could take a lifetime to explore, how do you possibly see and taste it all? You’ve spent months dreaming of this, only to be handed a schedule so dense it feels impossible to crack.
Imagine the sinking feeling of hearing the distant roar of the crowd for a legend’s set while you’re stuck on the opposite side of the infield. You spend your day battling a sea of people, crisscrossing the grounds under a hot sun, only to miss the first three songs of a band you were dying to see. The fear of missing out becomes a tangible stress, turning a dream trip into a frantic race against the clock. Without a rock-solid strategy, you risk experiencing only a fraction of what this incredible event offers, leaving with a nagging regret over the missed bands and uneaten crawfish bread.
Forget the festival FOMO. This is your playbook for conquering the controlled chaos of the Fair Grounds, turning a dizzying schedule into a masterclass of music, food, and soul. We will break down everything you need to build a flawless plan, navigate the grounds like a local, and balance the world-class music with the equally legendary food. This is the ultimate lineup planner for Jazz Fest New Orleans, designed to ensure your time is spent soaking in the magic, not getting stuck in the mud.

Before You Go: Pre-Festival Prep for the Savvy Planner
A masterful Jazz Fest experience begins long before you step through the gates. The sheer scale of the event, which roars to life from April 24 to May 4, 2025, demands a thoughtful approach. Smart preparation is the secret that separates the overwhelmed amateur from the festival pro who glides effortlessly from stage to stage. This is your foundational work, where you turn the festival’s massive schedule from an intimidating document into a personalized roadmap. As one of the crown jewels we celebrate in our definitive guide to [New Orleans Holidays: Cultural Feasts], Jazz Fest is a cultural pilgrimage that richly rewards those who arrive with a plan.
Decoding the "Cubes": Your First Step to Lineup Mastery
In the lexicon of Jazz Fest veterans, the daily performance schedules are simply "the cubes." This grid-style layout is your bible, detailing who is playing where and when. Your first mission is to become fluent in its language.
Download the Official App: Weeks before the festival, the official New Orleans Jazz & Heritage Festival app becomes the most important app on your phone. Download it the moment it’s released. This digital tool contains the full "cubes," an interactive map, vendor lists, and, most critically, the ability to build your own personalized schedule.
Study the Grounds: Before you start picking artists, spend time with the festival map. Get a feel for the locations of the major stages—like the Festival Stage and the Gentilly Stage where headliners hold court—and the more intimate tents, such as the legendary Gospel Tent, the Blues Tent, and the Jazz Tent. Understanding the physical distance between stages is the key to realistic planning.
Star Your Favorites: Go through the lineup day by day and start "starring" or "favoriting" every single act that piques your interest. Don't hold back; this is your master list of possibilities. This year’s lineup already boasts a staggering collection of headliners like Pearl Jam, Dave Matthews Band, Luke Combs, and Lil Wayne & The Roots, so your list of must-sees will fill up fast.
Assembling Your Tiers: From "Must-See" to "Happy Accident"
With your initial list of favorited artists, it's time to get strategic. Set times will inevitably clash. The key is to prioritize ruthlessly.
Tier 1: The Non-Negotiables: Identify the 3-4 artists each day that you absolutely, positively cannot miss. These are your anchors, the pillars around which the rest of your day will be built.
Tier 2: The High-Interest Acts: These are the performers you’d be thrilled to see. If their set times and locations work conveniently around your Tier 1 picks, you’ll make every effort to be there.
Tier 3: The Serendipity List: This is your list for discovery. It’s filled with intriguing local brass bands, up-and-coming songwriters, or genres you’re curious about. These are the acts you’ll check out when you have a gap in your schedule. The true magic of Jazz Fest often lies in stumbling upon an incredible performance you never planned to see.

Essential Gear for a Full Day at the Fair Grounds
The festival is a marathon, not a sprint. It runs from 11 AM to 7 PM daily and proceeds "rain or shine," so you need to be prepared for anything a Louisiana spring day can throw at you.
Sun Protection: A wide-brimmed hat, sweatproof sunscreen, and sunglasses are non-negotiable. Shade is a precious and rare commodity.
Footwear: You will walk miles on uneven terrain that can turn to mud in an instant. Comfortable, broken-in, waterproof boots are your best bet.
Rain Gear: A lightweight poncho is a must. A classic New Orleans downpour can appear out of nowhere, and a simple poncho can save your day.
Hydration: Bring an empty reusable water bottle. Free water stations are located throughout the grounds, and staying hydrated is critical.
A Small Blanket or Chair: A small, foldable festival chair or a compact blanket gives you a home base at a stage and a chance to get off your feet. Always check the official festival website for the latest rules on chair sizes.
Navigating the Stages: A Pro's Guide to the Jazz Fest New Orleans Landscape
Once you’re on the grounds, a new challenge emerges: moving efficiently through a temporary city of music lovers. The space is vast, the crowds are thick, and every minute spent fighting a human traffic jam is a minute of music lost. Mastering the art of movement is what separates the pros from the rookies.
The Art of Stage Hopping: The Perimeter Strategy
The single most effective technique for navigating between stages is to avoid the center. The natural instinct is to cut directly through the middle of the crowd, but this is almost always the slowest and most frustrating path.
Instead, adopt the perimeter strategy. When you need to move, walk to the outer edge of the crowd and use the less-congested pathways along the racetrack, food vendor areas, and craft marketplaces. It may look like a longer route on the map, but you will move significantly faster. This method is your secret weapon for making it from the Gospel Tent to the Gentilly Stage in record time.
Understanding the Vibe of Each Major Stage Area
While the lineup is diverse everywhere, different stages at Jazz Fest New Orleans cultivate their own unique atmospheres. Knowing these vibes helps you plan not just your schedule, but your energy.
The Main Stages (Festival Stage & Gentilly Stage): These are the epicenters for the big-name headliners. Expect massive crowds, high energy, and a classic large-scale concert feel. If you want to be close, you need to camp out hours in advance.
The Tents (Gospel, Blues, Jazz): The tents offer a more intimate and often more intense musical experience. The Gospel Tent is legendary for its powerful, soul-stirring performances. The Blues and Jazz tents are where you’ll find virtuoso musicians in a focused, respectful listening environment. They also provide crucial shade.
The Cultural Stages (Fais Do-Do, Jazz & Heritage): These stages are the heart of the festival's "heritage" mission, showcasing the rich sounds of Louisiana, from Cajun and Zydeco to Mardi Gras Indians. The vibe here is pure, joyful, and deeply authentic.
Pro-Tip: Use the official festival app to set alerts for your must-see artists 15 minutes before their set time. This gives you a travel-time buffer to move from one stage to another using the perimeter strategy without feeling rushed.
More Than Music: Planning Your Culinary and Cultural Itinerary
To treat Jazz Fest as only a music festival is to miss half the point. It is, without exaggeration, one of the greatest food festivals on the planet. Furthermore, the craft areas showcase the incredible artistry of the region. A truly ultimate lineup plan integrates these cultural pillars into your day.

The "Food Fest" Within the Jazz Fest: Don't Miss These Bites
The food booths at Jazz Fest are a headline attraction. Planning your meals is just as important as planning your music.
Eat at Off-Peak Times: The food lines are longest between noon and 2 PM. Plan to eat an early lunch right when the gates open or a later one after 3 PM to minimize your wait.
Divide and Conquer: If you’re with a group, send one person for drinks while others wait in different food lines for Crawfish Monica, Mango Freeze, or Alligator Sausage. Reconvene and share your haul to sample more of the legends.
The vibrant colors of the food, the elaborate costumes, and the soulful expressions of the musicians are all begging to be photographed. To make your festival shots pop, download our [Free Travel Lightroom Presets]. They are expertly designed to enhance the unique light and color palette of a New Orleans celebration.
Exploring the Heritage Crafts: A Mid-Day Music Break
Jazz Fest features three distinct craft marketplaces: Congo Square African Marketplace, Contemporary Crafts, and the Louisiana Marketplace. When the sun is at its peak or you have a gap between sets, take a leisurely stroll through these areas. It’s a perfect way to rest your ears, cool down, and find a unique, handmade souvenir that truly represents the soul of the festival.
Advanced Strategies for the Ultimate Jazz Fest New Orleans Experience
You’ve prepped, you’ve planned, and you know how to navigate. Now it’s time for the pro-level strategies that will elevate your experience from great to unforgettable.
The "Rain or Shine" Reality: How to Prepare for Louisiana Weather
The festival’s "rain or shine" policy is serious. While stages may temporarily close for lightning, the event continues.
Protect Your Gear: Bring a waterproof bag or Ziploc bags for your phone and wallet. A wet phone can quickly ruin a day.
Embrace the Mud: If it rains, the Fair Grounds will become muddy. This is where your choice of waterproof footwear pays off. Lean into it.
Post-Rain Strategy: After a storm, the covered tents will be packed. This is a great time to head to an outdoor stage, as many people will be slow to leave the shelter, giving you a chance to get a better spot.

The Zero-Waste Warrior: Participating in Festival Sustainability
Jazz Fest is a massive event, and you can play a role in reducing its environmental impact. Look for the festival’s oyster shell recycling program, a fantastic initiative that helps rebuild coastal reefs. Use the designated recycling and compost bins, and always opt for refilling your water bottle over buying single-use plastic.
Pro-Tip: The last set of the day creates a massive exit rush. Consider leaving 15-20 minutes before the final song of the headliner you're watching to beat the crowds heading for the shuttles. That small head start can save you an hour of waiting in line.
Planning a trip to Jazz Fest is often the centerpiece of a larger New Orleans adventure. To make the most of your entire visit, from the French Quarter to the Garden District, our comprehensive [Travel Guide] provides expert-led itineraries and local secrets to help you build the perfect trip.

Your Blueprint for Jazz Fest Success
You are now armed with a complete strategic blueprint to not just attend the New Orleans Jazz & Heritage Festival, but to truly conquer it. By decoding the cubes, prioritizing your artist list, and mastering the perimeter strategy, you’ve eliminated the guesswork. By integrating the world-class food and crafts into your plan, you’ve ensured a rich experience that captures the true spirit of this cultural institution. You are ready to move with purpose, eat with gusto, and immerse yourself in the unparalleled soundscape of the incredible Jazz Fest New Orleans.
Meta Data Suggestions:
SEO Meta Title: Jazz Fest New Orleans: The Ultimate Lineup & Stage Planner
URL Slug: /jazz-fest-new-orleans-lineup-planner
SEO Meta Description: Conquer Jazz Fest 2025 with our ultimate planner. Get pro tips on navigating stages, scheduling artists like Pearl Jam, and finding the best food.
Don't Miss Out! Subscribe for Exclusive Content
SubscribeComments 0
No comments yet
Be the first to share your experience!
Dont Miss Out! Subscribe for Exclusive Content

San Francisco Cherry Blossoms: A Local's Guide to the Blooms

Halloween SF: Haunts Without Horrors

SF Festivals: 7 Must-See Lineups

Christmas SF: Lights & Wharf Wonders

SF Pride: 6 Route & Party Hacks
