How to Make a Solo Travel Budget (That You'll Actually Keep)
TrekGuider @trekguider
You have the destination pinned on a map, the screenshots saved, the dream of a life-changing solo trip burning bright. But a huge, intimidating question mark looms over the entire fantasy: the money. You have no real idea how much it costs, how to save for it, or how you’ll manage it all on your own. This financial uncertainty is paralyzing, isn't it? It’s the anchor that keeps your dream moored in the harbor of "someday," while you watch others set sail. You worry that you’ll either never save enough or, even worse, that you’ll miscalculate and run out of money halfway through your adventure, turning a dream trip into a stressful nightmare.
This guide is your anchor chain cutter. It is the definitive, step-by-step system to create a realistic, achievable, and stress-free financial plan for your adventure. We’re going to demystify the process of how to budget for solo travel, breaking down every potential cost, from pre-flight essentials to daily gelato. This isn't about restriction; it's about empowerment. It's about giving you the clarity and control to turn "someday" into a firm departure date. For a complete roadmap of your entire journey, start with our foundational pillar article, The Ultimate Guide to Solo Female Travel (15 Essential Tips).
The "Why" Before the "How": A Solo Traveler's Financial Mindset
Before we open a single spreadsheet, let's establish a crucial mindset shift. For a solo traveler, a budget is not a cage—it is the key that unlocks the cage. When you travel with others, costs are often shared or split. When you travel alone, you bear 100% of the financial responsibility for every room, ride, and meal. While this may seem daunting, it grants you an unparalleled superpower: absolute financial agility and control.
You, and you alone, decide where to splurge and where to save. You can choose a hostel in Prague to save for a Michelin-starred meal in Paris. This level of autonomy is a core part of the solo travel experience, a movement dominated by women who make up a staggering 84% of the market. Mastering your budget is the first and most critical step in mastering the art of traveling on your own terms.
From Dream to Departure: Your Step-by-Step Guide on How to Budget for Solo Travel
Creating a comprehensive travel budget isn't guesswork; it's a systematic process that transforms a vague dream into an actionable financial goal. Follow these four steps to build a plan you can trust.
Step 1: Research and Estimate Your "Big Three" Costs
Your first task is to get a realistic, high-level estimate of what your trip will cost. Focus your research on the three largest categories of expense that will form the foundation of your budget.
Pre-Trip Fixed Costs: These are the one-time expenses you'll incur before you even leave home. This category includes things like necessary visas, travel insurance (an absolute non-negotiable), essential gear you need to buy (like a good backpack or walking shoes), and any required vaccinations.
Major Transportation: For most trips, this will be your round-trip flight to and from your destination region. Use tools like Google Flights or Skyscanner and search with flexible dates to get a ballpark figure for this significant cost.
Average Daily On-the-Ground Cost: This is the most variable part of your budget, and it's heavily influenced by your destination and travel style. Research is key here. As we'll see below, the difference between regions is dramatic. A budget-conscious solo traveler could comfortably explore Prague on around €65 per day, while maintaining a similar travel style in Paris would require at least €115 per day, according to cost-of-living data.

Step 2: Build Your Master Budget Spreadsheet
Once you have your "Big Three" estimates, it's time to get granular. Create a detailed spreadsheet or use a budgeting app to break down your total estimated cost into specific, itemized categories. This detailed view is crucial because it shows you exactly where your money is going and helps you identify areas where you can potentially cut back.
Your spreadsheet should include the following categories:
Pre-Trip Costs: (Visa fees, travel insurance, vaccinations, new gear)
International Transport: (Flights, long-distance trains)
Daily Lodging: (Your estimated nightly cost x number of nights)
Daily Food: (Your estimated daily cost x number of days)
Daily Activities: (Museum tickets, tours, special experiences)
Local Transport: (Subway passes, buses, occasional taxis)
Miscellaneous: (Souvenirs, laundry, toiletries)
Your Ultimate Planning Companion
A great budget is the foundation of a great itinerary. To help you organize every aspect of your trip, from flight details and accommodation confirmations to your daily spending plan, we've created the perfect tool to put this plan into action.
Download your free Travel Itinerary Template now! This comprehensive template will help you keep all your essential information in one organized place, making your planning process seamless and stress-free.
Step 3: Set a Savings Goal and Automate Your Success
With a tangible number in your sights, the path to your departure date sharpens from a hazy dream into simple, motivating math. Divide the total cost by the number of months you have until your departure. This number is your required monthly savings target.
The single most effective strategy for hitting this target is automation. Don't rely on willpower. Set up an automatic, recurring transfer from your checking account to a dedicated high-yield savings account for the day after you get paid. By treating your travel savings as a non-negotiable monthly bill, you pay your future self first and ensure you stay on track without having to think about it.
Step 4: The Golden Rule: Build a 15-20% Contingency Fund
This is the most crucial, and most often overlooked, step in building a resilient budget. After you’ve calculated your total estimated trip cost, add a buffer of 15% to 20% on top of that total. This is your contingency fund.
This fund is not just for emergencies like a missed flight or a medical issue. It is also your "opportunity fund." It’s the financial freedom to say "yes" to a spontaneous, can't-miss experience—like a last-minute ticket to the opera or a day trip with new friends from your hostel. This buffer is what prevents financial stress on the road and allows you to travel with confidence and flexibility.
The Cost of Style: Decoding Daily Expenses for Three Travel Tiers
That four-step framework gives you the how, but the biggest variable will always be the where and the what. To give you tangible financial targets, let's break down what those "on-the-ground costs" actually look like across three distinct travel styles, based on global averages for popular destinations. These figures are for a single person in USD and do not include major pre-trip costs like international flights.

The Budget Backpacker: Stays in hostel dorms, primarily eats street food or cooks in the hostel kitchen, and focuses on free activities like walking tours.
The Mid-Range Comfort Seeker: Stays in private hostel rooms or budget hotels, eats a mix of cafe meals and local restaurants, and enjoys a paid activity each day.
The Affordable Luxury Traveler: Stays in boutique hotels, dines out for most meals, uses ride-shares, and books multiple guided tours or unique experiences.
To see these numbers in action, explore the Travel Guide marketplace on TrekGuider. Many of our expert guides, published by seasoned solo travelers, include detailed budget breakdowns from their own trips, giving you invaluable real-world insight.
Hacking the System: 5 Actionable Tips for Slashing Your Biggest Costs
For a solo traveler, flights and accommodation are the two largest line items in the budget. Employing a few savvy strategies can dramatically reduce these costs, freeing up more of your hard-earned money for actual experiences.
Travel in the Shoulder Season: The months just before and after peak tourist season (typically spring and autumn) are the sweet spot. You’ll enjoy pleasant weather, fewer crowds, and flight and accommodation costs that can be 25-50% cheaper than in peak summer.
Embrace Modern Hostels (and Their Private Rooms): The stereotype of dingy dorms is long gone. Many modern hostels are stylish, social hubs that offer private rooms with ensuite bathrooms at a fraction of the cost of a hotel. You get privacy plus access to money-saving amenities like a communal kitchen.
Filter for Single Rooms: When searching on booking sites, specifically look for "single rooms" or studios. Many traditional European guesthouses offer smaller rooms designed for one person at a lower price than a standard double.
Use Flight Scanners with Flexible Date Searches: Instead of searching for a specific date on Google Flights or Skyscanner, use their calendar or "whole month" functions. You’ll often find that shifting your departure by just a day or two can result in massive savings.
Leverage Loyalty Programs: Before your trip, sign up for the free loyalty programs of the airlines and hotel chains you plan to use. More significantly, using a travel-focused credit card to pay for your trip expenses can earn valuable points and miles for free flights and hotel stays in the future.

How to Budget for Solo Travel and Avoid the "Budget Busters"
Even a perfect plan can be derailed by unexpected expenses. Being aware of these common "hidden" costs allows you to account for them in your contingency fund from the start.
The Single Supplement: The most notorious cost for solo travelers. Many tours and cruises base their pricing on double occupancy and charge extra for a single person. Always look for companies that cater to solo travelers or offer to pair you with a roommate to waive this fee.
ATM and Foreign Transaction Fees: This is death by a thousand cuts. Using the wrong card can mean paying a 3% fee on every purchase and $5-$10 for every cash withdrawal.
Baggage Fees: Budget airlines are famous for their exorbitant fees for both checked and carry-on luggage. Always read the fine print on baggage allowances before booking.
Local Tourist Taxes: Many cities charge a small tourist tax per person, per night, that is often not included in your prepaid booking price and must be paid in cash at your hotel.
International Data: Relying on your home carrier's roaming plan can be incredibly expensive. Budget for a local SIM card or an eSIM to ensure affordable connectivity.
Pro-Tip: Your most powerful tool against hidden fees is a strategic financial setup. Travel with two key products: a credit card that has no foreign transaction fees (like the Chase Sapphire Preferred®) and a debit card from a bank that offers worldwide ATM fee reimbursements (like the Charles Schwab Bank High Yield Investor Checking Account). This combination alone can save you hundreds of dollars.
Pro-Tip: Before you leave, create a "financial lifeline." Photocopy the front and back of every credit and debit card you plan to carry. Leave one copy with a trusted emergency contact at home and keep a digital copy in a secure cloud storage service. If your wallet is lost or stolen, having the card numbers and the international toll-free numbers on the back will make the cancellation process infinitely smoother.
Frequently Asked Questions About Solo Travel Budgeting
How far in advance should I start budgeting for a big solo trip?
Ideally, start your high-level research 9-12 months out. This gives you plenty of time to track flight deals, understand seasonal price shifts, and, most importantly, allows you to set a smaller, less intimidating monthly savings goal over a longer period.
Is it better to bring a lot of cash or just use cards?
Never carry large amounts of cash. The best strategy is a multi-pronged approach. Use a no-foreign-transaction-fee credit card for the majority of your purchases (hotels, restaurants, tours) to maximize security and rewards. Use a fee-reimbursing debit card to withdraw small amounts of local currency every few days for things like small market purchases, tips, or cash-only street food.
The 15-20% contingency fund seems like a lot. Is it really necessary?
Absolutely. Think of it as buying peace of mind. On a $3,000 trip, a 15% buffer is $450. That single fund could cover a last-minute flight change, a necessary trip to a doctor, or the spontaneous decision to take a ferry to a Greek island with new friends. Without it, any unexpected event becomes a major crisis. With it, it’s just a manageable part of the adventure.
Your Journey to Financial Freedom Awaits
A budget is not about what you can't do; it's about empowering everything you can do. It transforms a vague, anxiety-inducing dream into a clear, tangible, and achievable goal. By following this systematic approach, you now have the tools to build a financial plan that is not just a spreadsheet of numbers, but a roadmap to the world. You have a framework for how to budget for solo travel that puts you in complete control of your adventure.
This financial competence is the foundation upon which the most incredible solo journeys are built. With your budget sorted, you can focus on the real magic: planning your itinerary, discovering new cultures, and, most importantly, discovering yourself.

SEO Meta Data Suggestions:
SEO Meta Title (59 characters): How to Make a Solo Travel Budget You'll Actually Stick To
URL Slug: /how-to-budget-for-solo-travel
SEO Meta Description (154 characters): A step-by-step guide on how to budget for solo travel. Learn to estimate costs, save effectively, and avoid hidden fees for your next adventure.
Don't Miss Out! Subscribe for Exclusive Content
Subscribe


Comments 0
No comments yet
Be the first to share your experience!
Dont Miss Out! Subscribe for Exclusive Content

Ultimate USA Holidays Guide: Top Picks

FTC Affiliate Disclosure Essentials: Stay Compliant as a Travel Creator

Essential Affiliate Tools: From Tracking to Full Optimization

Booking.com Affiliate Program Review: Pros, Cons, and Earnings Potential

Decoding Affiliate Commission Rates: Benchmarks for Travel Creators

Top 11 High-Paying Affiliate Programs for Travel Bloggers
Lollapalooza: 7 Stage-Hopping Tips
TrekGuider @trekguider
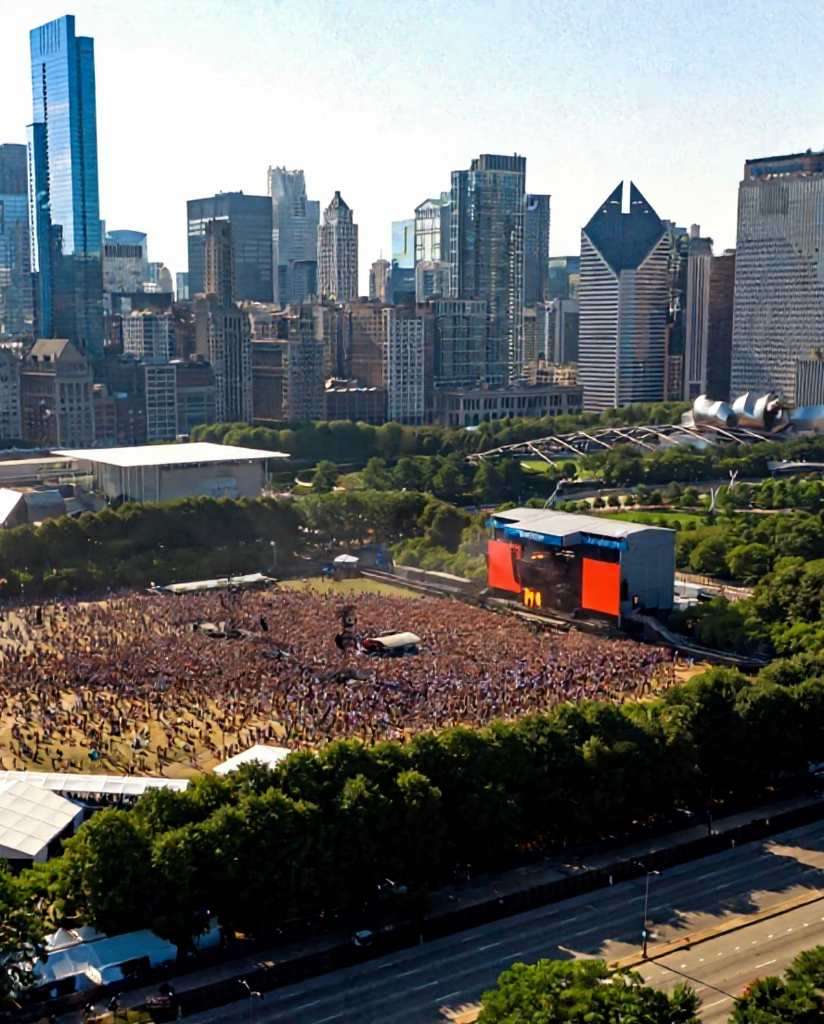
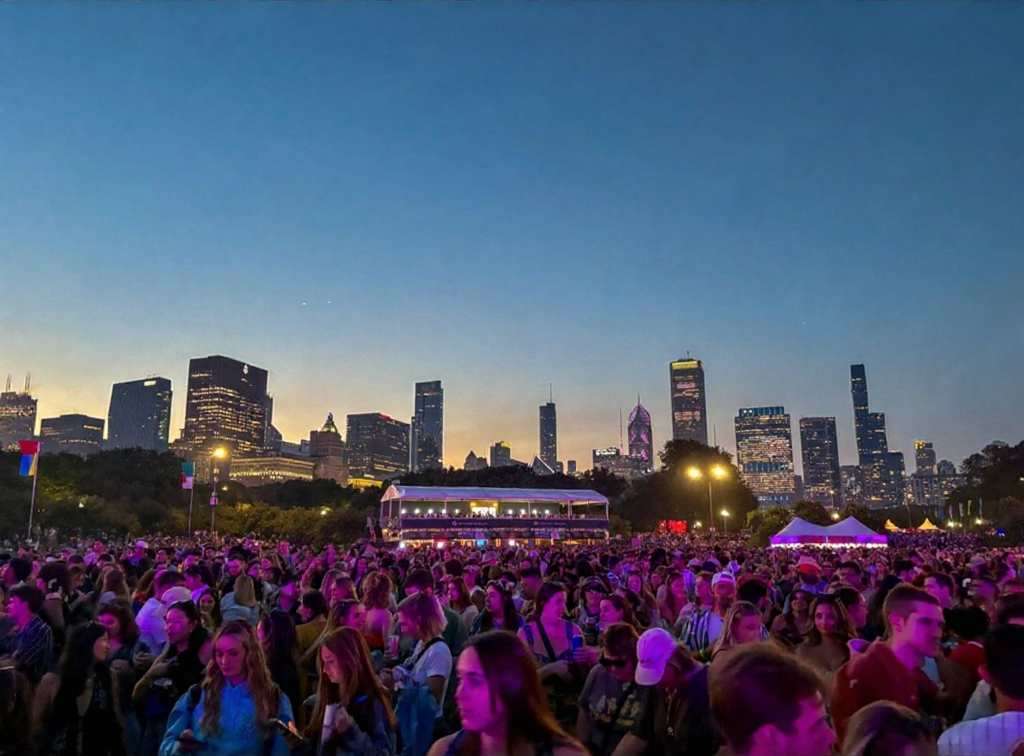
You’ve done it. You scored the golden ticket to Lollapalooza, the four-day musical marathon that transforms Chicago’s Grant Park into the center of the universe. But now, staring at a schedule that looks more like a complex circuit board than a concert lineup, the reality sets in. Dozens of artists you’re dying to see are scattered across a dozen stages, their set times overlapping in a cruel twist of fate. The sheer scale of the festival, with its massive crowds and sprawling grounds, suddenly feels less like a dream and more like a daunting logistical nightmare.
The anxiety begins to bubble. You picture yourself spending half the day trudging from the T-Mobile stage at the south end to the Bud Light stage at the north, only to arrive sweaty, exhausted, and just in time to hear the final chords of your favorite song. The fear of missing out becomes a palpable threat, turning the promise of unforgettable musical moments into a frantic race against the clock. Without a rock-solid plan, your festival experience could be defined by endless walks, missed opportunities, and the nagging feeling of being perpetually in the wrong place. This isn't just about seeing bands; it's about conquering one of the keystone events in a city known for its epic celebrations, a true highlight among the many experiences we cover in our definitive guide to Chicago Holidays: Windy City Thrills.
Forget the stress. This guide is your strategic playbook for navigating the glorious chaos of Lollapalooza Chicago. We’re breaking down the art of stage-hopping into seven actionable, pro-level tips that will transform you from a frantic fan into a festival veteran. From mastering the map before you even step foot in Grant Park to planning a seamless exit, these strategies will ensure you maximize your time, conserve your energy, and catch every single performance on your must-see list.
1. Become a Pre-Festival Master of the Map & Schedule
The biggest mistake a Lollapalooza rookie can make is showing up and trying to figure it all out on the fly. Grant Park is a massive urban oasis, and when it’s filled with stages, vendors, and hundreds of thousands of people, it becomes a complex, pulsating labyrinth. Your success begins long before you scan your wristband.
Download the Official App Immediately
Long before you even think about packing, your first move is to download the official Lollapalooza app. Consider it your digital command center for the entire weekend, running from July 31 to the final day of the festival. The app provides the most up-to-date schedule, a detailed festival map, and, most importantly, real-time push notifications. If a set time changes, a stage is delayed, or a surprise guest appears, the app will be the first to tell you. It also sends out crucial emergency alerts, making it an indispensable tool for staying safe and informed.
Create Your Artist Tiers
Once the full schedule drops, it’s time for strategy. Open the lineup—featuring titans like Olivia Rodrigo, Tyler the Creator, Sabrina Carpenter, and A$AP Rocky for the 2026 festival—and categorize every artist into two simple lists:
Tier 1 (Must-See): These are your non-negotiables. The artists you bought the ticket for. You will be at their set, no matter what.
Tier 2 (Nice-to-See): These are the artists you’d love to catch if the timing and location work out. They are your flexible options, the happy bonuses.
This simple act of prioritization is the bedrock of your stage-hopping plan. It allows you to build your day around your top-tier artists and fill the gaps with others, preventing the decision paralysis that comes from having too many choices.
Internalize the Grant Park Layout
Study the festival map like you’re planning a heist. The two main stages are typically located at the far north and south ends of Grant Park, a walk that can easily take 20-30 minutes through a thick crowd. Identify the locations of your Tier 1 artists and mentally map the routes between them. Note the locations of smaller stages, food courts (Chow Town), and, critically, the free water stations. Understanding the physical distances involved will help you make realistic calls about which back-to-back sets are doable and which are pure fantasy.

2. Master the "Perimeter Path" to Navigate Crowds
The center of any festival crowd is a slow-moving, densely packed sea of humanity. Trying to cut directly through the middle to get from one stage to another is a rookie move that wastes time and energy. The secret to swift movement is to think like a river, flowing where the resistance is lowest.
Stick to the Arteries
The most effective way to navigate Lollapalooza Chicago is by using the perimeter paths. Instead of plunging into the heart of the crowd, stick to the designated walkways along the sides. These paths, often lining the edges of the park or separating vendor areas, are the festival's arteries. While they may look like the longer route on a map, they are almost always faster than trying to push through a stationary audience. Make a mental note of these pathways when you first arrive.
Live by the 15-Minute Rule
If your next Tier 1 artist is on a stage across the park, you need to be ruthless with your timing. Implement the 15-Minute Rule: leave the current set 15 minutes before it ends. This gives you a critical head start, allowing you to exit the immediate crowd before the mass exodus begins when the music stops. It might sting to walk away from the end of a great performance, but that small sacrifice ensures you’re in a good position for the next one, rather than hearing it faintly from a quarter-mile away.
3. Hydrate and Fuel Like a Seasoned Athlete
Stage-hopping is a sport. You’ll be on your feet for 10 hours a day, walking several miles under the summer sun. You’re not just attending a concert; you’re entering a temporary city that generates a staggering economic impact—estimated at over $440 million. That scale demands respect and a bit of preparation.
Make Water Your First Priority
Lollapalooza provides free water refill stations throughout the grounds. When you first enter Grant Park, make it your mission to locate the station nearest the entrance and the stages you’ll be frequenting. Dehydration is the number one enemy of the festival-goer; it saps your energy, causes headaches, and can ruin your entire weekend. Make it a personal rule to refill your water bottle every single time you pass a station.
Pro-Tip: Bring a collapsible water bottle or an empty hydration pack. It's light, complies with security rules, and allows you to carry more water than a standard bottle. This means fewer trips to the refill station and more time enjoying the music.

4. Dress for a Four-Day Marathon, Not a Fashion Sprint
While Lollapalooza is a prime spot for people-watching and showing off your style, practicality should be your guiding principle. Your fashion choices can make or break your physical ability to enjoy the festival.
Your Shoes Are Your Most Important Gear
You will be walking and standing on concrete, grass, and uneven ground for hours on end. This is not the time for brand-new boots that need breaking in, flimsy sandals, or anything with a heel. Your number one priority should be comfortable, supportive, and already broken-in sneakers or walking shoes. Your feet are your foundation for the entire weekend; treat them well.
Prepare for All Four Chicago Seasons in One Day
Chicago weather is famously unpredictable. A day that starts hot and sunny can quickly turn cool and rainy. The key is to dress in layers. Start with a lightweight, breathable base layer and bring a flannel, hoodie, or light jacket that you can tie around your waist during the day and put on after the sun goes down. Most importantly, pack a poncho. It’s small, light, and will be an absolute lifesaver if a sudden downpour occurs.
5. Establish a "Home Base" for Your Crew
Navigating Lollapalooza Chicago with friends is a core part of the experience, but it’s incredibly easy to get separated. Cell service is notoriously unreliable when tens of thousands of people are trying to use it at once, so you can’t count on a text message or call to find your group.
Why a Meeting Point is Non-Negotiable
Before you even think about splitting up to see different artists, establish a clear, specific, and easy-to-find meeting point. This is your group’s "home base." If anyone gets lost, their phone dies, or you just need to regroup, everyone knows exactly where to go.
How to Choose a Good Spot
Don’t pick a generic spot like "the fountain" or "the food court." Choose a unique and unmistakable landmark. A good meeting point is something like, "the giant silver sculpture near the Buckingham Fountain" or "the corner of the 'Deep Dish' pizza stand in Chow Town." Pick a spot that is slightly away from the main walkways to avoid being constantly jostled. Check in at your home base at pre-determined times to ensure everyone is safe and accounted for.

6. Embrace the Journey Between the Stages
Stage-hopping isn’t just a commute; it’s an opportunity. The journey from one performance to another is part of the festival experience itself. Instead of seeing it as a chore, reframe it as a chance for discovery and inspiration.
Discover Your Next Favorite Band
As you walk the perimeter paths, you’ll pass smaller stages where artists you’ve never heard of are playing. Pause for a few minutes and listen. This is how you stumble upon incredible new music. Some of the most memorable Lollapalooza moments happen not at the massive headliner stages, but in the intimate settings of the BMI or Grove stages. Let your ears guide you.
Explore the Full Festival Experience
Lollapalooza is more than just a concert. It’s a massive cultural event filled with creativity. On your way from one stage to the next, take a detour through the art installations, check out the merch tents, or see what activations the sponsors have set up. This spirit of creative discovery is what fuels the best entrepreneurs. If you're feeling inspired by the artistry around you, channel that energy into your own project with our free Digital Product Ideas Guide. By exploring, you break up the monotony of walking and get a richer, more complete festival experience.

7. Plan Your Grand Escape in Advance
How you leave the festival is just as important as how you navigate it. At 10 PM, when the final headliner finishes, a massive wave of people will pour out of the Grant Park exits, creating a human traffic jam that can be overwhelming and slow.
Beat the Final Rush
Just as with the 15-Minute Rule for stage-hopping, consider leaving a few minutes before the absolute end of the night. Slipping out during the last song or just before the encore can save you up to an hour of being stuck in a slow-moving crowd. You’ll get to public transit or your rideshare pickup spot ahead of the main surge, which is a priceless advantage after a long day.
Know Your Public Transit Route Cold
The best way to get to and from Lollapalooza Chicago is by using the CTA rail system. Multiple downtown street closures make driving or using rideshares near the park a nightmare. Before the festival, identify the closest CTA station to your accommodation and memorize the route to and from the park exits. Having this plan locked in will prevent you from wandering aimlessly with a dead phone at the end of a long day.
Pro-Tip: If you must use a rideshare, set your pickup location several blocks away from the Grant Park exits. Walk away from the chaos and toward your pin. You'll escape the immediate surge pricing, and your driver will be able to find you much more easily than in the gridlock traffic near the festival grounds.
Your Blueprint for Lollapalooza Domination
The overwhelming scale of Lollapalooza can intimidate even the most enthusiastic music fan, but it doesn’t have to. With a strategic approach, the festival transforms from a logistical puzzle into the ultimate musical playground. By preparing in advance, navigating smartly, and taking care of your body, you shift from being a passive attendee to the master of your own experience. With these stage-hopping tips, you're now fully equipped with the knowledge of a seasoned pro, ready to conquer Lollapalooza Chicago and create a weekend of flawless, unforgettable memories.

Your Lollapalooza adventure is just one part of an incredible trip. To make the most of your time in the Windy City and beyond, check out our comprehensive Travel Guide. It’s packed with insider tips for exploring the best destinations across the USA.
Don't Miss Out! Subscribe for Exclusive Content
SubscribeComments 0
No comments yet
Be the first to share your experience!
Dont Miss Out! Subscribe for Exclusive Content

San Francisco Cherry Blossoms: A Local's Guide to the Blooms

Halloween SF: Haunts Without Horrors

SF Festivals: 7 Must-See Lineups

Christmas SF: Lights & Wharf Wonders

SF Pride: 6 Route & Party Hacks

Chinese New Year SF: Parade Essentials
10 Best International Destinations for Digital Nomads
TrekGuider @trekguider
The dream of working from anywhere is powerful, but the reality of choosing where to plant your laptop is a daunting, high-stakes decision. You’ve seen the polished photos, but behind that image lies a complex web of visa regulations, tax laws, and the non-negotiable need for blazing-fast internet. The web is flooded with generic listicles that tout beautiful scenery but gloss over the critical details that can make or break your experience. Choosing wrong means legal headaches, financial strain, and a level of frustration that will have you booking a ticket straight back home.
Forget the superficial listicles. This is your definitive, data-driven playbook for the 10 best international destinations for digital nomads in 2026, built for the savvy American remote worker who demands more than just pretty pictures. We cut through the noise to focus on the pillars that truly matter, empowering you to make a strategic, confident decision about your next chapter. After all, succeeding as a nomad isn't just about picking a spot on the map; it requires a foundation of confidence, and our guide on essential is the perfect place to start building it.

The Four Pillars of a Perfect Nomad Base
Before we jet off, let's establish the framework. A world-class nomad destination is a careful balance of four key factors.
Cost of Living: This isn't about surviving; it's about thriving. We analyze the monthly budget for a comfortable lifestyle, including a modern apartment, a mix of dining out and cooking, and co-working space access.
Digital Infrastructure: High-speed, reliable internet is your lifeline. We look at average broadband speeds and the general stability of the connection in key cities.
Visa Accessibility: This is often the biggest hurdle. We assess the ease of securing legal long-term residency through official digital nomad visas, weighing income requirements against long-term benefits.
Quality of Life: This is the magic ingredient. It’s a measure of community, safety, culture, and the overall vibe that makes a place feel like home.
The Gold Standard: 5 Destinations That Get Everything Right
These locations represent the top tier, offering a world-class balance of all four pillars. They boast mature infrastructure, welcoming communities, and clear legal pathways for American remote workers.
1. Lisbon, Portugal: Europe’s Magnetic West Coast Hub

Lisbon has cemented its status as the quintessential European hub for digital nomads. It's a magical blend of old-world charm, with its rattling trams and historic Alfama district, and a buzzing modern tech scene. Its coastal location, incredible food, and established international community make it an almost perfect entry point for living and working in Europe.
The Data Breakdown:
Cost of Living: Expect a monthly budget of $2,500 - $3,900 for a comfortable lifestyle. While it’s one of the more affordable Western European capitals, its popularity has driven up prices.
Internet Speed: Excellent. With widespread fiber-optic coverage, you can expect reliable average speeds of 150 Mbps.
Visa Situation: Portugal offers the D8 Digital Nomad Visa, requiring a monthly income of around $3,480. Critically, this visa provides a clear pathway to permanent residency after five years—a massive long-term benefit.
Quality of Life: Superb. Lisbon is safe, walkable, and packed with world-class restaurants and cafes. The large, active nomad community means you’ll never struggle to find your tribe.
On-the-Ground Intel: Popular neighborhoods include the historic Alfama and the trendy, central Chiado. Co-working spaces like Second Home and LACS are central hubs for networking and deep work.
2. Mexico City, Mexico: The North American Nearshore Favorite
For Americans, Mexico City is an unbeatable combination of affordability, cultural richness, and logistical ease. Its position in a North American time zone is a massive advantage for collaborating with US-based teams. It's a sprawling, dynamic metropolis with a world-class culinary scene and a cost of living that feels like a dream.
The Data Breakdown:
Cost of Living: A fantastic value. A comfortable monthly budget falls between $1,500 - $2,100.
Internet Speed: Good, but diligence is required. Average speeds are around 60 Mbps, which is sufficient for most work, but can be inconsistent. Always confirm the internet speed with your Airbnb host or landlord before committing.
Visa Situation: This is evolving. The reliable, long-term solution is the Temporary Residence Visa, which requires proving financial solvency and should be obtained from a Mexican consulate before you go.
Quality of Life: Exceptional. The energy of CDMX is infectious. The neighborhoods of Condesa and Roma are nomad epicenters, filled with beautiful parks, Art Deco architecture, and some of the best cafes on the planet.
On-the-Ground Intel: Base yourself in Condesa or Roma for the quintessential nomad experience. Public transportation is extensive, and Uber is cheap and reliable for getting around this massive city.
3. Chiang Mai, Thailand: The Original Budget-Friendly Haven

Chiang Mai is the legendary cradle of the digital nomad movement. It continues to offer an almost impossibly low cost of living without sacrificing quality of life. Surrounded by lush mountains, filled with ancient temples, and home to an incredible food culture, it provides a relaxed base with one of the most established nomad communities on the planet.
The Data Breakdown:
Cost of Living: Astonishingly low. You can live a very comfortable life for $1,000 - $1,300 per month.
Internet Speed: Surprisingly fast. Fiber-optic is common, delivering average speeds of 100 Mbps.
Visa Situation: Thailand has recently introduced the Destination Thailand Visa (DTV), a 5-year visa for remote workers that is a game-changer, replacing the old, precarious system of "visa runs."
Quality of Life: Excellent. The pace of life is slower, the people are famously friendly, and the food alone is worth the trip.
On-the-Ground Intel: The Nimman neighborhood is the modern heart of the nomad scene, packed with trendy cafes and co-working spaces like Punspace. Renting a scooter is the most common and enjoyable way to get around.
Pro-Tip: When looking for monthly accommodation, book a hotel or Airbnb for your first 1-2 weeks. Use that time to explore neighborhoods in person and connect with local Facebook groups for digital nomads. The best and most affordable deals are almost always found on the ground, not online.
4. Tbilisi, Georgia: The Undiscovered Gem with an Unbeatable Visa
For those seeking an off-the-beaten-path destination with a stunningly simple visa policy, Tbilisi is a revelation. The capital of Georgia is a city of dramatic contrasts, where ancient churches sit next to futuristic architecture. It's incredibly affordable, with a unique culture and cuisine that will captivate adventurous nomads.
The Data Breakdown:
Cost of Living: Very affordable, ranging from $1,000 - $2,200 a month.
Internet Speed: The main drawback. Speeds average a slower 15 Mbps. It's workable, but not ideal for data-heavy professions.
Visa Situation: Unbeatable. Georgia offers a 1-year visa-free policy for Americans on arrival, making it the easiest place in the world to set up a long-term base with zero bureaucracy.
Quality of Life: High for the price. Tbilisi is a city with deep history, a burgeoning wine scene, and a dramatic landscape. The community is smaller but growing and tight-knit.
On-the-Ground Intel: The Vake and Vera neighborhoods are popular with expats for their green spaces and modern amenities. The city is compact and walkable, and Georgian hospitality is legendary.
5. Budapest, Hungary: Old-World Grandeur, New-World Speeds
Budapest offers the quintessential grand European capital experience at a fraction of the price. Straddling the Danube River, the "Pearl of the Danube" is famous for its stunning architecture, historic thermal baths, and eclectic ruin bars. For nomads, its biggest selling point is world-class internet in a beautiful, central European setting.
The Data Breakdown:
Cost of Living: Very reasonable for a major European city, at $1,100 - $1,300 per month.
Internet Speed: Blazing fast. With average speeds of 220 Mbps, it's one of the most reliable cities on this list.
Visa Situation: Hungary offers a digital nomad visa (called the "White Card") with an income requirement of around €2,000 per month.
Quality of Life: Fantastic. It's a city with endless things to do, from exploring castles to relaxing in centuries-old spas. It’s a great base for exploring the rest of Central Europe.
On-the-Ground Intel: Most nomads live on the bustling Pest side, particularly in the lively Jewish Quarter (District VII), which is the heart of the city's nightlife and creative scene.
5 More World-Class Contenders for Your Shortlist
These locations are fantastic options that excel in specific areas, making them perfect for nomads with particular priorities.
Medellín, Colombia: Known as the "City of Eternal Spring" for its perfect climate, Medellín has become a thriving, innovative hub for nomads.
Bali, Indonesia: The ultimate destination for wellness, surfing, and spirituality. The town of Canggu is the epicenter of a massive and vibrant community.
Buenos Aires, Argentina: Crave a European feel with a Latin American passion? This city of grand boulevards, tango, and incredible steak is for you, though economic instability can be a challenge.
Valencia, Spain: A fantastic quality of life with beautiful beaches, a stunning park, and a more relaxed vibe than Madrid or Barcelona. Its new digital nomad visa is very popular.
Kuala Lumpur, Malaysia: A modern, multicultural Asian metropolis that serves as a fantastic and affordable hub for exploring Southeast Asia with top-notch infrastructure.
The Visa Game: Your Guide to Staying Legal Long-Term

Understanding the legal landscape matters most. The world is shifting away from the gray area of tourist visas towards official international destinations for digital nomads visas.
Tourist Visas: The "old way" involved "visa runs" (leaving and re-entering to reset the clock). This strategy is risky, increasingly unreliable, and provides no legal right to work.
Digital Nomad Visas (DNVs): These are official residency permits designed for remote workers. They provide a legal, long-term basis to live and work in a country, but come with bureaucracy and high minimum income requirements (typically $2,500-$3,500+ per month).
Pro-Tip: Taxes are the most complex part of nomad life. As a US citizen, you are taxed on worldwide income regardless of where you live. Rules like the Foreign Earned Income Exclusion can help, but this is not a DIY situation. Always consult a tax professional specializing in US expat taxes before you leave.
The Nomad Reality Check: Answering Your Toughest Questions

How do you build community and avoid loneliness?
Be proactive. Choose a destination with an established community. Join co-working spaces. Use apps like Meetup.com. Prioritize "slow travel"—staying in one place for 3-6 months to build deeper connections.
What are the essential items to pack?
Less than you think. Aim for carry-on only. Pack versatile clothing (merino wool is king), a solid power bank, a universal travel adapter, and noise-canceling headphones. Almost anything you forget can be bought abroad.
Is the digital nomad lifestyle a permanent vacation?
Absolutely not. This is a common and dangerous myth. A sustainable nomad lifestyle is about living your normal life—with work deadlines, budgets, and chores—in a different location. It requires immense self-discipline.
Choosing from the many amazing international destinations for digital nomads is a deeply personal decision. The "best" place isn't a rank on a list; it's the location where the delicate balance of cost, connectivity, community, and culture aligns perfectly with your personal and professional needs. This guide has given you the data-driven framework and on-the-ground intelligence to make that strategic choice. You have the tools to move beyond the dream and build a real, sustainable life of freedom and adventure abroad. The world is waiting.
Read the full guide: Anxious to Adventurous: The Ultimate Guide to Solo Travel Confidence
Don't Miss Out! Subscribe for Exclusive Content
SubscribeComments 0
No comments yet
Be the first to share your experience!
Dont Miss Out! Subscribe for Exclusive Content

Is Public WiFi Safe? How to Protect Your Data Abroad

A Woman's Guide to Safe Travel: 10 Critical Tips

7 Hotel Safety & Security Tips for Peace of Mind

11 Essential Solo Travel Safety Tips You Need to Know

The Ultimate Guide to Travel Safety: A 2026 Playbook
