How to Stay Safe While Hiking: A Hiker's Safety Guide
TrekGuider @trekguider
The call of the trail is a powerful one. It promises sweeping vistas, the quiet solitude of the forest, and the profound satisfaction of reaching a summit under your own power. But for all its beauty, the wilderness is impartial and unforgiving. The same trail that offers bliss on a sunny morning can present serious danger when the weather turns, a wrong turn is made, or an ankle is twisted. This is the problem every hiker faces: the gap between the adventure we dream of and the preparation it demands.
That gap is often filled with anxiety. A flicker of doubt about reading the map, a worry about the approaching clouds, or a sudden fear of what that noise was in the undergrowth can rob an incredible experience of its joy. Too often, hikers—both novice and experienced—find themselves in serious trouble simply by underestimating the trail and overestimating their preparedness. According to Search and Rescue (SAR) teams, most emergencies are the result of small, preventable mistakes. This guide is your definitive playbook for closing that gap for good. We’re providing the essential, expert-backed hiking safety tips you need to move through the backcountry with unwavering confidence. This isn't about fear; it's about empowerment. By mastering these skills, you’re ensuring every hike is a safe one, a core pillar of the responsible adventurer’s mindset we explore in our definitive The Ultimate Guide to Travel Safety: A 2026 Playbook. Let’s gear up, get smart, and get you ready to hit the trail.

This journey from novice to self-sufficient hiker begins not on the trail itself, but with a simple, powerful philosophy of preparedness that has been tested and refined by generations of mountaineers and wilderness experts. It all starts with your pack.
The Foundation of Safety: The 10 Essentials System
Long before your boots touch the dirt, your safety on the trail has already been decided by one thing: what’s inside your pack. Endorsed by the National Park Service and outdoor organizations like REI, the "10 Essentials" is not just a packing list; it's a systematic approach to preparedness. It ensures you have the tools to handle common problems and survive an unexpected night outdoors. Think of these not as ten individual items, but as ten crucial systems.
Navigation: Your primary system for knowing where you are and where you’re going. This must include a physical topographic map of the area and a compass. A GPS device or a smartphone with downloaded offline maps is a great tool, but electronics can fail. A map and compass are your foolproof backup.
Illumination: You need to be able to see in the dark, period. Carry a headlamp or flashlight with a full charge, and always pack extra batteries. A headlamp is superior as it keeps your hands free for other tasks.
Sun Protection: Sunburn and sunstroke can be serious dangers on the trail. This system includes sunglasses, broad-spectrum sunscreen (SPF 30+), and a wide-brimmed hat. Sun-protective clothing can also be a game-changer.
First-Aid Supplies: You must have the ability to treat common trail injuries. Your kit should be equipped to handle blisters, cuts, scrapes, and sprains. A basic kit is good; a custom-built one is better.
Repair Kit and Tools: Gear can break. A multi-tool or knife is invaluable, and a small roll of duct tape can repair everything from a torn jacket to a broken tent pole.
Fire: In an emergency, fire provides warmth, a way to purify water, and a powerful psychological boost. Carry waterproof matches, a reliable lighter, and a dedicated fire starter like dryer lint or a commercial fire-starting block.
Insulation: Weather can change in an instant, especially at elevation. You must carry an extra layer of clothing beyond what you start the hike in, regardless of the forecast. This should be a moisture-wicking layer, like a fleece jacket or thermal top—never cotton, which loses all insulating properties when wet.
Nutrition: Always pack more food than you think you’ll need. An extra day’s worth of non-perishable, high-energy food is the standard. Items like protein bars, nuts, and dried fruit are perfect.
Hydration: Carry more water than you expect to need and have a way to purify more. This means carrying a water filter or purification tablets to safely treat water from streams or lakes in an emergency.
Emergency Shelter: If you’re forced to spend an unplanned night out, protection from the elements is critical to preventing hypothermia. This doesn't mean a tent. A lightweight, packable emergency space blanket or bivy sack is all you need.

For expert-vetted gear lists and detailed trail guides from seasoned creators, the TrekGuider Marketplace is an invaluable resource for taking your preparation to the next level.
"Never Get Lost Again": Mastering Trail Navigation
Of all the potential hiking dangers, getting lost is one of the most common and terrifying. A recent study of SAR missions revealed that "error in judgment" was a leading cause of hikers needing rescue, and a huge part of that is poor navigation. Relying solely on your phone’s GPS is one of the biggest hiking safety tips to ignore—service is unreliable in the backcountry, and batteries die. True navigational confidence comes from time-tested skills.
How to Use a Map and Compass
This fundamental skill is easier than you think and is your most reliable tool.
Place the Compass on the Map: Lay your map flat. Identify your current location and your destination. Place your compass so the long edge of its baseplate creates a line connecting the two points, with the "Direction of Travel" arrow on the compass pointing toward your destination.
Set the Compass Bezel: Keeping the baseplate still, rotate the round bezel (the dial) until the orienting lines inside it are parallel with the map's north-south grid lines. Make sure the "N" on the bezel is pointing to North on the map. The number on the bezel aligned with the Direction of Travel arrow is now your bearing.
Follow the Bearing: Lift the compass off the map and hold it level in front of you. Turn your body until the red magnetic needle is "in the shed"—that is, perfectly inside the red orienting arrow on the bezel. The Direction of Travel arrow now points precisely to your destination. Pick a landmark in that direction, walk to it, and repeat the process.
Pro-Tip: The difference between "true north" (on your map) and "magnetic north" (where your compass points) is called declination. For precise navigation, you must adjust your compass for the local declination, which will be printed on your map.

Wildlife on the Trail: A Guide to Safe Encounters
Seeing wildlife is a thrilling part of hiking, but it’s crucial to remember that you are a visitor in their home. The core principles of every encounter are to maintain a safe distance, never feed wildlife, and know how to react to avoid escalating a situation.
Bear Encounters (Black vs. Grizzly)
Making noise while you hike (talking, clapping) is the best way to avoid surprising a bear. If you do encounter one, your reaction depends on the species.
If a Black Bear Approaches: Never run. Make yourself look as large as possible by raising your arms and opening your jacket. Yell, clap, and make loud noises. If it attacks, fight back aggressively. Target the bear's face and nose with anything you have—rocks, trekking poles, your fists. Do not play dead.
If a Grizzly Bear Approaches/Charges: Do not run and do not make direct eye contact. Speak in a calm, low voice to show you are not a threat. If it charges, stand your ground and use bear spray when it is within 30 feet. If it makes contact, play dead. Lie flat on your stomach, protect the back of your neck with your hands, and use your pack as a shield.
Mountain Lion (Cougar) Encounters
These predators are ambush hunters, so an encounter is rare. If you see one, it has likely been watching you.
Protocol: Do not run, as this triggers their chase instinct. Make direct eye contact. Make yourself appear larger by raising your arms and opening your jacket. Speak in a loud, firm voice. Slowly back away, giving the cat an escape route.
If Attacked: Fight back with everything you've got. Use rocks, sticks, or your hands to target the animal's eyes and face.
Venomous Snake Encounters
Snakes have no interest in humans and will only strike if they feel threatened.
Protocol: If you see a snake, freeze. Do not make any sudden movements. Once you've located the snake, slowly back away and give it a wide berth to move on. Be careful where you step and place your hands, especially when scrambling over rocks or logs.
If Bitten: The priority is to stay calm to slow the spread of venom. Limit physical activity and get to a hospital as quickly and safely as possible for evaluation and potential antivenom treatment.
Handling Trail Emergencies: What to Do When Things Go Wrong
Even with perfect preparation, accidents can happen. A twisted ankle, a sudden illness, or getting turned around can escalate quickly. Your ability to stay calm and make rational decisions is your most valuable asset. If you find yourself in trouble, remember the acronym S.T.O.P.
Stop: The moment you realize you are in trouble, stop moving. Sit down.
Think: Assess your situation calmly. What went wrong? What resources do you have?
Observe: Look around you. Where is the sun? Can you see any landmarks? Is there a source of water or shelter nearby?
Plan: Formulate a simple, logical plan. Don't make panicked decisions.
First Aid on the Trail
Your first-aid kit from the 10 Essentials is your go-to tool for injuries. Here's how to handle the most common trail ailments:
Blisters: The moment you feel a "hot spot" on your foot, stop and address it. Clean the area and apply moleskin or a blister-specific pad. Don't wait for it to become a full-blown blister.
Sprains: For a twisted ankle or knee, use an elastic wrap bandage from your kit to provide compression and support. Loosen it if you feel any numbness or tingling. Elevate the joint when you rest, and use a trekking pole or sturdy branch as a crutch if needed.
Cuts and Scrapes: Control any bleeding with direct pressure using a sterile gauze pad. Once it stops, clean the wound thoroughly with an antiseptic wipe and apply antibiotic ointment before covering it with a bandage.
A well-stocked daypack is crucial, but so is a plan for the whole trip. Before you head out to explore our incredible national parks, make sure your vehicle and supplies are just as prepared as your hiking gear.
Your Ultimate Adventure Blueprint
Ready to hit the road? Don't leave home without our expert-vetted National Park Road Trip Checklist. This free guide covers everything from vehicle prep and essential gear to can't-miss stops, ensuring your adventure is seamless from start to finish. Download it for free now!
Hiking Safety FAQs
A prepared mind anticipates questions. Here are expert answers to common concerns.
1. What's the right way to signal for help?
If you determine you cannot get yourself out of a situation safely, you need to signal for help. The universal distress signal is three of anything: three whistle blasts, three flashes of a headlamp, or three piles of rocks. A whistle is a must-have item that uses far less energy and carries further than shouting. For serious backcountry travel, consider investing in a personal locator beacon (PLB) or satellite messenger, which can send an SOS signal with your exact location to emergency services.
2. Is it safe to hike alone?
Solo hiking can be an incredibly rewarding experience, but it requires a higher level of preparation and self-sufficiency. All the rules in this guide become even more critical. It is absolutely essential that you leave a detailed itinerary with a trusted friend or family member. Include your planned route, your start and end times, and a "panic time"—the specific time they should call for help if they haven't heard from you.
3. What do I do if the weather turns bad unexpectedly?
Your first priority is to get below the treeline if you're in an exposed area to reduce the risk of lightning strikes. Put on your extra insulating layer and your rain gear before you get wet and cold. Assess your map and your situation. It is often safer to turn back, even if you're close to your destination, than to push on into deteriorating conditions.
Pro-Tip: Always tell someone your plan. Before every hike, leave a detailed itinerary with a trusted friend or family member. This is the single most important safety net you have.

Your Adventure, Empowered by Preparation
The goal of these hiking safety tips is not to fill you with fear, but to arm you with confidence. Every piece of gear you pack and every skill you learn is a key that unlocks a new level of freedom on the trail. Preparation allows you to push your boundaries, explore wilder places, and immerse yourself in the beauty of nature without the nagging whisper of anxiety. By respecting the wilderness and committing to self-sufficiency, you transform from a simple visitor into a capable, confident adventurer.
Now that you have the skills for a safe hike, you can integrate that adventure into a larger, perfectly planned journey. For a complete master plan covering everything from budgeting and logistics to finding the best trails and tours, our all-encompassing Travel Guide is the only resource you'll ever need.
Don't Miss Out! Subscribe for Exclusive Content
Subscribe


Comments 0
No comments yet
Be the first to share your experience!
Dont Miss Out! Subscribe for Exclusive Content

How to Avoid Travel Scams: A Global Guide

Is Public WiFi Safe? How to Protect Your Data Abroad

A Woman's Guide to Safe Travel: 10 Critical Tips

7 Hotel Safety & Security Tips for Peace of Mind

9 Beach Safety Tips That Could Save Your Life

7 Travel Insurance Red Flags to Spot Before You Buy
Solo Travel Packing: Pack for Freedom, Not Fear
TrekGuider @trekguider
Forget every checklist you’ve ever downloaded. The internet is littered with lists of what to pack, but they all miss the fundamental point. For a solo traveler, the contents of your bag are secondary. What truly matters is the system behind it. Mainstream packing advice is a trap, designed for travelers who can lean on a partner. But for you, every ounce and every decision is a direct reflection of your independence.
The secret the pros know is this: packing isn’t a chore you endure before a trip. It is the first, most critical act of the adventure itself. It’s a declaration of self-reliance. Getting it wrong leads to the classic traveler mistakes: wrestling an overstuffed bag on a crowded train, becoming an obvious target, or having a minor inconvenience like a dead phone escalate into a genuine crisis in an unfamiliar city.
This is not another packing list. This is a manifesto on the philosophy of smart travel. We’re going to dismantle the conventional wisdom and replace it with a set of battle-tested systems. These are the solo travel packing hacks that go beyond gear, transforming your bag from a burdensome anchor into a strategic asset for a safer, more mobile, and profoundly more liberating journey. Of course, packing is just one piece of the puzzle. For the complete playbook on traveling alone, be sure to consult our master resource on Anxious to Adventurous: Solo Travel Tips for Confidence.

The Mindset Shift: Why Your Bag is Your Most Important Travel Companion
For a solo traveler, your pack is your superpower. It’s your home, your toolkit, and your shield. Embracing this mindset is the key. A masterful packing strategy isn’t about what you leave behind; it’s about what you gain—freedom from the tyranny of heavy luggage, the anxiety of unpreparedness, and the vulnerability that comes with looking like a lost tourist.
This philosophy is built on three core pillars:
Radical Self-Reliance: You are your entire support system. Every item must be a tool that empowers your independence, from a simple roll of duct tape for on-the-fly repairs to a power bank that ensures you are never without your digital lifeline.
Calculated Efficiency: Your time and energy are your most precious resources. An intelligently organized bag means less time spent rummaging for a charging cable and more time savoring a sunset. It means navigating cobblestone streets and endless train station stairs with ease, not exhaustion.
Proactive Security: A smart packer moves with confidence, and confidence is a powerful deterrent. This isn't about paranoia; it's about preparation. It’s choosing and organizing your gear in a way that makes you a "hard target," so you can focus on the joy of discovery.
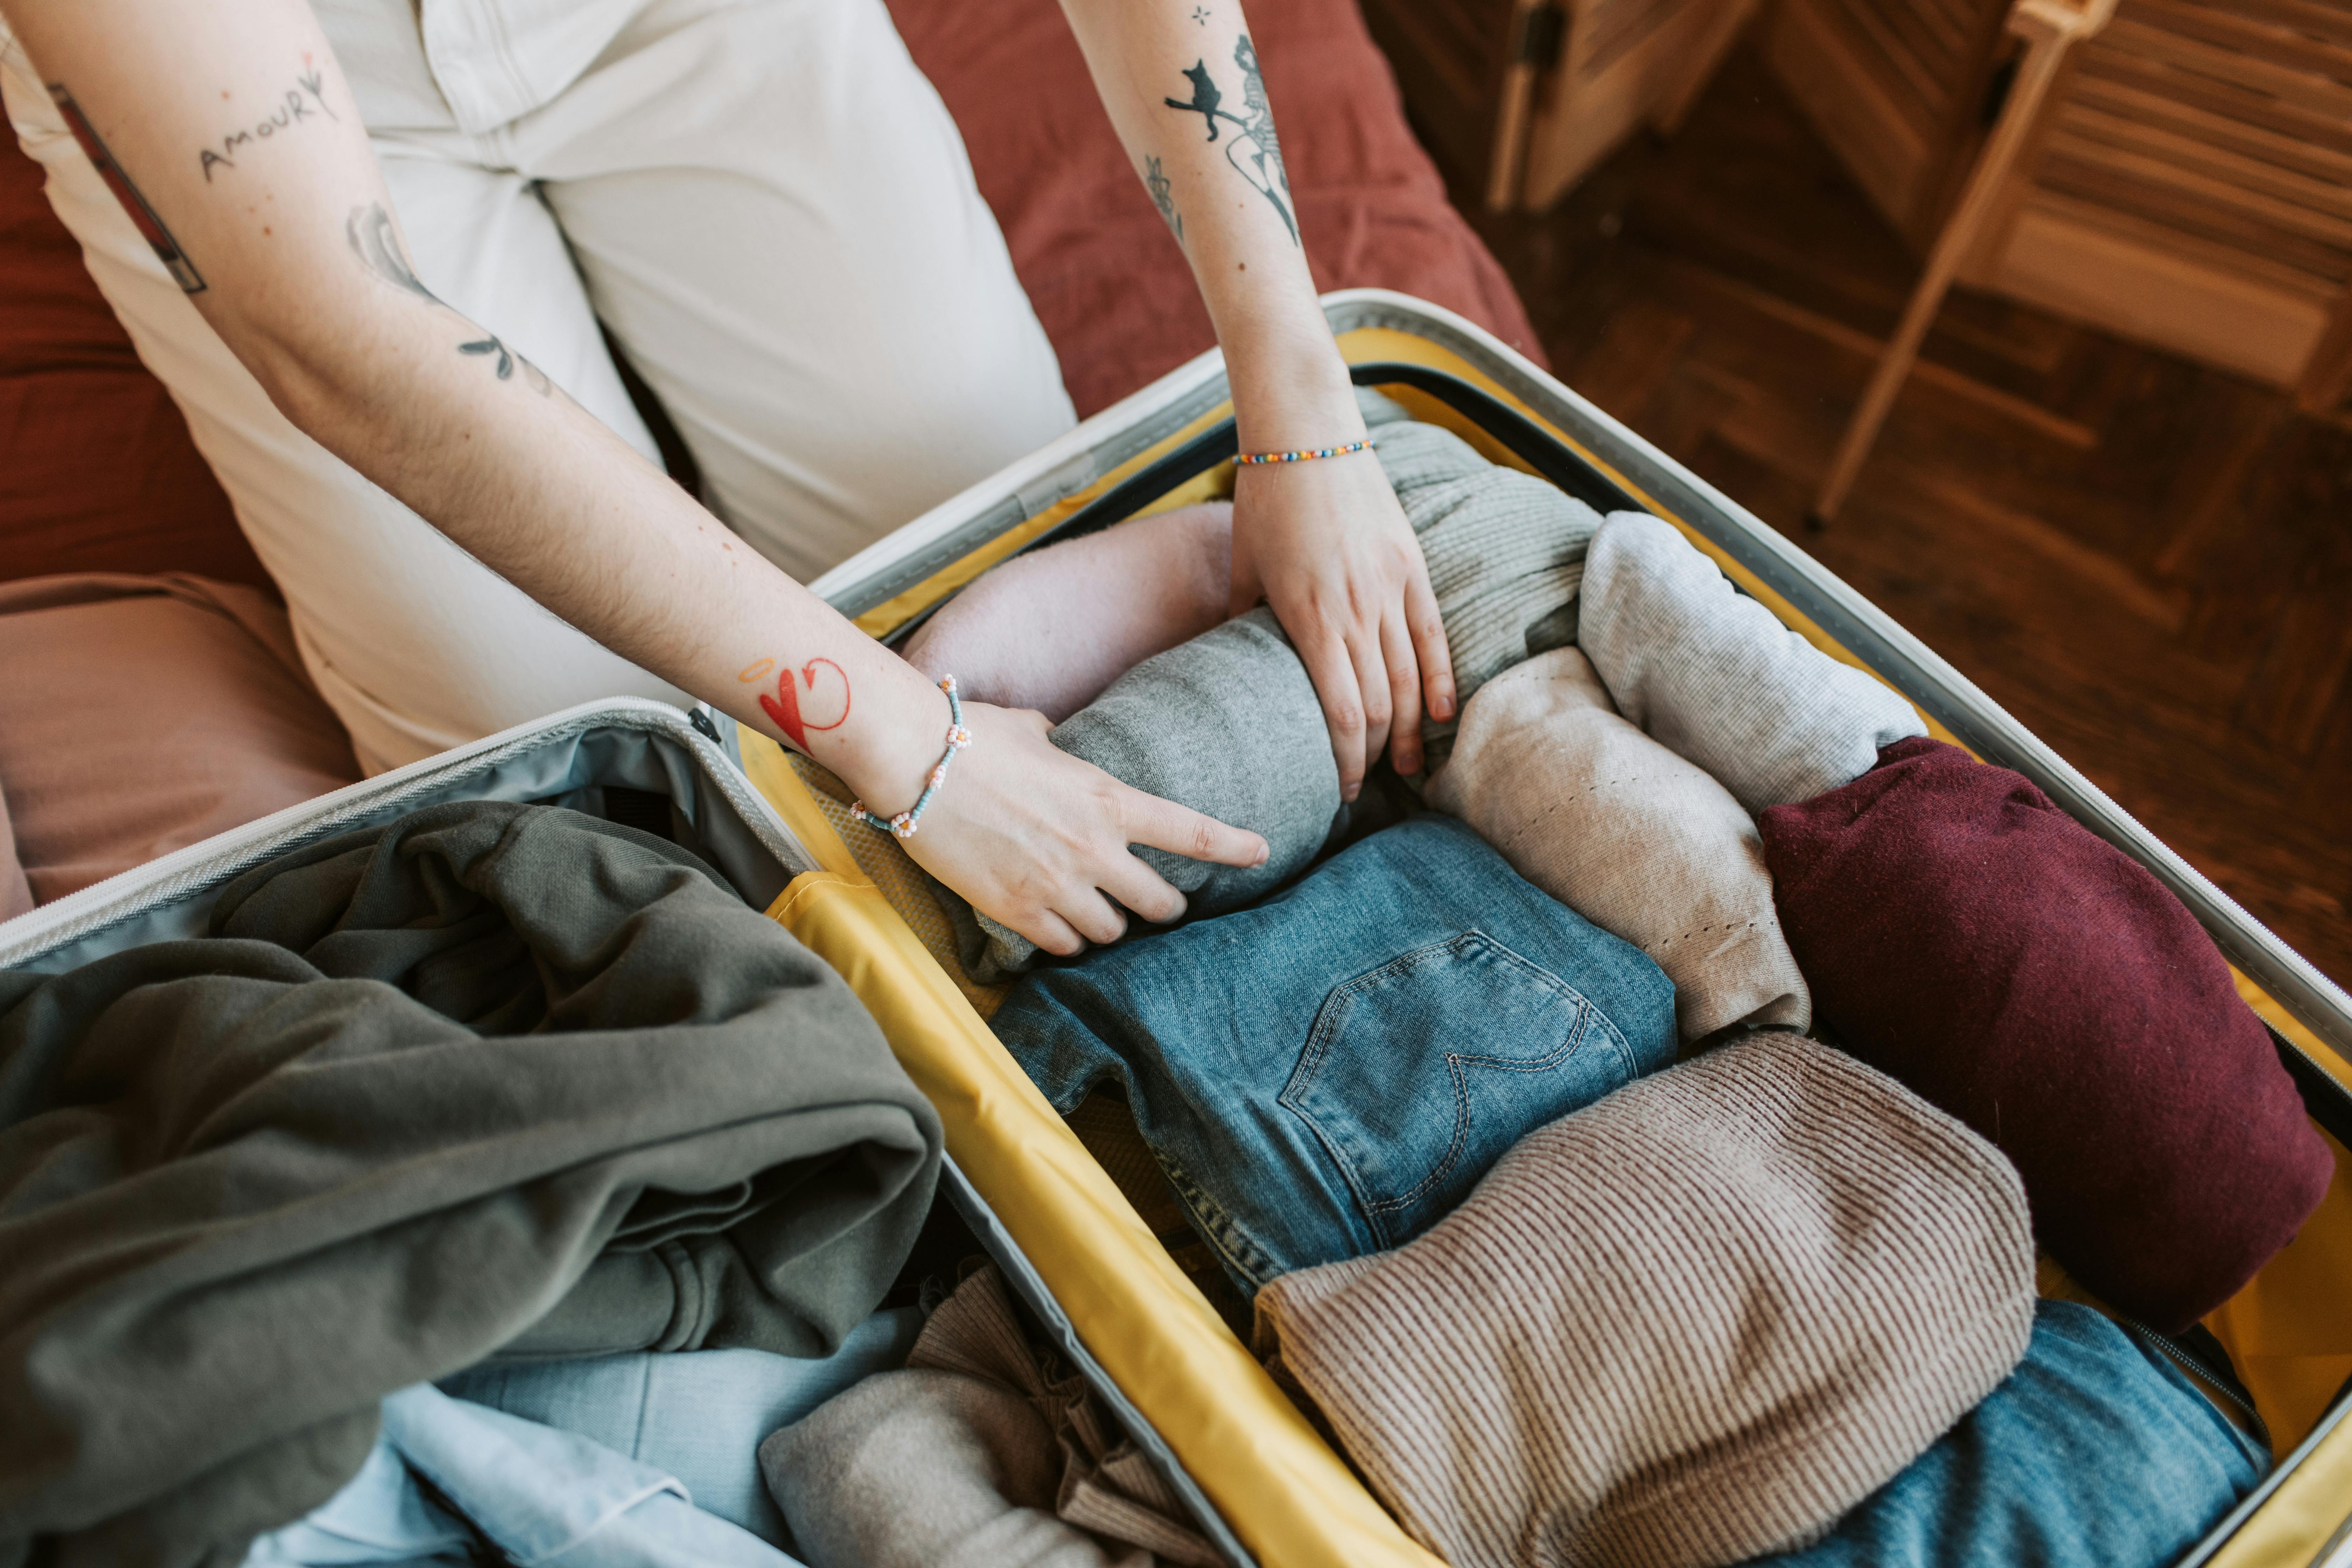
System 1: The Capsule Wardrobe - A Masterclass in Infinite Style, Minimal Space
The Philosophy: More Options from Fewer Items
The capsule wardrobe isn't just a space-saving technique; it's a strategic weapon against decision fatigue. The goal is to create a small, curated collection of versatile, interchangeable clothing. This ensures you feel confident and appropriate in any situation, from a morning market stroll to an impromptu dinner invitation, without ever having to waste mental energy on what to wear.
The Method in Action
This system works by making smart, upfront choices. For example, a common framework for a one-week trip is the 5-4-3-2-1 guideline: 5 sets of socks/underwear, 4 tops, 3 bottoms, 2 pairs of shoes, and 1 layering piece. But the real magic is in the details.
Invest in high-performance fabrics. Merino wool is the undisputed champion for solo travelers; it’s temperature-regulating, moisture-wicking, and naturally odor-resistant, meaning you can wear it multiple times without washing. One merino wool shirt does the work of three cotton ones.
Build on a neutral palette. Sticking to a base of colors that all work together (black, grey, navy, tan) creates dozens of potential outfits. You can then add personality with a lightweight, colorful scarf or a unique accessory—items that provide maximum visual impact for minimal packing space.
System 2: Modular Organization - The Secret to Effortless Efficiency & Discretion
The Philosophy: A Place for Everything, and Everything in Its Place
How you organize your bag is a strategic choice. A chaotic bag bleeds time and energy. Worse, it forces you to expose your entire inventory just to find one item, a critical vulnerability in a shared hostel dorm. The goal is to create a modular system that allows you to access exactly what you need, when you need it, without disrupting anything else.
The Method in Action
The key element of modular organization is compartmentalization.
Packing cubes are the gold standard. They aren’t just for compression; they turn your backpack into a tidy chest of drawers. By using different colored cubes for different categories (e.g., blue for tops, red for bottoms, grey for electronics), you can retrieve an item in seconds, discreetly and efficiently.
The rolling method is foundational. Tightly rolling your clothes is superior to folding. It minimizes wrinkles and allows you to see every piece of clothing at a glance within your packing cube, eliminating the need to dig.
System 3: The Fortress of Self-Reliance - Your Security & Problem-Solving Toolkit
The Philosophy: Prepare for the Worst, Enjoy the Best
True freedom on the road doesn't come from hoping problems won't arise. It comes from the quiet confidence that you can handle them when they do. This system is about building a portable fortress of security and a toolkit for self-reliance, so you can explore with an unshakeable peace of mind.
The Three Layers of Your Fortress
Layer 1: Proactive Gear Security
The goal here is to make yourself a less appealing target. Opportunistic thieves look for easy wins.
Carry a decoy wallet with a small amount of local currency and some expired cards. If confronted, you can hand it over without losing your essential documents.
Use a simple carabiner to clip the zippers of your daypack together. It’s not a high-security lock, but it’s an effective deterrent against a pickpocket trying to subtly slide your bag open in a crowd.
Layer 2: Personal & Digital Safety
Your well-being matters most. These items are non-negotiable.
A rubber door stop is one of the most effective, low-cost security tools you can carry. Shoved under your hotel or Airbnb door, it provides a powerful physical barrier against unwanted entry.
Your phone is your lifeline. A dead phone is a safety crisis. Always carry a fully charged power bank (at least 10,000mAh).
Public Wi-Fi is a hunting ground for data thieves. Using a VPN on your phone and laptop is essential to protect your banking information and passwords.
Layer 3: The "MacGyver" Multi-Tools
When you’re alone, small problems can become major headaches. The MacGyver mindset is about packing a few multi-purpose items that can solve countless issues.
Wrap a few feet of duct tape around a water bottle or pen. It can repair a broken sandal, patch a backpack, or serve as a makeshift bandage.
A bandana or sarong is the ultimate multi-tool. It can be a towel, a sun shield, a dust mask, a makeshift bag, or a privacy screen.
Beyond the Gear: Packing for the Solo Experience
Expert packing goes beyond the purely practical. It’s also about packing for your emotional well-being and enhancing the unique moments that solo travel offers.
Pack a sensory comfort item. Loneliness can strike unexpectedly. Something small that connects you to home—a few of your favorite tea bags, a familiar scent, a silk pillowcase—can be an incredible comfort.
Bring a social icebreaker. A simple deck of playing cards placed on a table in a hostel common room is a universal invitation to connect with other travelers, breaking down language and cultural barriers instantly.
Empower your inner photographer. Don't let being solo stop you from getting great photos. A small, flexible mini tripod allows you to use your phone's self-timer for stunning shots that aren't just selfies. The "video screenshot hack" is another pro move: record a short video of yourself moving through a scene, then scrub through it later to pull out perfect, candid-looking still images.
Conclusion: Stop Packing, Start Preparing
You now possess the framework. The difference between an amateur and an expert traveler isn't what they pack, but how they think. It’s the understanding that a capsule wardrobe is about mental clarity, modular organization is about efficiency, and a fortress of self-reliance is about absolute freedom.
This guide was the "why." You have the philosophy.
Now it's time for the "what." To put these systems into practice, you need the right tools. We've compiled everything—every piece of gear, every item of clothing, every essential document—into one definitive resource.
Your next step is clear. Take these principles and build your ultimate kit with our . It’s the tactical playbook that will bring this strategy to life.
Read the full guide: Anxious to Adventurous: The Ultimate Guide to Solo Travel Confidence
Don't Miss Out! Subscribe for Exclusive Content
SubscribeComments 0
No comments yet
Be the first to share your experience!
Dont Miss Out! Subscribe for Exclusive Content

Ultimate USA Holidays Guide: Top Picks

FTC Affiliate Disclosure Essentials: Stay Compliant as a Travel Creator

Essential Affiliate Tools: From Tracking to Full Optimization

Booking.com Affiliate Program Review: Pros, Cons, and Earnings Potential

Decoding Affiliate Commission Rates: Benchmarks for Travel Creators

Amazon Associates for Travel: Strategies to Maximize Commissions
The Secret to a Solo Travel Blog People Actually Read
TrekGuider @trekguider
You’ve returned from a life-changing solo trip, your camera roll is full, and your head is buzzing with stories. You open up your laptop, ready to launch the blog you've been dreaming of, and... you freeze. Paralyzed by the thought that it's all been done before by influencers with perfect photos and unlimited budgets, you start to question everything. The pressure to present a flawless journey can feel immense, leaving you wondering if your own authentic, sometimes messy, experiences are even worth sharing.
What if the secret isn't to be perfect, but to be real? What if the moments of uncertainty, the budget-stretching decisions, and the quiet evenings spent alone are the very things that will make your readers connect with you on a deeper level? Your unique perspective is your single greatest asset. This is not just another list of generic topics. This is your playbook for turning your unique experiences—the good, the bad, and the beautifully mundane—into a solo travel blog that people will actually want to read.

First, Find Your Lane: Choosing a Powerful Solo Travel Niche
The travel blogging world is crowded, but most of it exists on a single, wide highway. The secret to standing out isn't to shout louder; it's to take a well-marked exit ramp into a specific niche.
"Niching down" isn't about limiting yourself; it's about becoming a big fish in a smaller, more passionate pond. Instead of being a generalist talking to everyone, you become the go-to expert for a specific type of solo traveler. This is how you build a loyal community that hangs on your every word.
For the Thrill-Seeker: The Adventurer
Your content revolves around the adrenaline of the journey, focusing on physically demanding, nature-based experiences.
"Training for the Inca Trail: My 3-Month Fitness Plan for Solo Hikers"
"My First Solo Scuba Dive: What to Expect in the Red Sea"
"Ranking the Best (and Safest) Destinations for Solo Rock Climbing"
"A Complete Gear Guide for a Multi-Day Solo Trek in Patagonia"
For the Knowledge-Seeker: The Culturalist
You travel for the stories, the art, and the history. Your blog is a treasure map to the world's most fascinating cultural experiences.
"How to Conquer the Uffizi Gallery in Florence as a Solo Traveler"
"Beyond the Temples: Finding Authentic Local Art in Kyoto"
"A Guide to Respectfully Visiting Historical Sites When You're Alone"
"The Ultimate 3-Day Historical Walking Tour of Rome for One"
For the Taste-Tester: The Foodie
Your itinerary is built around meals. You guide your readers on a culinary journey, helping them experience a destination one bite at a time.
"The Solo Foodie's Guide to the Best Street Food in Bangkok"
"How to Confidently Book a Table for One at a High-End Restaurant"
"I Took a Cooking Class in Tuscany Alone—Here’s What I Learned"
"Mapping Out the Perfect Solo Food Tour of Mexico City"
For the Quiet Observer: The Introvert
You prove solo travel isn't just for extroverts. Your blog focuses on mindful journeys, quiet retreats, and the profound joy of solitude.
"The Best Quiet Cafes in Paris for Reading and People-Watching"
"Why a Silent Retreat in a Japanese Monastery Was My Best Solo Trip Yet"
"A Guide to the Most Peaceful National Parks for Solo Exploration"
"How to Travel Solo Without Feeling Pressured to Socialize"
For the Savvy Saver: The Budget Backpacker
Your expertise lies in stretching every dollar. You provide actionable advice for long-term, sustainable travel on a shoestring.
"How I Traveled Through Southeast Asia for 3 Months on Under $3,000"
"An Honest Review of Hostel Life: The Good, The Bad, and The Smelly"
"The Ultimate Guide to Finding Cheap (But Amazing) Eats Anywhere"
"Workaway vs. Worldpackers: Which is Better for the Solo Traveler?"
Turn Problems into Your Best Posts
Every aspiring solo traveler has the same core fears: safety, loneliness, money, and logistics. When you address these fears head-on with honesty and practical advice, you don’t just get clicks—you build deep, lasting trust. Turning your fears into content is a powerful way to connect with readers. Of course, before you can write about overcoming these challenges, you need the right strategies to handle them in the first place. For a comprehensive breakdown of safety, budgeting, and planning, is your essential starting point. This is a crucial category of solo travel blog ideas because it provides immense value.

On Safety: Your Digital Bodyguard Content
"My Non-Negotiable Solo Female Safety Checklist for Southeast Asia"
"10 Things I Do to Feel Safer in a Hotel or Airbnb Alone"
"The Peace-of-Mind Apps on My Phone When I'm Traveling Solo"
"How to Handle Unwanted Attention: My Go-To Scripts"
On Loneliness: Writing About the Elephant in the Room
"What I Did When I Felt Crushing Loneliness in a Lisbon Crowd"
"A Guide to Making Friends on the Road (Even If You're an Introvert)"
"It's Okay to Be Sad: How I Deal with Homesickness During Long Trips"
"The Unexpected Joy of Dining Alone: A Mindset Shift"
On Money: From Budgeting Anxiety to Financial Freedom
"How I Saved $5,000 for My First Big Solo Trip (And You Can Too)"
"A Complete Breakdown of My Budget for One Month in Vietnam"
"The Worst Money Mistakes I've Made Traveling (And How to Avoid Them)"
"Credit Cards vs. Debit Cards vs. Cash: My Best Mix for Solo Travel"
On Photography: Nailing the Shot When You're the Whole Crew
"My No-Tripod Tricks for Amazing Solo Travel Photos"
"How to Ask Strangers to Take Your Photo (and Actually Get a Good One)"
"The Ultimate Guide to Using a GorillaPod and Your Phone's Self-Timer"
"The 'Video Screenshot' Hack That Changed My Solo Travel Photography"
Pro-Tip: When writing about challenges, use the "Problem-Solution-Transformation" framework. Start with the relatable problem ("I was terrified of eating alone"), explain your practical solution ("I started by sitting at the bar instead of a table"), and describe the transformation ("Now, it's one of my favorite parts of traveling and a great way to meet bartenders and other travelers").
The Unfiltered Guide: Reinventing the Destination Post
Forget the generic "Top 10 Things to Do" lists. Your readers crave authenticity. The best destination guides are filled with personal stories, honest opinions, and practical details that can't be found in a corporate guidebook. Share the mistakes and the magic.

The "First Impressions" Post
This is your raw, immediate reaction to a new place. It’s relatable and captures the feeling of arrival.
"24 Hours in Tokyo: The Honest Truth About Overwhelm and Wonder"
"My First Thoughts on Arriving in Cairo: A Sensory Overload"
"Landing in Iceland: What I Wish I'd Known Before Leaving the Airport"
The "Biggest Mistake" Post
Vulnerability builds trust. Sharing what went wrong is often more valuable than sharing what went right.
"The Tourist Trap I Fell For in Rome (And How You Can Avoid It)"
"Why I Hated My First Day in Paris (And How I Turned the Trip Around)"
"The Packing Mistake That Almost Ruined My Trip to the Andes"
The "A Day in the Life" Post
This format gives readers a true sense of your travel style. It’s less about a packed itinerary and more about the vibe.
"A Slow Travel Day in a Parisian Cafe: Journaling, Coffee, and Croissants"
"A Budget Backpacker's Day in Chiang Mai: Temples, Street Food, and Night Markets"
"My Digital Nomad Routine: A Work Day from a Beach in Portugal"
The "Hidden Gem" List
Go beyond the obvious landmarks. This is where you showcase your unique discoveries and provide immense value.
"5 Things to Do in Barcelona That Aren't in the Guidebooks"
"Forget the Main Square: Here Are the Best Neighborhoods to Explore in Prague"
"The Best Local Restaurant I Found in Florence (And How I Stumbled Upon It)"
Creative Formats to Keep Readers Hooked
Your blog doesn’t have to be an endless series of destination guides. Mixing up your content formats keeps your audience engaged and allows you to explore different facets of the solo travel experience, making your solo travel blog a dynamic resource.
Personal Essays: "How Solo Travel Forced Me to Face My Social Anxiety."
How-To Guides: "A Beginner's Guide to Using Public Transit in Europe."
Interviews: "I Interviewed a 70-Year-Old Solo Female Traveler: Here's Her Advice."
Gear Reviews: "The Only Backpack You Need for a Month-Long Trip: An In-Depth Review."
"A Week in My Wallet": A detailed, day-by-day spending diary from a specific city.
"What I Read on the Road": A list of books that shaped your journey.
Pro-Tip: Create templates for your most common post types. For example, have a "Day in the Life" template with sections for morning, afternoon, evening, what you ate, how much you spent, and a "vibe check." This streamlines your writing and creates consistency for readers.
Writing Blog Posts That Earn
From day one, you can be strategic about creating content that has the potential to earn an income. This isn't about selling out; it's about sustainably funding your work by providing genuinely valuable recommendations.

For Affiliate Income: The "Problem-Solver" Post
These posts recommend products or services you actually use and love. The key is to frame your recommendation as the hero of a story. Don't just list "My Favorite Power Bank." Write "The $30 Power Bank That Saved My Phone (and My Sanity) on a 14-Hour Train Ride."
"The 10 Travel Essentials I Never Leave Home Without"
"My Complete Solo Travel Tech Kit (Camera, Power Bank, and More)"
"Why Specific Travel Insurance is the Best for Solo Adventurers"
"The Most Comfortable Walking Shoes for Exploring Cities All Day"
For Building Your Email List: The "Lead Magnet" Post
Create content that naturally leads to a freebie (like a PDF checklist) that you offer in exchange for an email address. Your email list is one of your most valuable assets.
"My Ultimate Pre-Travel Planning Checklist (Get Your Free PDF!)"
"The 10 Most Important Phrases to Learn in Italian (Download the Cheatsheet)"
"How to Plan Your First Solo Trip in 10 Easy Steps (Free Workbook)"
For Selling Your Own Products: The "Appetizer" Post
Write a detailed, valuable free guide to a city, then offer a super-detailed, day-by-day downloadable itinerary for a small price for readers who want an expert plan without the work.
"The Perfect 3-Day Solo Solo Itinerary for Lisbon"
"How to Spend a Magical Week Alone in the Scottish Highlands"
"The Ultimate Solo Traveler's Guide to New York City"
Your Questions, Answered: A Solo Travel Blogger's FAQ
What should my first solo travel blog post be about?
Your first post should be your manifesto. Introduce yourself, share the story that sparked your love of solo travel, and most importantly, tell your readers why you're starting this blog and who it is for. Set the tone and make a promise about the authentic value you'll provide.
How do I make my travel blog stand out?
Find your unique niche and be ruthlessly authentic. Don't just share the postcard moments; share the challenges, the lessons learned, and your honest opinions. Your unique voice and real-world perspective are your biggest competitive advantages.
Do I need to be a great writer to start a travel blog?
You need to be a clear communicator. Write like you're talking to a friend. Use simple language, short paragraphs, and a conversational tone. Passion and honesty are far more important than a sophisticated vocabulary. You'll become a better writer simply by writing more.
Can I start a travel blog without traveling full-time?
Absolutely. Some of the most successful travel blogs are run by people with full-time jobs. You can blog about weekend trips, planning for a future big adventure, or exploring your own city like a tourist. Your audience will likely find this more relatable than the life of a full-time nomad.
Your Story Is Waiting
You’re standing at the trailhead of an incredible journey. That blinking cursor on a blank page isn't a barrier; it's a boarding pass. Every post you write, every story you share, and every fear you address is a step toward building something that is uniquely yours. This playbook of solo travel blog ideas is designed to give you the spark, but your experiences will provide the fire. Don't aim for perfection; aim for connection. Your story is waiting to be told.
Read the full guide: Anxious to Adventurous: The Ultimate Guide to Solo Travel Confidence
Don't Miss Out! Subscribe for Exclusive Content
SubscribeComments 0
No comments yet
Be the first to share your experience!
Dont Miss Out! Subscribe for Exclusive Content
FTC Affiliate Disclosure Essentials: Stay Compliant as a Travel Creator
Essential Affiliate Tools: From Tracking to Full Optimization

Avoid These 5 Affiliate Landing Page Mistakes for Better Conversions

Affiliate Keyword Research Mastery for Travel Blogs
Booking.com Affiliate Program Review: Pros, Cons, and Earnings Potential