Transportation Safety: Staying Safe on Planes & Trains
TrekGuider @trekguider
There's a certain magic to being in transit—that liminal space where you're neither here nor there, just a passenger watching the world blur past your window. It’s the very heart of travel, but it’s also a moment of profound vulnerability. The problem is, amidst the controlled chaos of an airport, the anonymous bustle of a train station, or the quiet confines of a taxi, our focus can drift.
This constant motion agitates a core travel anxiety: the fear that one moment of distraction could lead to a lost passport, a stolen wallet, or a compromised sense of security that sours an entire trip. But it doesn't have to be this way. The solution is to trade that anxiety for a set of simple, repeatable habits—a tactical playbook for navigating every mode of transport with unshakable confidence. This guide delivers the essential transportation safety tips you need, broken down by the unique challenges of air, rail, and ground travel. Mastering these routines is a critical part of any smart travel strategy, a foundation we explore in our comprehensive guide to The Ultimate Guide to Travel Safety: A 2026 Playbook.
Think of your journey in stages, with each mode of transport presenting its own unique playbook. We’ll start where most international trips begin: the controlled chaos of the airport.
Mastering the Airport: Your Guide to Air Travel Security
An airport is a marvel of modern logistics, but for a traveler, it’s a gauntlet of queues, checkpoints, and crowds. Its process-driven environment creates unique security challenges, but a few smart transportation safety tips can make all the difference from the moment you pack your bags to the second you reclaim them.
Before You Leave: Smart Packing & Luggage Security
Your airport safety strategy begins at home. How you pack and secure your luggage is your first and most important line of defense.
Never Pack Valuables in Checked Luggage: This is the cardinal rule of air travel. If it’s valuable or irreplaceable, it belongs with you in the cabin. Your carry-on is the only secure place for:
Passport, IDs, and all travel documents
Cash, credit cards, and debit cards
Electronics (laptops, tablets, cameras, power banks)
Essential medications (plus extra for delays)
Jewelry and any other items of sentimental or high monetary value
Use Globally Recognized Locks: The TSA needs to be able to inspect checked bags. If you use a non-approved lock, they will cut it off. To avoid this, use locks recognized by the TSA. According to their official guidelines, these can be opened by security officers using universal master keys. Look for the Travel Sentry (red diamond) or Safe Skies logo when buying a lock. This isn't just a U.S. system; it's a global standard used by security agencies in Canada, the UK, Germany, Japan, and dozens of other countries.
Make Your Bag Stand Out: In a sea of black roller bags, a little personality is a security feature. Use a colorful luggage strap, a unique tag, or a bright ribbon to make your bag instantly identifiable. This dramatically reduces the chance of an accidental bag swap at the carousel.
Photograph Your Evidence: Before you hand over your bag, take a quick photo of your packed suitcase (both open and closed). If your bag is lost, delayed, or damaged, this provides an indisputable visual record for your airline and insurance claims.

Pack Smarter, Not Harder
A lighter bag is a safer bag. It’s easier to manage, less likely to be checked, and keeps your essentials within arm's reach. Our definitive guide shows you how to fit everything you need into a single carry-on, saving you time, money, and the stress of lost luggage.
Download the Free How to Pack Light Guide
Navigating the Security Checkpoint
The security line is a notorious chokepoint where travelers are distracted, rushed, and temporarily separated from their belongings. This is a time for heightened focus.
Guard Your Bins: As your items slide onto the conveyor belt, keep your eyes on them. Wait to walk through the metal detector until you see your bins beginning to enter the X-ray machine. This minimizes the time your valuables are sitting unattended on the other side.
Consolidate Before the Line: Don't wait until you're at the bins to fumble with loose items. Before you even join the queue, place your phone, wallet, passport, and boarding pass inside a zipped pocket of your jacket or deep within your carry-on.
Beware of Coordinated Distractions: Professional thieves sometimes work in teams at security. One person might create a delay in front of you (e.g., setting off the metal detector repeatedly) while an accomplice on the other side of the scanner quickly grabs your emerging laptop or wallet. Be patient, but stay vigilant and focused on your belongings.
On the Rails: A Playbook for Safe Train Travel
Train travel offers a romantic and scenic way to see the world, but the open nature of stations and the shared spaces on board require a specific approach to security.
General Security on Daytime Trains
During the day, the primary risk is opportunistic theft in crowded stations or on busy carriages.
Maintain Physical Contact: In a chaotic station, your luggage should be in direct physical contact with you at all times. Loop a strap around your foot or keep a hand on the handle. When waiting on a platform, stand with your back to a wall and your bags in front of you.
Position Luggage Strategically: On the train, store your main suitcase on an overhead rack that is across the aisle from you, not directly above. This keeps it constantly within your line of sight. If you must use the large luggage racks at the end of a carriage, use a lightweight cable lock to secure your bag to the rack itself.
Never Let Your Daypack Go: Your small bag containing your valuables should be treated as an extension of your body. Keep it on your lap, on the seat next to you, or in a crossbody position. When you get up to use the restroom or walk to the dining car, it goes with you. No exceptions.
Overnight on the Rails: Your Security Checklist
Sleeping on a train is an unforgettable experience, but it’s also when you are most vulnerable. Follow these three protocols to ensure a safe and restful journey.
Physically Secure Your Main Luggage: A thief can silently walk through a dark train car and lift a bag from an unlocked compartment. Make your bag an inconvenient, noisy target. Use a small cable lock or even your bag’s own strap to attach it to a fixed object like:
The luggage rack frame
The ladder to the top bunk
The metal frame under your seat
Keep Essential Valuables on Your Person: Your most critical items—passport, phone, cash, cards—should never be in your main luggage while you sleep. The only secure place is on your body.
Use a money belt worn under your clothes.
Sleep with your small daypack physically on your bunk. Use it as a pillow or loop a strap around your arm or leg. This ensures your essentials remain safe even if your main bag is compromised.
Secure Your Compartment Door: The door is your primary barrier. As soon as everyone is settled for the night, lock it from the inside. Private sleeper cabins have strong locks. In a shared couchette, have a polite conversation with your cabin mates and agree to keep the door locked. Train staff or border officials will knock loudly enough to wake you if they need entry.
Pro-Tip: When booking a bunk in a shared couchette, the top bunk is often the most secure choice. It is harder for anyone to access your belongings without waking you and keeps you out of the general foot traffic in the compartment.
On the Ground: Staying Safe in Taxis & Ride-Shares
Your journey isn’t over until you’ve reached your hotel. Ground transportation is the final leg, and it’s a critical moment to apply your safety knowledge.

Your Ride-Share Safety Checklist
Ride-sharing apps have built-in safety features, but they only work if you use them. Before you get into any vehicle, run through this non-negotiable verification checklist.
Verify the Vehicle:
Match the License Plate: This is the most important step. The license plate number in the app must match the plate on the car. If it doesn’t, do not get in. Cancel the ride and report the mismatch.
Match the Car Details: Confirm the make, model, and color of the car also match the information in the app.
Verify the Driver:
Check the Driver's Photo: Glance at the driver and ensure they match the photo in the app.
Confirm Your Name: Ask the driver, "Who are you here for?" or "What's my name?" They must be able to say your name. Never volunteer it by asking, "Are you here for Jane?" This gives a fraudulent driver the information they need.
Use PIN Verification: Many apps now offer a PIN verification feature. Enable it. The trip cannot start until you provide the correct PIN to your driver, guaranteeing you are in the right car.
Share Your Trip Details:
As soon as the trip starts, use the app’s built-in "Share Trip Status" function. This sends a live map of your journey, including the car's route and your ETA, to a trusted contact.
Sit in the Back Seat:
Especially when traveling alone, sitting in the back provides personal space and allows you to exit from either side of the vehicle if you feel uncomfortable.
Trust Your Instincts:
If anything feels off—the driver, the vehicle, the situation—do not get in. Cancel the ride, report your concerns, and order another car. Your safety is worth more than a cancellation fee.
Navigating Taxis and Tuk-Tuks Safely
When using traditional taxis, you are more reliant on your own judgment and vigilance.
Insist on the Meter: The "broken meter" is one of the oldest travel scams in the book, designed to lock you into a wildly inflated flat fare. Before getting in, point to the meter and say, "Meter, please." If the driver refuses, simply find another taxi.
Follow Your Route: Have your destination pulled up on a map app on your phone. This helps you ensure the driver is taking a logical route and not an inefficient "scenic" one designed to drive up the fare.
Use Official Taxi Ranks: At airports and train stations, always use the designated, official taxi queue. Avoid the freelance drivers who approach you in the arrivals hall, as they are often unlicensed and operating illegally.
Pro-Tip: Ask your hotel or restaurant to call a taxi for you. They almost always have a relationship with a reputable, trusted local company. Before you get in, take a quick, discreet photo of the taxi's license plate and driver ID card (usually displayed on the dash).

Frequently Asked Questions (FAQ)
Q: What's the safest way to carry my passport and money while in transit? A: The best method is to use multiple locations. Keep your passport, one credit card, and the bulk of your cash in a secure money belt or neck wallet worn under your clothing. Keep a small amount of daily cash and a second credit card in a more accessible wallet in a front pocket or a secure crossbody bag.
Q: Are airport charging stations safe to use? A: Avoid using the public USB ports. Hackers can modify these stations for "juice jacking," which can install malware or steal data from your phone. Always use your own AC power adapter and plug it into a standard electrical outlet, or carry a portable power bank.
Q: Should I use my phone's data plan abroad or rely on public WiFi? A: Using your own cellular data plan (either an international plan or a local SIM card) is always more secure than public WiFi. If you must use public WiFi, you absolutely need to use a VPN (Virtual Private Network) to encrypt your connection and protect your data from hackers.
Travel with Confidence
Transportation is the thread that connects the incredible moments of your journey. By mastering these transportation safety tips, you transform these in-between moments from periods of uncertainty into a seamless and secure part of your adventure. Whether you’re locking your bag before a flight, securing your cabin on an overnight train, or verifying your ride-share before hopping in, these proactive habits build a powerful foundation of security.
This allows you to move through the world not with fear, but with the calm confidence of a prepared and savvy traveler. For a more comprehensive look at planning your entire journey, our all-encompassing Travel Guide is the perfect resource. And for expert advice on navigating the specific transit systems of your next destination—from the Tokyo Metro to the Swiss rail network—be sure to explore the detailed guides from our expert creators on the TrekGuider. You're now equipped to handle the journey, so you can focus on the destination.
Don't Miss Out! Subscribe for Exclusive Content
Subscribe


Comments 0
No comments yet
Be the first to share your experience!
Dont Miss Out! Subscribe for Exclusive Content

Ultimate USA Holidays Guide: Top Picks

FTC Affiliate Disclosure Essentials: Stay Compliant as a Travel Creator

Essential Affiliate Tools: From Tracking to Full Optimization

Booking.com Affiliate Program Review: Pros, Cons, and Earnings Potential

Decoding Affiliate Commission Rates: Benchmarks for Travel Creators

Amazon Associates for Travel: Strategies to Maximize Commissions
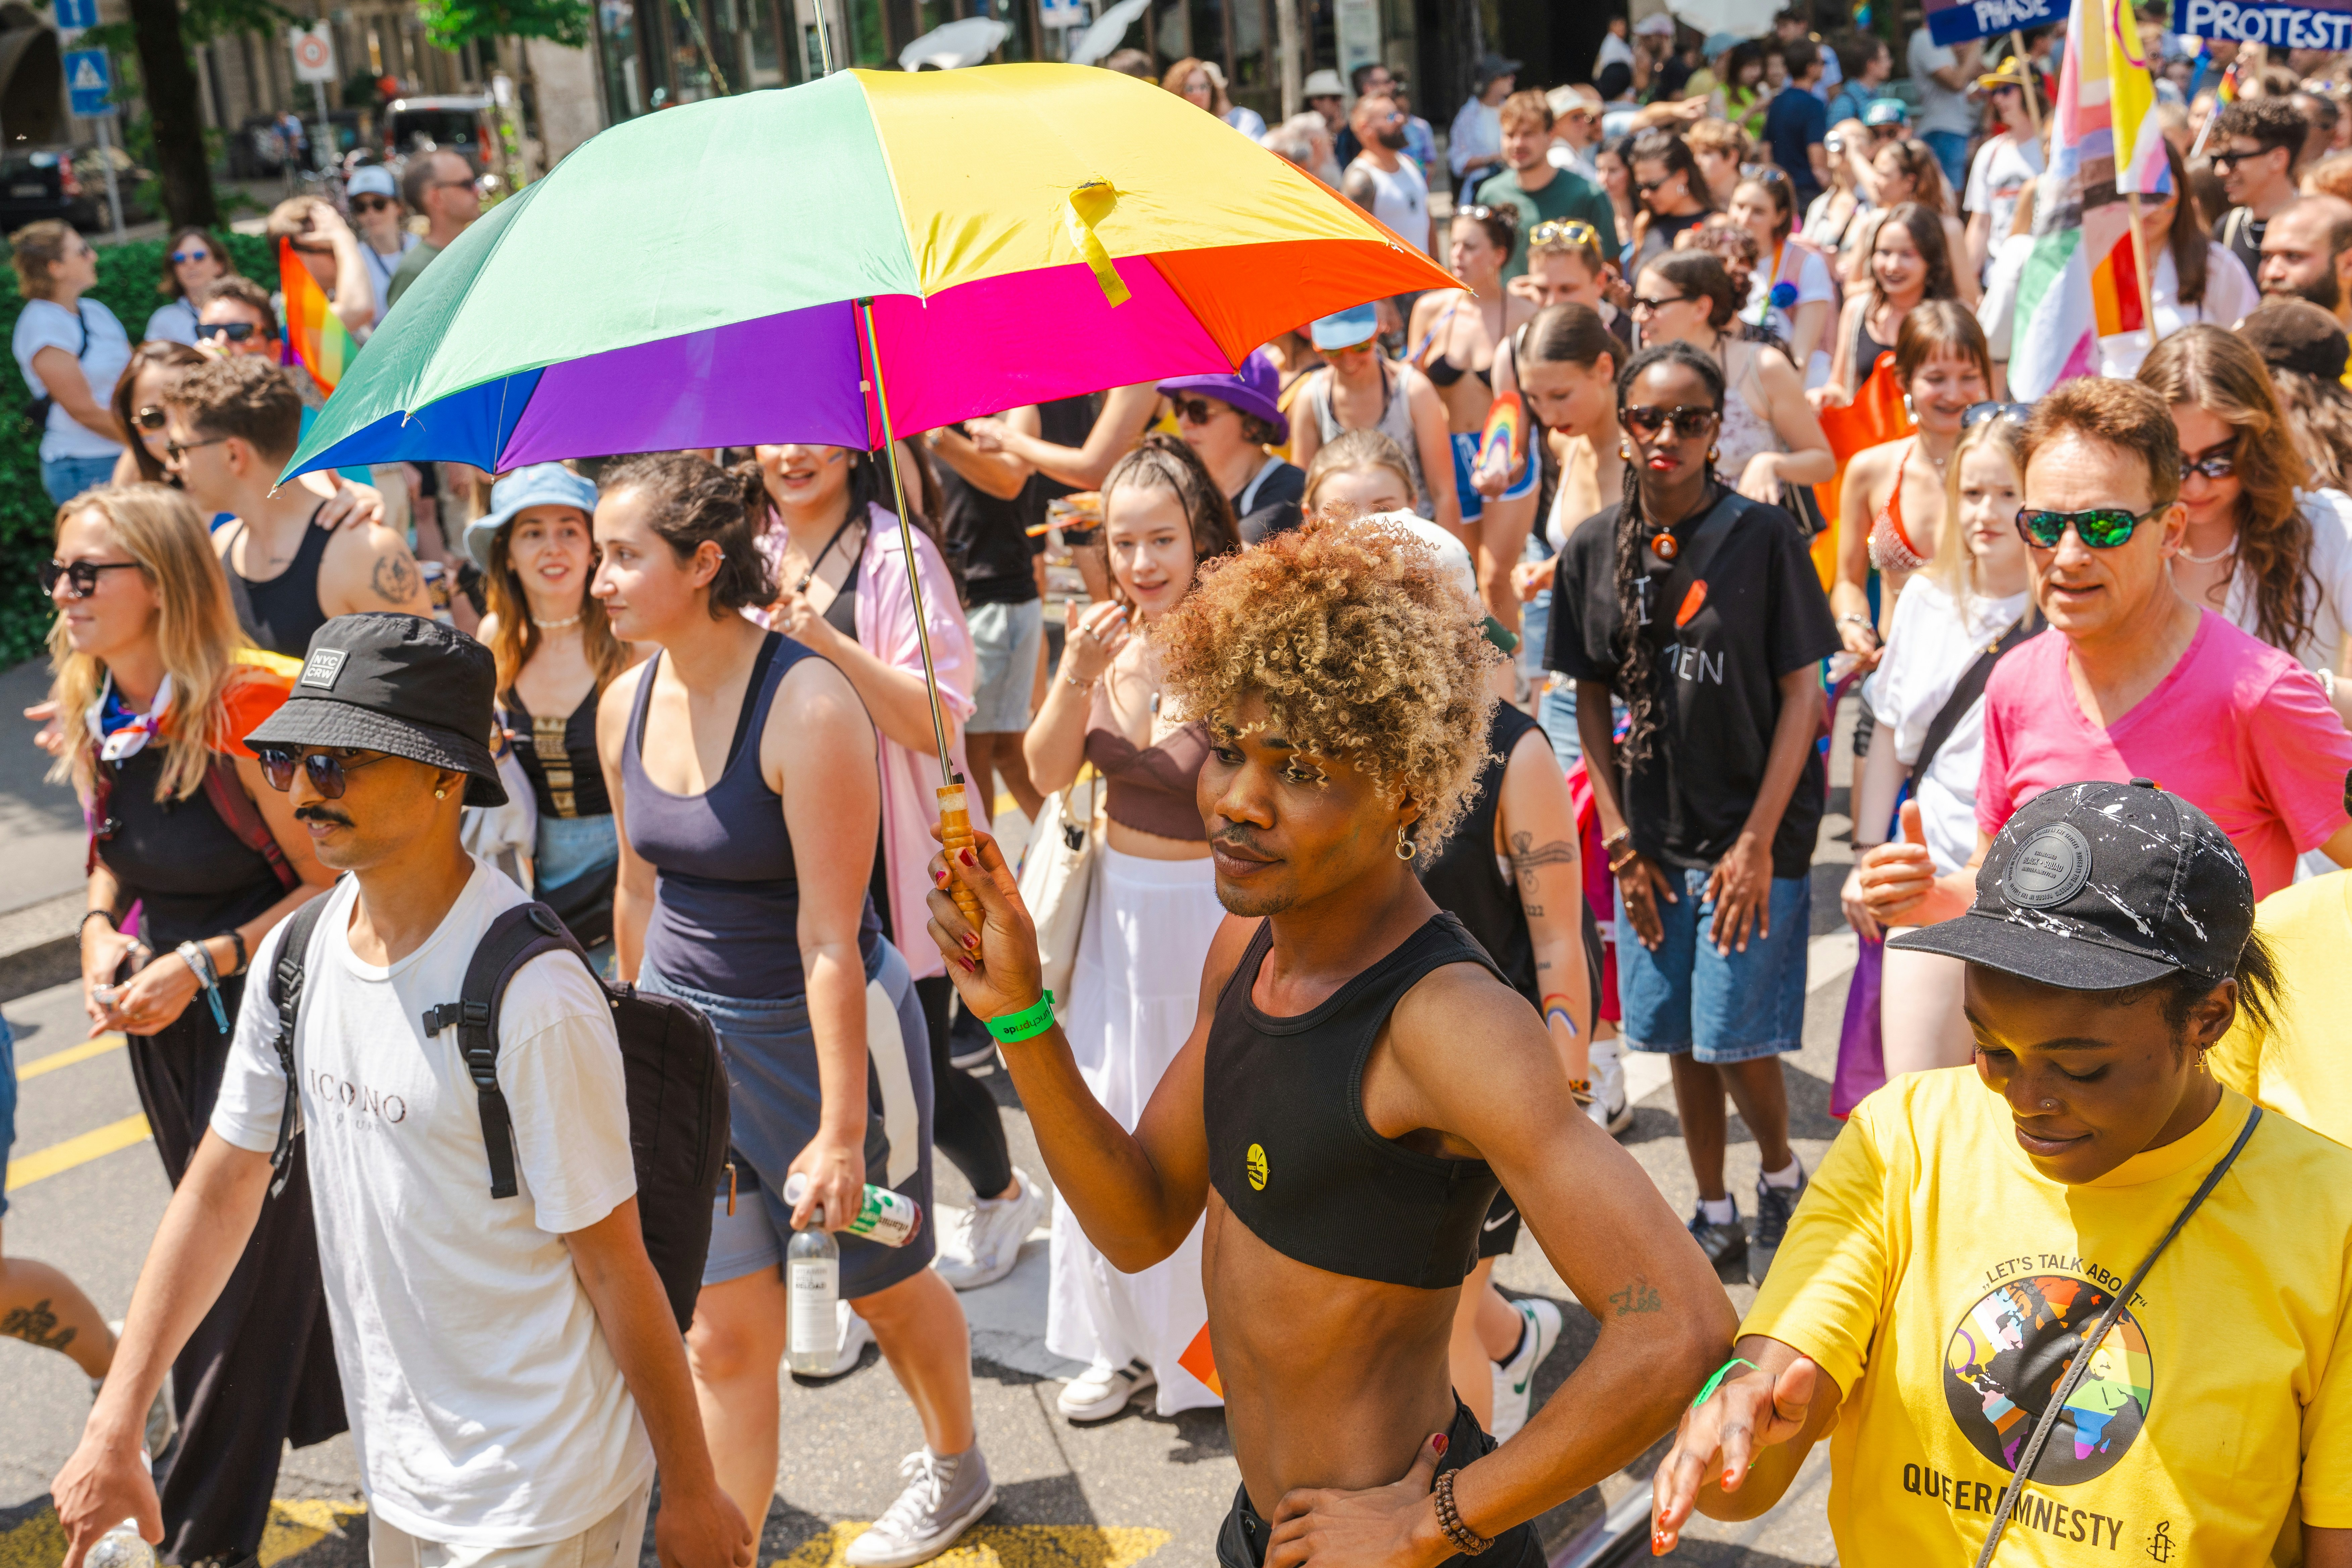
NYC Pride: Parade Route Essentials
TrekGuider @trekguider
The air crackles with anticipation. You feel the bass from a distant float thumping in your chest, a rhythmic heartbeat for a city ready to explode in a celebration of love, identity, and history. The NYC Pride Parade is one of the most iconic, life-affirming events on the planet. But as you picture the cascade of rainbow flags, a knot of logistical questions tightens in your stomach. With millions of people flooding Manhattan, where do you even begin? How early is early enough? How do you navigate a multi-mile route to actually see the parade without getting swallowed by the crowd?
Without a smart plan, the dream experience can dissolve into a logistical nightmare. You risk being stuck ten-deep behind a wall of people, catching only glimpses of the spectacle. You could spend hours feeling overwhelmed, battling for a sliver of sidewalk instead of immersing yourself in the powerful current of community and celebration. The line between an unforgettable day of joy and a frustrating ordeal is drawn by preparation.
This is your definitive playbook for conquering the chaos. Forget the guesswork. We are breaking down the entire pride parade New York route, section by section, arming you with insider strategies and actionable essentials. From the electric energy of the formation zone to the historic heart of the Village, this guide will help you navigate the day like a seasoned pro. Get ready to transform potential stress into pure, unadulterated Pride.
The Heartbeat of Pride: A Journey from Protest to Celebration
But to truly appreciate the river of rainbow flags and joyous noise, you have to understand its source. This isn’t just a party; it’s a pilgrimage. The modern NYC Pride Parade is the direct descendant of the Christopher Street Liberation Day March, first held in 1970, exactly one year after the Stonewall Uprising of 1969. That rebellion, a series of spontaneous and defiant demonstrations against a police raid on the Stonewall Inn, was the flashpoint that ignited the modern gay rights movement.
What began as a protest march has evolved over decades into a powerful dual-purpose event: a joyous celebration of identity and a formidable platform for activism. In the 1980s, as the AIDS crisis devastated the community, the parade became a vital and visible front line for raising awareness and demanding action, cementing its role as the community's conscience and its loudest voice. Its deep historical roots and unwavering commitment to progress make it a key element event—and for good reason, a non-negotiable highlight in our definitive guide to New York Holidays: 10 Must-Do Events. Understanding this legacy enriches the entire experience, transforming you from a spectator into a participant in living history.
Mark Your Calendar: 2026 NYC Pride Parade Date and Time
Precision is your best friend when planning for an event of this magnitude. Get these details locked into your calendar now.
Date: Sunday, the last Sunday of June
Start Time: The parade officially kicks off between 11:00 AM and 12:00 PM.
A word of caution: Do not mistake the start time for your arrival time. The parade route is miles long, and the best viewing spots are claimed hours in advance. For a prime location, especially in the more popular sections, you should be in position no later than 9:00 AM. For the truly iconic spots, even earlier is better.
Deconstructing the Route: A Mile-by-Mile Guide to the Pride Parade New York
The official route for the pride parade New York is a journey through the city's cultural and historical soul. Each segment offers a distinct atmosphere and viewing experience. Your perfect spot depends entirely on the vibe you’re seeking.
The Kick-Off: 26th Street and 5th Avenue (The Formation Zone)
The Vibe: This is the epicenter of pure, unharnessed anticipation. The energy here is electric, a fascinating mix of organized chaos and raw excitement. You’ll see floats getting their final sound checks, dance troupes running through their choreography one last time, and thousands of marchers buzzing with adrenaline before they take their first official step. It’s less of a polished performance and more of an authentic, behind-the-scenes look at the massive human effort powering the event.
Viewing Advice: Standing near the start means you see every contingent at its absolute freshest. The costumes are pristine, the energy is at its peak, and the performances are sharp. It’s a fantastic spot for photographers wanting to capture candid moments and fine details. The crowds here are intense as everyone jockeys for that first glimpse.
Logistics: Arrive extra early—think 8:00 AM—to secure a spot with a clear line of sight. Amenities are scarcer here compared to further down the route. Pack what you need for the morning, as ducking into a local shop will be a major, time-consuming undertaking.
The Main Artery: South on 5th Avenue (The Spectator Hub)
The Vibe: As the parade marches down the world-famous 5th Avenue, it hits its full, spectacular stride. This is the quintessential big-city parade experience. The avenue is wide, the crowds are massive, and the backdrop is pure New York City grandeur. The sound of music and cheering reverberates off the tall buildings, creating an immersive wall of sound. You’ll be surrounded by a diverse mix of families, tourists, and locals, all united in a shared celebration.
Viewing Advice: This is the longest stretch of the parade and where most spectators naturally congregate. For a slightly less condensed crowd, try to find a spot further north, perhaps in the high 30s or 40s. The closer you get to the Village, the exponentially denser the crowds become.
Logistics: This section offers the best access to delis, coffee shops, and stores for restrooms and refreshments. However, be prepared for long lines for absolutely everything. Public transportation is your best friend here; the numerous subway stops along 6th Avenue run parallel to the route, making access relatively straightforward.
The Historic Turn: 8th Street to Christopher Street (The Soul of Pride)
The Vibe: This is the emotional and historical heart of the entire parade. As the route makes its key turn off 5th Avenue and winds through the narrower streets of Greenwich Village towards the Stonewall National Monument, the atmosphere shifts. It becomes more intimate, more intense, and deeply resonant. The sense of history is palpable. This is where the cheers often feel the loudest and the connection between the marchers and the crowd feels most profound.
Viewing Advice: This is, without question, the most meaningful and popular place to watch the parade. Consequently, it is the most crowded. To get a spot here, you must be committed. Arrive by 8:00 AM at the absolute latest, and be prepared to hold your ground for hours. The experience, however, is powerful and unparalleled.
Logistics: Once you’re in a spot here, you’re in for the duration. The narrow streets and dense crowds make movement nearly impossible. Pack everything you need for several hours. There are fewer commercial establishments directly on these streets, so plan accordingly.

Pro-Tip: For a less obstructed view, look for spots near intersections on the opposite side of the street from the parade's direction of travel. Crowd density is often slightly lower there as people tend to cluster on the inside of the turns.
The Grand Finale: Finishing Near 15th Street and 7th Avenue (The Dispersal Zone)
The Vibe: The energy at the end of the route is one of joyous exhaustion and collective accomplishment. Marchers, who have been on their feet for hours, are often interacting more freely with the crowd as they complete their long journey. It’s less of a formal procession and more of a massive, mobile street party winding down into its final, celebratory moments.
Viewing Advice: This is by far the least crowded section of the route, making it an excellent choice for families, those with accessibility concerns, or anyone who couldn't arrive at the crack of dawn. You’ll still see every float and group, but with significantly more room to breathe and move.
Logistics: This area offers the easiest exit strategy. With the parade dispersing, streets begin to reopen sooner, and access to multiple subway lines on 7th Avenue (like the 1, 2, and 3 trains) makes for a quicker trip home or to your next destination.
Your Strategic Viewing Plan: 7 Essential Tips for the Best Experience
A little strategy goes a long way in a crowd of millions. Follow these essential tips to ensure your day is smooth, safe, and spectacular.
Arrive Early, Then Arrive Earlier: This cannot be overstated. For a front-row spot anywhere south of 23rd Street, 9:00 AM is a good baseline. For a coveted spot in the West Village or near Christopher Street, you need to be thinking 7:30 AM or 8:00 AM. The most dedicated spectators arrive with breakfast and a blanket.
Pack Your Urban Survival Kit: You are essentially setting up a base camp for the day. Your kit should include: a large, reusable water bottle (staying hydrated is non-negotiable), high-SPF sunscreen, a portable phone charger, and plenty of snacks. Relying on local bodegas is a rookie mistake; they will be overwhelmed and may run out of supplies.
Master Public Transit: Driving is not an option. Street closures are extensive and begin in the early morning. The subway is your only logical choice. Use lines that run along 6th Avenue (B, D, F, M) or Lexington Avenue (4, 5, 6) and walk west. Avoid stations directly on the route, as they will be dangerously crowded.
Choose Your Vibe, Not Just a Spot: Before you pick a location, decide what kind of experience you want. Do you crave the high-energy launch? The massive midtown spectacle? The deeply emotional historic heart? Or the relaxed, celebratory finish? Matching the location to your desired vibe is the secret to a perfect day.
Stay Connected (But Have a Backup): With millions of people in one area, cell service can be notoriously unreliable. While you should keep your phone charged, don’t depend on it for communication. Use a buddy system, and if you’re with a group, establish a clear, physical meeting point and time in case you get separated.
Prioritize Accessibility: Organizers are continually working to make the event more accessible. Check the official NYC Pride website in the weeks leading up to the parade for detailed information on designated viewing areas for people with disabilities. These locations offer better sightlines and a less congested environment.
Embrace the Virtual Experience: If you can't make it in person or prefer to avoid massive crowds, don't worry. The NYC Pride Parade is live-streamed across multiple platforms. You can catch all the action from the comfort of your home, a powerful option for those who want to participate from afar.
Pro-Tip: The blocks just after the parade turns off 5th Avenue onto 8th Street can be a strategic viewing sweet spot. The crowd thins slightly as it navigates the corner, offering a brief window for better photos and a bit more breathing room before it swells again towards Christopher Street.
Beyond the Sidelines: Documenting Your Day
The spirit of Pride is participation. Even as a spectator, you are a vital part of the event. Wear your brightest colors, create a supportive sign, and cheer loudly for the groups that resonate with you. Your energy is what fuels the marchers on their long walk.
For many, capturing the day is part of the experience. The vibrant colors, powerful emotions, and incredible stories of the pride parade New York make it a content creator's dream. If you're looking to capture and share the experience like a pro, preparation is everything. To elevate your storytelling, our The Travel Creator's Toolkit provides the essential checklists and guides to turn your passion into compelling content that does justice to this incredible event.
Planning the Perfect Pride Weekend in NYC
The parade is the magnificent centerpiece of a city-wide, month-long celebration. Pride Month in New York is packed with parties, cultural events, and community gatherings. Don’t limit your experience to just a few hours on a Sunday afternoon. Make it the anchor of an unforgettable weekend or a longer trip to the city.
Navigating the parade is just one piece of an unforgettable trip. To build a complete itinerary—from finding the best LGBTQ+-friendly hotels in Chelsea or Hell's Kitchen to exploring other iconic city sights that have shaped queer history—our comprehensive Travel Guide is the ultimate resource for planning your entire New York adventure. It helps you weave the parade into a broader, richer travel experience.
Your Mission: Experience Pride to the Fullest
You are now armed with the essential knowledge to navigate the pride parade New York not just as a spectator, but as an informed participant in a powerful celebration. You know the history that fuels the march, the unique vibe of each section of the route, and the practical strategies to make your day a resounding success. The parade is more than a route on a map; it's a journey through history, proof of resilience, and an explosion of pure joy.
So pick your spot, pack your survival kit, and get ready to experience the love, history, and unbreakable community of NYC Pride. Go with an open heart, a loud voice, and a solid plan.
Meta Data Suggestions:
SEO Meta Title: NYC Pride Parade Route Guide: Best Viewing Spots & Tips 2026
URL Slug: /nyc-pride-parade-route-essentials
SEO Meta Description: Your ultimate guide to the 2026 NYC Pride Parade. Discover the best viewing spots, route map, start times, and essential tips to navigate the crowds.
Don't Miss Out! Subscribe for Exclusive Content
SubscribeComments 0
No comments yet
Be the first to share your experience!
Dont Miss Out! Subscribe for Exclusive Content

San Francisco Cherry Blossoms: A Local's Guide to the Blooms

Halloween SF: Haunts Without Horrors

SF Festivals: 7 Must-See Lineups

Christmas SF: Lights & Wharf Wonders

SF Pride: 6 Route & Party Hacks

Chinese New Year SF: Parade Essentials
How to Meet People While Traveling Solo (Without Being Awkward)
TrekGuider @trekguider
The dream is crystal clear: the absolute freedom of a solo trip. You picture yourself wandering through ancient cobblestone streets, discovering hidden cafes, and moving entirely at your own pace. But then, a shadow creeps in. It’s the fear of a silence that’s less than peaceful, the specter of profound loneliness. You worry about eating every meal alone, of having no one to turn to and say, "Wow, look at that sunset," of the journey feeling isolating rather than liberating. This fear of awkward, lonely moments—a concern that ranks right alongside safety for many women—is one of the most powerful deterrents for aspiring solo travelers, a quiet anxiety that can keep the most adventurous spirits tethered to home.
But what if that fear is based on a false premise? What if traveling solo didn’t have to mean being lonely? The truth is, a solo journey isn't about isolation; it's about being the sole captain of your social ship. You have complete control over when to embrace solitude and when to seek connection. This guide is your tactical playbook for doing exactly that. We’re moving beyond vague advice and into actionable, non-awkward strategies for how to meet people traveling solo. These are the proven methods to fill your adventure with as much connection as you want, on your own terms. This is a critical skill, and it’s just one part of the bigger picture we cover in our foundational guide, The Ultimate Guide to Solo Female Travel (15 Essential Tips).

Laying the Foundation: Your Accommodation is Your Social Hub
The single easiest way to build a social element into your trip is to choose accommodation that is designed for it. Your hotel room or rental can be either an isolating box or a vibrant launchpad for connection—the choice is yours, and it begins before you even book.
The Modern Hostel: A Solo Traveler's Secret Weapon
Let’s dismantle an outdated stereotype: the modern hostel is not the dingy, crowded dorm room of decades past. Today’s best hostels are stylish, clean, and carefully designed to be social hubs. They are, without a doubt, the number one asset for a solo traveler seeking connection.
The magic of a hostel lies in its common spaces. The kitchen, the lounge, the rooftop terrace—these areas are intentionally designed to foster low-pressure interaction. Cooking a meal in the communal kitchen is a natural conversation starter. Joining the free group dinner or movie night instantly gives you a "ready-made" group of friends for the evening.
Pro-Tip: You don't have to sacrifice comfort and privacy. Many modern hostels offer private rooms with ensuite bathrooms that are often cheaper than a standard hotel room. This gives you the perfect balance: a secure, private sanctuary to retreat to, with instant access to a social scene right outside your door whenever you’re in the mood.
Beyond the Hostel: Guesthouses and Co-Living Spaces
If dorms aren't your style, look for smaller, family-run guesthouses or B&Bs. The environment is often more intimate than a large hotel, and the hosts can be incredible connectors, offering local insights and introducing you to other guests. For longer stays, consider co-living spaces, which are becoming increasingly popular in hubs for digital nomads and offer a built-in community of fellow travelers and remote workers.

The Power of Shared Experiences: Meeting People Through Activities
One of the most effective and least awkward ways to meet people is to join an activity where a shared interest is the automatic, built-in icebreaker. The focus is on the experience itself, and the social connection happens as a natural, easy byproduct.
The Classic First-Day Strategy: Free Walking Tours
On your first day in a new city, make a free walking tour your number one priority. This is a classic for a reason. You’ll get oriented to the city's layout, learn about its history, and spend a couple of hours with a small group of other curious travelers. The format is perfect for striking up a conversation. A simple, "Wow, I didn't know that," about a historical fact or, "Do you have any plans for lunch after this?" is a completely natural way to connect.
Learn and Connect: Cooking Classes, Surf Lessons, and More
Signing up for a class to learn a local skill is a fantastic way to meet both locals and other travelers. Whether it’s a pasta-making class in Tuscany, a tango lesson in Buenos Aires, or a surfing class in Costa Rica, you’re placed in a small-group environment where you’re all learning something new together. The shared challenge and laughter create an instant bond that feels authentic and unforced.
Explore Together: Day Trips and Group Tours
For the safety-conscious first-timer, group tours are an incredible confidence-builder. In fact, an estimated 75% of women who have never traveled alone would be more likely to do so for the first time on a group tour. Joining a guided day trip to a nearby vineyard, a historical site, or a national park takes all the logistical stress off your shoulders and places you with a group for the entire day, making conversation and connection almost inevitable.

Your Digital Toolkit for In-Person Connection
In the modern travel era, your smartphone can be your most powerful tool for finding your tribe. Used safely and intentionally, technology can bridge the gap between solo exploration and real-world, in-person connection.
Vetted Online Communities: Your Global Circle of Friends
Before you even leave home, join a few key online communities. Large, well-moderated Facebook groups like Solo Female Travelers or Host a Sister are invaluable resources. These groups have hundreds of thousands of active members who regularly post about their travel plans. It’s common to see a post like, "Hey! I’m a 30-year-old from Canada, and I’ll be in Lisbon next week. Any other solo travelers want to meet up for a coffee or explore the Alfama district?" It’s a way to pre-vet potential friends and make plans before you even land.
Apps for Friendship, Not Just Dating
Many apps have expanded beyond romance to focus on platonic connection. BumbleBFF is the "friend" mode of the popular dating app, allowing you to swipe and find other people in your area who are also looking for friends. Meetup.com is another fantastic tool for finding local groups and events based on your specific hobbies, whether it's a hiking club, a language exchange gathering, or a board game night.
A Critical Note on Safety with Digital Meetups
The digital world is for making the connection; the real world is for building it. The golden rule is to always move the conversation from the app to a safe, public, well-lit space. Always arrange to meet for the first time in a popular coffee shop or a busy public square during the day. Inform a friend back home of your plans, including who you are meeting, where, and when. Trust your intuition—if a conversation online feels off, don't hesitate to cancel. Your safety is non-negotiable.
Your Ultimate Safety Companion
Meeting new people is one of the most rewarding parts of travel, but your safety is always priority number one. Our free, comprehensive guide is designed to give you the tactical knowledge you need to navigate every situation with confidence.
Download Your Free Solo Female Travel Safety Guide Here
This downloadable checklist covers everything from vetting your accommodation to transportation safety protocols, ensuring you can embrace connection without compromising your security.

Everyday Encounters: Finding Connection in the Routine
Beyond the structured tours and scheduled meetups lies the real magic of solo travel: the spontaneous, everyday encounters. These moments can't be planned, but you can absolutely create the conditions for them to happen.
The Cafe Strategy: Communal Tables and Becoming a "Regular"
When you stop for your morning coffee or an afternoon break, choose your venue with intention. Look for cafes that have large, communal tables. Sitting at one of these tables, rather than a small table for one, signals an openness to interaction and creates a natural opportunity for a simple conversation to spark with those sitting nearby.
If you’re staying in a neighborhood for a few days, try becoming a "regular" at a local coffee shop or bakery. Visiting the same spot at the same time each day allows you to become a familiar face to the staff and other patrons. A simple nod of recognition can easily blossom into a friendly "hello" and a genuine conversation, giving you a deeper sense of connection to the place you’re visiting.
The Power of the Bar Seat
As we discuss in our guide to 5 Ways to Confidently Eat Alone While Traveling, the bar or counter is the ultimate solo-friendly spot. It’s a dynamic space that eliminates the awkwardness of a table for one and provides an easy opportunity for casual conversation with the bartender or your neighbors.
Speaking the Universal Language: How to Break the Ice
The final hurdle is often the first word. The fear of being awkward or intrusive can be paralyzing. The secret is to keep it simple, observational, and low-stakes.
Start with a compliment: "I love your backpack, where did you get it?"
Ask for a small favor: "Would you mind taking a photo for me?"
Make an observation about your shared experience: "This view is incredible, isn't it?" or "Have you tried the coffee here? I’m trying to decide what to get."
Ask for a recommendation: "You look like you know your way around. Do you have a recommendation for a good, non-touristy restaurant in this area?"
Pro-Tip: Wear something that tells a story or invites a question—a t-shirt from your favorite band, a pin from your home city, or a unique piece of jewelry. These small items can act as conversation-starters, giving people an easy and natural entry point to start talking to you.

Frequently Asked Questions About Meeting People Solo
I'm an introvert. Will these strategies feel overwhelming?
Absolutely not. The beauty of these strategies is that they are scalable to your comfort level. Introverts often thrive in situations with a shared focus, like a cooking class or a walking tour. The activity—not the conversation—does the heavy lifting. You can participate, enjoy the company, and engage as much or as little as you feel comfortable with, without any pressure to be "on."
What if I try to talk to someone and they're not interested?
It happens, and it is almost never personal. They might be busy, tired, or simply not in a social mood. Don't view it as a rejection of you; see it as a simple misalignment of timing. Smile, wish them a good day, and move on. The goal is to make small, low-risk offers of connection, not to force a friendship with every person you meet.
Is it safe to tell new people I'm traveling alone?
This requires discretion. In a controlled, public group setting like a guided tour or a hostel common room, it's generally fine and helps build camaraderie. However, in one-on-one encounters with strangers, it's wise to be a bit more vague at first. You can mention you're "meeting friends later" or just keep the focus of the conversation on the activity at hand until you've established a comfortable level of trust.
Your Journey, Your Connections
The narrative that solo travel is a lonely endeavor is a myth. It is, in fact, an experience that can be rich with human connection—perhaps even more so than when traveling with a partner, as you are inherently more open and approachable to the world around you. The key is to be intentional. By choosing social accommodations, joining shared experiences, leveraging technology safely, and being open to everyday encounters, you gain complete control over your social life on the road.
These strategies are your toolkit for how to meet people traveling solo in a way that feels authentic to you. They are the bridge between the profound freedom of solitude and the joy of shared moments. You will learn to dance between the two, creating a travel experience that is perfectly, uniquely your own. With this knowledge, you can step out into the world with the confidence that you will find your tribe, wherever your journey takes you.
For even more detailed planning resources, you can explore our collection of expert-written Travel Guide to find specific tours, classes, and solo-friendly accommodations that have been vetted and reviewed by a community of seasoned travelers just like you.
Meta Data Suggestions:
SEO Meta Title (Under 60 characters): How to Meet People Traveling Solo: 5 Awkward-Free Ways
URL Slug: how-to-meet-people-traveling-solo
SEO Meta Description (Under 155 characters): Feeling lonely on the road? Learn 5 easy, safe, and non-awkward strategies for how to meet people traveling solo, from group tours to social apps.
Don't Miss Out! Subscribe for Exclusive Content
SubscribeComments 0
No comments yet
Be the first to share your experience!
Dont Miss Out! Subscribe for Exclusive Content
San Francisco Cherry Blossoms: A Local's Guide to the Blooms
Halloween SF: Haunts Without Horrors
SF Festivals: 7 Must-See Lineups
Christmas SF: Lights & Wharf Wonders
SF Pride: 6 Route & Party Hacks