NYC Pride: Parade Route Essentials
TrekGuider @trekguider
The air crackles with anticipation. You feel the bass from a distant float thumping in your chest, a rhythmic heartbeat for a city ready to explode in a celebration of love, identity, and history. The NYC Pride Parade is one of the most iconic, life-affirming events on the planet. But as you picture the cascade of rainbow flags, a knot of logistical questions tightens in your stomach. With millions of people flooding Manhattan, where do you even begin? How early is early enough? How do you navigate a multi-mile route to actually see the parade without getting swallowed by the crowd?
Without a smart plan, the dream experience can dissolve into a logistical nightmare. You risk being stuck ten-deep behind a wall of people, catching only glimpses of the spectacle. You could spend hours feeling overwhelmed, battling for a sliver of sidewalk instead of immersing yourself in the powerful current of community and celebration. The line between an unforgettable day of joy and a frustrating ordeal is drawn by preparation.
This is your definitive playbook for conquering the chaos. Forget the guesswork. We are breaking down the entire pride parade New York route, section by section, arming you with insider strategies and actionable essentials. From the electric energy of the formation zone to the historic heart of the Village, this guide will help you navigate the day like a seasoned pro. Get ready to transform potential stress into pure, unadulterated Pride.
The Heartbeat of Pride: A Journey from Protest to Celebration
But to truly appreciate the river of rainbow flags and joyous noise, you have to understand its source. This isn’t just a party; it’s a pilgrimage. The modern NYC Pride Parade is the direct descendant of the Christopher Street Liberation Day March, first held in 1970, exactly one year after the Stonewall Uprising of 1969. That rebellion, a series of spontaneous and defiant demonstrations against a police raid on the Stonewall Inn, was the flashpoint that ignited the modern gay rights movement.
What began as a protest march has evolved over decades into a powerful dual-purpose event: a joyous celebration of identity and a formidable platform for activism. In the 1980s, as the AIDS crisis devastated the community, the parade became a vital and visible front line for raising awareness and demanding action, cementing its role as the community's conscience and its loudest voice. Its deep historical roots and unwavering commitment to progress make it a key element event—and for good reason, a non-negotiable highlight in our definitive guide to New York Holidays: 10 Must-Do Events. Understanding this legacy enriches the entire experience, transforming you from a spectator into a participant in living history.
Mark Your Calendar: 2026 NYC Pride Parade Date and Time
Precision is your best friend when planning for an event of this magnitude. Get these details locked into your calendar now.
Date: Sunday, the last Sunday of June
Start Time: The parade officially kicks off between 11:00 AM and 12:00 PM.
A word of caution: Do not mistake the start time for your arrival time. The parade route is miles long, and the best viewing spots are claimed hours in advance. For a prime location, especially in the more popular sections, you should be in position no later than 9:00 AM. For the truly iconic spots, even earlier is better.
Deconstructing the Route: A Mile-by-Mile Guide to the Pride Parade New York
The official route for the pride parade New York is a journey through the city's cultural and historical soul. Each segment offers a distinct atmosphere and viewing experience. Your perfect spot depends entirely on the vibe you’re seeking.
The Kick-Off: 26th Street and 5th Avenue (The Formation Zone)
The Vibe: This is the epicenter of pure, unharnessed anticipation. The energy here is electric, a fascinating mix of organized chaos and raw excitement. You’ll see floats getting their final sound checks, dance troupes running through their choreography one last time, and thousands of marchers buzzing with adrenaline before they take their first official step. It’s less of a polished performance and more of an authentic, behind-the-scenes look at the massive human effort powering the event.
Viewing Advice: Standing near the start means you see every contingent at its absolute freshest. The costumes are pristine, the energy is at its peak, and the performances are sharp. It’s a fantastic spot for photographers wanting to capture candid moments and fine details. The crowds here are intense as everyone jockeys for that first glimpse.
Logistics: Arrive extra early—think 8:00 AM—to secure a spot with a clear line of sight. Amenities are scarcer here compared to further down the route. Pack what you need for the morning, as ducking into a local shop will be a major, time-consuming undertaking.
The Main Artery: South on 5th Avenue (The Spectator Hub)
The Vibe: As the parade marches down the world-famous 5th Avenue, it hits its full, spectacular stride. This is the quintessential big-city parade experience. The avenue is wide, the crowds are massive, and the backdrop is pure New York City grandeur. The sound of music and cheering reverberates off the tall buildings, creating an immersive wall of sound. You’ll be surrounded by a diverse mix of families, tourists, and locals, all united in a shared celebration.
Viewing Advice: This is the longest stretch of the parade and where most spectators naturally congregate. For a slightly less condensed crowd, try to find a spot further north, perhaps in the high 30s or 40s. The closer you get to the Village, the exponentially denser the crowds become.
Logistics: This section offers the best access to delis, coffee shops, and stores for restrooms and refreshments. However, be prepared for long lines for absolutely everything. Public transportation is your best friend here; the numerous subway stops along 6th Avenue run parallel to the route, making access relatively straightforward.
The Historic Turn: 8th Street to Christopher Street (The Soul of Pride)
The Vibe: This is the emotional and historical heart of the entire parade. As the route makes its key turn off 5th Avenue and winds through the narrower streets of Greenwich Village towards the Stonewall National Monument, the atmosphere shifts. It becomes more intimate, more intense, and deeply resonant. The sense of history is palpable. This is where the cheers often feel the loudest and the connection between the marchers and the crowd feels most profound.
Viewing Advice: This is, without question, the most meaningful and popular place to watch the parade. Consequently, it is the most crowded. To get a spot here, you must be committed. Arrive by 8:00 AM at the absolute latest, and be prepared to hold your ground for hours. The experience, however, is powerful and unparalleled.
Logistics: Once you’re in a spot here, you’re in for the duration. The narrow streets and dense crowds make movement nearly impossible. Pack everything you need for several hours. There are fewer commercial establishments directly on these streets, so plan accordingly.

Pro-Tip: For a less obstructed view, look for spots near intersections on the opposite side of the street from the parade's direction of travel. Crowd density is often slightly lower there as people tend to cluster on the inside of the turns.
The Grand Finale: Finishing Near 15th Street and 7th Avenue (The Dispersal Zone)
The Vibe: The energy at the end of the route is one of joyous exhaustion and collective accomplishment. Marchers, who have been on their feet for hours, are often interacting more freely with the crowd as they complete their long journey. It’s less of a formal procession and more of a massive, mobile street party winding down into its final, celebratory moments.
Viewing Advice: This is by far the least crowded section of the route, making it an excellent choice for families, those with accessibility concerns, or anyone who couldn't arrive at the crack of dawn. You’ll still see every float and group, but with significantly more room to breathe and move.
Logistics: This area offers the easiest exit strategy. With the parade dispersing, streets begin to reopen sooner, and access to multiple subway lines on 7th Avenue (like the 1, 2, and 3 trains) makes for a quicker trip home or to your next destination.
Your Strategic Viewing Plan: 7 Essential Tips for the Best Experience
A little strategy goes a long way in a crowd of millions. Follow these essential tips to ensure your day is smooth, safe, and spectacular.
Arrive Early, Then Arrive Earlier: This cannot be overstated. For a front-row spot anywhere south of 23rd Street, 9:00 AM is a good baseline. For a coveted spot in the West Village or near Christopher Street, you need to be thinking 7:30 AM or 8:00 AM. The most dedicated spectators arrive with breakfast and a blanket.
Pack Your Urban Survival Kit: You are essentially setting up a base camp for the day. Your kit should include: a large, reusable water bottle (staying hydrated is non-negotiable), high-SPF sunscreen, a portable phone charger, and plenty of snacks. Relying on local bodegas is a rookie mistake; they will be overwhelmed and may run out of supplies.
Master Public Transit: Driving is not an option. Street closures are extensive and begin in the early morning. The subway is your only logical choice. Use lines that run along 6th Avenue (B, D, F, M) or Lexington Avenue (4, 5, 6) and walk west. Avoid stations directly on the route, as they will be dangerously crowded.
Choose Your Vibe, Not Just a Spot: Before you pick a location, decide what kind of experience you want. Do you crave the high-energy launch? The massive midtown spectacle? The deeply emotional historic heart? Or the relaxed, celebratory finish? Matching the location to your desired vibe is the secret to a perfect day.
Stay Connected (But Have a Backup): With millions of people in one area, cell service can be notoriously unreliable. While you should keep your phone charged, don’t depend on it for communication. Use a buddy system, and if you’re with a group, establish a clear, physical meeting point and time in case you get separated.
Prioritize Accessibility: Organizers are continually working to make the event more accessible. Check the official NYC Pride website in the weeks leading up to the parade for detailed information on designated viewing areas for people with disabilities. These locations offer better sightlines and a less congested environment.
Embrace the Virtual Experience: If you can't make it in person or prefer to avoid massive crowds, don't worry. The NYC Pride Parade is live-streamed across multiple platforms. You can catch all the action from the comfort of your home, a powerful option for those who want to participate from afar.
Pro-Tip: The blocks just after the parade turns off 5th Avenue onto 8th Street can be a strategic viewing sweet spot. The crowd thins slightly as it navigates the corner, offering a brief window for better photos and a bit more breathing room before it swells again towards Christopher Street.
Beyond the Sidelines: Documenting Your Day
The spirit of Pride is participation. Even as a spectator, you are a vital part of the event. Wear your brightest colors, create a supportive sign, and cheer loudly for the groups that resonate with you. Your energy is what fuels the marchers on their long walk.
For many, capturing the day is part of the experience. The vibrant colors, powerful emotions, and incredible stories of the pride parade New York make it a content creator's dream. If you're looking to capture and share the experience like a pro, preparation is everything. To elevate your storytelling, our The Travel Creator's Toolkit provides the essential checklists and guides to turn your passion into compelling content that does justice to this incredible event.

Planning the Perfect Pride Weekend in NYC
The parade is the magnificent centerpiece of a city-wide, month-long celebration. Pride Month in New York is packed with parties, cultural events, and community gatherings. Don’t limit your experience to just a few hours on a Sunday afternoon. Make it the anchor of an unforgettable weekend or a longer trip to the city.
Navigating the parade is just one piece of an unforgettable trip. To build a complete itinerary—from finding the best LGBTQ+-friendly hotels in Chelsea or Hell's Kitchen to exploring other iconic city sights that have shaped queer history—our comprehensive Travel Guide is the ultimate resource for planning your entire New York adventure. It helps you weave the parade into a broader, richer travel experience.
Your Mission: Experience Pride to the Fullest
You are now armed with the essential knowledge to navigate the pride parade New York not just as a spectator, but as an informed participant in a powerful celebration. You know the history that fuels the march, the unique vibe of each section of the route, and the practical strategies to make your day a resounding success. The parade is more than a route on a map; it's a journey through history, proof of resilience, and an explosion of pure joy.
So pick your spot, pack your survival kit, and get ready to experience the love, history, and unbreakable community of NYC Pride. Go with an open heart, a loud voice, and a solid plan.
Meta Data Suggestions:
SEO Meta Title: NYC Pride Parade Route Guide: Best Viewing Spots & Tips 2026
URL Slug: /nyc-pride-parade-route-essentials
SEO Meta Description: Your ultimate guide to the 2026 NYC Pride Parade. Discover the best viewing spots, route map, start times, and essential tips to navigate the crowds.
Don't Miss Out! Subscribe for Exclusive Content
Subscribe


Comments 0
No comments yet
Be the first to share your experience!
Dont Miss Out! Subscribe for Exclusive Content

San Francisco Cherry Blossoms: A Local's Guide to the Blooms

Halloween SF: Haunts Without Horrors

SF Festivals: 7 Must-See Lineups

Christmas SF: Lights & Wharf Wonders

SF Pride: 6 Route & Party Hacks

Chinese New Year SF: Parade Essentials
Food & Water Safety Abroad: How to Avoid Getting Sick
TrekGuider @trekguider
There’s a moment on every trip where the true magic happens: the first bite of a dish you can’t pronounce from a street cart buzzing with locals, the refreshing sip of a regional drink, the discovery of a flavor that will forever define a place in your memory. Food is culture, connection, and the fastest way to the heart of a destination. And that’s the traveler’s paradox, isn’t it? The very experiences that promise the most profound connection also carry a potent, gut-wrenching risk.
One bad meal or a single sip of contaminated water can derail your entire adventure, swapping days of discovery for days spent locked in a hotel room. This fear is agitated by horror stories from fellow travelers and the sheer unpredictability of an unfamiliar environment. It's a valid concern—traveler's diarrhea is unequivocally the most common travel-related illness, affecting up to 80% of international travelers depending on the destination. The fear of getting sick can make you timid, causing you to stick to bland, "safe" foods and miss out on the rich mix of flavors your destination has to offer. It can rob you of the very experiences you traveled so far to find.

But it doesn't have to be this way. This guide is your solution, a definitive and practical playbook for mastering food and water safety abroad. We’ve synthesized actionable advice from the world’s leading health organizations, including the Centers for Disease Control and Prevention (CDC) and the World Health Organization (WHO), to empower you to eat boldly and drink safely. This isn’t a list of things to fear; it’s a set of simple, memorable rules for prevention, identification, and, if necessary, management. This is a critical deep-dive into a core pillar of preparedness we cover in The Ultimate Guide to Travel Safety: A 2026 Playbook, designed to give you the confidence to dive fork-first into the heart of a culture.
The Golden Rule of Food and Water Safety: "Boil It, Cook It, Peel It, or Forget It"
If you remember only one thing from this guide, make it this simple, five-word mantra. Promoted by the CDC and other global health bodies, this single rule is a powerful and easy-to-use filter for nearly every culinary decision you'll make on the road. It’s the foundation of your entire food and water safety strategy.
Boil It: Your Safest Bet for Liquids
Pathogens like bacteria, viruses, and parasites are killed by heat. This makes boiling the most effective method for purifying liquids.
Examples: Drinking water that has been brought to a vigorous, rolling boil for at least one full minute. Hot beverages like tea or coffee that are served steaming hot are also generally safe. Any milk products you consume should be confirmed to be pasteurized or have been boiled.
Cook It: The Power of Heat
Thoroughly cooking food kills the harmful microorganisms that cause illness. The key is to ensure it is cooked all the way through and served hot.
Examples: Meat, poultry, or seafood that is well-cooked (not rare or raw) and served steaming hot to the touch. This is especially crucial for street food; dishes that are cooked fresh to order in front of you are a much safer bet than those that have been sitting out.
Peel It: Nature’s Own Packaging
For raw fruits and vegetables, the contamination is almost always on the outside surface. By peeling it yourself with clean hands, you remove the risk.
Examples: Fruits with a thick, peelable skin like bananas, oranges, mangoes, and avocados are your safest and best friends for a healthy snack. Similarly, vegetables you can peel, such as cucumbers, are also a great option.
Forget It: When in Doubt, Go Without
This is the most critical and sometimes most difficult part of the rule to follow. It requires discipline, but it’s your ultimate defense. If an item of food or drink doesn't meet one of the three criteria above, you must skip it.
Examples: Tap water and ice cubes made from tap water are the biggest culprits. Salads and raw leafy greens like lettuce are high-risk because they are difficult to clean thoroughly and may have been washed in contaminated water. You should also avoid fruits that cannot be peeled, such as grapes and berries, and any unpasteurized dairy products like milk or cheese. Finally, be very wary of any food served at room temperature, such as from a buffet.
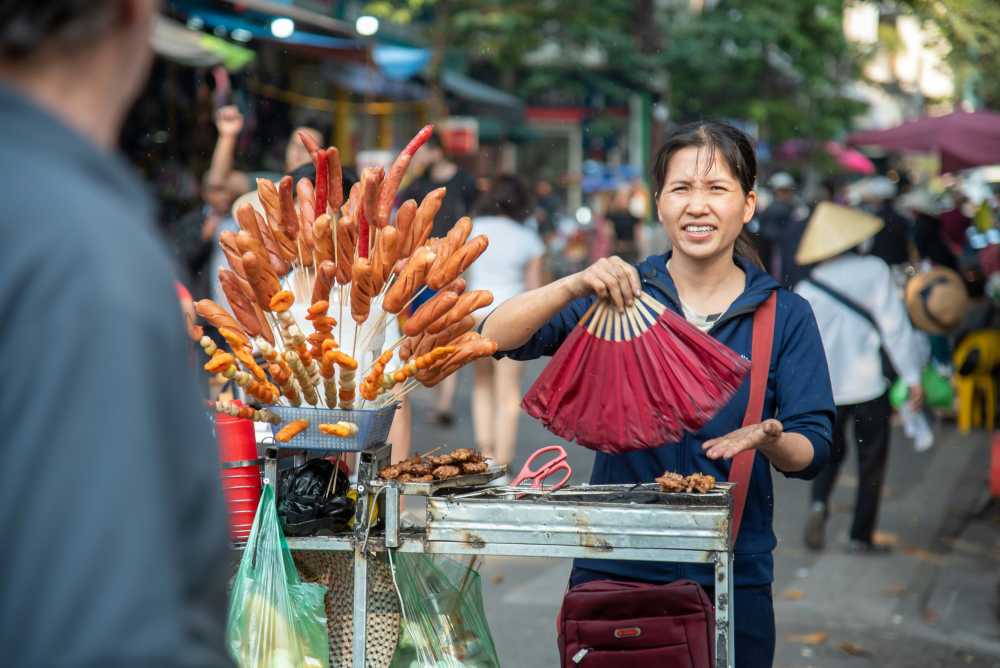
Navigating the Streets: A Visual Guide to Spotting Unsafe Food
Street food is often the soul of a city's cuisine, but not all vendors are created equal. Your eyes are your best tool for vetting a stall. Before you order, take thirty seconds to perform a quick visual inspection. Look for these five clear signs of a safe or unsafe operation.
Poor General Cleanliness: This is the most obvious indicator. Red flags include dirty workstations with unwiped spills, visible food waste, rubbish on the ground, and the presence of pests like flies or wasps. The vendor themselves should also appear clean, with tidy clothes and hands.
Improper Food Temperatures: Food left in the "danger zone" (room temperature) is a breeding ground for bacteria. Avoid stalls where cooked food, especially meat, is sitting out in large trays. The safest option is always food that is cooked fresh to order, right in front of you. Hot food should be visibly steaming.
Obvious Cross-Contamination: Watch how the vendor handles ingredients. A major red flag is using the same cutting board, knife, or unwashed hands to handle raw meat and then touch ready-to-eat items like bread, salad, or cooked food.
Use of Contaminated Water: Look at the vendor’s water source. Rinsing dishes, utensils, or vegetables in a single bucket of murky, stagnant water is a sign of a high-risk operation. Likewise, avoid ice in your drinks unless you can confirm it was made from purified water (commercially bagged ice is usually a safe sign).
Lack of a Crowd (Especially Locals): A busy stall with a long line, particularly of local residents, is one of the best indicators of a trusted and safe food source. High customer turnover means the food is fresh and hasn't been sitting out for long. An empty stall is often empty for a reason.
Pro-Tip: Make "follow the locals" your street food mantra. A long line of residents is a walking, talking five-star review of a vendor's quality and safety. It's the most reliable seal of approval you can find.
Securing Your Water Supply: A Deep Dive into Hydration and Purification
Staying hydrated is non-negotiable for your health and energy while traveling, but assuming tap water is safe is one of the most common and dangerous mistakes a traveler can make. Here’s how to ensure every sip you take is safe.
Identifying Safe and Unsafe Drinking Water Sources
The CDC and WHO have clear guidelines. Unless you are in a country with a known, highly-developed sanitation system, you should assume all tap water is unsafe.
Safest Sources: Commercially bottled water in a factory-sealed, tamper-proof container is your most reliable option. Carbonated water is even safer, as a broken seal is immediately obvious. The second safest source is water that you have personally brought to a rolling boil for at least one minute.
Unsafe Sources to Avoid: Tap water, well water, ice made from tap water, fountain drinks mixed with tap water, and even water from clear mountain streams (which can contain germs) should all be avoided unless they have been purified.
Your Purification Playbook: The Top 3 Methods
When bottled or boiled water isn't available, you need a backup plan. Here are the top three recommended purification methods.
Boiling (The Gold Standard): This is consistently ranked by the CDC and WHO as the single most effective method. It kills all known disease-causing microorganisms, including viruses, bacteria, and parasites. Simply bring clear water to a rolling boil for 1 minute (or 3 minutes at elevations above 6,500 feet / 2,000 meters).
Filtration: A high-quality portable water filter is highly effective at removing bacteria and protozoan parasites like Giardia and Cryptosporidium. Look for a filter with an absolute pore size of 1 micron or smaller. The main limitation is that most portable filters do not remove viruses, so in high-risk areas, the CDC recommends following filtration with chemical disinfection.
Chemical Disinfection: Chlorine, iodine, or chlorine dioxide tablets/drops are a lightweight and easy way to kill viruses and bacteria. However, they are not consistently effective against the parasite Cryptosporidium and require a contact time of at least 30 minutes.
For in-depth planning on what gear to pack for every type of trip, from water filters to first-aid supplies, our all-encompassing Travel Guide is the only resource you'll ever need.
Damage Control: How to Manage Traveler's Diarrhea
But let’s be realistic: even the most diligent traveler can have a bad day. When that happens, knowing exactly what to do—and what not to do—can be the difference between a 24-hour nuisance and a trip-ruining ordeal. This is the damage control phase of your food and water safety plan.
The First and Most Critical Step: Oral Rehydration
According to travel medicine doctors, dehydration is the single most likely and dangerous complication of traveler's diarrhea. Replacing lost fluids and electrolytes is your absolute first priority.
Method: The best way to rehydrate is with a dedicated Oral Rehydration Solution (ORS), which comes in packets of salts and sugars that you mix with boiled or bottled water. In a pinch, sports drinks or clear soups can also be used.
Symptomatic Treatment for Mild to Moderate Cases
If the diarrhea is tolerable and not accompanied by a high fever or blood, over-the-counter medications can provide relief and help you get through a travel day.
Medications: An antimotility agent like Loperamide (the active ingredient in Imodium, a top pharmacist-recommended brand) can reduce the frequency of bowel movements. Bismuth Subsalicylate (found in Pepto-Bismol, another pharmacist favorite) can also help decrease the frequency and shorten the duration of the illness.
When to Use Standby Antibiotics (For Severe Cases)
If diarrhea is distressing, incapacitating, or contains blood or mucus, a prescribed antibiotic may be necessary.
Method: Before you travel, speak with your doctor or a travel medicine clinic. For travelers heading to high-risk destinations, they may provide a prescription for a standby antibiotic, such as Azithromycin, to carry with you. A single dose is often highly effective at treating severe cases.
Pro-Tip: Within your main travel first-aid kit, create a dedicated "Digestive Distress" module. Keep it in a separate, clearly-labeled zip-top bag containing a few packets of Oral Rehydration Salts, a strip of Loperamide, and a few antacids. This way, when you need it, you won't have to rummage through your entire kit.

Ready to Pack Like a Pro?
A smart food and water safety strategy is just one piece of your pre-trip preparation. To ensure you don't overlook a single essential item—from documents and finances to clothing and medical supplies—a master checklist is your most powerful tool. Our comprehensive, free checklist has you covered for every stage of your journey.
Download Your Free International Travel Checklist Now!
Food and Water Safety FAQs
A prepared mind is a safe mind. Here are expert answers to common questions that take your preparedness to the next level.
1. Besides traveler's diarrhea, what are the most common travel illnesses?
While traveler's diarrhea is number one, the CDC reports that other common issues include acute respiratory infections (like influenza or COVID-19, often acquired in transit), vector-borne fevers like Dengue and Malaria in tropical regions, and other food-borne illnesses like Hepatitis A and Typhoid Fever. Skin conditions from insect bites are also extremely common.
2. Is it safe to eat at a restaurant if I'm worried about street food?
Generally, restaurants can be safer, but the same principles apply. A busy restaurant full of locals is a great sign. Be cautious with the same high-risk items: salads, unpeeled fruits, and tap water or ice. If you want to find trusted, local-approved gems, explore the TrekGuider platform, where travel creators often share their own curated guides to safe and authentic eats.
3. Should I carry a standby antibiotic in my first-aid kit?
This is a question for your doctor or a travel medicine clinic. For travelers heading to high-risk destinations where severe traveler's diarrhea is common, many doctors will provide a prescription for a standby antibiotic like Azithromycin. It’s not for mild cases but can significantly shorten the duration of a severe bout of illness. Discuss your itinerary with your doctor to see if this is right for you.
Eat Boldly, Travel Well
The world of food is a world of incredible diversity and connection, and it deserves to be explored with an open mind and a curious palate. The goal of mastering food and water safety is not to build a wall of fear that separates you from authentic experiences. It is about building a foundation of knowledge that gives you the freedom to be adventurous. By internalizing the golden rule of "Boil it, cook it, peel it, or forget it," learning to trust your own visual assessment of a food stall, and knowing exactly what to do if you get sick, you replace anxiety with empowerment. You are now equipped with the skills to navigate the world's most exciting cuisines with confidence, ensuring your focus remains on the flavor, connection, and joy that every journey promises. Go explore, eat boldly, and travel well.

Meta Data Suggestions:
SEO Meta Title (Under 60 characters): Food & Water Safety Abroad: How to Avoid Getting Sick
URL Slug: food-water-safety-abroad
SEO Meta Description (Under 155 characters): Avoid traveler's diarrhea with our expert guide to food and water safety abroad. Learn the golden rules for eating street food, purifying water, and staying healthy.
Don't Miss Out! Subscribe for Exclusive Content
SubscribeComments 0
No comments yet
Be the first to share your experience!
Dont Miss Out! Subscribe for Exclusive Content

Chicago Beer Fests: Top 6 Tastings

Ultimate USA Holidays Guide: Top Picks

FTC Affiliate Disclosure Essentials: Stay Compliant as a Travel Creator

Essential Affiliate Tools: From Tracking to Full Optimization

Booking.com Affiliate Program Review: Pros, Cons, and Earnings Potential

Decoding Affiliate Commission Rates: Benchmarks for Travel Creators
The Ultimate Guide to Solo Female Travel (15 Essential Tips)
TrekGuider @trekguider
The world of travel is being redrawn by its most powerful new explorers: women journeying on their own. This isn't just a trend; it's a seismic cultural shift. With the global solo travel market projected to surge past $1.5 trillion by 2033, and women making up a staggering 84% of that market, one thing is clear: the solo female traveler is here to stay. This movement is powered by a desire for something more than a vacation. According to recent reports, it's about pursuing profound personal growth (68%) and the unparalleled freedom that only comes from navigating the world on your own terms.
If you're reading this, you likely feel that same pull. And while the ambition is thrilling, it's often shadowed by valid questions about safety, logistics, and loneliness. This guide is here to replace that apprehension with confident, decisive action. These are the essential solo female travel tips—a comprehensive roadmap designed to take you from daydream to departure with clarity and courage.
The Foundation - Safety & Mindset
Before you book a flight or pack a bag, the most important part of your journey begins. It's the internal work of building a resilient mindset, understanding the emotional landscape of solo travel, and grounding yourself in smart, practical safety strategies.
Tip 1: Master Situational Awareness to Travel Confidently
The single biggest concern for women traveling solo is safety. A recent study found that 66% of solo female travelers worry about their personal safety, and it's a valid, intelligent concern. But here is the empowering reality: the same study revealed that while 25% have felt they were in a dangerous situation, a mere 1% were ultimately the victim of a crime. This tells us that women are overwhelmingly capable and successful at navigating the world safely.
The key is trading abstract fear for concrete skills, and situational awareness is your most powerful tool. It’s not about paranoia; it’s about presence. It means understanding how to recognize and avoid common tourist scams, from the "friendship bracelet" ploy near the Sacré-Cœur to the broken taxi meter at a foreign airport. It’s knowing how to carry yourself with purpose and confidence, even when you’re lost, and making conscious, clear-headed decisions about where you go, especially after dark.
Most powerfully, the data reveals a direct correlation between experience and anxiety. While a significant 77% of women who have taken fewer than six solo trips worry about safety, that number drops to just 55% for those with over ten trips under their belt. The act of traveling solo is, in itself, the most potent antidote to the fear of it. Each challenge overcome recalibrates your personal risk assessment, replacing media-fueled fear with managed awareness built on real-world evidence of your own competence.

For a complete tactical breakdown, get your free Solo Female Travel Safety Guide and read our in-depth article, The 7 Solo Female Travel Safety Rules You Can't Ignore.
Tip 2: Embrace the Journey of Personal Growth
Why do you really want to travel alone? For the vast majority of women, the answer goes far beyond seeing new sights. It’s an investment in the self. Solo travel is a real-world masterclass in capability, forcing you to become your own navigator, problem-solver, and chief decision-maker. Every challenge overcome—from successfully navigating a foreign subway system to ordering a meal in a new language—builds a powerful and tangible sense of radical self-reliance.
This journey strips away the familiar roles you play at home—employee, partner, daughter, friend—and allows you to connect with your authentic self, free from the expectations of others. You'll develop a profound resilience, learning to view setbacks not as crises but as puzzles to be solved. As Alice Teacake of Teacake Travels puts it, "it's through leaving our comfort zone and facing challenges that we become far more adaptable, quick-thinking, stronger and wiser." This isn’t just about feeling good; it's about fundamental personal development. The confidence you build on the road doesn’t stay in your suitcase; it comes home with you, permanently altering how you see yourself and your capabilities in the world.
To explore the transformative "why" behind the journey, read our inspirational guide: The 5 Unexpected Benefits of Traveling by Yourself.
Tip 3: Learn the Art of Confidently Dining Alone
For many aspiring solo travelers, one of the most daunting thoughts isn't about navigating a new city, but about a simple, seemingly trivial act: eating a meal alone in a restaurant. This social anxiety is incredibly common, but it's an obstacle that can be transformed from a dreaded necessity into one of the most pleasant and empowering rituals of your trip. The key is to be strategic.
Start by choosing your venue wisely. Actively avoid establishments that are overtly formal or marketed towards romantic couples. Instead, opt for casual bistros, lively cafes with outdoor seating perfect for people-watching, or restaurants known for their counter seating. Sitting at the bar is the universally accepted and most comfortable spot for a solo diner. It eliminates the feeling of occupying an empty table and often places you in a more dynamic, social environment where you can chat with the bartender or simply observe the action in comfortable anonymity.

Bringing a "prop"—a travel journal to record your day's adventures, a good book, or a map to plan the next day—gives you a purposeful focus during any lulls. It signals to yourself and others that you are content and engaged in your own company. Dining during off-peak hours can also significantly reduce anxiety, as the restaurant will be less chaotic. With a little practice, you'll find that a table for one is a front-row seat to the world.
For a full menu of confidence-building tactics, see our guide: 5 Ways to Confidently Eat Alone While Traveling.
Tip 4: Build Your Tribe on the Road (Safely)
Traveling solo doesn’t have to mean traveling lonely. One of the most enriching parts of the experience is connecting with other people, both locals and fellow travelers, on your own terms. The secret is to create opportunities for interaction in safe, structured, and natural ways.
Your choice of accommodation is the easiest place to start. Modern hostels are designed as social hubs, with common areas, kitchens, and organized events like group dinners or walking tours. Even if you book a private room for security and comfort, simply spending time in the common lounge is a low-pressure way to strike up a conversation. Joining group activities is another guaranteed method. A free walking tour on your first day in a new city is a classic and highly effective strategy to get your bearings while chatting with other travelers. Consider a local cooking class, a surf lesson, or a day trip to a nearby attraction; the shared experience makes conversation feel natural and easy.
Technology can also be a powerful tool for safe connection. Vetted, women-focused Facebook groups like "Solo Female Travelers" or apps like BumbleBFF can help you meet up for a coffee or a meal. The goal isn't to fill every moment with social interaction, but to know how to find it when you want it, enriching your journey with shared experiences and new perspectives.
Learn how to create meaningful connections without compromising your safety in our guide: How to Meet People While Traveling Solo (Without Being Awkward).
Tip 5: Find Inspiration from Those Who've Gone Before
The path to your first solo trip is paved with the stories and advice of the millions of women who have gone before you. Tapping into this vast well of experience is one of the best ways to build confidence and gather practical, real-world advice. Solo female travel blogs are an invaluable resource, offering everything from packing lists for specific climates to warnings about local scams. Following a few trusted voices can make you feel like you have a savvy friend in your pocket.
For the Safety-Conscious Traveler: Kate McCulley of Adventurous Kate has built her platform on the mission to "teach women how to travel the world safely!" After being shipwrecked in Indonesia, she became a leading advocate for preparedness and risk management. Her blog is a go-to resource for practical, no-nonsense safety advice that empowers rather than scares.
For the Aspiring Digital Nomad: Kristin Addis of Be My Travel Muse specializes in off-the-beaten-path and adventure travel. She focuses on authentic experiences that foster personal growth and encourages women to find a travel style that is uniquely meaningful to them, making her a fantastic resource for anyone dreaming of a long-term travel lifestyle.
For the Part-Time Traveler: Amanda Williams of A Dangerous Business champions the idea that you don't have to quit your job to see the world. Her blog is perfect for those who want to integrate more travel into their existing life, offering realistic itineraries and practical tips for maximizing vacation time and traveling smarter, not just longer.
Discover your next favorite travel mentor in our curated list: Top 11 Solo Female Travel Blogs to Follow in 2026.
The Logistics - Planning Your Perfect Trip

With a confident mindset established, it’s time to dive into the exciting logistics of where you'll go and how you'll get there. This is where your dream trip starts to take tangible shape.
Tip 6: Choose Your First Destination Wisely
The choice of where to take that first solo trip is a monumental one; it sets the tone for every adventure to come. The ideal country for a first-timer combines a high of safety, a well-developed tourist infrastructure, and a culture that is welcoming to independent travelers. Using data from sources like the Global Peace Index (GPI) provides a solid, fact-based starting point for your research.
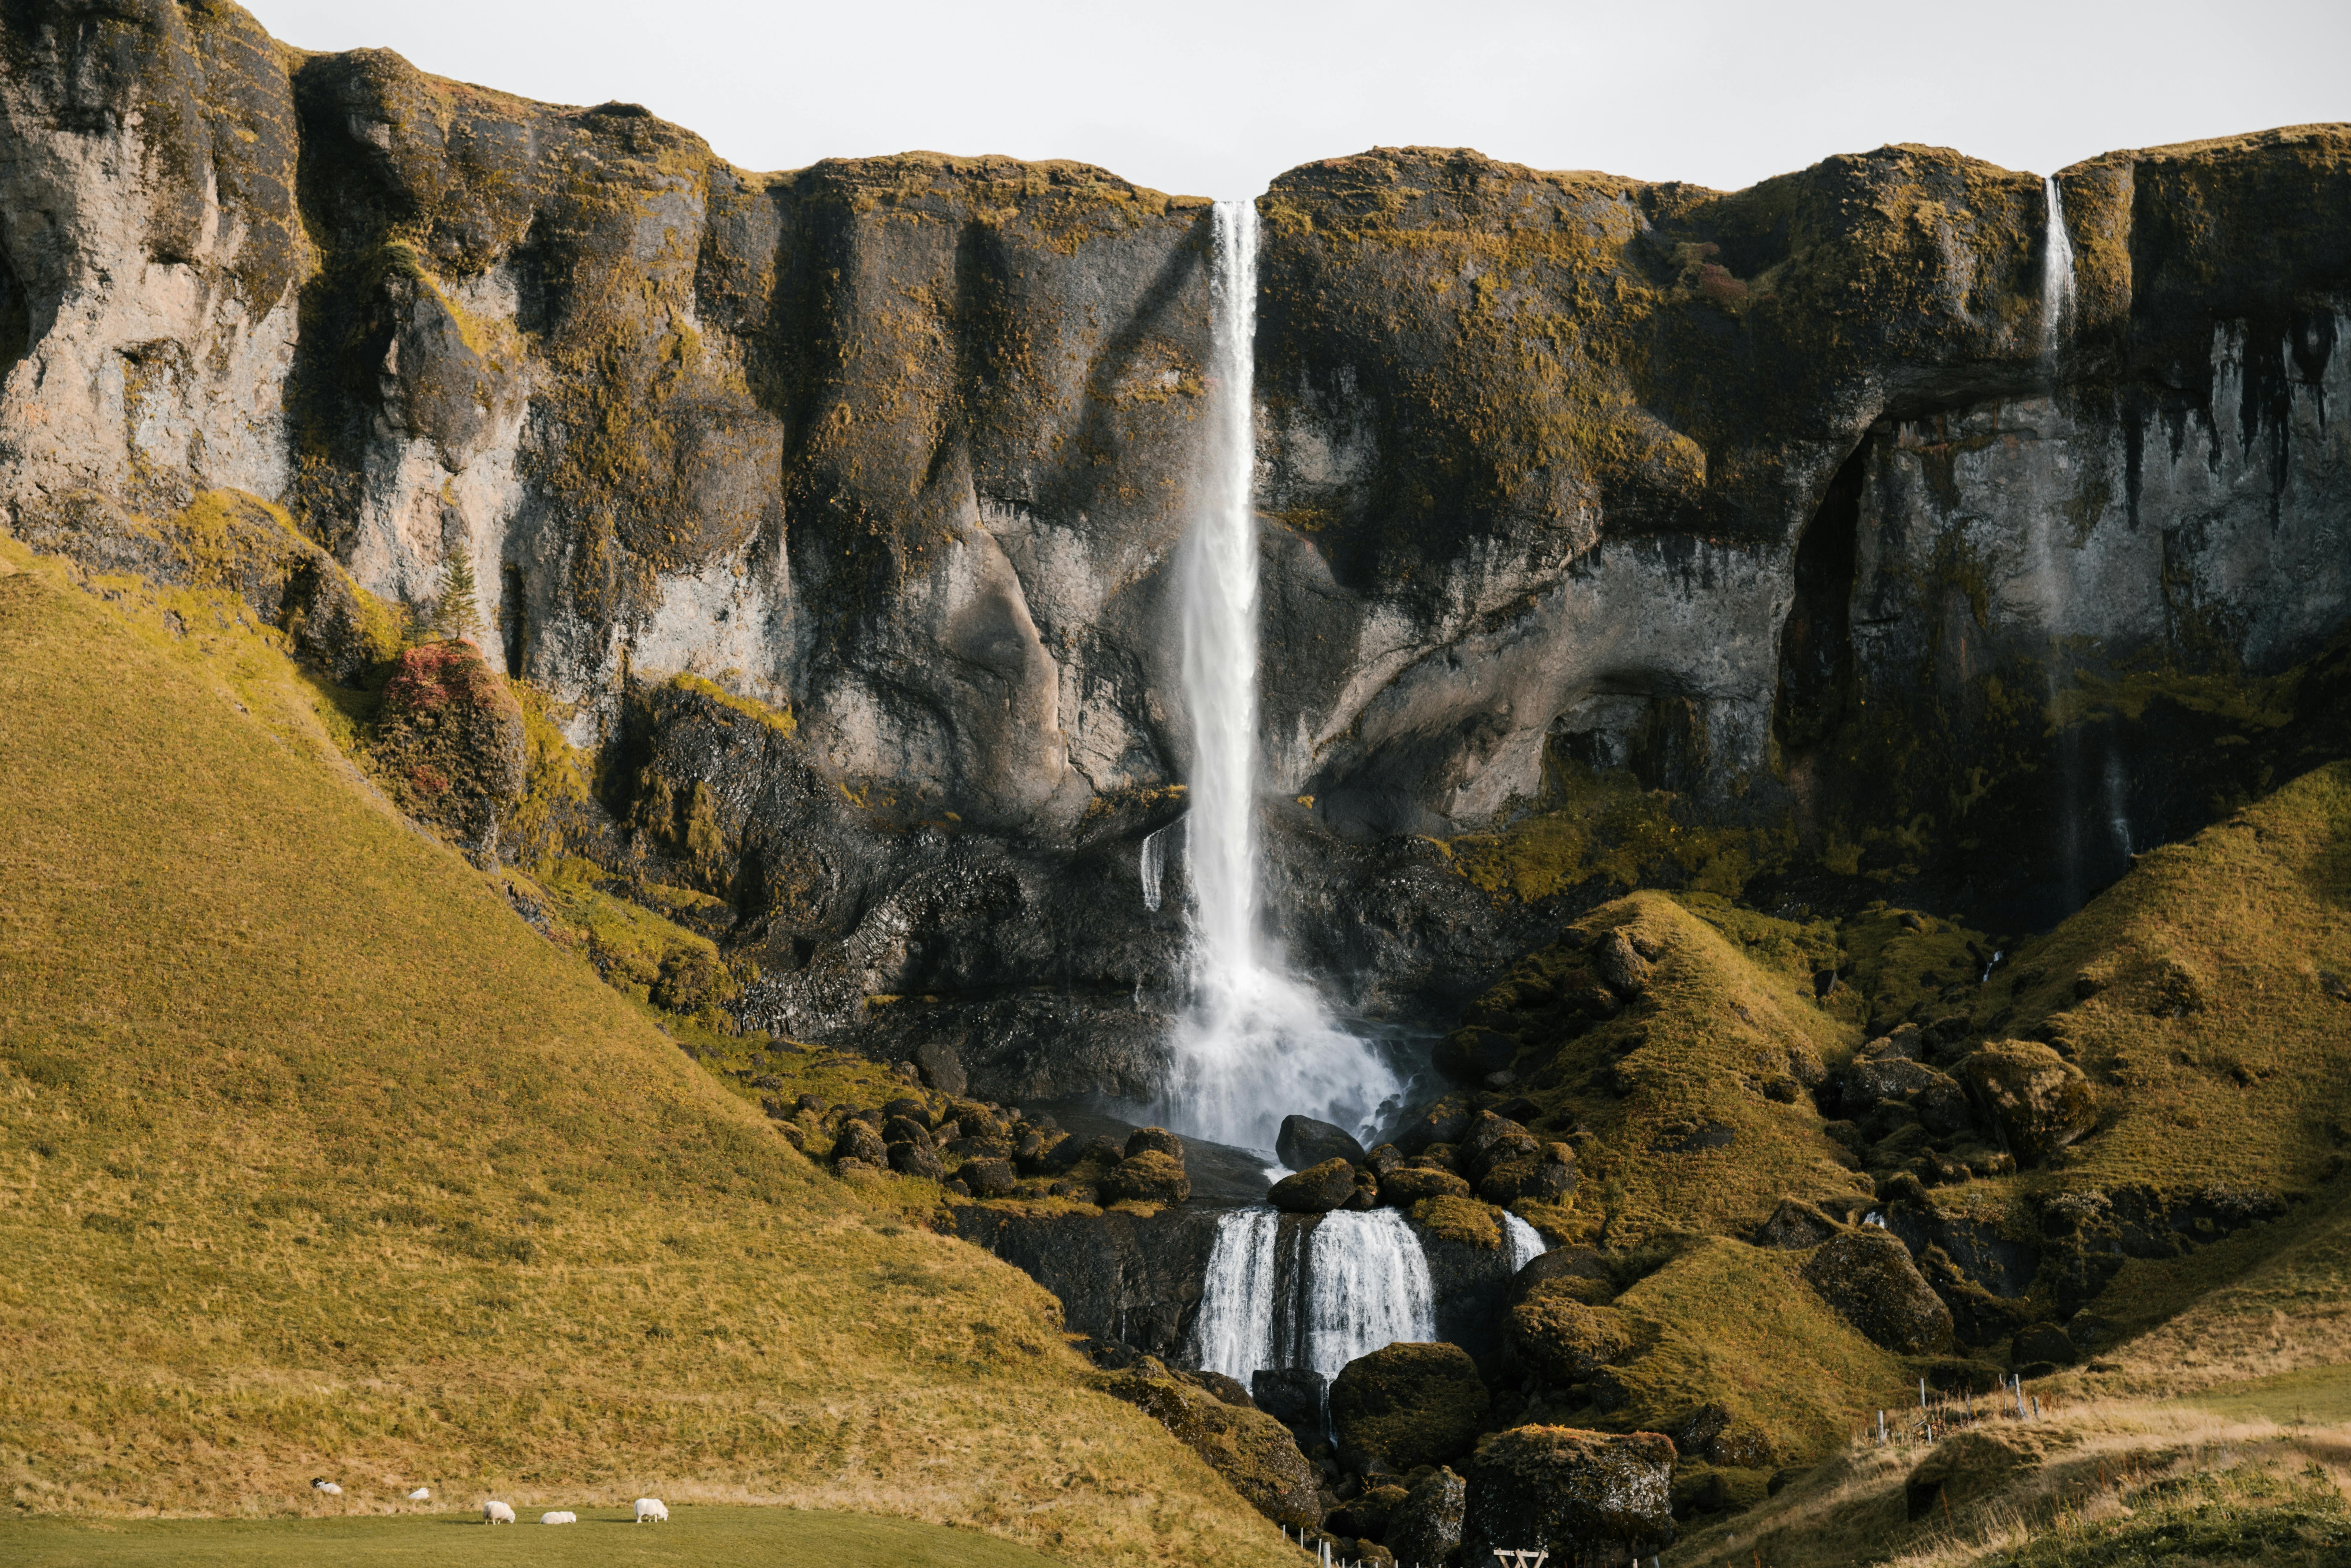
Iceland: Consistently ranked the most peaceful country in the world by the GPI, Iceland is an outstanding choice. It boasts an exceptionally low crime rate, a high degree of gender equality, and English is widely spoken. Its strong tourism infrastructure, with countless tours and easy-to-navigate routes like the Ring Road, makes it highly accessible for independent travelers seeking otherworldly landscapes.

Portugal: A consistent top-ten performer on the GPI, Portugal offers the safety and charm of Western Europe at a more affordable price point. Its cities are considered very safe, the locals are welcoming, and it has become a major hub for solo travelers and digital nomads, ensuring a vibrant community of like-minded people. Ready to explore its charming cities and stunning coastlines? Our Portugal Guide has everything you need to get started.

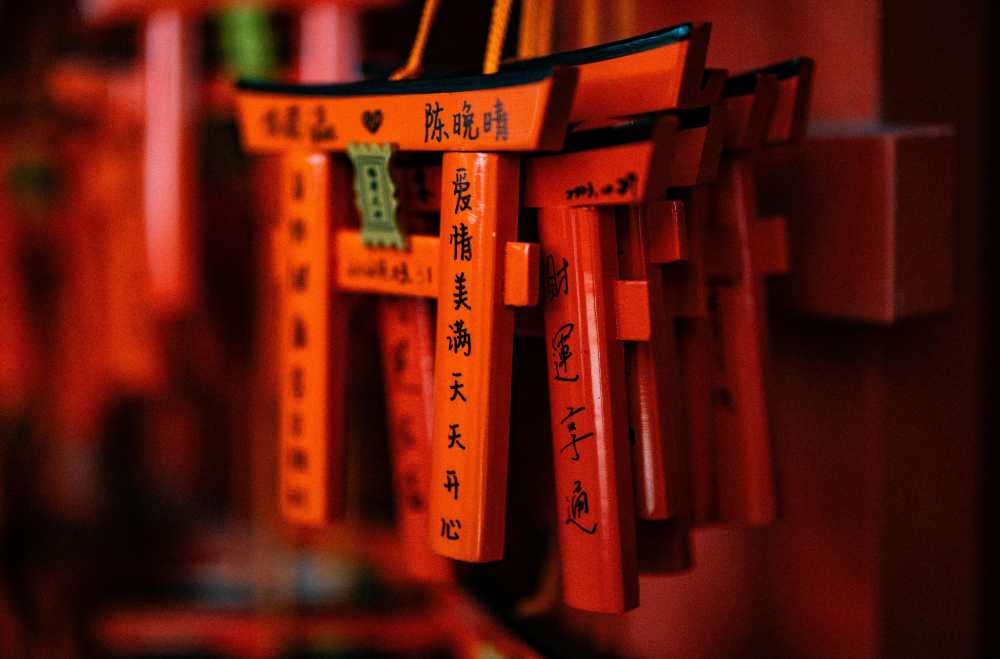
Japan: Renowned for its astonishingly low crime rates and a culture of deep respect for public order, Japan is one of the safest-feeling countries on earth. The efficiency of its public transport is legendary, and features like women-only subway cars during rush hour provide an added layer of comfort for solo female travelers seeking a unique and profound cultural immersion. Check out our detailed guide to Japan.
For a full list of beginner-friendly and secure destinations, check out our guide: The 10 Best Countries for a First Solo Trip in 2026.
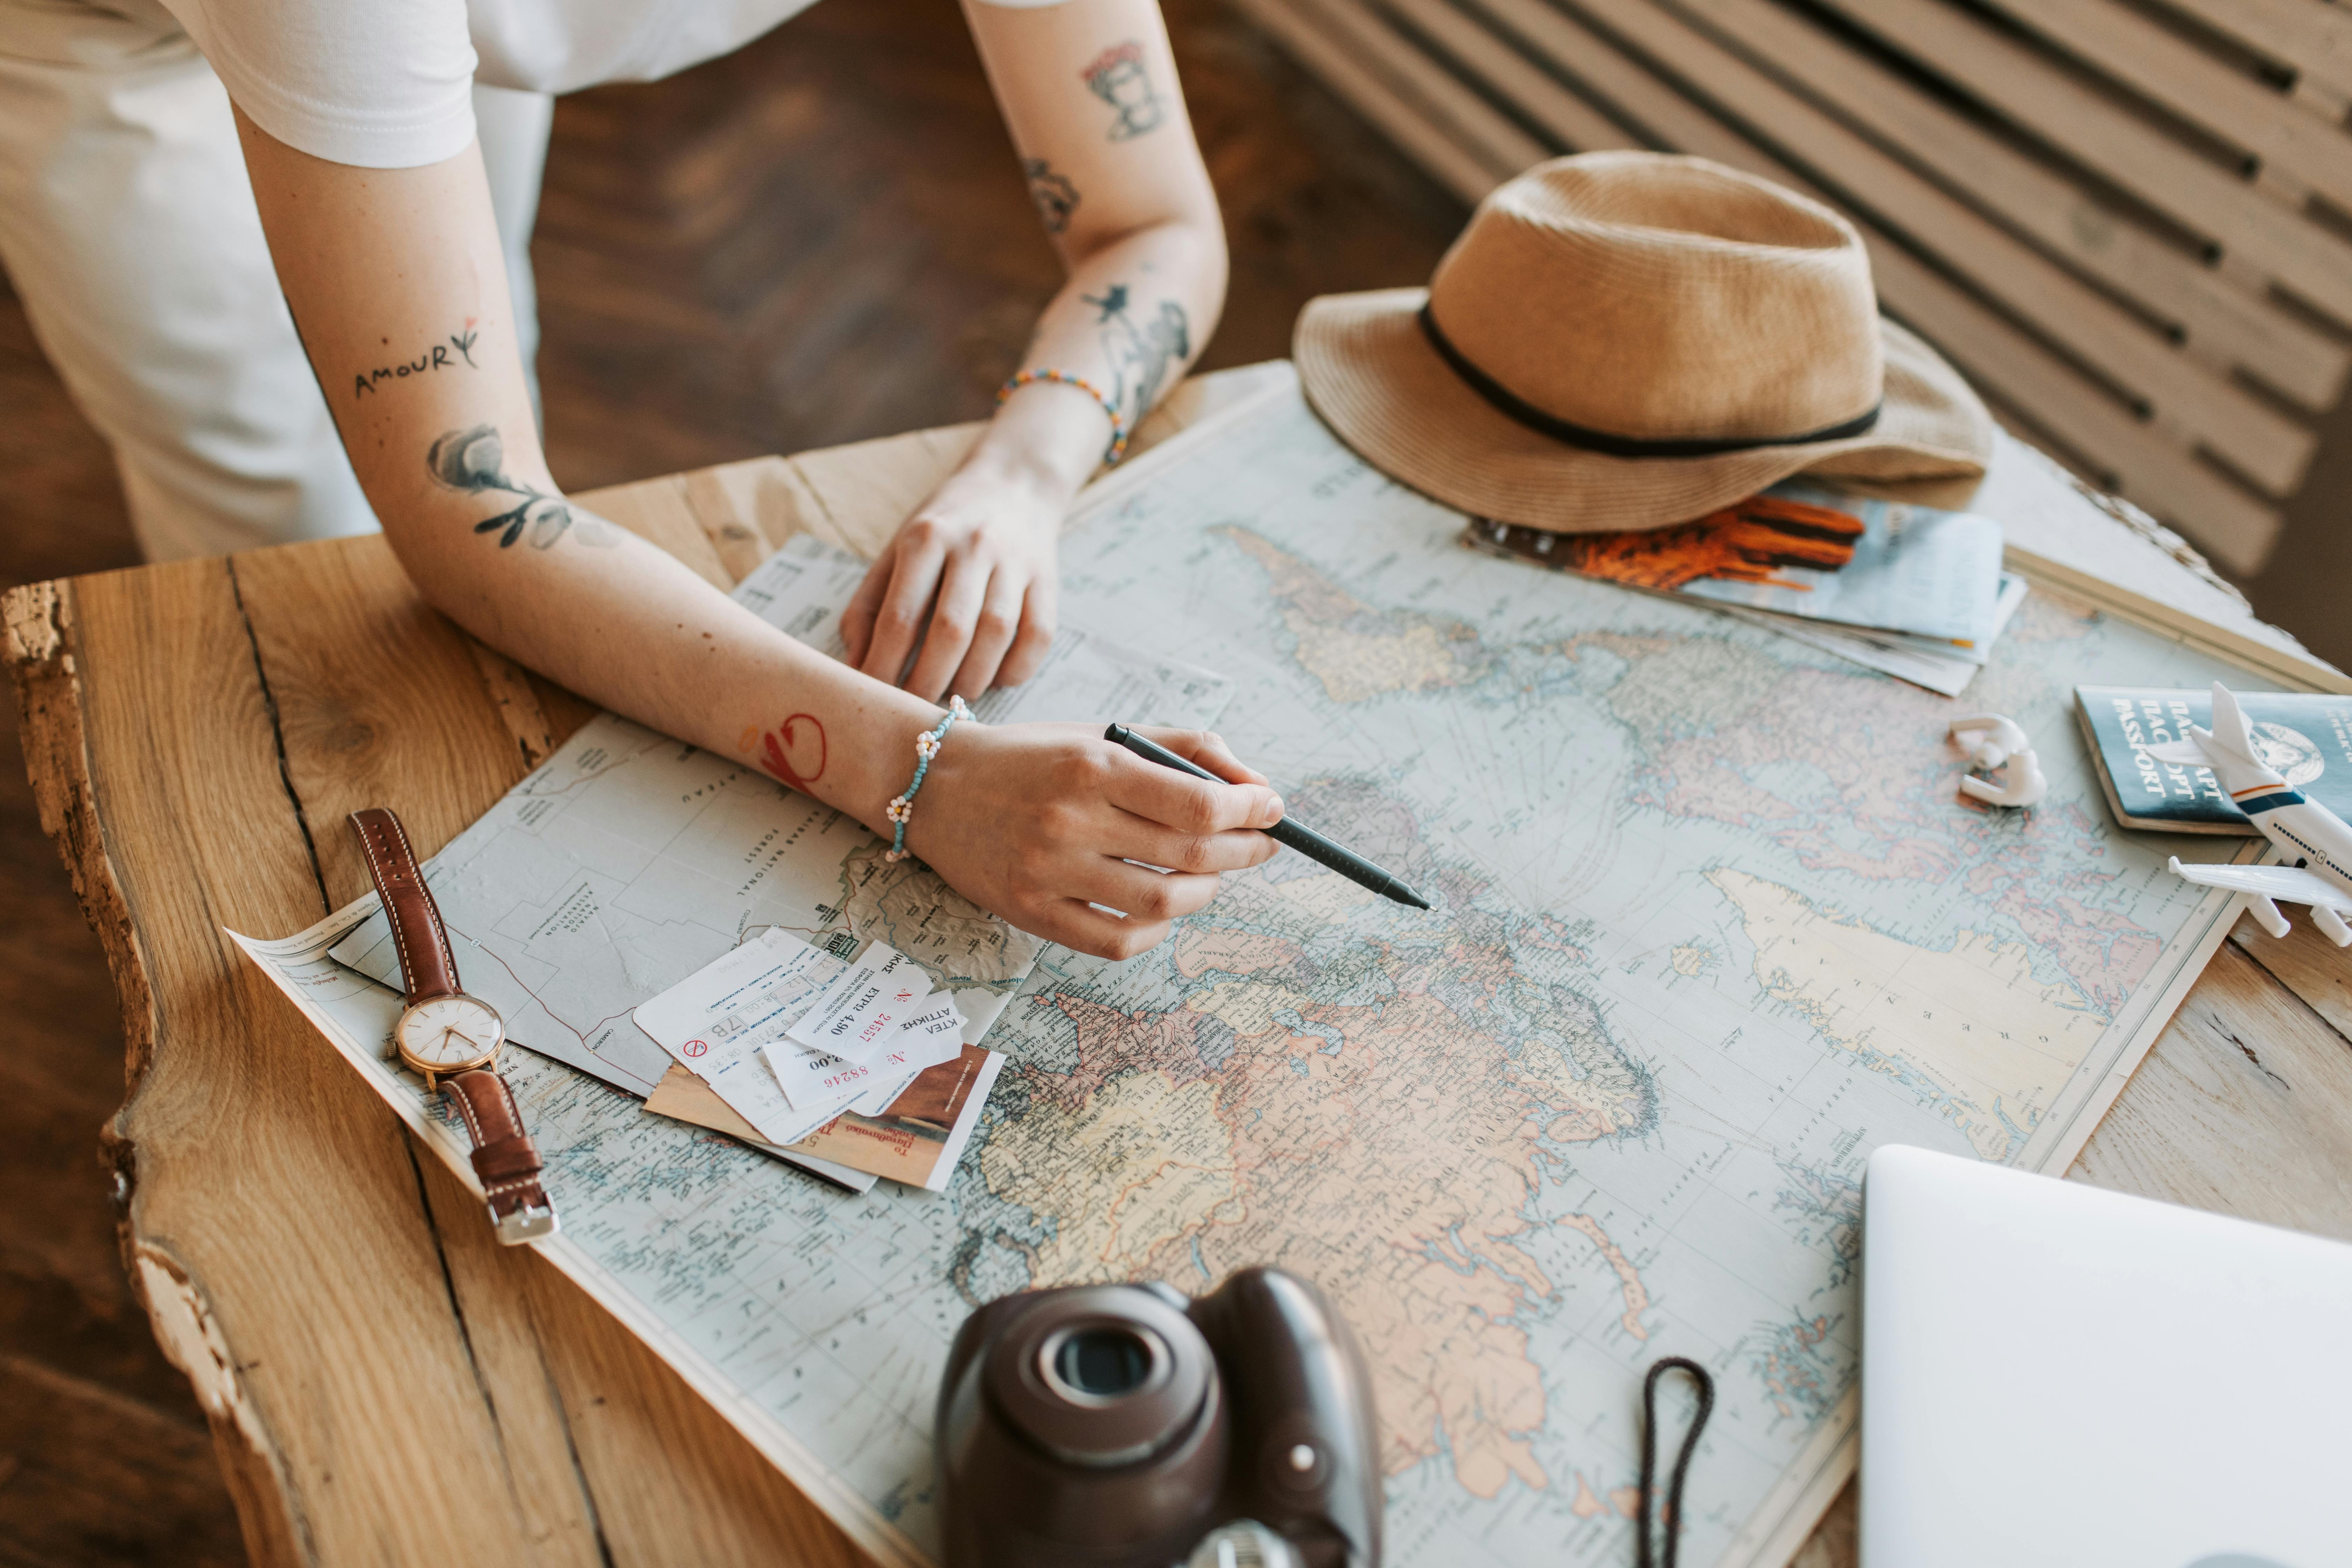
Tip 7: Craft a Realistic Budget You'll Actually Stick To
Financial planning is the bedrock of a stress-free solo journey. As the sole bearer of all costs, a strategic approach to budgeting isn't just advisable—it's essential. The process transforms a vague dream into an achievable financial goal. Start by researching the three largest costs: pre-trip essentials (visas, gear), long-haul transportation (flights), and a realistic average daily on-the-ground cost for your chosen destination. A daily budget in Prague, for example, can be less than half of what you'd spend in Paris, primarily due to lodging and food costs.
Create a detailed spreadsheet breaking down all expenses into specific categories: Pre-Trip Costs, International Transport, Daily Lodging, Daily Food, Daily Activities, and Local Transport. This gives you a clear picture of where your money is going and identifies areas where you can save. Once you have a total, work backward to set a monthly savings target and automate the transfer to a dedicated, high-yield savings account.
The most critical step? Incorporate a contingency fund. No budget is perfect, and travel is full of unexpected opportunities and challenges. Add a buffer of 15-20% to your total estimated cost. This fund is your safety net for emergencies, unexpected fees, or the freedom to say "yes" to a spontaneous, can't-miss experience without financial guilt.

For a step-by-step walkthrough and downloadable templates, see our complete guide: How to Make a Solo Travel Budget (That You'll Actually Keep).
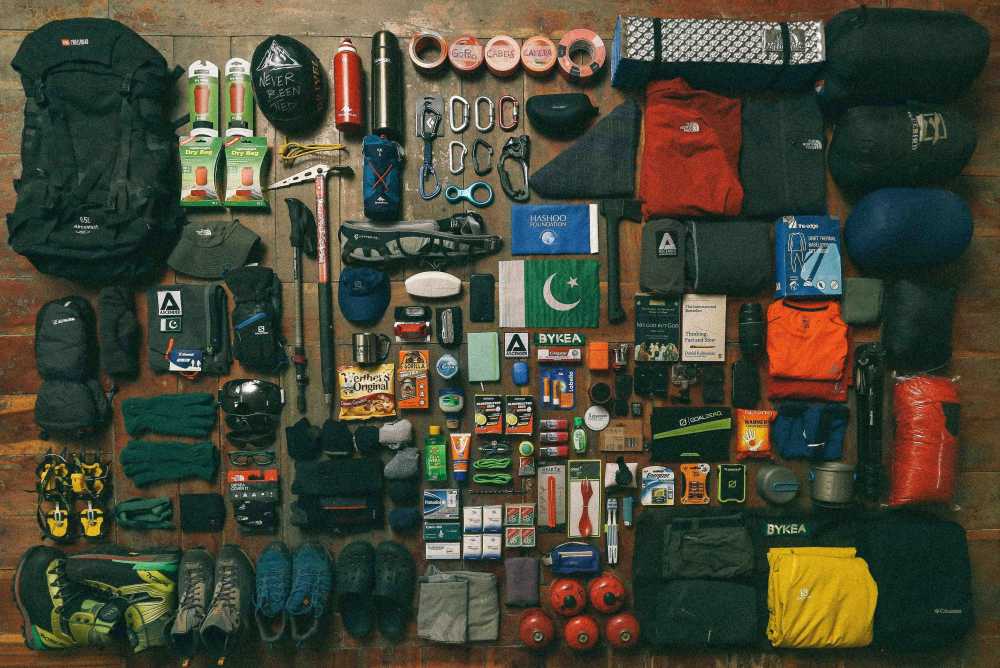
Tip 8: Pack Light, Travel Free
For a solo traveler, mastering the art of minimalist packing is a superpower. Traveling with only a carry-on-sized bag enhances mobility, saves you money on baggage fees, and increases security by keeping your belongings with you at all times. It’s the ultimate form of travel freedom, allowing you to navigate crowded train stations and cobblestone streets with ease. The philosophy is simple: pack for one week and plan to do laundry once.
The key to a minimalist wardrobe is versatility. A merino wool t-shirt is a traveler's miracle fabric; it regulates temperature, wicks moisture, and is naturally antimicrobial, meaning you can wear it multiple times between washes. A large, high-quality scarf or sarong is the ultimate multi-tool, functioning as an accessory, a wrap for a chilly plane, a head covering for religious sites, or a picnic blanket. Solid toiletries—like shampoo bars and conditioner bars—are a game-changer, eliminating the worry of liquid spills and airport security rules. By choosing every item with intention and focusing on multi-use pieces, you can easily fit everything you need for a 10-day trip into a single, liberating bag.
Get the complete checklist and strategy in our ultimate guide: The Minimalist Solo Travel Packing List: A Complete Guide.
Tip 9: Explore Europe Like a Pro
Europe is a classic and incredibly rewarding destination for solo female travelers, thanks to its breathtaking diversity, high levels of safety, and excellent transportation networks. Choosing how to get from country to country is a key part of planning your adventure, with each option offering a different balance of cost, speed, and experience.
By Train: The quintessential European experience. Traveling by rail pass offers scenic views and the unparalleled convenience of arriving directly in the city center. It’s best for travelers who value flexibility and spontaneity, though high-speed routes in countries like Spain and Italy often require advance seat reservations, which come with an extra fee. Our Spain Guide can help you navigate the system.
By Budget Airline: Unbeatable for covering long distances quickly and cheaply. A flight from Lisbon to Berlin is far more time-efficient than any land-based option. However, the low headline price often hides hefty fees for luggage, and airports are typically located far outside the city, adding significant time and transit costs to your journey. It's efficient, but often a stressful means to an end.
By Coach Bus: Almost always the cheapest way to travel between cities, especially in Central and Eastern Europe where the bus network is extensive. Modern coaches are often comfortable, with Wi-Fi and power outlets, but journeys are significantly longer than by train or plane and are susceptible to traffic delays. This is the best option for the budget-conscious traveler for whom time is not the primary concern.
For a detailed comparison and continent-specific advice, see our first-timer's manual: How to Travel Europe Alone: A 2026 First-Timer's Guide.
Tip 10: Discover the Best of the USA on a Solo Road Trip
The United States offers a lifetime of solo travel possibilities, and the great American road trip is an iconic journey of freedom and discovery. The key to a successful solo trip is to focus on a specific region or theme rather than trying to cover too much ground. These itineraries offer a perfect blend of adventure, culture, and stunning scenery.
Pacific Coast Highway (California): A quintessential American drive. This 5-7 day itinerary from San Francisco to Los Angeles is all about the dramatic coastal scenery of Highway 1, with essential stops in the charming arts town of Carmel-by-the-Sea and the iconic, redwood-lined cliffs of Big Sur.
Southwest National Parks Loop (Utah/Arizona): An epic 7-10 day road trip for the avid hiker. Fly into Las Vegas and create a loop to visit the majestic canyons of Zion National Park, the otherworldly hoodoos of Bryce Canyon National Park, and the awe-inspiring Grand Canyon. The proximity of these parks makes for a manageable and visually stunning journey.
Southern Culinary & Music Trail (TN/LA): A journey through the heart of American music. Start in Nashville for country music and hot chicken, drive to Memphis to experience the blues on Beale Street and visit Graceland, and end in New Orleans for the vibrant sounds of jazz in the French Quarter. This trip is a feast for the ears and the taste buds.
Find your perfect American adventure in our list of itineraries: Solo Travel in the USA: 10 Incredible Itinerary Ideas.
Advanced Tactics - The Savvy Traveler's Toolkit
You’ve got the mindset and the plan. Now, let’s sharpen your skills with advanced, practical solo female travel tips that separate the novice from the savvy, seasoned traveler.
Tip 11: Choose Your Accommodation Like a Security Pro
Your accommodation is your sanctuary, a private space to rest and recharge. Ensuring its security is a non-negotiable first step upon arrival. Executing a consistent, methodical check immediately upon entering a hotel room or Airbnb can provide critical peace of mind. This protocol should become an automatic habit. First, prop the door open with your luggage before fully entering the room; this prevents the door from locking behind you and ensures an immediate escape route should you discover the room is not empty.
Next, conduct a quick but thorough physical search of the entire space: under the bed, behind all curtains, inside closets, and in the bathroom. Once you've confirmed the room is empty, close the door and immediately test all locking mechanisms, including the deadbolt and any chain locks. Go to every window and balcony door to ensure they are secure. Your personal security devices provide a layer of protection that is entirely within your control. Immediately place a rubber wedge doorstop alarm under the main door or install a portable door lock. Finally, locate the fire exit map, identify the two nearest exits, and physically walk the route to each. This mental map is invaluable for navigating in darkness or smoke.
Tip 12: Master Ground Transportation Safety
Ground transportation in an unfamiliar country can be a point of vulnerability. Adhering to a strict set of safety protocols for every ride is essential. When using a ride-share app, always follow the "Match, Name, Share" protocol. First, carefully Match the vehicle's make, model, and license plate number with the information provided in the app. Second, from a safe position on the curb, ask the driver, "Who are you here for?" to make them say your Name. Never ask, "Are you here for Jane?" A legitimate driver will know your name without prompting.
Finally, before your ride begins, use the app's built-in feature to Share your trip status with a trusted friend or family member, allowing them to track your journey in real-time. As a solo traveler, always sit in the back seat on the side opposite the driver. This creates physical distance and gives you access to two separate exits. Keep your own mapping application open on your phone throughout the journey to follow the route. If the driver takes a significant and unexplained detour, you are empowered to question it and, if necessary, end the ride in a safe, well-lit public area.
Tip 13: Never Leave Home Without Travel Insurance
For a solo traveler, travel insurance is not an optional luxury; it is an absolute necessity. It functions as a financial and logistical safety net in the event of a medical emergency, trip disruption, or theft far from home. When evaluating policies, a solo traveler should ensure the plan includes strong coverage in several key areas.
The most critical component is Emergency Medical Coverage; medical care abroad can be extraordinarily expensive, so a policy should offer a minimum of $250,000 in benefits. Emergency Medical Evacuation is also essential, as it covers the potentially astronomical cost of transporting you to a hospital with adequate facilities or back to your home country.
Critically for solo travelers, look for a policy that includes Emergency Medical Reunion (Companion Coverage). If you are hospitalized for an extended period, this coverage will pay for a family member's transportation and accommodation to be at your bedside. This logistical and emotional support is invaluable when you are alone and ill in a foreign country. Finally, ensure the policy covers Trip Interruption and has adequate reimbursement for lost or stolen baggage.
Tip 14: Assemble a Digital and Physical "Lifeline" Packet
Before departing on any international trip, a solo traveler should establish a "mission control" back home by providing a designated emergency contact with a comprehensive packet of information. This ensures that if you are unreachable, someone you trust has all the necessary details to assist you. This packet should include both physical and digital copies of your passport photo page, any necessary visas, your driver's license, your travel insurance policy (with the 24/7 assistance number), and the front and back of every credit and debit card you're carrying.
Also include a complete day-by-day itinerary with flight numbers, train schedules, and the names, addresses, and phone numbers of all booked accommodations. The final, crucial step is to enroll your trip with the U.S. Department of State’s free Smart Traveler Enrollment Program (STEP). Enrolling your trip online provides the nearest U.S. Embassy or Consulate with your itinerary and contact information. It creates a three-way digital bridge connecting you, your emergency contact, and the State Department, ensuring a coordinated response in a worst-case scenario.
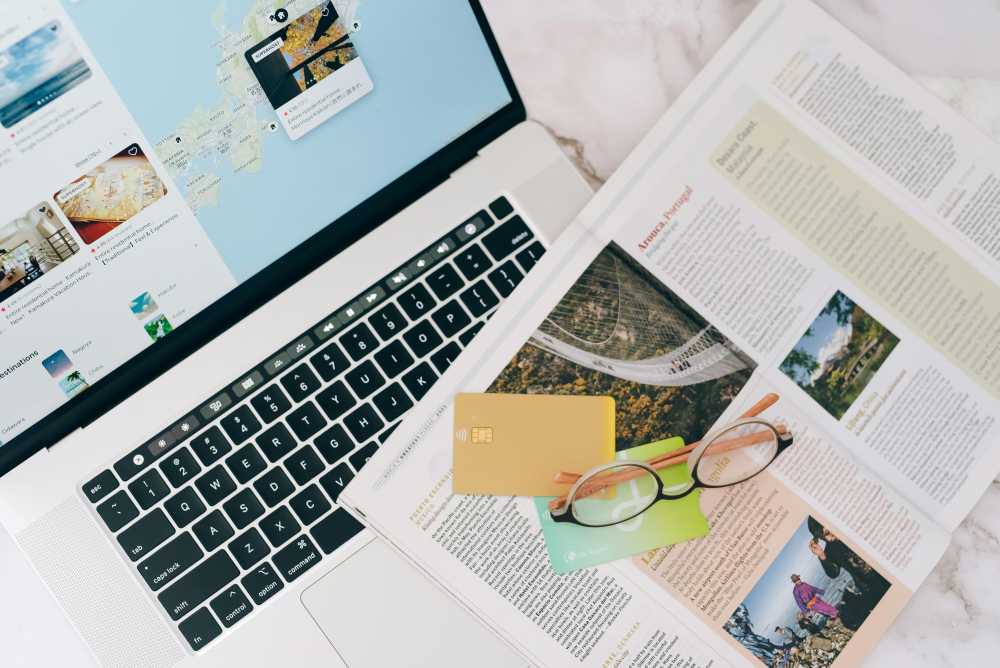
Tip 15: Use the Right Financial Tools to Avoid Hidden Fees
Using the right financial tools abroad is crucial for avoiding costly and unnecessary fees that can silently drain your travel budget. The two most important products for a solo traveler are a credit card with no foreign transaction fees and a debit card that reimburses ATM fees worldwide.
Many credit cards charge a foreign transaction fee, typically 3% of every purchase made abroad. This fee can quickly add up and negate any rewards you might be earning. It is essential to travel with a credit card that explicitly has no such fees; leading options include the Chase Sapphire Preferred® Card and the Capital One Venture Rewards Credit Card.
Similarly, withdrawing local currency from an ATM almost always involves two fees: one from your home bank and one from the local ATM operator. To circumvent this, open an account with a bank that offers worldwide ATM fee reimbursements. A premier example in the United States is the Charles Schwab Bank High Yield Investor Checking Account, which refunds all ATM fees incurred anywhere in the world at the end of each month. Using these two products in tandem can save you hundreds of dollars over the course of a long trip.

Your Journey Awaits
The rise of the solo female traveler is proof of a collective desire for growth, freedom, and self-discovery. The journey requires preparation, awareness, and courage, but it is more accessible and safer today than ever before. These solo female travel tips are designed to be your foundation, a toolkit to dismantle fear and build competence. By embracing smart strategies, you can confidently navigate the challenges and unlock the profound rewards of exploring the world on your own terms. It's one of the most powerful investments you can ever make in yourself.
The world is waiting. Start planning with our comprehensive Travel Guide and ensure your safety with our free Solo Female Travel Safety Guide.
Your Story is the Next Chapter
As you start your own solo adventures, you’ll collect stories, insights, and expertise that are uniquely yours. You’ll discover the best gelateria in Rome, the quietest hiking trail in Zion, the most efficient way to navigate the Tokyo metro. That knowledge is valuable. At TrekGuider, we’ve built a platform for travelers like you to become creators—to share your wisdom, publish your own guides, and inspire the next wave of explorers. When you're ready, your journey can become the guide.
Don't Miss Out! Subscribe for Exclusive Content
SubscribeComments 0
No comments yet
Be the first to share your experience!
Dont Miss Out! Subscribe for Exclusive Content
Ultimate USA Holidays Guide: Top Picks
FTC Affiliate Disclosure Essentials: Stay Compliant as a Travel Creator
Essential Affiliate Tools: From Tracking to Full Optimization
Booking.com Affiliate Program Review: Pros, Cons, and Earnings Potential
Decoding Affiliate Commission Rates: Benchmarks for Travel Creators
