How to Create a Digital Travel Guide People Will Buy
TrekGuider @trekguider
You’re a travel expert. Your notes are filled with hidden gems, your camera roll is a treasure trove of untold stories, and your advice could save fellow travelers hundreds of dollars and hours of stress. You know your expertise has value, but packaging it into a real, scalable income stream feels like a monumental task. Relying on the slow trickle of ad revenue or the unpredictability of affiliate sales is a frustrating grind, keeping your dream of a truly independent business just out of reach.
This uncertainty keeps you on the content treadmill, trading your valuable time for pennies. You see other creators launching their own products and achieving a level of financial freedom that feels like a distant fantasy. The path forward is a confusing fog of questions about design, content, pricing, and technology, leaving you stuck in analysis paralysis while the immense opportunity of the creator economy—a market projected to nearly double from $250 billion to almost $500 billion by 2027—passes you by.
It’s time to stop trading hours for dollars and start building assets. This is your chronological, step-by-step playbook. We will demystify the entire process and show you exactly how to create a digital travel guide that people will not only buy but will also love and recommend. This is your complete workflow for transforming your hard-won expertise into a polished, professional product that generates passive income for years to come. Think of this as a critical chapter in your business plan; for the complete blueprint on building a modern creator enterprise, be sure to read our ultimate guide to [How to Make Money Online: A Creator's Guide for 2026].

Why a Digital Guide is Your Ultimate Scalable Asset
Before diving into the "how," it's critical to understand the "why." Transitioning from promoting others' products to creating and selling your own is the single most powerful step you can take toward building a profitable, independent business. While ads and affiliate links have their place, digital products offer a level of control and scalability that other models simply can't match.
The advantages are transformative:
Infinite Scalability: Digital products operate on a "create once, sell forever" model. Whether you sell 10 copies or 10,000, your workload remains the same. There is no inventory to manage and no shipping to worry about.
Exceptionally High Profit Margins: With no manufacturing or distribution costs, the profit margins are extraordinary. Once you recoup your initial time investment, nearly every sale is pure profit.
Full Ownership and Control: When you sell your own guide, you own the entire process. You control the product, the pricing, the marketing, and the customer relationship. You are no longer dependent on an affiliate partner’s commission rates or an ad network's traffic requirements.
Solidifies Your Authority: Creating and selling a high-quality product instantly positions you as an expert. It builds deep trust with your audience, as you are no longer just recommending other people's stuff—you are standing behind your own valuable creation.
The market reflects this opportunity. The e-learning sector alone, a huge component of the digital product world, is projected to surge to an incredible $848 billion by 2030. This isn't a fleeting trend; it's a fundamental shift in how creators build resilient businesses.
The Blueprint – Research and Validation
The costliest mistake a creator can make is to spend months building a product nobody asked for. Thorough research and validation aren't optional; they are the foundation upon which a profitable product is built.
Identify Audience Needs and Define a Specific Niche
Your first job isn't to be a brilliant inventor; it's to be a sharp detective, uncovering the real, recurring problems your audience is desperate to solve.
Listen to Your Audience: The best ideas are hidden in plain sight. Dive into your blog comments, email replies, and social media DMs. What destinations are people constantly asking about? What part of the travel planning process do they find most challenging or stressful? Their recurring questions are your product ideas.
Define a Hyper-Specific Niche: Avoid creating a generic guide. A broad guide to "Mexico" will get lost in a sea of competition. A highly specific product like "A First-Timer's Foodie Guide to Mexico City's Roma Norte Neighborhood" is more valuable, easier to market, and instantly positions you as a niche expert.
Conduct Keyword and Market Research to Validate Demand
Once you have an idea, you must validate it with data.
Analyze Search Volume: Use an SEO tool to check the search volume for terms related to your guide idea. High search volume for long-tail keywords like "7-day Japan itinerary for foodies" or "what to do in Lisbon with kids" is a strong data signal that a ready market exists for a guide on that topic.
Conduct Competitor Analysis: Find 3-5 comparable digital travel guides in your niche. Your goal isn’t to copy them, but to identify a gap in the market. Analyze their price points, what they include, and, most importantly, read their reviews. What are customers praising? What are they complaining about? This will show you exactly how to create a superior product.
Pro-Tip: True validation comes from the intersection of qualitative and quantitative data. A great product idea is one that your audience is asking for (qualitative) and that a significant number of people are searching for online (quantitative).

The Core – Outlining and Content Creation
With a validated idea, it’s time to build the heart of your product: the content. This is where your unique expertise, voice, and experience shine.
Develop a Logical Structure
A good guide flows intuitively and is easy to navigate. Before you write a single word, create a detailed table of contents. This will be your roadmap and ensure you don't miss any crucial information. A typical structure includes:
Introduction: A brief overview of the destination, essential facts (currency, language), and why your guide is the ultimate resource.
Logistics: The practical nuts and bolts—getting there, getting around, visa requirements, and curated recommendations on where to stay for different budgets.
Experiences: The core of your guide. This includes top attractions, detailed daily itineraries, and deep dives into your niche (e.g., food and drink recommendations, hiking trails, photo spots).
Practicalities: The crucial final details like safety tips, packing lists, a budget breakdown, and useful local phrases.
Write Compelling and Useful Content
This is where you go beyond the generic advice found on a thousand other blogs.
Gather Your Assets: Compile all of your personal notes, journal entries, and high-quality photographs from your travels to the destination. Your first-hand experience and unique visuals are your primary competitive advantage.
Be Both Inspirational and Intensely Practical: Write in an engaging, personal tone. Share anecdotes and insider tips that bring the destination to life. Go beyond simply listing facts; tell your readers why a place is special. Share the hard-won wisdom that can't be found elsewhere, like "skip the line at the Colosseum by booking this specific tour" or "the best gelato is actually found two blocks away from the main square at this tiny shop."
With your raw content compiled, the next step is to give it a professional polish that signals its immense value.

The Polish – Professional Design for Non-Designers
Your guide's content may be brilliant, but in the digital world, packaging matters. A professional, user-friendly design signals quality and dramatically improves the customer experience.
Select a User-Friendly Design Tool
You don't need to be a graphic designer to create a stunning product. For a travel blogger whose primary goal is to efficiently create a static PDF travel guide, a template-based tool like Canva is the strategically superior choice. While powerful professional software like Figma or Adobe Illustrator has a steep learning curve that can delay your launch by weeks, Canva is built specifically for this type of project. Its intuitive, drag-and-drop interface is designed to help non-designers produce high-quality visuals quickly.
Feeling inspired to build your own assets but not sure where to begin? Creating high-value products is the core of a modern creator business. To accelerate your journey, we've bundled together some of our most powerful resources. [The Travel Creator's Toolkit] is a free collection of checklists, templates, and guides designed to help you streamline your workflow and build your business faster.
5 Essential Mobile-First Design Principles for a User-Friendly Guide
Your guide will almost certainly be used on a mobile phone while your customer is in-destination. Designing with a mobile-first user experience (UX) is not an option; it is essential for your product to be functional and valuable.
Prioritize Legibility and High Contrast: The content must be effortlessly readable on a small screen, often in bright sunlight. Use a clean, simple font of at least 11 points so users don't need to pinch-and-zoom. Crucially, ensure a high contrast ratio between the text and background—at least 4.5:1 as recommended by Web Content Accessibility Guidelines (WCAG)—to maintain readability.
Implement Simplified Navigation: The single most important navigation element is a hyperlinked Table of Contents at the beginning of the document. This allows users to jump directly to the section they need with a single tap, which is crucial when they're trying to find information quickly on a busy street.
Design for Touch with Finger-Friendly Targets: Any included hyperlinks (e.g., a link to a restaurant's website or a Google Maps location) must have a clickable area large enough to be easily tapped with a finger—the industry standard is a minimum touch target size of 44x44 points (approximately 7-10mm).
Minimize Cognitive Load by Eliminating Clutter: Mobile users are often distracted. Their interaction with a guide is typically in short bursts or "micro-tasks". To accommodate this, use short paragraphs, bulleted lists, bolded text for key information, and generous white space. A clean, uncluttered interface helps users find what they need with minimum effort.
Optimize for Performance and Portrait Orientation: The vast majority (94%) of mobile users hold their phones vertically. Your guide must be designed with a portrait layout (e.g., A4 or US Letter size). Crucially, keep the final PDF file size as small as possible by compressing all images before inserting them into your document. A large file will download slowly on a weak cellular connection, creating a poor user experience.

The Launchpad – How to Create a Digital Travel Guide for Sale
You've created a valuable, beautifully designed resource. The final phase is to package it, price it for profit, and get it into the hands of your customers.
How to Price Your First Digital Product
Pricing is one of the most challenging decisions. The most effective strategy for a knowledge-based product is value-based pricing. Instead of focusing on your production costs, price your product based on the transformation it provides to the customer. If your guide saves a user 20 hours of stressful research and helps them discover priceless experiences they would have otherwise missed, its value is immense.
A practical process for setting your price:
Step 1: Research the Market: Identify 3-5 comparable digital travel guides in your niche to establish a realistic market range.
Step 2: Articulate the Value: Make a specific list of the tangible outcomes your guide provides (e.g., "Saves over 15 hours of planning," "Includes a pre-planned 7-day itinerary worth over $100 in planning fees").
Step 3: Set an Initial Price and Test: For a high-quality, first-time travel guide, a price point between $19 and $49 is a strong starting position. It communicates significant value without creating sticker shock for the buyer.
Choose a Sales Platform That Works for You
You need a platform to handle the sale and secure digital delivery of your product. While you can use e-commerce plugins on your own blog, the smartest strategy is to leverage a platform that puts you in front of a built-in audience of motivated buyers.
Pro-Tip: Don't just build a product; build your business inside an ecosystem. A specialized marketplace like TrekGuider is the ideal place to sell your high-quality [Travel Guide]. It provides a professional, ready-made storefront and connects you with a global audience of passionate travelers who are actively searching for expert resources. You can publish articles to attract new customers directly on the platform, creating a powerful marketing funnel that leads right back to your product page.
Frequently Asked Questions (FAQ)
1. How long should my digital travel guide be?
Value is not measured in page count. A concise, 50-page guide packed with unique, actionable advice is far more valuable than a rambling 200-page guide filled with generic information. Focus on comprehensively solving the specific problem your niche audience has.
2. Do I need to have visited the destination very recently?
While recent, first-hand experience is ideal, an "evergreen" guide focused on core attractions, culture, and logistics can have a long shelf life. The key is transparency. Be clear about when you last visited and focus on information that doesn't change rapidly. You can always update your guide with new editions.
3. What if I'm not a professional writer or photographer?
You don't need to be. Your audience values authenticity and expertise over perfect prose. Write in your natural, conversational voice, as if you were giving advice to a friend. For photos, a modern smartphone can capture high-quality images. The goal is to be clear, helpful, and genuine.

Your Journey from Expert to Entrepreneur Starts Now
You now have the complete, A-to-Z workflow. You've moved from the vague idea of a product to a concrete, actionable blueprint that covers research, content creation, professional design, and a smart launch strategy. The path from being a passionate travel expert to a successful digital entrepreneur is no longer a fog of confusion.
You have the definitive answer to the question of how to create a digital travel guide that provides immense value and generates a sustainable income. The only thing left to do is take the first step. Start the research, outline your expertise, and begin building the asset that will power your business and fund your adventures for years to come.
SEO Meta Data Suggestions:
SEO Meta Title (58 characters): How to Create a Digital Travel Guide People Will Actually Buy
URL Slug: how-to-create-digital-travel-guide
SEO Meta Description (154 characters): A step-by-step playbook for travel creators on how to create a digital travel guide, from research and writing to design, pricing, and selling your product.
Don't Miss Out! Subscribe for Exclusive Content
Subscribe


Comments 0
No comments yet
Be the first to share your experience!
Dont Miss Out! Subscribe for Exclusive Content

FTC Affiliate Disclosure Essentials: Stay Compliant as a Travel Creator

Essential Affiliate Tools: From Tracking to Full Optimization

Avoid These 5 Affiliate Landing Page Mistakes for Better Conversions

Affiliate Keyword Research Mastery for Travel Blogs

Booking.com Affiliate Program Review: Pros, Cons, and Earnings Potential

Decoding Affiliate Commission Rates: Benchmarks for Travel Creators
CA Family Beach Vacations: A Pro's Planning Guide
TrekGuider @trekguider
Staring at a map of California's 840-mile coastline can feel overwhelming. You're searching for one perfect stretch of sand that pleases everyone—from toddlers who need calm water to teens who crave adventure. The fear of choosing wrong is real: a trip ruined by unsafe surf, zero parking, or the dreaded "I'm bored" can turn a dream vacation into a stressful ordeal.
This guide is your antidote to that analysis paralysis. We'll give you a clear framework for picking the right beach for your family's unique needs, ensuring your trip is filled with golden-hour memories, not logistical nightmares.
Choosing the right destination is the first step in planning an amazing trip, a core principle we cover in our comprehensive guide to Family Travel Ideas: The 2026 Guide to Unforgettable Trips. This playbook will give you the California-specific details you need to make the perfect choice.

First, Define Your Perfect Beach: A 4-Point Framework for California
California's coastline is stunningly diverse. The secret to a successful trip is finding a beach that suits your family's needs. Before looking at a map, use this framework to determine your family's “beach DNA” and find the perfect option.
Type 1: Calm & Shallow Waters (Best for Toddlers & Cautious Swimmers)
Let's be honest—when you're traveling with toddlers, 'safety' isn't just a priority; it's the entire game. You need waters that are less 'crashing surf' and more 'gentle bathwater.' These beaches are characterized by gentle, lapping waves, shallow entry points, and natural protections like coves or bays.
Top California Picks: La Jolla Shores (San Diego), Coronado Central Beach (San Diego), Avila Beach (Central Coast).
Type 2: Active & Adventurous Shores (Best for Kids & Teens)
If your crew gets restless just sitting on the sand, you need a destination with built-in action. These are the hubs for boogie boarding, learning to surf, pier fishing, and boardwalk cycling. The energy here is palpable, and there's always something to do.
Top California Picks: Huntington Beach ("Surf City USA"), Santa Monica State Beach (Los Angeles), Pismo Beach (Central Coast).
Type 3: Full-Service & Amenity-Rich (For Maximum Convenience)
These are the beaches for families who want everything at their fingertips. Think easy parking, clean restrooms, on-duty lifeguards, nearby playgrounds, and plenty of places to grab a snack or rent equipment. They are designed to minimize friction and maximize relaxation.
Top California Picks: Moonlight State Beach (Encinitas), Main Beach (Laguna Beach), Carmel Beach (Carmel-by-the-Sea).
Type 4: Natural & Unspoiled Coasts (For Exploration & Wildlife)
For families who want to escape the crowds and connect with nature, these beaches offer tide pools teeming with life, scenic hiking trails, and the chance to spot wildlife, from barking sea lions to migrating whales.
Top California Picks: Leo Carrillo State Park (Malibu), Point Dume State Beach (Malibu), Stinson Beach (Marin County).

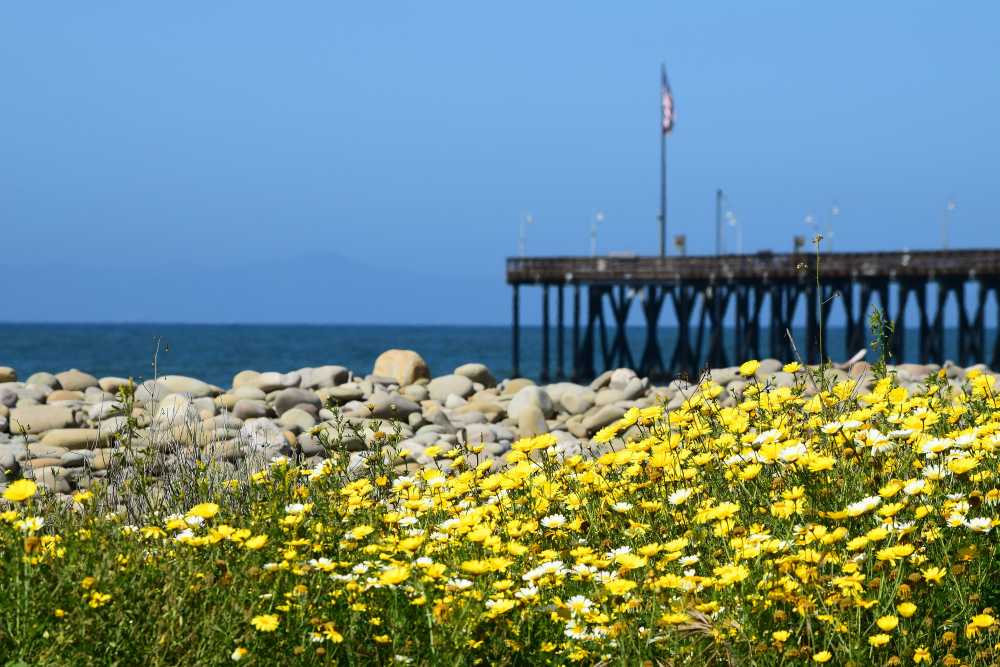
Southern California (SoCal): A Deep Dive into Family Beach Vacations
SoCal is the classic choice for family beach vacations for a reason: it delivers iconic sunshine, relatively warm water, and an unmatched density of attractions. From San Diego to Malibu, this region packs in a staggering variety of coastal experiences.

San Diego County: America's Finest Family Beaches
Often considered the gold standard, San Diego offers a perfect equilibrium between pristine beaches and world-class attractions.
La Jolla Shores: This is arguably the best beach in California for families with toddlers. A mile-long sandy expanse with some of the gentlest waves on the West Coast, it's perfect for splashing and sandcastle construction. The adjacent Kellogg Park has a fantastic playground.
Don't Miss: Book a guided kayak tour to paddle over the La Jolla Underwater Park—you'll see sea lions, bright orange Garibaldi fish, and (harmless) leopard sharks swimming right below you. It's an unforgettable experience for kids ages 6 and up.
Coronado Central Beach: Famous for its iconic Hotel del Coronado backdrop and shimmering, mica-infused sand, Coronado is wide, flat, and impeccably clean. The surf is typically gentle, and the sheer size means you can always find your own space.
Insider Tip: At low tide, fantastic tide pools emerge at the southernmost end of the beach, offering a great, free activity for curious kids.
Moonlight State Beach (Encinitas): For the family that values pure, unadulterated convenience, this beach in the surf town of Encinitas is your holy grail. It features a large, dedicated parking lot, clean restrooms, a snack bar, and a great playground right on the sand.
Insider Tip: The beach is situated in a natural bowl, which keeps it somewhat protected from the wind, making it a comfortable spot to spend the entire day.
Orange County: From "Surf City" to Art Coves
The OC offers a more polished, upscale beach experience, with beautifully maintained towns and legendary surf breaks.
Huntington Beach: Known globally as "Surf City USA," this is the place for an active family. The energy is infectious.
Don't Miss: Beyond surf lessons, rent a multi-person surrey bike and cruise the 10-mile paved beach path. At night, grab a fire pit (first-come, first-served) for the ultimate s'mores experience.
Newport Beach: Centered around the Balboa Peninsula, Newport offers two distinct experiences. The ocean side has bigger waves perfect for boogie boarding, while the bay side (at the Balboa Fun Zone) offers calm waters, boat rentals, and a classic Ferris wheel.
Insider Tip: Take the historic Balboa Island Ferry for a charming, scenic trip across the harbor. Kids love it, and it’s a budget-friendly thrill.
Main Beach (Laguna Beach): Nestled in a charming, artsy town, Main Beach has a "Coke commercial" vibe with its central lifeguard tower and boardwalk.
Don't Miss: The real magic of Laguna lies in its many small coves. A short walk south brings you to Treasure Island Beach, which has some of the most accessible and vibrant tide pools in all of SoCal.

Los Angeles County: Iconic Piers and Urban Shores
LA's beaches are vibrant and full of character, offering everything from entertainment hubs to quiet, natural retreats.
Santa Monica State Beach: The Santa Monica Pier, with its amusement park and aquarium, makes this a can't-miss destination. The beach itself is massive, providing ample room for everyone.
Don't Miss: Renting bikes and riding south to the Venice Beach Boardwalk is a quintessential LA family experience, filled with street performers and unique sights.
Leo Carrillo State Park (Malibu): For a completely different vibe, head north to Leo Carrillo. This stunning beach is famous for its sea caves and fascinating tide pools. It's a place for exploration, where kids can hunt for sea stars, crabs, and anemones.
Insider Tip: Check the tide charts before you go. The sea caves are only accessible and safe to explore during low tide.
Pro-Tip: Southern California experiences a weather pattern known as "May Gray" and "June Gloom," where a persistent marine layer can keep the coast cloudy and cool until the early afternoon. If you're planning a trip during these months, schedule other activities for the morning and plan for your main beach time after lunch when the sun typically breaks through.
When to Go: A Seasonal Guide to the California Coast
Choosing the right time to visit can make or break your trip. Here’s a breakdown:
Summer (June-August): The classic choice with the warmest weather and water temperatures. Pros: Everything is open, and the vibe is energetic. Cons: Massive crowds and peak pricing for flights and lodging.
Fall (September-October): This is the locals' secret. Pros: The best weather of the year, with warm, sunny days and far fewer crowds. Water is still warm from the summer. Cons: Kids are back in school, making it tougher for families.
Winter (November-February): A great time for a different kind of beach trip. Pros: Lowest prices and no crowds. It's also the best time for whale watching. Cons: Water is too cold for swimming without a wetsuit, and you might get some rain.
Spring (March-May): A mixed bag. Pros: Beautiful wildflowers, pleasant weather for non-swimming activities. Cons: The weather can be unpredictable, and the water is still very cold. "June Gloom" can start as early as May.
Central Coast & Northern California: Unspoiled Beauty
For families seeking a more tranquil and nature-focused trip, the coasts north of LA offer dramatic scenery, charming small towns, and a welcome escape from the crowds.

The Central Coast: A Slower Pace of Life
Pismo Beach: A classic California beach town, Pismo is famous for its long fishing pier and being the "Clam Capital of the World."
Don't Miss: It's one of the few places where you can legally drive on the beach (in designated areas), making it a hub for ATV rentals and a unique family adventure.
Avila Beach: Tucked into a sunny cove, Avila is often warmer and less windy than its neighbors. The calm waters of the bay are perfect for paddleboarding and kayaking.
Insider Tip: Walk to the end of the Harford Pier to see sea lions lounging and barking up close.
The Bay Area & North: Boardwalks and Rugged Coastlines
Santa Cruz Main Beach: Home to the West Coast's oldest seaside amusement park, the Santa Cruz Beach Boardwalk is a paradise for kids and teens. The combination of classic roller coasters, arcade games, and a wide sandy beach is unbeatable.
Insider Tip: Buy your ride tickets online in advance to save money and skip the ticket lines.
Stinson Beach (Marin County): Just a spectacular drive from the Golden Gate Bridge, Stinson is a vast expanse of white sand with relatively calm water for a NorCal beach. It feels like a world away from the city.
Insider Tip: The drive on Highway 1 to get there is gorgeous but winding. If anyone in your family is prone to car sickness, be prepared. It's a key part of what we cover in The Sanity-Saving System for Your Next Family Road Trip.
Explore California's Iconic Coastline
Planning to drive the dramatic coast around Big Sur? Don't leave it to chance. Download our free Big Sur Map & Itinerary for a curated route, must-see stops, and insider tips to make the most of this unforgettable drive.
Your California Beach Trip Playbook
A great plan is what separates a stressful trip from a relaxing one. Here’s how to manage the practical side of your California family beach vacation. For a deeper dive into simplifying the entire process, check out our guide on How to Make Family Travel Planning Actually Easy.
Step 1: Budgeting for the Golden State
Lodging: Vacation rentals are often more cost-effective than hotels for families. Book 3-6 months in advance.
Food: Pack a cooler for your beach days. This can save you $50-$100 per day.
Parking: Beach parking can range from $10-$30. Look for free residential parking a few blocks away.
Activities: Focus on free fun! Sandcastle building, tide pooling, and pier strolling cost nothing.
Sample 5-Day SoCal Budget (Family of 4)
Step 2: The Essential California Beach Packing List

The key is layers. Coastal weather can change in an instant.
Sun Protection: High-SPF sunscreen (reef-safe), wide-brimmed hats, sunglasses, and a rash guard for each child.
The Layers: In addition to swimsuits, everyone needs a sweatshirt or fleece.
Beach Gear: A lightweight beach tent or umbrella, sand toys, boogie boards, and a good cooler.
Footwear: Flip-flops and comfortable walking shoes.
First-Aid Kit: Include bandages, antiseptic wipes, pain reliever, and aloe vera gel.
Pro-Tip: For notoriously difficult parking areas like Santa Monica or Laguna Beach, use an app like SpotHero or ParkWhiz to reserve a parking spot in a nearby garage ahead of time. It can save you an immense amount of stress.
Frequently Asked Questions
What is the best month for a California family beach vacation?
September and October are often considered the best months. You'll enjoy warm, sunny weather and ocean temperatures held over from summer, but with significantly fewer crowds. While summer is classic, it brings peak prices and packed beaches.
Which California beach is the absolute best for toddlers?
La Jolla Shores in San Diego is widely considered the top choice for families with toddlers. Its waves are exceptionally gentle, the sandy shoreline has a very gradual slope, and the adjacent Kellogg Park offers a convenient playground.
Is it better to stay in San Diego or Orange County for a family trip?
It depends on your priorities. San Diego is ideal for families with younger kids, offering calmer beaches like La Jolla and world-class attractions. Orange County offers a more polished experience and is great for active families with older kids or teens, with hubs like Huntington Beach for surfing.
Besides swimsuits, what is one essential item to pack for a California beach day?
Layers, specifically a sweatshirt or fleece for everyone in the family. California's coastal weather can change quickly, with cool marine fog in the morning and breezy afternoons. Having a warm layer ensures you'll be comfortable all day long.
Conclusion
A successful California family beach vacation isn't about finding a secret spot—it's about matching the right beach to your family's unique travel style. Whether you need the gentle bays of San Diego for a toddler's first splash or the vibrant energy of Santa Cruz for your teens, the Golden State has the perfect patch of sand waiting for you.
You now have the framework and destination intelligence to move from planning to action. With this playbook, you're ready to choose your spot, pack your bags, and make this the trip that actually happens. To help you with the bigger picture, see our guide on How to Plan a US Family Vacation That Actually Happens.
Don't Miss Out! Subscribe for Exclusive Content
SubscribeComments 0
No comments yet
Be the first to share your experience!
Dont Miss Out! Subscribe for Exclusive Content

Ultimate USA Holidays Guide: Top Picks
FTC Affiliate Disclosure Essentials: Stay Compliant as a Travel Creator
Essential Affiliate Tools: From Tracking to Full Optimization
Booking.com Affiliate Program Review: Pros, Cons, and Earnings Potential
Decoding Affiliate Commission Rates: Benchmarks for Travel Creators

Amazon Associates for Travel: Strategies to Maximize Commissions
Is Public WiFi Safe? How to Protect Your Data Abroad
TrekGuider @trekguider
You’ve just touched down in a new country, a city buzzing with unfamiliar energy. You’re desperate to check the map to your hotel, message family that you’ve arrived safely, or book that last-minute tour. Then you see it, a digital oasis in the chaos of travel: "Free_Airport_WiFi." It feels like a lifesaver. But the moment you connect to that open network, you might as well be shouting your passwords, credit card numbers, and private messages in the middle of a crowded town square.
This isn’t a hypothetical threat; it’s a silent, digital mugging that happens every single day in airports and cafes around the globe. Every unsecured connection is a wide-open door for digital thieves who are masters at exploiting the trust of travelers. They can intercept your data, steal your identity, and drain your bank account before you’ve even claimed your luggage. This menace can cast a shadow of anxiety over your entire trip, turning a tool of convenience into a source of vulnerability.
But it doesn’t have to be this way. This guide is your solution—a simple, non-technical playbook for protecting your digital life abroad. We will demystify the dangers and provide a clear, step-by-step process for using any public network with total confidence. Mastering public wifi safety is a critical skill for the modern traveler and a key part of the masterclass in preparedness we offer in our definitive guide, [The Ultimate Guide to Travel Safety: A 2026 Playbook].

The Hidden Danger: What Really Happens on Public WiFi?
The fundamental problem with most public WiFi networks—in cafes, hotels, airports, and libraries—is that they are unencrypted. Think of it like sending a postcard through the mail. Anyone who handles it along the way can read the message written on the back. When you log into your email or check your bank account on an unencrypted network, your data is sent "in the clear," making it trivially easy for a hacker on the same network to intercept and read it.
These hackers don’t need sophisticated government-level equipment. They use readily available software to "sniff" the digital airwaves, plucking your sensitive information out of the stream of data flowing around them. Their primary method for doing this is a shockingly simple and effective strategy known as a "Man-in-the-Middle" attack.
Understanding the "Man-in-the-Middle" Attack
A "Man-in-the-Middle" (MitM) attack is exactly what it sounds like. A hacker secretly positions their computer between your device (your phone or laptop) and the legitimate internet connection point (the WiFi router). You believe you’re communicating directly and securely with the websites you’re visiting, but in reality, the hacker is intercepting, reading, and potentially even altering every piece of information you send and receive.
The most common way they achieve this is through a tactic called a "malicious hotspot" or "evil twin" attack:
The Setup: A hacker sits in a busy airport or coffee shop and sets up a new WiFi network on their laptop. They give it a believable, trustworthy-sounding name, like "Airport_Guest_WiFi" or "Starbucks_Free," often mimicking the name of the legitimate network.
The Connection: Your phone, set to connect to known networks automatically, might connect to this stronger, malicious signal without you even noticing. Or, you might manually select it, assuming it’s the official network.
The Interception: The moment you connect, all of your internet traffic is routed directly through the hacker's computer. They become an invisible eavesdropper on your digital life, capturing your login credentials when you check Facebook, your credit card details when you buy something online, and the contents of your private messages.
To you, the internet works perfectly. You can browse websites and use your apps as usual. You have no idea that a digital thief is silently recording your every move.

Your Digital Bodyguard: The Ultimate Guide to Using a VPN
If an unencrypted network is like sending a postcard, then using a Virtual Private Network (VPN) is like sealing that same message inside a locked, armored briefcase before sending it. A VPN is the single most powerful and essential tool for ensuring your public wifi safety. In simple terms, a VPN is an app for your phone or computer that creates a secure, encrypted tunnel for all your internet traffic, making your data completely unreadable to anyone who tries to intercept it.
When you connect to a VPN, even if you’re on a hacker’s malicious hotspot, all they can see is a stream of indecipherable gibberish. Your passwords, bank details, and messages are completely shielded from prying eyes.
How to Set Up a VPN on Your Smartphone in 4 Simple Steps
You don’t need to be a tech expert to use a VPN. Modern VPN services are designed to be incredibly user-friendly. Here’s a simple, step-by-step guide for any non-technical traveler.
Step 1: Choose and Subscribe to a VPN Service
Before you travel, you need to sign up for a reputable, subscription-based VPN provider. Do some research by reading reviews from trusted tech websites like Wired or The Verge. Crucially, avoid "free" VPN services. These companies have to make money somehow, and they often do it by logging your online activity, selling your data to advertisers, or, in the worst cases, embedding malware in their own software. A paid subscription to a well-known provider is a small investment for ironclad security.
Step 2: Download and Install the VPN App
Once you’ve created an account on the VPN provider’s website, the next step is to get the app on your phone.
On an iPhone: Go to the App Store, search for the name of your chosen VPN (e.g., NordVPN, ExpressVPN, Surfshark), and tap "Get" to download and install it.
On an Android phone: Go to the Google Play Store, search for the name of your VPN provider, and tap "Install."
Step 3: Log In and Grant Permissions
Open the newly installed app. You’ll be prompted to log in using the email and password you created when you subscribed. The very first time you try to connect, the app will ask for permission to add a VPN configuration to your phone's settings. A standard system pop-up from iOS or Android will appear. You must tap "Allow" or "OK." This is a necessary and safe step that allows the app to manage your phone's internet connection.
Step 4: Connect to a VPN Server
This is the easiest part. Most VPN apps are designed for one-tap simplicity.
The app’s main screen will almost always feature a large "Quick Connect" or "Connect" button. Tapping this will automatically connect you to the fastest or nearest server available. For general security on public WiFi, this is all you need to do.
If you want to appear as if you are browsing from a specific country (useful for accessing home-country content), you can tap on the "Locations" or "Servers" list within the app and select a country to connect through.
Once you tap connect, the app will confirm your "Connected" status, and a small VPN icon will appear in your phone’s status bar at the very top of the screen. That’s it. Your internet connection is now fully encrypted and secure.

Pro-Tip: For travelers who work on the road, like digital nomads or content creators, a VPN isn't just a recommendation—it's an essential business tool. Consistent use is key to protecting client data and financial information. This level of professional-grade security is at the heart of the resources we provide in [The Travel Creator's Toolkit].
Are You a Travel Creator or Digital Nomad?
Protecting your data is just the beginning. To thrive on the road, you need the right tools for content creation, productivity, and monetization. Our free toolkit has you covered with expert-vetted recommendations for the apps, gear, and platforms that power a successful location-independent career.
Beyond the VPN: 3 Essential Habits for Ironclad Public WiFi Safety
While a VPN is your star player, a few additional habits will complete your digital defense, creating a multi-layered security strategy that protects you from a wider range of threats.
1. Practice Impeccable Device and Password Hygiene
Your first line of defense is the device itself. Before you leave home, make sure your digital house is in order.
Secure Your Devices: Ensure all your devices—laptop, smartphone, tablet—are updated with the latest operating system and security patches. Lock every single device with a strong, complex passphrase or, even better, biometric protection like a fingerprint or facial recognition.
Manage Passwords Securely: Never store passwords in a plain text file on your device. Use a reputable, cloud-based password manager app to generate and store unique, complex passwords for every account.
Perform a Digital "Clean Up": Before you travel, clear your browser's history, cache, and saved passwords. When you return home, make it a habit to change the passwords for any critical accounts you accessed while you were away, especially banking and email.
2. Avoid "Juice Jacking": The Threat of Public USB Ports
Those convenient USB charging stations you see in airports, cafes, and hotel lobbies are a potential security risk. Hackers can modify these public ports in a practice known as "juice jacking," where the USB connection is used not only to charge your device but also to secretly install malware or steal data from it. The data pins on a USB cable can transmit information while the power pins are charging your device.
The solution is simple and non-negotiable: never plug your device directly into a public USB port. Instead, use your own AC power adapter and plug it into a standard electrical outlet, or carry a portable power bank to recharge your devices safely.

3. Beware of Digital Trojan Horses: Untrusted Accessories
This same principle applies to any untrusted digital accessory. If you find a USB drive left behind in a hotel business center or a cafe, do not plug it into your laptop out of curiosity. Criminals sometimes intentionally leave these "bait" drives in public places, loaded with malware that will auto-install the moment it's connected to a computer. Treat any found accessory as a potential threat.
Pro-Tip: Before you leave, do a digital 'pack-up.' Log out of all non-essential apps on your phone and laptop. This reduces your 'attack surface,' meaning that even if your device is compromised, the hacker has access to far less of your personal data.
Public WiFi Safety FAQs
A prepared mind anticipates questions. Here are expert answers to common concerns about staying safe online while traveling.
1. Is WiFi on a plane or in a reputable hotel safer than in a coffee shop?
Not necessarily. While a hotel network may require a password, that doesn't mean the connection itself is encrypted or secure from other guests on the same network. The rule of thumb is to treat any WiFi network you do not personally own and control as untrusted. The same risks of interception and Man-in-the-Middle attacks can apply anywhere, from a budget hostel to a five-star resort. Always use your VPN.
2. Are "Free VPNs" really that bad?
Yes. A reliable VPN service requires significant infrastructure—servers, software development, and security maintenance—which costs money. If a "free" VPN provider isn't charging you a subscription fee, they are making money from you in other ways. Many have been caught logging user activity, selling browsing data to third parties, or even injecting extra ads into your browsing. In the worst cases, the "free VPN" itself is just a front for harvesting your data. A reputable, paid VPN service is a small investment for a massive gain in privacy and security.
3. Can't I just use my phone's cellular data plan instead?
Yes, and you should when possible. Your phone's 4G or 5G cellular data connection is significantly more secure than public WiFi. However, international data roaming charges can be astronomically expensive. Learning to use public WiFi safely is a crucial skill for budget-conscious travelers who need to stay connected without breaking the bank.

Connect with Confidence
Public WiFi is not inherently evil. It is a powerful tool that has become an indispensable part of modern travel. But like any powerful tool, it demands respect and the right safety equipment. The fear and uncertainty surrounding public wifi safety stem from a lack of knowledge, not from an insurmountable threat.
You now possess that knowledge. By understanding the simple risks and adopting the straightforward solutions—led by your essential VPN—you can transform any public hotspot from a potential liability into a trusted resource. You are now equipped to connect with confidence, anywhere in the world, freeing your mind to focus on the adventure in front of you.
This level of digital preparedness is just one part of a truly seamless travel experience. To master every aspect of your journey, from planning and packing to health and logistics, our all-encompassing [Travel Guide] is the only resource you'll ever need.
Don't Miss Out! Subscribe for Exclusive Content
SubscribeComments 0
No comments yet
Be the first to share your experience!
Dont Miss Out! Subscribe for Exclusive Content

How to Avoid Travel Scams: A Global Guide

A Woman's Guide to Safe Travel: 10 Critical Tips

7 Hotel Safety & Security Tips for Peace of Mind

9 Beach Safety Tips That Could Save Your Life

How to Stay Safe While Hiking: A Hiker's Safety Guide
