Amazon Associates for Travel: Strategies to Maximize Commissions
TrekGuider @trekguider
Let’s be blunt: the Amazon Associates program feels like a paradox. On one hand, it’s the undisputed titan of e-commerce, a platform your audience uses weekly, if not daily. On the other, its core metrics—a paltry 3-4% commission for most travel gear and a 24-hour cookie—seem purpose-built to underwhelm.
This isn't just a feeling; it's a business problem that breeds frustration. You see the industry reports—the affiliate marketing market soaring past $93 billion, with travel creators hitting a reported average of $13,847 a month—and it feels like your Amazon efforts are a high-effort, low-reward distraction. You’re stuck in a cycle of creating content for a platform that seems designed to underpay you, leaving a fortune on the table.
This guide is your way out of that cycle. This is a hyper-focused masterclass on transforming Amazon Associates from a minor annoyance into a consistent and significant revenue stream. We’re moving beyond the basics to deliver advanced, actionable strategies tailored specifically for amazon associates for travel bloggers. You will learn to master high-conversion gear lists, use the SiteStripe tool for maximum efficiency, and navigate the treacherous waters of Amazon’s Terms of Service to build a bulletproof and profitable system, a topic we deconstruct from every angle in our definitive command center for the entire affiliate ecosystem: Travel Affiliate Programs: The 2026 Ultimate Guide.

The Amazon Paradox: Why a Low-Commission Program is a Top Earner
At first glance, the program’s core metrics are discouraging. So why is Amazon Associates an essential, non-negotiable tool for virtually every top-earning travel creator?
The answer lies in two powerful forces: universal trust and the strategic magic of the 24-hour universal cookie.
First, you don’t have to sell your audience on the legitimacy of Amazon. They already have an account, their credit card is saved, and they trust the platform implicitly. This pre-existing brand equity dramatically reduces friction and leads to higher conversion rates than almost any other retailer.
Second, and most importantly, is the secret weapon: the 24-hour universal cookie. When a reader clicks your affiliate link for a travel adapter, a tracking cookie is placed on their browser. For the next 24 hours, you earn a commission on everything they add to their cart and purchase, not just the travel adapter.
Here’s how this plays out in the real world:
A reader clicks your link for a $15 travel adapter.
While on Amazon, they remember they also need a new $400 camera for their trip, a $150 suitcase, and $50 worth of toiletries.
They add it all to their cart and check out.
You don’t earn a commission on just the $15 adapter. You earn a commission on the entire $615 cart. This is the hidden engine that turns tiny clicks into substantial payouts. Your job isn’t just to sell a single product; it’s to open the 24-hour window.
Strategy 1: Master High-Conversion Content
Because the cookie window is so short, your content must be engineered to capture a user who is in the final stages of planning and ready to buy. Generic travelogues won’t cut it. Your focus must be on creating hyper-specific, product-focused content that solves an immediate purchasing need.

The Power of the Hyper-Specific Gear List
This is your bread and butter. But you must move beyond the generic "My Ultimate Packing List." The key to success is targeting long-tail keywords that attract a user with a very specific problem. Instead of competing with a million other packing lists, you become the definitive resource for a targeted niche.
Instead of: "My Packing List"
Target: "What to Pack for a Two-Week Safari in Tanzania"
Instead of: "Best Travel Cameras"
Target: "Best Vlogging Cameras and Mics for YouTube Travel Channels"
Instead of: "What to Wear in Europe"
Target: "What to Wear in Italy in October (That Isn't Jeans)"
These posts attract highly motivated buyers and are far less competitive to rank for in Google.
The "What's In My Bag?" Post
This is a classic for a reason: it works. This format allows you to showcase your gear in an authentic, personal context. The key is to use your own high-quality photos. Show the gear in use, show it laid out, and explain why each item has earned its place in your bag. This builds immense trust and makes your recommendations feel like they’re coming from a savvy friend, not a salesperson.
The Standalone Product Review
Reserve these for key, high-value, or truly exceptional pieces of gear that are central to your niche. If you are an adventure travel blogger, a deep-dive review of your favorite hiking boots or travel backpack can become an evergreen asset that earns commissions for years. Go into excruciating detail, share your real-world experiences, and include plenty of authentic photos and videos.
Strategy 2: The SiteStripe Workflow for Maximum Efficiency
One of the biggest hurdles to effectively monetizing with Amazon is the time it takes to generate links. Logging into your dashboard, searching for a product, and creating a custom link is a slow, clunky process. This is where mastering the Amazon SiteStripe is a game-changer.
SiteStripe is a free, official toolbar from Amazon that appears at the top of your browser whenever you’re logged into your Associates account and browsing Amazon.com. It allows you to generate a custom affiliate link for any product page with a single click.

Your High-Speed Workflow:
Find the Product: Navigate to the exact product page you want to recommend on Amazon.
Click to Generate: At the top of the page, use the SiteStripe toolbar to instantly get a link. You can choose:
Text: A clean, short amzn.to link.
Image: An image-based link with your tracking ID embedded.
Text + Image: A rich-text box with both the image and a text link.
Copy and Paste: Paste the link or code directly into your blog post.
What used to be a five-minute process now takes five seconds. This efficiency is critical. It allows you to quickly and easily add affiliate links to all relevant content, ensuring you never miss an opportunity to monetize.
Pro-Tip: Use SiteStripe to quickly grab image links. Product images hosted by Amazon are high-quality and load quickly. Using these official image links is often better than uploading your own product photos (for non-personal shots) and can help improve your page load speed.
Strategy 3: Build a Bulletproof System with TOS Mastery
Amazon is notoriously strict, and getting banned from the Associates program is a real risk. An accidental violation of their extensive Terms of Service (TOS) can result in the immediate termination of your account and the forfeiture of all your hard-earned commissions. Protecting your account matters most for any serious amazon associates for travel bloggers.

While you must read the full Associates Program Policies, here are the most common and critical violations that travel creators unwittingly commit:
Never Use Links in Emails: This is a cardinal sin. Amazon strictly forbids the use of affiliate links in any offline manner, including emails, newsletters, PDFs, or e-books. Always link from your email to a page on your blog, and place the Amazon links there.
Don't Cloak Your Links: While link cloaking is a best practice for most affiliate programs, Amazon has specific rules against it. They must be able to clearly identify that the link is coming from your site. Using a standard amzn.to short link generated by SiteStripe is always the safest bet.
Never Mention Specific Prices: Prices on Amazon fluctuate constantly. Stating a price in your article ("This backpack costs $199") is a violation because it can quickly become inaccurate. Instead, use a call-to-action like, "Check the latest price on Amazon."
Disclose, Disclose, Disclose: You must have a clear FTC disclosure on your site. Amazon also requires specific language: "As an Amazon Associate, I earn from qualifying purchases." This should be easily visible on your site.
Comply with Google's Rules: Beyond Amazon's rules, you must also comply with Google's. All paid links, including affiliate links, must use the rel="sponsored" HTML attribute. This signals to search engines that the link is commercial. Thankfully, most modern link management plugins can add this tag automatically, but it is your responsibility to ensure it’s there.
The Professional's Playbook: The Travel Creator's Toolkit
Mastering Amazon is a critical piece of the puzzle, but it's just one piece. To build a truly professional and profitable content business, you need a complete system. Our ultimate resource bundle, The Travel Creator's Toolkit, is packed with the checklists, content templates, and guides you need to build a resilient and diversified affiliate income stream.
Strategy 4: The Pro-Level Play - Combine Amazon with High-Margin Digital Products
The ultimate strategy for top-earning creators is to use Amazon as a foundational layer in a more sophisticated, diversified income strategy. Amazon is perfect for recommending physical products, but its commissions will never match the profit margins of selling your own digital products.
This is where you combine the high-volume nature of Amazon with the high-margin nature of your own expertise. This is the evolution from affiliate to owner.

The Funnel in Action:
The Blog Post: You write your hyper-specific gear list, "The Ultimate Packing List for a 7-Day Trek in Patagonia."
The Amazon Links: You populate the post with your affiliate links for the perfect hiking boots, waterproof jacket, wool socks, and trekking poles available on Amazon. You solve your reader's immediate gear problem.
The High-Margin Upsell: At the end of the post, you offer the perfect next step. You add a call-to-action that says: "Now that you have the gear, get the complete plan. My premium 'Patagonia Self-Guided Trekking Itinerary' is a downloadable guide with detailed maps, daily schedules, and booking links for all the campsites. Get it now on the TrekGuider Platform."
This is the master strategy. You use Amazon to earn commissions on the "what" (the gear) and then sell your own high-margin product that provides the "how" (the plan). This allows you to fully monetize your expertise and build a business that you control completely.
Frequently Asked Questions (FAQ)
1. Can I use Amazon affiliate links on social media like Instagram or Pinterest? Yes, but with extreme caution. You must use the special links generated through the Amazon mobile app's "Mobile GetLink" feature or SiteStripe. You also must clearly identify yourself as an Amazon Associate on the social media profile where the links are shared. Most importantly, the link cannot be on a page that is "behind a gate" (like a private Facebook group).
2. What happens if a product I link to is out of stock? The link will still work and the 24-hour cookie will still be set. If the customer buys something else on Amazon during that window, you will still earn a commission. However, it creates a poor user experience. It's good practice to periodically check your top-performing links to ensure the products are still available.
3. How do I handle international traffic? My readers are from all over the world? This is a critical issue for travel creators. By default, a link to Amazon.com will only earn you a commission if the purchase is made on the US store. To monetize your global audience, you must use a link localization service. Amazon has its own called "OneLink," which can automatically redirect your international visitors to their local Amazon storefront. Third-party services like Geniuslink (Geni.us) offer more advanced features and are very popular with professional affiliates.
Your Blueprint for Amazon Mastery
Stop thinking of Amazon Associates as a low-paying chore. Start seeing it for what it is: a high-volume conversion machine that, when used strategically, can become a powerful and reliable pillar of your income. The key is not to focus on the low commission rate but to obsess over leveraging the 24-hour universal cookie.
By mastering the strategies for amazon associates for travel bloggers—creating hyper-specific content, working efficiently with SiteStripe, staying relentlessly compliant with the TOS, and layering it with your own high-margin products—you transform the program from a source of frustration into a predictable engine for revenue. This is a foundational skill for any serious travel creator looking to build a diversified and resilient business that can fund their adventures for years to come.
Read the full guide: The Travel Blogger's Playbook to Affiliate Marketing Mastery
Don't Miss Out! Subscribe for Exclusive Content
Subscribe


Comments 0
No comments yet
Be the first to share your experience!
Dont Miss Out! Subscribe for Exclusive Content

Ultimate USA Holidays Guide: Top Picks

FTC Affiliate Disclosure Essentials: Stay Compliant as a Travel Creator

Essential Affiliate Tools: From Tracking to Full Optimization

Avoid These 5 Affiliate Landing Page Mistakes for Better Conversions

Affiliate Keyword Research Mastery for Travel Blogs

Booking.com Affiliate Program Review: Pros, Cons, and Earnings Potential
The Ultimate Solo Travel Packing List: A Modular Checklist
TrekGuider @trekguider
Staring at an empty suitcase can be overwhelming. This is not another generic article; this is your definitive, actionable solo travel packing list. It’s a methodical system designed to transform packing from a chore into an act of empowerment. We’ve built this checklist on a "Core + Modules" framework: a non-negotiable foundation of essentials, plus optional modules you can add for specific types of travel.
This tactical checklist is your "what." Before you dive into the specific items, we highly recommend reading our guide to to understand the minimalist systems and philosophy that make this list so powerful. Understanding the "why" will make packing the "what" intuitive and stress-free.
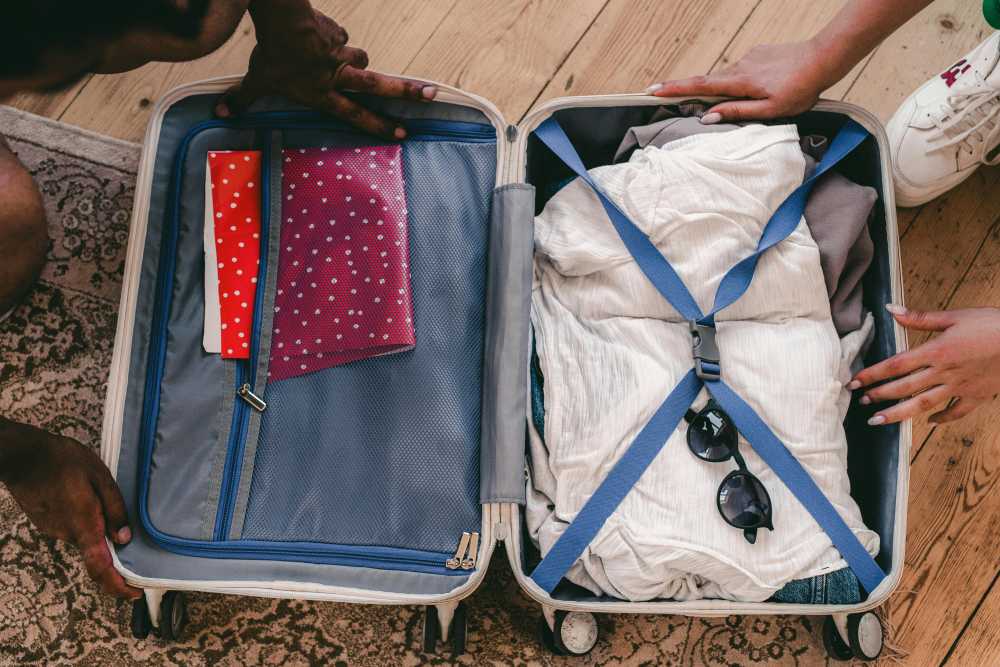
Your Core Essentials
Every trip, regardless of destination or duration, starts here. These are the non-negotiable items that form the base of any smart solo travel plan. Do not leave home without them.
Your Access to Everything
Your ability to move, transact, and prove your identity matters most. Build redundancy into your document strategy.
Passport/Visa: Check that your passport has at least six months of validity from your planned return date.
Digital & Physical Copies: Store a physical photocopy of your passport and driver's license in a separate bag from the originals. Keep high-quality photos of them in a secure cloud service (Google Drive, Dropbox) and in your email.
Travel Insurance Details: Carry a printed copy of your policy and save a PDF to your phone for offline access.
Multiple Bank Cards: Pack at least two different credit cards and one debit card. Store them in separate locations (e.g., one in your wallet, one in your daypack).
Emergency Cash: Hide $100-$200 USD deep within your main bag as a final safety net.
Bank Travel Notifications: Log into your banking apps and set a travel notice for your specific destinations and dates. This five-minute task prevents your accounts from being frozen for suspected fraud.
Your On-the-Go Wellness Kit
Stay healthy and comfortable on the road. The goal is a compact, leak-proof, and comprehensive kit.
Prescription Medications: Pack enough for your entire trip in their original, labeled containers. Bring a copy of the prescription itself.
Mini First-Aid Kit:
Pain relievers (Ibuprofen/Acetaminophen)
Assorted adhesive bandages
Antiseptic wipes
Blister treatment (e.g., Compeed)
Anti-diarrhea medication (e.g., Imodium)
Solid Toiletries: The ultimate packing hack. Eliminates liquid restrictions, prevents leaks, and lasts longer.
Solid shampoo bar
Solid conditioner bar
Solid soap bar
The Basics:
Toothbrush
Solid toothpaste tablets
Deodorant
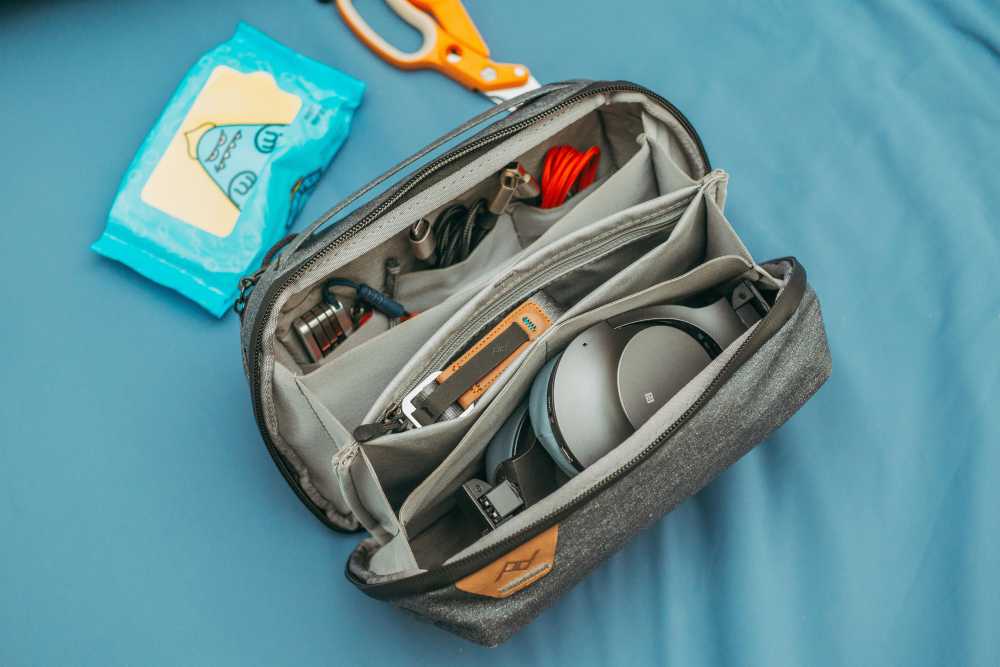
Your Digital Lifeline
Your smartphone is your navigator, translator, and connection to the world. Keeping it powered is mission-critical.
Smartphone: Your all-in-one command center. Download offline maps for your destination.
Portable Power Bank: A non-negotiable safety item. Choose a 10,000mAh+ model from a reliable brand like Anker to guarantee 2-3 full phone charges. Keep it charged.
Universal Power Adapter: Invest in one high-quality universal adapter with multiple USB ports. This allows you to charge all your devices from a single outlet.
Noise-Canceling Headphones: Essential for focus and peace on loud flights, trains, or in shared hostel rooms.

Essential Solo Travel Safety Gear
This module proactively addresses the "what-if" scenarios, allowing you to explore with confidence and sleep soundly. The gear here is your first line of defense, but true confidence comes from preparation. For a complete guide to situational awareness and navigating new environments securely, our comprehensive article, Anxious to Adventurous: Solo Travel Tips for Confidence, is required reading.

For Your Accommodation
Portable Door Lock (e.g., Addalock): A small, lightweight device that braces your door from the inside, making it impossible to open even with a key.
Door Stop Alarm: A wedge that slides under your door. If opened, it physically blocks the door while emitting a piercingly loud alarm.
For When You're Out & About
Anti-Theft Daypack (e.g., Pacsafe, Travelon): Choose a crossbody bag or backpack with slash-proof straps, lockable zippers, and RFID-blocking pockets.
Personal Safety Alarm: A keychain device that emits an ear-splitting siren and flashing strobe light to attract attention and disorient an attacker.
RFID-Blocking Wallet: Protects your passport and credit cards from electronic "skimming."
The 5-4-3-2-1 Formula
Pack less and wear more with a strategic, versatile wardrobe built on mix-and-match essentials. Choose a neutral color palette (black, gray, navy) for core items.
The 5-4-3-2-1 Formula (1-Week Framework)
5 Tops: Focus on wrinkle-resistant, odor-resistant fabrics. At least one should be merino wool—the ultimate travel fabric for temperature regulation and multi-day wear.
4 Bottoms: A typical mix includes one pair of comfortable travel pants, one pair of jeans or chinos, and one skirt or pair of shorts.
3 Accessories: A lightweight scarf or sarong is incredibly versatile (fashion, beach cover-up, towel, head covering).
2 Pairs of Shoes:
Pair 1: Supremely comfortable, broken-in walking shoes.
Pair 2: A versatile, slightly dressier option (flats, loafers, clean leather sneakers).
1 Jacket: A waterproof, windproof outer shell. Layer with a fleece or sweater for warmth as needed.
Climate Sub-Modules (Choose One)
Cold Climate Add-ons: One set of thermal base layers (top and bottom), a warm hat, gloves, and wool socks.
Tropical Climate Add-ons: A swimsuit, a quick-dry microfiber towel, a wide-brimmed sun hat, and sunglasses.
Digital Nomad's Checklist
This module is for anyone working on the road. It focuses on creating an efficient, ergonomic, and connected remote workstation.

Lightweight Laptop: An ultrabook (e.g., MacBook Air) offers the best balance of power and portability.
Portable Laptop Stand (e.g., Roost, Nexstand): The single best way to prevent neck and back pain.
Ergonomic Peripherals: A slim, portable keyboard (e.g., Logitech K380) and a portable mouse (e.g., Logitech MX Anywhere).
High-Quality Headphones with Mic: Essential for calls and focus in noisy environments.
eSIM: Use an app like Airalo to purchase and install a digital SIM card before you leave. Get connected the moment you land.
High-Capacity "PD" Power Bank: Ensure your power bank is "Power Delivery" rated and has enough capacity to charge your laptop, not just your phone.
What NOT to Pack
Knowing what to leave behind is as important as knowing what to bring.

Expensive or Sentimental Jewelry: Don't bring anything you would be devastated to lose.
Full-Sized Towel: Most accommodations provide them. If needed, a quick-dry travel towel is a superior option.
Multiple "Good" Outfits: Stick to versatile pieces that can be dressed up or down.
Physical Books: An e-reader provides an entire library at a fraction of the weight.
"Just in Case" Items: Unless you're traveling to a very remote location, you can buy most basic items at your destination.
Your Questions Answered
What should a solo female traveler add? Many add a versatile sarong (for modesty at religious sites), a silicone doorstop for extra security, and some opt for a fake wedding ring to deter unwanted attention.
How do I pack for a long-term trip in a carry-on? Commit to doing laundry. Pack one week's worth of clothing using the capsule method and plan to do laundry every 7-10 days.
What are the best shoes for solo travel? The ones you can walk in comfortably for 8+ hours. Never bring new, unbroken-in shoes on a trip.

By starting with the Core Essentials and adding modules tailored to your journey, you have now built the perfect solo travel packing list. This system eliminates guesswork, ensures you are prepared for your adventure, and empowers you to travel with the confidence of a pro.
Read the full guide: Anxious to Adventurous: The Ultimate Guide to Solo Travel Confidence
Don't Miss Out! Subscribe for Exclusive Content
SubscribeComments 0
No comments yet
Be the first to share your experience!
Dont Miss Out! Subscribe for Exclusive Content
Ultimate USA Holidays Guide: Top Picks
FTC Affiliate Disclosure Essentials: Stay Compliant as a Travel Creator
Essential Affiliate Tools: From Tracking to Full Optimization
Booking.com Affiliate Program Review: Pros, Cons, and Earnings Potential

Decoding Affiliate Commission Rates: Benchmarks for Travel Creators

Amazon Associates for Travel: Strategies to Maximize Commissions
Travel Insurance Guide: Avoid Mistakes & Travel Worry-Free
TrekGuider @trekguider
You’ve spent weeks, maybe even months, planning the perfect getaway. You’ve booked the flights, reserved the hotel, and your itinerary is a masterpiece of exploration and relaxation. But there’s one final task that feels more like a chore than an exciting step: buying travel insurance. The whole process is a minefield of confusing jargon, endless fine print, and the nagging fear that you’re either overpaying for coverage you don’t need or, worse, buying a worthless policy that will abandon you when you need it most. This is where our guide to choosing travel insurance comes in.

This isn't just a minor administrative headache; it's a high-stakes decision. A sudden illness in a foreign country can lead to six-figure medical bills that your domestic health plan won't cover. A last-minute trip cancellation could mean losing thousands of dollars in non-refundable deposits. Relying on the "free" insurance from your credit card often leaves critical gaps in coverage, especially for medical emergencies. The anxiety is real because the horror stories of denied claims are everywhere, leaving travelers financially and emotionally stranded. For any traveler, this financial safety net is non-negotiable, forming a core part of the playbook we lay out in our ultimate .
It’s time to trade that anxiety for absolute confidence. This guide will demystify the entire process. We will translate the arcane language of insurance into simple, actionable advice. We’ll provide you with a powerful, step-by-step framework to help you analyze your needs, compare policies like a pro, and identify the red flags that most people miss. By the end of this article, you won't just buy a travel insurance policy; you will strategically select the perfect coverage that empowers you to travel with true, unshakeable peace of mind.
Why Travel Insurance is Your Trip's Most Important Investment
Let's reframe the conversation. Travel insurance isn't an annoying expense; it is the foundational investment that protects the value of every other dollar you've spent on your trip. This isn't a niche product anymore; American travelers spent a staggering $5.56 billion on travel protection in 2024, a 46% increase from pre-pandemic levels, signaling a major shift in how we prepare for travel.
The cost of a strong policy typically falls between 5% and 10% of your total non-refundable trip costs. So, for a $4,000 vacation, you might pay between $200 and $400 for a policy.
Now, weigh that against the potential for catastrophic financial loss:
Medical Emergencies Abroad: An unexpected hospital stay in many countries can easily exceed $50,000. One uninsured traveler faced a $130,000 bill for a coronary bypass in the U.S.
Medical Evacuation: If you're injured in a remote location and need to be transported to a modern hospital or flown back home, the bill for an air ambulance can soar past $100,000.

Here's a hard truth every American traveler must understand: your domestic health insurance, including Medicare, becomes virtually useless the moment you cross the border. This makes dedicated travel medical insurance an absolute necessity for international journeys. Viewing your premium as the "price of certainty" is the first step. The next is understanding exactly what that certainty buys you.
The 6 Core Types of Coverage You Need to Understand
A comprehensive policy is a bundle of different coverages. Understanding what each piece does is the first step in choosing the right plan. Here’s a breakdown of the essential components.
1. Trip Cancellation
This is your primary defense against losing your prepaid, non-refundable deposits. It reimburses you if you have to cancel your trip before you leave for a covered reason, like a sudden illness, a family emergency, or severe weather making your destination inaccessible.
Recommended Minimum: 100% of all your prepaid, non-refundable trip costs.
Who Needs It Most: Any traveler with significant upfront financial commitments, such as those who have booked organized tours, cruises, or non-refundable flights and accommodations.
2. Trip Interruption
This coverage kicks in after your trip has already started. If you have to cut your trip short and return home early due to a covered reason, it reimburses you for the unused portion of your trip and can cover the often-exorbitant cost of a last-minute flight home.
Recommended Minimum: 125% to 150% of your trip cost. The extra percentage is crucial for covering those expensive last-minute travel arrangements.
Who Needs It Most: Individuals on long, multi-stop, or particularly expensive journeys where ending the trip early would mean a massive financial loss.
3. Emergency Medical Expense
This is the most critical component for international travel. It covers your bills for medical treatment, hospital stays, and doctor’s services for an illness or injury that occurs during your trip.
Recommended Minimum: At least $50,000 for general international travel. Increase this to $100,000 for cruises or travel to remote destinations.
Who Needs It Most: All international travelers. This is non-negotiable.
4. Emergency Medical Evacuation & Repatriation
This covers the immense cost of transporting you to the nearest adequate medical facility or, if deemed medically necessary, all the way back to your home country. This is a separate benefit from your Emergency Medical coverage and is absolutely vital.
Recommended Minimum: At least $250,000. An air ambulance is incredibly expensive, and being underinsured here could be financially devastating.
Who Needs It Most: Travelers visiting remote or undeveloped areas, participating in adventure sports, or going on cruises where they may be far from high-quality medical facilities.
5. Baggage & Personal Effects / Baggage Delay
This provides two distinct benefits. Baggage & Personal Effects coverage reimburses you if your luggage is lost, stolen, or damaged. Baggage Delay coverage gives you a stipend to buy essential items like clothes and toiletries if your checked bags are delayed by the airline for a certain period (e.g., 6-12 hours).
Recommended Minimum: Check the per-item sub-limits. Coverage for expensive electronics or jewelry is often capped at a low amount like $250-$500.
Who Needs It Most: Travelers with multiple flight connections or those carrying essential or expensive equipment.
6. "Cancel For Any Reason" (CFAR) Upgrade
CFAR is the ultimate flexibility upgrade. It’s an optional add-on that lets you cancel your trip for any reason whatsoever—even reasons not covered by a standard policy, like a work conflict or simply changing your mind—and get a significant portion of your non-refundable costs back, typically 50% to 75%.
Who Needs It Most: Travelers with very expensive or complex trips, those with unpredictable personal situations, or anyone who desires the maximum possible protection against losing their travel investment.

Pro-Tip: "Cancel For Any Reason" coverage is extremely time-sensitive. You must purchase this add-on within a short window, usually 7 to 21 days, of making your very first trip payment or deposit. If you miss this window, the option is gone.
Your 5-Step Playbook for Choosing the Perfect Policy

Don't just pick the cheapest plan. Follow this strategic process to ensure the policy you buy is perfectly aligned with your trip and your needs.
Calculate Your Total Financial Risk.
Before you do anything else, open a spreadsheet and tally up every single prepaid, non-refundable expense for your trip. This includes flights, cruise payments, tour deposits, non-refundable hotel stays, and event tickets. The final number is your total trip cost, and it dictates the minimum amount of Trip Cancellation coverage you need.
Assess Your Personal Risk Profile.
Next, look beyond the numbers and evaluate your unique circumstances.
Health: Do you, a traveling companion, or a close family member at home have a pre-existing health condition that could flare up?
Destination: Are you traveling to a remote area with limited medical infrastructure where an evacuation might be necessary?
Activities: Will you be skiing, scuba diving, or mountain climbing? These often require special coverage.
Use Comparison Sites to Shortlist, Not to Buy.
Online aggregator sites like Squaremouth and InsureMyTrip are fantastic tools for the initial research phase. You can enter your trip details and get dozens of quotes from different providers in a side-by-side format. Use these sites to identify a shortlist of two or three well-priced plans from reputable companies that appear to meet your top-level needs (e.g., $100,000 in medical coverage).
Scrutinize the Actual Policy Document.
This is the most important step. For each policy on your shortlist, download the full "Certificate of Insurance" or "Policy Wording." This is the legal contract. Ignore the marketing brochures and summary pages. You are on a mission to find the definitions, limitations, and, most importantly, the exclusions. This is where you’ll discover if that "adventure activity" you've planned is actually covered.
Call the Provider Before You Buy.
The final step is to get on the phone with a licensed agent from the insurance company. Your goal is to get verbal confirmation on your most critical questions.
"My itinerary includes skiing in the Alps. Can you confirm that this policy provides full medical and evacuation coverage for injuries sustained while skiing?"
"Can you explain the 'look-back period' for pre-existing conditions and the exact requirements to get the waiver?"
"If I have a medical emergency, what is the exact procedure? Do I need to call you for pre-authorization before I go to a hospital?"
Red Flags and Fine Print: A Savvy Traveler's Guide to Choosing Travel Insurance

A policy is defined as much by what it excludes as what it covers. Be on the lookout for these common traps that lead to denied claims.
Pre-Existing Medical Conditions
This is a leading cause of claim denials. A pre-existing condition is any ailment you received treatment or medical advice for during a "look-back period" (usually 60-180 days) before buying your policy. To cover these conditions, you need a "pre-existing medical condition exclusion waiver." As mentioned, this is time-sensitive and typically requires you to buy your policy within a week or two of your initial trip deposit.
Adventure Sports & High-Risk Activities
Standard policies often exclude activities they deem "hazardous." This can include everything from bungee jumping to scuba diving. If you plan on doing anything more adventurous than swimming, you must either find a policy that specifically covers it or purchase an adventure sports add-on.
U.S. State Department Advisories
This is a critical, often-overlooked exclusion. Insurance companies monitor official government travel advisories.
WARNING: Most policies will provide ZERO coverage if you travel to a country that is under a "Level 4: Do Not Travel" advisory from the U.S. State Department. Your entire policy could be voided. Always check the official State Department website before booking and before departing.
Mental Health, Pandemics, and "Fear of Travel"
Standard trip cancellation does not cover changing your mind. Canceling a trip due to anxiety, fear of a pandemic, or other mental health concerns is generally not a covered reason. This is a scenario where only a "Cancel For Any Reason" (CFAR) policy would provide reimbursement.
Pro-Tip: When dealing with a claim, especially for a delay, get everything in writing. If a flight is canceled, don't just accept a verbal reason. Go to the airline desk and get a printed statement detailing the official cause of the cancellation. This piece of paper can be the difference between a paid claim and a denial.
Is Your Credit Card's "Free" Travel Insurance Good Enough?
Many premium travel credit cards, like the Chase Sapphire Reserve or The Platinum Card from American Express, advertise travel insurance as a key benefit. But this "free" coverage has significant gaps and should be seen as a supplement, not a substitute for a real policy.
The Pros: Credit card coverage is often decent for things like trip delays, baggage delays, and rental car damage waivers.
The Critical Gaps:
Emergency Medical Coverage: This is the biggest weakness. Most cards offer little to no emergency medical coverage.
Emergency Evacuation: This is almost never included, leaving you exposed to a massive financial risk.
Low Cancellation Limits: The trip cancellation benefit is often capped at a level (e.g., $10,000 per trip) that may be insufficient for more expensive journeys.
Secondary vs. Primary Coverage: Much of the coverage is "secondary," meaning you have to file with any other insurance you have first, creating a complicated and lengthy claims process. A standalone policy provides "primary" coverage that pays first.
The Verdict: For any international trip, or any domestic trip with significant non-refundable costs, a dedicated, comprehensive policy with high primary medical and evacuation limits is the only prudent choice.
Choosing travel insurance is not a gamble; it is a strategic act of preparation that transforms hope into confidence. In today's world, a proactive approach to risk management is the key to true peace of mind. You are now armed with the knowledge to decode policy language, identify critical exclusions, and follow a proven framework for selecting the right coverage. By using this guide to choosing travel insurance, you can move forward with your planning, fully empowered and secure in the knowledge that you have a strong financial safety net in place. Your investment, your health, and your adventure are protected.
Read the full guide: Anxious to Adventurous: The Ultimate Guide to Solo Travel Confidence
Don't Miss Out! Subscribe for Exclusive Content
SubscribeComments 0
No comments yet
Be the first to share your experience!
Dont Miss Out! Subscribe for Exclusive Content
Ultimate USA Holidays Guide: Top Picks
FTC Affiliate Disclosure Essentials: Stay Compliant as a Travel Creator
Essential Affiliate Tools: From Tracking to Full Optimization
Booking.com Affiliate Program Review: Pros, Cons, and Earnings Potential
Decoding Affiliate Commission Rates: Benchmarks for Travel Creators