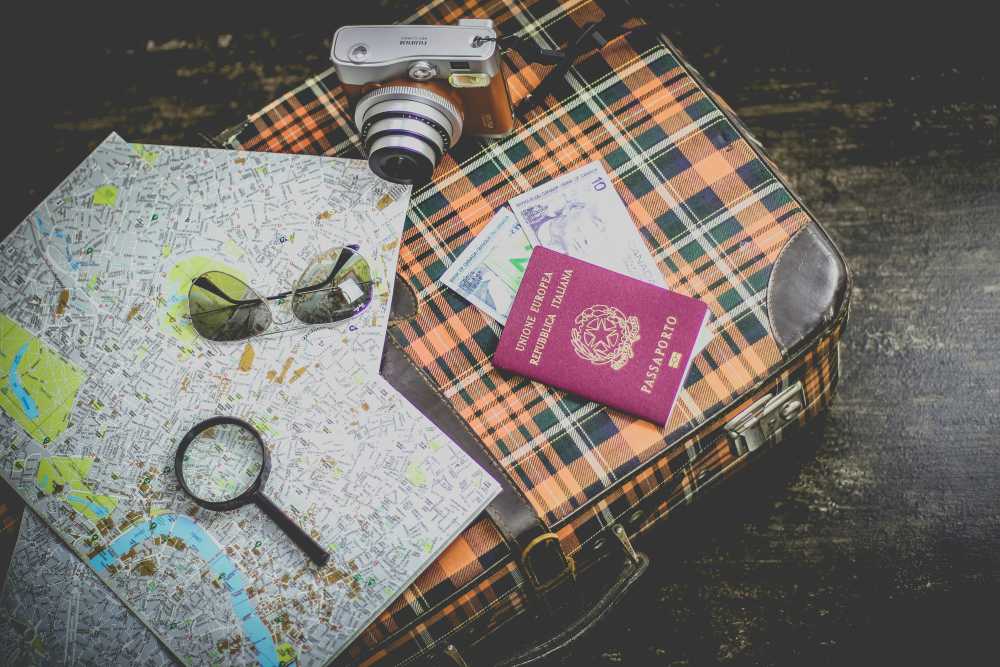
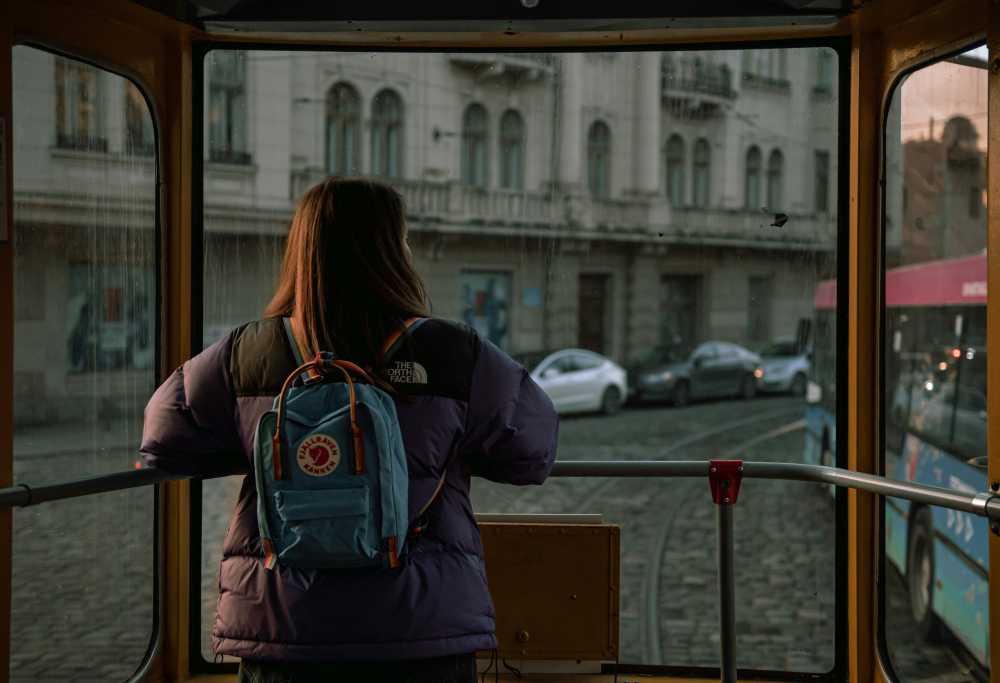
Solo Travel Europe Without Going Broke: A Realist's Guide
TrekGuider @trekguider
Does the dream of a solo trip through Europe—wandering Rome’s ancient streets, finding the perfect café in Lisbon, or watching the sunset over the Danube in Budapest—feel just out of reach because of one major hurdle? The cost. For years, the myth has persisted that a European adventure requires a massive savings account. You've seen the glamorous photos, but you’re agitated by the nagging fear that traveling alone means paying double for everything and draining your bank account.
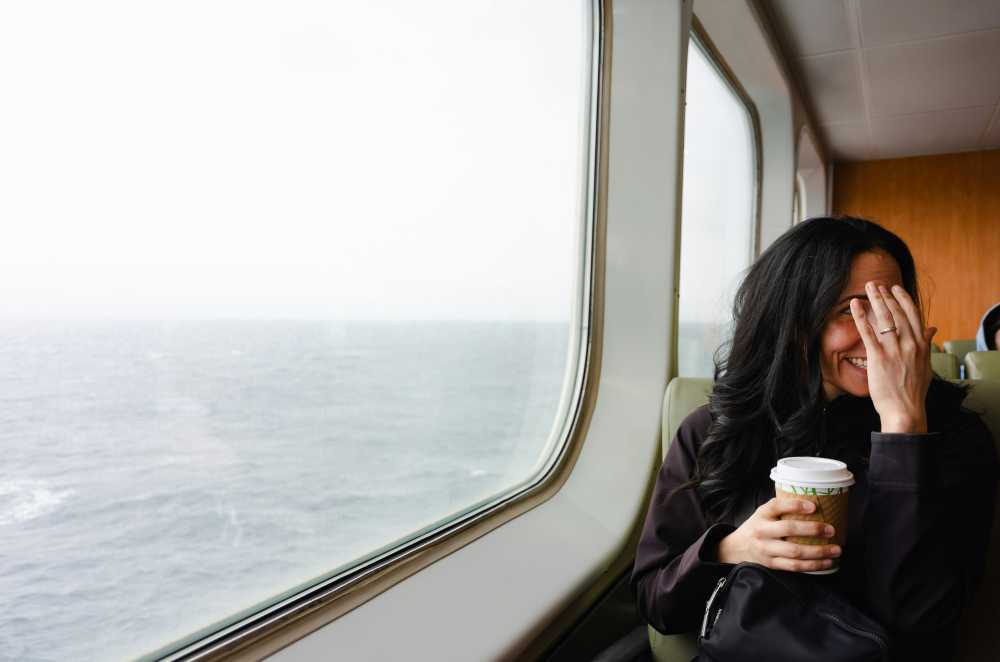
Let's put that fear to rest. The fantastic news is that this financial barrier is crumbling. The travel industry is finally waking up to the power of the solo traveler, and a smarter, more affordable way to explore the continent has emerged. This guide is your complete playbook for an incredible solo travel Europe adventure on a budget. We'll show you how to leverage Europe’s incredible network of hostels and trains, not as a sacrifice, but as a real advantage for a richer journey. These are the essential that transform financial anxiety into confident exploration.
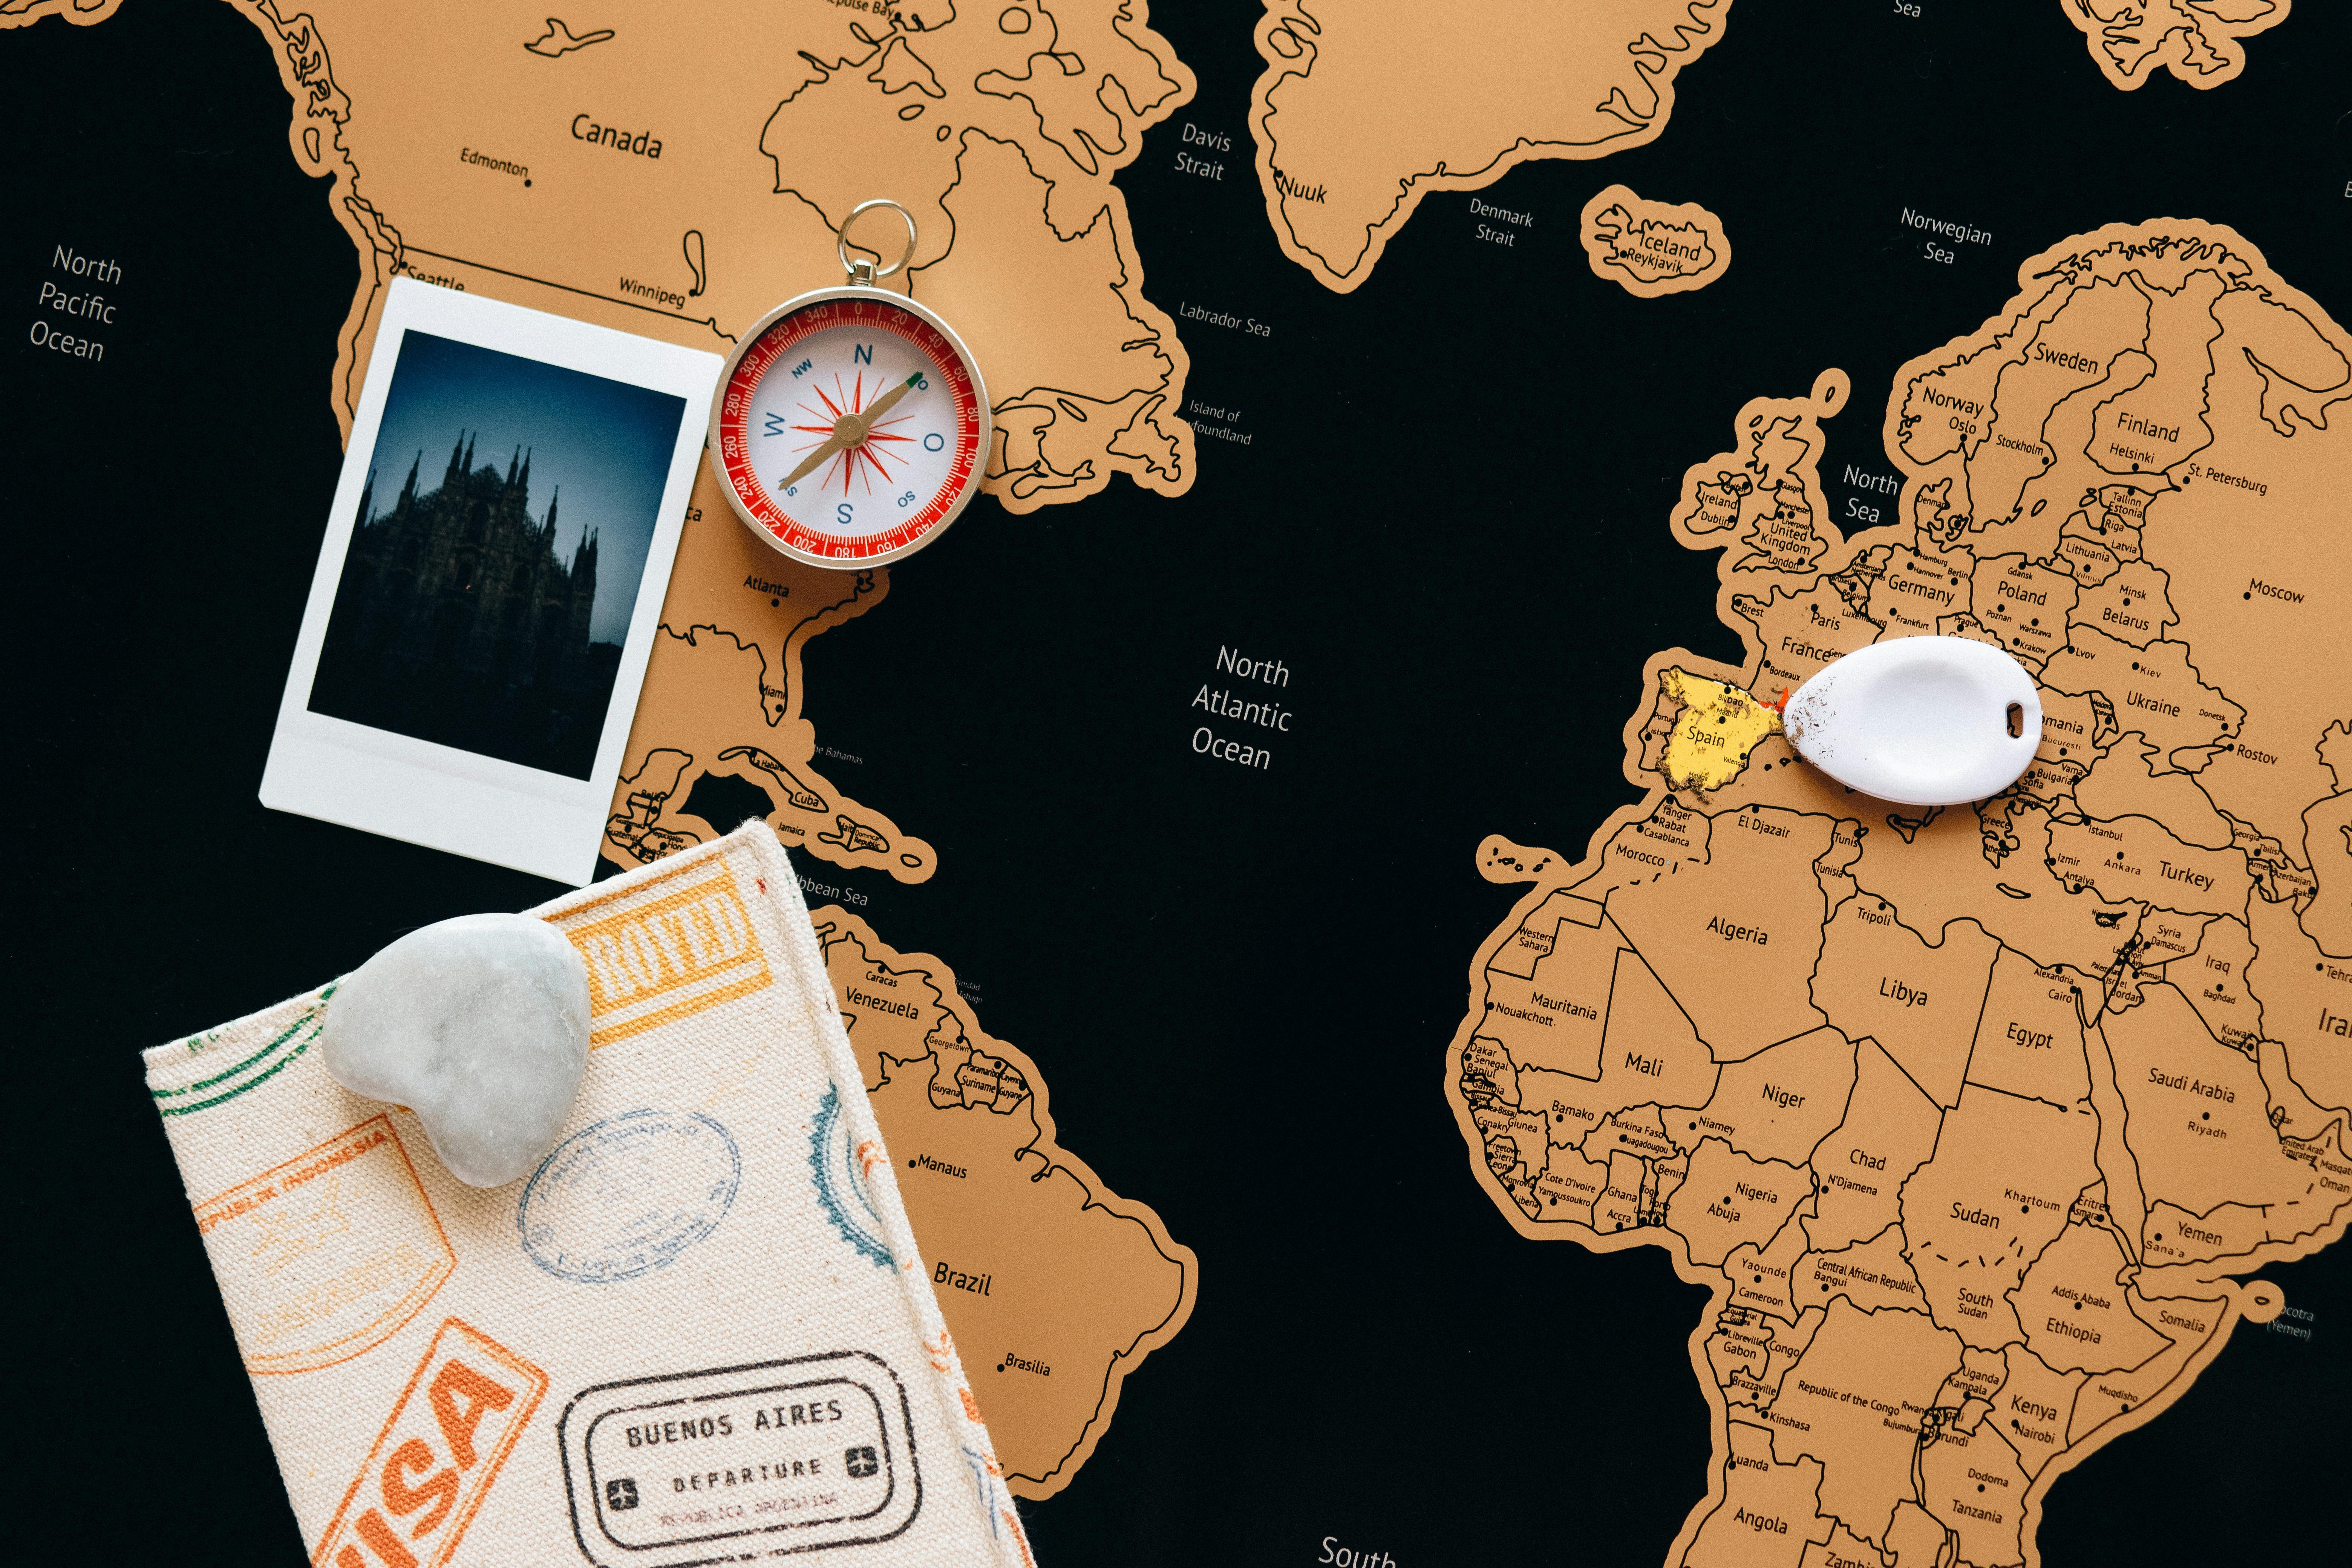
The First, Most Important Decision: Mastering Europe's Budget Map
The single most powerful decision you will make for your budget happens before you book a single hostel or train ticket: choosing where to go. The secret to affordable solo travel Europe is understanding that the continent has two distinct economic personalities. Your first strategic move is to divide your map into two zones: the pricier West and North, and the wonderfully affordable East and South.
This isn’t about sacrificing iconic experiences; it’s about being smart. A daily backpacker budget in Western Europe (think France, the UK, Switzerland) can easily run you $75-$125. That same travel style in Eastern Europe (Hungary, Poland, Czech Republic) will cost closer to $40-$70. To put it bluntly: a single dinner in Zurich can cost more than your entire day’s budget in Krakow.
Your Budget-Friendly Hubs (East & South): These regions are your financial superpower. They offer world-class history and vibrant culture at a fraction of the cost. Prioritize cities like:
Budapest, Hungary: Famous for its stunning architecture and thermal baths.
Krakow, Poland: A historical gem with a lively, youthful energy.
Prague, Czech Republic: A fairytale city of spires and bridges.
Lisbon, Portugal: Coastal charm, fantastic food, and a laid-back vibe.
Seville, Spain: The heart of Andalusia, with passionate culture and sunny plazas.
Athens, Greece: The cradle of Western civilization, with ancient wonders at every turn.
The Splurge-Worthy Destinations (West & North): This doesn't mean you have to skip London, Paris, or Amsterdam. It just means you visit them strategically.
Pro-Tip: Embrace the "Hybrid Trip" Strategy. Don't think in terms of "either/or." Plan to spend the bulk of your trip—say, two weeks—exploring the more affordable regions. This allows you to "bank" significant savings, which you can then deploy for a shorter, more focused four or five-day splurge in a bucket-list city like Paris without breaking the bank.
Forging Your Financial Compass
A budget isn’t a restriction; it’s a tool of empowerment. It’s what allows you to travel without financial stress. Instead of a single magic number, let's break down the costs so you can build a personalized plan.
Deconstructing the Daily Costs: Where Does the Money Go?
Forget generic advice. Your daily budget is a deeply personal number that hinges on your travel style. To give you a real-world compass, we’ve broken down the three most common approaches we see on the road:
The Bare-Bones Backpacker: $45-$65 per day. This is for the traveler who stays exclusively in hostel dorms, cooks most meals in the hostel kitchen, and focuses on free activities like walking tours and exploring neighborhoods on foot.
The Savvy Mid-Ranger: $75-$130 per day. This is the sweet spot for most. It allows for a mix of hostel dorms with the occasional private room, eating one meal out per day at a casual spot, visiting paid attractions, and enjoying the local nightlife.
The Comfort-Conscious Budgeter: $135+ per day. This budget allows for private rooms in hostels or budget hotels, dining out more frequently, and participating in unique paid experiences or guided tours.
Pre-Trip Savings vs. On-the-Ground Spending
Remember that a significant chunk of your budget will be spent before you even leave home. Factor in these major upfront costs:
International Flights: Use tools like Google Flights and Skyscanner with flexible date searches to find the best deals.
Travel Insurance: This is non-negotiable. It’s your ultimate safety net for medical emergencies or trip cancellations.
Essential Gear: A quality, comfortable backpack and two pairs of versatile shoes are your most important investments.
For your money on the ground, be a financial ninja. Get a credit or debit card with no foreign transaction fees (like the Chase Sapphire Preferred or Capital One Venture). These 2-3% charges on every purchase add up shockingly fast. Crucially, always avoid the bright blue and yellow Euronet ATMs. They are predatory, charging outrageous conversion rates and hidden fees. Stick to official bank ATMs—look for the logos of major national banks like Deutsche Bank, BNP Paribas, or Santander. Your wallet will thank you.
Sleep Smart, Save Big
For solo travelers, where you sleep is more than just a bed—it’s your social hub, your sanctuary, and your savings engine.
Hostels: Your Social Hub and Savings Engine
Hostels are the undisputed key element of budget travel in Europe. A dorm bed will typically cost between $25 and $45, a massive saving compared to a hotel. But their true value lies beyond the price tag.
Built-in Community: Hostels are designed for social interaction. The common areas, shared kitchens, and organized events (like free walking tours or pub crawls) make it incredibly easy to meet other travelers if you choose to.
Safety & Security: Modern hostels are safer than ever. Look for properties with 24-hour reception, secure individual lockers for your valuables (always bring your own padlock), and female-only dorms if that makes you more comfortable.
Amenities that Save: The communal kitchen is a budget game-changer. Cooking just a few meals a week can save you hundreds over a long trip.
When booking on sites like Hostelworld, read recent reviews like a detective. Pay close attention to comments on cleanliness, location, security, and the overall "vibe" to find the perfect fit for you.
Beyond the Dorm: Other Budget-Friendly Options
While hostels are king, they aren't your only choice. The rise of "lifestyle" hotel brands like Moxy offers smaller, stylish single rooms that can be a great value. Renting a private room on Airbnb is another option, though often pricier than a hostel. A key piece of good news: the dreaded "single supplement" fee is slowly dying. The industry has recognized the solo travel boom, and more companies are offering true single-person pricing. Once you've locked in your home base, the next piece of the puzzle is mastering the art of getting from A to B without draining your travel fund.
Mastering the Rails & Roads
Europe’s transport network is a marvel, but choosing the cheapest option requires a strategic trade-off between cost, time, and convenience. This is a critical component of your plan for solo travel Europe on a budget.
Eurail Pass vs. Point-to-Point Tickets
Is a Eurail Pass worth it for a solo traveler? The answer is: it depends.
Get a Eurail Pass if: You crave ultimate flexibility and plan to travel extensively through expensive countries like Germany, Switzerland, and Austria, where last-minute train tickets are costly.
Buy Point-to-Point Tickets if: You have a relatively fixed itinerary and are focusing on Southern or Eastern Europe. Booking individual bus or train tickets in advance on platforms like Omio or Trainline is almost always cheaper.
Pro-Tip: Before you buy a pass, map out your ideal route and price out each individual leg of the journey. Compare that total to the cost of the pass. This simple exercise can save you hundreds of dollars.
Eating Like Royalty on a Pauper's Budget
Forget surviving on instant noodles. Eating affordably in Europe can be one of the most delicious and authentic parts of your journey.
The Holy Trinity of Budget Eating
Supermarkets & Picnics: This is your #1 money-saving tactic. Visit a local grocery store or an outdoor market. Buy a fresh baguette, some regional cheese, local cured meats, fruit, and a bottle of wine for a few euros. Enjoying this feast in a Parisian park or along a Venetian canal is a 5-star experience at a 1-star price.
Hostel Kitchens: Cooking dinner with new friends in the hostel kitchen is a quintessential backpacking experience. It’s social, fun, and incredibly cheap.
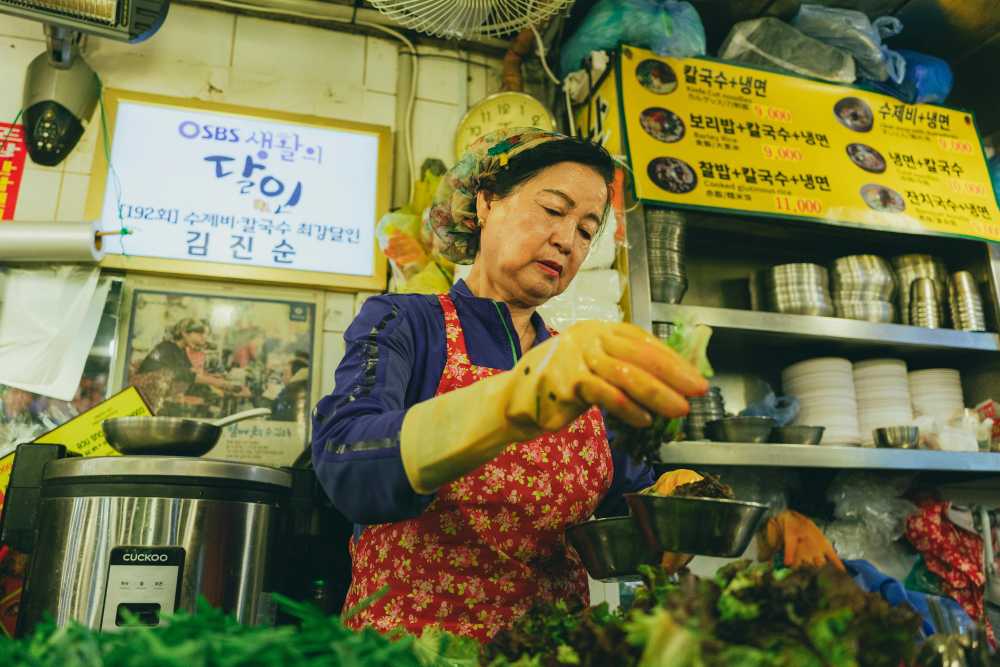
Street Food & Local Markets: From gyros in Greece to pierogi in Poland, covered food halls and street food stalls are where you’ll find authentic, delicious local food for just a few dollars.

Smart Restaurant Hacks
When you do dine out, eat smart. Embrace the lunch special. Across Europe, especially the menu del día in Spain (which typically includes a starter, main, dessert, and a drink for a set price), restaurants offer multi-course lunch menus for a fraction of their dinner prices. And always use the Five Block Rule: walk at least five blocks away from any major tourist attraction before choosing a restaurant. You’ll almost always find better food at a lower price.
Two Field-Tested Budget Itineraries
Let's make this real. Here are two sample itineraries showing these principles in action.
The 3-Week Eastern Europe Classic (€50/day)
Route: Prague → Krakow → Budapest → Belgrade
The Vibe: This is the ultimate budget-friendly route through the heart of Central and Eastern Europe. You’ll experience stunning history, incredible nightlife, and delicious food and beer, all while your daily costs stay incredibly low. Transportation between these cities is fast, cheap, and easy via bus or train.
The 3-Week "Best of Both" Hybrid (€85/day)
Route: Lisbon → Seville → (Fly to) Rome → Florence → (Overnight bus to) Ljubljana
The Vibe: This itinerary demonstrates the Hybrid Strategy. You start in affordable and beautiful Portugal and Spain, then take a strategic budget flight to tackle your Italian bucket list. You finish in charming, budget-friendly Slovenia, using an overnight bus from Italy to save on both transport and a night's accommodation.
Your Top Budget Questions, Answered
How much money do I need for 1 month of solo travel in Europe?
A solo traveler can expect to spend between $1,500 (frugal backpacker in the East) and $4,500 (mid-range traveler including the West) for a one-month trip. Your destination choices and travel style are the biggest factors.
Is Europe safe for a first-time solo female traveler?
Absolutely. Europe is generally very safe for solo female travelers. Countries like Iceland, Portugal, and Slovenia are consistently ranked among the safest in the world. Standard precautions—being aware of your surroundings, securing your belongings, and trusting your gut—are key.
What is the absolute cheapest way to travel between countries in Europe?
The bus is almost always the cheapest option. Companies like Flixbus have an extensive network with fares as low as $5, making them a backpacker's best friend.
Should I travel in the summer or the off-season?
For budget travel, the shoulder seasons (April-May, September-October) are perfect. You’ll get pleasant weather with far fewer crowds and significantly lower prices for flights and accommodation compared to the peak summer months.
You now have the framework for an affordable and unforgettable European adventure. The key to a successful solo travel Europe journey on a budget isn't about restriction; it's about smart, strategic planning. By choosing your destinations wisely, embracing the social and economic power of hostels, and mastering the continent's incredible public transport, you transform a dream into an achievable, actionable plan. The freedom of the open road—and the railway—is yours for the taking.
Read the full guide: Anxious to Adventurous: The Ultimate Guide to Solo Travel Confidence
Don't Miss Out! Subscribe for Exclusive Content
Subscribe


Comments 0
No comments yet
Be the first to share your experience!
Dont Miss Out! Subscribe for Exclusive Content

Top 11 High-Paying Affiliate Programs for Travel Bloggers

High-Paying Affiliate Opportunities for Individual Travel Affiliates

Amazon Associates for Travel: Strategies to Maximize Commissions

How to Avoid Travel Scams: A Global Guide

A Woman's Guide to Safe Travel: 10 Critical Tips

7 Hotel Safety & Security Tips for Peace of Mind
The Ultimate Travel First Aid Kit Checklist (2026)
TrekGuider @trekguider
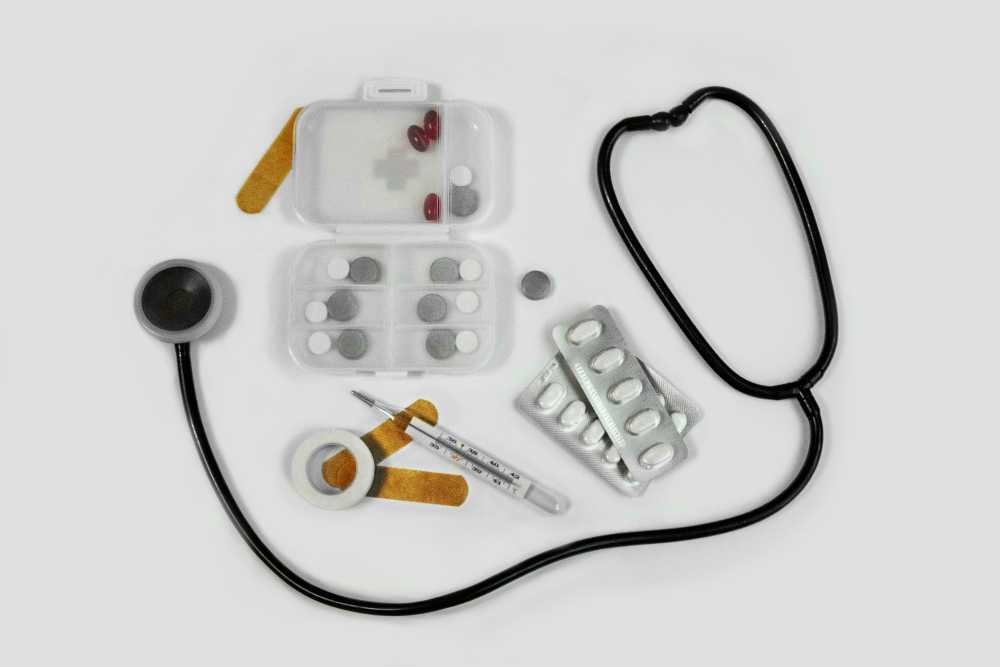
But it doesn’t have to be that way. The single most powerful tool for ensuring a healthy, stress-free journey is one you create before you even leave home: a comprehensive travel first aid kit. This isn’t just a box of bandages; it’s a personalized arsenal of preparedness that empowers you to handle common health issues with confidence and ease. Building your own kit is at the heart of the proactive mindset we cover in our comprehensive The Ultimate Guide to Travel Safety: A 2026 Playbook. Think of this guide less as a simple shopping list and more as a masterclass in preparedness, backed by pharmacist-approved advice to help you build the ultimate defense against travel’s minor medical curveballs.
DIY vs. Pre-Made: Which Travel First Aid Kit is Right for You?
Before we dive into the specific items, it’s worth considering whether to build your kit from scratch or buy a pre-made one.
Pre-Made Kits: These offer undeniable convenience. They come in a compact case and provide a decent baseline of supplies. However, they are often filled with low-quantity, generic items and may lack the specific medications you need for your trip.
DIY Kits: Building your own kit requires a bit more effort upfront but is superior in every other way. It allows you to choose high-quality brands, pack sufficient quantities, and tailor the contents specifically to your destination, your planned activities, and your personal health needs.
Our recommendation? Start with a high-quality pre-made kit as your base and then use this checklist to supercharge it, swapping out generic items and adding the crucial medications and tools it’s missing. This hybrid approach gives you the best of both worlds.
The Core Components of Your Ultimate Travel First Aid Kit
A truly effective travel first aid kit is organized like a mobile clinic, with specific supplies to treat the most common categories of travel-related ailments. Here is the definitive breakdown of what you need.
Wound & Burn Care: For Life's Little Scrapes
From a papercut to a scraped knee on a cobblestone street, any break in the skin is an open invitation for infection, especially in new environments. Here’s how you shut that door, fast.
Antiseptic Wipes (BZK or alcohol-based): For cleaning wounds, scrapes, and your hands before providing treatment. Individual packets are perfect for travel.
Antibiotic Ointment (e.g., bacitracin): A crucial step to prevent infection in minor cuts, scrapes, and burns after cleaning.
Assorted Adhesive Bandages: Pack a variety of sizes. Fabric bandages are generally more durable and flexible than plastic ones.
Butterfly Bandages / Wound-Closure Strips: Essential for taping the edges of a minor cut together to help it heal cleanly.
Sterile Gauze Pads and a Roll of Gauze: For dressing larger wounds or as a compress to control bleeding. Pack a few different sizes.
Medical Adhesive Tape: To secure gauze and bandages in place.
Moleskin or Blister Treatment Pads: An absolute lifesaver for any trip involving significant walking or hiking. Apply it as soon as you feel a "hot spot" to prevent a blister from forming.
Aloe Vera Gel: Provides soothing relief for minor sunburns.
Pain, Fever & Sprains: Managing Aches and Injuries
Long days of sightseeing, sleeping in unfamiliar beds, and carrying luggage can lead to aches and pains. Be prepared to manage them effectively so they don't slow you down.
Pain Relievers/Fever Reducers: Pack both an ibuprofen-based and an acetaminophen-based option. Pharmacists consistently recommend trusted brands like Advil/Motrin (Ibuprofen) for inflammation and pain, and Tylenol (Acetaminophen) for general pain and fever.
Aspirin: While not for general pain relief for everyone, a dose of aspirin can be life-saving for an adult experiencing symptoms of a heart attack.
Elastic Wrap Bandage: Invaluable for providing support and compression to a sprained ankle, wrist, or knee.
Instant Cold Packs: These single-use packs are activated by squeezing them and are excellent for reducing swelling from sprains, strains, and other minor injuries in the first 24-48 hours.
Pro-Tip: Decant pills into small, clearly labeled travel containers to save space, but take a photo of the original packaging first. This helps you remember dosages and provides information for pharmacists or doctors abroad if needed.

Digestive Issues: Your Defense Against Traveler's Diarrhea
Let’s be direct: traveler’s diarrhea is the single most common illness to strike travelers, affecting up to 80% of visitors in some destinations. Having a dedicated section in your kit to manage digestive distress is absolutely critical.
Anti-diarrhea Medication: To manage symptoms when you need to travel or get through a planned activity. The top pharmacist-recommended brand is Imodium (Loperamide).
Antacids: For relief from indigestion, heartburn, and general upset stomach. Pepto-Bismol is another pharmacist-favorite that can also help with mild diarrhea.
Oral Rehydration Salts: This is arguably the most important item in this section. Dehydration is the primary risk of diarrhea and vomiting. These pre-measured packets mix with safe, bottled water to replenish the essential fluids and electrolytes your body has lost.
Anti-nausea or Motion Sickness Medication: Essential if you’re prone to motion sickness on planes, boats, or winding bus rides.
Allergies, Bites & Skin: Soothing Irritations
New environments mean new pollens, unfamiliar insects, and different plants. Be ready to tackle itches, rashes, and allergic reactions before they become a major annoyance.
Antihistamine (e.g., diphenhydramine): For treating allergic reactions, hives, and severe itching. Note that some antihistamines can cause drowsiness.
Hydrocortisone Cream (1%): A topical steroid cream that provides fast relief from the irritation and itching of rashes and insect bites.
Insect Repellent: In any region with mosquito-borne illnesses like Dengue or Malaria, this is as important as your passport. Choose a repellent with an effective active ingredient like DEET or Picaridin.
Epinephrine Auto-Injector (e.g., EpiPen): This requires a prescription and is absolutely essential for travelers with a history of severe allergic reactions (anaphylaxis).
Ready to Pack Like a Pro?
Your travel first aid kit is a critical piece of your travel puzzle, but it's not the only one. To ensure you don't overlook a single essential item—from documents and finances to clothing and gear—you need a master list. Our comprehensive, free checklist has you covered.
Download Your Free International Travel Checklist Now!
Essential Tools & Personal Medications
The final layer of your kit includes the tools to use your supplies effectively and your own personal health necessities.
Fine-Point Tweezers: For removing splinters, ticks, or other foreign objects from the skin.
Small, Rounded-Tip Scissors: For cutting medical tape, gauze, or moleskin. (Ensure they meet TSA guidelines if packing in a carry-on).
Disposable Non-Latex Gloves: To protect your hands and prevent infection when treating a wound on yourself or someone else.
Digital Thermometer: For accurately checking for fever.
Personal Medications: This is the most critical category. Pack a sufficient supply for your entire trip, plus at least a few extra days' worth in case of delays. Always keep your personal medications in your carry-on luggage in their original, labeled containers.
Pro-Tip: Before you leave, ask your doctor for a letter describing your condition and the medications you take, including their generic names. Keep a digital copy of this and your prescriptions on your phone. This can be invaluable if your medication is lost or you need to see a doctor abroad.

Beyond the Basics: Customizing Your Kit
The ultimate travel first aid kit is not one-size-fits-all. Once you have the core components, elevate your preparedness by customizing it for your specific journey.
By Destination:
Tropical/Developing Countries: Add anti-fungal cream, more insect repellent, and potentially a prescription for a standby antibiotic for severe traveler's diarrhea (consult your doctor).
High-Altitude Destinations: Speak with your doctor about medication to prevent altitude sickness.
By Activity:
Hiking/Trekking: Double down on blister care (moleskin, gel pads), pack an elastic wrap for sprains, and add pain-relieving gel.
Beach Vacation: Add extra aloe vera gel, sting-relief spray, and waterproof bandages.
By Traveler:
With Children: Include children’s formulations and dosages of pain/fever reducers, kid-friendly bandages, and any specific allergy medications they need.
Travel First Aid Kit FAQs
A great kit anticipates problems. Here are answers to common questions that take your preparedness to the next level.
1. What’s the first thing I should do if I get traveler’s diarrhea?
According to the CDC and travel medicine doctors, the first and most important step is oral rehydration. Dehydration is the biggest risk. Start sipping an Oral Rehydration Solution (ORS), sports drinks, or clear broths immediately. For mild to moderate cases that don't have a high fever or blood, an antimotility drug like Loperamide (Imodium) can help manage the symptoms. If symptoms are severe, incapacitating, or include a high fever or blood, it's time to consider a prescribed standby antibiotic and seek medical advice.
2. Should I pack a standby antibiotic in my kit?
This is a question for your doctor or a travel medicine clinic. For travelers heading to high-risk destinations where severe traveler's diarrhea is common, many doctors will provide a prescription for a standby antibiotic like Azithromycin. It’s not for mild cases but can significantly shorten the duration of a severe bout of illness. Discuss your itinerary with your doctor to see if this is right for you.
3. Is it okay to pack medications outside their original bottles to save space?
While it's tempting, it's safest to keep prescription medications in their original, clearly labeled containers. This avoids any confusion or legal issues with customs officials. For over-the-counter pills, you have more flexibility. If you use a travel pill organizer, consider taking a photo of the original packaging so you have the dosage information and ingredients handy.

Pack Confidence for Every Journey
A carefully assembled travel first aid kit does more than just prepare you for minor medical issues; it provides profound peace of mind. It transforms you from a worried passenger into a self-sufficient, empowered traveler, ready to handle the small bumps in the road so you can stay focused on the incredible experiences ahead. By following this checklist, you’re not just packing supplies—you’re packing the confidence to explore the world freely and fully.
Now that your health and safety are covered, you can focus on the other details that make a trip unforgettable. For a complete, deep-dive into every facet of trip planning, from health and safety to budgeting and logistics, our comprehensive Travel Guide is the only resource you'll ever need.
Meta Data Suggestions:
SEO Meta Title (55 characters): The Ultimate Travel First Aid Kit Checklist (2026)
URL Slug: travel-first-aid-kit-checklist
SEO Meta Description (154 characters): Build the perfect travel first aid kit. Our 2026 checklist, with pharmacist-approved tips, covers everything from wound care to stomach issues. Be prepared.
Don't Miss Out! Subscribe for Exclusive Content
SubscribeComments 0
No comments yet
Be the first to share your experience!
Dont Miss Out! Subscribe for Exclusive Content

Ultimate USA Holidays Guide: Top Picks

FTC Affiliate Disclosure Essentials: Stay Compliant as a Travel Creator

Essential Affiliate Tools: From Tracking to Full Optimization

Booking.com Affiliate Program Review: Pros, Cons, and Earnings Potential

Decoding Affiliate Commission Rates: Benchmarks for Travel Creators
Amazon Associates for Travel: Strategies to Maximize Commissions
San Francisco Cherry Blossoms: A Local's Guide to the Blooms
TrekGuider @trekguider
The cherry blossom experience in San Francisco is not a grand, sweeping spectacle. It’s something more intimate, more soulful. It’s about turning a corner in a vibrant, historic neighborhood and finding yourself under a delicate canopy of blossoms, the scent of ramen broth mixing with the faint fragrance of spring. It’s a celebration rooted not in diplomacy, but in the fierce resilience of a community.
This is a concentrated jewel box of culture. But that intimacy comes with its own challenges. The Northern California Cherry Blossom Festival, the largest on the West Coast, packs over 220,000 people into the tight-knit blocks of Japantown. A poorly planned visit can quickly devolve into a frustrating battle with crowds, leaving you with more stress than serenity.
This isn’t just another guide. This is your strategic playbook for experiencing San Francisco’s cherry blossoms like a local. We’ll deconstruct the bloom’s tricky timing, reveal the best viewing spots both in and out of the festival’s epicenter, and provide the transportation hacks you need to navigate the city like a pro. By the end of this, you’ll have a plan to witness one of America’s most meaningful cultural celebrations in all its glory.

A Story of Resilience: The Soul of the Festival
To truly appreciate the blossoms here, you have to understand their story. San Francisco’s are proof of a community’s will to survive. Japantown, or Nihonmachi, is one of only three remaining in the United States, a neighborhood that has weathered unimaginable challenges.
After the forced internment of Japanese Americans during WWII, the community returned to find their homes and businesses lost. In the 1960s, city redevelopment projects displaced thousands more. The Northern California Cherry Blossom Festival was born from this turmoil. First held in 1968, it was a defiant celebration of culture and a powerful statement that the community was here to stay.
So when you stand in the Peace Plaza, you’re standing on historic ground. That iconic, five-tiered structure is the Peace Pagoda, a gift from San Francisco’s sister city of Osaka, designed by the renowned Japanese architect Yoshiro Taniguchi. It’s not just a landmark; it’s the spiritual anchor of the entire festival. Every blossom that blooms here feels more meaningful because of the history it represents.
Decoding the Bloom: Festival Dates vs. Nature’s Whim
The first mistake visitors make is confusing the festival schedule with the flowers’ schedule. They are two separate things.
For your planning purposes, here are the official festival dates, which traditionally span two weekends in April:
2026 Northern California Cherry Blossom Festival: April 12-13 & April 19-20, 2026
But here’s the critical distinction every visitor must understand: the festival dates are not the bloom dates. The festival is a fixed celebration of culture, while the blossoms themselves are a fleeting, unpredictable miracle of nature. Your goal is to find the magic window where the two overlap.

The Nuance of "Peak Bloom" in the Bay Area
In San Francisco, "peak bloom" is a rolling event, not a single moment. It depends on the tree variety and the city’s famously fickle microclimates.
The First Wave (Yoshino): The delicate, pale pink Yoshino cherry trees are typically the first to bloom, usually from late March into early April. These are the classic, ethereal blossoms you see in the Japanese Tea Garden.
The Second Wave (Kwanzan): Following the Yoshino are the Kwanzan cherry trees, which produce much fuller, fluffier, and deeper pink blossoms. These are hardier and their bloom often coincides perfectly with the festival’s second weekend and the Grand Parade, making for a spectacular show in Japantown.
Predicting the bloom is an art, not a science. A warm, dry winter can sometimes delay the bloom, as the trees need a certain number of "chill hours" to properly set their buds. Your best bet is to monitor social media. The official festival website and the Instagram accounts for the Japanese Tea Garden and SF Botanical Garden are invaluable resources for real-time updates.
Your Strategic Viewing Guide
You can experience the blossoms in three distinct ways: embracing the festival’s vibrant chaos, seeking tranquil beauty in a world-class garden, or discovering a hidden gem beloved by locals.
1. The Epicenter: Japantown & The Peace Plaza
During the festival weekends, the blocks around the Peace Plaza transform into a bustling hub of Japanese culture. You’ll find everything from traditional music and martial arts demonstrations to mouth-watering street food.
In Japantown, timing isn’t just important—it’s everything. It’s the difference between a serene morning stroll among the blossoms and being swept up in a shoulder-to-shoulder river of festival-goers.
Pro-Tip for Foodies: The food booths, known as yatai, are a massive draw. Don't miss the Takoyaki (octopus balls) from Kagura or the sweet, red-bean-filled Imagawayaki. To beat the lines, arrive right at 11 AM when the festival opens and eat first. The lines can be an hour long by 1 PM.
Pro-Tip for Photographers: The best shot of the Peace Pagoda framed by blossoms is from the Webster Street Bridge overlooking the plaza. For street scenes, a weekday morning before the festival begins offers beautiful, soft light and empty streets.
Go Deeper: For those who want to go even deeper, this is the perfect opportunity to connect with a local expert. The history of Japantown is complex and deeply moving, and a guided walk can reveal stories you’d never find on your own.
2. The Oasis: Golden Gate Park
If you need a break from the festival energy, a short bus ride will take you to the serene landscapes of Golden Gate Park, home to two premier blossom-viewing locations.
The Japanese Tea Garden: This is the oldest public Japanese garden in the United States, and it is an absolute masterpiece. The cherry trees here are artfully placed around the Drum Bridge, pagodas, and koi ponds. It’s a photographer’s dream. There is an entrance fee, but it’s worth every penny. To avoid crowds, purchase your ticket online in advance and go on a weekday morning.
The San Francisco Botanical Garden: Just a short walk from the Tea Garden, the SFBG offers a more sprawling, less crowded experience. Head to the Temperate Asia collection to find their grove of cherry trees. It’s a perfect spot for a quiet picnic under the petals.
3. The Secret Spot: The Palace of Fine Arts
For a truly local experience, head to the Marina district. Tucked away behind the iconic rotunda of the Palace of Fine Arts is a small, enchanting grove of cherry trees. The blossoms here often peak a bit later, sometimes into early May. The sight of the delicate pink flowers against the Greco-Roman architecture is breathtaking and feels like a hidden secret. It’s the perfect place to escape the crowds and enjoy a quiet moment.
Logistics Masterclass: Getting Around
Rule number one: Do not drive to Japantown during the festival. You will spend your entire day circling for non-existent parking. Here’s how to do it right:
Public Transit (Muni): This is your best friend. The 38-Geary and 38R-Geary Rapid buses run constantly along a major corridor and stop one block from the festival. The 2-Clement and 22-Fillmore are also excellent options. Use a Clipper card or the MuniMobile app to make things seamless.
Parking (If You Absolutely Must): The only sane option is the Japan Center Main Garage. The entrance is on Geary Blvd. On festival weekends, you must arrive before 10 AM, or you will find it full.
Ride-Sharing: A good option, but set your drop-off and pick-up points at least three blocks away from the festival’s core (e.g., at Geary & Laguna or Post & Franklin) to avoid getting stuck in gridlock.
Don't-Miss Festival Highlights
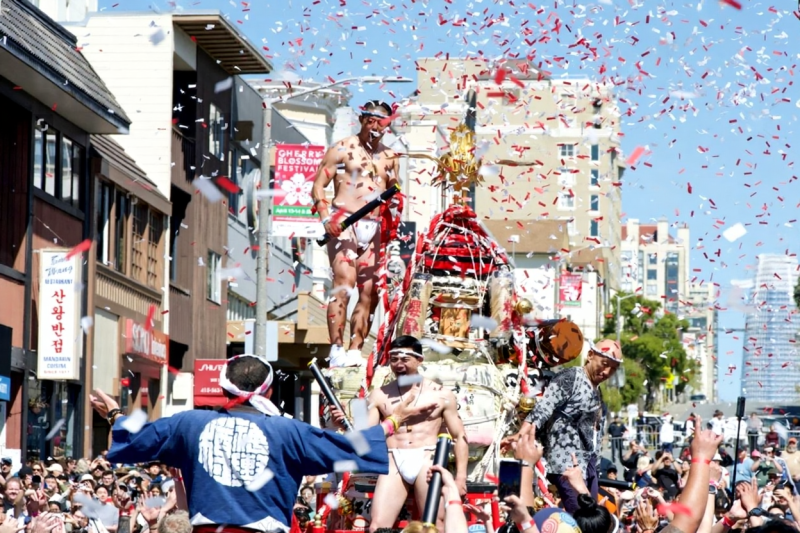
The festival’s crown jewel is the Grand Parade, which closes out the final Sunday of the event. This is a spectacular procession that starts near City Hall and travels up Post Street into the heart of Japantown. You’ll see everything from taiko drummers and dancers to the newly crowned Cherry Blossom Queen and her court—a leadership program for young Japanese American women.
The parade’s incredible finale is the Taru Mikoshi. This is a massive, ornate portable shrine weighing over 1,000 pounds, carried on the shoulders of over 100 chanting participants. It’s a powerful, energetic display of community spirit and a must-see spectacle.
Your Pre-Trip Checklist
A little preparation goes a long way in San Francisco.
Dress in Layers: This is the golden rule of SF. A chilly, foggy morning can become a sunny, breezy afternoon in an instant. A fleece or mid-layer under a windbreaker is the standard local uniform for a reason.
Comfortable Shoes: You will be walking. A lot. The hills are no joke. This is not the time to break in new shoes.
Portable Power Bank: Between navigating, taking photos, and using transit apps, your phone battery won’t stand a chance. A power bank is essential.
Cash: While most vendors take cards, the lines for ATMs are long and the smaller food stalls are often cash-only.
The Cherry Blossom Festival is one of the city's signature spring events. For a complete look at what's happening year-round, our complete guide to San Francisco Holidays: Bay Area Buzz is the essential next read for planning a trip around the city's top seasonal events.
An Unforgettable Bloom
San Francisco’s cherry blossom celebration offers something truly special: a world-class cultural event with the heart of a neighborhood block party. It’s a chance to not only witness the stunning beauty of spring but to feel the powerful spirit of a community that has refused to be erased.
By timing your visit strategically, knowing where to find your own quiet corner, and embracing the city’s public transit, you can bypass the stress and create a truly unforgettable memory. You’re no longer just a tourist; you’re an insider, ready to experience this beautiful and meaningful spectacle to its fullest.
Capture the Perfect Bloom
You’re going to take hundreds of photos of the cherry blossoms—don’t let them get lost on your camera roll. Our free collection of Travel Lightroom Presets is designed to make your photos pop with just one click. Transform your shots of the delicate pink petals and vibrant festival scenes into professional-quality images you’ll be proud to share.
Frequently Asked Questions (FAQ)
When is the absolute best time to see the cherry blossoms in San Francisco? While the festival is in mid-to-late April, the "best" time depends on what you want to see. For the most ethereal, classic blossoms in a garden setting, aim for the first week of April at the Japanese Tea Garden. For the full, vibrant festival experience with the fluffy Kwanzan blossoms, the second weekend of the festival is your best bet.
Is the Northern California Cherry Blossom Festival free? Yes, attending the festival in Japantown, including all the stage performances and watching the parade, is completely free. You will need to pay for food, drinks, and any items from craft vendors. Note that visiting the Japanese Tea Garden in Golden Gate Park requires a separate admission fee.
How much time should I budget for the festival? If you plan to eat, watch a few performances, and browse the stalls, give yourself at least 3-4 hours in Japantown. If you want to see the parade, plan for that to take an additional 2 hours of your day.
Is the festival kid-friendly? Absolutely. Kids love the energy, the food, and the parade. There are also often hands-on cultural activities like origami folding. However, the crowds can be overwhelming for small children, so a weekday visit or arriving right at the opening on a weekend is recommended.
Can I see cherry blossoms in San Francisco outside of Japantown and Golden Gate Park? Yes! Besides our "secret spot" at the Palace of Fine Arts, you can often find beautiful blooming trees scattered in residential neighborhoods like the Richmond and Sunset districts. Keep your eyes peeled in late March and April—you’ll be surprised where they pop up.
Don't Miss Out! Subscribe for Exclusive Content
SubscribeComments 0
No comments yet
Be the first to share your experience!
Dont Miss Out! Subscribe for Exclusive Content

Halloween SF: Haunts Without Horrors

SF Festivals: 7 Must-See Lineups

Christmas SF: Lights & Wharf Wonders

SF Pride: 6 Route & Party Hacks

Chinese New Year SF: Parade Essentials
