Affiliate Keyword Research Mastery for Travel Blogs
TrekGuider @trekguider
You’re doing everything right. Your destination guides are insightful, your photos are stunning, and your packing lists are careful. You’ve joined the affiliate programs, placed the links, and then... crickets. It’s the silent frustration that burns out thousands of talented travel creators.
You see the industry reports, like the one stating the average monthly income for travel affiliates is a staggering $13,847, and it feels like it’s happening in another universe. The chasm between the effort you pour into your work and the revenue trickling into your bank account isn't a reflection of your talent—it's a reflection of your strategy.
The solution is to stop writing into the void and start targeting your content with the precision of a sniper. The secret, the absolute bedrock of every successful affiliate business, is mastering affiliate keyword research. This isn't about SEO wizardry or gaming the system; it's about deeply understanding the language of your audience at the exact moment they are ready to buy. This guide is your definitive, step-by-step masterclass in finding the profitable keywords that will transform your travel blog from a passion project into a revenue-generating powerhouse. For a complete command of the entire affiliate landscape, our definitive pillar page, Travel Affiliate Programs: The 2026 Ultimate Guide, is your essential command center.

The Mindset Shift: From "What to Write" to "What to Target"
The most common mistake in content creation is brainstorming ideas in a vacuum. A creator thinks, "I'll write a post about my amazing trip to Rome." They produce a beautiful, engaging travelogue, sprinkle in a few links to hotels and tours, and then wonder why it doesn't make a dime.
But the highest-earning creators? They flip this model on its head. Their entire content strategy starts not with an idea, but with a question: "What are people who are ready to spend money on a trip to Rome searching for on Google?"
This is the critical difference between informational intent and commercial investigation intent.
Informational Intent: The user is in learning mode. They're searching for things like "what to do in Rome," "history of the Colosseum," or "how to pack a carry-on." This content is fantastic for building an audience, but it rarely leads directly to a sale.
Commercial Investigation Intent: The user has their wallet out. They are actively researching a purchase, comparing options, and looking for an expert to validate their final decision. This is where the money is.
Mastering affiliate keyword research is the disciplined process of finding these "commercial investigation" keywords and building your content around them. When you do this, you stop hoping for random sales and start attracting a steady stream of visitors who arrive on your blog primed to convert.

The Anatomy of a Money-Making Keyword
To find these golden-nugget keywords, you first need to know what they look like. Commercial investigation keywords typically fall into three high-value categories. If you build your content calendar around these formats, you are building a business designed for profit.
1. "Best Of" Keywords
This is the quintessential affiliate keyword. The user is overwhelmed with options and is looking for a trusted expert (you) to curate a list of the top choices.
Travel Examples:
"best carry-on luggage for international travel"
"best travel insurance for digital nomads"
"best hiking boots for rocky trails"
"best all-inclusive resorts in Mexico for families"
2. Comparison & "Vs" Keywords
These keywords are pure gold. The user has already done their initial research and has narrowed their options down to two or three contenders. They are at the final stage of their decision-making process.
Travel Examples:
"Viator vs GetYourGuide"
"SafetyWing vs World Nomads"
"Osprey Farpoint vs Porter"
"Booking.com vs Expedia"
3. Review Keywords
Here, the user is looking for a detailed, real-world verdict on a single product, tour, or service. They are one step away from clicking "buy" and are seeking that final piece of social proof and expert validation.
Travel Examples:
"G Adventures Peru tour review"
"Away Bigger Carry-On review"
"Nomatic travel pack review"
"SafetyWing insurance review"

The Affiliate Keyword Research Workflow: A Step-by-Step Tutorial
Theory is great, but execution is everything. Here is a simple, repeatable process for finding high-value affiliate keywords using a standard SEO tool like Ahrefs or Semrush.
Step 1: Brainstorm Your "Seed" Keywords
Begin by listing the broad topics, products, and services that are central to your niche. Don't filter yourself. If your niche is "luxury eco-tourism in Costa Rica," your seed keywords might include:
eco-lodge
Costa Rica tours
sustainable travel
adventure travel
bird watching gear
waterproof backpack
These terms are too broad to target on their own, but they are the seeds from which your entire profitable content strategy will grow.
Step 2: Use Commercial Modifiers to Find Gold
Now, take your seed keywords and plug them into your SEO tool's "Keywords Explorer." This is where you transform broad topics into specific, monetizable content ideas. Use the tool's filters to find phrases that contain your seed keyword plus a commercial modifier.
Commercial modifiers are the words that signal buying intent. Your core list should include:
best
review
vs
alternative
top
cheap
affordable
comparison
For example, using the seed keyword "eco-lodge," your research might uncover:
"best eco-lodges in Costa Rica"
"Pacuare Lodge Costa Rica review"
"Lapa Rios Lodge vs Pacuare Lodge"
"alternatives to luxury resorts in Costa Rica"
This single step will generate a treasure map of content ideas, each one pointing directly to a user with commercial intent.
Step 3: Analyze the SERP (Search Engine Results Page)
A keyword can look perfect in your SEO tool, but the real test is analyzing the live competition on Google. Before you commit to writing a single word, search for your target keyword and scrutinize the top 10 results.
Confirm the Intent: Are the top-ranking pages other blog posts, reviews, and listicles? That's a green light. If the page is dominated by the homepages of major brands or e-commerce category pages, it's a signal that Google doesn't think a blog post is the right answer, and it will be much harder to rank.
Scope Out the Competition: Are the top spots held by media behemoths like Forbes or Condé Nast Traveler? Or do you see other independent travel blogs like yours? If other creators are ranking, it's definitive proof that you can, too.
Find the "10x Content" Opportunity: Look for weaknesses in the current top-ranking articles. Are they outdated? Thin on detail? Lacking personal experience or high-quality photos? Your mission is to create a piece of content that is so much more thorough, helpful, and engaging that it's undeniably the best result for that search.
Step 4: Balance Keyword Difficulty (KD) and Search Volume
Your SEO tool will give you two final, crucial metrics:
Search Volume: An estimate of how many times a month people search for this term.
Keyword Difficulty (KD): A score (usually from 0-100) that estimates how hard it will be to rank on the first page of Google.
For a newer blog, the sweet spot is a keyword with a KD score under 30. Don't be put off by lower search volumes (e.g., 50-250 searches/month). These keywords are often far less competitive, and the traffic they bring is hyper-targeted and converts at a much higher rate.
Pro-Tip: Don't ignore long-tail keywords. These are longer, highly specific phrases like "best waterproof travel backpack for Southeast Asia monsoon season." They have low search volume, but the user searching for this knows exactly what they need. Ranking for these terms can be incredibly profitable.

Beyond Products: Keyword Research for Next-Level Opportunities
A truly sophisticated affiliate strategy evolves. Once you've mastered promoting products, you can apply the same affiliate keyword research principles to higher-margin opportunities like referral programs. This means shifting your focus from targeting consumers to targeting your peers: other creators.
The goal is to find what other creators are searching for when they're trying to grow their own businesses.
For example, the TrekGuider Seller Platform is built for travel creators to sell their own digital products—itineraries, guides, presets, and more. To attract other creators to the platform using your unique referral link, you would target keywords they are searching for:
"how to sell travel itineraries online"
"best platform for travel creators"
"make money as a travel blogger 2026"
"digital product ideas for travel creators"
"alternatives to Gumroad for travel guides"
By creating genuinely helpful content that solves these business-level problems, you can introduce your peers to a valuable tool and, through a referral program, earn a recurring revenue share from their success. This adds a powerful, diversified income stream that isn't dependent on one-off product sales.
Pro-Tip: The rise of video means your keyword research shouldn't be confined to your blog. According to industry projections, video will account for 55% of all affiliate traffic by 2026. The same keywords you find for your blog posts—"Away Bigger Carry-On review," "Best Hostels in Bangkok"—are the exact titles you should be using for your YouTube videos and TikToks to capture high-intent search traffic on those platforms as well.
The Travel Creator's Toolkit
Feeling ready to build your keyword strategy? Mastering affiliate keyword research is the first step. To help you organize your findings and build a complete, professional affiliate marketing system, we've created the ultimate resource bundle. It includes checklists, content templates, and keyword tracking sheets designed to accelerate your journey from beginner to pro.
Download Your Free Bundle: The Travel Creator's Toolkit

Frequently Asked Questions (FAQ)
1. What if two of my articles start ranking for the same keyword? Is that bad? This is called "keyword cannibalization," and yes, it can be a problem. It confuses Google about which page is the most important, potentially hurting the rankings of both. The best way to avoid this is to assign one primary target keyword to each article and ensure your content is distinct.
2. Should I ignore keywords with very low search volume (e.g., under 50 searches/month)? Absolutely not! These low-volume, long-tail keywords are often a goldmine. The competition is usually non-existent, and the user searching for such a specific phrase is often highly motivated and ready to buy. A page that gets only 20 visits a month but converts at 25% is a huge asset.
3. How long does it take to rank for a new keyword? For a newer blog, it can take 6-12 months for Google to fully trust your site and grant you authoritative rankings for competitive keywords. This is why consistency is key. The work you do on affiliate keyword research today is building a business asset that will pay you dividends for years to come.
Your Blueprint for a Profitable Content Strategy
You now possess the single most valuable skill for building a profitable travel blog. Affiliate keyword research is the foundation upon which every successful affiliate business is built. It elevates your content strategy from a game of chance into a predictable system for generating revenue.
By shifting your focus from simply "creating content" to "targeting commercial intent," you align your hard work directly with an audience that is actively looking for your expert guidance. You are no longer just a travel writer; you are a strategic business owner. You have the knowledge and the step-by-step process to find the keywords that will attract high-value traffic and drive consistent affiliate sales.
The path is clear. Stop writing into the void. Start targeting with precision. Your journey to becoming a top-earning travel creator begins with the very next keyword you choose.
Meta Data Suggestions:
SEO Meta Title (59 characters): Affiliate Keyword Research: A Masterclass for Travel Blogs
URL Slug: /affiliate-keyword-research-travel-blogs
SEO Meta Description (154 characters): Learn how to find profitable keywords with our step-by-step affiliate keyword research tutorial. Drive more sales and grow your travel blog's income today.
Read the full guide: The Travel Blogger's Playbook to Affiliate Marketing Mastery
Don't Miss Out! Subscribe for Exclusive Content
Subscribe


Comments 0
No comments yet
Be the first to share your experience!
Dont Miss Out! Subscribe for Exclusive Content

FTC Affiliate Disclosure Essentials: Stay Compliant as a Travel Creator

Essential Affiliate Tools: From Tracking to Full Optimization

Avoid These 5 Affiliate Landing Page Mistakes for Better Conversions

Booking.com Affiliate Program Review: Pros, Cons, and Earnings Potential

Decoding Affiliate Commission Rates: Benchmarks for Travel Creators

7 Proven Affiliate Marketing Tips to Skyrocket Travel Income
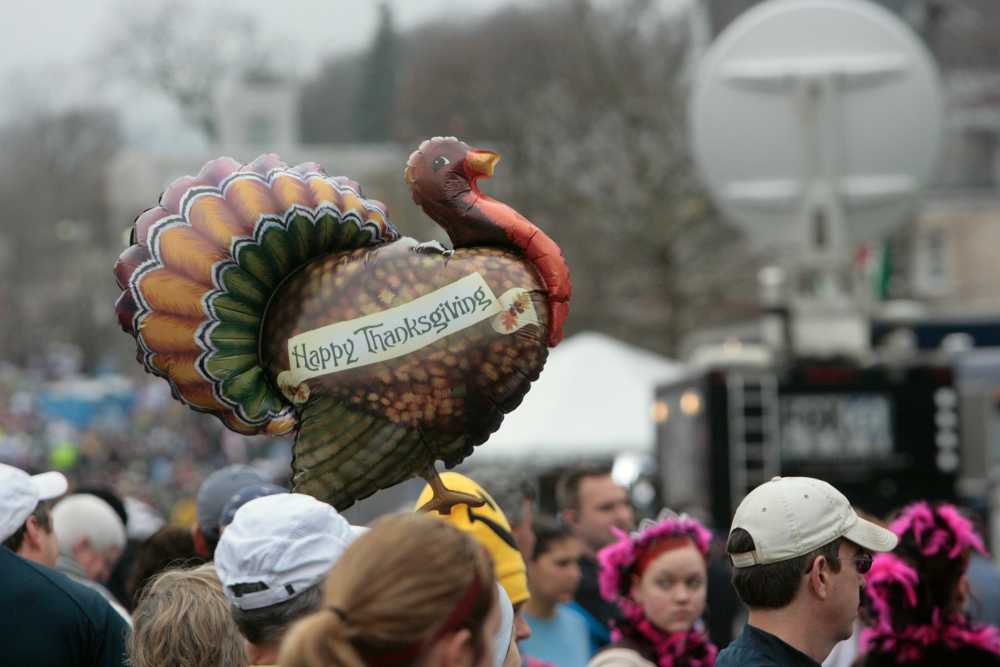
Thanksgiving Parade: 6 Prime Spots
TrekGuider @trekguider
You’ve seen it on television your whole life: colossal cartoon characters floating between skyscrapers, world-class marching bands sending echoes through the avenues, and the final, festive arrival of Santa Claus himself. The Macy's Thanksgiving Day Parade is an American institution, the magical kick-off to the holiday season. But the dream of seeing it in person is often haunted by a logistical nightmare. You’re worried about battling millions for a tiny patch of sidewalk, only to have your view blocked, your kids get restless, and the entire enchanting experience devolve into a cold, stressful ordeal.
That anxiety is completely valid. Every year, over 3.5 million people descend on the route, and without a rock-solid plan, you’ll see more of the back of someone’s head than you will of the giant Snoopy balloon. You risk waking up before dawn only to find every good spot claimed, leaving your family disappointed and shivering. The magic you traveled for feels impossibly out of reach, lost in a sea of chaos. You deserve to experience the wonder, not the worry.
Forget the frustration. This is your strategic blueprint for success. We’re going to bypass the chaos and transform you into a parade-viewing expert. We’ll unveil the six prime spots to watch the spectacle, complete with insider strategies on timing, what to pack, and how to navigate the city like a local. This is your definitive plan for conquering the Thanksgiving parade in New York and creating memories that will last a lifetime. It’s one of the most iconic events in the city, a true highlight that we cover in our broader guide to New York Holidays: 10 Must-Do Events.

Understanding the Parade Route: Your Strategic Map
Before you can pick your spot, you need to understand the battlefield. The Macy's Thanksgiving Day Parade is a massive operation, and its route is the key to everything. Knowing the path, the timing, and—most importantly—the restricted zones will give you a powerful advantage.
The parade officially kicks off at 8:30 AM sharp on Thanksgiving morning, Thursday, the fourth Thursday of November. It begins on the Upper West Side and marches for 2.5 miles, concluding around noon.
Here’s the official step-by-step route:
Starts: 77th Street & Central Park West at 8:30 AM.
Travels South: Proceeds down Central Park West to Columbus Circle.
Turns: At Columbus Circle, it turns onto Broadway.
Continues South: It follows Broadway through the heart of Midtown.
Ends: The parade concludes around noon at the iconic Macy's Herald Square on 34th Street.
Our internal research confirms two critical areas to avoid at all costs: the start zone around 77th Street and the finish zone near Herald Square (from 34th to 38th Street). These areas have heavily restricted public viewing and are reserved for television broadcasting. Trying to watch from here is a rookie mistake that guarantees disappointment. Your strategy must focus on the long stretches in between.
The 6 Prime Viewing Spots for the Thanksgiving Parade in New York
Now for the main event. Choosing your location is the single most important decision you’ll make. Each of these six spots offers a unique advantage, whether it’s fewer crowds, better photo opportunities, or more family-friendly conditions.
1. The Upper West Side: The Classic Family Choice
Location: Along Central Park West, from 77th Street down to Columbus Circle (specifically the west side of the street).
Why It’s Prime: As the parade’s very first leg, this 16-block stretch is where the magic is freshest. The performers are electric with energy, the marching bands are at their most thunderous, and the balloon handlers are still wrangling their colossal characters into perfect formation. Because it's more residential, the crowds feel slightly more manageable and family-oriented than in the commercial chaos of Midtown. The backdrop of Central Park on one side and historic apartment buildings on the other makes for stunning photos.
Your Strategy:
Timing is Everything: You must arrive by 6:00 AM. The front-row spots are often claimed by locals before the sun is up. By 6:30 AM, the area will be packed several rows deep.
Positioning: Plant yourself on the west side of Central Park West. This gives you a direct, unobstructed view as the parade marches south.
What to Expect: It will be cold and dark when you arrive. This spot requires a commitment to waiting, but the payoff is a fantastic, high-energy viewing experience.
2. The Shops at Columbus Circle: The VIP Indoor View
Location: The second and third floors of The Shops at Columbus Circle, overlooking the parade’s turn from Central Park West onto Broadway.
Why It’s Prime: This is the ultimate parade hack for those who want to avoid the cold and the crowds. You get a warm, elevated, bird’s-eye view of the entire spectacle. Plus, you have immediate access to restrooms, coffee, and food—luxuries that are unthinkable for those on the street.
Your Strategy:
This Isn't Free: This is not a public viewing area. Access is typically granted to customers of the shops and restaurants within the mall.
Plan Months Ahead: Check with stores like Williams-Sonoma or restaurants with windows facing the circle. Many host private, ticketed viewing events that sell out far in advance.
Be Prepared to Spend: You will need to make a purchase or pay for a breakfast event to gain entry. Consider it the price of unparalleled comfort and convenience.

3. The Sixth Avenue Stretch: The Urban Canyon Experience
Location: Along Sixth Avenue (Avenue of the Americas) from 59th Street down to 38th Street.
Why It’s Prime: This is the longest and straightest portion of the route, offering dozens of blocks for potential viewing. Watching the giant balloons squeeze between the towering skyscrapers of Midtown is a uniquely New York experience. The sheer scale of the buildings creates a dramatic "urban canyon" effect that makes the parade feel even more grand.
Your Strategy:
Arrive Early: The secret is out on this spot. To get a decent view, be in position by 6:30 AM at the latest. The blocks closest to Central Park (59th to 50th) fill up the fastest.
Avoid Corners: Set up in the middle of a block. Corners are notoriously crowded and chaotic, with people constantly moving and blocking views.
Look for Scaffolding: Sometimes, construction scaffolding can be a blessing in disguise, creating a covered area that offers some protection from the elements and can deter massive crowds from forming in that exact spot.
Pro-Tip: The area between 70th and 75th streets on Central Park West offers a slightly wider sidewalk, giving you a little more breathing room. Pack a thermos of hot chocolate to stay warm while you wait—it’s a game-changer.
4. The "Quiet Zone" Near Radio City Music Hall
Location: The stretch of Sixth Avenue between 49th and 51st Streets.
Why It’s Prime: While no part of the route is truly "quiet," this section is designated as a no-marching-band-performance zone to accommodate the national television broadcast headquartered at Radio City. This means you get a brief respite from the loudest musical numbers—a great option for families with young children or those with sensory sensitivities.
Your Strategy:
Know the Trade-Off: You will see all the floats and balloons perfectly, but you will miss the live performances from the marching bands as they pass this specific area.
Use the Location: This spot is fantastic for its iconic backdrop. You can capture incredible photos of the balloons with the famous Radio City Music Hall marquee in the background.
Post-Parade Plans: You are perfectly positioned to see the Rockettes' Christmas Spectacular later in the day or head over to Rockefeller Center.

5. The South Side of 38th Street: The Late-Arrival Lifeline
Location: The blocks along Sixth Avenue from 40th Street down to 38th Street.
Why It’s Prime: Let's be realistic: not everyone can wake up at 4 AM. If you’re running late, this is your last best chance. As the parade nears its end at 34th Street, the area becomes a restricted broadcast zone. Therefore, the blocks just before this cutoff are the final public viewing areas.
Your Strategy:
Manage Expectations: You will not get a front-row view here. This is a spot for seeing the tops of the balloons and catching the general energy of the event.
Look Up: Your view will be mostly vertical. It’s less about seeing the performers on the street and more about witnessing the spectacle of the giant balloons against the sky.
Quick Exit: The advantage of being near the end of the route is that you can make a quick exit once the final float passes, beating some of the mass exodus heading for the subway.
6. The Virtual View: Your Hotel Room Perch
Location: Any hotel with rooms directly overlooking the parade route on Central Park West or Sixth Avenue.
Why It’s Prime: This is the most comfortable, stress-free, and luxurious way to experience the Thanksgiving parade in New York. You can watch the entire event from the warmth of your room, in your pajamas, with a cup of coffee in hand. You have your own bathroom, your own food, and an unbeatable, unobstructed view.
Your Strategy:
Book a Year in Advance: Rooms with parade views are often booked a year or more ahead and come at a significant premium.
Confirm the View: When booking, you must call the hotel directly to confirm that your specific room has a "parade view." An "avenue view" is not always sufficient.
Notable Hotels: Some hotels famous for their parade views include the JW Marriott Essex House, the Mandarin Oriental, New York, the Warwick New York, and the New York Hilton Midtown.
Pro-Level Survival Guide for Parade Day
Securing a great spot is only half the battle. You need a solid plan for the hours you’ll spend waiting. Follow these tips to ensure your experience is comfortable and memorable for all the right reasons.
The Ultimate Timing Strategy
The golden rule, confirmed by years of experience, is to arrive by 6:00 AM. This is non-negotiable for a front-row or second-row spot along Central Park West or the prime stretches of Sixth Avenue. By 6:30 AM, these areas are typically full. By 7:00 AM, you’ll be lucky to find a spot where you can see anything at all. Set your alarm, bundle up, and get there early. The early bird gets the best view of the parade.
What to Wear and Pack: The Family Checklist
New York in late November is cold. Standing still for hours makes it feel even colder.
Dress in Layers: Start with a thermal base layer, add a fleece or sweater, and top it off with a warm, wind-resistant winter coat. Don't forget a hat, gloves, and a scarf.
Comfortable Footwear: Wear warm, waterproof boots. Your feet will thank you.
The Essentials Bag: Pack a backpack with:
Snacks and Drinks: A thermos of hot chocolate or coffee is a must. Bring water and easy-to-eat snacks like granola bars and fruit.
Entertainment: A book, a deck of cards, or a fully charged phone with headphones can help pass the time.
Portable Phone Charger: Your battery will drain faster in the cold.
Small Folding Stools: If you have space, these can be a lifesaver for your back and legs.
For a comprehensive list of what to bring on any family adventure, our National Park Road Trip Checklist has you covered, with tips that apply just as well to an urban expedition.

Navigating the Crowds with Kids
The parade is a magical experience for children, but the crowds and waiting can be tough.
Avoid Strollers: In the most crowded areas, strollers are more of a liability than a help. They are difficult to maneuver and take up valuable space. A carrier is a much better option for very young children.
Establish a Meeting Point: As soon as you claim your spot, pick a clear, fixed landmark (e.g., a specific lamppost, a store entrance) as your family's meeting point in case you get separated.
Use a Buddy System: Ensure everyone has a partner.
Ladders: You will see people with small ladders for their kids to see over the crowd. If you bring one, be sure to place it a safe distance from the street and be courteous to those around you.
Pro-Tip: Skip the car. Public transportation is your best friend. The subway will be running on a holiday schedule, but expect crowded stations near the route. Plan your subway route in advance and buy your MetroCard the day before to avoid long lines at the machines on Thanksgiving morning.
Beyond the Parade: Making it a Full Thanksgiving Experience
Remember, the parade ends around noon, leaving you with a full day to enjoy the city. Many people head straight to a Thanksgiving dinner. If you plan to eat out, you must make reservations weeks, if not months, in advance. New York City is one of the world's culinary capitals, and a festive meal is the perfect way to cap off a magical morning.
Planning the perfect holiday trip, from the parade to the feast, requires expert knowledge. Our comprehensive Travel Guide provides detailed itineraries and booking advice for major US cities, ensuring your entire vacation is seamless and spectacular.

Your Mission, Should You Choose to Accept It
Watching the Macy's Thanksgiving Day Parade in person is a bucket-list dream, and with this guide, it’s a dream you can turn into a flawless reality. You now have the route, the prime locations, and the pro-level strategies to outsmart the crowds and secure a fantastic viewing experience. You’re no longer a tourist hoping for a glimpse; you’re a prepared strategist ready to claim your prime spot and soak in every moment of the magic. The Thanksgiving parade in New York is waiting for you.
Now go make those once-in-a-lifetime memories!
Meta Data Suggestions:
SEO Meta Title: 6 Prime Spots for the NYC Thanksgiving Day Parade (2026)
URL Slug: thanksgiving-parade-new-york-viewing-spots
SEO Meta Description: Don't just watch the Thanksgiving parade in New York, conquer it. Our guide reveals 6 prime viewing spots and insider tips for a stress-free family experience.
Don't Miss Out! Subscribe for Exclusive Content
SubscribeComments 0
No comments yet
Be the first to share your experience!
Dont Miss Out! Subscribe for Exclusive Content

San Francisco Cherry Blossoms: A Local's Guide to the Blooms

Halloween SF: Haunts Without Horrors

SF Festivals: 7 Must-See Lineups

Christmas SF: Lights & Wharf Wonders

SF Pride: 6 Route & Party Hacks

Chinese New Year SF: Parade Essentials
50+ Travel Blog Name Ideas (And How to Choose)
TrekGuider @trekguider
You feel it in your bones—the burning desire to turn your travel adventures into something more. You're ready to build a brand, share your stories, and launch the travel blog you've been dreaming of. But you’re stuck. You’re staring at a blank screen, trapped by the single most paralyzing question every creator faces: What do I call it?
The pressure to find the perfect name is immense. Every brilliant idea you have feels either too generic, too cheesy, or, most frustratingly, already taken. You worry about choosing a name you’ll outgrow or one that fails to capture the essence of your vision, and this single decision is holding you back from ever hitting "publish."
Forget the endless, frustrating brainstorming sessions. This guide is your definitive branding workshop. We’re not just going to give you a list of generic travel blog name ideas; we’re going to equip you with a proven, step-by-step framework for brainstorming, vetting, and choosing a powerful, memorable, and—most importantly—available brand name. Consider this the final resource you’ll need to overcome the naming hurdle and finally launch your travel media business.
Why Your Blog’s Name is a Critical Business Decision
In the competitive world of travel content, your blog's name is far more than just a URL; it’s the foundation of your entire brand. It’s the first impression you make on a potential reader, a signal of your niche, and a promise of the value you provide. The right name can convey authority, personality, and trustworthiness in a split second.
As the digital world becomes more crowded, a unique and memorable name is a key differentiator that helps you stand out and build a loyal community. Choosing the right name is the very first step in joining the ranks of The Best Travel Blogs to Follow in 2026, transforming your passion from a simple hobby into a legitimate media brand. It sets the tone for your content, guides your visual identity, and becomes the anchor for the entire business you are about to build.
The 5-Step Framework for Choosing the Perfect Travel Blog Name
Treat this framework as your strategic playbook. By following these five steps systematically, you’ll move from a state of overwhelming uncertainty to one of confident clarity, ensuring you select a name that is not only creative but also commercially viable.

Step 1: The Foundation — Brainstorm Core Keywords
Before you can think of a single name, you must first define what your brand is about. This initial step is all about creating a "word bank" of concepts that are central to your blog. Don’t self-censor here; just write.
Create lists of words associated with these four categories:
Your Niche: Are you focused on luxury, budget, adventure, family, food, or solo travel? List every related term. For example, a family adventure blog might list: family, kids, teens, journey, trek, quest, wild, explore, outdoors.
Your Target Audience: Who are you writing for? Digital nomads, parents, retirees, college students? List words that describe them or resonate with them. For example: nomad, creator, parent, wanderer, seeker, adventurer.
Your Tone & Voice: What feeling do you want to evoke? Is your brand inspiring, funny, practical, sophisticated, or rugged? List adjectives. For example: witty, curious, bold, serene, classic, heirloom, luxe.
Travel & Exploration Verbs/Nouns: List general travel-related words that you like the sound of. For example: atlas, compass, globe, passport, voyage, roam, wander, seek, journey, passage, trail.
At the end of this exercise, you’ll have a rich palette of keywords to work with in the next steps.
Step 2: The Spark — Apply Proven Naming Formulas
Now, take the keywords from your word bank and start combining them using these common, effective naming formulas. This is where the magic happens.
The Alliteration Formula (Same Letter): This technique makes names catchy and memorable.
Examples: Roaming Roads, Compass Chronicles, Summit Stories.
The Portmanteau Formula (Blend Words): Combine two words to create a new, unique one.
Examples: Foodventure (Food + Adventure), Staycationist (Stay + Vacation), Technomad (Tech + Nomad).
The "Your Name" Formula (Personal Brand): Using your own name builds a personal connection and positions you as the expert.
Examples: Adventurous Kate, Nomadic Matt, Travels with Taylor.
The "Adjective + Noun" Formula (Descriptive): This is a classic, straightforward approach.
Examples: The Wandering Wagars, The Broke Backpacker, The Travel Bite.
Experiment by mixing and matching words from your Step 1 list into these formulas. Generate a long list of 20-30 potential names without judgment.
Step 3: The Inspiration — Use Blog Name Generators (Wisely)
Online blog name generators can be helpful, but they should be used for inspiration, not as a final answer. Input your top keywords from Step 1 into a few of these tools. Most of the suggestions will be generic or unusable, but occasionally, a generator can spark a new idea or a creative word combination you hadn't considered. Add any interesting options to your long list.
Pro-Tip: Think five or ten years into the future. Will the name you choose still fit if your travel style evolves? A name like "Backpacking a Twenty-Something" might feel perfect now, but it has a built-in expiration date. Aim for a name that allows your brand to grow with you.

Step 4: The Reality Check — Verify Availability
This is the most critical and often most disheartening step, but it’s non-negotiable. You must thoroughly check if your favorite names are available.
Check the Domain: Your primary goal is to secure a .com domain. Our market analysis consistently shows that a professional, easy-to-navigate website is a direct signal of brand investment. A .com domain is at the heart of that perception, inspiring a level of trust that other extensions simply don't. Use a domain registrar like Namecheap or GoDaddy to see if YourBlogName.com is available. If it’s taken, you should strongly consider moving on to the next name on your list.
Check Social Media Handles: Once you find an available .com, immediately check if the name is available as a consistent handle across your target social media platforms (e.g., Instagram, TikTok, Pinterest, YouTube). Having @YourBlogName everywhere is crucial for brand consistency.
If your top name passes both checks, put it on your shortlist. If not, cross it off and move on. Do not get emotionally attached to a name you can't own outright.
Step 5: The Final Hurdle — Conduct a Conflict Check
Before you purchase the domain, perform one last check to avoid future headaches.
Google It: Do a simple Google search for your chosen name. Is another brand, especially in a related industry, already using it? Even if the .com is available, you don’t want to compete with an established brand for name recognition.
Check Trademarks: For extra diligence, perform a basic search on the U.S. Patent and Trademark Office (USPTO) database. This can help you avoid obvious trademark conflicts down the road.
The name that makes it through all five steps is your winner.
Ready to Build Your Brand?
Choosing a name is the first step. Building a successful travel blog requires a full suite of tools for content creation, SEO, and monetization. Get a head start with our comprehensive, expert-curated toolkit.
The Travel Creator's Toolkit
75+ Travel Blog Name Ideas to Spark Your Creativity
To help you with Step 1 and 2, here is a categorized list of over 75 travel blog name ideas. Use these as a starting point to fuel your own unique combinations.

Puns & Wordplay
In Tents Exploration
The Globe Trotters
Suitcase Stories
Miles and Smiles
Pretty Plane Sailing
Frequent Flier Finds
Life is a Trip
Home is Where the Bag is
Have Luggage, Will Travel
Check-In & Check-Out
Alliteration & Rhyme
Roaming Roads
Compass Chronicles
Voyage Vision
Summit Stories
Passage Planner
Wayward Wanderings
The Travel Tribe
Seeker’s Saga
Trekking Threads
The Global Guide
Niche-Specific Names
Family: The Family Fold, Park Pack, Teen Travel Tribe, Little Luggage Life, The Wandering Weans
Solo: Solo Sphere, One Woman’s World, The Independent Itinerary, Just Me Journeys, The Singular Seeker
Luxury: The Gilded Getaway, First Class Compass, The Curated Journey, Velvet Atlas, Heritage & Hideaways
Budget: The Frugal Flier, Penny-Wise Passage, The Backpacker's Billfold, Thrifty Trails, The Value Voyager
Adventure: Adventure Atlas, Summit & Scale, The Adrenaline Almanac, Off-Grid Odyssey, The Wild Wayfarer
Action-Oriented & Evocative
Chase the Horizon
Seek the Summit
Beyond the Map
Find Your Path
Cross the Meridian
The Saffron Trail
Saltwater Soul
Alpenglow Atlas
Terra Incognita
The Far-Flung
Modern & Simple
The Travel Edit
Wayward Co.
Compass Collective
The Getaway Guide
Trip Theory
Atlas & Anchor
Itinerary & Ink
The Local Lens
Foreign & Familiar
The Departure Desk
Food Travel
Feast Finder
Culinary Compass
The Hungry Horizon
Fork & Globe
Spice Routes
The Traveling Table
Street Food Stories
Plates & Passports
The Foodie Flight
Cravings & Capitals
Photography Travel
The Shutter Sphere
Aperture Abroad
Focus Finder
The Framing Fellow
Light & Landmark
Pixel Passport
The Wandering Lens
ISO Elsewhere
The Photo Trekker
Viewfinder Voyages

Frequently Asked Questions About Naming Your Blog
Should my blog name include my destination niche (e.g., "Awesome Italy")?
It can be a powerful strategy for building authority quickly. It tells readers and search engines exactly what you're about. However, it can be limiting if you decide to travel elsewhere. If you're certain you'll focus on one area for years, go for it. If you think you might expand, a broader name offers more long-term flexibility.
What if the .com for my name is taken, but .net or .co is free?
We strongly advise against it. As mentioned, the .com extension is the gold standard; it conveys professionalism and trust. Other extensions can appear less credible and are harder for people to remember. Your audience will instinctively type .com, and you don’t want to send your hard-earned traffic to another website. It’s better to find a new name with an available .com.
Is it a bad idea to use my own name for my travel blog?
Not at all! Using your own name is an excellent way to build a personal brand, positioning yourself as the face of your business. Industry leaders like Nomadic Matt and Adventurous Kate have done this with massive success. The only downside is a potential lack of privacy, so be sure you're comfortable with putting your name out there publicly.
How important is having a keyword in my blog name for SEO?
It's less important than it used to be. Today, search engines prioritize the quality of your content over having an exact-match keyword in your domain. Focus on choosing a name that is memorable, unique, and brandable. A strong brand name is far more valuable for long-term SEO than a clunky, keyword-stuffed domain.
The Final Step: From Name to Brand
Once you’ve successfully navigated the framework and chosen your perfect name, act immediately. The internet moves fast, and you don’t want someone else to grab your idea.

Pro-Tip: As soon as you decide on a name that is available, purchase the .com domain and claim the social media handles on all relevant platforms. Do this immediately, even before you have a website built. Owning these assets is the first real step in making your brand a reality.
With your name secured, you’re no longer just dreaming; you’re building. The next step is to create a platform where you can share your expertise and begin monetizing your content. While traditional methods like advertising exist, the most profitable and sustainable path is to sell your own unique digital products—like itineraries, guides, or workshops. This is where you transition from being a content creator to a media entrepreneur. The TrekGuider Platform is the ultimate ecosystem designed for creators like you, providing the tools and marketplace to sell your digital products and build a thriving business from day one.
Your Journey Starts Now
Choosing a name for your travel blog can feel like an insurmountable obstacle, but it doesn’t have to be. By shifting your mindset from searching for a "cool name" to executing a strategic branding process, you can move forward with confidence and clarity. You now have a repeatable framework and a wealth of travel blog name ideas to break through the creative block that has been holding you back.
The perfect name is a strategic blend of personal expression and practical verification. You are equipped with the knowledge to find it. You're no longer just a traveler with an idea; you're a founder. Go claim your name, and start building your empire.
Meta Data Suggestions:
SEO Meta Title (58 characters): 75+ Travel Blog Name Ideas & How to Choose the Perfect One
URL Slug: travel-blog-name-ideas
SEO Meta Description (154 characters): Stuck on naming your travel blog? Get unstuck with our 5-step framework and 75+ creative travel blog name ideas to find the perfect brand name for you today.
Don't Miss Out! Subscribe for Exclusive Content
SubscribeComments 0
No comments yet
Be the first to share your experience!
Dont Miss Out! Subscribe for Exclusive Content

Ultimate USA Holidays Guide: Top Picks
FTC Affiliate Disclosure Essentials: Stay Compliant as a Travel Creator
Essential Affiliate Tools: From Tracking to Full Optimization
Avoid These 5 Affiliate Landing Page Mistakes for Better Conversions

Affiliate Keyword Research Mastery for Travel Blogs