7 Hotel Safety & Security Tips for Peace of Mind
TrekGuider @trekguider
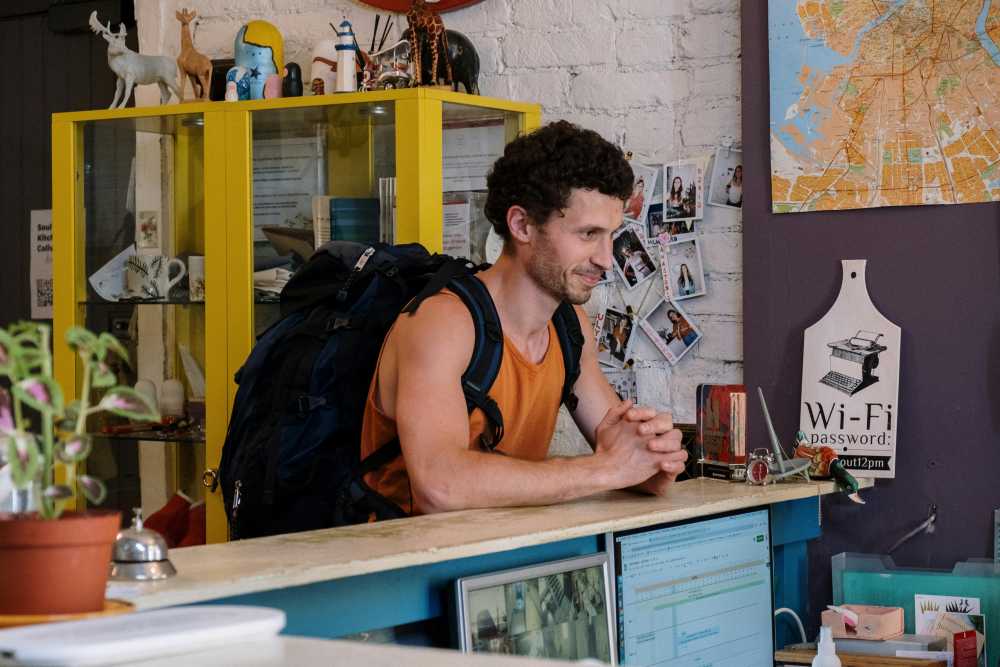
You’ve finally made it. After a long day of navigating airports, taxis, and unfamiliar streets, you slide the key card into your hotel room door and a wave of relief washes over you. This is your sanctuary, your home base for the adventures ahead. But as you drop your bags, another feeling can creep in, spoiling the moment. Let’s be honest: that sterile, anonymous hotel room doesn't feel as secure as your own home. It’s a vulnerability that can cast a shadow over an entire trip, a persistent whisper of "what if" that prevents you from ever truly relaxing.

The good news is that safety isn't a matter of luck; it's a repeatable skill. This guide is your new ritual, a systematic playbook for transforming any hotel room into a personal fortress. We’ve synthesized advice from former hotel security personnel and fire safety experts to bring you seven essential hotel safety tips. This isn’t about paranoia; it's about empowerment. By making these simple checks a habit, you can ensure your peace of mind is the most valuable thing you pack. These strategies are a critical part of the accommodation-specific awareness we cover in our comprehensive guide to [The Ultimate Guide to Travel Safety: A 2026 Playbook].
The 60-Second Security Sweep: Your First Check-In Ritual
Your first minute inside a new hotel room is the most important. This is your window to verify, secure, and orient yourself before you get distracted by unpacking or collapsing on the bed. By turning the following steps into an unbreakable habit, you proactively eliminate the most common security and safety risks. Think of it as a professional-grade inspection that takes less time than it does to check your email.
Tip 1: Secure the Door and Verify the Room is Empty
Before you do anything else, take control of your entry point. A common mistake is to walk in, close the door, and immediately turn your back to it while dealing with luggage. This makes you vulnerable. Instead, follow this security-conscious procedure.
Prop the Door: As you enter, use your luggage to prop the door open so it can't be closed behind you.
Conduct a Visual Clear: From the doorway, quickly scan the room to ensure it is empty. This includes a glance behind the curtains, in the closet, under the bed, and inside the shower.
Close and Lock: Once you've confirmed the room is unoccupied, remove your luggage from the entryway, close the door, and immediately test every single locking mechanism. This includes the primary deadbolt and any secondary security devices like a security chain or a flip latch. Ensure they are all functional and engage smoothly. Don't assume they work; physically test them.
Tip 2: Check Your Communication and Safety Gear
Now that the room is secure, your next step is to verify your lifelines. You need to know that the room’s built-in safety equipment is present and functional.
Test the Phone: Pick up the in-room phone and confirm there’s a dial tone or call the front desk for a quick "hello." This ensures you have a reliable way to call for help if your cell phone has no service or the battery dies.
Locate Safety Devices: Visually identify the smoke detector and fire alarm sprinkler heads. It’s also wise to check for a carbon monoxide detector, especially in hotels with in-room fireplaces or those attached to large parking garages. If one isn't present and you have concerns, report it to the front desk.
Tip 3: Create a Mental Fire Escape Map
This is one of the most critical hotel safety tips, yet it's the one most often ignored. In the event of a fire, heavy smoke can reduce visibility to absolute zero. The evacuation map on the back of your door is not decoration; it's your key to survival.

According to fire safety experts, you must identify three key things:
Your Primary and Secondary Exits: The map will show the nearest emergency exit stairwell. Crucially, you must also identify an alternative, secondary exit in case your primary route is blocked by fire or smoke. Remember, elevators must never be used in a fire.
The Door Count: This is the most important part. Physically walk out into the hallway and count the number of doors between your room and the nearest emergency exit. Memorize this number. In a dark, smoke-filled hallway, this knowledge will allow you to feel your way along the wall to safety, counting the doors as you go.
Location of Safety Equipment: As you identify your route, note the location of fire alarm pull stations and fire extinguishers in the hallway.
Tip 4: Fortify Your Privacy
Your final step in the initial sweep is to ensure your room is a truly private space.
Check Windows and Connecting Doors: Go to every window and make sure it is locked securely. If your room has a connecting door to an adjacent room, verify that it is locked from your side. A good practice is to slide a chair or your luggage in front of a connecting door as an extra physical and audible barrier.
Close the Curtains: Fully close the curtains to ensure privacy from the outside, especially in ground-floor rooms or those that face other buildings.
Scan for Oddities: While rare, hidden cameras are a modern concern. Conduct a quick visual scan for any electronics or objects that seem out of place. Pay attention to smoke detectors, alarm clocks, and USB wall outlets, looking for unusual pinholes or lenses.
Beyond the Locks: Advanced Hotel Safety Tips
Okay, the room is secure. But a locked door is just the first line of defense. Now it’s time to think like a pro and protect your belongings with the kind of savvy that separates seasoned travelers from the rest.
Tip 5: Outsmart a Thief: How to Hide Your Valuables
The in-room safe should always be your first choice for storing passports, extra cash, and small electronics. However, if a safe is unavailable, broken, or you simply don't trust it, you need a smart hiding strategy. The key is to avoid the first places a thief would look: in drawers, under the mattress, and inside your suitcase.

Security consultants recommend using non-obvious, "high-friction" hiding spots that take time and effort to find.
Taped in an Inconspicuous Location: Use a small amount of duct tape to secure an envelope containing cash or cards to a surface that is out of sight. Think creatively: the underside of a heavy desk, the back panel of a chest of drawers, or high up on a closet shelf.
Inside a Common, Uninteresting Object: Hide valuables in plain sight by placing them inside items a thief would ignore. A popular tactic is to place cash inside a bag of dirty laundry, as it's highly unlikely to be searched. You can also slip flat items like cash or cards inside the hotel room's bible or another book on a shelf.
Within the Room's Fixtures: Some parts of a hotel room offer clever nooks. For a laptop, a surprisingly effective tactic is to hide it inside a pillowcase on the bed, then pile the other pillows on top to disguise its shape.
Pro-Tip: When hiding cash or cards in an envelope, tape it flat against a surface and choose a dark color for the envelope (e.g., black or brown) to prevent it from being seen through any gaps.
Tip 6: Bring Your Own Security: Portable Safety Devices
For the ultimate peace of mind, especially when staying in older hotels, budget accommodations, or short-term rentals, consider investing in a portable security device. These lightweight gadgets are designed to provide an extra layer of defense against unauthorized entry.
Portable Door Locks: These devices brace against the door frame from the inside, making it physically impossible for the door to be opened from the outside, even with a key.
Door Stop Alarms: These are simple, wedge-shaped door stops that you place under your door from the inside. If the door is pushed open, it triggers a piercingly loud alarm, startling the intruder and alerting you and others to the breach.
The Final Layer of Protection: Personal Habits
Your physical security measures are only half the battle. The other half is cultivating smart habits and maintaining a high level of situational awareness throughout your stay.
Tip 7: Practice Smart "Hotel Habits"
Small, consistent habits can significantly reduce your risk profile.
Sanitize High-Touch Surfaces: Upon arrival, use a disinfectant wipe to clean the objects that are most frequently handled but often overlooked by cleaning staff: the TV remote, light switches, doorknobs, and the phone.
Be Discreet with Your Room Number: When checking in, if the front desk clerk announces your room number out loud, politely ask for a different room and for them to write it down for you instead. Never leave your key card sleeve, which often has the room number written on it, lying around in public areas.
Use the "Do Not Disturb" Sign: When you are in your room, hang the "Do Not Disturb" sign on the outside of your door. This is a clear signal that the room is occupied and can deter someone from trying to enter, whether by mistake or with ill intent.
Verify All Visitors: Never blindly open your door. If someone knocks claiming to be hotel staff, call the front desk to verify that they sent someone to your room before opening the door.
Pro-Tip: If you order room service or have hotel staff coming to your room, call the front desk to verify the person's identity before opening the door. It's a simple step that confirms the visitor is legitimate.
A secure hotel stay is a cornerstone of a well-planned trip. To ensure every other aspect of your journey is just as prepared, from packing lists to financial planning, a comprehensive resource is essential. The right [Travel Guide] can be the difference between a good trip and a flawless one.
Your Pre-Trip Master Plan
A secure hotel room is just one piece of your travel safety puzzle. To ensure you don't overlook a single essential item—from documents and finances to clothing and gear—a master checklist is your most powerful tool. Our comprehensive, free checklist has you covered for every stage of your trip.

Download Your Free [International Travel Checklist] Now!
Hotel Safety FAQs
A prepared mind anticipates questions. Here are expert answers to common concerns.
1. Is an in-room safe really the most secure option?
For the vast majority of travelers, yes. Modern electronic safes are quite secure against opportunistic theft. However, hotel management does have a master key or code for emergencies. The greatest risk often comes from user error (choosing an obvious code like 1234) or a dishonest staff member (which is rare in reputable hotels). For irreplaceable items, using a smart hiding spot in addition to the safe, or keeping them on your person, can provide an extra layer of security.
2. Are short-term rentals (like an Airbnb) more or less secure than hotels?
It varies dramatically. A professionally managed rental in a secure building can be safer than a budget motel. However, rentals lack the 24/7 staff, multiple security cameras, and controlled access points of a hotel. When booking a rental, read reviews carefully for any mention of safety concerns, check the lock quality upon arrival, and consider bringing your own portable door lock.
3. What should I do if hotel staff need to enter my room while I'm out?
If you have requested maintenance or housekeeping, you have a reasonable expectation they will enter. Secure all valuables in the safe or hide them before you leave. If you are concerned, you can request that these services only be performed while you are present in the room. Always leave the "Do Not Disturb" sign on your door when you leave if you do not want anyone entering.
Travel with True Peace of Mind
Your hotel room should be a sanctuary—a place where you can recharge after a day of exploration and sleep soundly through the night. It shouldn't be a source of anxiety. By incorporating these seven hotel safety tips into your check-in routine, you are taking active control of your environment. You are replacing uncertainty with a plan and vulnerability with empowerment. This simple, 60-second ritual does more than just secure a room; it secures your peace of mind, freeing you to focus on the real purpose of your journey: the adventure that awaits outside your door.

Meta Data Suggestions:
SEO Meta Title (Under 60 characters):
7 Essential Hotel Safety Tips for Travelers
URL Slug:
hotel-safety-security-tips
SEO Meta Description (Under 155 characters):
Sleep soundly on your next trip. Our expert-backed hotel safety tips cover room security, hiding valuables, fire safety, and more for total peace of mind.
Don't Miss Out! Subscribe for Exclusive Content
Subscribe


Comments 0
No comments yet
Be the first to share your experience!
Dont Miss Out! Subscribe for Exclusive Content

Ultimate USA Holidays Guide: Top Picks

FTC Affiliate Disclosure Essentials: Stay Compliant as a Travel Creator

Essential Affiliate Tools: From Tracking to Full Optimization

Booking.com Affiliate Program Review: Pros, Cons, and Earnings Potential

Decoding Affiliate Commission Rates: Benchmarks for Travel Creators

Amazon Associates for Travel: Strategies to Maximize Commissions
How to Plan Your First Solo Trip (and Conquer the Fear)
TrekGuider @trekguider
You’ve seen the photos, heard the stories, and a powerful idea has taken root: traveling the world on your own terms. But right behind that excitement, a wave of doubt probably follows. What if I get lonely? What if it’s not safe? What if I’m just not the kind of person who can do this?
Let’s take a breath. Feeling a mix of excitement and sheer terror is the unofficial rite of passage for every person who has ever considered traveling alone. It’s not a sign you should stop; it’s a sign you’re about to do something brave. This guide is your starting point. We’re not going to overwhelm you with packing lists or complex itineraries. Instead, we're going to focus on the most important first step: turning that anxiety into a quiet confidence and creating a simple, actionable plan to get you started. This is how to plan your first solo trip by conquering the fear first.
For the bigger picture on planning your first independent journey, explore

The Most Important Step: Your Mindset Shift
Before you book a single flight, the real journey begins in your mind. The psychological hurdles are the biggest barriers for most aspiring solo travelers. Let’s dismantle them together.
It's Normal to Feel Anxious. Here's How to Use It.
Feeling nervous before a big adventure is completely normal—it means you’re taking this exciting challenge seriously. The trick is to treat your fears not as stop signs, but as a pre-flight checklist.
Fear thrives on vague, undefined worries. Clarity is its kryptonite. So, grab a notebook and write down your top three concerns. Is it safety? Loneliness? Getting lost? By giving your anxieties a name, you take back control. For every worry, there is a practical solution, and you’ll find that a little preparation makes you feel capable, not scared.
The Antidote to "What If I'm Lonely?"
Let's reframe the biggest myth in solo travel. There is a world of difference between being alone and being lonely. Being alone is a superpower. For the first time, your schedule is 100% your own. You can spend three hours in a museum, change your entire plan on a whim, or eat gelato for dinner without a single committee meeting. This isn’t loneliness; it’s absolute freedom.
Remember, traveling solo doesn’t mean you’re isolated. It means you have complete control over your social thermostat. You can turn it up by joining a food tour or staying in a social guesthouse, or turn it down when you just need to recharge. This journey is an incredible chance to get comfortable in your own company—a skill that will empower you for the rest of your life.

How to Handle Naysayers (Even When They Mean Well)
Often, the most discouraging feedback comes from those who love us most. Their own fears, disguised as concern for you, can chip away at your resolve. Navigating these conversations requires a calm, confident strategy.
Present a Plan, Not a Plea: Instead of saying, “I’m thinking of going to Portugal alone,” try this: “I’m so excited—I've started planning a solo trip to Portugal for next year. I've found some amazing, highly-rated places to stay in a really safe neighborhood.” You are not asking for permission; you are sharing your exciting news.
Demonstrate Your Competence: Proactively show them you’re taking this seriously. Talk about the research you’re doing on safe destinations or the simple communication plan you'll have, like a daily WhatsApp check-in. When they see you’ve thought it through, their anxiety will decrease because yours already has.
Your 'First Three Steps' Action Plan
With your mindset fortified, it's time for action. We're going to keep it simple. Here are three manageable, non-intimidating first steps to turn your dream into a reality.

Step 1: Choose a Beginner-Friendly Destination
For your first trip, set yourself up for an overwhelming win. Choosing a destination that is known for being easy to navigate will boost your confidence for all future adventures. Look for places with:
A Welcoming Tourist Infrastructure: Places with reliable public transport, lots of accommodation choices, and readily available information (like Portugal, Japan, or Costa Rica) make logistics a breeze.
A High Safety Ranking: Use resources like the Global Peace Index to find countries known for safety and stability.
Ease of Communication: While you don't need to go somewhere that only speaks English, choosing a destination where it's widely spoken in tourist areas (like the Netherlands or Scandinavia) can reduce a layer of stress.
Ready to explore your options? For a deep dive into the pros and cons of different regions and a list of the top 10 safest countries for solo travelers, check out the ».
Step 2: Book Your First Night's Accommodation
Don't worry about planning the entire trip right now. The single most effective way to make your trip feel real is to commit to Day One. Research and book your accommodation for the first one or two nights. This simple action creates a secure "landing pad," transforming a vague idea into a concrete event with a date and an address. It’s your anchor, giving you a safe, secure base from which to start your adventure.
Step 3: Do a "Low-Stakes" Solo Practice Run
Build your solo muscle at home. Before you fly across the world, take yourself on a solo "date" for a full day in a nearby town or even a different neighborhood in your own city. Go to a museum alone. Navigate to a park you’ve never visited. Eat a meal at a restaurant by yourself. The point is to experience the feeling of navigating, making decisions, and enjoying your own company. This small taste of self-reliance will prove to you that you absolutely can do this.
Your Adventure Is Closer Than You Think
You've already taken the hardest step: deciding to explore this possibility. The fear you feel is not a weakness; it's a gateway to discovering just how capable you are. By shifting your mindset and taking a few small, deliberate planning actions, you are building the foundation for an incredible adventure.
You don't need to have all the answers right now. You just need to be willing to take the next step.
Don't Miss Out! Subscribe for Exclusive Content
SubscribeComments 0
No comments yet
Be the first to share your experience!
Dont Miss Out! Subscribe for Exclusive Content
Ultimate USA Holidays Guide: Top Picks
FTC Affiliate Disclosure Essentials: Stay Compliant as a Travel Creator
Essential Affiliate Tools: From Tracking to Full Optimization
Booking.com Affiliate Program Review: Pros, Cons, and Earnings Potential
Decoding Affiliate Commission Rates: Benchmarks for Travel Creators
Amazon Associates for Travel: Strategies to Maximize Commissions
Mardi Gras: 6 Parade Survival Tips
TrekGuider @trekguider
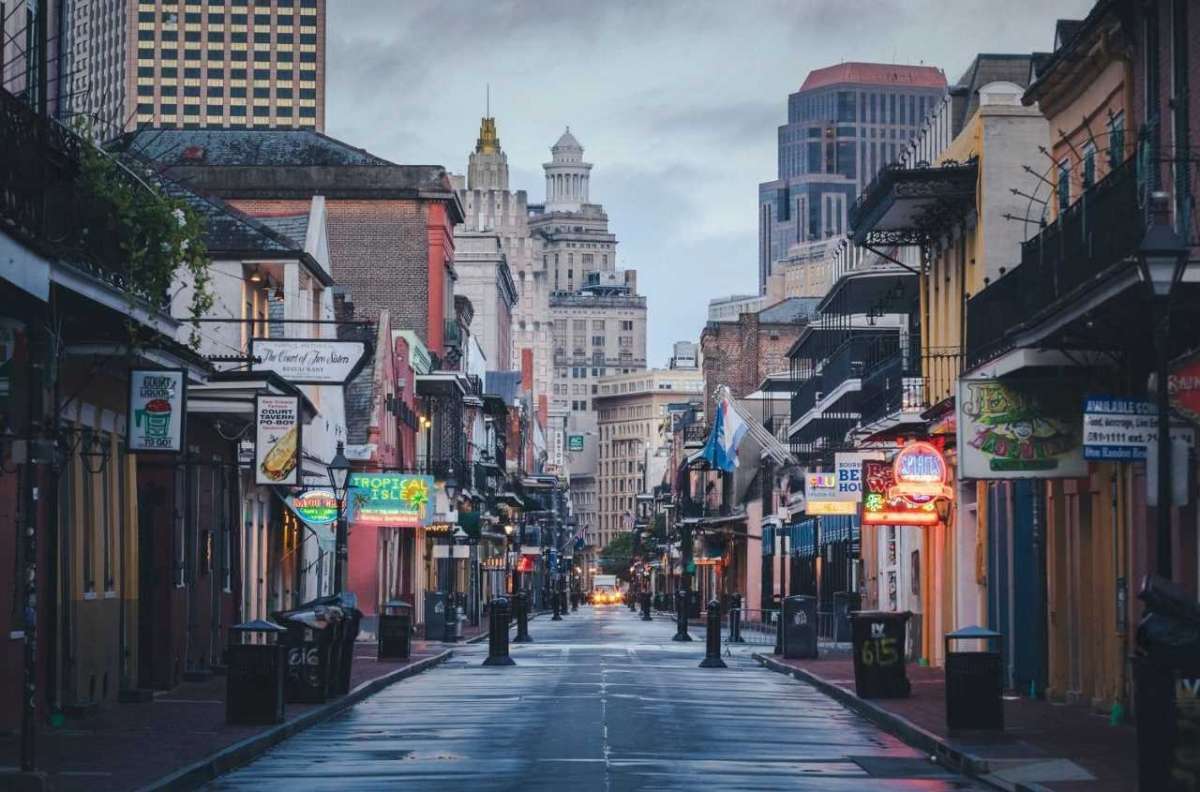
You’ve seen the photos—a blizzard of purple, green, and gold beads flying through the air. You’ve heard the stories of jazz music spilling onto streets packed with revelers. The dream of Mardi Gras in New Orleans is a powerful one, a siren call to the world’s greatest free party. It’s a bucket-list spectacle of dazzling floats, intricate costumes, and pure, unadulterated joy. But let’s be honest: the reality behind that dream can be intimidating. The sheer scale of the crowds, the labyrinthine parade schedules, and the logistical hurdles can turn a fantasy trip into a frantic mess.
Without a battle plan, you risk becoming just another overwhelmed tourist. Imagine traveling all that way only to be stuck ten rows deep, craning your neck for a fleeting glimpse of a float. Picture the rising panic of losing your friends in a sea of humanity with zero cell service, or the bone-deep exhaustion that sets in after hours on your feet, unprepared. The magic of Carnival can fade fast when you’re fighting the chaos instead of embracing it.
This is where you stop worrying. Consider this your official playbook for not just surviving, but thriving at the parades. We’re going to arm you with the insider knowledge to navigate the festivities like a seasoned pro. These six essential survival tips will transform your Mardi Gras New Orleans experience from stressful to unforgettable. This is just one of the incredible cultural celebrations we explore in our complete guide to [New Orleans Holidays: Cultural Feasts], but for now, let’s master the art of the parade.

Tip 1: Decode the Schedule & Choose Your Krewes Like a Local
First, let’s clear up a common misconception: Mardi Gras isn't just one day. It's an entire season, a cultural crescendo that officially begins on January 6th and culminates in the city-wide blowout of "Fat Tuesday." The parades, organized by social clubs known as "krewes," are the lifeblood of the celebration, and they hit a fever pitch in the final two weeks. Knowing which parades to see—and when—is the first step to crafting your perfect experience.
The final weekend before Fat Tuesday is when the legendary "super-krewes" roll, drawing the biggest crowds and delivering the most spectacular shows. For 2025, these are the dates to circle in red on your calendar:
Saturday, March 1, 2025: A marathon day featuring the massive Krewe of Endymion, an evening parade so spectacular it feels like a rolling blockbuster.
Sunday, March 2, 2025: The Krewe of Bacchus, another titan of Carnival, hits the streets at 5:15 PM with its own celebrity monarch and jaw-dropping floats.
Monday, March 3, 2025 (Lundi Gras): Witness history with the Krewes of Proteus and Orpheus, two stunning nighttime parades that light up the city.
Tuesday, March 4, 2025 (Fat Tuesday): The grand finale. The day kicks off with the Krewe of Zulu at 8:00 AM, famous for its coveted hand-painted coconut throws, followed by the regal Krewe of Rex at 10:30 AM, whose leader is the official "King of Carnival."
Not all krewes offer the same experience. Daytime parades often have a more relaxed, family-centric vibe. Nighttime parades are a different animal entirely—lit by historic gaslight torches called "flambeaux," they are dazzling, high-energy spectacles that draw a more party-oriented crowd. Do a little research on each krewe's theme and history to find the ones that match your style.
Pro-Tip: Before you even leave your hotel, download a real-time parade tracker app from a local New Orleans news station. These GPS-powered apps show you the exact location of the parade's lead float, giving you the intel to know if you have time for a bathroom break or a food run before the action reaches you.

Tip 2: Location is Everything: How to Claim Your Parade Turf
Your viewing spot will define your entire parade experience. The primary routes snake through the stately Uptown/St. Charles Avenue corridor and along the edge of the French Quarter. For a more traditional, family-friendly atmosphere, plant yourself along St. Charles Avenue. Under the canopy of ancient oak trees, you’ll find generations of families who have claimed the same spot for decades. For a more intense, high-octane experience, the sections of the route closer to Canal Street are where the crowds roar loudest.
Let’s be clear: the golden rule of securing a good spot is to arrive obscenely early. For a super-krewe on that final weekend, we’re not talking 30 minutes ahead—we’re talking hours. This is a marathon of patience. You’ll see locals set up their full camp—chairs, coolers, and ladders—long before the first siren wails. About those ladders: you’ll see many custom-built ladder seats designed to give kids a safe, elevated view. It’s a brilliant tradition, but if you use one, follow the local etiquette: place it at least six feet back from the curb to avoid obstructing the view of those in front and to stay clear of the massive floats.
Remember, the major parades do not go through the narrow, historic streets of the French Quarter. While Bourbon Street is its own unique Mardi Gras spectacle, it is not the place to watch the krewes roll.

Tip 3: Master the Art of the "Throw" for Your Mardi Gras New Orleans Haul
The quintessential Mardi Gras New Orleans experience is reaching up and catching a string of colorful beads. These items, tossed from the floats by krewe members, are called "throws," and they are the currency of Carnival. But it’s so much more than just beads. Each krewe has its own signature throws, from decorated plastic cups and doubloon coins to light-up toys and stuffed animals. Some are true collector's items, like the exquisitely hand-decorated shoes from the all-female Krewe of Muses or the legendary painted coconuts from Zulu.
Catching the best stuff is a skill. Here’s how to improve your odds:
Engage and Make Eye Contact: Float riders are scanning the crowd for energy. Wave your arms, smile, and yell the classic line: "Throw me something, mister!" They are more likely to toss something special to someone who is clearly having a great time.
Practice Good Karma: Be aware of the people around you, especially children. If a coveted throw lands near a kid, let them have it. The spirit of Mardi Gras is communal joy, not competition.
Bring a Designated Bag: You will catch far more than you can wear or carry. A simple tote bag or small backpack is essential for stashing your loot.
Above all, be safe. The number one rule is never, ever run into the street or chase a float for a throw. These floats are enormous, pulled by tractors with limited visibility. Wait for the throws to come to you and never reach under a float. No plastic necklace is worth the risk.
Tip 4: Pack Your Ultimate Parade Survival Kit
A day on the parade route is an urban endurance event. You’ll be on your feet for hours, exposed to the elements, and a long way from your home base. A well-packed day bag is non-negotiable. Being prepared for any great American adventure requires the right checklist, and just as you’d use our [National Park Road Trip Checklist] to prepare for the wild, this kit will ensure you conquer the urban jungle of Carnival.
These are the absolute essentials for your Mardi Gras survival kit:
Hydration: Pack more water than you think you need. Staying hydrated is critical.
Fuel: High-energy, easy-to-carry snacks like protein bars, trail mix, and pretzels will keep your energy levels up.
Sun & Rain Gear: New Orleans weather is fickle. Pack sunscreen, a hat, and sunglasses for daytime parades, but also throw in a cheap poncho. A sudden downpour can’t ruin your day if you’re prepared for it.
Layers: A sunny 70-degree afternoon can plummet to a chilly 50 degrees after sunset. Wear layers you can easily shed or add.
Portable Power Bank: Between taking photos, coordinating with friends, and running a parade tracker, your phone battery will vanish. A portable charger is a modern-day necessity.
Sanitation Supplies: Public restrooms are of the port-a-potty variety and see heavy use. A travel-sized pack of tissues and a bottle of hand sanitizer will feel like pure luxury.
A Throw Bag: A lightweight, foldable tote is perfect for your haul.

Tip 5: Navigate the Crowds & Stay Safe Like a Pro
The sheer scale of the crowds can be staggering—this is, after all, an event that generated an $891 million economic impact in 2024. Navigating this joyful mass of humanity requires a proactive approach to safety.
First, the buddy system is not optional. Stick with your group. Before you even head out, establish a non-obvious, hyper-specific meeting point. "Under the clock at the hotel" is good. "The corner of Canal and St. Charles" is a recipe for disaster. Cell service will be spotty at best, so you cannot rely on your phone to reunite.
When it comes to getting around, forget driving. Street closures and traffic make it a nightmare. Parking, if you can find it, will be exorbitant—reserve a spot in a garage well in advance if you must bring a car. Your best bets are walking, using public transit, or grabbing a rideshare, but be prepared for surge pricing and long waits after a parade.
Pro-Tip: To move through a thick crowd, don't try to bull your way through the middle. The pro move is to retreat one block off the parade route, walk parallel to it in the direction you want to go, and then cut back in. It’s a slightly longer walk that will save you immense time and frustration.
Tip 6: Embrace the Spirit of "Laissez les Bons Temps Rouler"
Finally, the most crucial tip of all: embrace the official motto of Mardi Gras, Laissez les bons temps rouler—Let the good times roll. This isn't just a slogan; it's the city's philosophy. This celebration is a profound expression of New Orleans' unique Creole heritage, a season defined by king cake feasts, brass bands, and an unbreakable sense of community. Don't get so wrapped up in logistics that you forget to be present.
Strike up a conversation with the family next to you. Compliment a stranger's incredible costume. Share your snacks. New Orleanians are famously hospitable and love sharing their traditions. Participate in the culture, don't just observe it. To truly understand the soul of this festival and others like it, our comprehensive [Travel Guide] offers a deep dive into the cultural fabric of America's most fascinating cities, providing the context that turns a great trip into a meaningful one.
Your Mission: Go Forth and Conquer Carnival
You are now officially prepared. Armed with these insider strategies, you can confidently tackle your Mardi Gras New Orleans adventure. You have the knowledge to decode the schedule, claim the best spots, pack for success, and stay safe in the joyous chaos. You are no longer just a tourist hoping for the best; you are an informed participant, ready to dive into the heart of one of the world's greatest cultural spectacles.
So book the ticket, pack your most festive attire, and get ready to let the good times roll. The magic of Mardi Gras is waiting for you.
Don't Miss Out! Subscribe for Exclusive Content
SubscribeComments 0
No comments yet
Be the first to share your experience!
Dont Miss Out! Subscribe for Exclusive Content

San Francisco Cherry Blossoms: A Local's Guide to the Blooms

Halloween SF: Haunts Without Horrors

SF Festivals: 7 Must-See Lineups

Christmas SF: Lights & Wharf Wonders

SF Pride: 6 Route & Party Hacks
