How to Create a Digital Travel Guide People Will Buy
TrekGuider @trekguider
You’re a travel expert. Your notes are filled with hidden gems, your camera roll is a treasure trove of untold stories, and your advice could save fellow travelers hundreds of dollars and hours of stress. You know your expertise has value, but packaging it into a real, scalable income stream feels like a monumental task. Relying on the slow trickle of ad revenue or the unpredictability of affiliate sales is a frustrating grind, keeping your dream of a truly independent business just out of reach.
This uncertainty keeps you on the content treadmill, trading your valuable time for pennies. You see other creators launching their own products and achieving a level of financial freedom that feels like a distant fantasy. The path forward is a confusing fog of questions about design, content, pricing, and technology, leaving you stuck in analysis paralysis while the immense opportunity of the creator economy—a market projected to nearly double from $250 billion to almost $500 billion by 2027—passes you by.
It’s time to stop trading hours for dollars and start building assets. This is your chronological, step-by-step playbook. We will demystify the entire process and show you exactly how to create a digital travel guide that people will not only buy but will also love and recommend. This is your complete workflow for transforming your hard-won expertise into a polished, professional product that generates passive income for years to come. Think of this as a critical chapter in your business plan; for the complete blueprint on building a modern creator enterprise, be sure to read our ultimate guide to How to Make Money Online: A Creator's Guide for 2026.

Why a Digital Guide is Your Ultimate Scalable Asset
Before diving into the "how," it's critical to understand the "why." Transitioning from promoting others' products to creating and selling your own is the single most powerful step you can take toward building a profitable, independent business. While ads and affiliate links have their place, digital products offer a level of control and scalability that other models simply can't match.
The advantages are transformative:
Infinite Scalability: Digital products operate on a "create once, sell forever" model. Whether you sell 10 copies or 10,000, your workload remains the same. There is no inventory to manage and no shipping to worry about.
Exceptionally High Profit Margins: With no manufacturing or distribution costs, the profit margins are extraordinary. Once you recoup your initial time investment, nearly every sale is pure profit.
Full Ownership and Control: When you sell your own guide, you own the entire process. You control the product, the pricing, the marketing, and the customer relationship. You are no longer dependent on an affiliate partner’s commission rates or an ad network's traffic requirements.
Solidifies Your Authority: Creating and selling a high-quality product instantly positions you as an expert. It builds deep trust with your audience, as you are no longer just recommending other people's stuff—you are standing behind your own valuable creation.
The market reflects this opportunity. The e-learning sector alone, a huge component of the digital product world, is projected to surge to an incredible $848 billion by 2030. This isn't a fleeting trend; it's a fundamental shift in how creators build resilient businesses.
The Blueprint – Research and Validation
The costliest mistake a creator can make is to spend months building a product nobody asked for. Thorough research and validation aren't optional; they are the foundation upon which a profitable product is built.
Identify Audience Needs and Define a Specific Niche
Your first job isn't to be a brilliant inventor; it's to be a sharp detective, uncovering the real, recurring problems your audience is desperate to solve.
Listen to Your Audience: The best ideas are hidden in plain sight. Dive into your blog comments, email replies, and social media DMs. What destinations are people constantly asking about? What part of the travel planning process do they find most challenging or stressful? Their recurring questions are your product ideas.
Define a Hyper-Specific Niche: Avoid creating a generic guide. A broad guide to "Mexico" will get lost in a sea of competition. A highly specific product like "A First-Timer's Foodie Guide to Mexico City's Roma Norte Neighborhood" is more valuable, easier to market, and instantly positions you as a niche expert.
Conduct Keyword and Market Research to Validate Demand
Once you have an idea, you must validate it with data.
Analyze Search Volume: Use an SEO tool to check the search volume for terms related to your guide idea. High search volume for long-tail keywords like "7-day Japan itinerary for foodies" or "what to do in Lisbon with kids" is a strong data signal that a ready market exists for a guide on that topic.
Conduct Competitor Analysis: Find 3-5 comparable digital travel guides in your niche. Your goal isn’t to copy them, but to identify a gap in the market. Analyze their price points, what they include, and, most importantly, read their reviews. What are customers praising? What are they complaining about? This will show you exactly how to create a superior product.
Pro-Tip: True validation comes from the intersection of qualitative and quantitative data. A great product idea is one that your audience is asking for (qualitative) and that a significant number of people are searching for online (quantitative).

The Core – Outlining and Content Creation
With a validated idea, it’s time to build the heart of your product: the content. This is where your unique expertise, voice, and experience shine.
Develop a Logical Structure
A good guide flows intuitively and is easy to navigate. Before you write a single word, create a detailed table of contents. This will be your roadmap and ensure you don't miss any crucial information. A typical structure includes:
Introduction: A brief overview of the destination, essential facts (currency, language), and why your guide is the ultimate resource.
Logistics: The practical nuts and bolts—getting there, getting around, visa requirements, and curated recommendations on where to stay for different budgets.
Experiences: The core of your guide. This includes top attractions, detailed daily itineraries, and deep dives into your niche (e.g., food and drink recommendations, hiking trails, photo spots).
Practicalities: The crucial final details like safety tips, packing lists, a budget breakdown, and useful local phrases.
Write Compelling and Useful Content
This is where you go beyond the generic advice found on a thousand other blogs.
Gather Your Assets: Compile all of your personal notes, journal entries, and high-quality photographs from your travels to the destination. Your first-hand experience and unique visuals are your primary competitive advantage.
Be Both Inspirational and Intensely Practical: Write in an engaging, personal tone. Share anecdotes and insider tips that bring the destination to life. Go beyond simply listing facts; tell your readers why a place is special. Share the hard-won wisdom that can't be found elsewhere, like "skip the line at the Colosseum by booking this specific tour" or "the best gelato is actually found two blocks away from the main square at this tiny shop."
With your raw content compiled, the next step is to give it a professional polish that signals its immense value.

The Polish – Professional Design for Non-Designers
Your guide's content may be brilliant, but in the digital world, packaging matters. A professional, user-friendly design signals quality and dramatically improves the customer experience.
Select a User-Friendly Design Tool
You don't need to be a graphic designer to create a stunning product. For a travel blogger whose primary goal is to efficiently create a static PDF travel guide, a template-based tool like Canva is the strategically superior choice. While powerful professional software like Figma or Adobe Illustrator has a steep learning curve that can delay your launch by weeks, Canva is built specifically for this type of project. Its intuitive, drag-and-drop interface is designed to help non-designers produce high-quality visuals quickly.
Feeling inspired to build your own assets but not sure where to begin? Creating high-value products is the core of a modern creator business. To accelerate your journey, we've bundled together some of our most powerful resources. The Travel Creator's Toolkit is a free collection of checklists, templates, and guides designed to help you streamline your workflow and build your business faster.
5 Essential Mobile-First Design Principles for a User-Friendly Guide
Your guide will almost certainly be used on a mobile phone while your customer is in-destination. Designing with a mobile-first user experience (UX) is not an option; it is essential for your product to be functional and valuable.
Prioritize Legibility and High Contrast: The content must be effortlessly readable on a small screen, often in bright sunlight. Use a clean, simple font of at least 11 points so users don't need to pinch-and-zoom. Crucially, ensure a high contrast ratio between the text and background—at least 4.5:1 as recommended by Web Content Accessibility Guidelines (WCAG)—to maintain readability.
Implement Simplified Navigation: The single most important navigation element is a hyperlinked Table of Contents at the beginning of the document. This allows users to jump directly to the section they need with a single tap, which is crucial when they're trying to find information quickly on a busy street.
Design for Touch with Finger-Friendly Targets: Any included hyperlinks (e.g., a link to a restaurant's website or a Google Maps location) must have a clickable area large enough to be easily tapped with a finger—the industry standard is a minimum touch target size of 44x44 points (approximately 7-10mm).
Minimize Cognitive Load by Eliminating Clutter: Mobile users are often distracted. Their interaction with a guide is typically in short bursts or "micro-tasks". To accommodate this, use short paragraphs, bulleted lists, bolded text for key information, and generous white space. A clean, uncluttered interface helps users find what they need with minimum effort.
Optimize for Performance and Portrait Orientation: The vast majority (94%) of mobile users hold their phones vertically. Your guide must be designed with a portrait layout (e.g., A4 or US Letter size). Crucially, keep the final PDF file size as small as possible by compressing all images before inserting them into your document. A large file will download slowly on a weak cellular connection, creating a poor user experience.

The Launchpad – How to Create a Digital Travel Guide for Sale
You've created a valuable, beautifully designed resource. The final phase is to package it, price it for profit, and get it into the hands of your customers.
How to Price Your First Digital Product
Pricing is one of the most challenging decisions. The most effective strategy for a knowledge-based product is value-based pricing. Instead of focusing on your production costs, price your product based on the transformation it provides to the customer. If your guide saves a user 20 hours of stressful research and helps them discover priceless experiences they would have otherwise missed, its value is immense.
A practical process for setting your price:
Step 1: Research the Market: Identify 3-5 comparable digital travel guides in your niche to establish a realistic market range.
Step 2: Articulate the Value: Make a specific list of the tangible outcomes your guide provides (e.g., "Saves over 15 hours of planning," "Includes a pre-planned 7-day itinerary worth over $100 in planning fees").
Step 3: Set an Initial Price and Test: For a high-quality, first-time travel guide, a price point between $19 and $49 is a strong starting position. It communicates significant value without creating sticker shock for the buyer.
Choose a Sales Platform That Works for You
You need a platform to handle the sale and secure digital delivery of your product. While you can use e-commerce plugins on your own blog, the smartest strategy is to leverage a platform that puts you in front of a built-in audience of motivated buyers.
Pro-Tip: Don't just build a product; build your business inside an ecosystem. A specialized marketplace like TrekGuider is the ideal place to sell your high-quality Travel Guide. It provides a professional, ready-made storefront and connects you with a global audience of passionate travelers who are actively searching for expert resources. You can publish articles to attract new customers directly on the platform, creating a powerful marketing funnel that leads right back to your product page.
Frequently Asked Questions (FAQ)
1. How long should my digital travel guide be?
Value is not measured in page count. A concise, 50-page guide packed with unique, actionable advice is far more valuable than a rambling 200-page guide filled with generic information. Focus on comprehensively solving the specific problem your niche audience has.
2. Do I need to have visited the destination very recently?
While recent, first-hand experience is ideal, an "evergreen" guide focused on core attractions, culture, and logistics can have a long shelf life. The key is transparency. Be clear about when you last visited and focus on information that doesn't change rapidly. You can always update your guide with new editions.
3. What if I'm not a professional writer or photographer?
You don't need to be. Your audience values authenticity and expertise over perfect prose. Write in your natural, conversational voice, as if you were giving advice to a friend. For photos, a modern smartphone can capture high-quality images. The goal is to be clear, helpful, and genuine.
Your Journey from Expert to Entrepreneur Starts Now
You now have the complete, A-to-Z workflow. You've moved from the vague idea of a product to a concrete, actionable blueprint that covers research, content creation, professional design, and a smart launch strategy. The path from being a passionate travel expert to a successful digital entrepreneur is no longer a fog of confusion.
You have the definitive answer to the question of how to create a digital travel guide that provides immense value and generates a sustainable income. The only thing left to do is take the first step. Start the research, outline your expertise, and begin building the asset that will power your business and fund your adventures for years to come.
SEO Meta Data Suggestions:
SEO Meta Title (58 characters): How to Create a Digital Travel Guide People Will Actually Buy
URL Slug: how-to-create-digital-travel-guide
SEO Meta Description (154 characters): A step-by-step playbook for travel creators on how to create a digital travel guide, from research and writing to design, pricing, and selling your product.
Read the full guide: The Travel Blog Business Plan: How to Make Real Money in 2026
Don't Miss Out! Subscribe for Exclusive Content
Subscribe


Comments 0
No comments yet
Be the first to share your experience!
Dont Miss Out! Subscribe for Exclusive Content

FTC Affiliate Disclosure Essentials: Stay Compliant as a Travel Creator

Essential Affiliate Tools: From Tracking to Full Optimization

Avoid These 5 Affiliate Landing Page Mistakes for Better Conversions

Affiliate Keyword Research Mastery for Travel Blogs

Booking.com Affiliate Program Review: Pros, Cons, and Earnings Potential

Decoding Affiliate Commission Rates: Benchmarks for Travel Creators
5 Things to Never Do When Traveling Alone
TrekGuider @trekguider
Let’s be honest: society tells women two conflicting stories about traveling alone. On one hand, you have the romanticized, 'Eat, Pray, Love' fantasy of a life-changing journey of self-discovery. On the other, you have a much darker, fear-based narrative—a constant, insidious whisper of warnings about dark alleys and stranger danger. This conflict creates a paralyzing anxiety, trapping would-be adventurers between a deep desire for freedom and a legitimate concern for their well-being. The constant worry about solo travel women safety can feel so overwhelming that the dream of an independent trip starts to feel reckless or irresponsible.

But what if that choice—between being adventurous and being safe—is a false one? What if safety isn't the opposite of adventure, but the very foundation that makes true adventure possible? Confident and secure solo travel is not about eliminating risk; it’s about mastering it. It requires transforming abstract fear into a series of manageable, concrete challenges that you can systematically overcome with the right knowledge and preparation. This guide is your strategic playbook. Bridging the gap between fear and freedom, it combines official expert advice with the hard-won wisdom of experienced travelers. For the bigger picture on planning your first independent journey, explore . This article, however, is your deep dive into the specific art of navigating the world as a strong, savvy, and secure solo female traveler.
Your Pre-Flight Mission: Master Your Destination Before You Go
Incredible journeys are born from careful preparation. The most impactful steps you take to ensure your safety happen long before you ever pack your bag. This proactive phase is the single greatest antidote to travel anxiety, systematically dismantling worries by replacing them with a robust, well-researched plan.
Step 1: Research is Your First and Best Line of Defense
Knowledge is power, and in the context of solo travel, it is your primary shield. A multi-pronged research strategy empowers you to make informed decisions, transforming the unknown into the familiar.
Official Advisories: Your first, non-negotiable stop is the U.S. Department of State's travel advisories. Understand their four-level system (Level 1: Exercise Normal Precautions, Level 2: Exercise Increased Caution, Level 3: Reconsider Travel, Level 4: Do Not Travel). This provides the official, high-level safety assessment for any country you plan to visit.
Cultural Norms: Go beyond government warnings and dig into local customs. Researching appropriate dress codes and social etiquette is not just a sign of respect; it's a key safety strategy. Blending in helps you avoid unwanted attention and navigate social interactions more smoothly.
Location-Specific Vetting: Don't stop at the country level. True safety planning is granular. You must research specific cities and, even more importantly, individual neighborhoods. A city can be generally safe, but have pockets of high crime.
Pro-Tip: Adopt this three-tier research process for total clarity.
Macro-Level (The Official View): Start with the U.S. State Department for the non-negotiable baseline.
Meso-Level (The Community View): Move to community sources like the Solo Female Travelers Club forums or trusted travel blogs for recent, on-the-ground experiences.
Micro-Level (The Street View): Finally, get hyper-local. Use Google Maps Street View to virtually "walk" around a potential hotel. Check local news sites for recent incidents and browse local subreddits for candid discussions about neighborhood safety.

Step 2: Choosing Your Safe Haven: A Masterclass in Vetting Accommodations
Your accommodation is more than just a place to sleep; it’s your secure base of operations. Treat its selection with the seriousness it deserves. While it can be tempting to book the cheapest option, a slight increase in your budget can yield a massive return in safety and peace of mind. Prioritize properties with 24-hour reception, a critical feature for late-night arrivals or if you find yourself in an emergency and need immediate assistance.
When analyzing reviews, learn to read between the lines. Use the search function to look for keywords like "solo female," "safe at night," "helpful staff," and "secure lockers." These comments provide invaluable insights from travelers who share your priorities.
Finally, protect your privacy during the check-in process. When registering, use only your first initial and last name. Avoid titles like "Ms." or "Mrs." that advertise your gender and marital status. It's a small, simple step that prevents staff or other guests from making assumptions about you being alone.
Step 3: Your At-Home Support Network: The Lifeline You Set Up in Advance
Traveling solo never means being completely isolated. A pre-planned, strong communication strategy is a crucial safety net that provides peace of mind for both you and your loved ones back home.
The Itinerary Share: Before you leave, share a comprehensive copy of your itinerary with a trusted friend or family member. This should include flight numbers, hotel names, addresses, and phone numbers, and a general outline of your plans.
The Power of Live Location: Leverage modern technology for an added layer of security. Apps like Apple's "Find My" or the location-sharing feature in WhatsApp allow you to share your real-time GPS location with a trusted contact for the duration of your trip.
Official Registration: Enroll in the U.S. Department of State's free Smart Traveler Enrollment Program (STEP). This service allows the local U.S. embassy to send you security alerts and helps them locate you in an emergency. It's the official, government-backed component of your support network.
Street Smarts on the Ground
Once your trip begins, safety becomes an active practice. It's about conscious behavior, unwavering situational awareness, and projecting a quiet confidence that makes you a less appealing target for opportunistic individuals.
The Golden Rules of Solo Travel Women Safety: 5 Things to Never Do
This is your non-negotiable list of on-the-ground rules, learned from the collective wisdom of thousands of experienced solo female travelers.
NEVER Advertise You're Alone: Master the art of the "white lie." If a stranger's questions make you uncomfortable, mentioning a husband who is "meeting you shortly" or a friend who is "waiting at the hotel" is a highly effective way to shut down unwanted advances. It’s not about shame; it’s about smart information management.
NEVER Bury Your Head in Your Phone: Project confidence, even if you don't feel it. Walk with your head up, shoulders back, and make brief, deliberate eye contact. If you need to check a map, step into a shop or cafe rather than stopping in the middle of a busy sidewalk, which marks you as a lost and distracted tourist.
NEVER Let Politeness Override Your Instincts: This is the most critical rule. Women are often socialized to be polite, but your safety is far more important than a stranger's feelings. If someone or something feels wrong, it is wrong. Trust that gut feeling. Use a firm voice, direct language ("Leave me alone"), and remove yourself from the situation immediately. Being safe is more important than being polite.
NEVER Be Out of Touch: Your communication plan isn't a one-time setup; it's a daily practice. A quick "Goodnight" text or email to your at-home contact maintains that vital link and ensures someone knows you're safe at the end of each day.
NEVER Do Abroad What You Wouldn't Do at Home: This is a simple but powerful gut-check. If you wouldn't walk down a dark, unfamiliar alley alone at 3 AM in your own city, don't do it in Rome or Bangkok. Your common sense is one of your most valuable travel companions.
Mastering Movement: Transportation Safety for the Solo Traveler
How you get from point A to point B is a frequent point of vulnerability. Understanding the hierarchy of safe options is key.
The Gold Standard (App-Based Ride-Shares): Services like Uber and Lyft offer unparalleled safety features. The digital record of the ride, driver identification, PIN verification, and real-time trip sharing create a powerful digital paper trail that deters bad behavior.
Official Taxis: If using a taxi, ensure it is a licensed, reputable one. Look for official markings and a visible meter. Be especially wary of unlicensed "fake taxis," a common scam at airports.
Public Transit: While often practical, public transport requires heightened awareness. Avoid completely empty train cars, which increase isolation, as well as overly crowded ones, which are ideal for pickpockets.
The Hard No: There is no ambiguity here. Do not hitchhike. Ever.
Socializing and Nightlife: How to Stay Safe While Having Fun
Experiencing local culture often includes nightlife, but it demands extra vigilance. One of the biggest concerns is drink spiking. Follow these steps without fail: never accept a drink from a stranger, always watch your drink being made, and physically cover the top of your glass with your hand when you're not sipping it.
Above all, continue to trust your gut. If you get a strange vibe from a new acquaintance, that's all the reason you need to politely excuse yourself and leave. If you ever start to feel strange or unwell in a way that seems inconsistent with your alcohol consumption, immediately inform a trusted person (like a bartender), call for local emergency help, and, if abroad, contact the nearest U.S. embassy.
A Nuanced Guide to Solo Travel Women Safety in the USA
One of the biggest mistakes in travel planning is treating the United States as a single, homogenous entity. Safety in the USA varies dramatically by region, state, city, and even by neighborhood. As one traveler wisely noted, "Do research on specific neighborhoods/towns you want to visit rather than the country as a whole."
The USA is Not a Monolith: A Framework for Regional Risk Assessment
Understanding the context of your environment is critical. The risks in a major city are different from those in a remote national park.
Urban vs. Rural vs. Wilderness: Major cities like New York or Chicago present higher risks of theft and scams, but offer the "safety in numbers" of bustling streets. Rural or wilderness areas, like national parks, involve risks of isolation, wildlife encounters, and the need for self-sufficiency.
State-by-State Variation: Safety metrics can vary wildly. States like Vermont and Maine consistently rank as among the safest, while certain neighborhoods within large cities require a much higher degree of caution, especially after dark.
Pro-Tip: Use this four-step USA Location Vetting Checklist for any domestic trip. 1) Check City-Level Crime Statistics: Look up official data on city police department websites or the FBI's crime data explorer. 2) Use Neighborhood-Specific Tools: Websites like NeighborhoodScout offer detailed local data. Also, use the local knowledge on forums like Reddit (e.g., asking about a specific block on r/AskNYC). 3) Read Local News: A quick Google News search for the neighborhood can reveal any recent patterns of crime. 4) Analyze Accommodation Reviews: Look for reviews that specifically mention feeling safe walking in the immediate area at night.
Practical Scenarios: City Streets, National Parks, and Road Trips
Major Cities (e.g., New York, San Francisco): Understand the rhythm of the city. Subways are generally safe during the day but require more caution late at night. Be aware of common urban scams, like someone trying to "help" you with a broken ATM.
National Parks: The primary risks here are environmental. Always check the weather forecast, carry more water than you think you'll need, be aware of local wildlife, and inform a park ranger or friend of your hiking plans and expected return time.
The Great American Road Trip: Secure your vehicle. Never leave valuables in plain sight, especially at trailheads or in busy city centers. Be cautious at remote, unlit rest stops at night; well-lit, busy truck stops are often a safer choice.

Your Emergency Action Plan & Toolkit
Planning for the worst isn't about fear; it's about building resilience. Knowing exactly what to do in a crisis reduces panic and leads to better outcomes.
Your Step-by-Step Emergency Response Plan
If you are in immediate physical danger, follow these steps in order:
Attract Attention: Get loud. Yell, scream, blow a whistle, or use a personal safety alarm. Creating a disturbance is your best defense.
Contact Local Authorities: In the United States, the emergency number is 911. In Europe, it's 112, and in the UK, it's 999. Save the correct number in your phone.
Contact the U.S. Embassy: If you are abroad, the nearest U.S. embassy or consulate is a critical resource for American citizens who are victims of crime.
Seek Medical Attention: In the event of an assault, seeking immediate medical care is crucial. This is vital for your health and for the collection of potential evidence.
Contact Support Networks: Organizations like the Rape, Abuse, and Incest National Network (RAINN) have 24/7 hotlines and offer confidential support, no matter where you are.

At-a-Glance Emergency Resource Directory
The World is Ready For You. Are You?
Safe solo travel women safety is not about living in a bubble of fear. It is the exact opposite. It's about having the confidence and competence to step out of your comfort zone, armed with the knowledge that you are prepared, aware, and fully capable of handling whatever comes your way. Through diligent research, unwavering trust in your instincts, and a commitment to smart, conscious decision-making, you transform yourself from a potential target into a savvy, empowered world traveler. The world is vast and beautiful, and it is waiting for you to explore it—safely, and on your own terms.
We encourage you to build this community of empowered travelers. Share your own hard-won safety tips in the comments below, and please, share this article with any woman in your life who dreams of a solo adventure.
Read the full guide: Anxious to Adventurous: The Ultimate Guide to Solo Travel Confidence
Don't Miss Out! Subscribe for Exclusive Content
SubscribeComments 0
No comments yet
Be the first to share your experience!
Dont Miss Out! Subscribe for Exclusive Content

How to Avoid Travel Scams: A Global Guide

Is Public WiFi Safe? How to Protect Your Data Abroad

A Woman's Guide to Safe Travel: 10 Critical Tips

7 Hotel Safety & Security Tips for Peace of Mind

9 Beach Safety Tips That Could Save Your Life

How to Stay Safe While Hiking: A Hiker's Safety Guide
The Ultimate Travel First Aid Kit Checklist (2026)
TrekGuider @trekguider
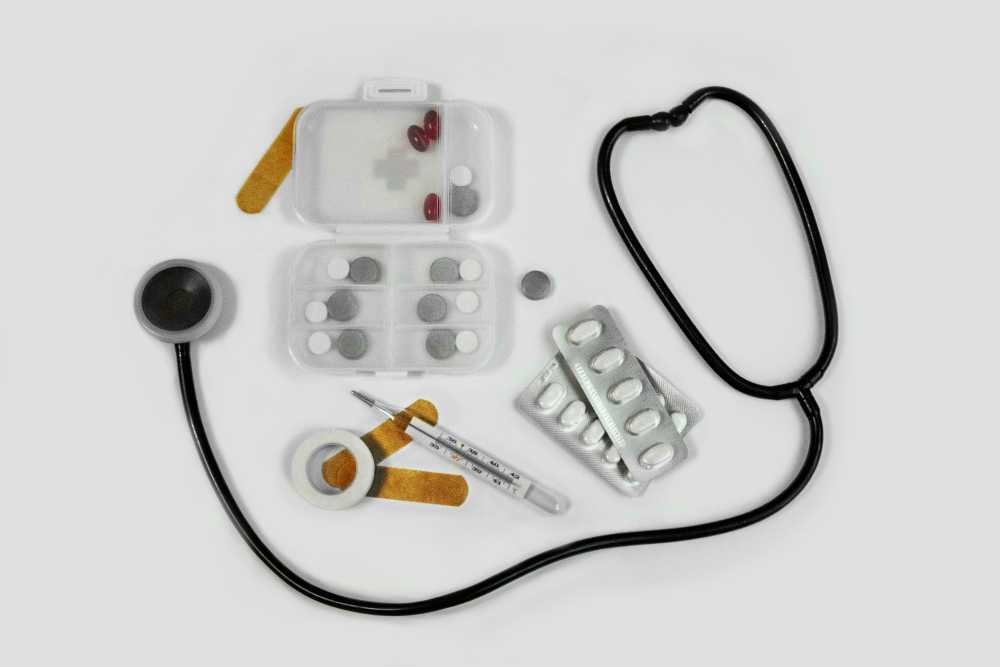
But it doesn’t have to be that way. The single most powerful tool for ensuring a healthy, stress-free journey is one you create before you even leave home: a comprehensive travel first aid kit. This isn’t just a box of bandages; it’s a personalized arsenal of preparedness that empowers you to handle common health issues with confidence and ease. Building your own kit is at the heart of the proactive mindset we cover in our comprehensive The Ultimate Guide to Travel Safety: A 2026 Playbook. Think of this guide less as a simple shopping list and more as a masterclass in preparedness, backed by pharmacist-approved advice to help you build the ultimate defense against travel’s minor medical curveballs.
DIY vs. Pre-Made: Which Travel First Aid Kit is Right for You?
Before we dive into the specific items, it’s worth considering whether to build your kit from scratch or buy a pre-made one.
Pre-Made Kits: These offer undeniable convenience. They come in a compact case and provide a decent baseline of supplies. However, they are often filled with low-quantity, generic items and may lack the specific medications you need for your trip.
DIY Kits: Building your own kit requires a bit more effort upfront but is superior in every other way. It allows you to choose high-quality brands, pack sufficient quantities, and tailor the contents specifically to your destination, your planned activities, and your personal health needs.
Our recommendation? Start with a high-quality pre-made kit as your base and then use this checklist to supercharge it, swapping out generic items and adding the crucial medications and tools it’s missing. This hybrid approach gives you the best of both worlds.
The Core Components of Your Ultimate Travel First Aid Kit
A truly effective travel first aid kit is organized like a mobile clinic, with specific supplies to treat the most common categories of travel-related ailments. Here is the definitive breakdown of what you need.
Wound & Burn Care: For Life's Little Scrapes
From a papercut to a scraped knee on a cobblestone street, any break in the skin is an open invitation for infection, especially in new environments. Here’s how you shut that door, fast.
Antiseptic Wipes (BZK or alcohol-based): For cleaning wounds, scrapes, and your hands before providing treatment. Individual packets are perfect for travel.
Antibiotic Ointment (e.g., bacitracin): A crucial step to prevent infection in minor cuts, scrapes, and burns after cleaning.
Assorted Adhesive Bandages: Pack a variety of sizes. Fabric bandages are generally more durable and flexible than plastic ones.
Butterfly Bandages / Wound-Closure Strips: Essential for taping the edges of a minor cut together to help it heal cleanly.
Sterile Gauze Pads and a Roll of Gauze: For dressing larger wounds or as a compress to control bleeding. Pack a few different sizes.
Medical Adhesive Tape: To secure gauze and bandages in place.
Moleskin or Blister Treatment Pads: An absolute lifesaver for any trip involving significant walking or hiking. Apply it as soon as you feel a "hot spot" to prevent a blister from forming.
Aloe Vera Gel: Provides soothing relief for minor sunburns.
Pain, Fever & Sprains: Managing Aches and Injuries
Long days of sightseeing, sleeping in unfamiliar beds, and carrying luggage can lead to aches and pains. Be prepared to manage them effectively so they don't slow you down.
Pain Relievers/Fever Reducers: Pack both an ibuprofen-based and an acetaminophen-based option. Pharmacists consistently recommend trusted brands like Advil/Motrin (Ibuprofen) for inflammation and pain, and Tylenol (Acetaminophen) for general pain and fever.
Aspirin: While not for general pain relief for everyone, a dose of aspirin can be life-saving for an adult experiencing symptoms of a heart attack.
Elastic Wrap Bandage: Invaluable for providing support and compression to a sprained ankle, wrist, or knee.
Instant Cold Packs: These single-use packs are activated by squeezing them and are excellent for reducing swelling from sprains, strains, and other minor injuries in the first 24-48 hours.
Pro-Tip: Decant pills into small, clearly labeled travel containers to save space, but take a photo of the original packaging first. This helps you remember dosages and provides information for pharmacists or doctors abroad if needed.

Digestive Issues: Your Defense Against Traveler's Diarrhea
Let’s be direct: traveler’s diarrhea is the single most common illness to strike travelers, affecting up to 80% of visitors in some destinations. Having a dedicated section in your kit to manage digestive distress is absolutely critical.
Anti-diarrhea Medication: To manage symptoms when you need to travel or get through a planned activity. The top pharmacist-recommended brand is Imodium (Loperamide).
Antacids: For relief from indigestion, heartburn, and general upset stomach. Pepto-Bismol is another pharmacist-favorite that can also help with mild diarrhea.
Oral Rehydration Salts: This is arguably the most important item in this section. Dehydration is the primary risk of diarrhea and vomiting. These pre-measured packets mix with safe, bottled water to replenish the essential fluids and electrolytes your body has lost.
Anti-nausea or Motion Sickness Medication: Essential if you’re prone to motion sickness on planes, boats, or winding bus rides.
Allergies, Bites & Skin: Soothing Irritations
New environments mean new pollens, unfamiliar insects, and different plants. Be ready to tackle itches, rashes, and allergic reactions before they become a major annoyance.
Antihistamine (e.g., diphenhydramine): For treating allergic reactions, hives, and severe itching. Note that some antihistamines can cause drowsiness.
Hydrocortisone Cream (1%): A topical steroid cream that provides fast relief from the irritation and itching of rashes and insect bites.
Insect Repellent: In any region with mosquito-borne illnesses like Dengue or Malaria, this is as important as your passport. Choose a repellent with an effective active ingredient like DEET or Picaridin.
Epinephrine Auto-Injector (e.g., EpiPen): This requires a prescription and is absolutely essential for travelers with a history of severe allergic reactions (anaphylaxis).
Ready to Pack Like a Pro?
Your travel first aid kit is a critical piece of your travel puzzle, but it's not the only one. To ensure you don't overlook a single essential item—from documents and finances to clothing and gear—you need a master list. Our comprehensive, free checklist has you covered.
Download Your Free International Travel Checklist Now!
Essential Tools & Personal Medications
The final layer of your kit includes the tools to use your supplies effectively and your own personal health necessities.
Fine-Point Tweezers: For removing splinters, ticks, or other foreign objects from the skin.
Small, Rounded-Tip Scissors: For cutting medical tape, gauze, or moleskin. (Ensure they meet TSA guidelines if packing in a carry-on).
Disposable Non-Latex Gloves: To protect your hands and prevent infection when treating a wound on yourself or someone else.
Digital Thermometer: For accurately checking for fever.
Personal Medications: This is the most critical category. Pack a sufficient supply for your entire trip, plus at least a few extra days' worth in case of delays. Always keep your personal medications in your carry-on luggage in their original, labeled containers.
Pro-Tip: Before you leave, ask your doctor for a letter describing your condition and the medications you take, including their generic names. Keep a digital copy of this and your prescriptions on your phone. This can be invaluable if your medication is lost or you need to see a doctor abroad.

Beyond the Basics: Customizing Your Kit
The ultimate travel first aid kit is not one-size-fits-all. Once you have the core components, elevate your preparedness by customizing it for your specific journey.
By Destination:
Tropical/Developing Countries: Add anti-fungal cream, more insect repellent, and potentially a prescription for a standby antibiotic for severe traveler's diarrhea (consult your doctor).
High-Altitude Destinations: Speak with your doctor about medication to prevent altitude sickness.
By Activity:
Hiking/Trekking: Double down on blister care (moleskin, gel pads), pack an elastic wrap for sprains, and add pain-relieving gel.
Beach Vacation: Add extra aloe vera gel, sting-relief spray, and waterproof bandages.
By Traveler:
With Children: Include children’s formulations and dosages of pain/fever reducers, kid-friendly bandages, and any specific allergy medications they need.
Travel First Aid Kit FAQs
A great kit anticipates problems. Here are answers to common questions that take your preparedness to the next level.
1. What’s the first thing I should do if I get traveler’s diarrhea?
According to the CDC and travel medicine doctors, the first and most important step is oral rehydration. Dehydration is the biggest risk. Start sipping an Oral Rehydration Solution (ORS), sports drinks, or clear broths immediately. For mild to moderate cases that don't have a high fever or blood, an antimotility drug like Loperamide (Imodium) can help manage the symptoms. If symptoms are severe, incapacitating, or include a high fever or blood, it's time to consider a prescribed standby antibiotic and seek medical advice.
2. Should I pack a standby antibiotic in my kit?
This is a question for your doctor or a travel medicine clinic. For travelers heading to high-risk destinations where severe traveler's diarrhea is common, many doctors will provide a prescription for a standby antibiotic like Azithromycin. It’s not for mild cases but can significantly shorten the duration of a severe bout of illness. Discuss your itinerary with your doctor to see if this is right for you.
3. Is it okay to pack medications outside their original bottles to save space?
While it's tempting, it's safest to keep prescription medications in their original, clearly labeled containers. This avoids any confusion or legal issues with customs officials. For over-the-counter pills, you have more flexibility. If you use a travel pill organizer, consider taking a photo of the original packaging so you have the dosage information and ingredients handy.

Pack Confidence for Every Journey
A carefully assembled travel first aid kit does more than just prepare you for minor medical issues; it provides profound peace of mind. It transforms you from a worried passenger into a self-sufficient, empowered traveler, ready to handle the small bumps in the road so you can stay focused on the incredible experiences ahead. By following this checklist, you’re not just packing supplies—you’re packing the confidence to explore the world freely and fully.
Now that your health and safety are covered, you can focus on the other details that make a trip unforgettable. For a complete, deep-dive into every facet of trip planning, from health and safety to budgeting and logistics, our comprehensive Travel Guide is the only resource you'll ever need.
Meta Data Suggestions:
SEO Meta Title (55 characters): The Ultimate Travel First Aid Kit Checklist (2026)
URL Slug: travel-first-aid-kit-checklist
SEO Meta Description (154 characters): Build the perfect travel first aid kit. Our 2026 checklist, with pharmacist-approved tips, covers everything from wound care to stomach issues. Be prepared.
Don't Miss Out! Subscribe for Exclusive Content
SubscribeComments 0
No comments yet
Be the first to share your experience!
Dont Miss Out! Subscribe for Exclusive Content

Ultimate USA Holidays Guide: Top Picks
FTC Affiliate Disclosure Essentials: Stay Compliant as a Travel Creator
Essential Affiliate Tools: From Tracking to Full Optimization
Booking.com Affiliate Program Review: Pros, Cons, and Earnings Potential
Decoding Affiliate Commission Rates: Benchmarks for Travel Creators
