CA Family Beach Vacations: A Pro's Planning Guide
TrekGuider @trekguider
Staring at a map of California's 840-mile coastline can feel overwhelming. You're searching for one perfect stretch of sand that pleases everyone—from toddlers who need calm water to teens who crave adventure. The fear of choosing wrong is real: a trip ruined by unsafe surf, zero parking, or the dreaded "I'm bored" can turn a dream vacation into a stressful ordeal.
This guide is your antidote to that analysis paralysis. We'll give you a clear framework for picking the right beach for your family's unique needs, ensuring your trip is filled with golden-hour memories, not logistical nightmares.
Choosing the right destination is the first step in planning an amazing trip, a core principle we cover in our comprehensive guide to Family Travel Ideas: The 2026 Guide to Unforgettable Trips. This playbook will give you the California-specific details you need to make the perfect choice.

First, Define Your Perfect Beach: A 4-Point Framework for California
California's coastline is stunningly diverse. The secret to a successful trip is finding a beach that suits your family's needs. Before looking at a map, use this framework to determine your family's “beach DNA” and find the perfect option.
Type 1: Calm & Shallow Waters (Best for Toddlers & Cautious Swimmers)
Let's be honest—when you're traveling with toddlers, 'safety' isn't just a priority; it's the entire game. You need waters that are less 'crashing surf' and more 'gentle bathwater.' These beaches are characterized by gentle, lapping waves, shallow entry points, and natural protections like coves or bays.
Top California Picks: La Jolla Shores (San Diego), Coronado Central Beach (San Diego), Avila Beach (Central Coast).
Type 2: Active & Adventurous Shores (Best for Kids & Teens)
If your crew gets restless just sitting on the sand, you need a destination with built-in action. These are the hubs for boogie boarding, learning to surf, pier fishing, and boardwalk cycling. The energy here is palpable, and there's always something to do.
Top California Picks: Huntington Beach ("Surf City USA"), Santa Monica State Beach (Los Angeles), Pismo Beach (Central Coast).
Type 3: Full-Service & Amenity-Rich (For Maximum Convenience)
These are the beaches for families who want everything at their fingertips. Think easy parking, clean restrooms, on-duty lifeguards, nearby playgrounds, and plenty of places to grab a snack or rent equipment. They are designed to minimize friction and maximize relaxation.
Top California Picks: Moonlight State Beach (Encinitas), Main Beach (Laguna Beach), Carmel Beach (Carmel-by-the-Sea).
Type 4: Natural & Unspoiled Coasts (For Exploration & Wildlife)
For families who want to escape the crowds and connect with nature, these beaches offer tide pools teeming with life, scenic hiking trails, and the chance to spot wildlife, from barking sea lions to migrating whales.
Top California Picks: Leo Carrillo State Park (Malibu), Point Dume State Beach (Malibu), Stinson Beach (Marin County).

Southern California (SoCal): A Deep Dive into Family Beach Vacations
SoCal is the classic choice for family beach vacations for a reason: it delivers iconic sunshine, relatively warm water, and an unmatched density of attractions. From San Diego to Malibu, this region packs in a staggering variety of coastal experiences.

San Diego County: America's Finest Family Beaches
Often considered the gold standard, San Diego offers a perfect equilibrium between pristine beaches and world-class attractions.
La Jolla Shores: This is arguably the best beach in California for families with toddlers. A mile-long sandy expanse with some of the gentlest waves on the West Coast, it's perfect for splashing and sandcastle construction. The adjacent Kellogg Park has a fantastic playground.
Don't Miss: Book a guided kayak tour to paddle over the La Jolla Underwater Park—you'll see sea lions, bright orange Garibaldi fish, and (harmless) leopard sharks swimming right below you. It's an unforgettable experience for kids ages 6 and up.
Coronado Central Beach: Famous for its iconic Hotel del Coronado backdrop and shimmering, mica-infused sand, Coronado is wide, flat, and impeccably clean. The surf is typically gentle, and the sheer size means you can always find your own space.
Insider Tip: At low tide, fantastic tide pools emerge at the southernmost end of the beach, offering a great, free activity for curious kids.
Moonlight State Beach (Encinitas): For the family that values pure, unadulterated convenience, this beach in the surf town of Encinitas is your holy grail. It features a large, dedicated parking lot, clean restrooms, a snack bar, and a great playground right on the sand.
Insider Tip: The beach is situated in a natural bowl, which keeps it somewhat protected from the wind, making it a comfortable spot to spend the entire day.
Orange County: From "Surf City" to Art Coves
The OC offers a more polished, upscale beach experience, with beautifully maintained towns and legendary surf breaks.
Huntington Beach: Known globally as "Surf City USA," this is the place for an active family. The energy is infectious.
Don't Miss: Beyond surf lessons, rent a multi-person surrey bike and cruise the 10-mile paved beach path. At night, grab a fire pit (first-come, first-served) for the ultimate s'mores experience.
Newport Beach: Centered around the Balboa Peninsula, Newport offers two distinct experiences. The ocean side has bigger waves perfect for boogie boarding, while the bay side (at the Balboa Fun Zone) offers calm waters, boat rentals, and a classic Ferris wheel.
Insider Tip: Take the historic Balboa Island Ferry for a charming, scenic trip across the harbor. Kids love it, and it’s a budget-friendly thrill.
Main Beach (Laguna Beach): Nestled in a charming, artsy town, Main Beach has a "Coke commercial" vibe with its central lifeguard tower and boardwalk.
Don't Miss: The real magic of Laguna lies in its many small coves. A short walk south brings you to Treasure Island Beach, which has some of the most accessible and vibrant tide pools in all of SoCal.

Los Angeles County: Iconic Piers and Urban Shores
LA's beaches are vibrant and full of character, offering everything from entertainment hubs to quiet, natural retreats.
Santa Monica State Beach: The Santa Monica Pier, with its amusement park and aquarium, makes this a can't-miss destination. The beach itself is massive, providing ample room for everyone.
Don't Miss: Renting bikes and riding south to the Venice Beach Boardwalk is a quintessential LA family experience, filled with street performers and unique sights.
Leo Carrillo State Park (Malibu): For a completely different vibe, head north to Leo Carrillo. This stunning beach is famous for its sea caves and fascinating tide pools. It's a place for exploration, where kids can hunt for sea stars, crabs, and anemones.
Insider Tip: Check the tide charts before you go. The sea caves are only accessible and safe to explore during low tide.
Pro-Tip: Southern California experiences a weather pattern known as "May Gray" and "June Gloom," where a persistent marine layer can keep the coast cloudy and cool until the early afternoon. If you're planning a trip during these months, schedule other activities for the morning and plan for your main beach time after lunch when the sun typically breaks through.
When to Go: A Seasonal Guide to the California Coast
Choosing the right time to visit can make or break your trip. Here’s a breakdown:
Summer (June-August): The classic choice with the warmest weather and water temperatures. Pros: Everything is open, and the vibe is energetic. Cons: Massive crowds and peak pricing for flights and lodging.
Fall (September-October): This is the locals' secret. Pros: The best weather of the year, with warm, sunny days and far fewer crowds. Water is still warm from the summer. Cons: Kids are back in school, making it tougher for families.
Winter (November-February): A great time for a different kind of beach trip. Pros: Lowest prices and no crowds. It's also the best time for whale watching. Cons: Water is too cold for swimming without a wetsuit, and you might get some rain.
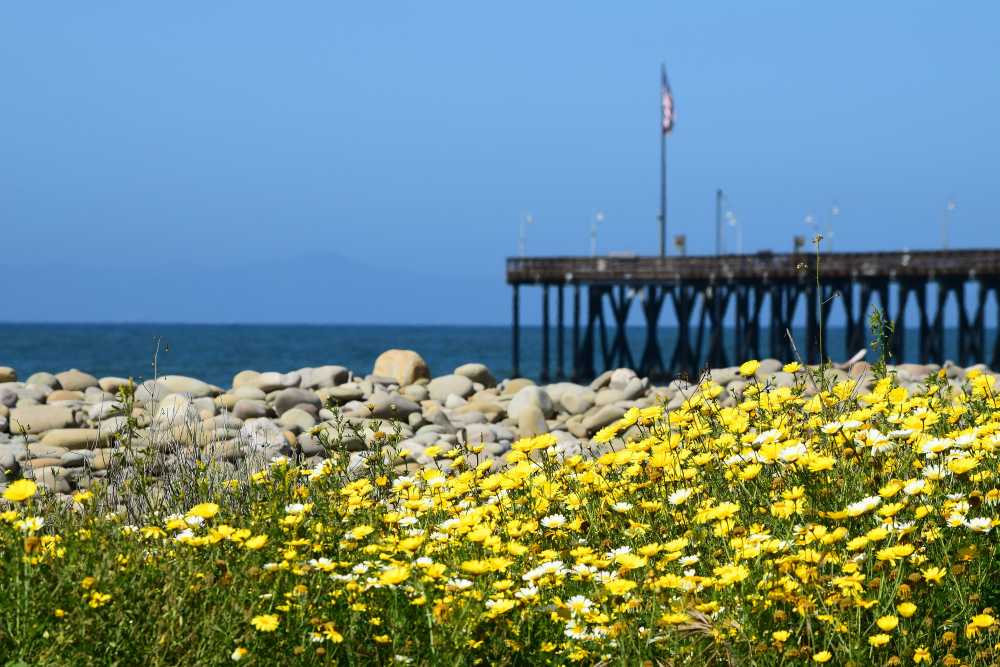
Spring (March-May): A mixed bag. Pros: Beautiful wildflowers, pleasant weather for non-swimming activities. Cons: The weather can be unpredictable, and the water is still very cold. "June Gloom" can start as early as May.
Central Coast & Northern California: Unspoiled Beauty
For families seeking a more tranquil and nature-focused trip, the coasts north of LA offer dramatic scenery, charming small towns, and a welcome escape from the crowds.

The Central Coast: A Slower Pace of Life
Pismo Beach: A classic California beach town, Pismo is famous for its long fishing pier and being the "Clam Capital of the World."
Don't Miss: It's one of the few places where you can legally drive on the beach (in designated areas), making it a hub for ATV rentals and a unique family adventure.
Avila Beach: Tucked into a sunny cove, Avila is often warmer and less windy than its neighbors. The calm waters of the bay are perfect for paddleboarding and kayaking.
Insider Tip: Walk to the end of the Harford Pier to see sea lions lounging and barking up close.
The Bay Area & North: Boardwalks and Rugged Coastlines
Santa Cruz Main Beach: Home to the West Coast's oldest seaside amusement park, the Santa Cruz Beach Boardwalk is a paradise for kids and teens. The combination of classic roller coasters, arcade games, and a wide sandy beach is unbeatable.
Insider Tip: Buy your ride tickets online in advance to save money and skip the ticket lines.
Stinson Beach (Marin County): Just a spectacular drive from the Golden Gate Bridge, Stinson is a vast expanse of white sand with relatively calm water for a NorCal beach. It feels like a world away from the city.
Insider Tip: The drive on Highway 1 to get there is gorgeous but winding. If anyone in your family is prone to car sickness, be prepared. It's a key part of what we cover in The Sanity-Saving System for Your Next Family Road Trip.
Explore California's Iconic Coastline
Planning to drive the dramatic coast around Big Sur? Don't leave it to chance. Download our free Big Sur Map & Itinerary for a curated route, must-see stops, and insider tips to make the most of this unforgettable drive.
Your California Beach Trip Playbook
A great plan is what separates a stressful trip from a relaxing one. Here’s how to manage the practical side of your California family beach vacation. For a deeper dive into simplifying the entire process, check out our guide on How to Make Family Travel Planning Actually Easy.
Step 1: Budgeting for the Golden State
Lodging: Vacation rentals are often more cost-effective than hotels for families. Book 3-6 months in advance.
Food: Pack a cooler for your beach days. This can save you $50-$100 per day.
Parking: Beach parking can range from $10-$30. Look for free residential parking a few blocks away.
Activities: Focus on free fun! Sandcastle building, tide pooling, and pier strolling cost nothing.
Sample 5-Day SoCal Budget (Family of 4)
Step 2: The Essential California Beach Packing List

The key is layers. Coastal weather can change in an instant.
Sun Protection: High-SPF sunscreen (reef-safe), wide-brimmed hats, sunglasses, and a rash guard for each child.
The Layers: In addition to swimsuits, everyone needs a sweatshirt or fleece.
Beach Gear: A lightweight beach tent or umbrella, sand toys, boogie boards, and a good cooler.
Footwear: Flip-flops and comfortable walking shoes.
First-Aid Kit: Include bandages, antiseptic wipes, pain reliever, and aloe vera gel.
Pro-Tip: For notoriously difficult parking areas like Santa Monica or Laguna Beach, use an app like SpotHero or ParkWhiz to reserve a parking spot in a nearby garage ahead of time. It can save you an immense amount of stress.
Frequently Asked Questions
What is the best month for a California family beach vacation?
September and October are often considered the best months. You'll enjoy warm, sunny weather and ocean temperatures held over from summer, but with significantly fewer crowds. While summer is classic, it brings peak prices and packed beaches.
Which California beach is the absolute best for toddlers?
La Jolla Shores in San Diego is widely considered the top choice for families with toddlers. Its waves are exceptionally gentle, the sandy shoreline has a very gradual slope, and the adjacent Kellogg Park offers a convenient playground.
Is it better to stay in San Diego or Orange County for a family trip?
It depends on your priorities. San Diego is ideal for families with younger kids, offering calmer beaches like La Jolla and world-class attractions. Orange County offers a more polished experience and is great for active families with older kids or teens, with hubs like Huntington Beach for surfing.
Besides swimsuits, what is one essential item to pack for a California beach day?
Layers, specifically a sweatshirt or fleece for everyone in the family. California's coastal weather can change quickly, with cool marine fog in the morning and breezy afternoons. Having a warm layer ensures you'll be comfortable all day long.
Conclusion
A successful California family beach vacation isn't about finding a secret spot—it's about matching the right beach to your family's unique travel style. Whether you need the gentle bays of San Diego for a toddler's first splash or the vibrant energy of Santa Cruz for your teens, the Golden State has the perfect patch of sand waiting for you.
You now have the framework and destination intelligence to move from planning to action. With this playbook, you're ready to choose your spot, pack your bags, and make this the trip that actually happens. To help you with the bigger picture, see our guide on How to Plan a US Family Vacation That Actually Happens.
Read the full guide: Family Travel Ideas: The 2026 Guide to Unforgettable Trips
Don't Miss Out! Subscribe for Exclusive Content
Subscribe


Comments 0
No comments yet
Be the first to share your experience!
Dont Miss Out! Subscribe for Exclusive Content

Ultimate USA Holidays Guide: Top Picks

FTC Affiliate Disclosure Essentials: Stay Compliant as a Travel Creator

Essential Affiliate Tools: From Tracking to Full Optimization

Booking.com Affiliate Program Review: Pros, Cons, and Earnings Potential

Decoding Affiliate Commission Rates: Benchmarks for Travel Creators

Amazon Associates for Travel: Strategies to Maximize Commissions
Christmas Chicago: 5 Market Musts
TrekGuider @trekguider
The dream of a perfect holiday trip to Chicago is a potent one. You picture yourself wandering through a wonderland of twinkling lights, the crisp winter air filled with the scent of roasted chestnuts and spiced wine. You’re on a mission to find that quintessential Christmas market experience, a place brimming with authentic cheer and unique, heartfelt gifts. But as you start to plan, a blizzard of options descends, leaving you overwhelmed and wondering where to even begin.
The anxiety creeps in. You worry about wasting precious vacation time on tourist traps, missing the truly magical local gems, or ending up too cold and frustrated to enjoy anything. The fear is that your festive getaway will devolve into a series of long lines and underwhelming souvenirs, failing to capture the genuine heart of Christmas in Chicago. You risk returning home with a feeling that you saw the lights but missed the magic.
This guide is your expert-led solution, your map through the holiday storm. Forget the guesswork. We’ve hand-picked the 5 must-visit Christmas markets that define the season in Chicago. From the world-famous German village that transforms Daley Plaza to the vibrant artisan fairs pulsing with local creativity, this is your insider’s tour. We’ll arm you with the pro tips needed to navigate each market like a seasoned Chicagoan, ensuring your trip is packed with unforgettable moments, delicious treats, and the pure, unadulterated festive spirit you came for.

Why Chicago is a Premier Christmas Market Destination
When the first snowflakes dust the city’s iconic architecture, Chicago undergoes a breathtaking metamorphosis. A palpable festive energy buzzes through the air as millions of lights illuminate the Magnificent Mile, turning the cityscape into a glittering spectacle. While the markets are the beating heart of the season, they are just one chapter in the city's epic holiday story—a story we explore fully in our definitive guide to Chicago Holidays: Windy City Thrills.
What sets Chicago apart is the sheer diversity of its market scene. You can be transported to a traditional German village one moment and, the next, find yourself in a bustling hall filled with cutting-edge handcrafted goods. This incredible variety ensures that every visitor—from the family seeking classic holiday fun to the discerning shopper on the hunt for a one-of-a-kind masterpiece—will find their perfect festive experience. It’s this rich mix that makes a trip here one of the best ways to experience Christmas in the USA.
1. Christkindlmarket Daley Plaza: The Iconic German Village
What Makes It a Must-Visit?
For generations of Chicagoans and visitors alike, the Christkindlmarket at Daley Plaza is the epicenter of the holiday season. Inspired by the 16th-century Christkindlesmarkt in Nuremberg, Germany, this outdoor market doesn't just imitate a charming European village—it becomes one right in the shadow of the Picasso sculpture. The moment you arrive, you’re enveloped by the sights of traditional timber-and-red-striped stalls, the sounds of cheerful carols, and the irresistible aroma of roasting nuts, sizzling bratwurst, and sweet, spiced wine.
The market is legendary for its authentic atmosphere and high-quality, family-friendly vendors. It’s a place where you can watch artisans demonstrate their craft, from glassblowing to woodworking, and browse for traditional German goods that feel both timeless and special.
Navigating the Market: A Pro's Guide
To conquer the Christkindlmarket, a little strategy is essential. This is a full sensory experience, so give yourself at least a couple of hours to explore without rushing.
Must-Try Food & Drink:
Glühwein: This hot spiced red wine is the market's signature drink. It’s served in a unique, boot-shaped souvenir mug whose design changes annually, making it a beloved collector's item. A non-alcoholic version (Kinderglühwein) is also available.
Bratwurst and German Pretzels: You can’t go wrong with a classic German sausage served on a hearty roll or a giant, doughy pretzel as big as your head.
Roasted Nuts: Follow the intoxicatingly sweet smell to vendors selling cinnamon-glazed almonds, pecans, and cashews, served hot in a paper cone.
Potato Pancakes (Kartoffelpuffer): Find the stall selling these crispy, golden-fried pancakes. Served with a side of applesauce or sour cream, they are the ultimate winter comfort food.

Shopping for Timeless Treasures:
Ornaments: Dozens of stalls are dedicated to exquisite, handcrafted ornaments. Discover delicate, hand-blown glass baubles from Germany, complex wooden figurines from the Erzgebirge region, and traditional straw stars.
Traditional Crafts: This is the place to find authentic German beer steins, complex cuckoo clocks, classic nutcrackers, and hand-carved wooden toys.
Pro-Tip: The market's peak times are evenings and weekends. To avoid the densest crowds, visit on a weekday afternoon. The lines for Glühwein and popular food stalls will be significantly shorter, giving you more space to browse the vendor stalls at a leisurely pace.
Essential Visitor Information
Location: Daley Plaza, 50 W Washington St, Chicago, IL 60602.
Best Time to Go: For the full magical effect, arrive just before dusk. You’ll get to see the market in the daylight before the holiday lights begin to twinkle against the darkening city skyline.
What to Wear: This is a completely outdoor market in the heart of a Chicago winter. Dress in warm layers: a thermal base, a fleece mid-layer, and a windproof winter coat. A hat, gloves, and a scarf are non-negotiable. Wear comfortable, waterproof boots to keep your feet warm and dry.
2. Christkindlmarket Wrigleyville: A Festive Home Run
A Unique Holiday Experience at Gallagher Way
Just outside the historic ivy-clad walls of Wrigley Field, the Christkindlmarket Wrigleyville offers a more spacious and modern take on its downtown sibling. Set in the lively Gallagher Way plaza, this market brilliantly fuses beloved German traditions with a distinctly fun, neighborhood vibe. The iconic ballpark marquee provides a stunning, uniquely Chicagoan backdrop for your holiday photos.
This location expands the experience beyond just shopping. With an ice-skating rink and a calendar full of special family-friendly programming, it’s an all-in-one festive destination. The atmosphere is generally more relaxed than the bustling Daley Plaza location, offering more room to stroll, sip, and soak in the holiday cheer.

What to Expect: Food, Fun, and Festivities
While you’ll find many of the same cherished vendors selling Glühwein, sausages, and ornaments, the Wrigleyville market has its own distinct character.
Ice Skating: The Gallagher Way ice rink is a major draw. Rent a pair of skates and glide around under the festive lights with the historic "Friendly Confines" watching over you.
Family Activities: Check the schedule for special events like visits from Santa, craft workshops for kids, and live musical performances on the Gallagher Way stage.
Local Flavor: In addition to the traditional German vendors, you’ll often find booths from local Wrigleyville businesses, adding a welcome neighborhood touch to your shopping.
Planning Your Visit
Location: Gallagher Way, 3635 N Clark St, Chicago, IL 60613.
Getting There: Public transportation is your best friend. The CTA Red Line ‘L’ train stops at the Addison station, just steps from the market. Parking in Wrigleyville is notoriously difficult and expensive, especially during events.
3. Renegade Craft Fair: The Indie Maker Showcase
The Anti-Traditional Christmas Market
Forget what you know about traditional Christmas markets. Renegade is a different beast entirely—a vibrant, curated explosion of independent craft and design, where you come to find gifts with a story, a soul, and a serious dose of originality. This is not the place for nutcrackers and cuckoo clocks; it’s a dynamic marketplace showcasing the absolute best in modern, independent making.
The atmosphere is creative, inspiring, and buzzing with the energy of hundreds of passionate artists. It’s a celebration of contemporary craftsmanship, perfect for those who value originality and want to give a gift that can’t be found anywhere else.

What You'll Find: A Treasure Trove of Creativity
Prepare to be blown away by the talent on display. Renegade brings together hundreds of makers from Chicago and across the country for its holiday fair.
Artisanal Goods You Can Discover:
Handmade Jewelry: From delicate, minimalist metalwork to bold, polymer clay statement pieces.
Original Artwork: Affordable screen prints, quirky illustrations, and stunning paintings from emerging artists.
Small-Batch Apothecary: Hand-poured soy candles with unique scent profiles, all-natural soaps, and luxurious body oils.
Ceramics and Home Decor: Beautifully crafted mugs, planters, and hand-printed textiles to elevate any living space.
Gourmet Foods: Small-batch chocolates, artisanal hot sauces, and locally roasted coffee beans.
Pro-Tip: While many vendors accept credit cards, some smaller makers may be cash-only. Bring a mix of payment options to ensure you don't miss out on the perfect find. It’s also wise to bring your own reusable tote bag to comfortably carry all your unique treasures.
Insider Tips for Shopping Renegade
Check the Dates: Renegade’s holiday fairs are typically held over a single weekend. Check their official website for the exact dates, times, and location, as it can change from year to year.
Browse the Vendor List: You can look through the list of makers online beforehand to map out your must-visit booths, or you can simply wander the aisles and let serendipity guide you. Either way, you’re bound to discover your new favorite artist.
4. One of a Kind Holiday Show: An Indoor Artisan Universe
The Ultimate Indoor Shopping Experience
When the Chicago wind is howling, escape into the warm, sprawling, and utterly captivating world of the One of a Kind Holiday Show. Held annually at the massive theMART, this indoor event is a paradise for the serious holiday shopper. It brings together more than 500 talented artists, artisans, and makers from across North America, offering an unparalleled selection of handcrafted goods all under one roof.
The sheer scale can feel daunting, but the true magic is in the direct connection with the creators. You can chat with a painter about their inspiration, ask a jeweler about their process, and find a truly meaningful gift that comes with a personal story.
Planning a major shopping trip, especially if you're traveling from overseas, requires serious organization. Our International Travel Checklist is the perfect free resource to ensure you have everything from your passport to your packing list sorted, so you can focus on the fun of the hunt.

Discovering Your Perfect Gift
With hundreds of vendors, there is truly something for every single person on your list. The show is thoughtfully organized into categories to make navigation a breeze.
Categories Include:
Fine Art and Sculpture
Fashion, Fiber, and Accessories
Jewelry
Home Goods and Furniture
Gourmet Foods
Pet Products
Children's Products
Making the Most of the Show
Wear Comfortable Shoes: You will be doing a lot of walking. Comfort is absolutely essential to enjoying a full day at the show.
Check the Floor Plan: Grab a map at the entrance or view it online beforehand. If you have specific artists you want to see, mark their booths to create a rough itinerary.
Take a Break: The show features cafes and seating areas. Take time to rest, recharge with a coffee, and review your shopping list.
5. Randolph Street Market: A Vintage Holiday Treasure Hunt
A Festive Market for Vintage Lovers
For those who believe the best gifts come with a past, the Randolph Street Market’s holiday edition is a treasure hunter's paradise. This nationally acclaimed market, famous for its incredible collection of antiques, vintage clothing, and unique collectibles, gets a festive makeover for its indoor winter events. It’s the ultimate destination for shoppers seeking items with soul, character, and a story to tell.
The market brings together dozens of the best dealers in the Midwest, specializing in everything from mid-century modern decor to Victorian-era jewelry. The atmosphere is eclectic and thrilling, with the promise of an amazing find around every corner.

What Treasures Await?
You truly never know what you might uncover at Randolph Street Market. It’s a place where you can find a gift that is utterly unique and steeped in history.
Potential Finds:
Vintage Ornaments: Discover beautiful, delicate glass ornaments from the 1950s and 60s.
Retro Holiday Decor: Find classic ceramic Christmas trees, quirky knee-hugger elves, and other nostalgic decorations.
Antique Jewelry: Unearth timeless lockets, brooches, and rings that tell a story.
Vintage Clothing and Furs: Shop for a glamorous party dress or a cozy winter coat from another era.
Collectible Barware: Find the perfect gift for the cocktail enthusiast, from Mad Men-era shakers to unique, colorful glassware.
How to Shop the Market Like a Pro
Arrive Early for First Dibs: The most sought-after items are often snatched up within the first hour. Arriving when the doors open gives you the best selection.
Don't Be Afraid to Dig: Some of the best treasures are hidden in plain sight. Take your time to look through boxes, browse the backs of booths, and look under tables.
Bring Cash and Be Ready to Bargain: While many vendors now accept cards, cash is still king at flea markets. Polite bargaining is often part of the fun, but always be respectful of the dealer's expertise.
A Traveler's Guide to Enjoying Chicago's Christmas Markets
Dressing for a Chicago Winter
Chicago’s winter weather is no joke. To stay comfortable while exploring, especially at the outdoor markets, layering is your best strategy.
Base Layer: A long-sleeved thermal shirt and leggings.
Mid Layer: A fleece or wool sweater.
Outer Layer: A warm, windproof, and preferably waterproof winter coat.
Accessories: A warm hat that covers your ears, a scarf to wrap around your face, and insulated gloves are absolutely essential.
Footwear: Insulated, waterproof boots with good traction will be your most important piece of gear.
Getting Around the City
Chicago’s public transit system, the CTA, is the most efficient and affordable way to navigate between markets. The ‘L’ trains and buses can get you within a short walk of every destination on this list. Purchase a Ventra card at any train station for easy tap-on access. While rideshares are plentiful, they can be slow and expensive during peak holiday times due to heavy traffic.
Beyond the Markets: Other Festive Must-Dos
While the markets are a highlight, they are just one part of the city's holiday magic. Be sure to experience other classic Chicago traditions like ice skating at Millennium Park with "The Bean" reflecting the skyline, seeing the spectacular ZooLights at the Lincoln Park Zoo, or taking an evening stroll down the Magnificent Mile to admire the brilliant window displays and the million-plus lights adorning the trees.
To build a complete holiday itinerary that covers everything from markets to museums, our comprehensive Travel Guide provides expert-curated plans and insider tips for making the most of your trip to Chicago and other top U.S. destinations.

Your Unforgettable Chicago Christmas Awaits
Chicago in winter is more than just a city; it’s a living, breathing snow globe waiting to be explored. Armed with this guide to the city’s five essential Christmas markets, you are now fully equipped to dive into the holiday season like a pro. From the old-world German charm of the Christkindlmarket to the creative buzz of Renegade Craft, you have the insider knowledge to plan a perfect, stress-free shopping adventure filled with magic, warmth, and one-of-a-kind finds. This is how you experience the very best of Christmas in the USA—right in the heart of the Windy City.
Which market are you most excited to visit? Let us know in the comments below!
SEO Meta Data Suggestions:
SEO Meta Title: Christmas in Chicago: Top 5 Holiday Markets Guide (2026)
URL Slug: /christmas-chicago-markets
SEO Meta Description: Discover the 5 best Christmas markets in Chicago. Our guide covers the iconic Christkindlmarket, artisan fairs, and vintage markets for a magical holiday.
Don't Miss Out! Subscribe for Exclusive Content
SubscribeComments 0
No comments yet
Be the first to share your experience!
Dont Miss Out! Subscribe for Exclusive Content

San Francisco Cherry Blossoms: A Local's Guide to the Blooms

Halloween SF: Haunts Without Horrors

SF Festivals: 7 Must-See Lineups

Christmas SF: Lights & Wharf Wonders

SF Pride: 6 Route & Party Hacks

Chinese New Year SF: Parade Essentials
How to Stay Safe While Hiking: A Hiker's Safety Guide
TrekGuider @trekguider
The call of the trail is a powerful one. It promises sweeping vistas, the quiet solitude of the forest, and the profound satisfaction of reaching a summit under your own power. But for all its beauty, the wilderness is impartial and unforgiving. The same trail that offers bliss on a sunny morning can present serious danger when the weather turns, a wrong turn is made, or an ankle is twisted. This is the problem every hiker faces: the gap between the adventure we dream of and the preparation it demands.
That gap is often filled with anxiety. A flicker of doubt about reading the map, a worry about the approaching clouds, or a sudden fear of what that noise was in the undergrowth can rob an incredible experience of its joy. Too often, hikers—both novice and experienced—find themselves in serious trouble simply by underestimating the trail and overestimating their preparedness. According to Search and Rescue (SAR) teams, most emergencies are the result of small, preventable mistakes. This guide is your definitive playbook for closing that gap for good. We’re providing the essential, expert-backed hiking safety tips you need to move through the backcountry with unwavering confidence. This isn't about fear; it's about empowerment. By mastering these skills, you’re ensuring every hike is a safe one, a core pillar of the responsible adventurer’s mindset we explore in our definitive The Ultimate Guide to Travel Safety: A 2026 Playbook. Let’s gear up, get smart, and get you ready to hit the trail.

This journey from novice to self-sufficient hiker begins not on the trail itself, but with a simple, powerful philosophy of preparedness that has been tested and refined by generations of mountaineers and wilderness experts. It all starts with your pack.
The Foundation of Safety: The 10 Essentials System
Long before your boots touch the dirt, your safety on the trail has already been decided by one thing: what’s inside your pack. Endorsed by the National Park Service and outdoor organizations like REI, the "10 Essentials" is not just a packing list; it's a systematic approach to preparedness. It ensures you have the tools to handle common problems and survive an unexpected night outdoors. Think of these not as ten individual items, but as ten crucial systems.
Navigation: Your primary system for knowing where you are and where you’re going. This must include a physical topographic map of the area and a compass. A GPS device or a smartphone with downloaded offline maps is a great tool, but electronics can fail. A map and compass are your foolproof backup.
Illumination: You need to be able to see in the dark, period. Carry a headlamp or flashlight with a full charge, and always pack extra batteries. A headlamp is superior as it keeps your hands free for other tasks.
Sun Protection: Sunburn and sunstroke can be serious dangers on the trail. This system includes sunglasses, broad-spectrum sunscreen (SPF 30+), and a wide-brimmed hat. Sun-protective clothing can also be a game-changer.
First-Aid Supplies: You must have the ability to treat common trail injuries. Your kit should be equipped to handle blisters, cuts, scrapes, and sprains. A basic kit is good; a custom-built one is better.
Repair Kit and Tools: Gear can break. A multi-tool or knife is invaluable, and a small roll of duct tape can repair everything from a torn jacket to a broken tent pole.
Fire: In an emergency, fire provides warmth, a way to purify water, and a powerful psychological boost. Carry waterproof matches, a reliable lighter, and a dedicated fire starter like dryer lint or a commercial fire-starting block.
Insulation: Weather can change in an instant, especially at elevation. You must carry an extra layer of clothing beyond what you start the hike in, regardless of the forecast. This should be a moisture-wicking layer, like a fleece jacket or thermal top—never cotton, which loses all insulating properties when wet.
Nutrition: Always pack more food than you think you’ll need. An extra day’s worth of non-perishable, high-energy food is the standard. Items like protein bars, nuts, and dried fruit are perfect.
Hydration: Carry more water than you expect to need and have a way to purify more. This means carrying a water filter or purification tablets to safely treat water from streams or lakes in an emergency.
Emergency Shelter: If you’re forced to spend an unplanned night out, protection from the elements is critical to preventing hypothermia. This doesn't mean a tent. A lightweight, packable emergency space blanket or bivy sack is all you need.

For expert-vetted gear lists and detailed trail guides from seasoned creators, the TrekGuider Marketplace is an invaluable resource for taking your preparation to the next level.
"Never Get Lost Again": Mastering Trail Navigation
Of all the potential hiking dangers, getting lost is one of the most common and terrifying. A recent study of SAR missions revealed that "error in judgment" was a leading cause of hikers needing rescue, and a huge part of that is poor navigation. Relying solely on your phone’s GPS is one of the biggest hiking safety tips to ignore—service is unreliable in the backcountry, and batteries die. True navigational confidence comes from time-tested skills.
How to Use a Map and Compass
This fundamental skill is easier than you think and is your most reliable tool.
Place the Compass on the Map: Lay your map flat. Identify your current location and your destination. Place your compass so the long edge of its baseplate creates a line connecting the two points, with the "Direction of Travel" arrow on the compass pointing toward your destination.
Set the Compass Bezel: Keeping the baseplate still, rotate the round bezel (the dial) until the orienting lines inside it are parallel with the map's north-south grid lines. Make sure the "N" on the bezel is pointing to North on the map. The number on the bezel aligned with the Direction of Travel arrow is now your bearing.
Follow the Bearing: Lift the compass off the map and hold it level in front of you. Turn your body until the red magnetic needle is "in the shed"—that is, perfectly inside the red orienting arrow on the bezel. The Direction of Travel arrow now points precisely to your destination. Pick a landmark in that direction, walk to it, and repeat the process.
Pro-Tip: The difference between "true north" (on your map) and "magnetic north" (where your compass points) is called declination. For precise navigation, you must adjust your compass for the local declination, which will be printed on your map.

Wildlife on the Trail: A Guide to Safe Encounters
Seeing wildlife is a thrilling part of hiking, but it’s crucial to remember that you are a visitor in their home. The core principles of every encounter are to maintain a safe distance, never feed wildlife, and know how to react to avoid escalating a situation.
Bear Encounters (Black vs. Grizzly)
Making noise while you hike (talking, clapping) is the best way to avoid surprising a bear. If you do encounter one, your reaction depends on the species.
If a Black Bear Approaches: Never run. Make yourself look as large as possible by raising your arms and opening your jacket. Yell, clap, and make loud noises. If it attacks, fight back aggressively. Target the bear's face and nose with anything you have—rocks, trekking poles, your fists. Do not play dead.
If a Grizzly Bear Approaches/Charges: Do not run and do not make direct eye contact. Speak in a calm, low voice to show you are not a threat. If it charges, stand your ground and use bear spray when it is within 30 feet. If it makes contact, play dead. Lie flat on your stomach, protect the back of your neck with your hands, and use your pack as a shield.
Mountain Lion (Cougar) Encounters
These predators are ambush hunters, so an encounter is rare. If you see one, it has likely been watching you.
Protocol: Do not run, as this triggers their chase instinct. Make direct eye contact. Make yourself appear larger by raising your arms and opening your jacket. Speak in a loud, firm voice. Slowly back away, giving the cat an escape route.
If Attacked: Fight back with everything you've got. Use rocks, sticks, or your hands to target the animal's eyes and face.
Venomous Snake Encounters
Snakes have no interest in humans and will only strike if they feel threatened.
Protocol: If you see a snake, freeze. Do not make any sudden movements. Once you've located the snake, slowly back away and give it a wide berth to move on. Be careful where you step and place your hands, especially when scrambling over rocks or logs.
If Bitten: The priority is to stay calm to slow the spread of venom. Limit physical activity and get to a hospital as quickly and safely as possible for evaluation and potential antivenom treatment.
Handling Trail Emergencies: What to Do When Things Go Wrong
Even with perfect preparation, accidents can happen. A twisted ankle, a sudden illness, or getting turned around can escalate quickly. Your ability to stay calm and make rational decisions is your most valuable asset. If you find yourself in trouble, remember the acronym S.T.O.P.
Stop: The moment you realize you are in trouble, stop moving. Sit down.
Think: Assess your situation calmly. What went wrong? What resources do you have?
Observe: Look around you. Where is the sun? Can you see any landmarks? Is there a source of water or shelter nearby?
Plan: Formulate a simple, logical plan. Don't make panicked decisions.
First Aid on the Trail
Your first-aid kit from the 10 Essentials is your go-to tool for injuries. Here's how to handle the most common trail ailments:
Blisters: The moment you feel a "hot spot" on your foot, stop and address it. Clean the area and apply moleskin or a blister-specific pad. Don't wait for it to become a full-blown blister.
Sprains: For a twisted ankle or knee, use an elastic wrap bandage from your kit to provide compression and support. Loosen it if you feel any numbness or tingling. Elevate the joint when you rest, and use a trekking pole or sturdy branch as a crutch if needed.
Cuts and Scrapes: Control any bleeding with direct pressure using a sterile gauze pad. Once it stops, clean the wound thoroughly with an antiseptic wipe and apply antibiotic ointment before covering it with a bandage.
A well-stocked daypack is crucial, but so is a plan for the whole trip. Before you head out to explore our incredible national parks, make sure your vehicle and supplies are just as prepared as your hiking gear.
Your Ultimate Adventure Blueprint
Ready to hit the road? Don't leave home without our expert-vetted National Park Road Trip Checklist. This free guide covers everything from vehicle prep and essential gear to can't-miss stops, ensuring your adventure is seamless from start to finish. Download it for free now!
Hiking Safety FAQs
A prepared mind anticipates questions. Here are expert answers to common concerns.
1. What's the right way to signal for help?
If you determine you cannot get yourself out of a situation safely, you need to signal for help. The universal distress signal is three of anything: three whistle blasts, three flashes of a headlamp, or three piles of rocks. A whistle is a must-have item that uses far less energy and carries further than shouting. For serious backcountry travel, consider investing in a personal locator beacon (PLB) or satellite messenger, which can send an SOS signal with your exact location to emergency services.
2. Is it safe to hike alone?
Solo hiking can be an incredibly rewarding experience, but it requires a higher level of preparation and self-sufficiency. All the rules in this guide become even more critical. It is absolutely essential that you leave a detailed itinerary with a trusted friend or family member. Include your planned route, your start and end times, and a "panic time"—the specific time they should call for help if they haven't heard from you.
3. What do I do if the weather turns bad unexpectedly?
Your first priority is to get below the treeline if you're in an exposed area to reduce the risk of lightning strikes. Put on your extra insulating layer and your rain gear before you get wet and cold. Assess your map and your situation. It is often safer to turn back, even if you're close to your destination, than to push on into deteriorating conditions.
Pro-Tip: Always tell someone your plan. Before every hike, leave a detailed itinerary with a trusted friend or family member. This is the single most important safety net you have.

Your Adventure, Empowered by Preparation
The goal of these hiking safety tips is not to fill you with fear, but to arm you with confidence. Every piece of gear you pack and every skill you learn is a key that unlocks a new level of freedom on the trail. Preparation allows you to push your boundaries, explore wilder places, and immerse yourself in the beauty of nature without the nagging whisper of anxiety. By respecting the wilderness and committing to self-sufficiency, you transform from a simple visitor into a capable, confident adventurer.
Now that you have the skills for a safe hike, you can integrate that adventure into a larger, perfectly planned journey. For a complete master plan covering everything from budgeting and logistics to finding the best trails and tours, our all-encompassing Travel Guide is the only resource you'll ever need.
Don't Miss Out! Subscribe for Exclusive Content
SubscribeComments 0
No comments yet
Be the first to share your experience!
Dont Miss Out! Subscribe for Exclusive Content

How to Avoid Travel Scams: A Global Guide

Is Public WiFi Safe? How to Protect Your Data Abroad

A Woman's Guide to Safe Travel: 10 Critical Tips

7 Hotel Safety & Security Tips for Peace of Mind

9 Beach Safety Tips That Could Save Your Life
